Get ready to add a touch of tropical beauty to your nails with this hibiscus flower nail art tutorial. This design is perfect for those who want to make a statement and stand out from the crowd. Follow these simple steps to create your own hibiscus flower masterpiece: Step 1: Start by applying a base coat to protect your natural nails and help your nail polish last longer. Step 2: Apply two coats of a bright pink nail polish to all of your nails. This will be the base color for your hibiscus flowers. Step 3: Using a thin nail art brush or a toothpick, create five small dots in a circle shape on your nail. These will be the petals of your hibiscus flower. Step 4: Take a darker pink nail polish and create smaller dots in between the petals to give your flower more dimension. Step 5: With a yellow nail polish, create a small dot in the center of your flower for the stamen. Step 6: Using a green nail polish, create three small lines at the bottom of your flower to represent the leaves. Step 7: Finish off with a top coat to seal in your design and add shine. You now have a beautiful hibiscus flower on your nails, perfect for any summer occasion.1. Hibiscus Flower Nail Art Tutorial


1. Hibiscus Flower Nail Art Tutorial


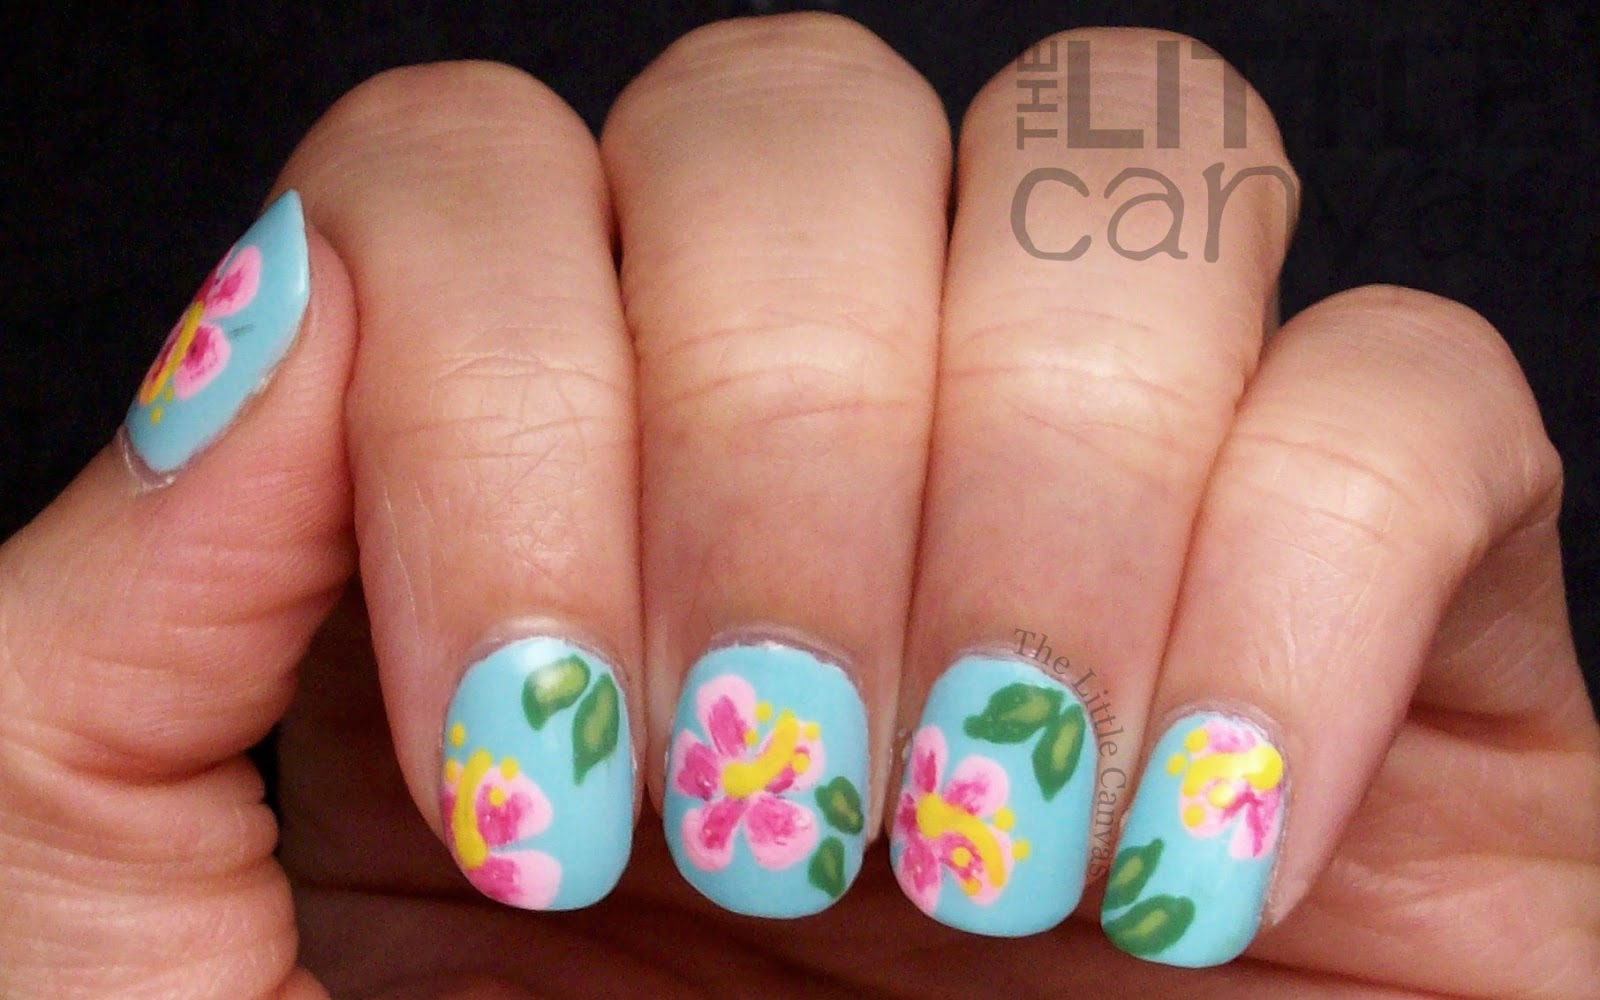
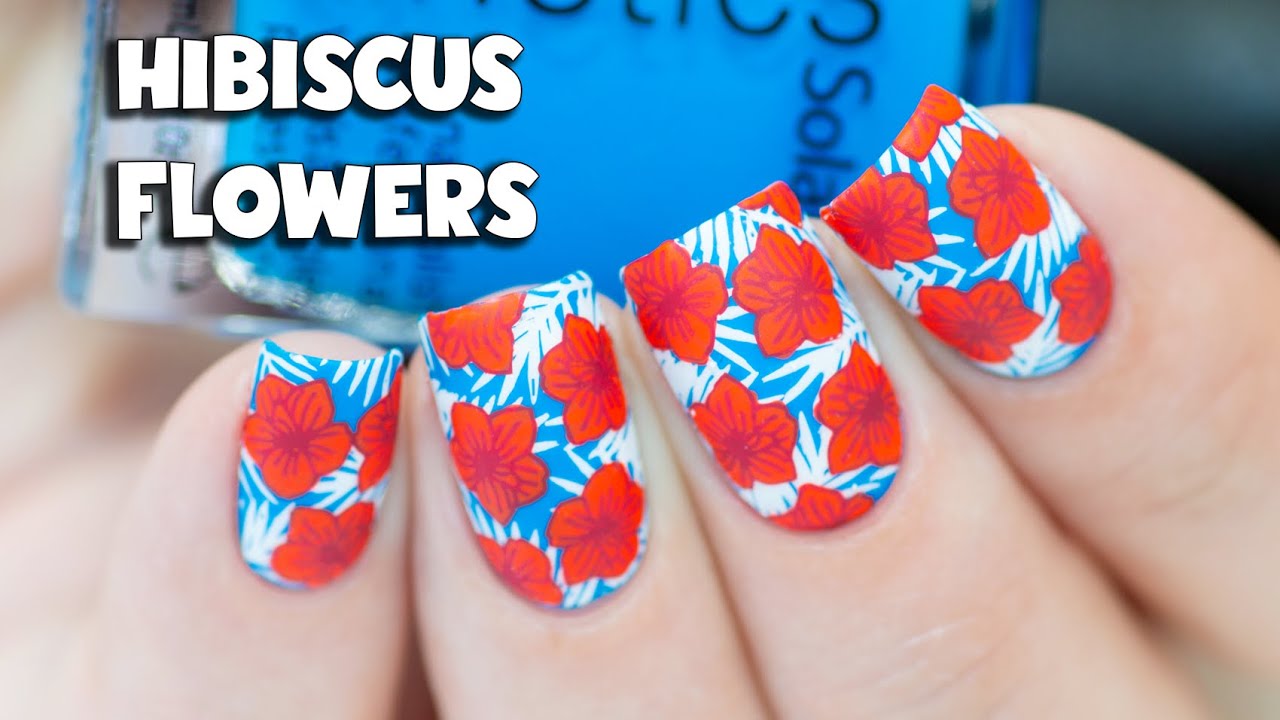
Bring a piece of the tropics to your nails with this tropical hibiscus nail art design. Follow these steps to create a colorful and fun look: Step 1: Apply a base coat to protect your nails and help your nail polish last longer. Step 2: Paint your nails with a light blue nail polish for a tropical sky background. Step 3: Using a thin nail art brush, create a palm tree on your accent nail with a dark green nail polish. Start by making a straight line down the middle of your nail, then add curved lines for the palm fronds. Step 4: Using a white nail polish, create small dots on your other nails to represent clouds in the sky. Step 5: On your middle finger, create a hibiscus flower using the same technique as in the previous tutorial. Step 6: Add a small yellow dot in the center of your flower for the stamen. Step 7: Finish off with a top coat to seal in your design and add shine. You now have a fun and tropical nail art design that is sure to make you feel like you're on vacation.2. Tropical Hibiscus Nail Art Design


2. Tropical Hibiscus Nail Art Design


If you're new to nail art or just want a quick and easy design, this hibiscus nail art tutorial is perfect for you. Follow these simple steps to create a beautiful hibiscus flower on your nails: Step 1: Apply a base coat to protect your nails. Step 2: Paint your nails with a light pink nail polish. Step 3: Using a toothpick, create five small dots in a circle shape on your nails for the petals of your hibiscus flower. Step 4: With a darker pink nail polish, create smaller dots in between the petals for dimension. Step 5: Add a yellow dot in the center for the stamen. Step 6: Using a green nail polish, create three small lines at the bottom of your flower for the leaves. Step 7: Finish off with a top coat to seal in your design and add shine. This easy hibiscus nail art tutorial is perfect for beginners or for those who want a quick and simple design.3. Easy Hibiscus Nail Art Tutorial

3. Easy Hibiscus Nail Art Tutorial


If you're not confident in your nail art skills or just don't have the time to create a design from scratch, hibiscus flower nail art stickers are the perfect solution. These stickers come in various designs and can easily be applied to your nails for a quick and beautiful look. Step 1: Start by applying a base coat to protect your nails. Step 2: Paint your nails with a light yellow nail polish. Step 3: Choose your hibiscus flower sticker and carefully place it on your nail, pressing down to make sure it sticks. Step 4: Using a green nail polish, create three small lines at the bottom of your flower for the leaves. Step 5: Finish off with a top coat to seal in your design and add shine. With hibiscus flower nail art stickers, you can easily achieve a professional-looking design in no time.4. Hibiscus Flower Nail Art Stickers


4. Hibiscus Flower Nail Art Stickers


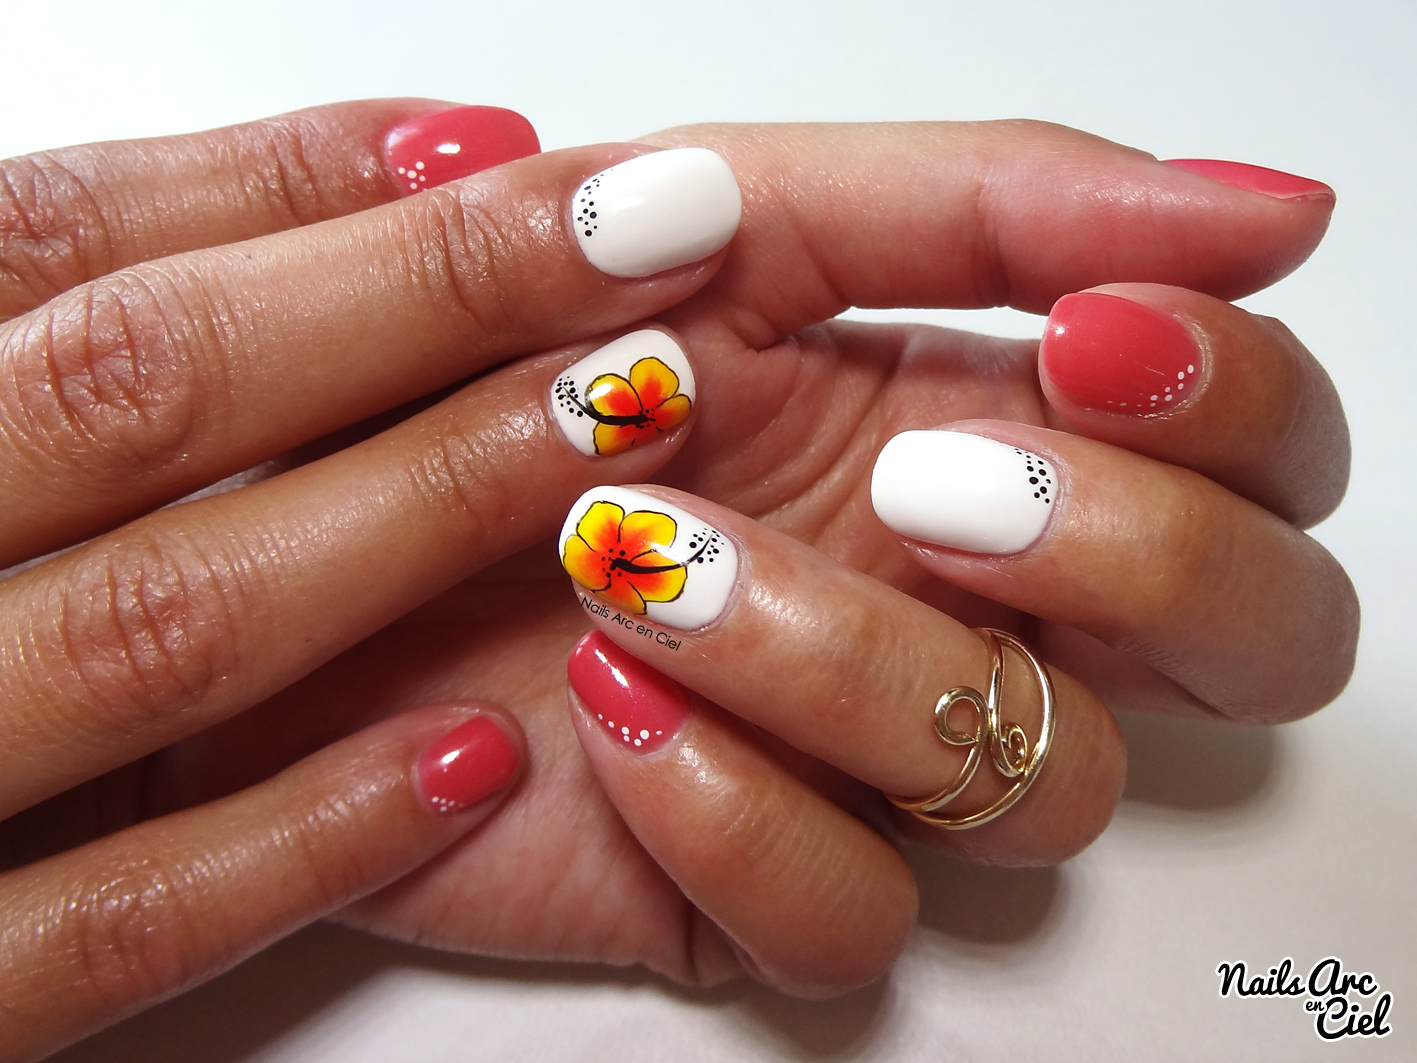
Summer is the perfect time to embrace bright and bold nail art designs, and hibiscus flowers are a popular choice for this season. Here are a few hibiscus nail art designs that are perfect for the summer months: Option 1: Paint your nails with a bright pink nail polish and create a hibiscus flower on your accent nail using the techniques mentioned in the previous tutorials. Add a green leaf on either side of the flower for a fun and colorful look. Option 2: Go for a more subtle look by painting your nails with a light yellow nail polish and adding a hibiscus flower on your ring finger using white and pink nail polish. Finish off with a top coat for a glossy finish. Option 3: For a more dramatic look, paint your nails with a blue base and add multiple hibiscus flowers in different colors, such as purple, orange, and yellow. This design is perfect for those who love a pop of color.5. Hibiscus Nail Art Designs for Summer

5. Hibiscus Nail Art Designs for Summer

If you want a design that is more intricate and detailed, hibiscus nail art decals are a great option. These decals come in a variety of designs and can be easily applied to your nails for a beautiful and unique look. Step 1: Start by applying a base coat to protect your nails. Step 2: Paint your nails with a light purple nail polish. Step 3: Choose your hibiscus nail art decal and carefully place it on your nail, pressing down to make sure it sticks. Step 4: Using a green nail polish, create three small lines at the bottom of your flower for the leaves. Step 5: Finish off with a top coat to seal in your design and add shine. Hibiscus nail art decals are perfect for those who want a more intricate and detailed design on their nails.6. Hibiscus Nail Art Decals


6. Hibiscus Nail Art Decals
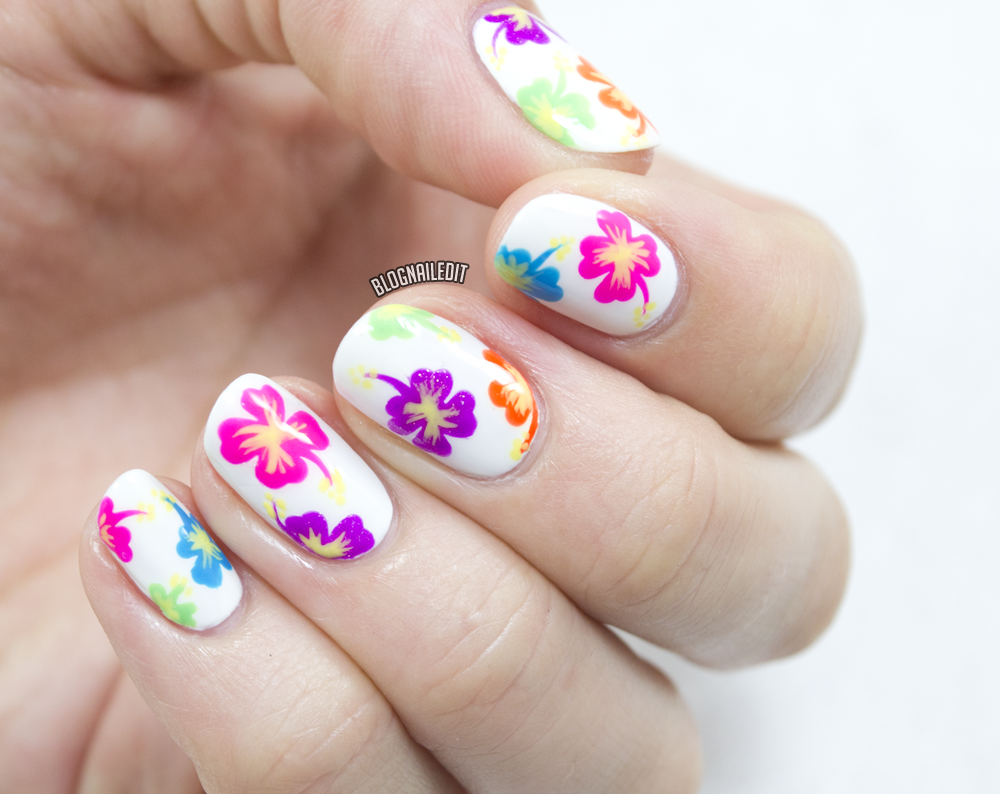
There are endless ways to incorporate hibiscus flowers into your nail art. Here are a few more ideas to inspire you: Idea 1: Create a gradient effect on your nails using pink, orange, and yellow nail polish. Then, add a white hibiscus flower on top for a tropical and colorful look. Idea 2: Use black nail polish to create a hibiscus flower on a white base for a chic and sophisticated design. Idea 3: Add some sparkle to your nails by using a glitter nail polish and creating a hibiscus flower on top with a silver nail polish. Get creative and try out different color combinations and techniques to make your hibiscus nail art unique and personal to you.7. Hibiscus Nail Art Ideas
7. Hibiscus Nail Art Ideas

Nail art stamping is a fun and easy way to add intricate designs to your nails. Here's how to use a hibiscus nail art stamp to create a beautiful and detailed design: Step 1: Apply a base coat to protect your nails. Step 2: Paint your nails with a light green nail polish. Step 3: Using a hibiscus flower nail art stamp and pink nail polish, stamp the flower onto your nails, making sure to cover the entire nail. Step 4: Add a small yellow dot in the center of the flower for the stamen. Step 5: Finish off with a top coat to seal in your design and add shine. Nail art stamping is a quick and easy way to achieve a detailed and professional-looking hibiscus flower design on your nails.8. Hibiscus Nail Art Stamping


8. Hibiscus Nail Art Stamping

Water decals are another great option for those who want a detailed design without the hassle. Here's how to use hibiscus nail art water decals: Step 1: Apply a base coat to protect your nails. Step 2: Paint your nails with a light blue nail polish. Step 3: Choose your hibiscus nail art water decal and carefully place it on your nail, pressing down to make sure it sticks. Step 4: Using a green nail polish, create three small lines at the bottom of your flower for the leaves. Step 5: Finish off with a top coat to seal in your design and add shine. Hibiscus nail art water decals are perfect for achieving a detailed and professional-looking design in no time.9. Hibiscus Nail Art Water Decals


9. Hibiscus Nail Art Water Decals
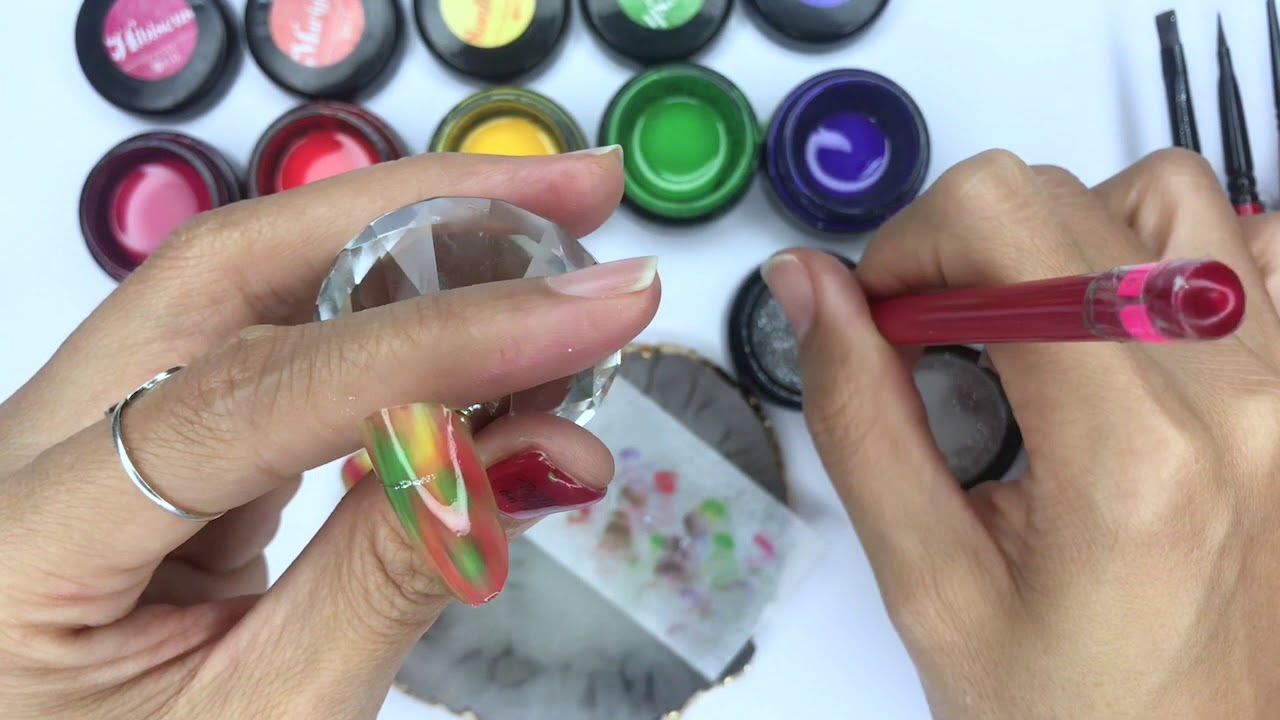
If you prefer using acrylic paint for your nail art, here's how to create a hibiscus flower design using this medium: Step 1: Apply a base coat to protect your nails. Step 2: Paint your nails with a light purple nail polish. Step 3: Using a thin brush or a toothpick, create five small dots in a circle shape on your nails for the petals of your hibiscus flower. Step 4: With a pink acrylic paint, create smaller dots in between the petals for dimension. Step 5: Add a yellow dot in the center for the stamen. Step 6: Using a green acrylic paint, create three small lines at the bottom of your flower for the leaves. Step 7: Finish off with a top coat to seal in your design and add shine. Acrylic paint is a great option for creating detailed and intricate designs on your nails, such as this hibiscus flower nail art.10. Hibiscus Nail Art Acrylic Paint Tutorial

10. Hibiscus Nail Art Acrylic Paint Tutorial


The Beauty of Hibiscus Nail Art Flowers

Unleashing Your Creativity
 When it comes to house design, we often focus on the bigger elements such as furniture, paint colors, and lighting. However, it's the small details that truly bring a space to life and make it feel like home. One such detail that has been gaining popularity in recent years is
hibiscus nail art flowers
.
These delicate and intricate floral designs have been seen on runways, red carpets, and even in everyday fashion. But why stop at clothing? Incorporating
hibiscus nail art flowers
into your home design can add a touch of elegance and whimsy to any room.
When it comes to house design, we often focus on the bigger elements such as furniture, paint colors, and lighting. However, it's the small details that truly bring a space to life and make it feel like home. One such detail that has been gaining popularity in recent years is
hibiscus nail art flowers
.
These delicate and intricate floral designs have been seen on runways, red carpets, and even in everyday fashion. But why stop at clothing? Incorporating
hibiscus nail art flowers
into your home design can add a touch of elegance and whimsy to any room.
A Touch of Nature
 One of the main attractions of
hibiscus nail art flowers
is their natural beauty. The vibrant colors and intricate details of these flowers can add a pop of color and visual interest to any space. Whether you choose to incorporate them into your wall art, pillows, or even as a wallpaper design,
hibiscus nail art flowers
will bring a touch of nature into your home.
One of the main attractions of
hibiscus nail art flowers
is their natural beauty. The vibrant colors and intricate details of these flowers can add a pop of color and visual interest to any space. Whether you choose to incorporate them into your wall art, pillows, or even as a wallpaper design,
hibiscus nail art flowers
will bring a touch of nature into your home.
Versatility and Customization
 What makes
hibiscus nail art flowers
truly unique is their versatility and ability to be customized. With different color combinations and design variations, you can easily find a style that suits your personal taste and complements your existing home decor. Plus, with the growing trend of DIY projects, you can even try creating your own
hibiscus nail art flowers
designs for a personalized touch.
What makes
hibiscus nail art flowers
truly unique is their versatility and ability to be customized. With different color combinations and design variations, you can easily find a style that suits your personal taste and complements your existing home decor. Plus, with the growing trend of DIY projects, you can even try creating your own
hibiscus nail art flowers
designs for a personalized touch.
Final Thoughts
 Incorporating
hibiscus nail art flowers
into your home design is a simple and budget-friendly way to add a touch of beauty and nature to your space. So why not unleash your creativity and give your home a fresh new look with these stunning floral designs? Whether it's on your walls, furniture, or even as a subtle accent,
hibiscus nail art flowers
are sure to make a statement in your home.
Incorporating
hibiscus nail art flowers
into your home design is a simple and budget-friendly way to add a touch of beauty and nature to your space. So why not unleash your creativity and give your home a fresh new look with these stunning floral designs? Whether it's on your walls, furniture, or even as a subtle accent,
hibiscus nail art flowers
are sure to make a statement in your home.


