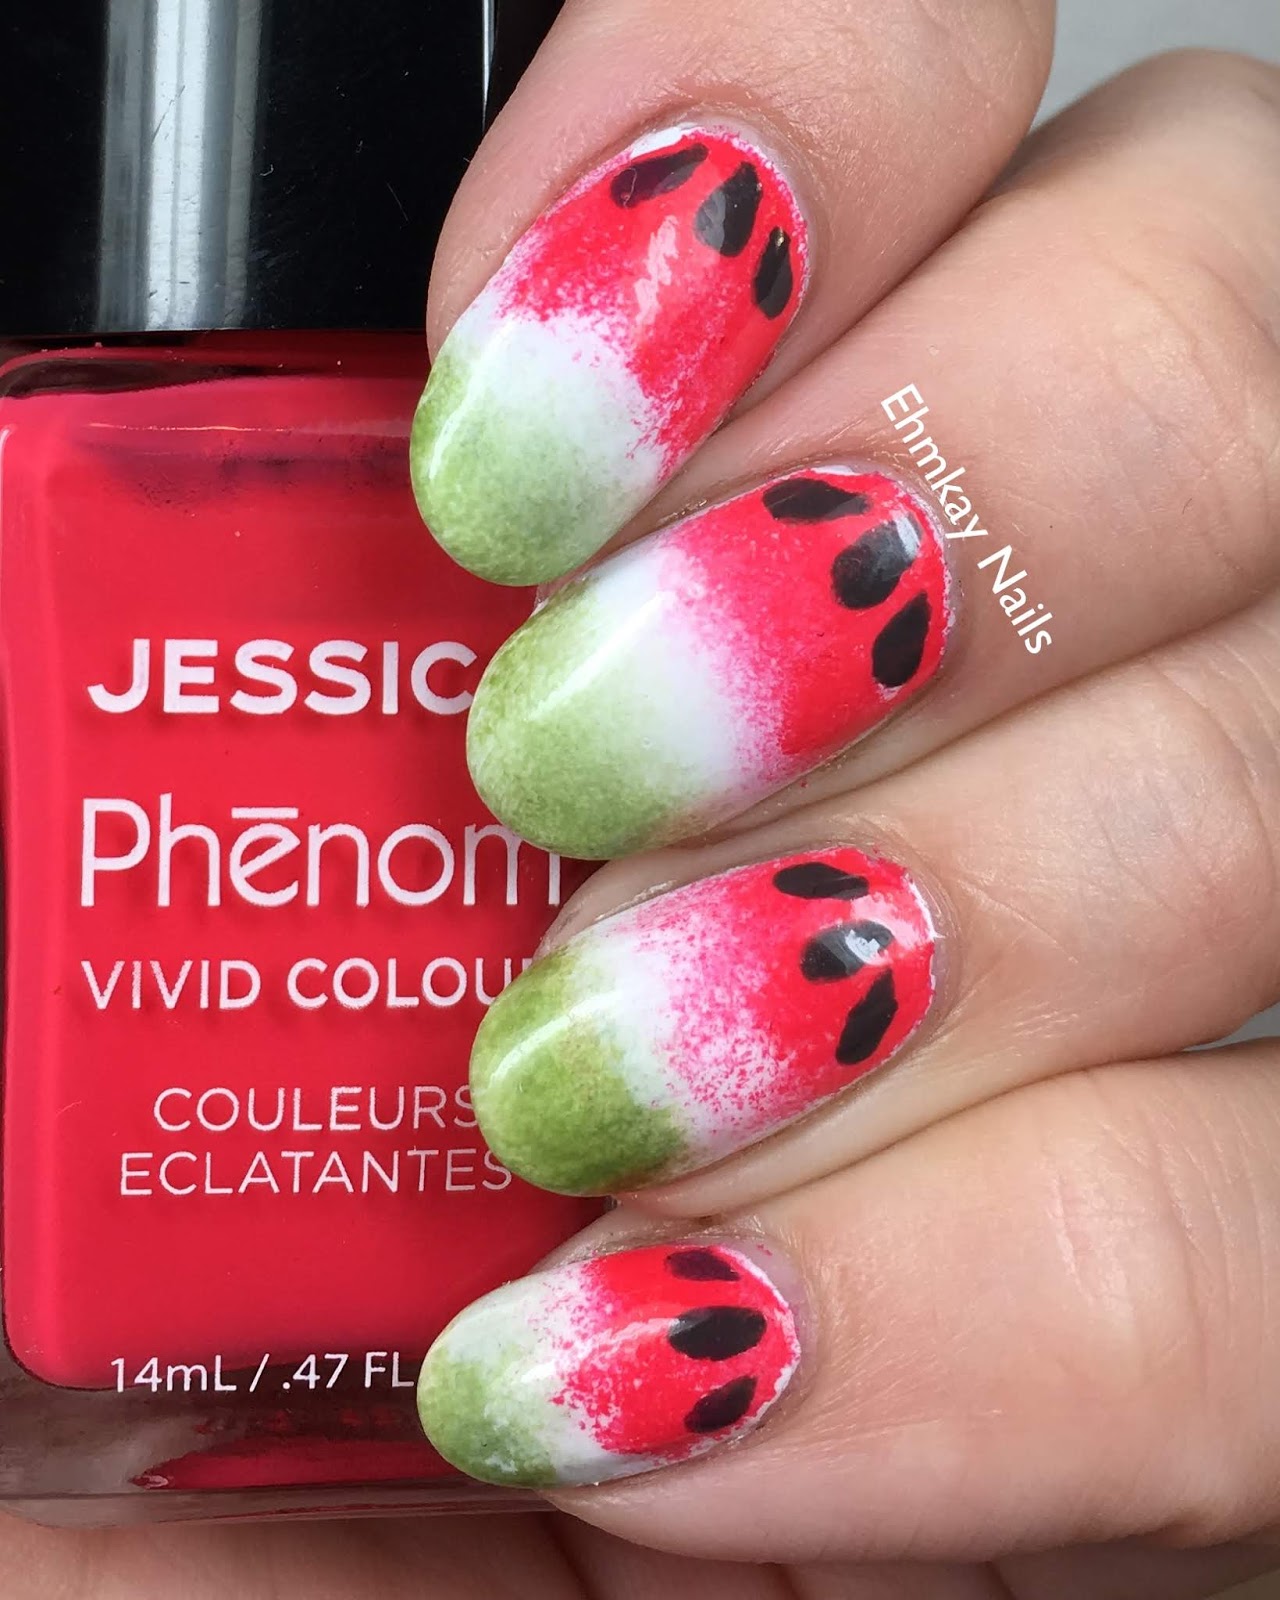
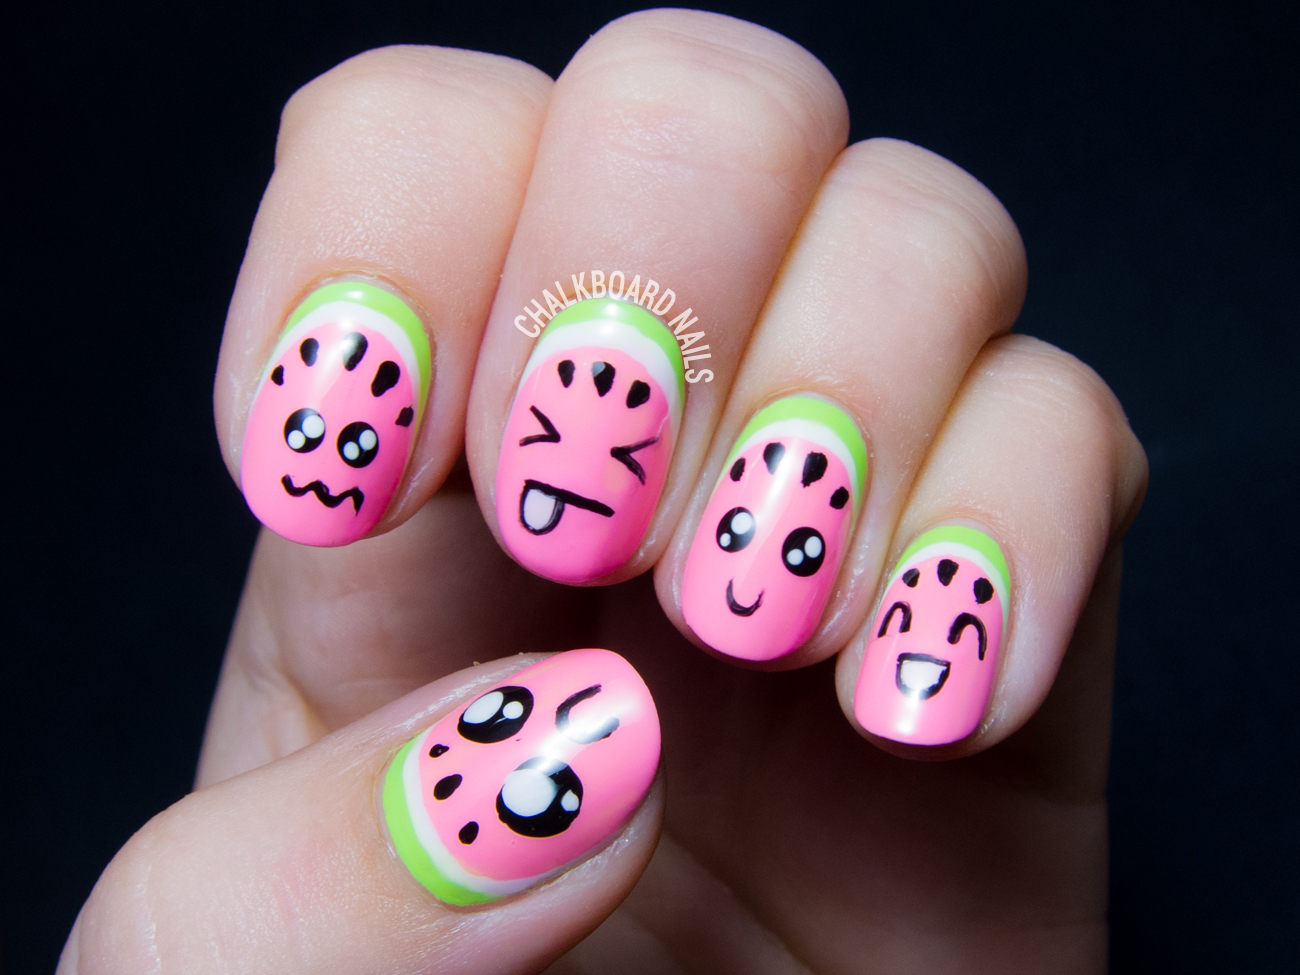
Summer is the perfect time to show off your creative side with some fun and colorful nail art. And what better way to do that than with some juicy watermelon and kiwi designs on your nails? These fruits not only make for a delicious treat, but they also make for a cute and refreshing nail art. If you're looking for some inspiration, keep reading for our top 10 kiwi watermelon nail art ideas and a step-by-step tutorial on how to achieve them.Watermelon Nail Art Tutorial


Watermelon Nail Art Tutorial


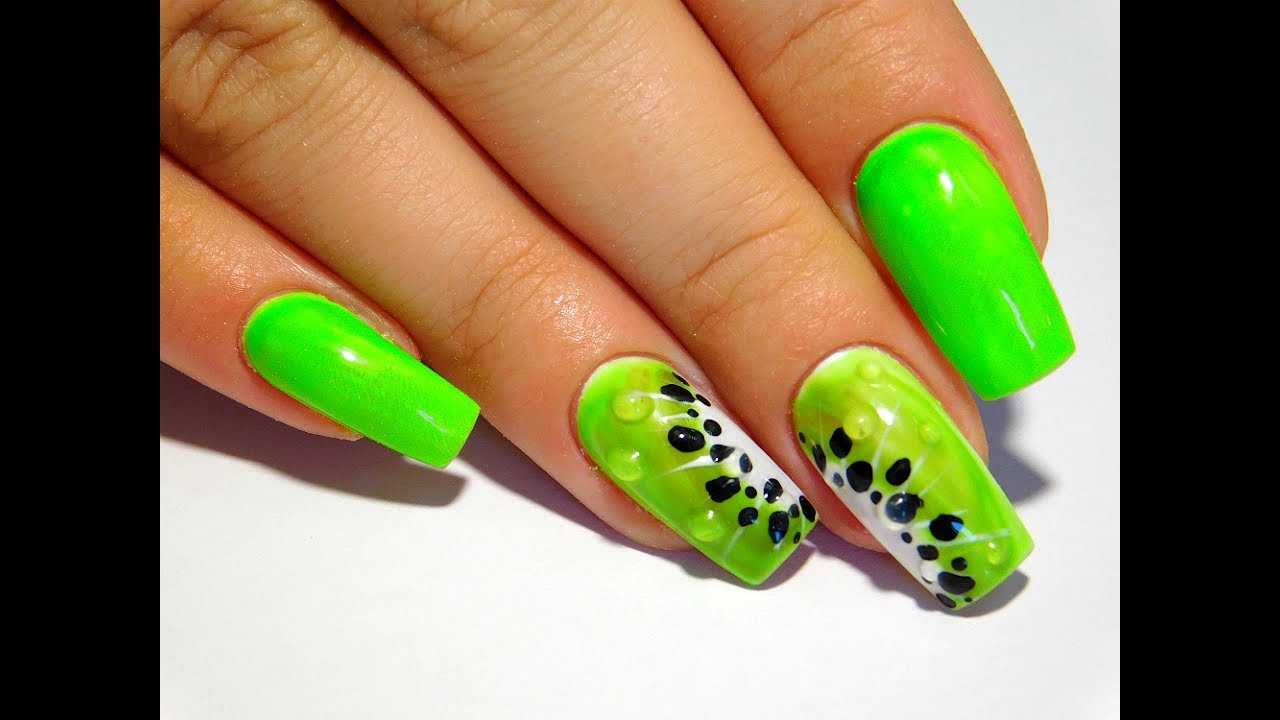
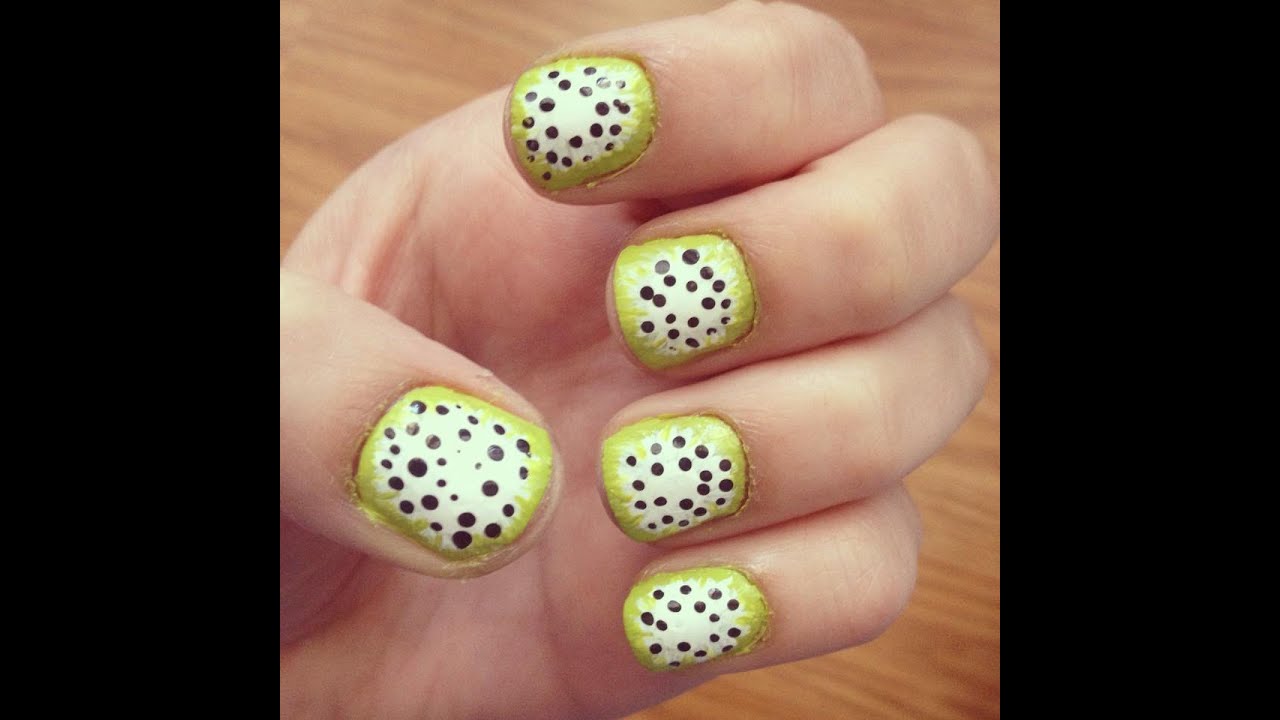
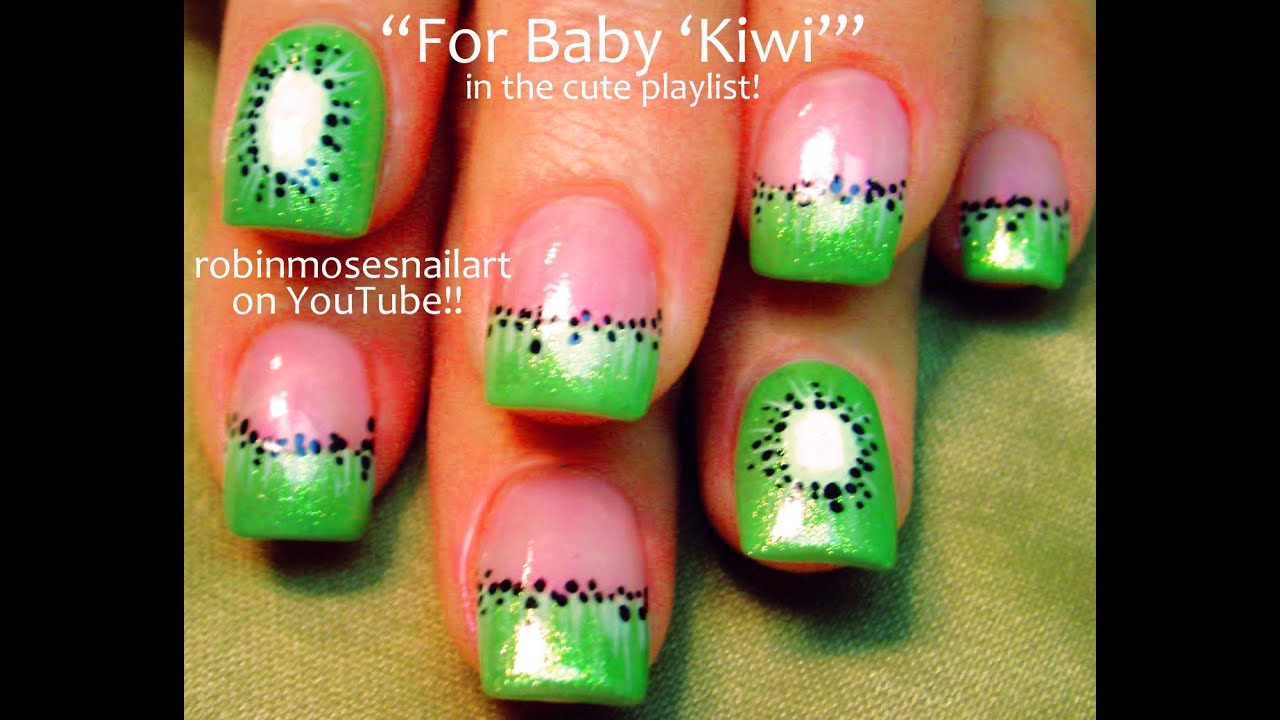
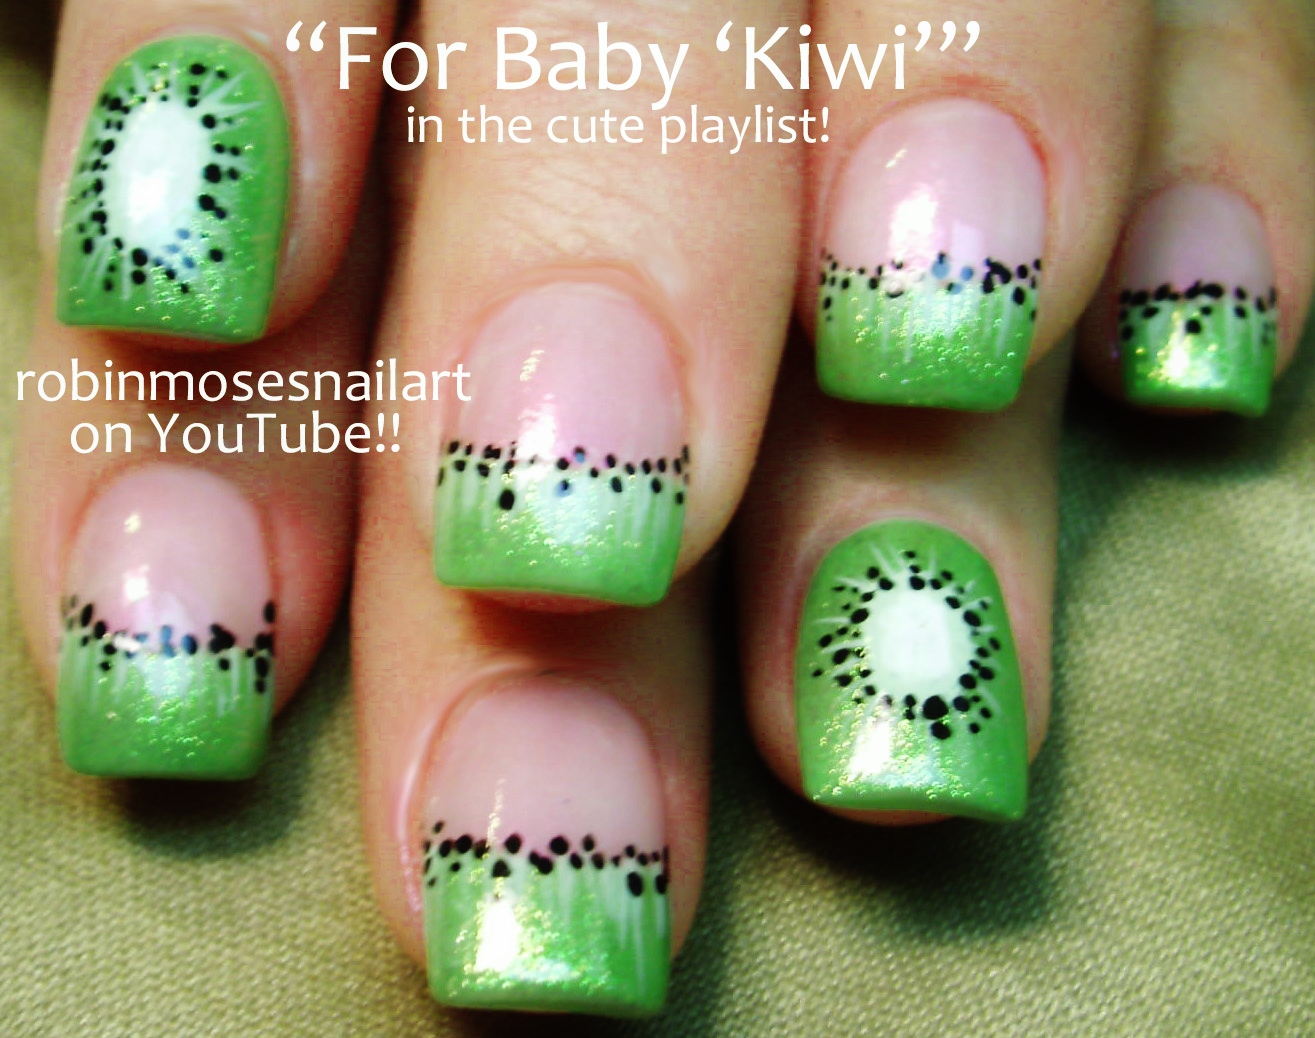
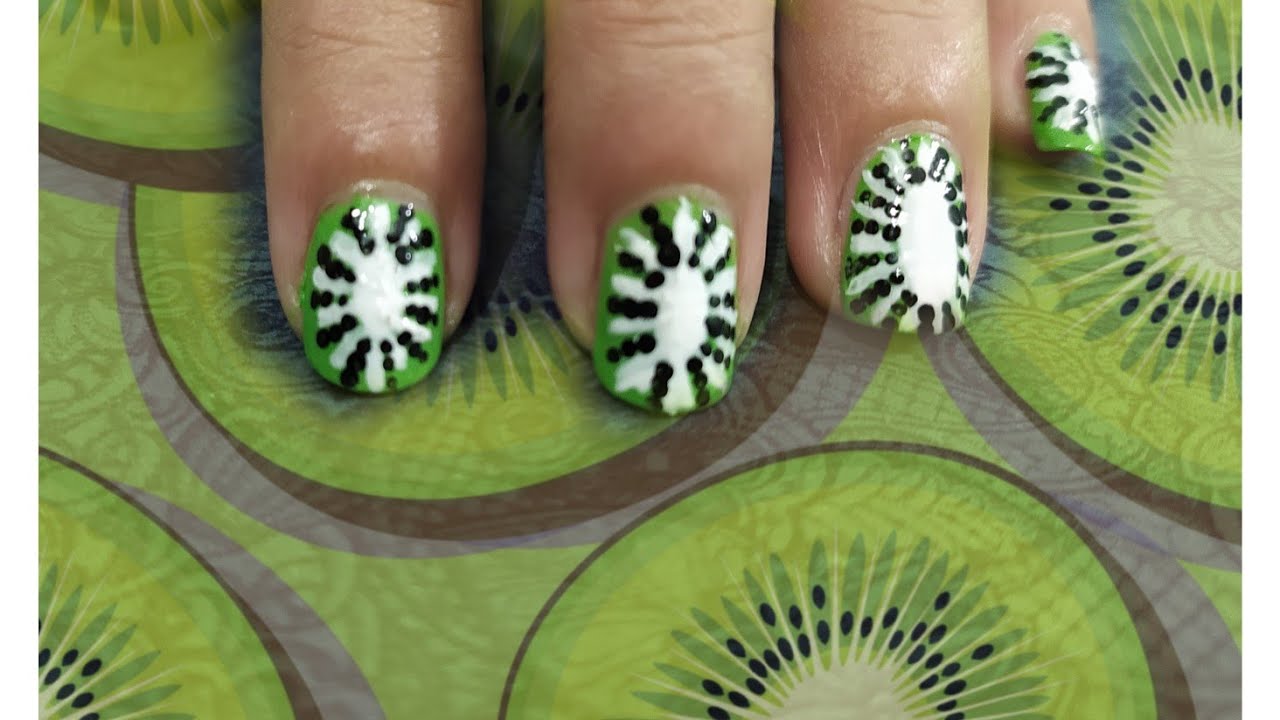
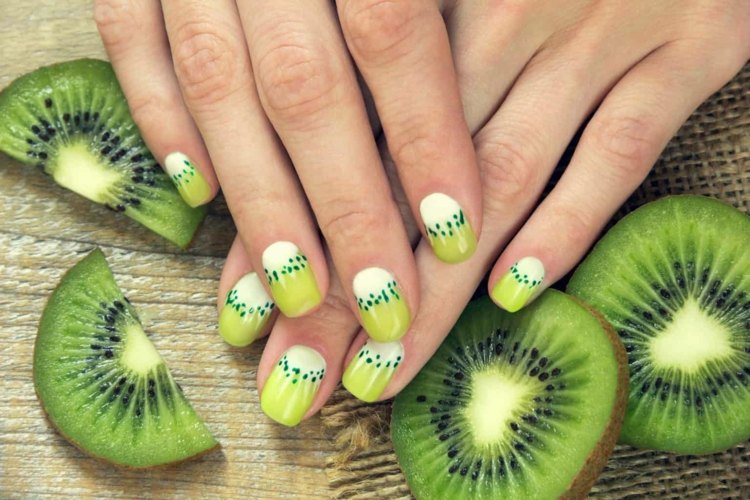
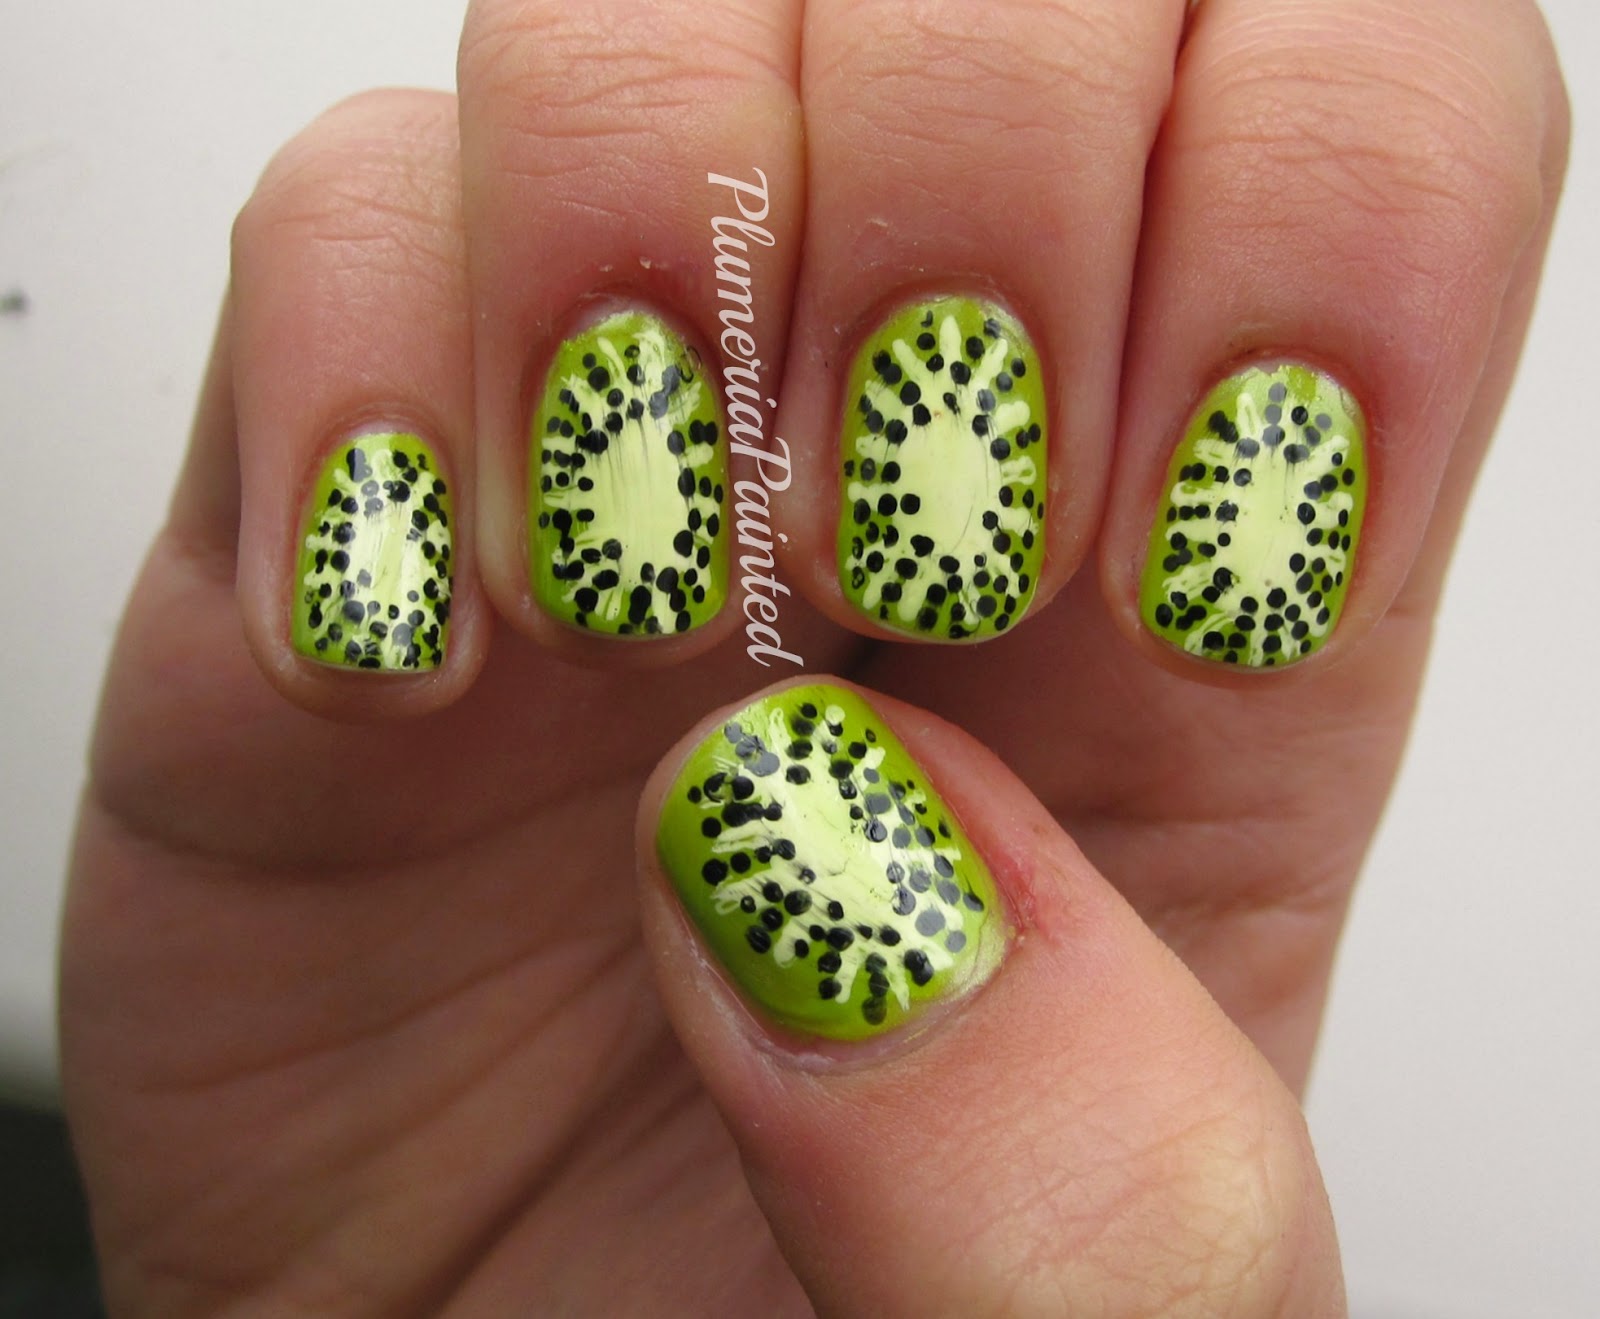
If you're a fan of the classic French manicure, why not add a twist to it by incorporating some kiwi designs? Start off by painting your nails with a light green base color. Then, using a darker green polish, draw a thin line across the tip of your nail to create the French tip. Once it dries, take a toothpick and dip it in some black polish. Use this to create tiny black dots on the green tip to mimic the kiwi seeds. Finish off with a clear top coat for a glossy finish.DIY Kiwi Nail Art


DIY Kiwi Nail Art


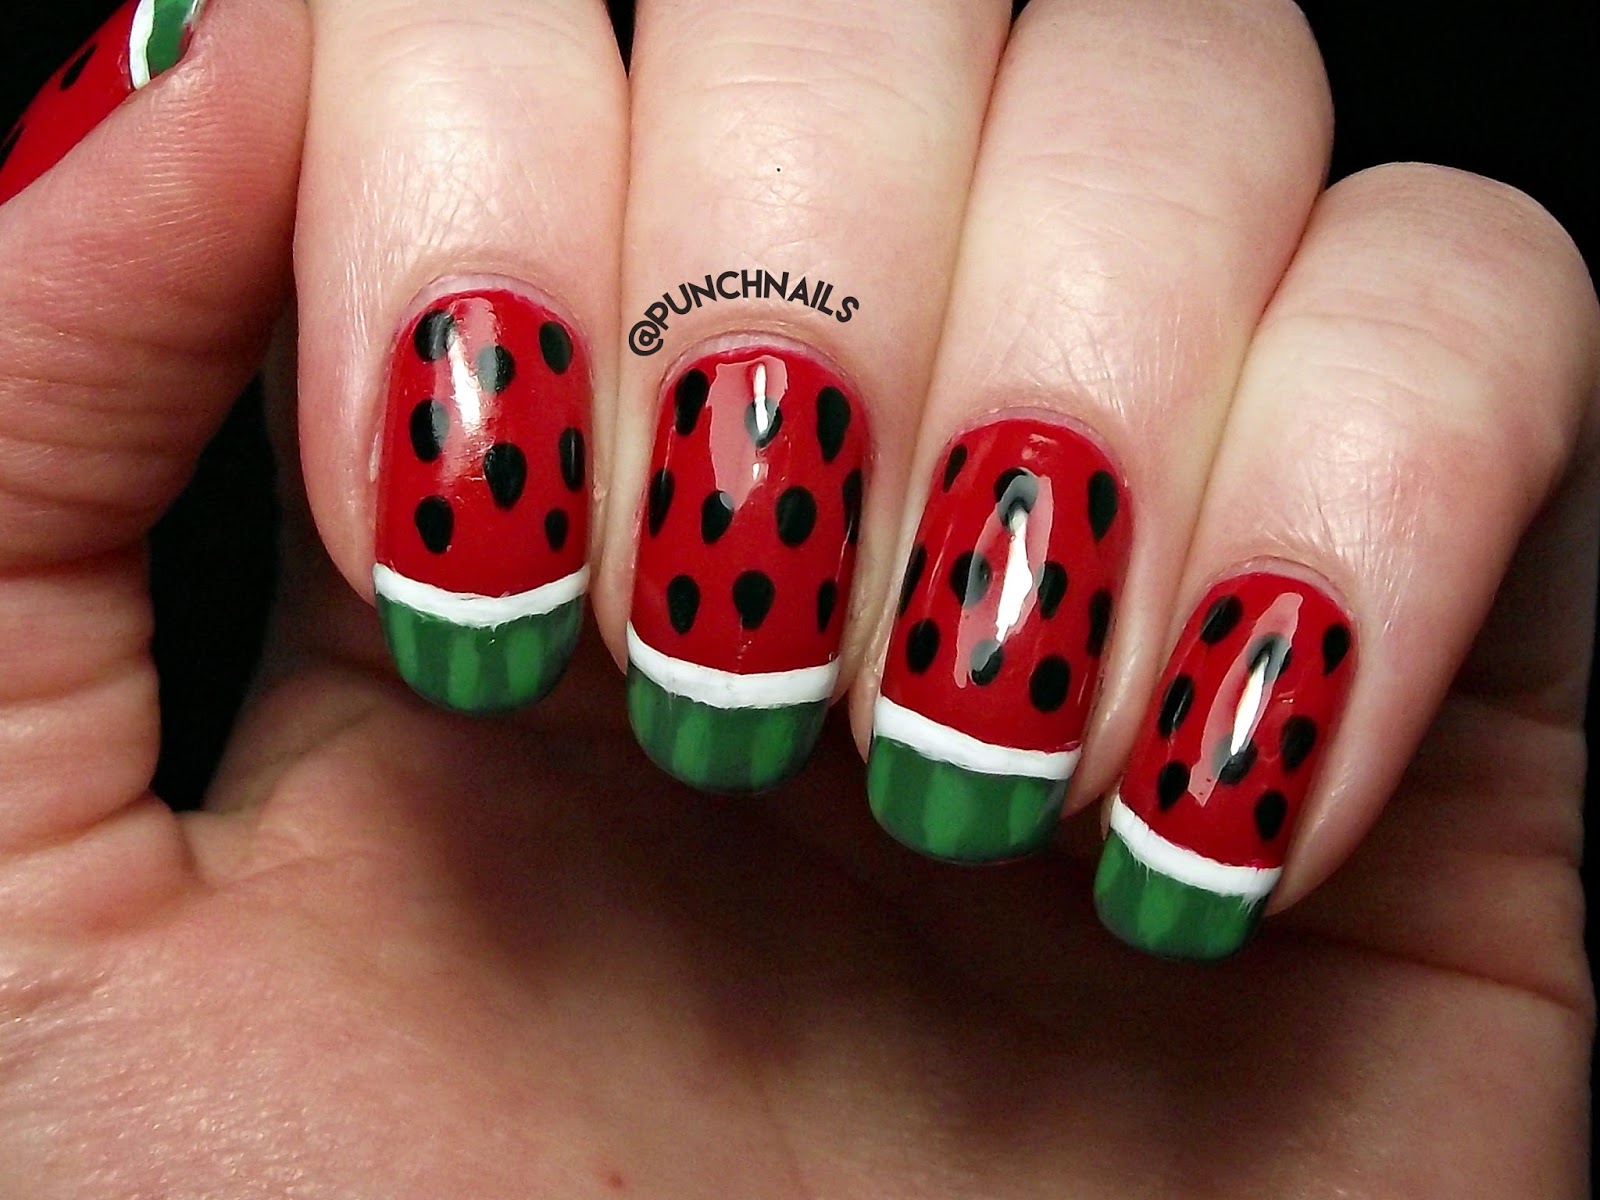
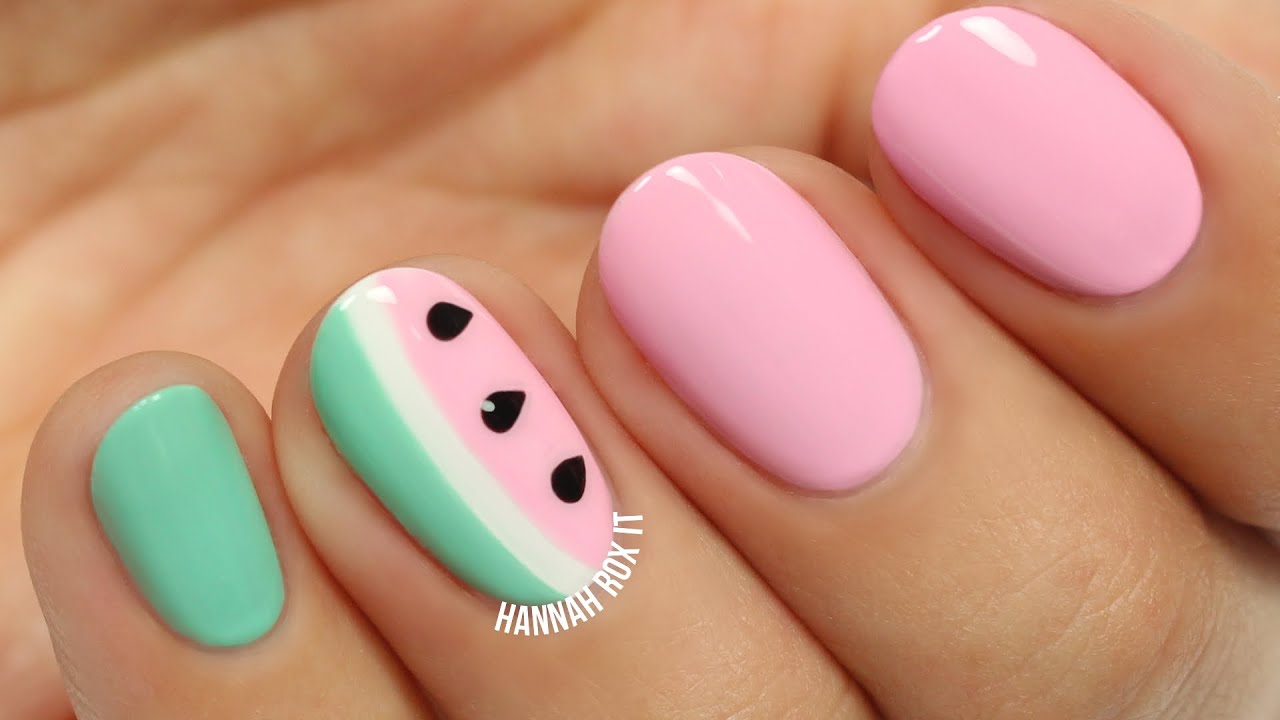
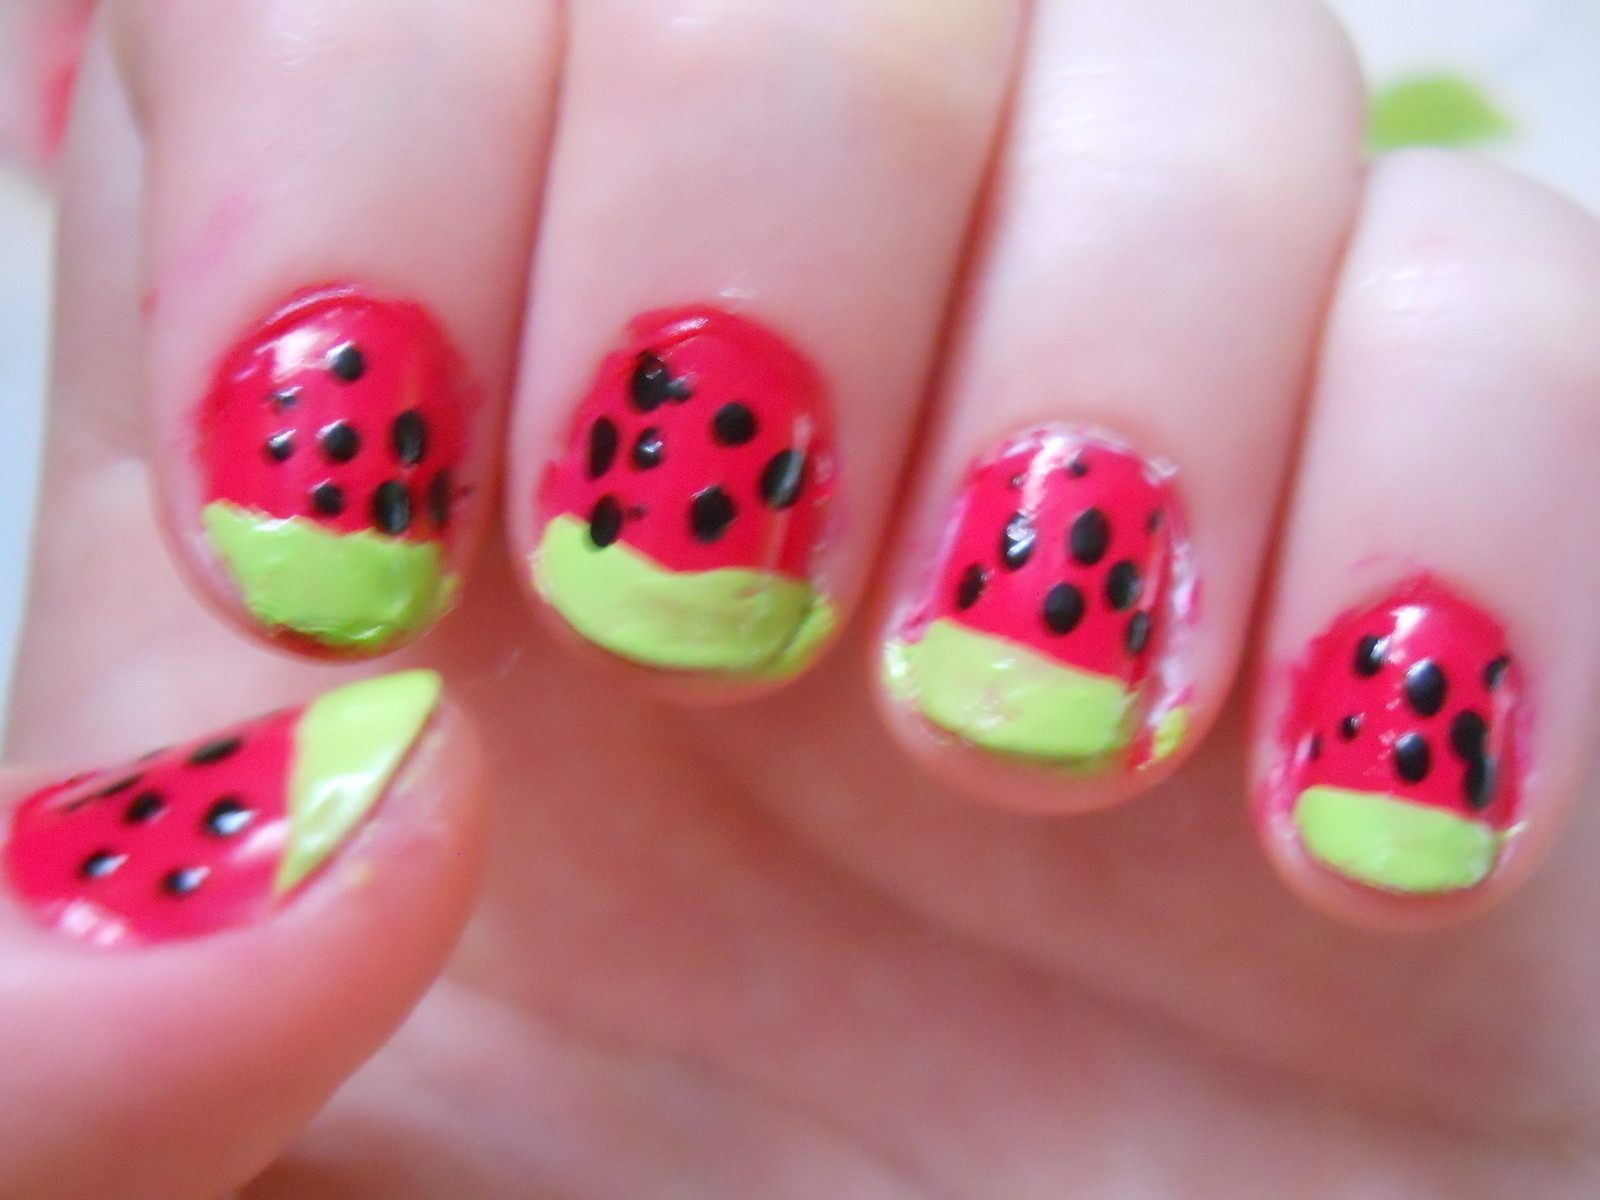
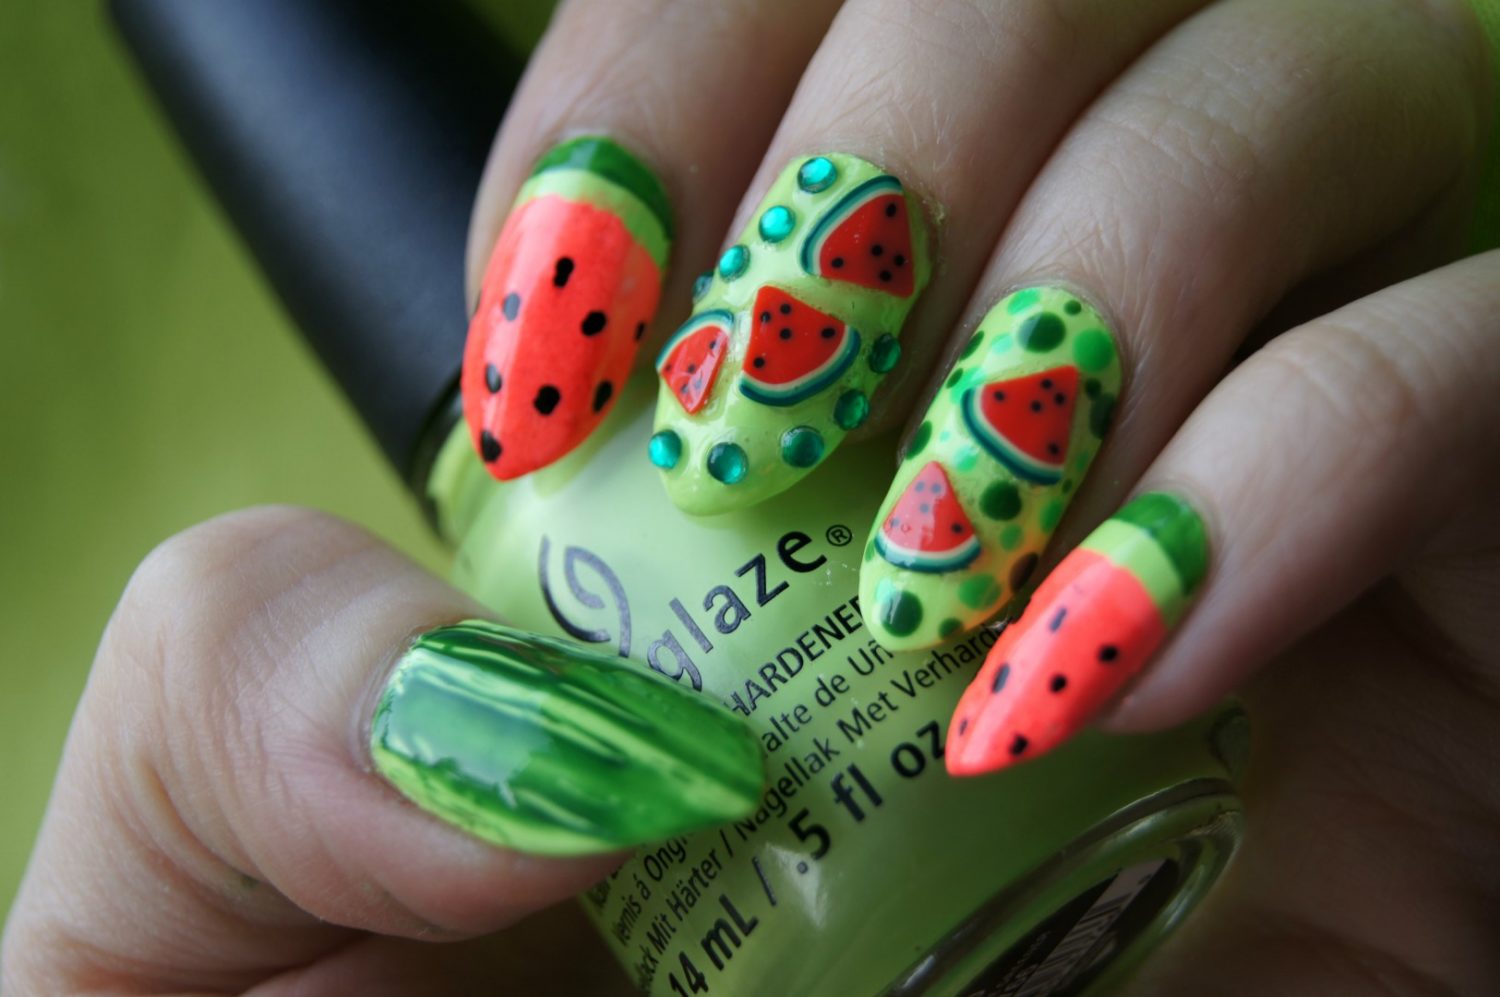
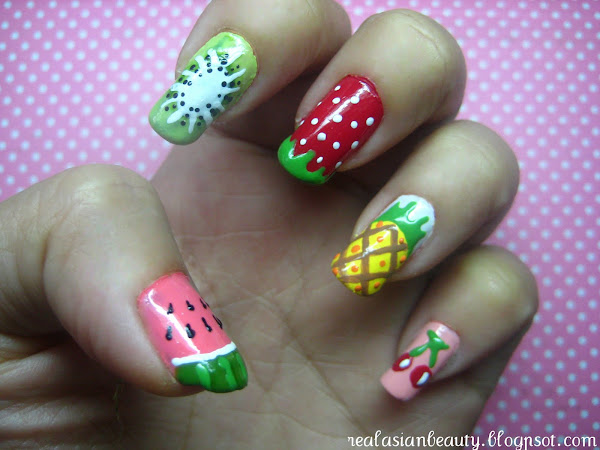
For a more intricate and detailed design, try a watermelon and kiwi nail art. Start by painting your nails with a light pink base color. Then, using a thin brush, draw a half-circle on the tip of your nail with a dark green polish to create the watermelon rind. Next, use a light green polish to fill in the rest of the nail. Once it dries, use a toothpick dipped in black polish to create tiny seeds on the light green area. Finally, add a small triangle of red polish at the bottom of the nail to complete the watermelon design. Repeat the same process on your other nails, but this time, use a light green base and a dark green rind to create the kiwi design.Watermelon and Kiwi Nail Design


Watermelon and Kiwi Nail Design


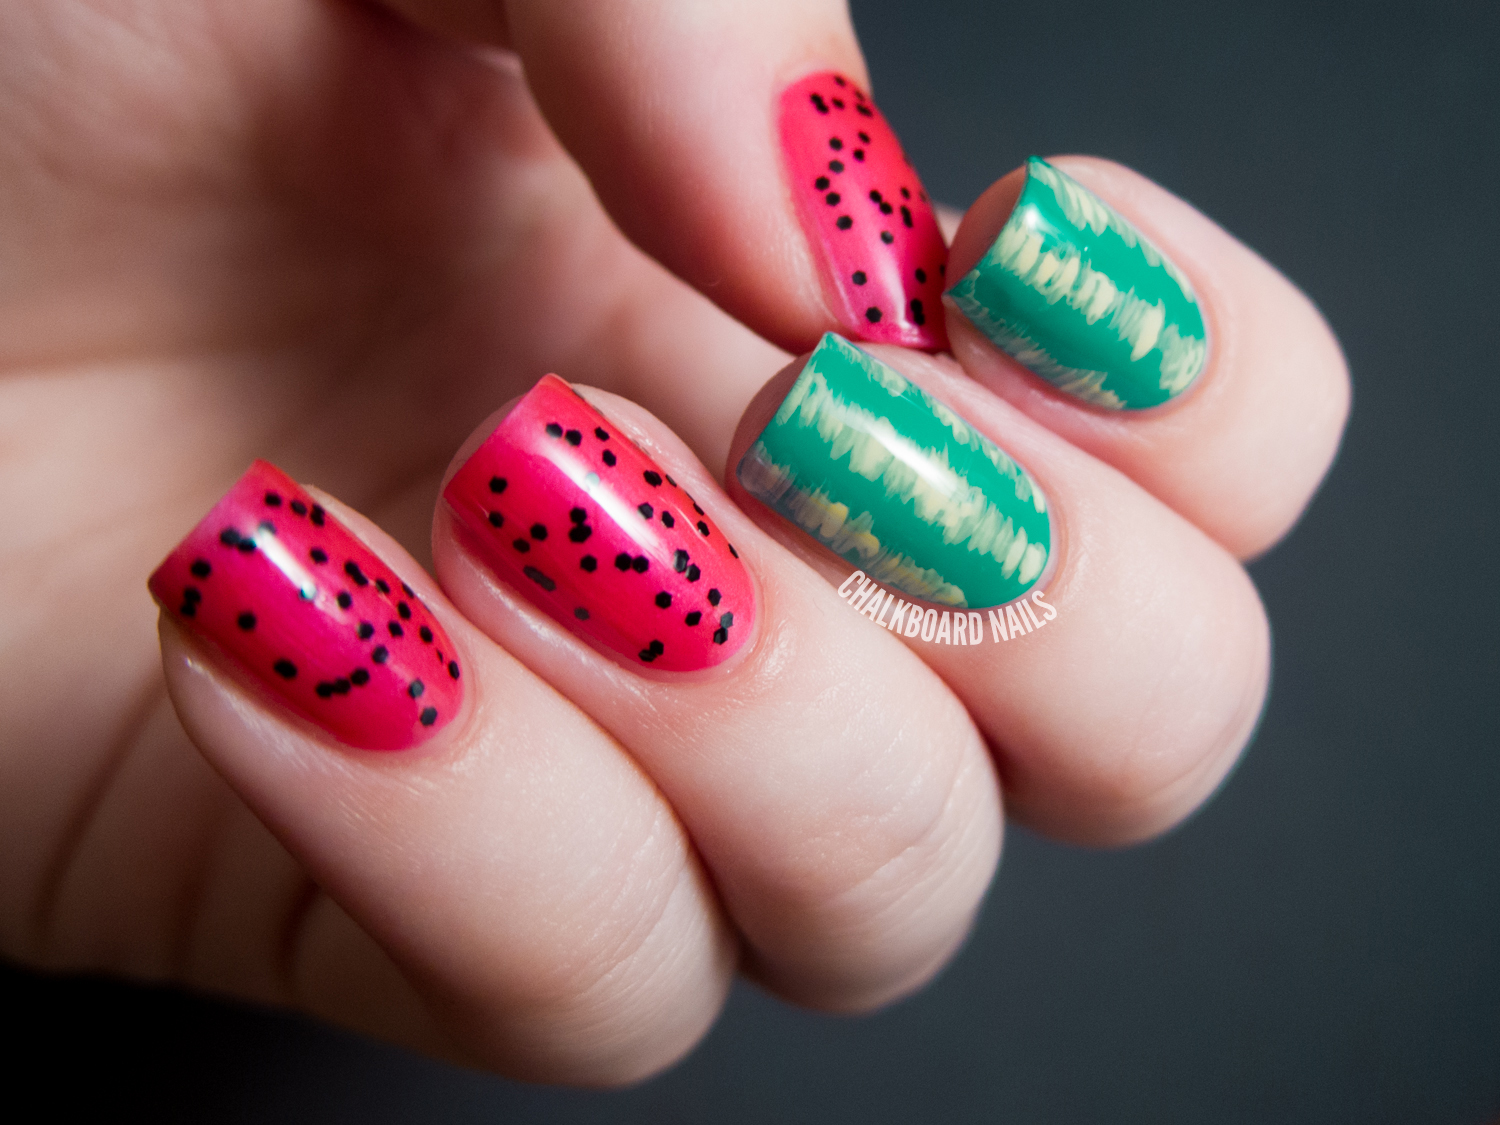
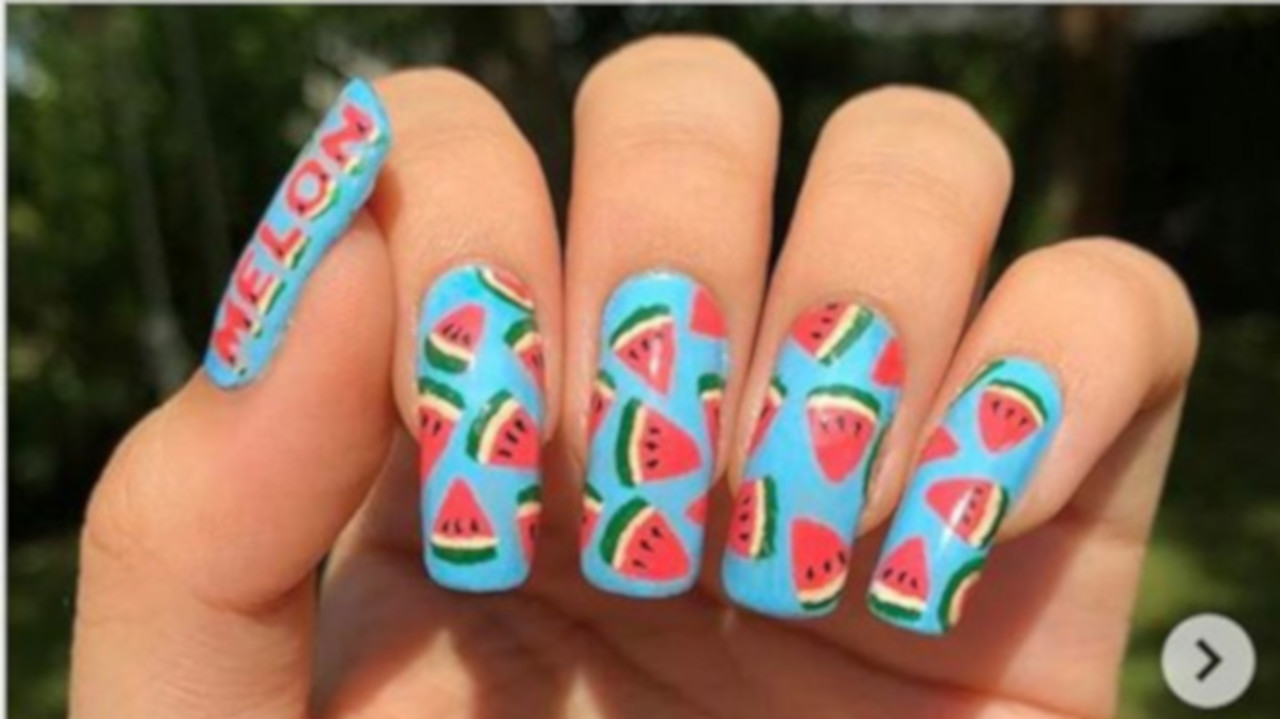
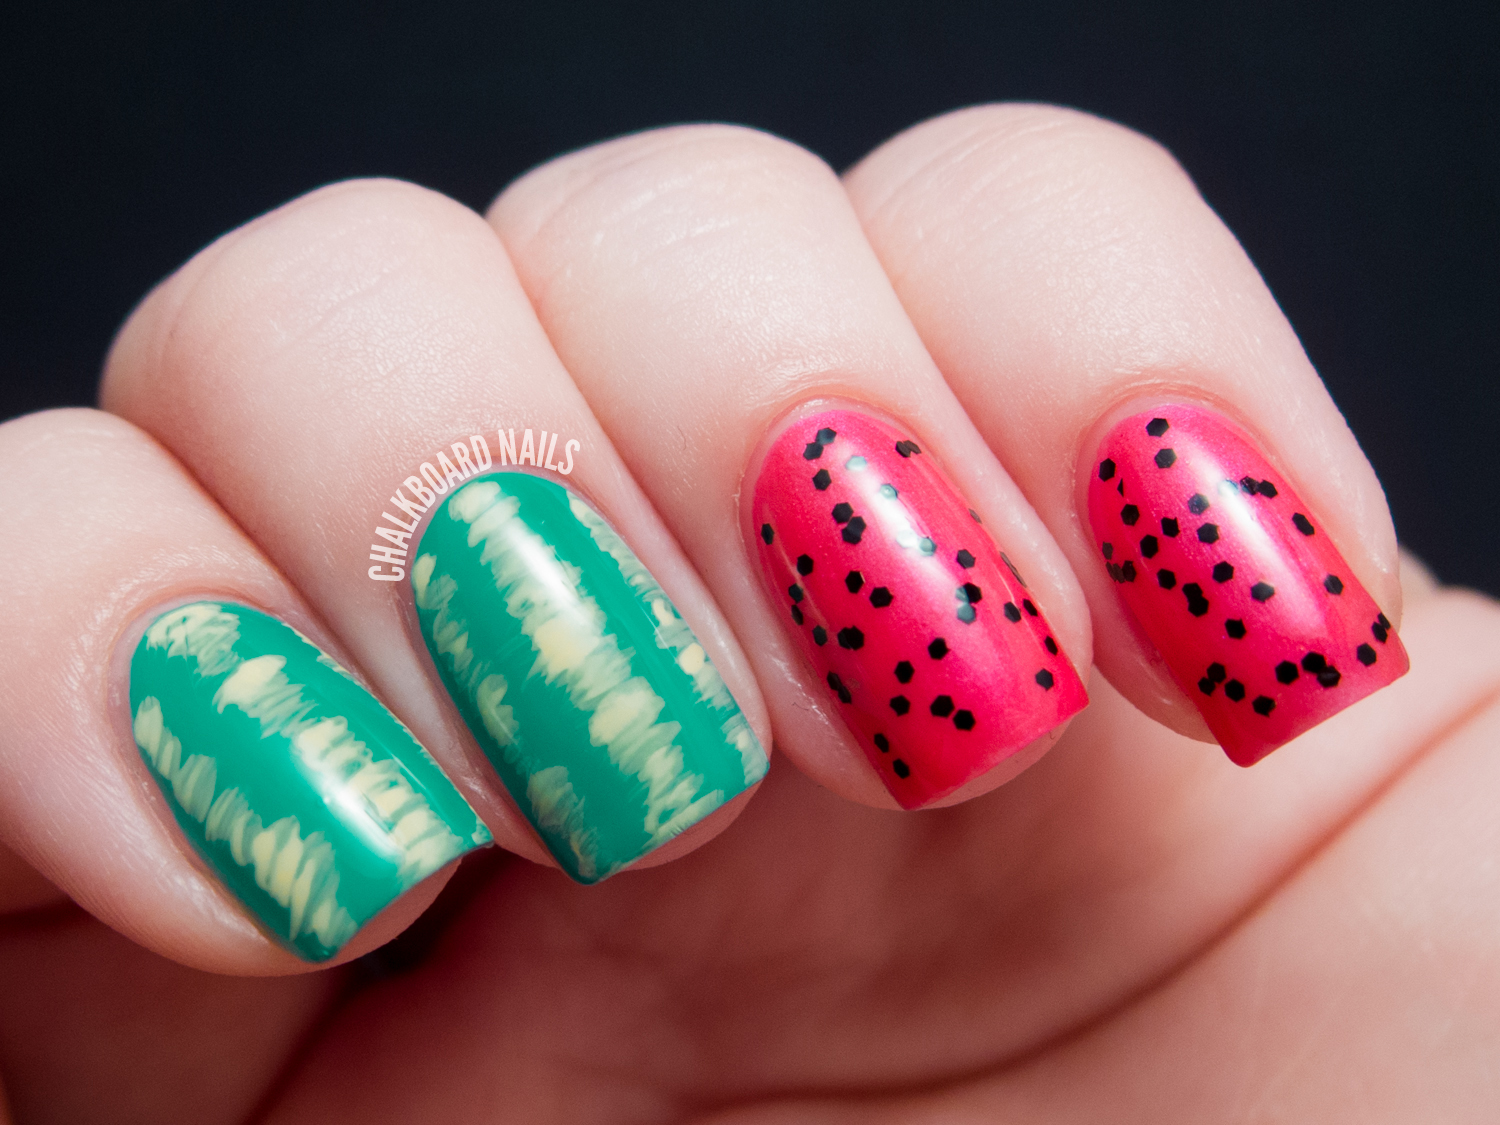
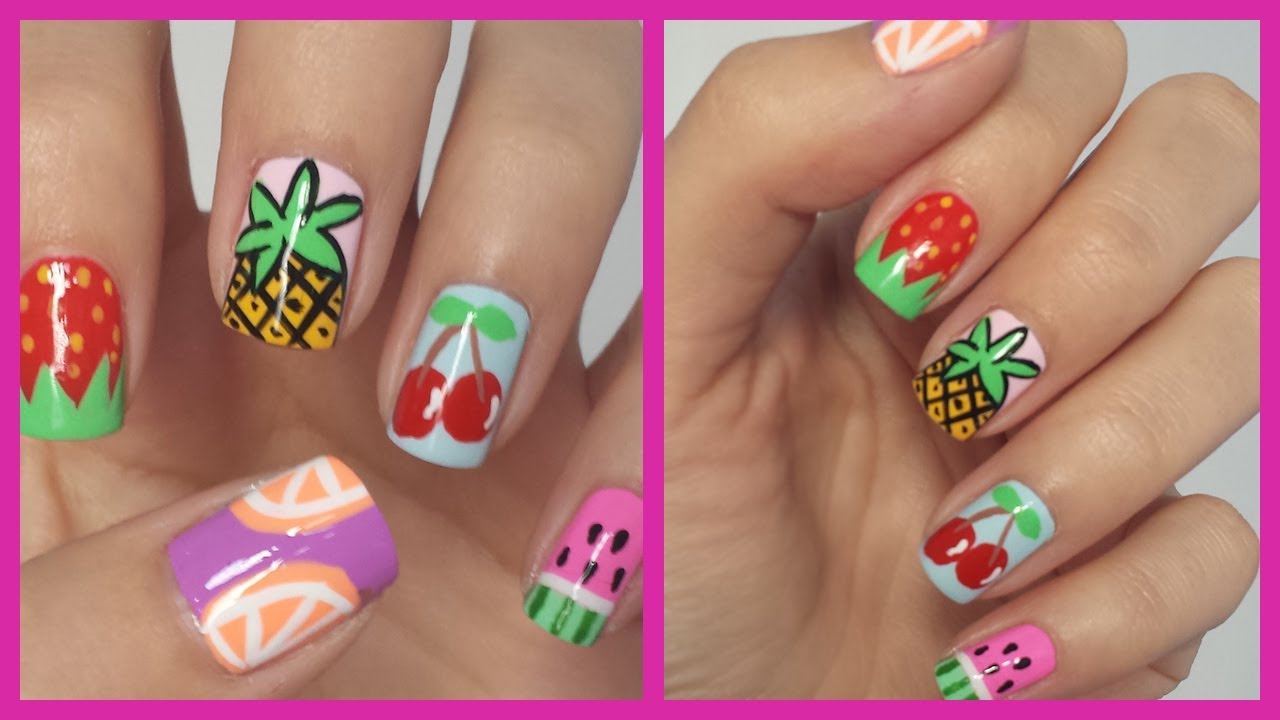
Why limit yourself to just watermelon and kiwi when you can have a whole fruit salad on your nails? This design is perfect for those who want to add some color and playfulness to their nails. Start by painting your nails with a light blue base color. Then, using a thin brush or a toothpick, create various fruit designs such as strawberries, pineapples, oranges, and of course, watermelons and kiwis. Use different colors and patterns to make each nail unique. Finish off with a top coat to seal in your fruity masterpiece.Summer Fruit Nail Art


Summer Fruit Nail Art
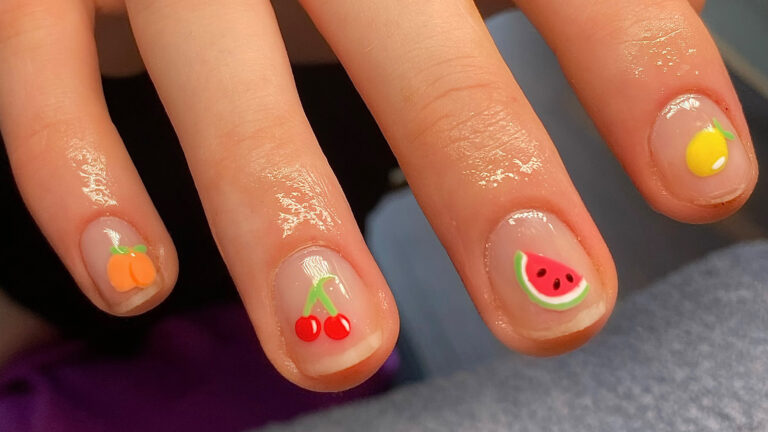


If you're feeling adventurous and want to try something different, why not mix and match watermelon and kiwi designs on your nails? Paint some of your nails with a light green base and create the watermelon rind and seeds as mentioned earlier. Then, on your other nails, paint a light pink base and add a kiwi design with a dark green rind and tiny black seeds. This way, each nail will have its own unique fruit design, making for a fun and playful look.Kiwi and Watermelon Nail Art Ideas

Kiwi and Watermelon Nail Art Ideas


Not everyone has the time or skills to create intricate nail art, but that doesn't mean you can't rock a watermelon and kiwi design on your nails. This simple and easy design is perfect for beginners or those who are short on time. Start by painting your nails with a light green base color. Then, using a toothpick dipped in red polish, create small dots on the tip of your nail to mimic the watermelon seeds. For the kiwi design, use a dark green polish to create a half-circle on the tip of your nail and add tiny black dots to imitate the seeds. Finish off with a top coat and you're good to go!Easy Watermelon and Kiwi Nail Art


Easy Watermelon and Kiwi Nail Art
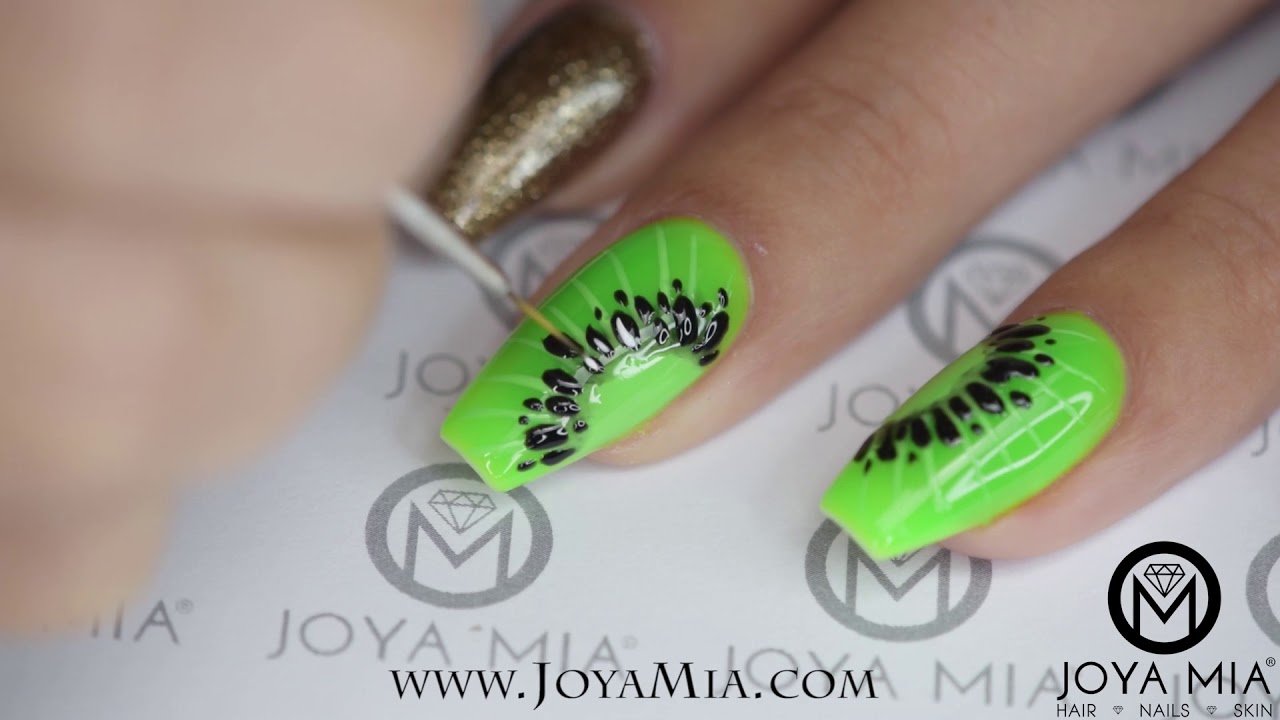
If you're someone who likes to follow a step-by-step guide, we've got you covered. Start by painting your nails with a light green base color. Then, using a thin brush, draw a half-circle on the tip of your nail with a dark green polish to create the watermelon rind. Next, use a light green polish to fill in the rest of the nail. Once it dries, use a toothpick dipped in black polish to create tiny seeds on the light green area. For the kiwi design, use a dark green polish to create a half-circle on the tip of your nail and add tiny black dots to imitate the seeds. Finish off with a top coat for a glossy finish.Step-by-Step Kiwi Watermelon Nail Art


Step-by-Step Kiwi Watermelon Nail Art
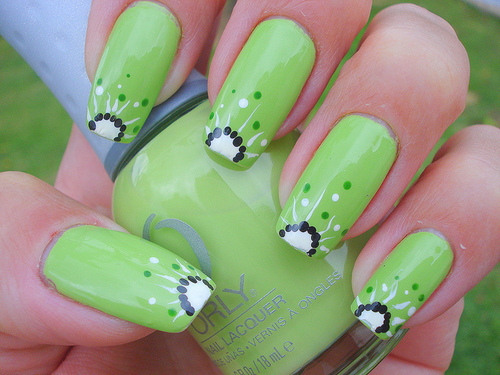
If you're a fan of all things cute and adorable, this fruit nail art is perfect for you. Start by painting your nails with a light pink base color. Then, using a thin brush, draw a half-circle on the tip of your nail with a dark green polish to create the watermelon rind. Next, use a light green polish to fill in the rest of the nail. Once it dries, use a toothpick dipped in black polish to create tiny seeds on the light green area. For the other nails, paint a light green base and add a kiwi design with a dark green rind and tiny black seeds. To complete the look, add some cute fruit stickers or decals on your nails.Cute Fruit Nail Designs


Cute Fruit Nail Designs


If you're still not sure which design to go for, try looking for some inspiration online. There are plenty of watermelon and kiwi nail art ideas on social media platforms like Instagram and Pinterest. You can also get creative and come up with your own unique design by combining different elements from various designs.Watermelon and Kiwi Nail Art Inspiration

Watermelon and Kiwi Nail Art Inspiration
Summer is the perfect time to experiment with bright and bold colors, and what better way to do that than with some fruit nail art? Whether you're heading to the beach or just want to add a pop of color to your everyday look, these watermelon and kiwi designs are sure to make a statement. So go ahead and try out these fun and refreshing nail art ideas and show off your fruity side this summer!Fruit Nail Art Designs for Summer

Fruit Nail Art Designs for Summer

Take Your Nail Art to the Next Level with Kiwi Watermelon Nail Art
Unleash Your Creativity with Kiwi Watermelon Nail Art
 Are you looking for a fun and unique way to spice up your nail game? Look no further than kiwi watermelon nail art. This playful and colorful design is sure to turn heads and make a statement. Not only is it eye-catching, but it also allows you to showcase your creativity and personality through your nails.
Get the Look with These Easy Steps
 Creating kiwi watermelon nail art is easier than you may think. With just a few simple steps, you can achieve this fun and vibrant design.
Step 1: Prep Your Nails
Before you begin, make sure your nails are clean and free of any old polish. Then, trim and shape your nails to your desired length and shape. Don't forget to push back your cuticles for a clean and polished look.
Step 2: Apply a Base Coat
To protect your natural nails and prevent staining, apply a layer of clear base coat to your nails. This will also help your nail polish last longer.
Step 3: Paint Your Nails
For the kiwi watermelon design, you will need a light green, dark green, red, and black nail polish. Use the light green polish to paint all of your nails, except for your ring finger. On your ring finger, use the dark green polish to create a half-moon shape at the base of your nail.
Step 4: Create the Watermelon Design
Using the red polish, create a curved line at the tip of your ring finger nail to represent the watermelon's flesh. Then, use the black polish to draw seeds on top of the red line.
Step 5: Add the Kiwi Details
To complete the kiwi watermelon design, use the dark green polish to create tiny seeds on the light green nails. You can also add a white polish dot to the center of each seed to give it more dimension.
Creating kiwi watermelon nail art is easier than you may think. With just a few simple steps, you can achieve this fun and vibrant design.
Step 1: Prep Your Nails
Before you begin, make sure your nails are clean and free of any old polish. Then, trim and shape your nails to your desired length and shape. Don't forget to push back your cuticles for a clean and polished look.
Step 2: Apply a Base Coat
To protect your natural nails and prevent staining, apply a layer of clear base coat to your nails. This will also help your nail polish last longer.
Step 3: Paint Your Nails
For the kiwi watermelon design, you will need a light green, dark green, red, and black nail polish. Use the light green polish to paint all of your nails, except for your ring finger. On your ring finger, use the dark green polish to create a half-moon shape at the base of your nail.
Step 4: Create the Watermelon Design
Using the red polish, create a curved line at the tip of your ring finger nail to represent the watermelon's flesh. Then, use the black polish to draw seeds on top of the red line.
Step 5: Add the Kiwi Details
To complete the kiwi watermelon design, use the dark green polish to create tiny seeds on the light green nails. You can also add a white polish dot to the center of each seed to give it more dimension.
Make It Your Own
 One of the best things about kiwi watermelon nail art is that you can make it your own. You can switch up the colors to match your personal style or add different designs like stripes or polka dots. The possibilities are endless, so let your creativity run wild.
In conclusion, kiwi watermelon nail art is a fun and easy way to add some personality to your nails. With just a few simple steps, you can achieve a playful and eye-catching design that is sure to turn heads. So why not give it a try and take your nail game to the next level?
One of the best things about kiwi watermelon nail art is that you can make it your own. You can switch up the colors to match your personal style or add different designs like stripes or polka dots. The possibilities are endless, so let your creativity run wild.
In conclusion, kiwi watermelon nail art is a fun and easy way to add some personality to your nails. With just a few simple steps, you can achieve a playful and eye-catching design that is sure to turn heads. So why not give it a try and take your nail game to the next level?


