Are you having trouble with your Konad nail art stamp not working? Don't worry, you're not alone. Many people struggle with getting the perfect transfer and design from their stamping kit. But fear not, we have some troubleshooting tips to help you achieve flawless results every time. If your design is coming out smudged or incomplete, the first thing to check is the condition of your stamper and scraper. Over time, these tools can become worn and affect the transfer of the design. Make sure to regularly clean and replace them if needed. Another common issue is the polish you are using. Some formulas may be too thick or too thin for stamping, resulting in a messy transfer. Look for specifically formulated stamping polishes or try thinning out your regular polish with some nail polish thinner. Lastly, make sure to prep your nails properly before stamping. This includes properly shaping and filing your nails, removing all oils from the surface, and using a good quality base coat. These steps will ensure a smooth and long-lasting transfer.1. Troubleshooting Tips for Konad Nail Art Stamping


1. Troubleshooting Tips for Konad Nail Art Stamping


One of the most frustrating things that can happen with your Konad nail art stamp is when it gets jammed. This can happen for a variety of reasons, such as dried out polish or debris stuck in the stamper. But don't worry, there are ways to fix this issue and get your stamping kit back in working order. If your stamper is jammed due to dried out polish, you can try soaking it in warm water for a few minutes to soften the polish. Then, use a cotton pad or paper towel to gently rub off the dried polish. If there is debris stuck in the stamper, use a toothpick or tweezers to carefully remove it. It is also important to keep your stamper clean and free of any residue. Regularly wash it with soap and water and make sure to remove any excess polish after each use. This will prevent any jamming in the future and keep your stamping kit in top condition.2. How to Fix a Jammed Konad Nail Art Stamper


2. How to Fix a Jammed Konad Nail Art Stamper


While Konad nail art stamping is a fun and creative way to add designs to your nails, there can be some common problems that arise. But fear not, we have solutions to help you overcome these issues and achieve flawless results. If your designs are not transferring properly, it could be due to not picking up enough polish or not pressing down hard enough on the stamper. Make sure to roll the stamper over the design plate and press down firmly on your nail to ensure a clean transfer. Another issue could be smudging or smearing of the design. This can happen if your base polish is not completely dry before stamping or if you are using a top coat that is not stamping-friendly. Make sure to allow enough drying time and use a top coat specifically designed for stamping. Lastly, if your designs are not showing up as clearly as you would like, it could be due to the design plate not being deep enough. In this case, you can try gently filing down the design plate to create deeper grooves for better stamping results.3. Common Problems with Konad Nail Art Stamping and How to Solve Them

3. Common Problems with Konad Nail Art Stamping and How to Solve Them

Have you ever had the perfect design on your stamping plate, only to have it not transfer properly onto your nail? This can be a frustrating issue, but there are a few common causes and solutions to help you achieve a successful transfer every time. The first cause could be the pressure you are applying with the stamper. If you press down too hard or too lightly, the design may not transfer properly. Practice finding the right amount of pressure to achieve a clean and crisp stamp. Another cause could be the angle at which you are stamping. It is important to hold the stamper at a 45-degree angle and roll it over the design plate and onto your nail. This will ensure that the entire design is picked up and transferred. If you are still having trouble with the transfer, try lightly buffing your nail with a nail buffer before stamping. This will create a smoother surface for the design to adhere to.4. Konad Nail Art Stamping Not Transferring Properly: Causes and Solutions


4. Konad Nail Art Stamping Not Transferring Properly: Causes and Solutions

Properly cleaning and maintaining your Konad nail art stamping kit is key to achieving flawless results. Neglecting to clean your tools and kit can lead to dried out polish, clogged stampers, and overall poor performance. Follow these steps to keep your kit in top condition. The first step is to regularly clean your stampers and scrapers. After each use, wipe off any excess polish with a cotton pad or paper towel. Every few uses, wash them with soap and water to remove any buildup. Make sure to dry them thoroughly before storing. It is also important to clean your design plates after each use. Use a cotton pad or Q-tip with some acetone or nail polish remover to wipe off any leftover polish. Avoid using anything too abrasive that could damage the design plate. Lastly, make sure to store your stamping kit in a cool and dry place. Extreme temperatures and humidity can affect the performance of your tools and polish. Keeping them in a sealed container or bag will also prevent any dust or debris from getting in.5. How to Clean and Maintain Your Konad Nail Art Stamping Kit


5. How to Clean and Maintain Your Konad Nail Art Stamping Kit
Achieving the perfect Konad nail art stamp can take some practice, but with these tips and tricks, you'll be a pro in no time. Tip #1: Use a good quality base coat before stamping to create a smooth and long-lasting surface for the design to adhere to. Tip #2: When using regular polish instead of stamping polish, make sure to work quickly as regular polish dries faster and can result in smudging. Tip #3: To create a unique design, mix and match different designs from different plates for a one-of-a-kind look. Tip #4: If your design is too large for your nail, use a cotton swab or brush to remove any excess polish before stamping. Tip #5: If you make a mistake, don't panic! Use a clean Q-tip dipped in acetone or nail polish remover to gently remove the design and start again.6. Konad Nail Art Stamping: Tips and Tricks for Perfect Results
6. Konad Nail Art Stamping: Tips and Tricks for Perfect Results
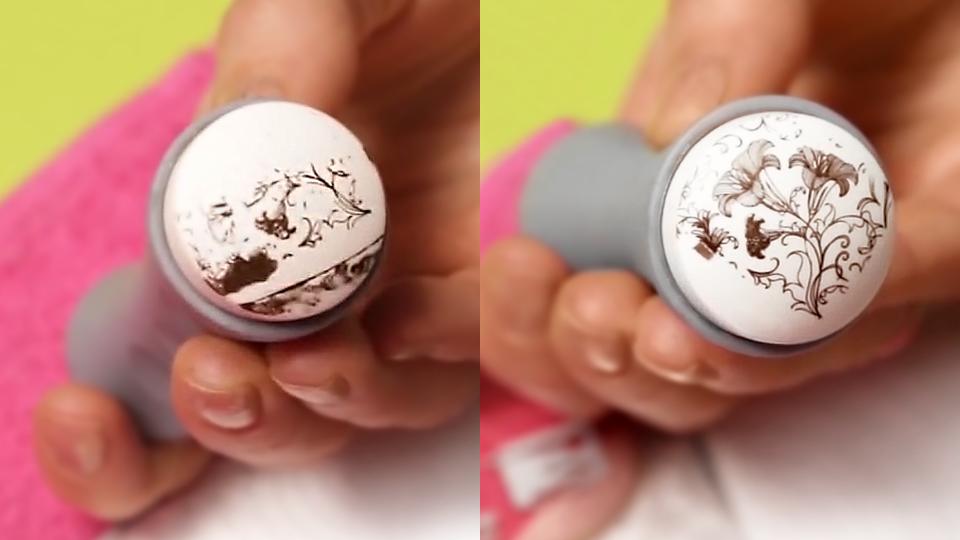
Even with all the right tools and techniques, sometimes designs just won't transfer as they should. But don't worry, there are some troubleshooting steps you can take to fix this issue. If your design is not transferring at all, it could be due to the polish not being picked up by the stamper. Make sure to apply enough polish and use a rolling motion when picking up the design. If only parts of the design are transferring, it could be due to not pressing down evenly on the stamper. Make sure to apply even pressure to ensure the full design is transferred onto your nail. If your design is coming out smudged or blurry, it could be due to not stamping straight onto the nail or the design plate being too close to your nail. Make sure to hold the stamper at a 45-degree angle and stamp directly onto the nail.7. Troubleshooting Konad Nail Art Stamping: What to Do When Designs Won't Transfer


7. Troubleshooting Konad Nail Art Stamping: What to Do When Designs Won't Transfer


While Konad nail art stamping is a fun and creative way to add designs to your nails, there are some common mistakes that beginners tend to make. By knowing these mistakes, you can avoid them and achieve flawless results. One of the most common mistakes is not prepping the nails properly before stamping. As mentioned before, this includes shaping, filing, and cleaning the nails and using a good quality base coat. Another mistake is using too much or too little polish on the design plate. This can result in a messy or incomplete transfer. Practice using the right amount of polish to achieve the perfect transfer. Lastly, not using enough pressure when stamping can also affect the transfer. Make sure to press down firmly and evenly to achieve a clean and crisp design.8. Konad Nail Art Stamping: Common Mistakes and How to Avoid Them

8. Konad Nail Art Stamping: Common Mistakes and How to Avoid Them
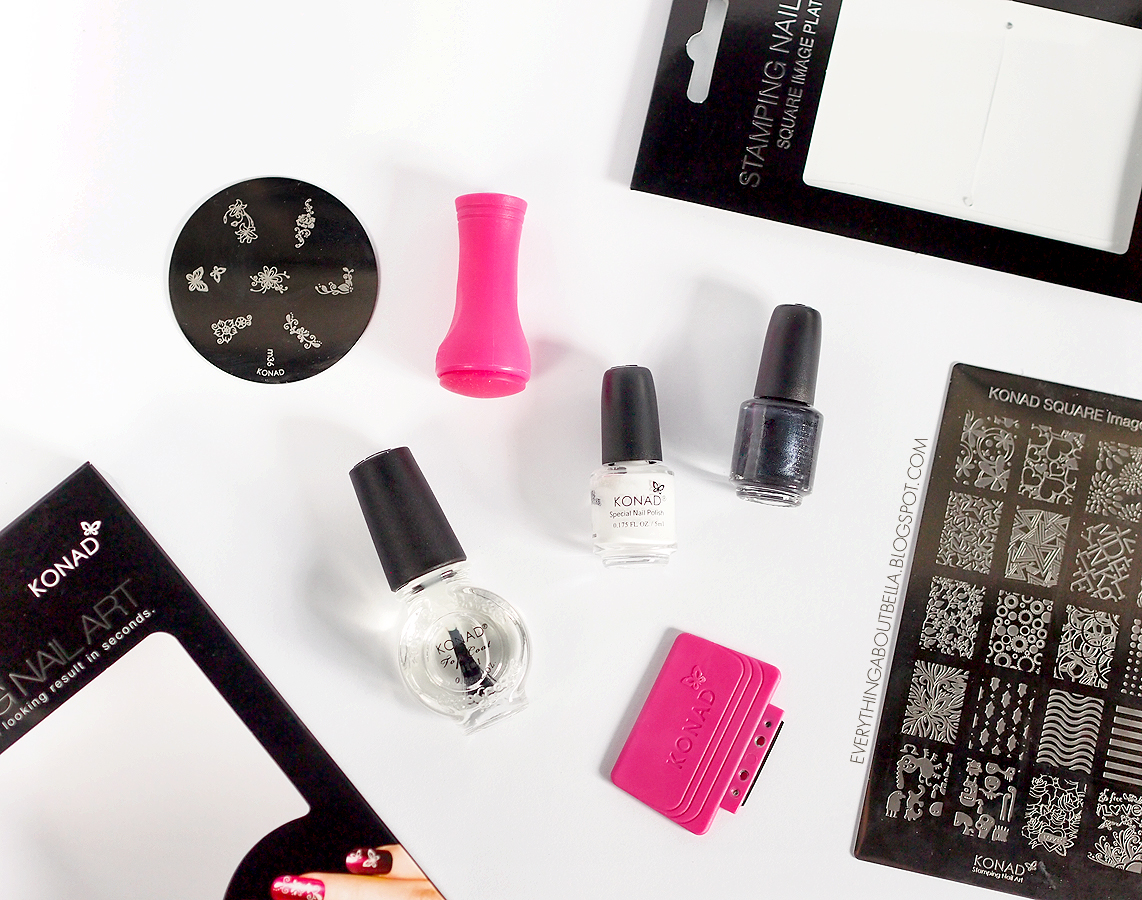
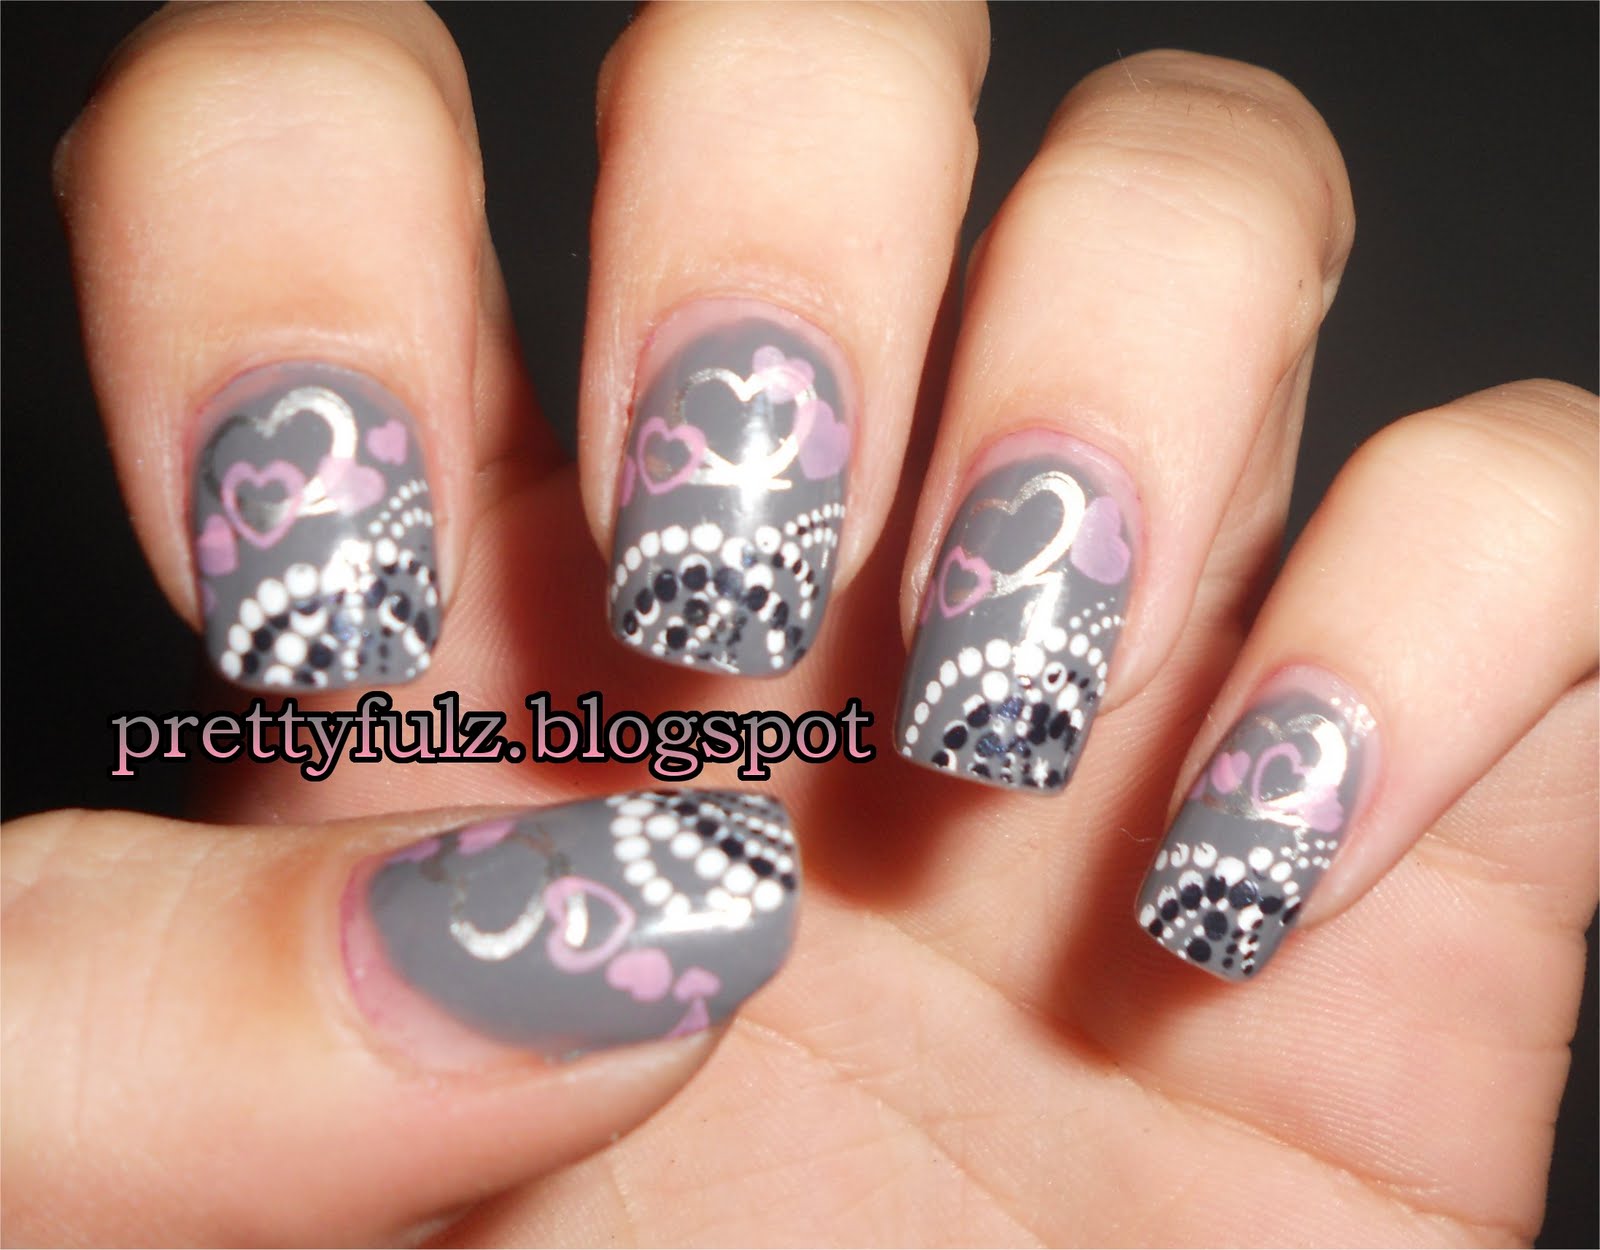
If you're new to Konad nail art stamping, it may seem intimidating at first. But with this step-by-step guide, you'll be able to create beautiful designs in no time. Step 1: Gather all your tools and materials, including your stamping plate, stamper, scraper, and stamping polish. Step 2: Start with clean and prepped nails. Apply a base coat and let it dry completely. Step 3: Choose your desired design from the stamping plate and apply a small amount of stamping polish over the design. Step 4: Use the scraper to remove any excess polish, leaving polish only in the grooves of the design. Step 5: Quickly roll the stamper over the design, picking up the polish. If the design is not fully transferred, try rolling the stamper in a different direction. Step 6: Firmly press the stamper onto your nail, making sure to cover the entire nail with the design. Step 7: Gently lift the stamper off your nail to reveal your design. If you make a mistake, use a clean Q-tip dipped in acetone or nail polish remover to remove the design before it dries. Step 8: Once the design is completely dry, apply a top coat to seal in your design and protect it from chipping.9. How to Use Konad Nail Art Stamping Plates: A Step-by-Step Guide


9. How to Use Konad Nail Art Stamping Plates: A Step-by-Step Guide

Q: Can I use regular nail polish for stamping? A: While you can use regular nail polish for stamping, it may not transfer as well as specifically formulated stamping polish. Make sure to work quickly and use a good quality top coat for best results. Q: How do I clean my stamping plate? A: Use a cotton pad or Q-tip with some acetone or nail polish remover to gently wipe off any excess polish. Avoid using anything too abrasive that could damage the design plate. Q: Can I use any stamper and scraper with Konad nail art stamping plates? A: It is recommended to use the Konad stampers and scrapers for best results. However, you can also use other brands as long as they are made of silicone or a similar material and are soft enough to pick up the design. Q: How do I fix a smudged design? A: If your design smudges, use a clean Q-tip dipped in acetone or nail polish remover to gently remove the design and start again. Q: How do I create a 3D effect with Konad nail art stamping? A: To create a 3D effect, use a different colored polish to fill in certain parts of the design before stamping onto your nail. This will create a layered and dimensional effect.10. Konad Nail Art Stamping: Frequently Asked Questions and Answers

10. Konad Nail Art Stamping: Frequently Asked Questions and Answers


Why Your Konad Nail Art Stamp Might Not Be Working
Is your Konad nail art stamp not living up to your expectations? You're not alone. Many people struggle with getting their stamp to work properly, and it can be frustrating when you're not getting the desired results. But before you give up on your stamp, here are some common reasons why it might not be working and how to fix them.
First and foremost, it's important to understand the proper technique for using a Konad nail art stamp. If you're new to stamping, it may take some practice to get the hang of it. Make sure you're using high-quality stamping polishes and not regular nail polish, as this can affect the transfer onto your nails. It's also important to clean the stamping plate between uses to avoid any leftover polish interfering with the design.
Another reason why your Konad nail art stamp may not be working is due to the type of nail polish you're using. Some polishes are too thick or too thin to properly transfer onto the stamping plate and onto your nails. Experiment with different brands and consistencies to find the best one for stamping. You can also try thinning out thicker polishes with a few drops of nail polish thinner.
Timing is also crucial when it comes to stamping. If you wait too long to transfer the design from the stamping plate to your nail, the polish may dry and not transfer properly. On the other hand, if you don't wait long enough, the polish may smudge or smear. Practice and patience will help you find the perfect timing for your stamping technique.
If your Konad nail art stamp is still not working, it could be due to the stamping plate itself. Over time, stamping plates can become scratched or worn, which can affect the transfer of the design. It may be time to invest in a new stamping plate if you notice this happening.
Finally, make sure you're pressing the stamp down firmly and evenly onto the nail. Any gaps or uneven pressure can result in a patchy or incomplete design. It may take some practice to get the pressure just right, but once you do, you'll have flawless stamped nails every time.
Don't give up on your Konad nail art stamp just yet! With these tips and some practice, you'll be able to achieve beautiful and intricate nail designs in no time. Remember, the key is to have patience and experiment with different techniques and polishes until you find what works best for you.
Now that you know why your Konad nail art stamp might not be working, it's time to put these tips into action and get stamping! And if you're looking for more inspiration and tips for nail art, be sure to check out our other articles on house design.


