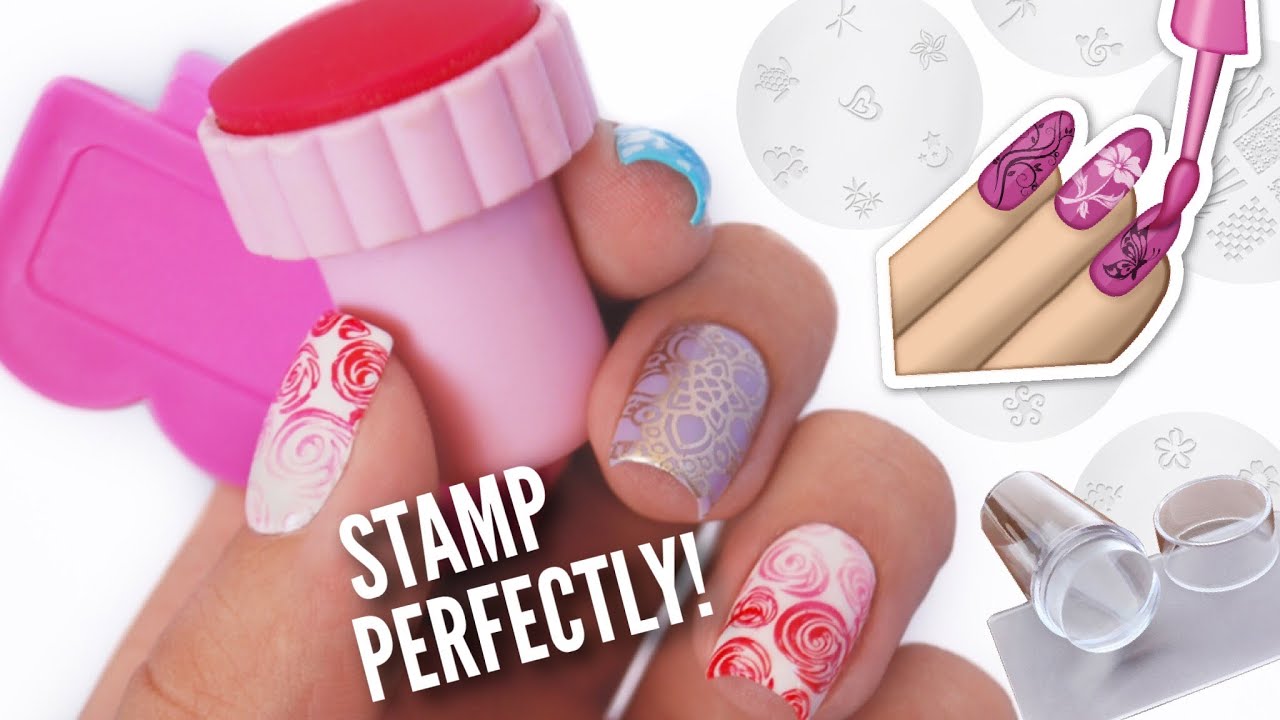
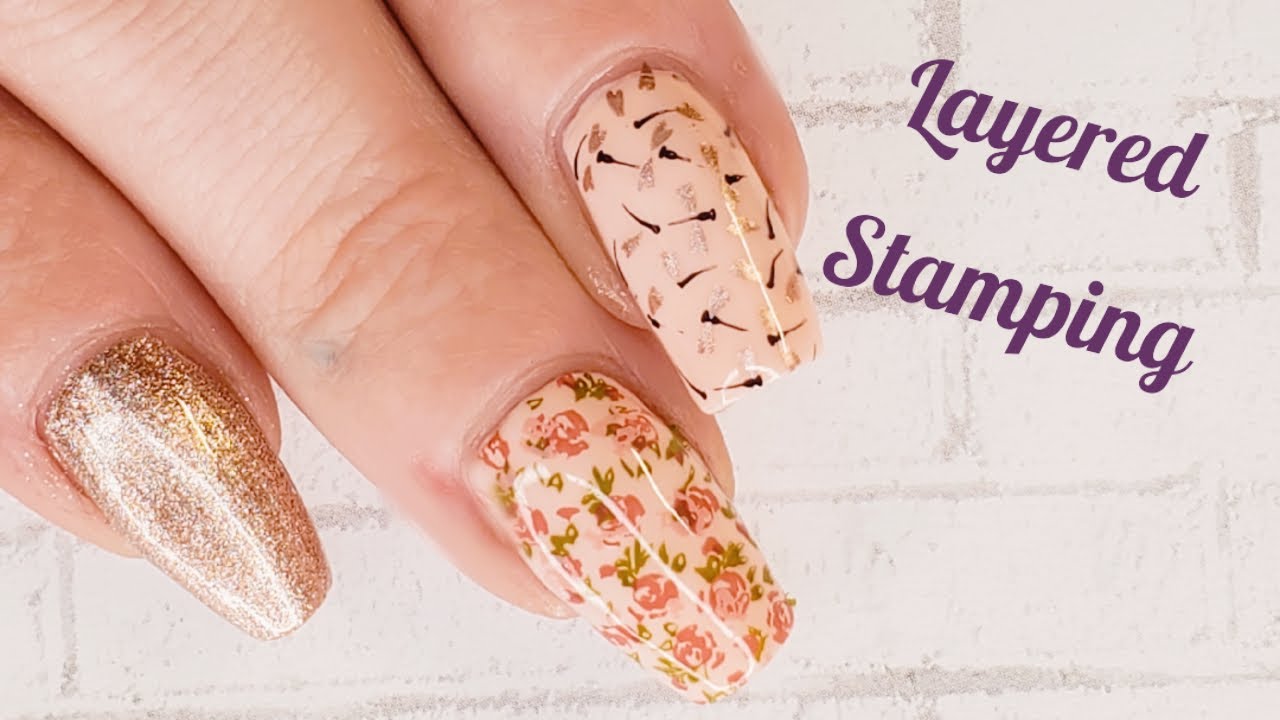
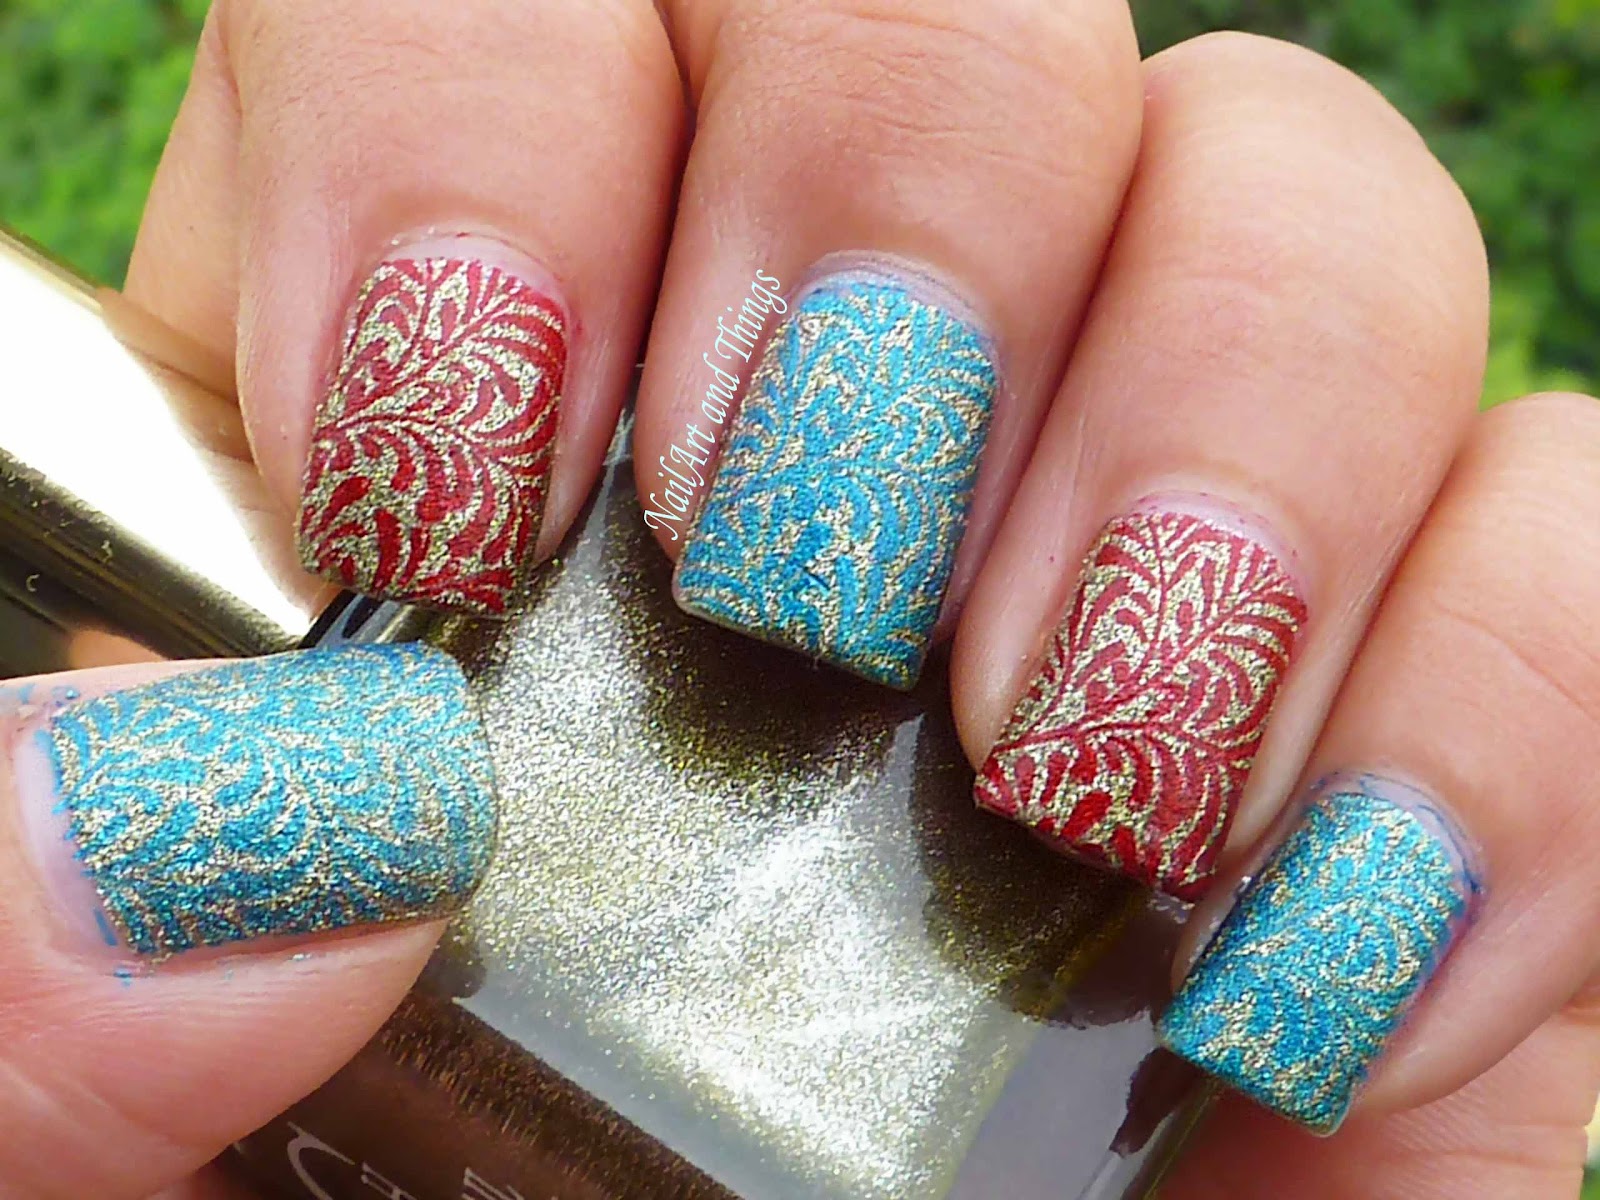
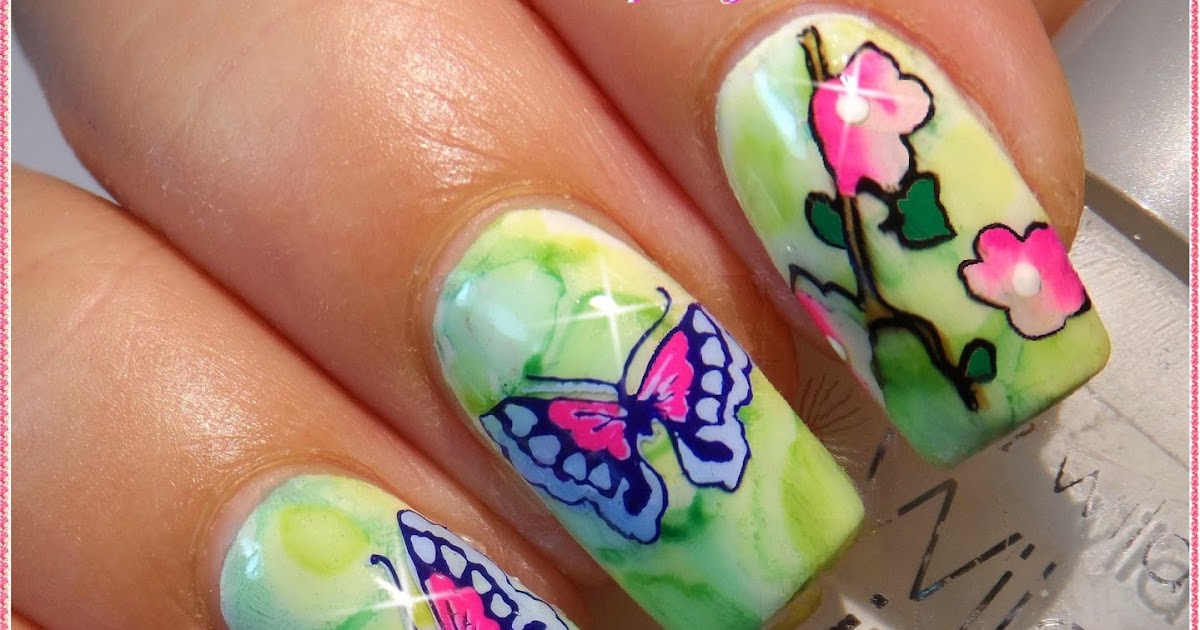
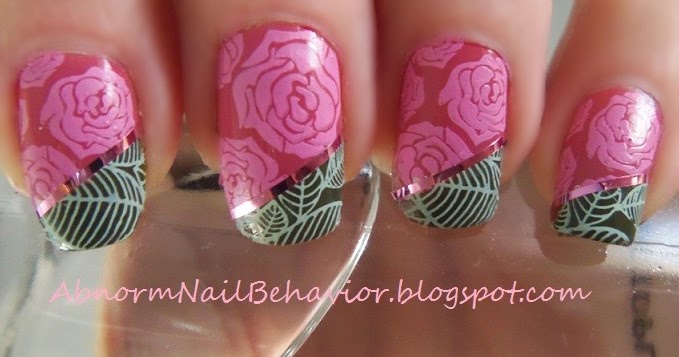
If you're looking to elevate your nail game, layered stamping nail art is the way to go. This technique involves stamping multiple layers of designs on your nails, creating a unique and intricate look. But don't worry, it's not as complicated as it sounds. In this tutorial, we'll walk you through the steps to achieve the perfect layered stamping nail art. To start, you'll need a layered stamping plate, a stamper, and a scraper. You can find these tools at most beauty supply stores or online. You'll also need a base color and several stamping polishes in different shades. Begin by applying your base color and letting it dry completely. This will serve as the background for your layered stamping design. Next, choose a design from your stamping plate and apply a layer of stamping polish over it. Use the scraper to remove any excess polish and then quickly press the stamper onto the design to transfer it onto your nail. Once the first layer is dry, repeat the process with another design and a different shade of stamping polish. You can continue adding layers until you achieve the desired look. Just be sure to let each layer dry completely before moving on to the next one. Finally, seal in your design with a top coat to protect it and give it a glossy finish. And there you have it, a gorgeous layered stamping nail art design that will surely turn heads.1. Layered Stamping Nail Art Tutorial


1. Layered Stamping Nail Art Tutorial


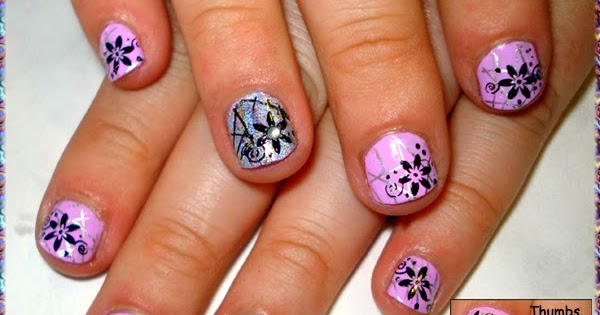
If you're new to layered stamping nail art, it can seem a bit intimidating. But don't worry, there are plenty of easy designs that you can try to get the hang of this technique. One simple design is to create a gradient effect using different shades of the same color. Start by applying a light base color and letting it dry. Then, choose a darker shade of the same color and stamp a design over it. Repeat with a third, even darker shade and a different design. This will create a beautiful gradient effect on your nails. You can also try using different designs from the same stamping plate to create a cohesive look. For example, you could use a floral design on one layer and a geometric design on another. Just make sure to choose colors that complement each other to tie the look together. Don't be afraid to experiment and have fun with different designs and color combinations. Layered stamping nail art allows for endless possibilities and is a great way to unleash your creativity.2. Easy Layered Stamping Nail Art Designs


2. Easy Layered Stamping Nail Art Designs

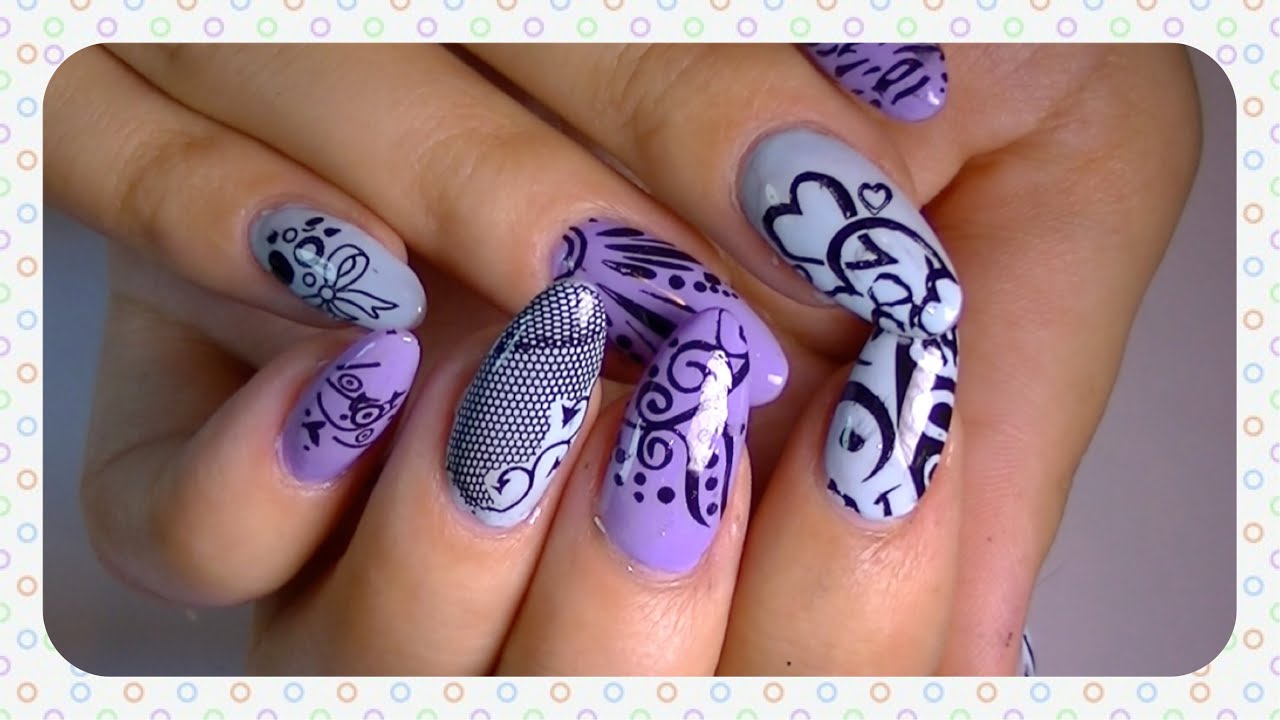

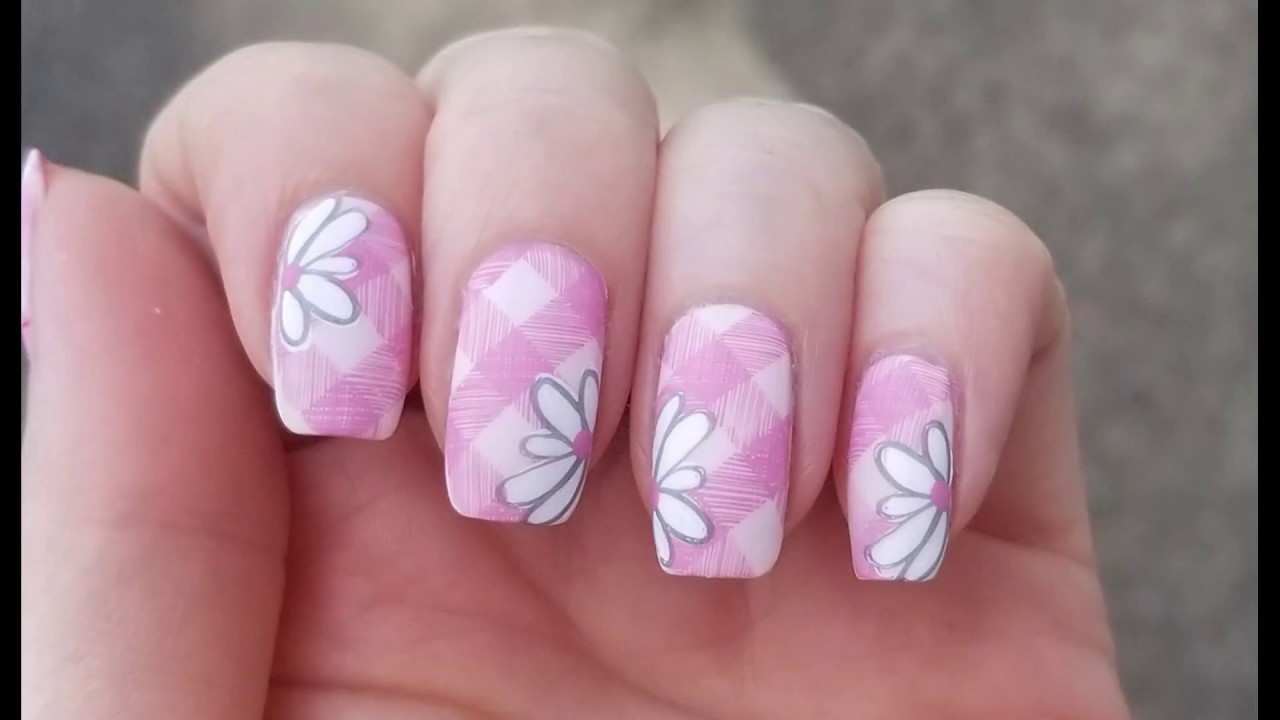
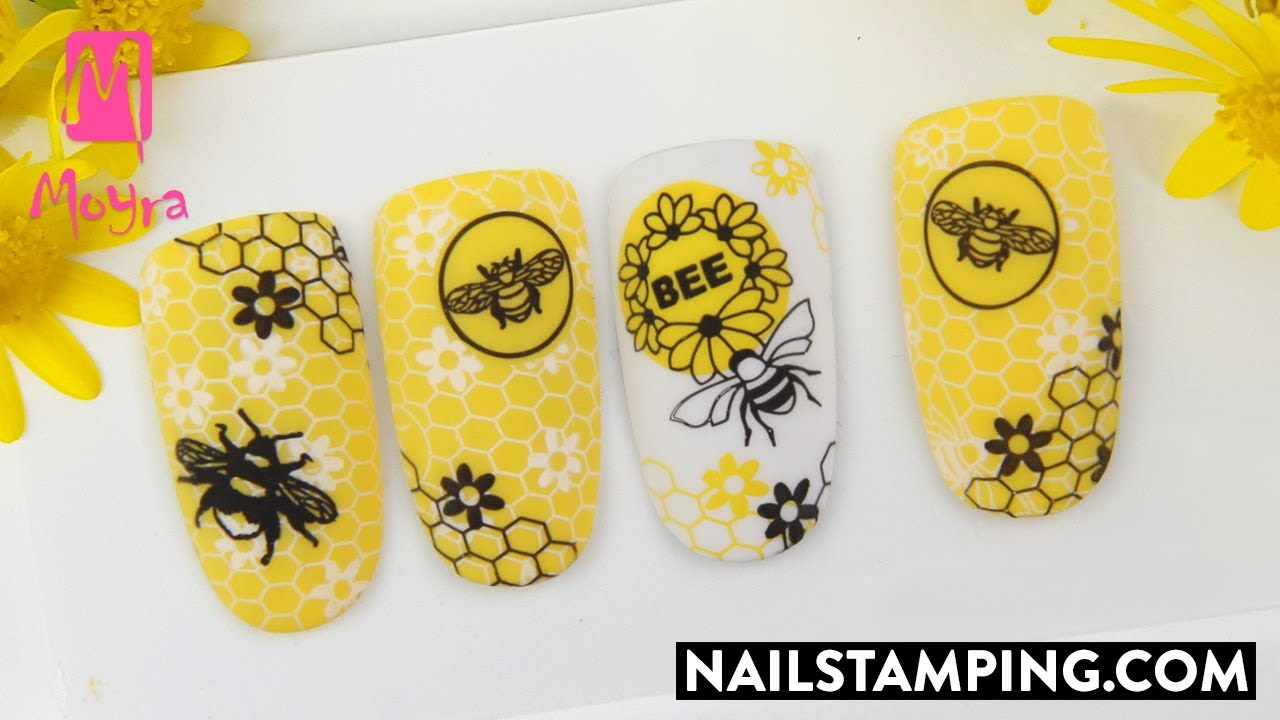
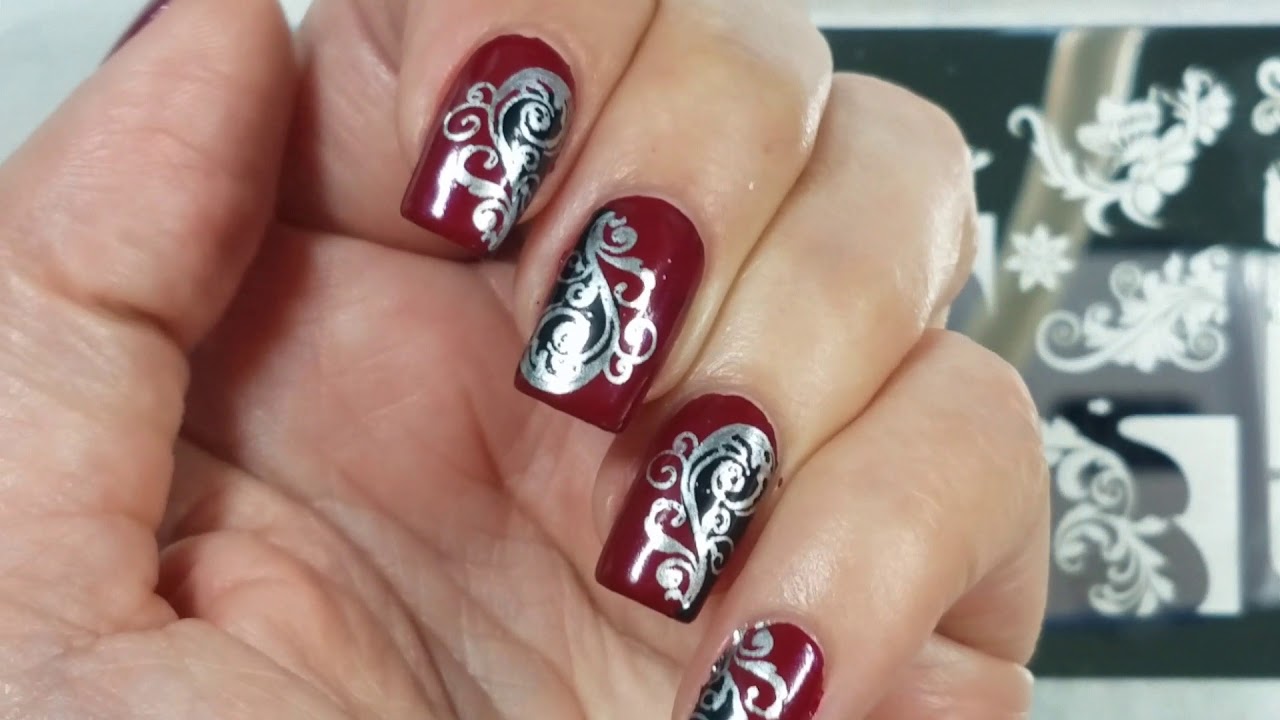
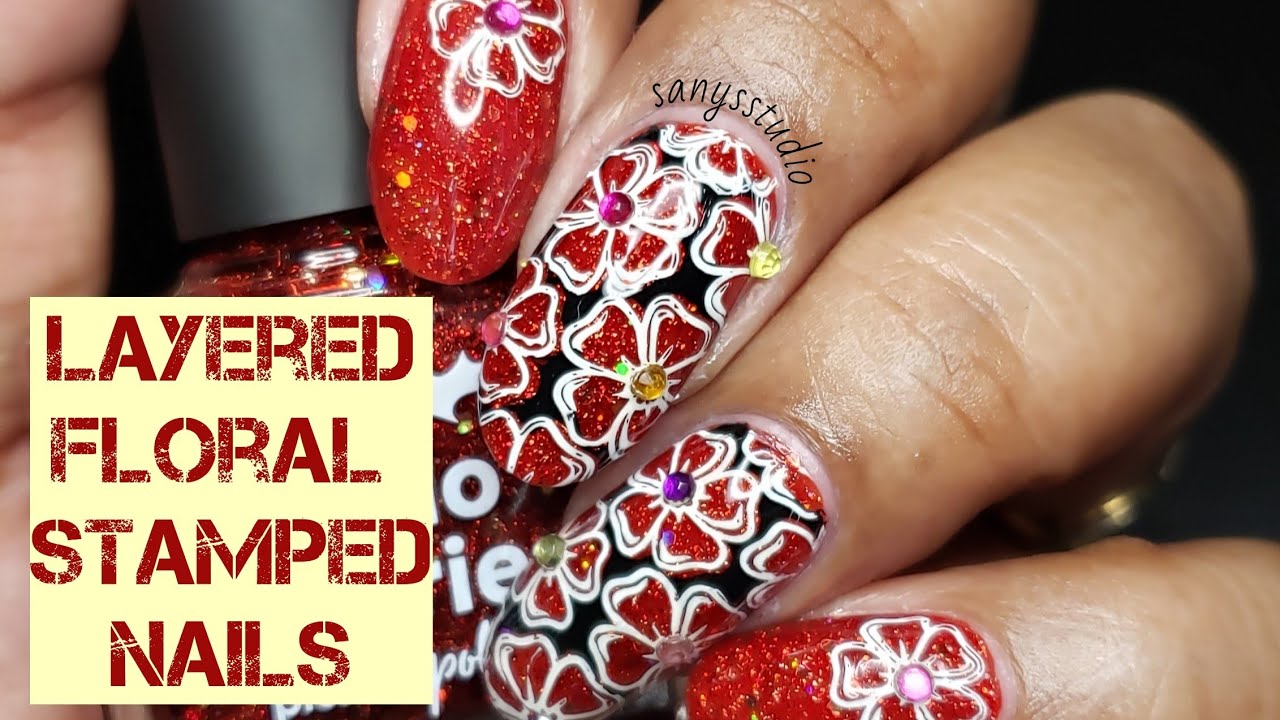
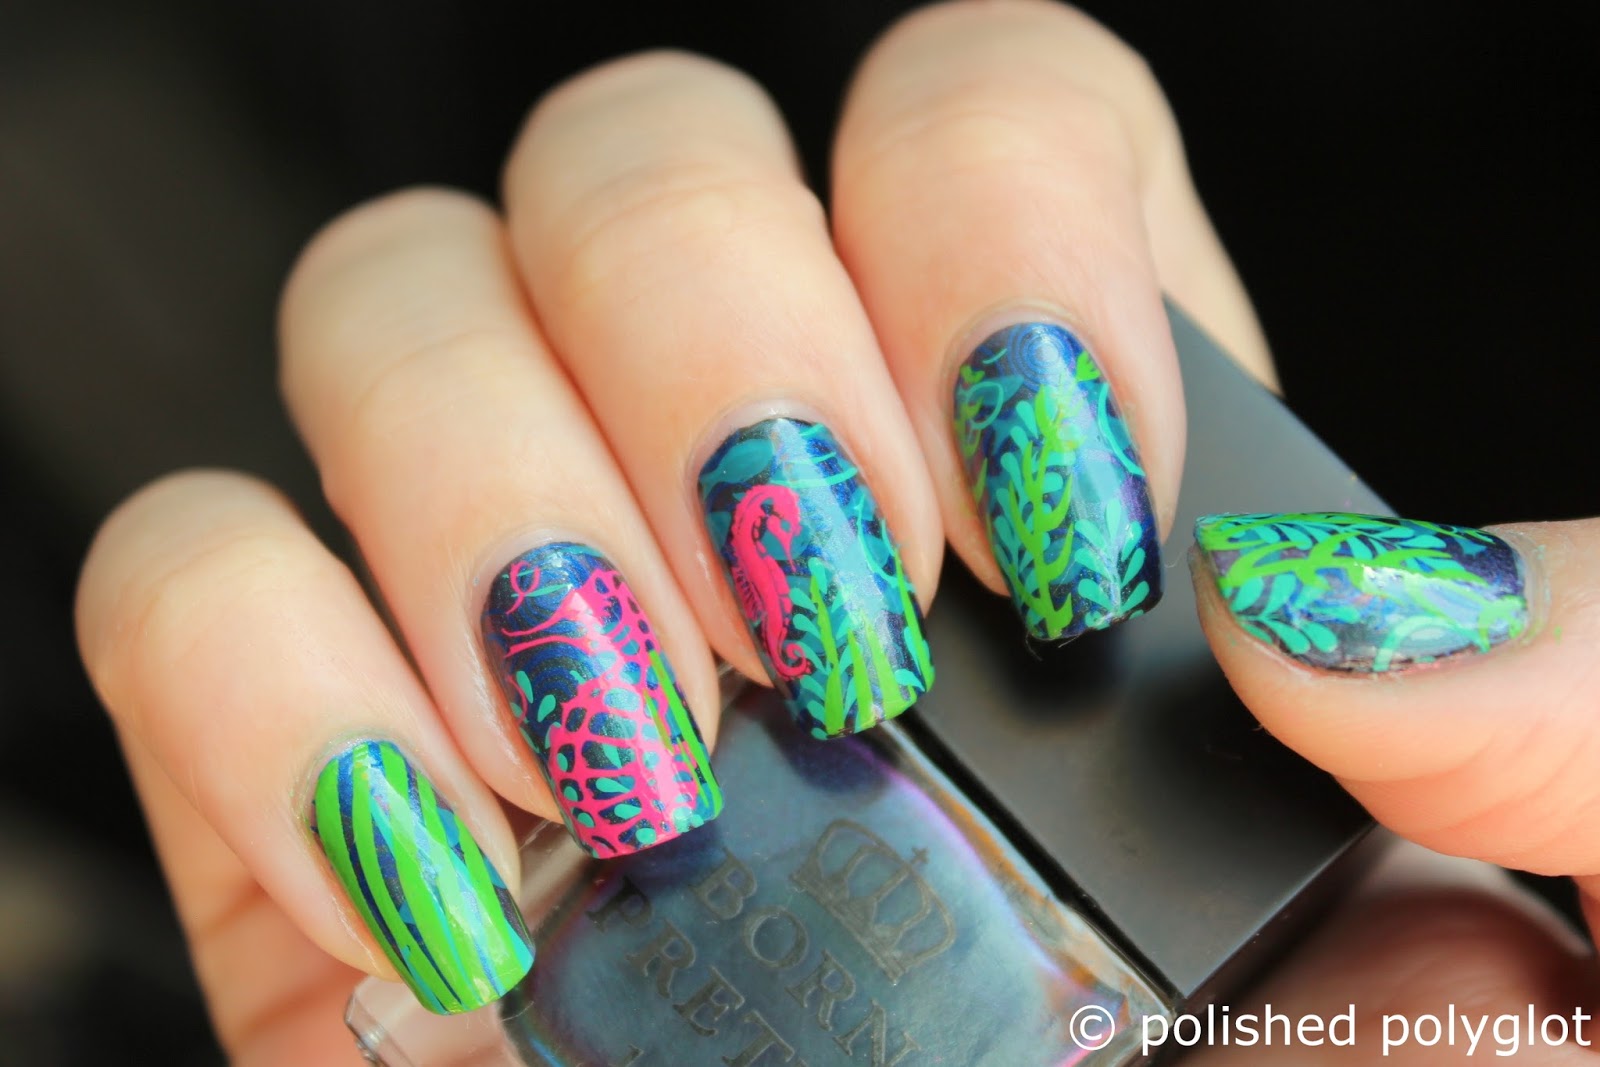
If you're in need of some inspiration for your next layered stamping nail art design, look no further. We've got some great ideas to help get your creative juices flowing. One idea is to create a layered floral design using different shades of the same color. You can also mix and match different floral designs on each layer to add more depth to the overall look. Another fun idea is to layer different geometric designs in different colors to create a bold and modern look. You can also try using a holographic stamping polish for a futuristic twist. If you want to keep it simple, try a monochromatic design using black and white stamping polishes. You can use different designs and patterns to create a chic and sophisticated look. Don't be afraid to mix and match different design elements to create a unique and eye-catching layered stamping nail art look.3. Layered Stamping Nail Art Ideas

3. Layered Stamping Nail Art Ideas
While layered stamping nail art may seem daunting at first, there are some tips and tricks that can make the process easier and more successful. First, make sure to have all of your tools and supplies ready before starting. This includes your stamping plate, stamper, scraper, base color, and stamping polishes. This will help you work efficiently and avoid any mistakes. When choosing stamping polishes, make sure to use ones that are highly pigmented and have a thick consistency. This will ensure that the design transfers onto your nail smoothly and evenly. It's also important to work quickly when stamping each layer to prevent the polish from drying before you can transfer the design. If you're new to this technique, you can practice on a plastic bag or a piece of paper before stamping onto your nails. Lastly, be patient and don't get discouraged if your first attempt doesn't turn out perfectly. Layered stamping nail art takes practice and with time, you'll be able to create stunning designs.4. Layered Stamping Nail Art Tips and Tricks


4. Layered Stamping Nail Art Tips and Tricks

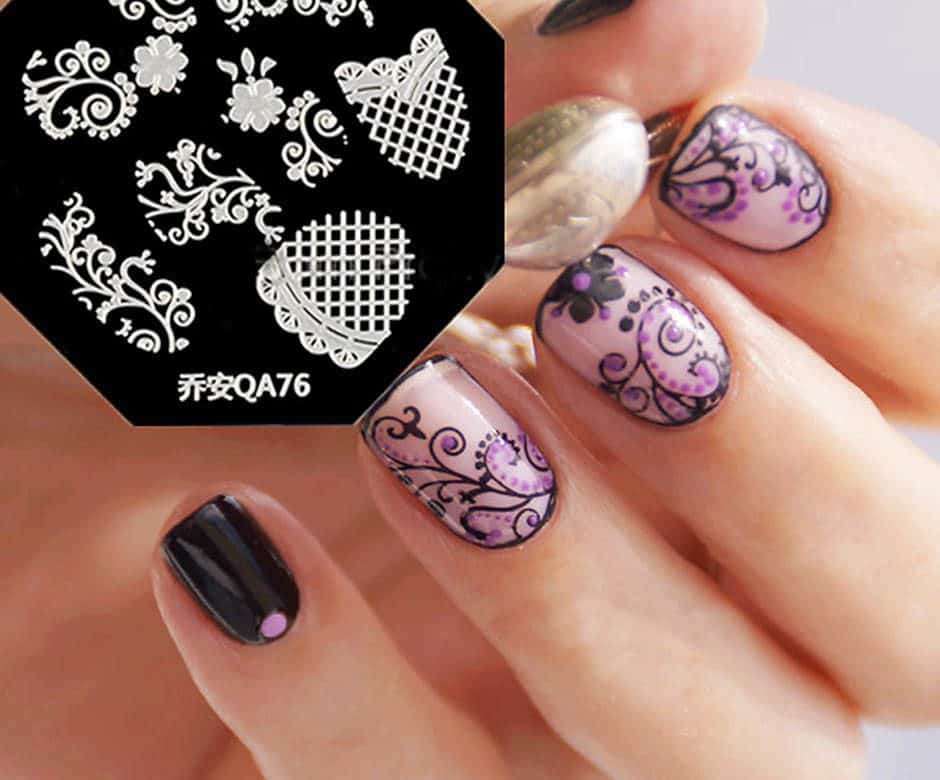
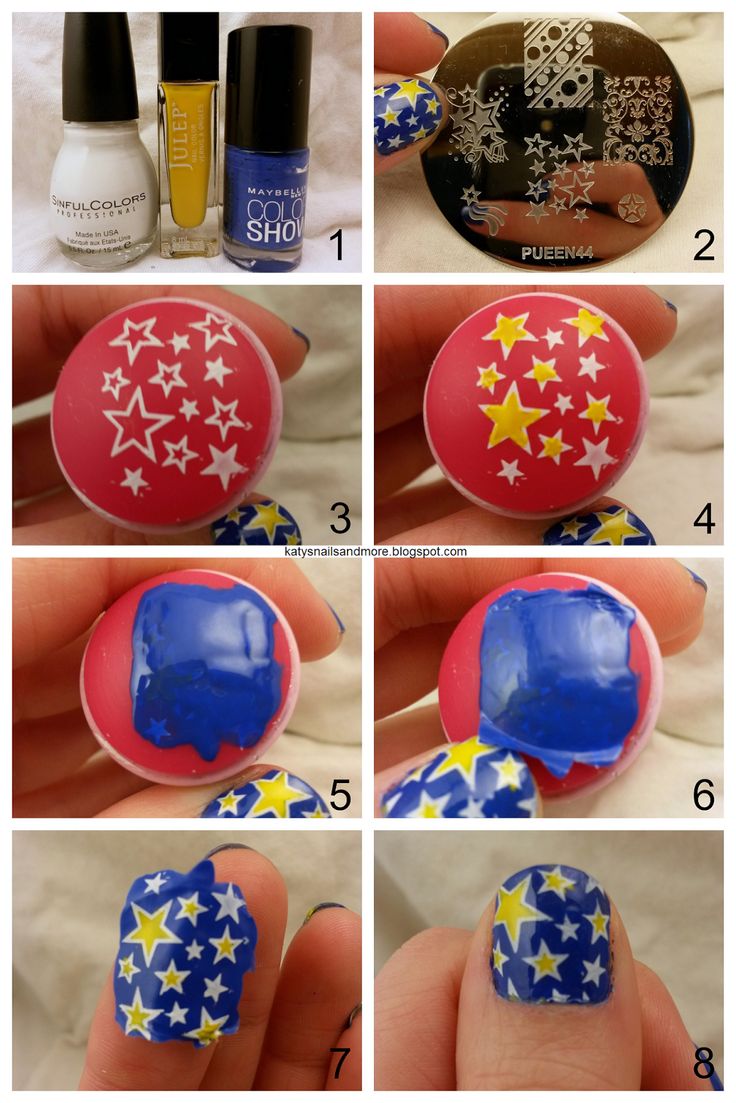
There are a few different techniques you can use to achieve layered stamping nail art. The most common method is to stamp each layer directly onto your nail, creating a multi-dimensional design. Another technique is to use a decal or transfer method. This involves stamping each layer onto a plastic sheet, peeling it off once dry, and then transferring it onto your nail. This method allows for more precision and control over the final design. You can also try stamping each layer onto a different nail and then combining them onto one nail to create a cohesive look. This is a great option for those with shorter nails who may not have enough space to stamp multiple layers on one nail. Experiment with different techniques to find the one that works best for you and your desired design.5. Layered Stamping Nail Art Techniques

5. Layered Stamping Nail Art Techniques
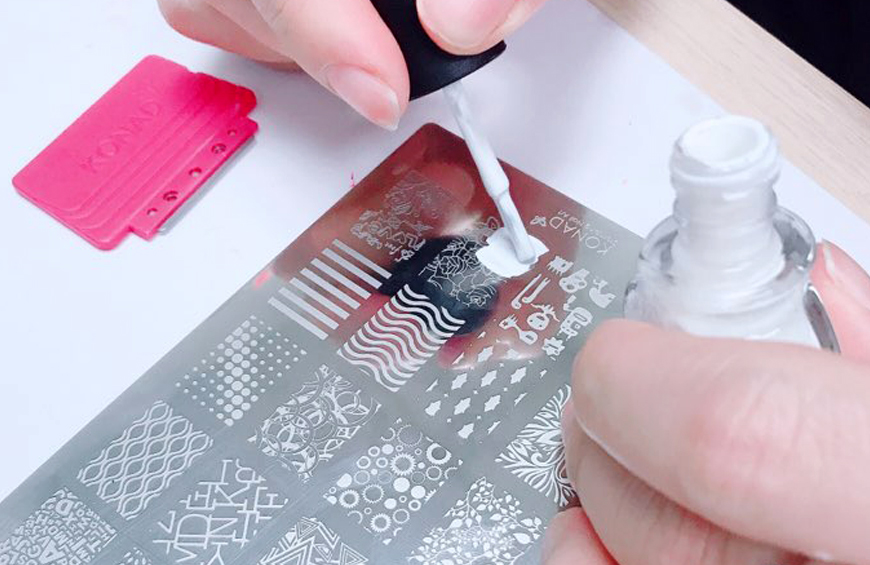
To achieve the perfect layered stamping nail art, you'll need a few essential supplies. These include a layered stamping plate, a stamper, and a scraper. You'll also need stamping polishes in different shades and a base color. There are also additional tools and supplies that can make the process easier and more successful. These include a lint roller to remove any stray polish from the stamping plate, a liquid latex barrier to protect your skin from excess polish, and a top coat to seal in your design. Investing in good quality tools and supplies will not only make the process more enjoyable but also ensure that your layered stamping nail art turns out flawlessly.6. Layered Stamping Nail Art Supplies
6. Layered Stamping Nail Art Supplies

If you're in need of some inspiration for your next layered stamping nail art design, look no further. Social media platforms like Instagram and Pinterest are great sources for finding unique and creative nail art ideas. You can also follow nail artists and bloggers who specialize in layered stamping nail art for even more inspiration. Don't be afraid to put your own spin on a design or combine different elements to create a one-of-a-kind look. Remember, the possibilities are endless with layered stamping nail art, so have fun and let your creativity shine.7. Layered Stamping Nail Art Inspiration


7. Layered Stamping Nail Art Inspiration

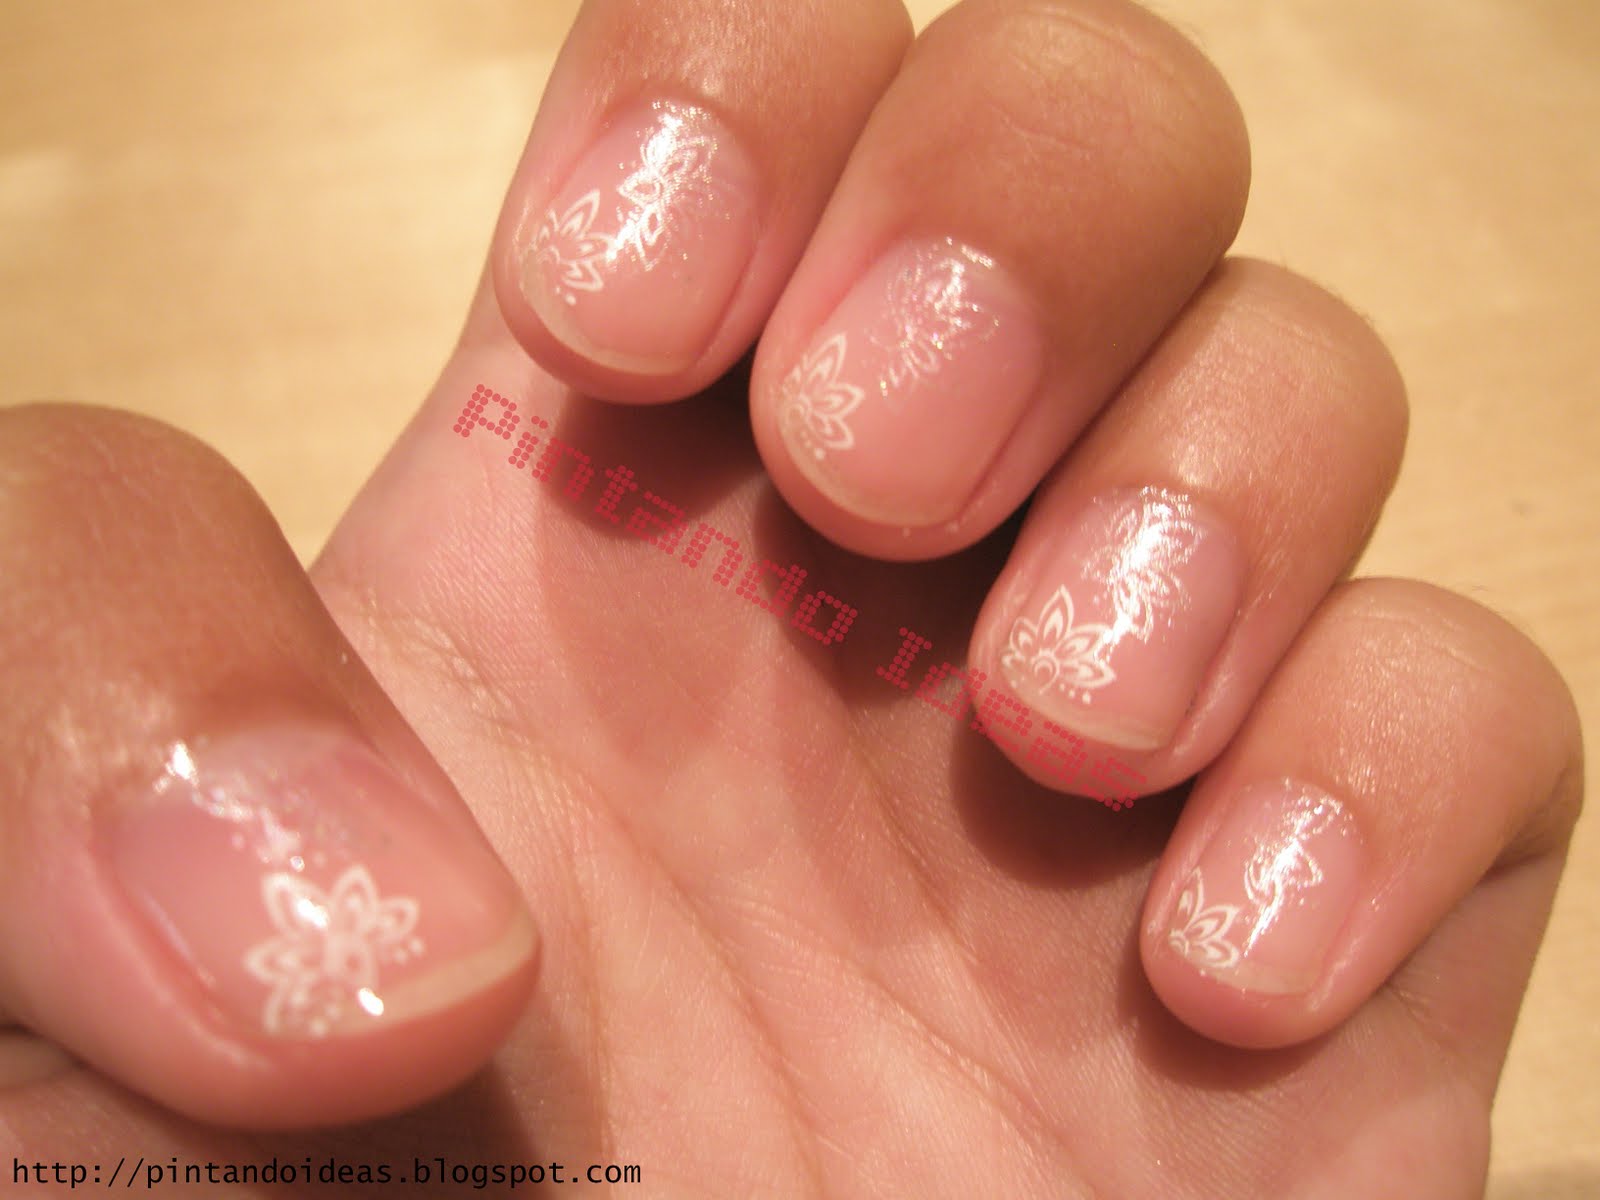
If you're new to layered stamping nail art, it can seem a bit intimidating. But with a little practice and patience, you can achieve stunning designs. Here are some tips for beginners: Start with simple designs and fewer layers. As you become more comfortable with the technique, you can gradually add more layers and intricate designs. Use colors that are easy to work with, such as black and white or different shades of the same color. These colors are forgiving and will still look great even if your stamping isn't perfect. Don't get discouraged if your first attempts don't turn out perfectly. Layered stamping nail art takes practice and with time, you'll become more confident and skilled in this technique.8. Layered Stamping Nail Art for Beginners
8. Layered Stamping Nail Art for Beginners
One of the great things about layered stamping nail art is that it can work for any nail length. For those with shorter nails, there are still plenty of designs and techniques that you can try. One option is to stamp each layer onto a different nail and then combine them onto one nail. This will create a cohesive look without overcrowding your shorter nails. You can also try stamping smaller designs or using fewer layers to avoid overwhelming your nails. And don't be afraid to get creative with negative space by leaving some of your natural nail exposed. With a little creativity and adaptation, you can rock layered stamping nail art on your short nails.9. Layered Stamping Nail Art Designs for Short Nails


9. Layered Stamping Nail Art Designs for Short Nails


Long nails are the perfect canvas for layered stamping nail art. With more surface area to work with, you can create intricate and eye-catching designs. Try using multiple designs and colors on each layer to add more depth to your design. You can also experiment with different placement of the designs on your nails for a unique and dynamic look. Just be sure to use enough stamping polish to cover the entire nail and avoid any gaps or patches. With long nails, you have the opportunity to create truly stunning layered stamping nail art designs.10. Layered Stamping Nail Art for Long Nails


10. Layered Stamping Nail Art for Long Nails

Taking Nail Art to the Next Level with Layered Stamping
Unleash Your Creativity with Layered Stamping Nail Art
 Are you tired of the same old plain nail polish and ready to elevate your nail game? Look no further than layered stamping nail art. This innovative technique allows you to create intricate and multi-dimensional designs on your nails, giving them a unique and eye-catching look. Layered stamping has taken the world of nail art by storm and for good reason – it's fun, easy, and allows you to unleash your creativity.
What is Layered Stamping Nail Art?
 Layered stamping nail art involves using multiple layers of stamped designs on your nails to create a complex and layered look. It involves using a stamping plate, a scraper, and a stamper to transfer the design onto your nails. The possibilities are endless with layered stamping as you can mix and match different colors, patterns, and textures to create a truly unique design.
Why is Layered Stamping Nail Art So Popular?
 Layered stamping nail art has become increasingly popular among nail enthusiasts for several reasons. For one, it allows you to achieve intricate and professional-looking designs without having to be an expert artist. The stamping plate does most of the work for you, making it a beginner-friendly technique. Additionally, layered stamping allows you to get creative and experiment with different colors, textures, and patterns, giving you endless design possibilities.
Layered stamping nail art
also offers long-lasting results. The layers of stamped designs create depth and dimension, making your manicure last longer than traditional nail polish. This means you can enjoy your beautiful nails for days without worrying about chipping or smudging.
Layered stamping nail art has become increasingly popular among nail enthusiasts for several reasons. For one, it allows you to achieve intricate and professional-looking designs without having to be an expert artist. The stamping plate does most of the work for you, making it a beginner-friendly technique. Additionally, layered stamping allows you to get creative and experiment with different colors, textures, and patterns, giving you endless design possibilities.
Layered stamping nail art
also offers long-lasting results. The layers of stamped designs create depth and dimension, making your manicure last longer than traditional nail polish. This means you can enjoy your beautiful nails for days without worrying about chipping or smudging.
How to Get Started with Layered Stamping Nail Art
 Getting started with layered stamping nail art is easier than you may think. All you need is a stamping plate, scraper, stamper, and your choice of nail polish. You can also add a clear topcoat for a glossy finish. Simply choose your desired design, apply the nail polish onto the stamping plate, scrape off the excess, and stamp the design onto your nails. Repeat this process with different designs and colors to create a layered effect. It's that simple!
In conclusion,
layered stamping nail art
is a fun and creative way to take your nail game to the next level. With endless design possibilities and long-lasting results, it's no wonder why this technique has become so popular. So why not give it a try and see what beautiful designs you can create? Your nails will thank you.
Getting started with layered stamping nail art is easier than you may think. All you need is a stamping plate, scraper, stamper, and your choice of nail polish. You can also add a clear topcoat for a glossy finish. Simply choose your desired design, apply the nail polish onto the stamping plate, scrape off the excess, and stamp the design onto your nails. Repeat this process with different designs and colors to create a layered effect. It's that simple!
In conclusion,
layered stamping nail art
is a fun and creative way to take your nail game to the next level. With endless design possibilities and long-lasting results, it's no wonder why this technique has become so popular. So why not give it a try and see what beautiful designs you can create? Your nails will thank you.


