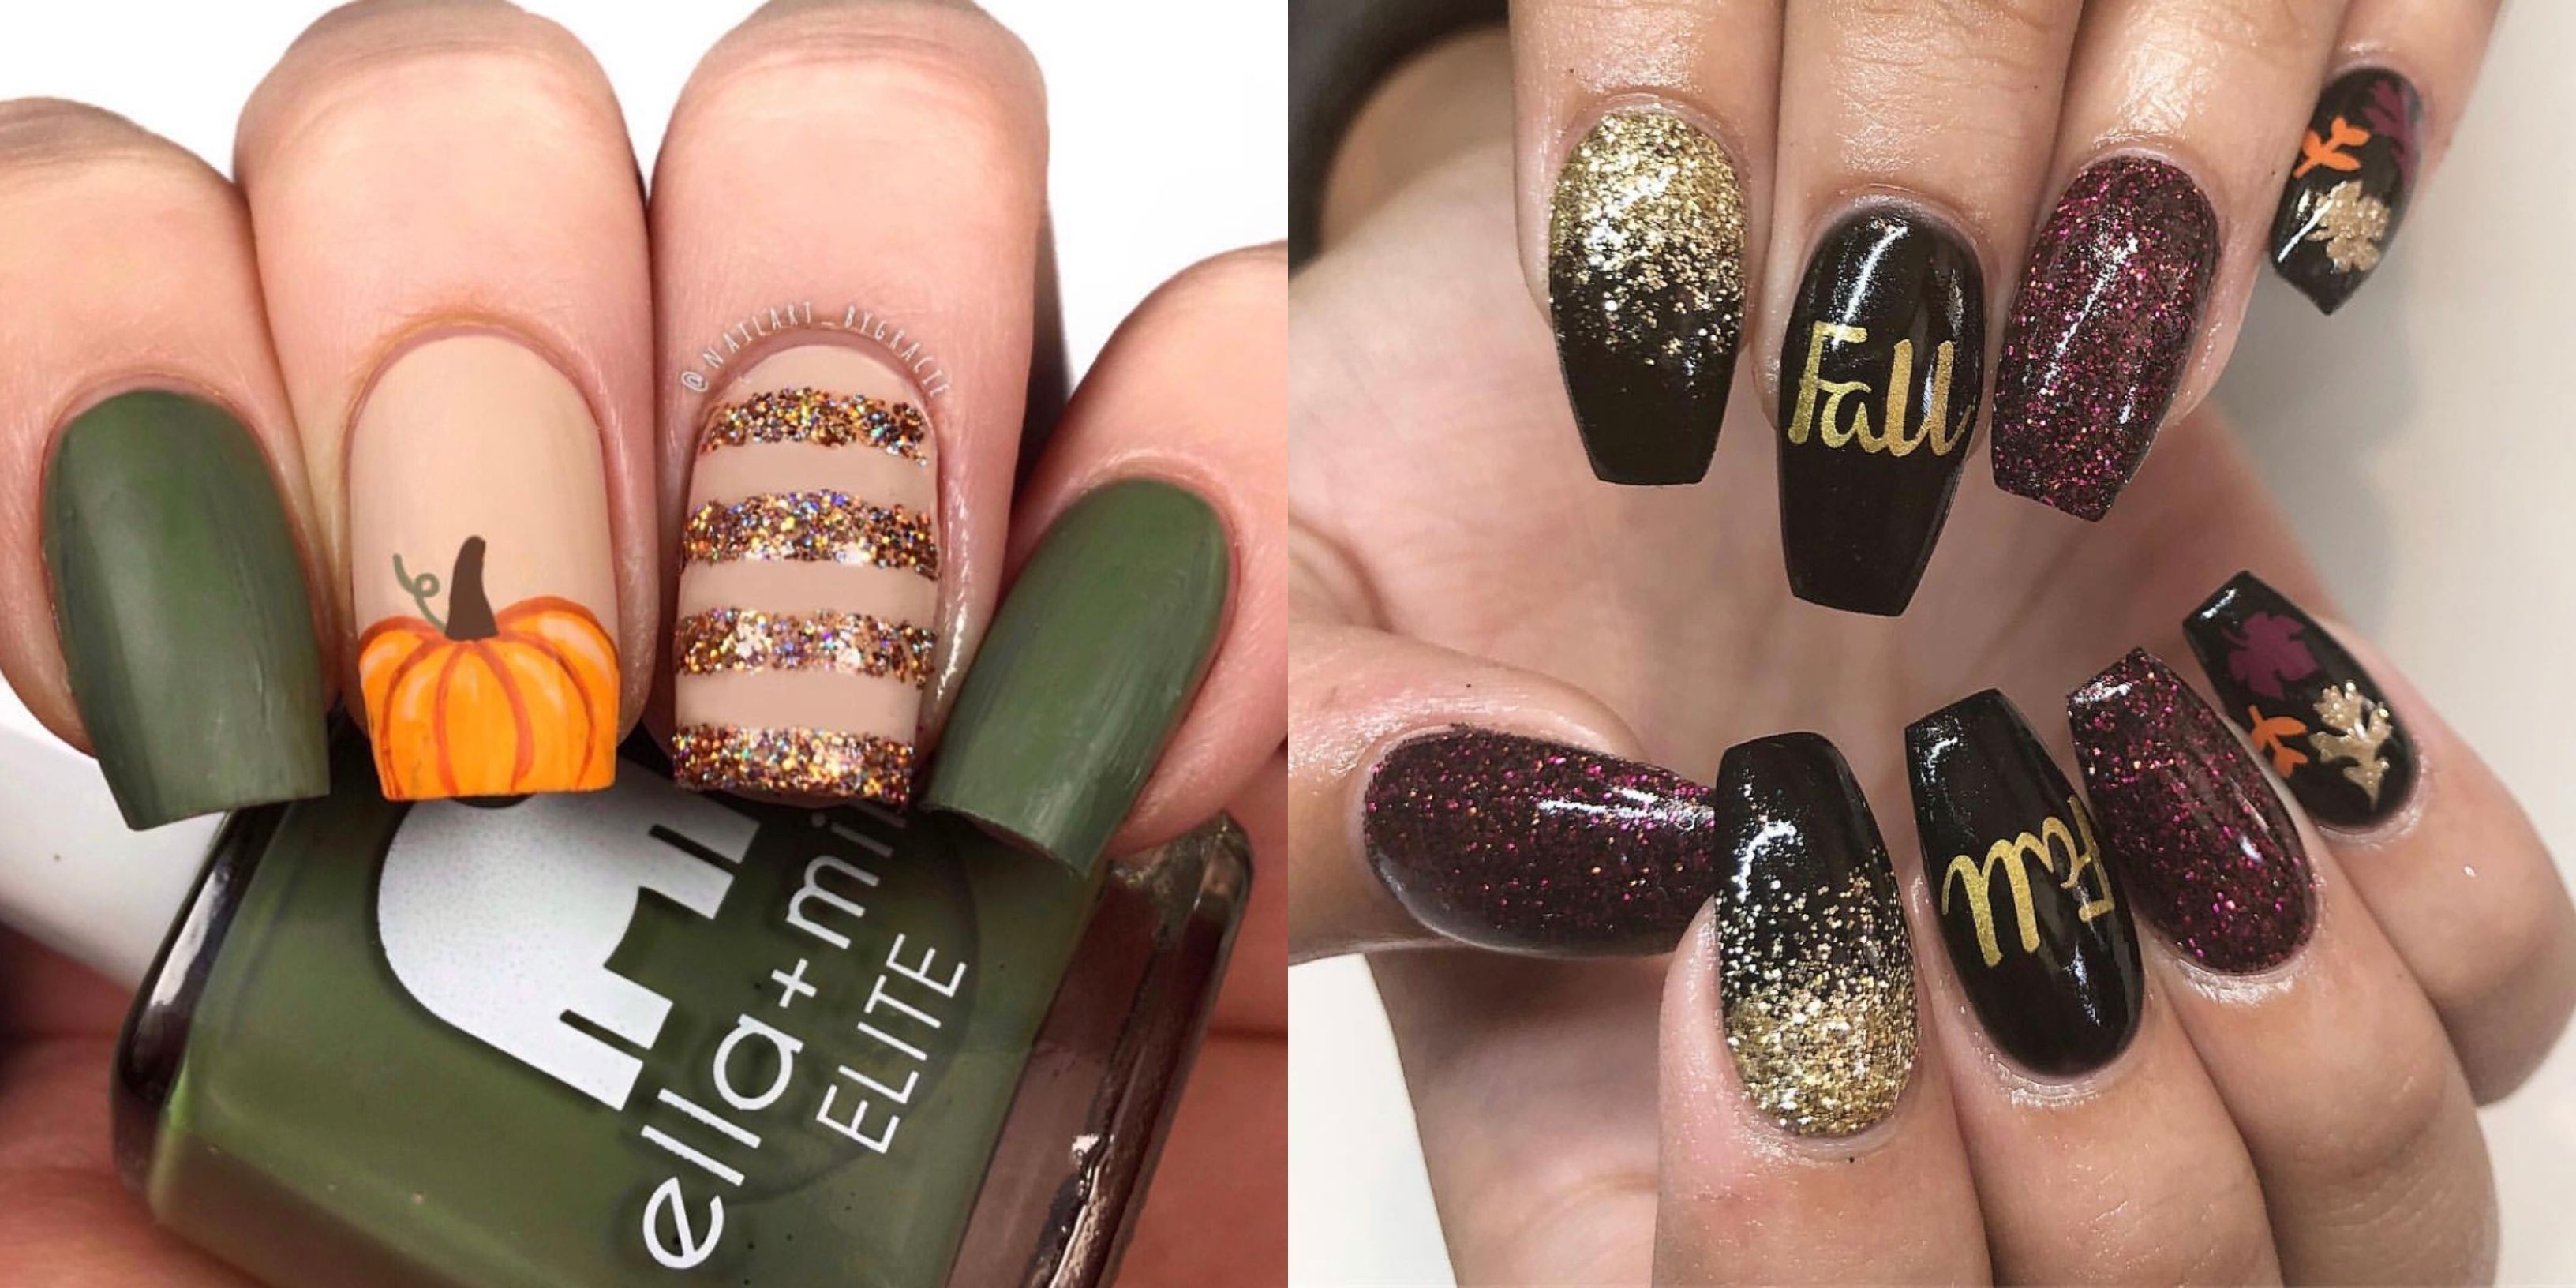
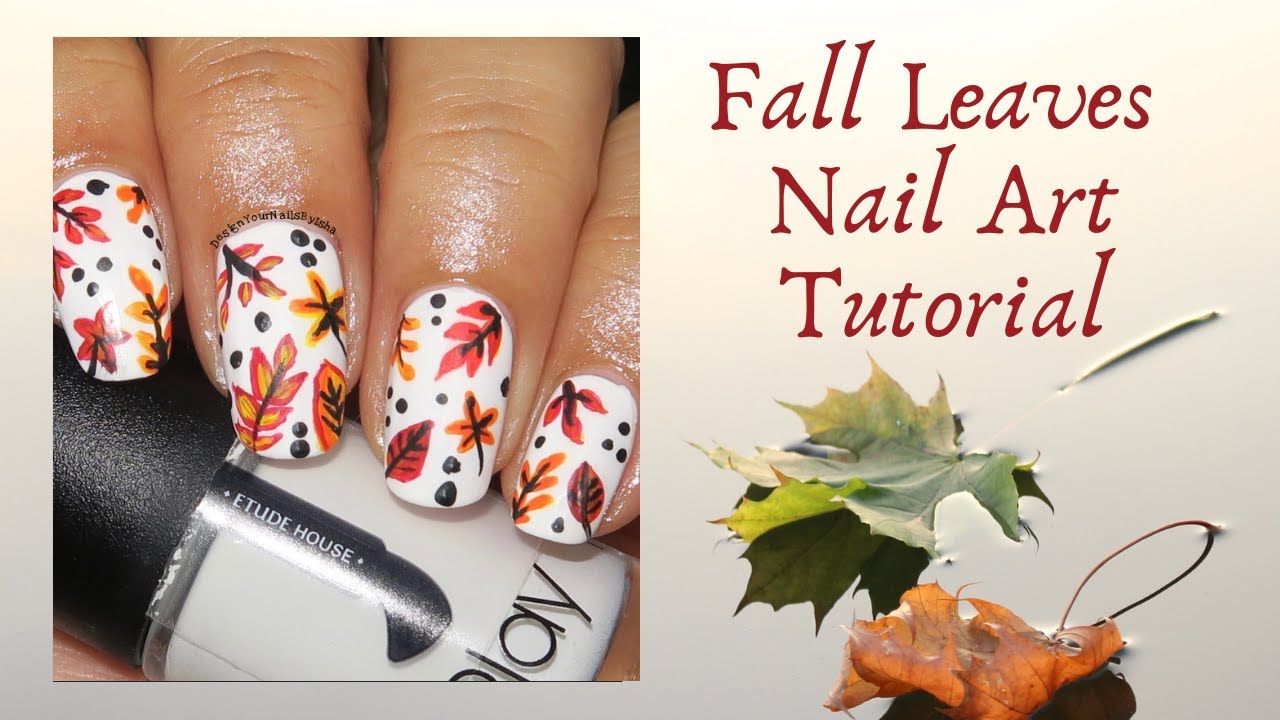
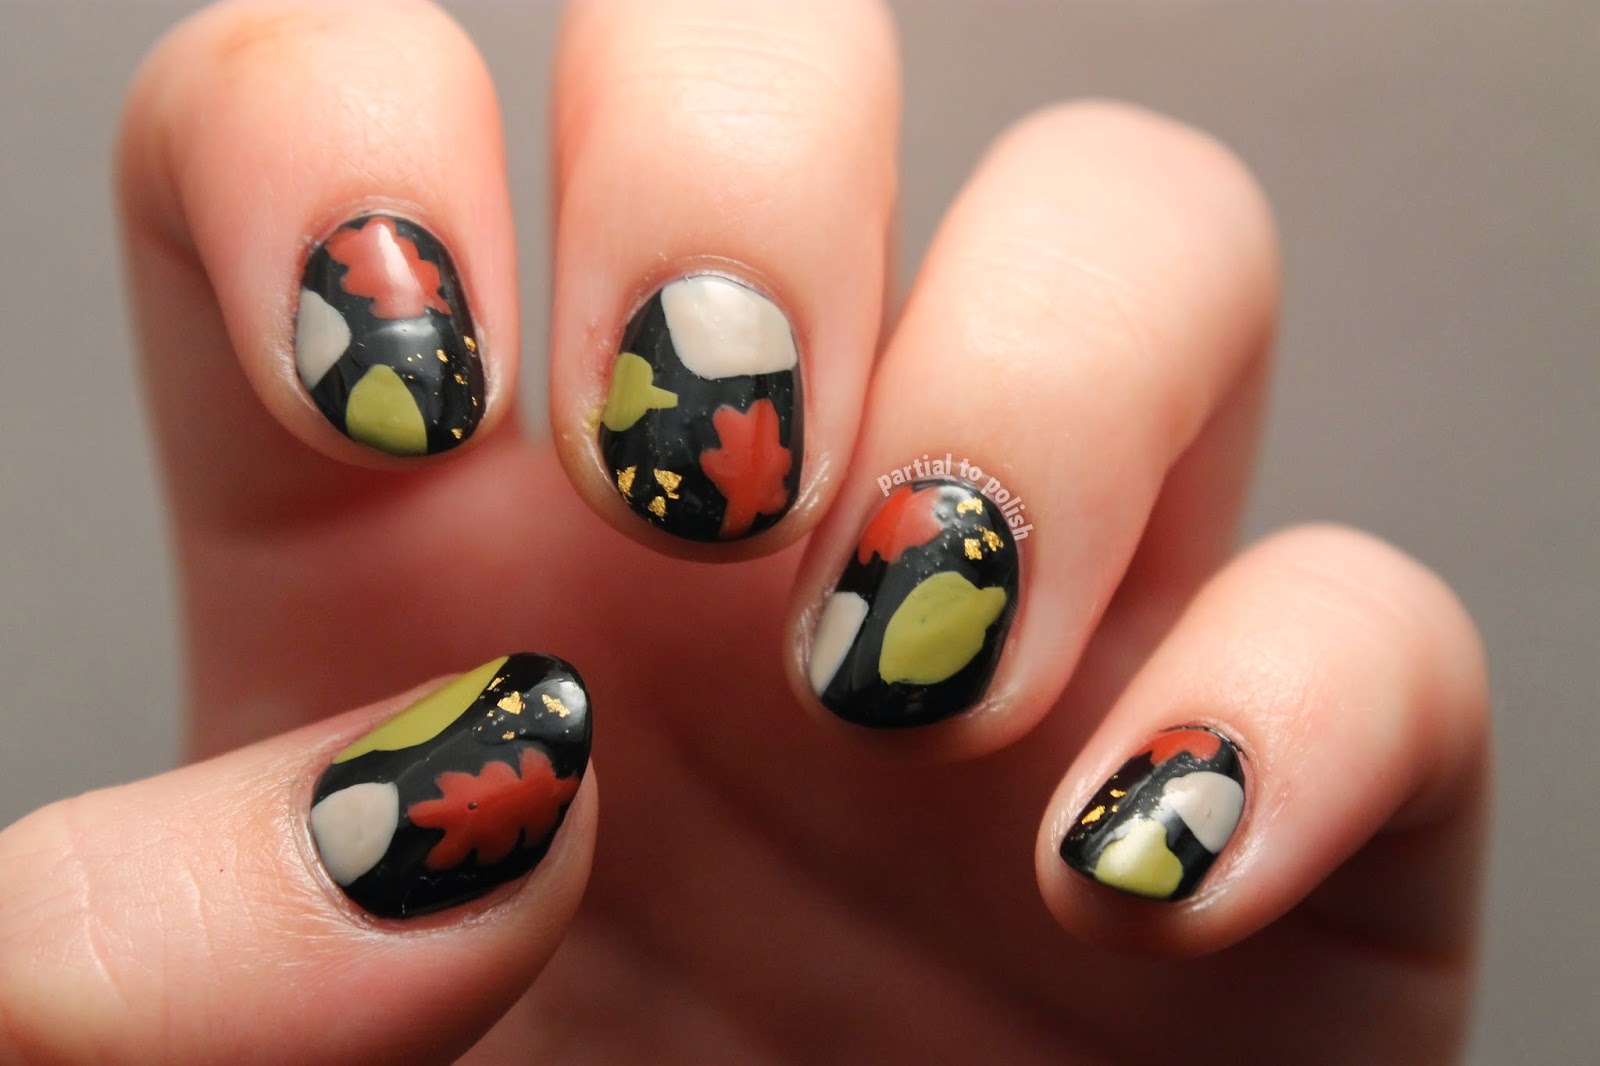
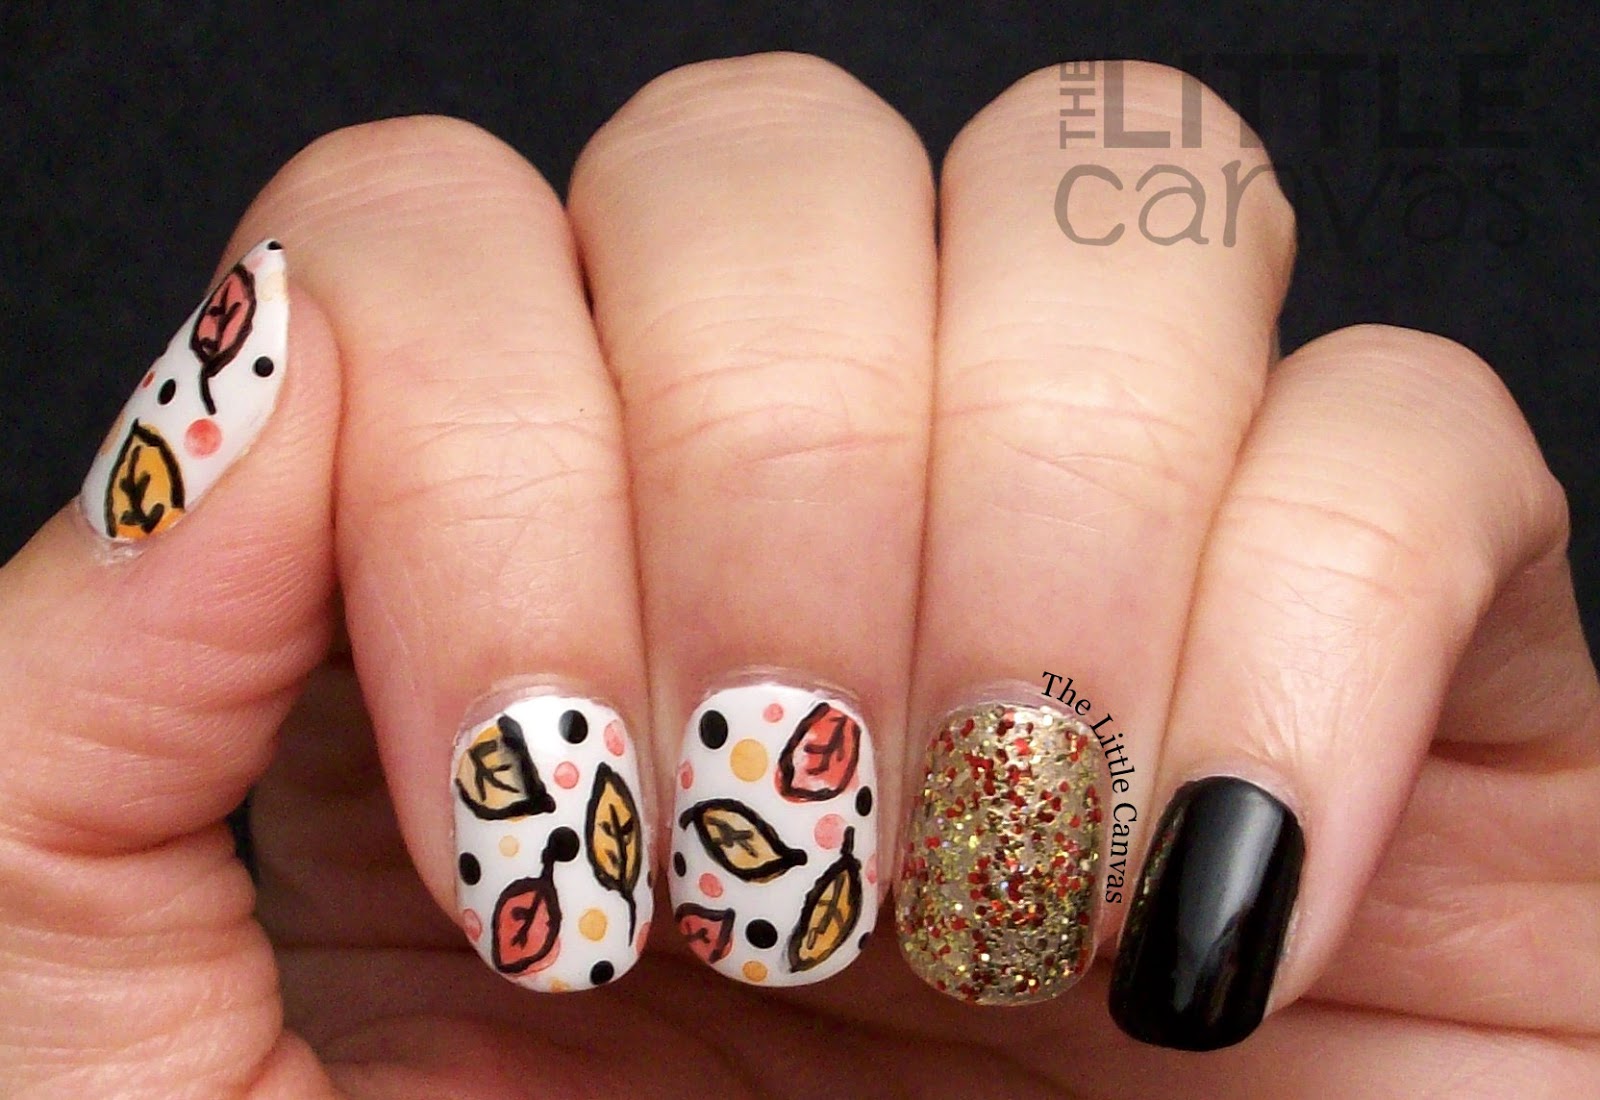
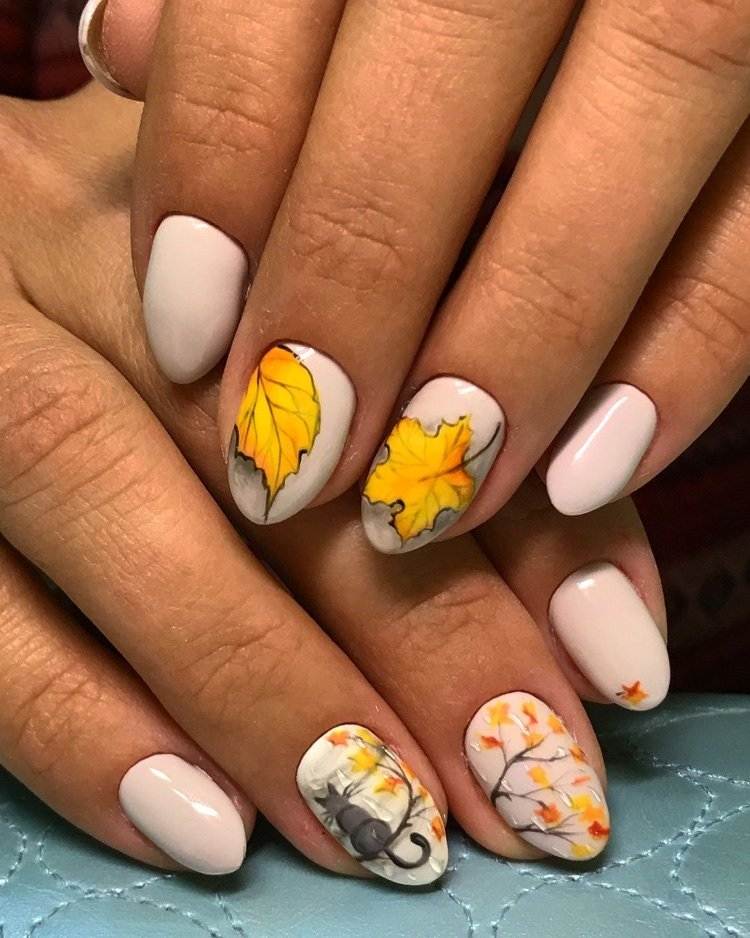
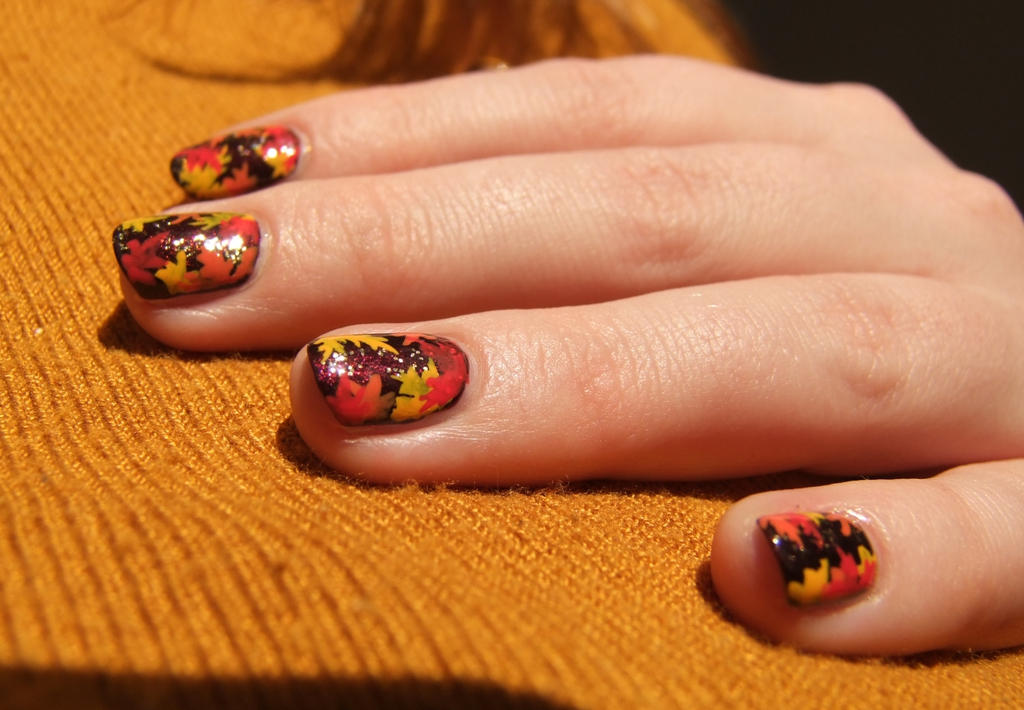
If you're looking for a simple and festive way to add some autumn vibes to your nails, then this easy fall leaves nail art tutorial is perfect for you. With just a few nail polish colors and some nail art tools, you can create a beautiful and DIY autumn leaf design that will make your nails stand out this season. To start, you'll need a base coat and a fall-inspired nail polish color. You can choose from shades like burnt orange, deep red, mustard yellow, or forest green to really capture the essence of fall. Apply the base coat and let it dry completely before moving on to the next step. Next, take a thin nail art brush and dip it into a darker shade of the same color you used for the base. This will be used to create the veins of the leaves. Starting from the base of your nail, draw a slightly curved line towards the tip. Then, draw smaller lines branching off from the main vein to create the leaf shape. Now, it's time to add some detail to the leaves. Use a lighter shade of the same color to add smaller veins on the leaves. You can also use a glitter nail polish to add some sparkle to the design. Just apply it on top of the veins to make them stand out. Once you're happy with the leaves, it's time to add some fall foliage. Take a small dotting tool or a toothpick and dip it into a yellow, orange, or brown nail polish. Create small dots around the leaves to represent fallen leaves on the ground. You can also add some fallen leaves using a nail art stencil or by freehand drawing them with a nail art brush. Finally, seal in your design with a top coat to protect the nail art and add some shine. And there you have it, a simple and beautiful fall leaves nail art design that will make your nails look like a work of art.Easy Fall Leaves Nail Art Tutorial


Easy Fall Leaves Nail Art Tutorial


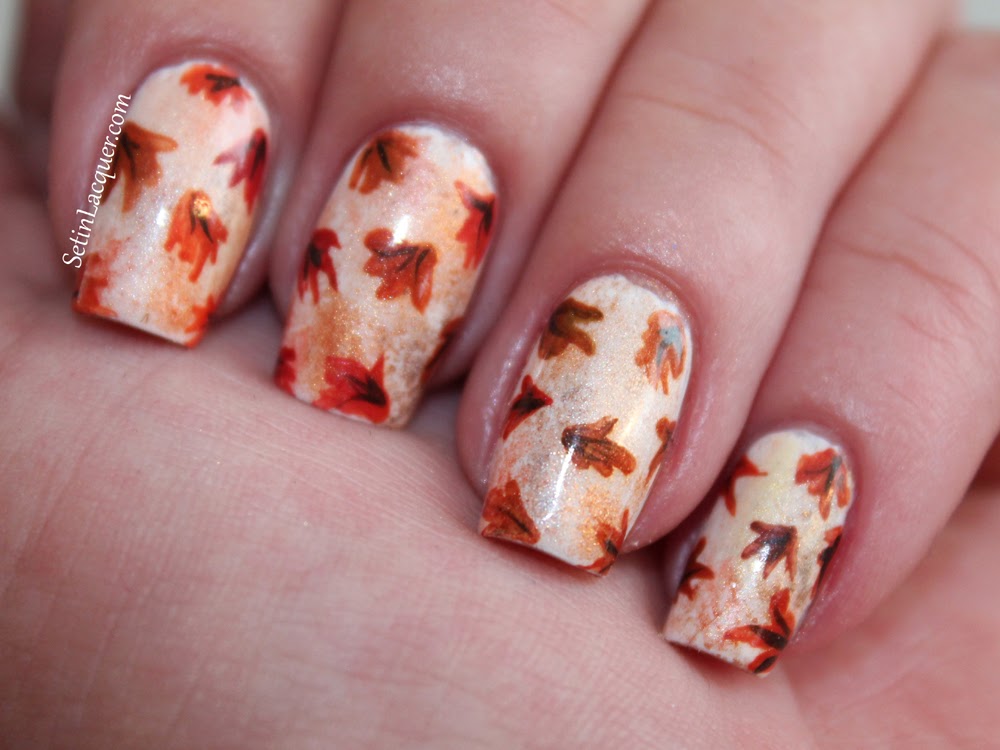
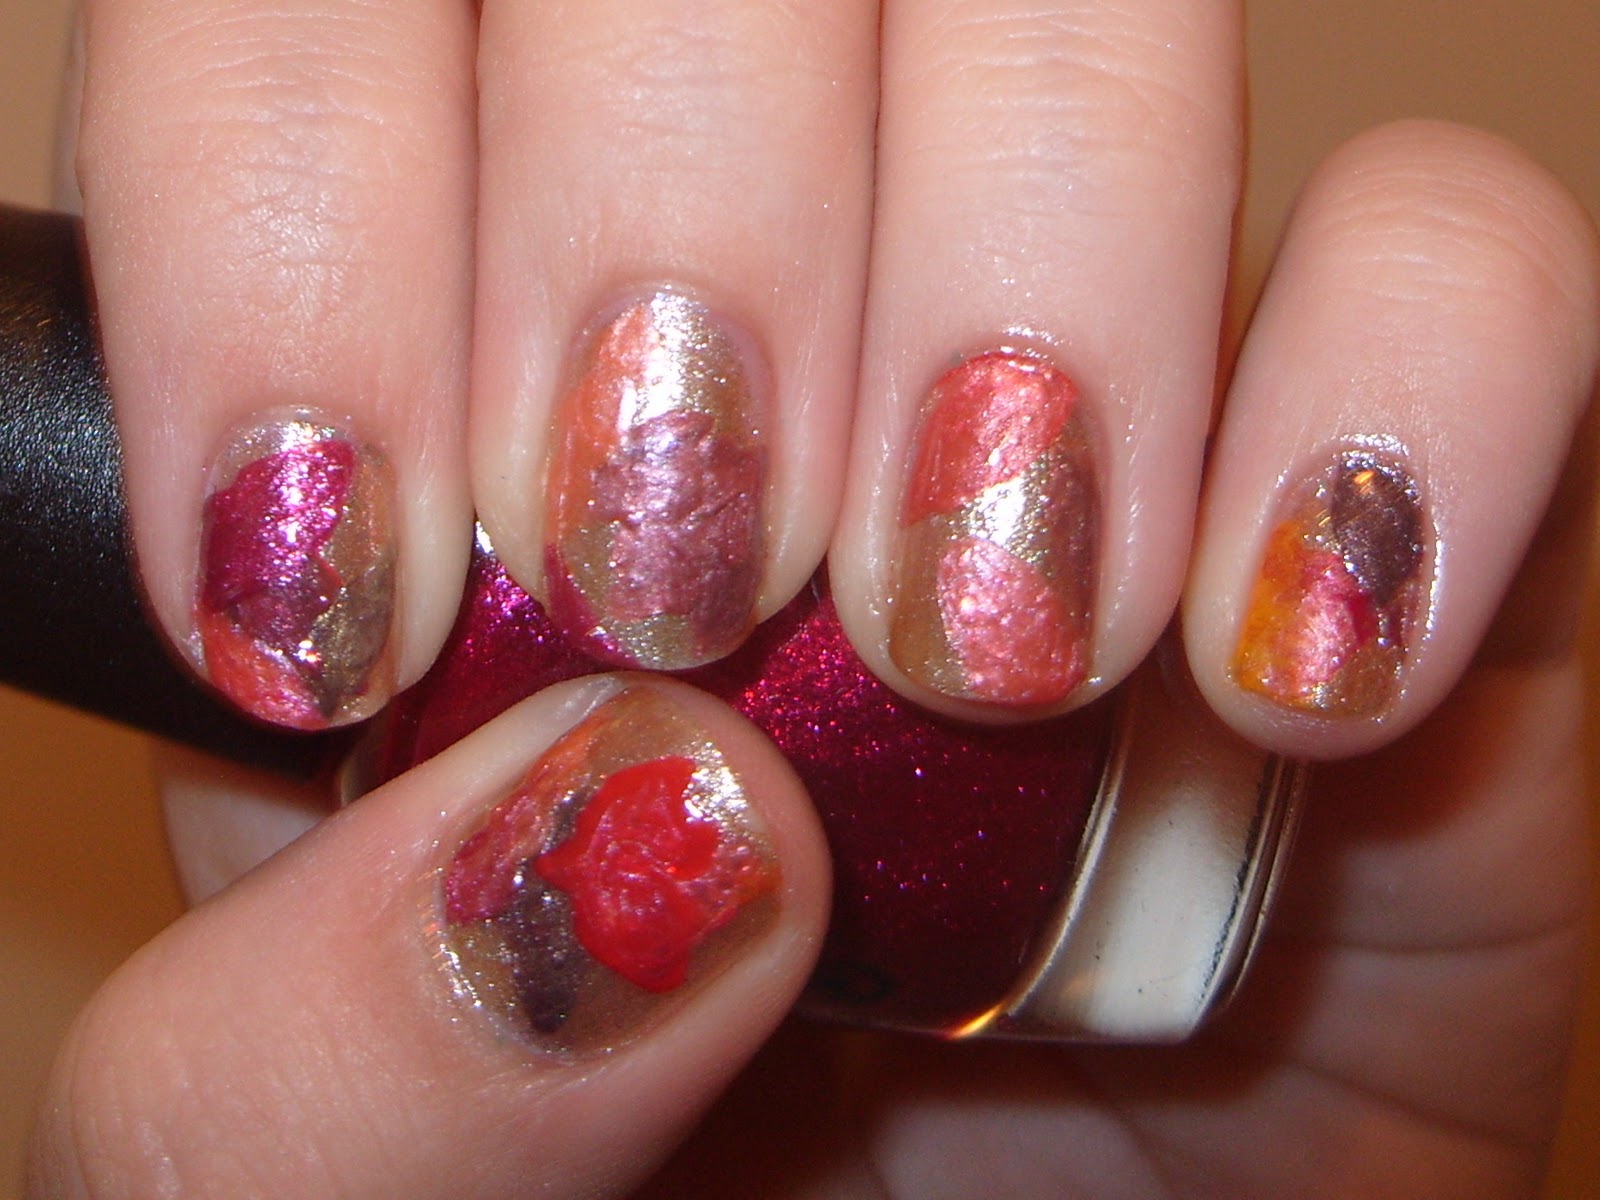
If you're a fan of do-it-yourself projects and you love nail art, then this DIY autumn leaves nail art tutorial is perfect for you. You don't need any fancy tools, just some nail polish colors and a few household items to create a stunning fall-inspired design on your nails. To start, you'll need a base coat and two fall colors of your choice. For this design, we'll use burgundy and mustard yellow. Apply the base coat and let it dry completely before moving on to the next step. Next, take a regular kitchen sponge and cut it into small pieces. You'll use these pieces to create a fall foliage effect on your nails. Dip one side of the sponge into the burgundy nail polish and dab it onto your nails. You can also use a lighter shade of the same color to add some dimension to the design. Once you're happy with the base color, let it dry for a few minutes before moving on to the next step. Now, take the other side of the sponge and dip it into the mustard yellow nail polish. Dab it onto your nails, focusing on the tips to create a gradient effect. This will represent the changing colors of leaves during the fall season. Now, it's time to add the leaves. Take a thin nail art brush and dip it into a darker shade of the burgundy color. Draw the veins of the leaves on your nails, starting from the base and curving towards the tip. Then, use a lighter shade of the same color to add smaller veins and details to the leaves. Finally, seal in the design with a top coat to protect it and add some shine. And there you have it, a beautiful and DIY autumn leaves nail art design that will make your nails look effortlessly chic.DIY Autumn Leaves Nail Art Tutorial


DIY Autumn Leaves Nail Art Tutorial

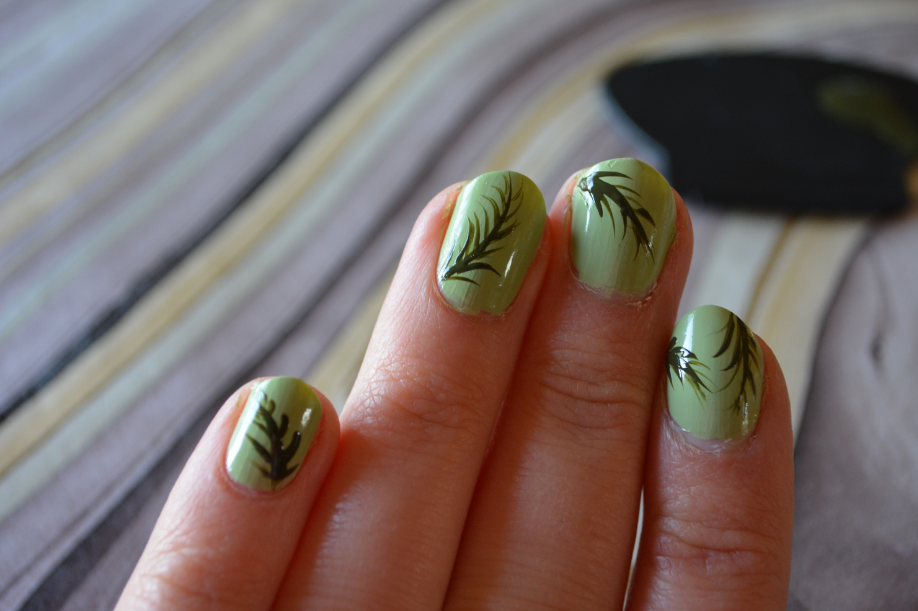
Creating a step-by-step nail art design can be helpful, especially for beginners who are still learning different techniques. This simple and easy-to-follow leaf nail art tutorial will guide you through the process of creating a beautiful and realistic autumn leaf design on your nails. Start by applying a base coat and a fall-inspired nail polish color of your choice. For this tutorial, we'll use olive green. Apply two coats for a more opaque base color. Next, take a thin nail art brush and dip it into a darker shade of the same color. Draw a slightly curved line from the base of your nail towards the tip to create the main vein of the leaf. Then, draw smaller lines branching off from the main vein to create the leaf shape. Now, it's time to add some detail to the leaves. Use a lighter shade of the same color to add smaller veins on the leaves. You can also use a glitter nail polish to add some sparkle to the design. Just apply it on top of the veins to make them stand out. Once you're happy with the leaves, it's time to add some fall foliage. Take a small dotting tool or a toothpick and dip it into a yellow, orange, or brown nail polish. Create small dots around the leaves to represent fallen leaves on the ground. You can also add some fallen leaves using a nail art stencil or by freehand drawing them with a nail art brush. Finally, seal in your design with a top coat to protect the nail art and add some shine. And there you have it, a step-by-step guide to creating a stunning autumn leaves nail art design that will leave everyone impressed.Step-by-Step Leaf Nail Art Tutorial


Step-by-Step Leaf Nail Art Tutorial


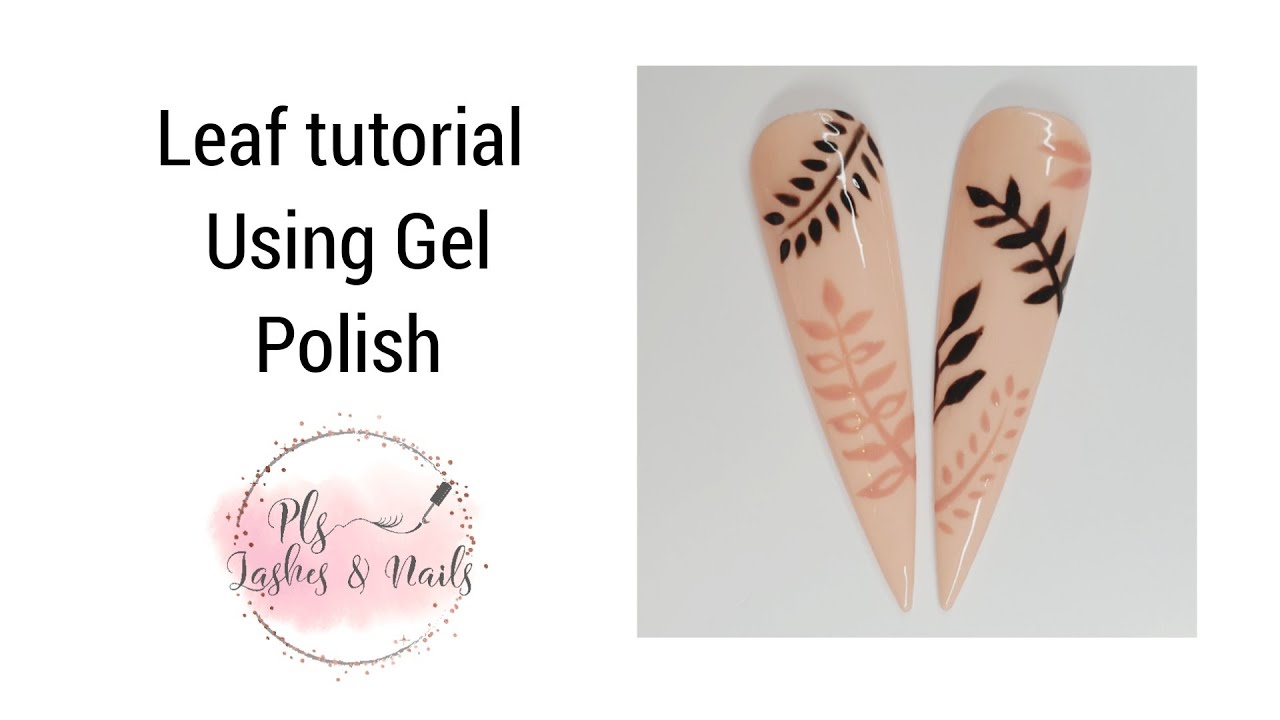
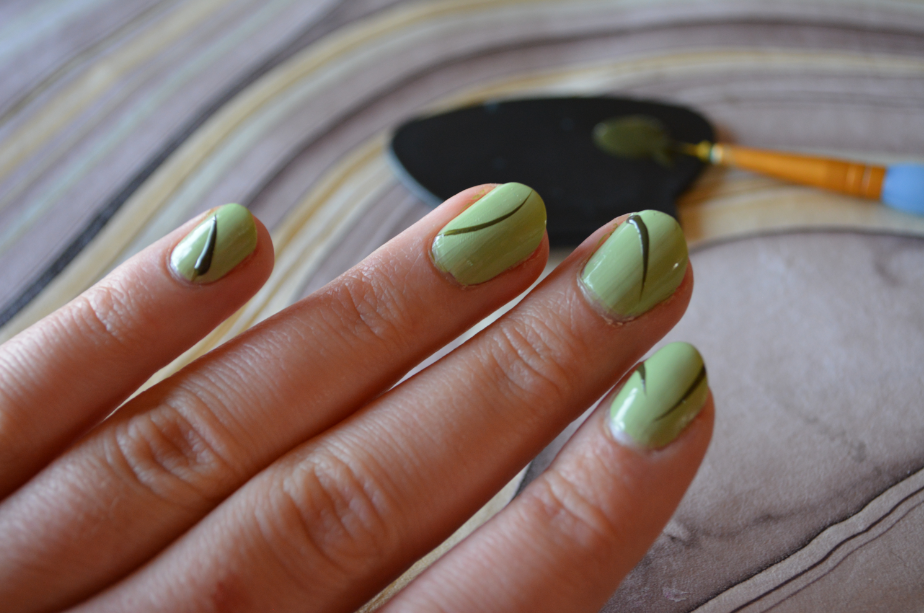


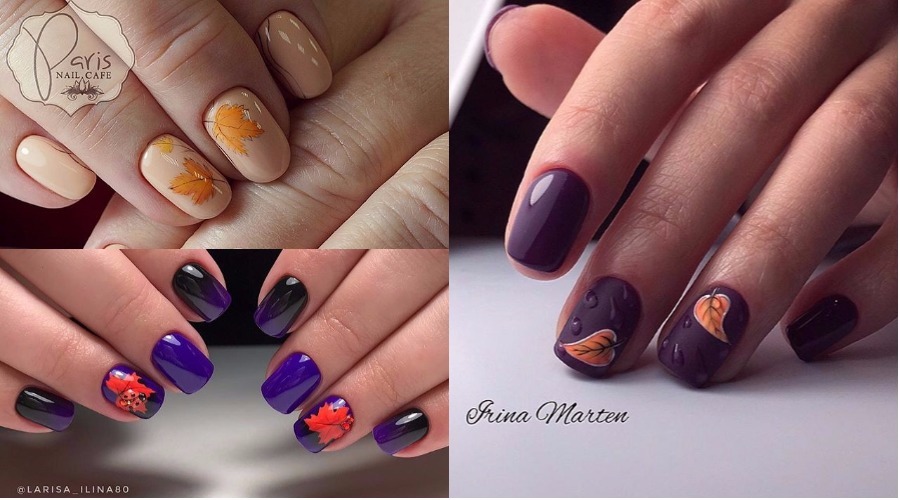
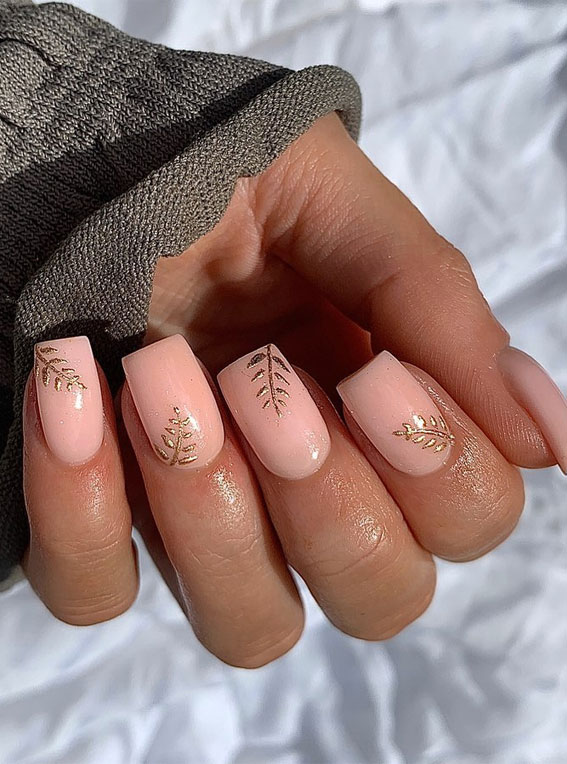
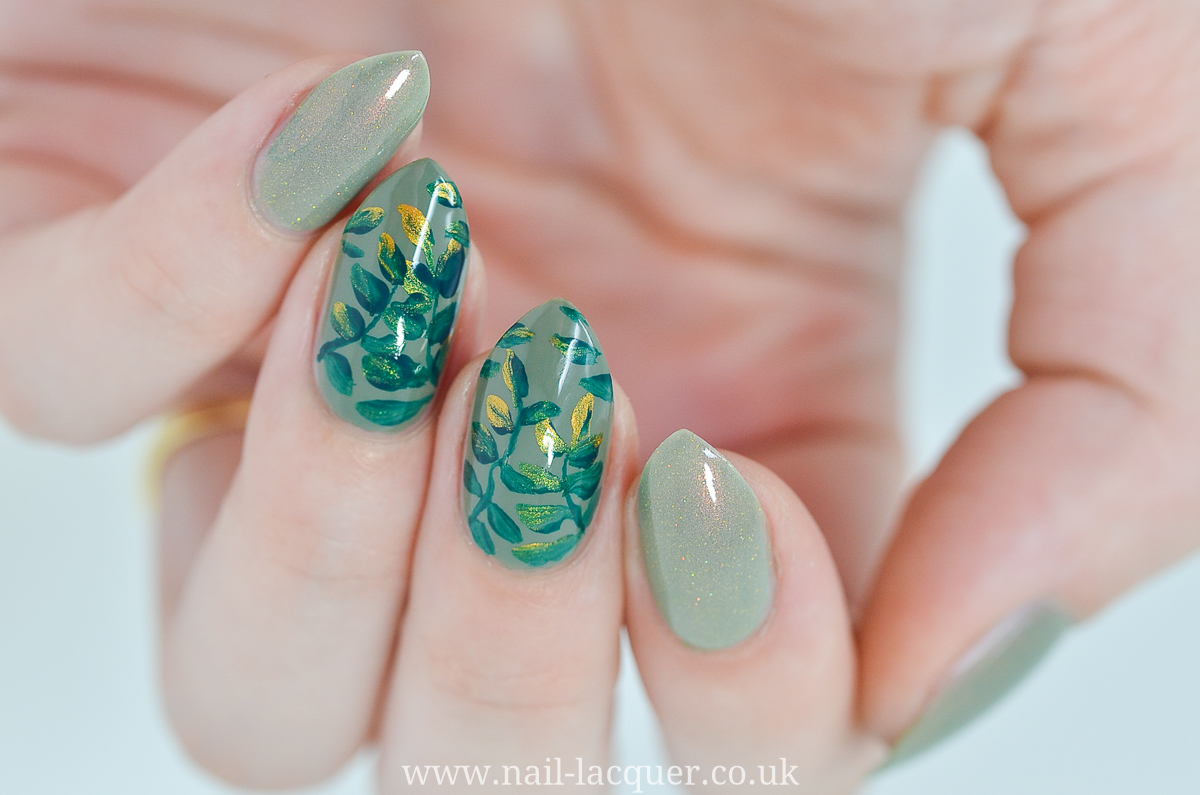
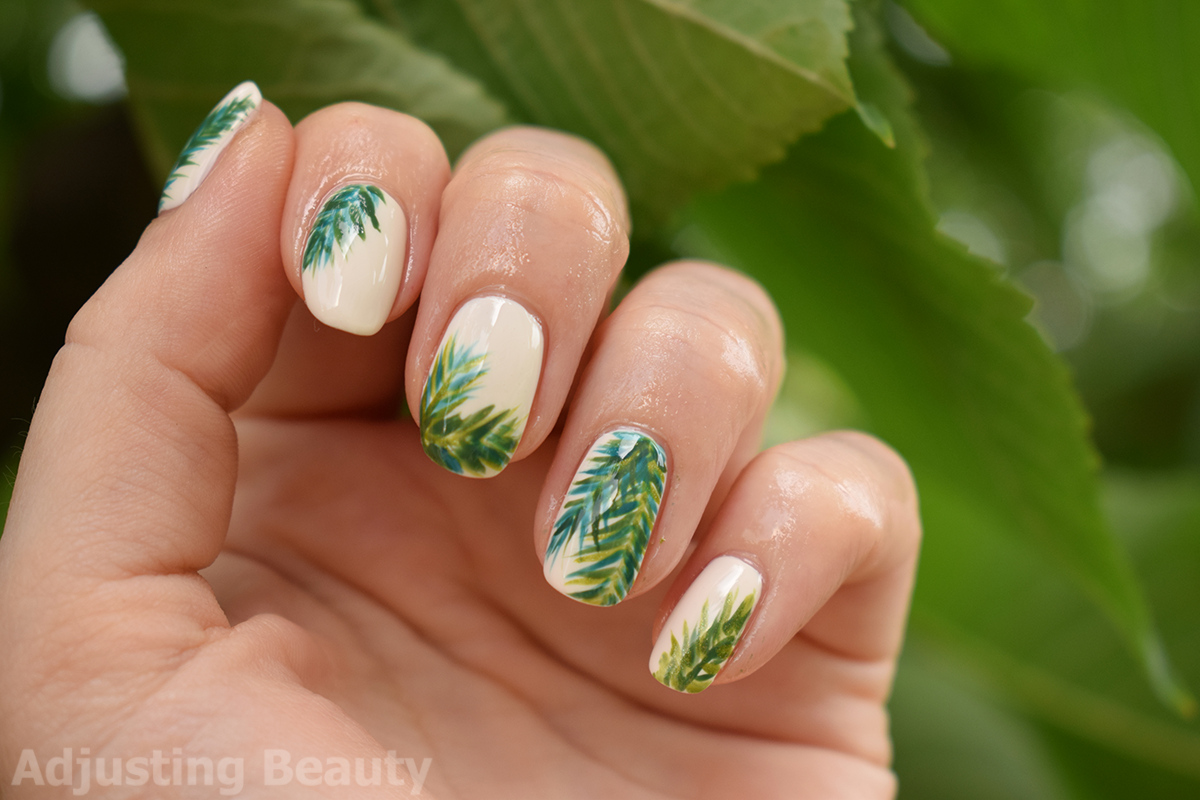
If you prefer a more minimalistic and subtle approach to nail art, then this simple leaf nail art tutorial is perfect for you. With just a few nail polish colors and some nail art tools, you can create a beautiful and effortless design that will make your nails stand out. Start by applying a base coat and a neutral nail polish color. You can choose from shades like nude, light pink, or beige. Apply two coats for a more opaque base color. Next, take a thin nail art brush and dip it into a dark green nail polish. Draw a slightly curved line from the base of your nail towards the tip to create the main vein of the leaf. Then, draw smaller lines branching off from the main vein to create the leaf shape. Now, it's time to add some detail to the leaves. Use a lighter shade of the same color to add smaller veins on the leaves. You can also use a warm bronze nail polish to add some dimension to the design. Just apply it on top of the veins to make them stand out. Finally, seal in your design with a top coat to protect the nail art and add some shine. And there you have it, a simple and chic leaf nail art design that is perfect for any occasion.Simple Leaf Nail Art Tutorial


Simple Leaf Nail Art Tutorial

If you're a fan of abstract and unique nail art designs, then this leaf print nail art tutorial is perfect for you. With just a few nail polish colors and a leaf as a tool, you can create a one-of-a-kind design that will make your nails stand out. To start, you'll need a base coat and a deep green nail polish color. Apply the base coat and let it dry completely before moving on to the next step. Next, take a leaf from your backyard or a nearby park. Make sure it is clean and dried before using it on your nails. Apply the nail polish on one side of the leaf and press it onto your nail, making sure to cover the entire nail. You can also use a leaf-shaped nail sticker if you don't have access to a real leaf. Once the nail polish is dry, carefully peel off the leaf to reveal the leaf print on your nail. You can use different sizes and shapes of leaves to create a more abstract design. Next, use a thin nail art brush and a darker green nail polish to add some detail to the leaves. Draw the veins and add some shading to make the print look more realistic. Finally, seal in the design with a top coat to protect it and add some shine. And there you have it, a unique and creative leaf print nail art design that will make your nails look like a piece of art.Leaf Print Nail Art Tutorial


Leaf Print Nail Art Tutorial


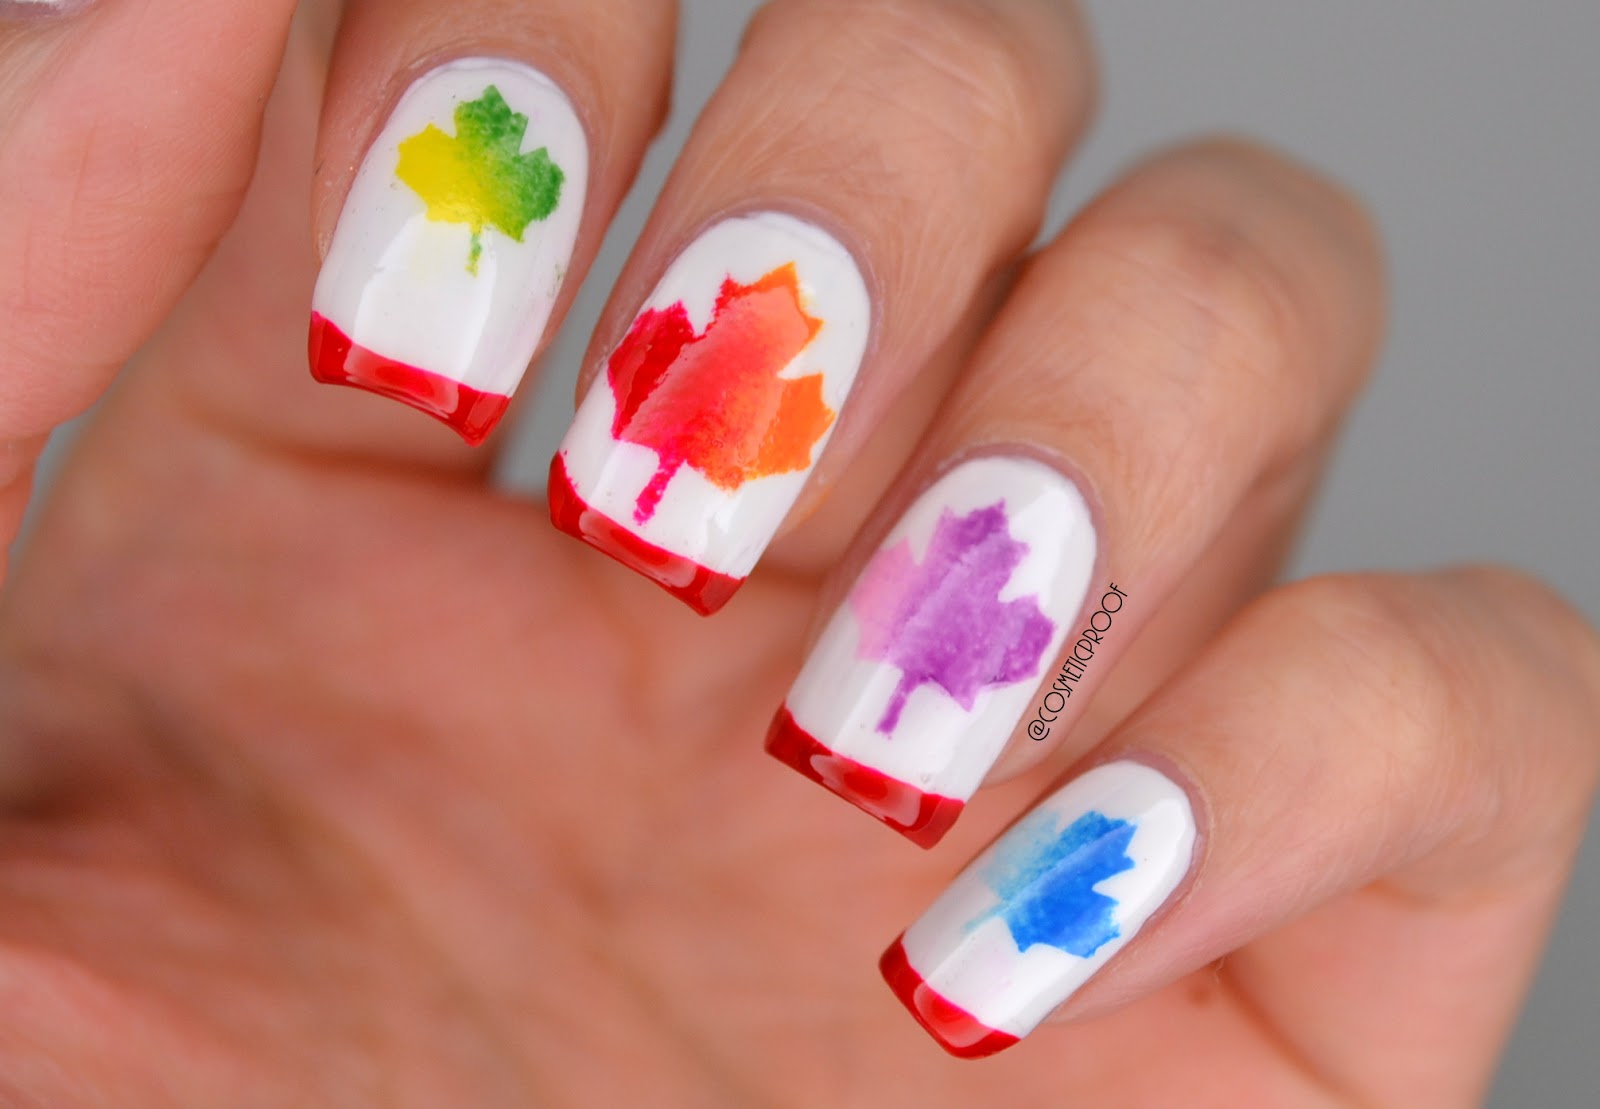
If you love watercolor paintings and want to incorporate them into your nail art, then this watercolor leaf nail art tutorial is perfect for you. With just a few nail polish colors and some water, you can create a beautiful and dreamy watercolor-inspired design on your nails. To start, you'll need a base coat and a white or light-colored nail polish. Apply the base coat and let it dry completely before moving on to the next step. Next, take a small dish and fill it with water. Choose two or three fall-colored nail polish shades and drop a few drops of each color into the water. Use a toothpick to create a marbled effect by gently swirling the colors together. Now, carefully dip your nails into the water, making sure to cover the entire nail. You can use a Q-tip to remove any excess nail polish from your skin. Once the nail polish is dry, use a top coat to seal in the design. Next, take a thin nail art brush and a dark green nail polish. Use it to create the veins of the leaves on your nails. You can also use a lighter shade of the same color to add some dimension to the design. Finally, seal in the design with a top coat to protect it and add some shine. And there you have it, a beautiful and dreamy watercolor leaf nail art design that will make your nails look like a work of art.Watercolor Leaf Nail Art Tutorial

Watercolor Leaf Nail Art Tutorial

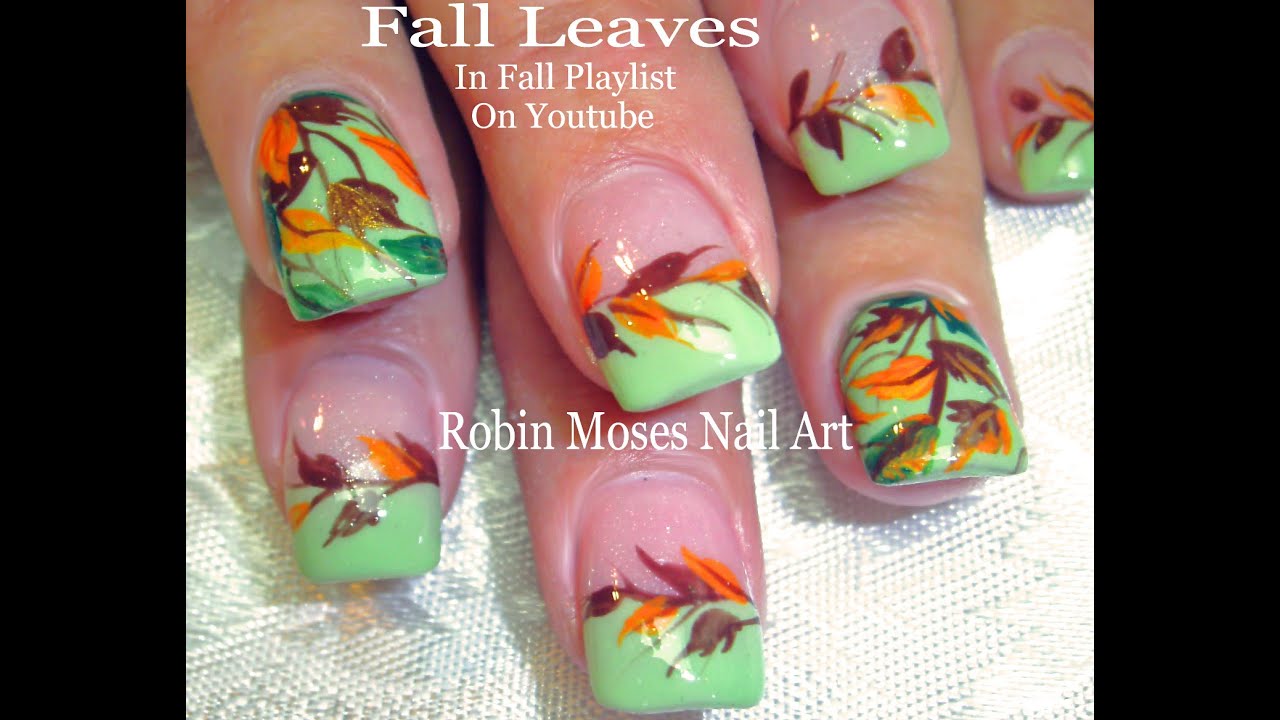
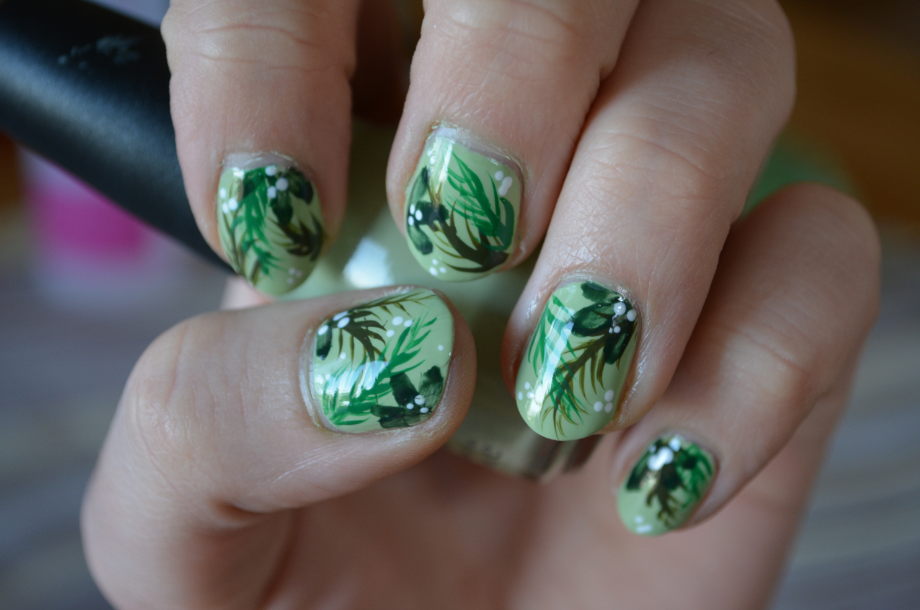
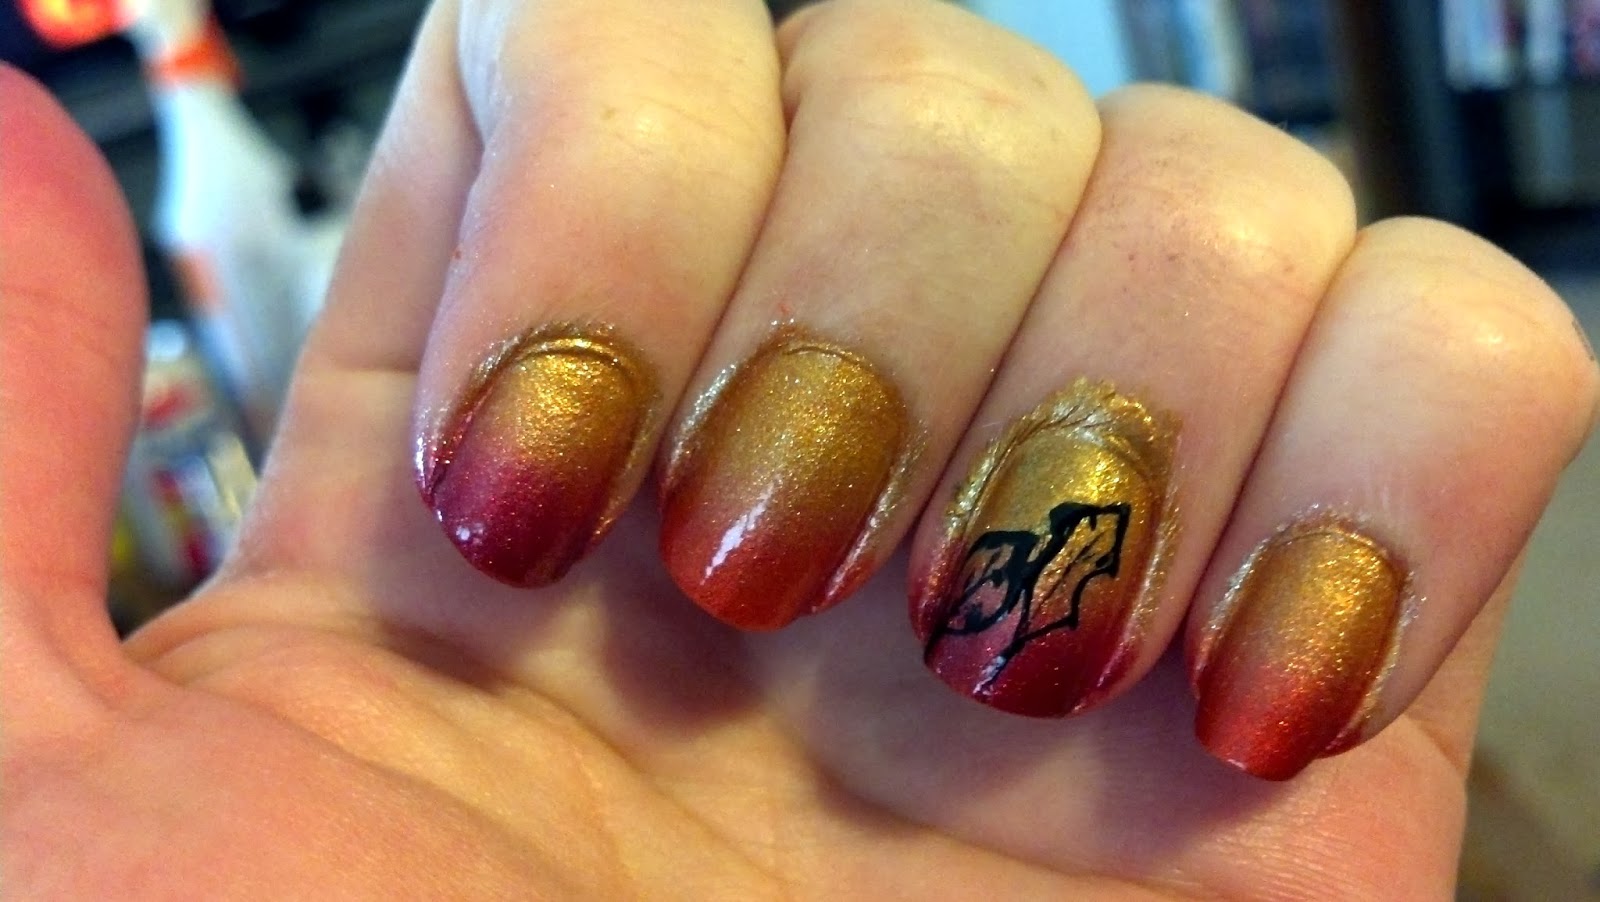
If you love gradient nail art designs, then this gradient leaf nail art tutorial is perfect for you. With just a few nail polish colors and a makeup sponge, you can create a stunning gradient effect on your nails that will make them stand out. Start by applying a base coat and a white or light-colored nail polish. Apply two coats for a more opaque base color. Next, take a makeup sponge and cut it into small pieces. You'll use these pieces to create a gradient effect on your nails. Dip one side of the sponge into a light green nail polish and dab it onto your nails. Then, dip the other side into a dark green nail polish and dab it onto your nails, focusing on the tips. Once the nail polish is dry, use a thin nail art brush and a dark green nail polish to create the veins of the leaves on your nails. You can also use a lighter shade of the same color to add some dimension to the design. Finally, seal in the design with a top coat to protect it and add some shine. And there you have it, a beautiful and gradient leaf nail art design that will make your nails look like a fall masterpiece.Gradient Leaf Nail Art Tutorial
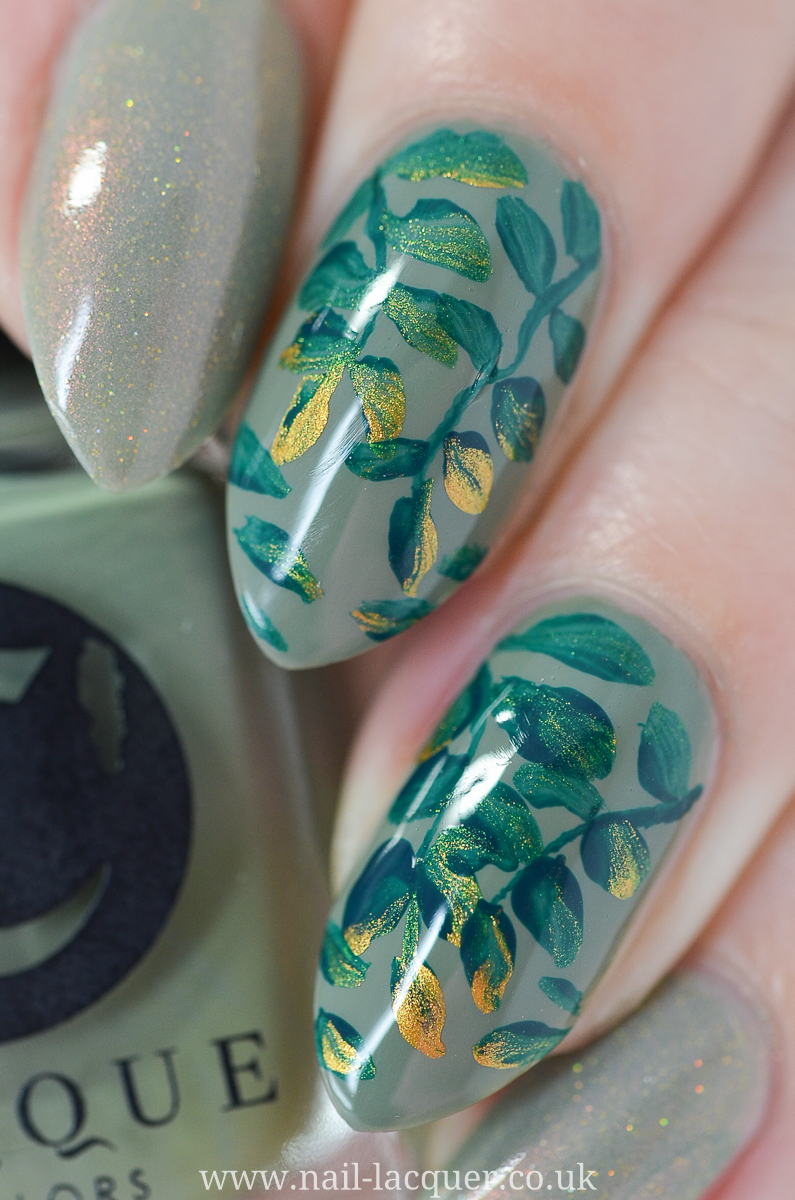

Gradient Leaf Nail Art Tutorial


Foil Leaf Nail Art Tutorial


Foil Leaf Nail Art Tutorial
Create a Unique and Eye-Catching Look with Leaves Nail Art

Unleash Your Creativity with Nature-Inspired Designs
 When it comes to nail art, the possibilities are endless. From intricate designs to bold colors, there is no limit to what you can create on your nails. And what better way to add a touch of nature to your look than with leaves nail art? With this tutorial, you'll learn how to create a stunning and unique design that will make your nails stand out.
Gather Your Materials
 Before you start, make sure you have all the necessary materials. You will need
nail polish
in various shades of green, a
base coat
, a
top coat
, a
dotting tool
, and a
thin nail art brush
. You will also need
dried leaves
of different shapes and sizes, which you can easily find in your backyard or a nearby park.
Before you start, make sure you have all the necessary materials. You will need
nail polish
in various shades of green, a
base coat
, a
top coat
, a
dotting tool
, and a
thin nail art brush
. You will also need
dried leaves
of different shapes and sizes, which you can easily find in your backyard or a nearby park.
Step-by-Step Tutorial
 1. Start by applying a base coat to protect your nails and help the nail polish last longer.
2. Choose your first nail polish color and apply it to your nails. You can use different shades of green or mix in some other colors like yellow or brown to create a more realistic look.
3. While the nail polish is still wet, take a dried leaf and carefully place it on your nail. Gently press down to transfer the
leaf pattern
onto your nail.
4. Use a dotting tool to create small dots on the leaf pattern. This will add depth and texture to the design.
5. Once the nail polish is dry, carefully remove the leaf to reveal the
imprinted pattern
on your nail.
6. Repeat this process on all your nails, using different leaves and colors for each one.
7. Once all your nails are done, use a thin nail art brush and a darker shade of green to add
veins
to the leaves. This will give your design a more realistic and detailed look.
8. Finally, finish off with a top coat to seal in your design and add shine.
1. Start by applying a base coat to protect your nails and help the nail polish last longer.
2. Choose your first nail polish color and apply it to your nails. You can use different shades of green or mix in some other colors like yellow or brown to create a more realistic look.
3. While the nail polish is still wet, take a dried leaf and carefully place it on your nail. Gently press down to transfer the
leaf pattern
onto your nail.
4. Use a dotting tool to create small dots on the leaf pattern. This will add depth and texture to the design.
5. Once the nail polish is dry, carefully remove the leaf to reveal the
imprinted pattern
on your nail.
6. Repeat this process on all your nails, using different leaves and colors for each one.
7. Once all your nails are done, use a thin nail art brush and a darker shade of green to add
veins
to the leaves. This will give your design a more realistic and detailed look.
8. Finally, finish off with a top coat to seal in your design and add shine.
Get Creative and Experiment
 Don't be afraid to get creative and experiment with different designs and colors. You can also use different types of leaves or even flowers to create a unique and personalized look. The possibilities are endless, so have fun and let your imagination run wild.
Now that you know how to create stunning leaves nail art, it's time to show off your nature-inspired nails. Whether you're heading to a special event or just want to add a touch of nature to your everyday look, this tutorial is the perfect way to do it. So go ahead and try it out for yourself and get ready to receive compliments on your beautiful nails.
Don't be afraid to get creative and experiment with different designs and colors. You can also use different types of leaves or even flowers to create a unique and personalized look. The possibilities are endless, so have fun and let your imagination run wild.
Now that you know how to create stunning leaves nail art, it's time to show off your nature-inspired nails. Whether you're heading to a special event or just want to add a touch of nature to your everyday look, this tutorial is the perfect way to do it. So go ahead and try it out for yourself and get ready to receive compliments on your beautiful nails.


