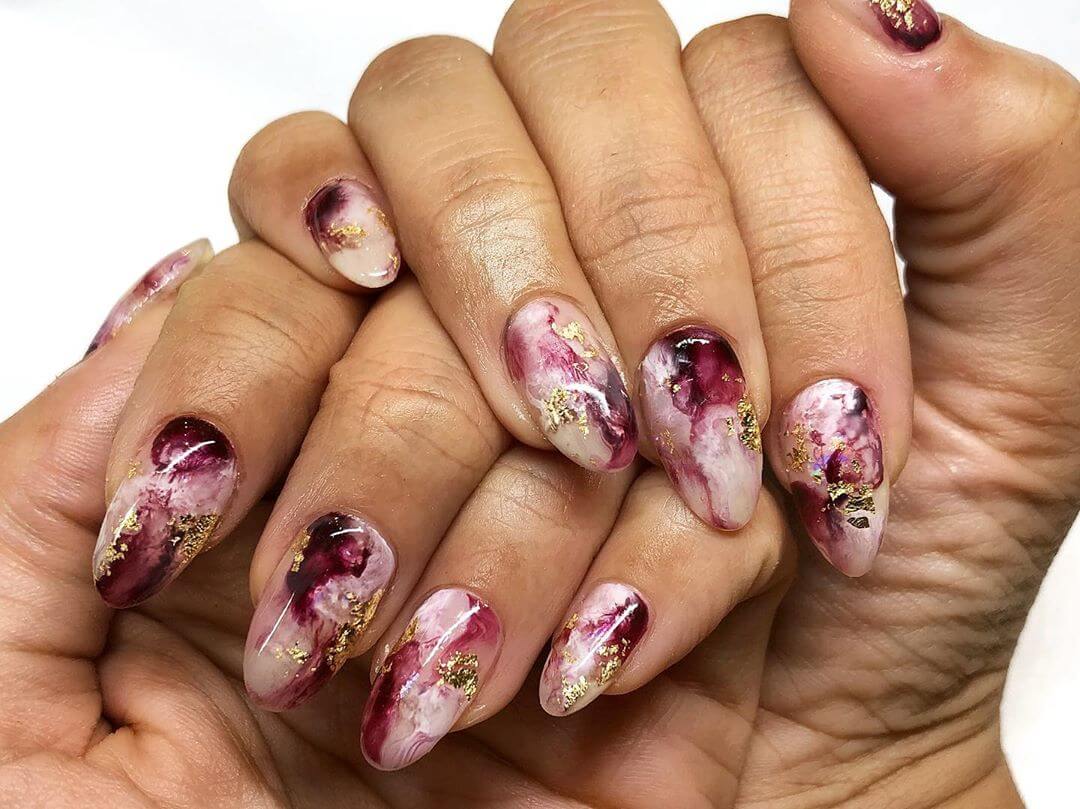
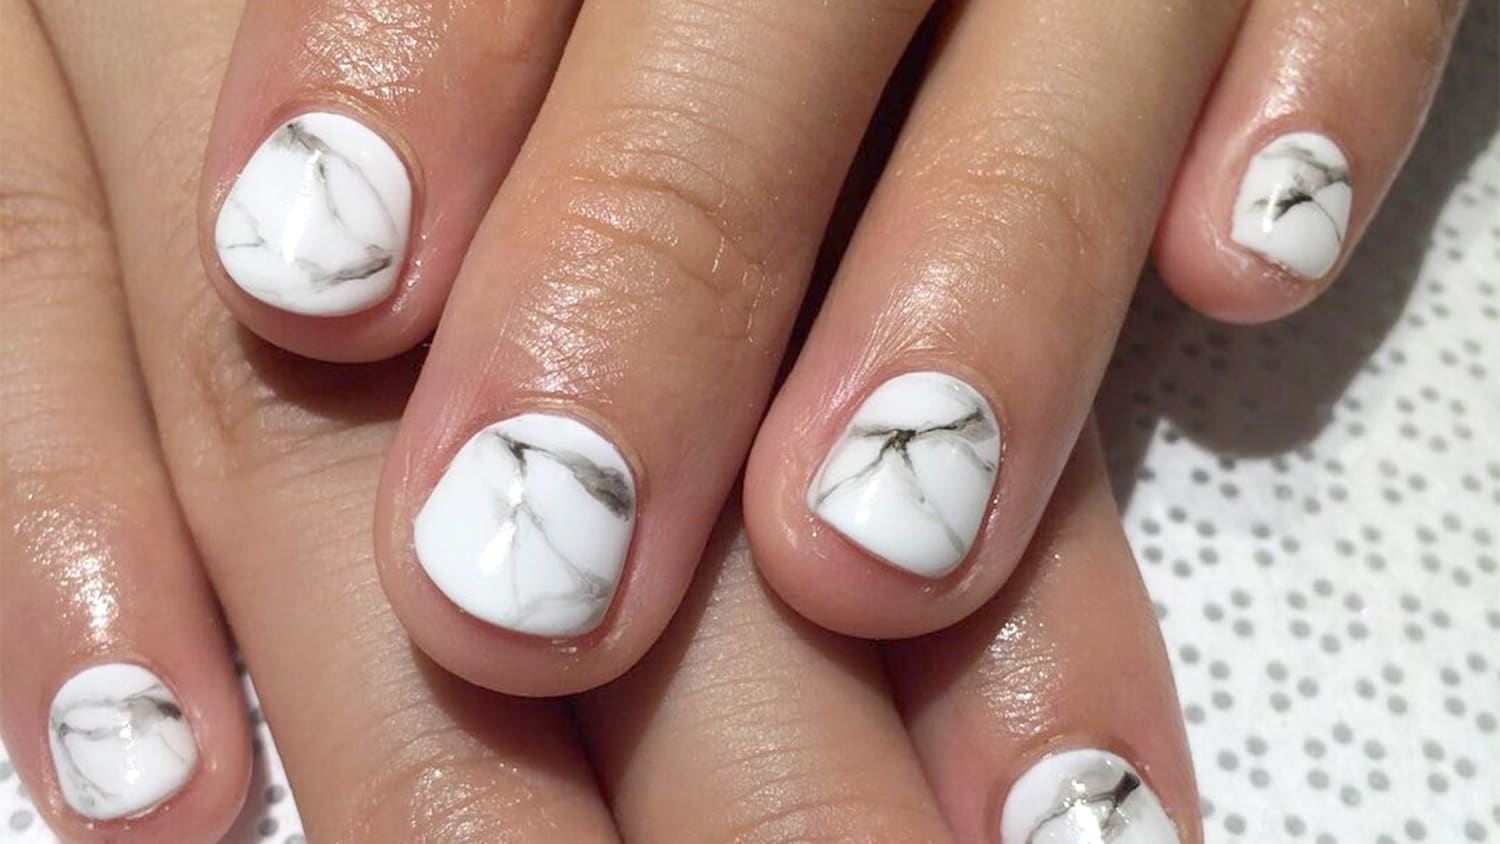
If you're a fan of nail art, then you've probably heard of the beautiful and intricate marble nail art trend. With its swirls and mix of colors, marble nail art is a perfect way to add a unique touch to your nails. And what better way to achieve this look than with Gelish products? Gelish is a popular brand known for its high-quality gel nail polishes that provide long-lasting and durable results. In this tutorial, we'll show you how to create stunning marble nail art using Gelish products. First, you'll need to gather your supplies. You'll need a base coat, two or more Gelish colors of your choice, a small brush, and a top coat. You can also add some glitter or rhinestones for an extra touch of glam. Start by applying a thin layer of base coat and curing it under a LED or UV lamp for the recommended time. Next, apply one coat of your base color and cure it under the lamp. This will be the color that will peek through the marble design. Now, it's time to create the marble effect. Take your second color and apply a few drops of it on your nail. Using a small brush, swirl the two colors together to create a marble pattern. You can also add a third color for a more dynamic look. Once you're happy with the design, cure it under the lamp. Repeat this process on all your nails and cure them under the lamp. Once the marble design is cured, add a layer of top coat and cure it for the recommended time. This will seal the design and give your nails a glossy finish. And there you have it, gorgeous marble nail art using Gelish products. Experiment with different color combinations and designs to create a unique look every time. With Gelish, you'll have long-lasting and stunning marble nails that are sure to turn heads.1. Marble Nail Art Tutorial Using Gelish


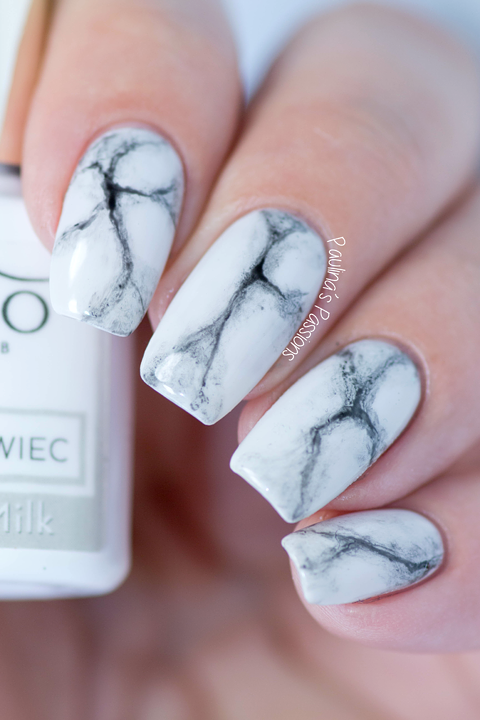
1. Marble Nail Art Tutorial Using Gelish


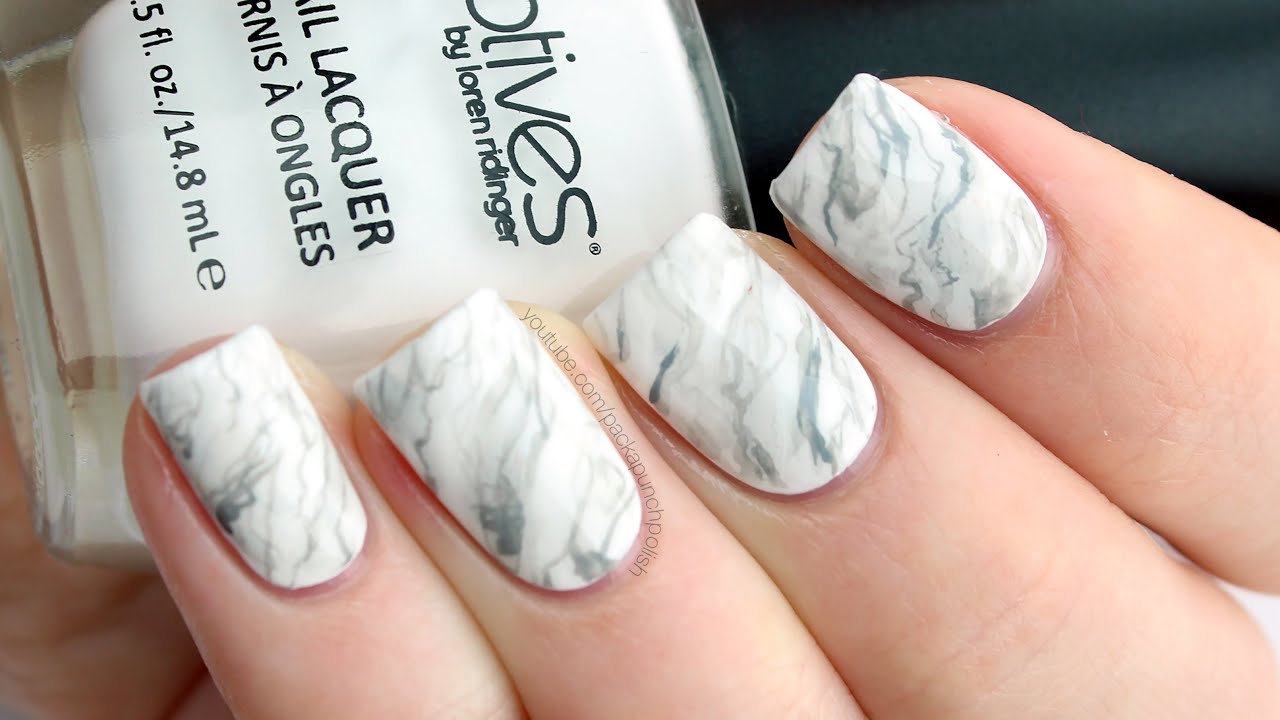


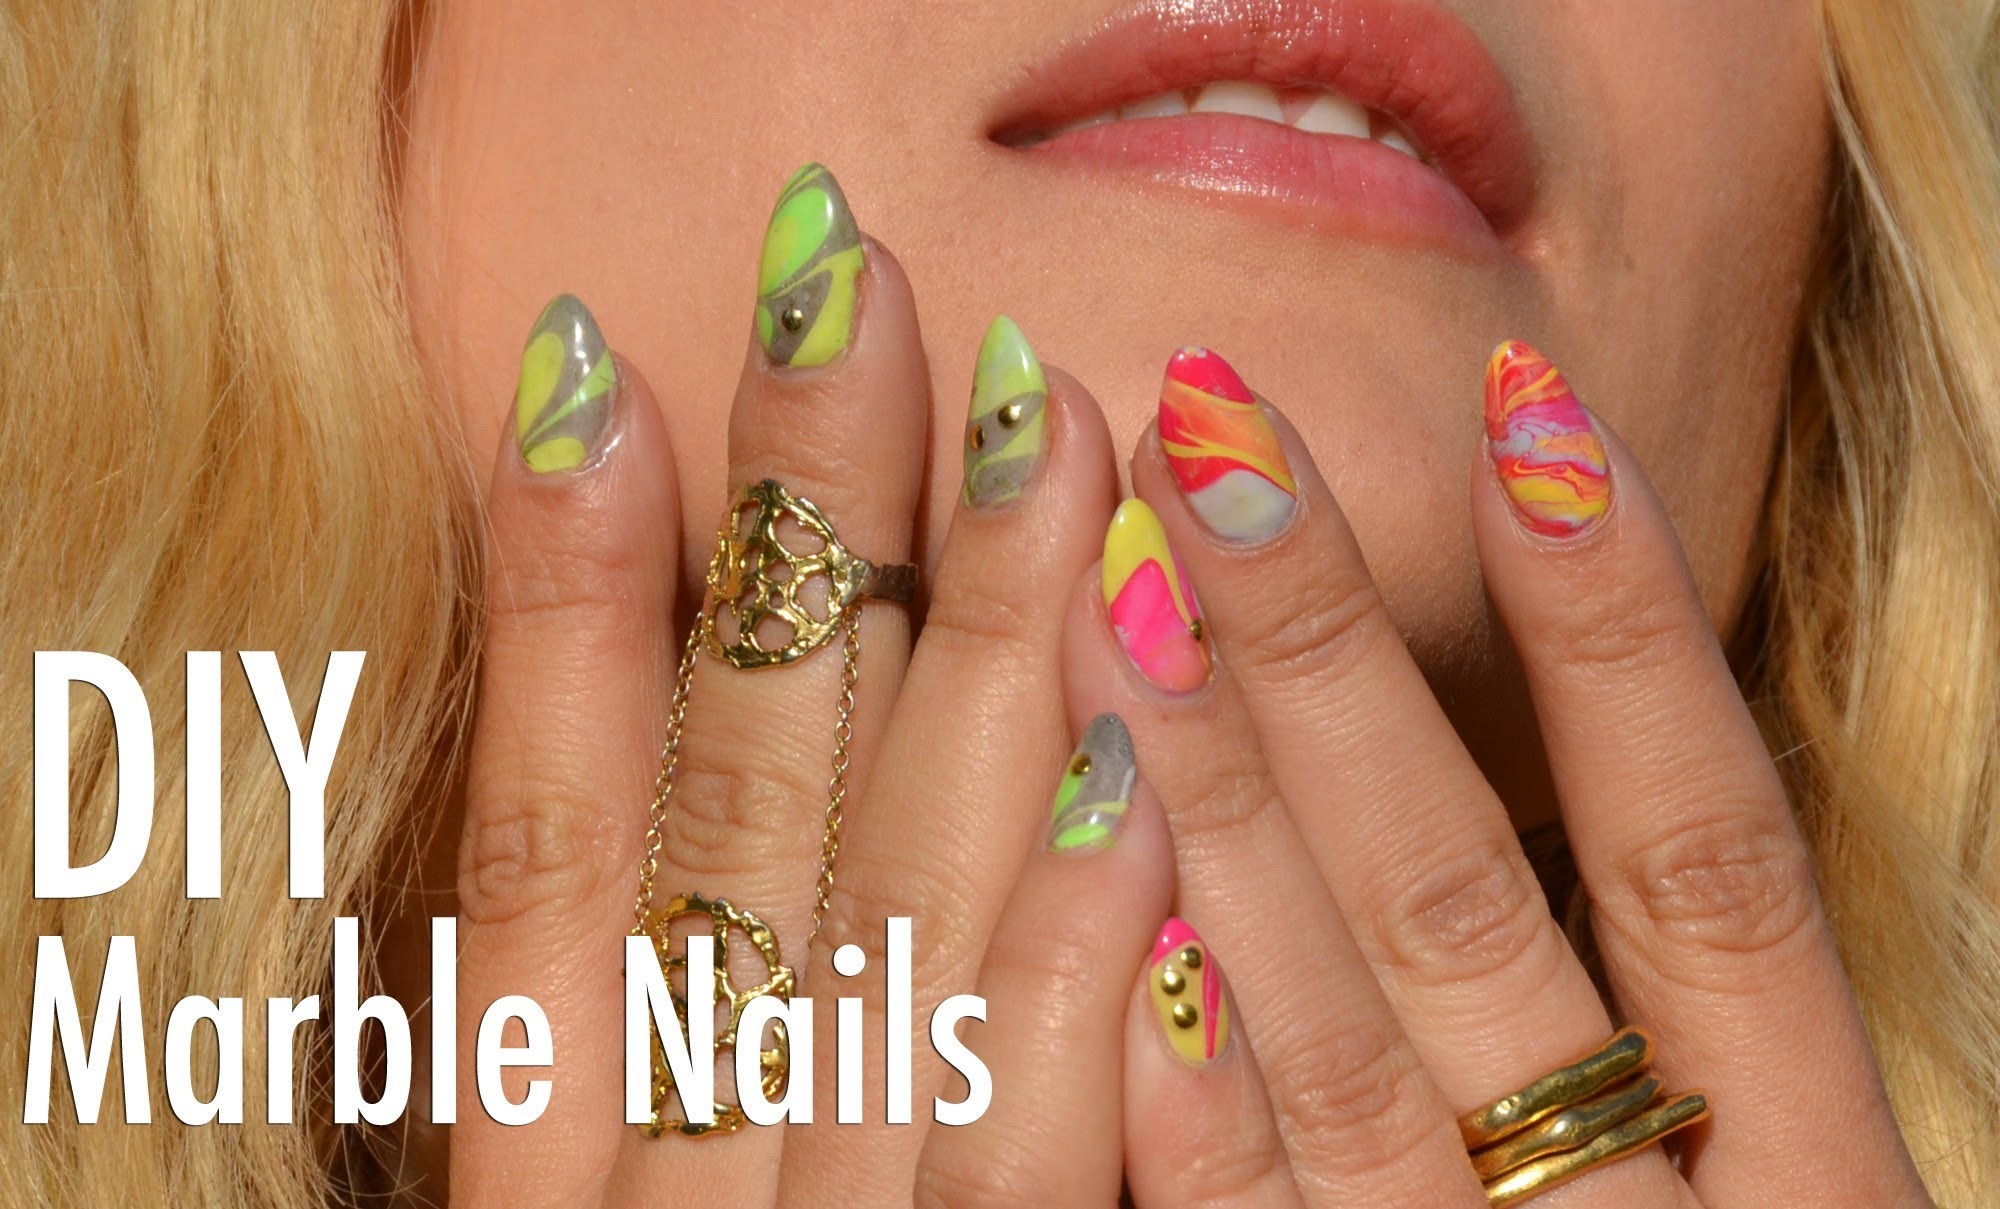

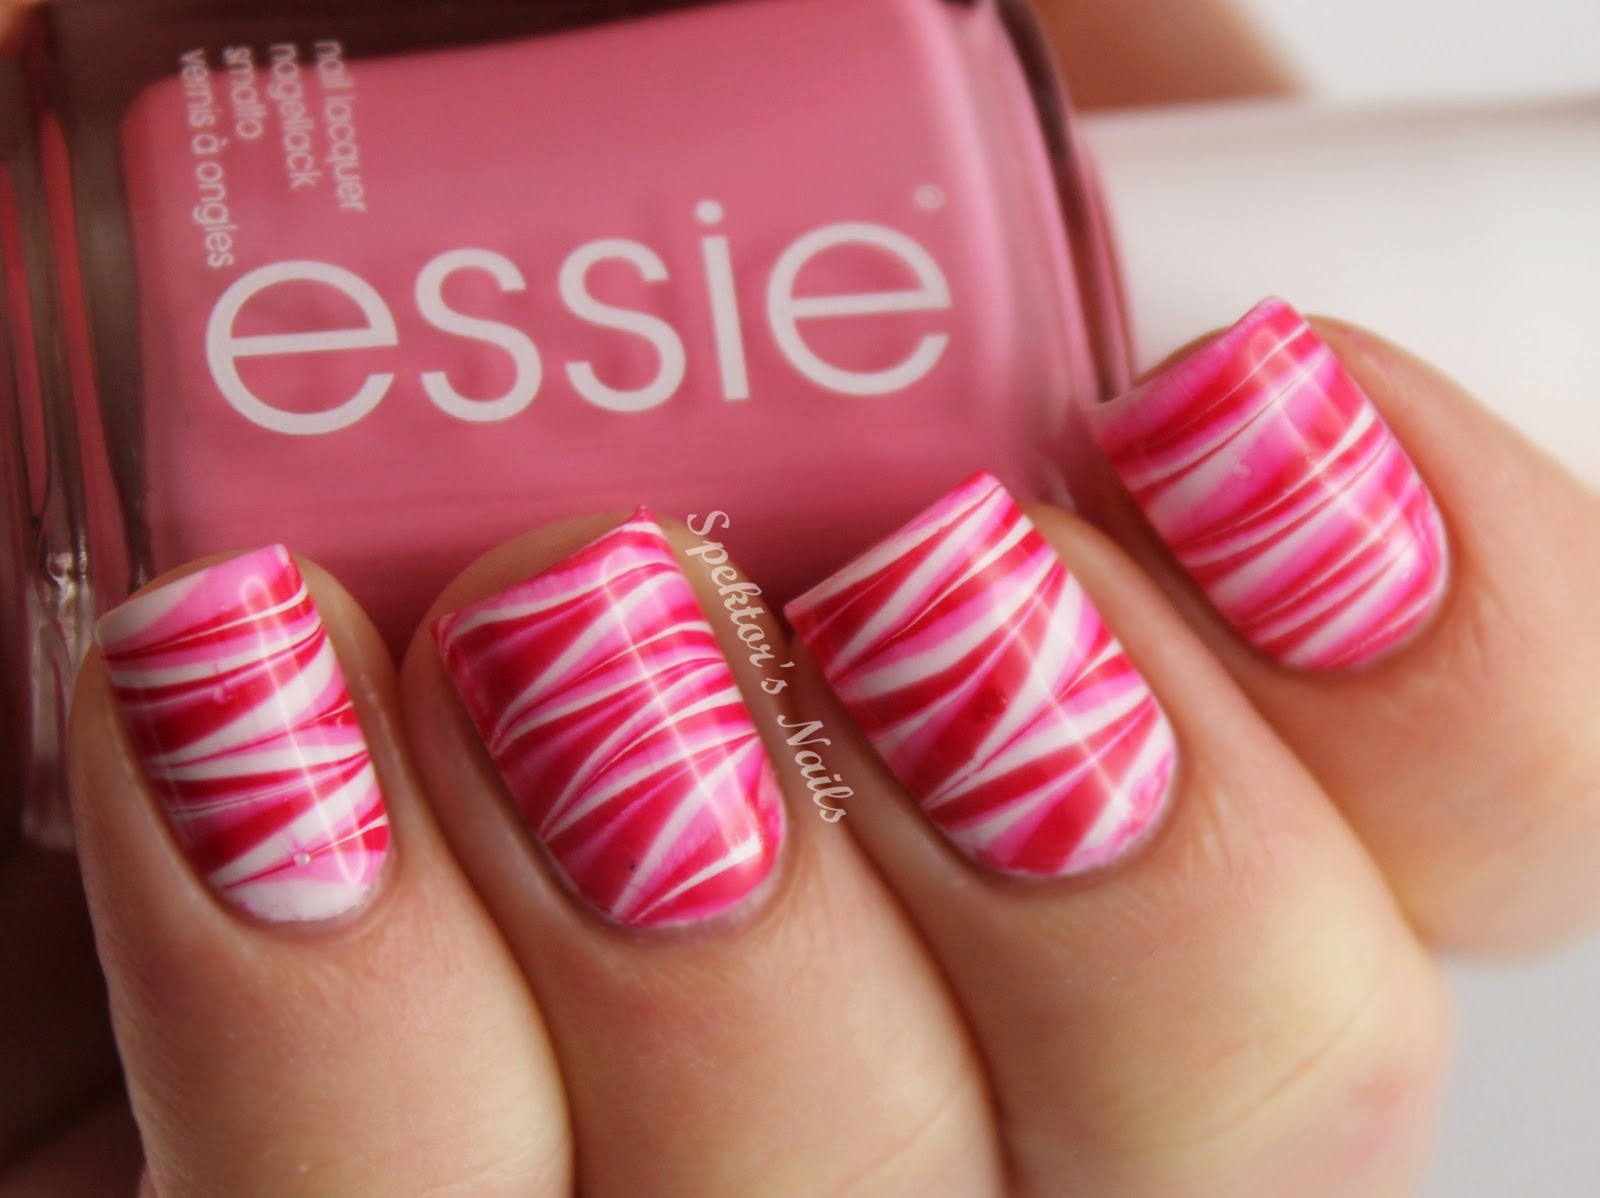
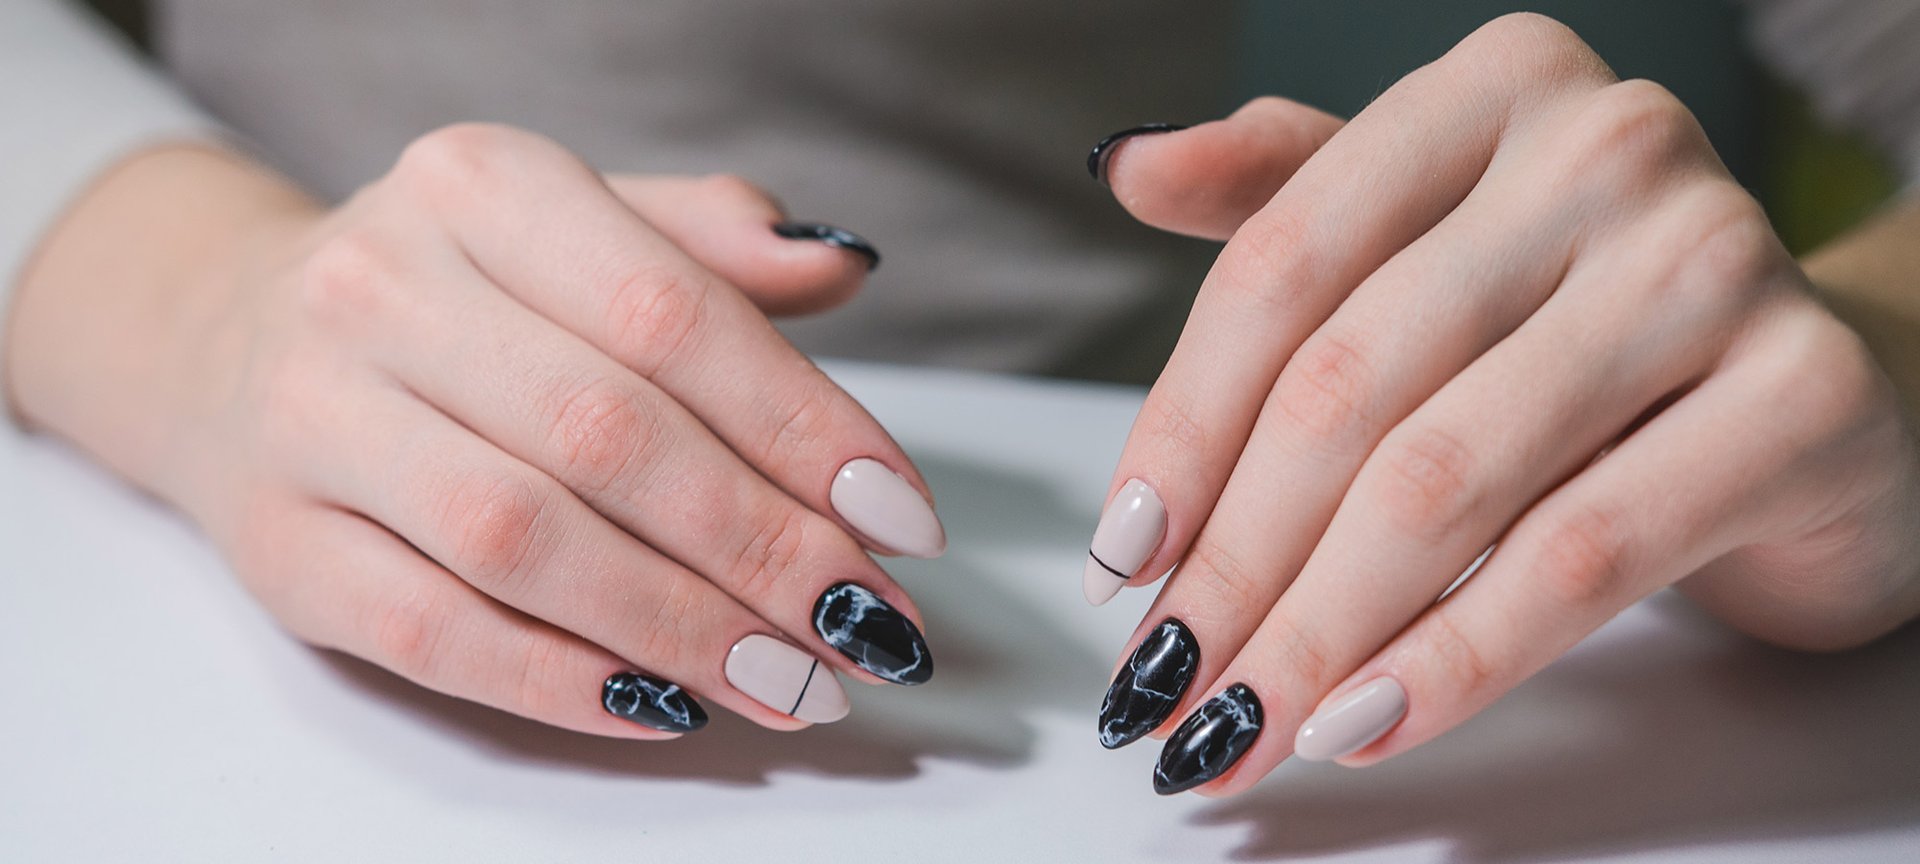
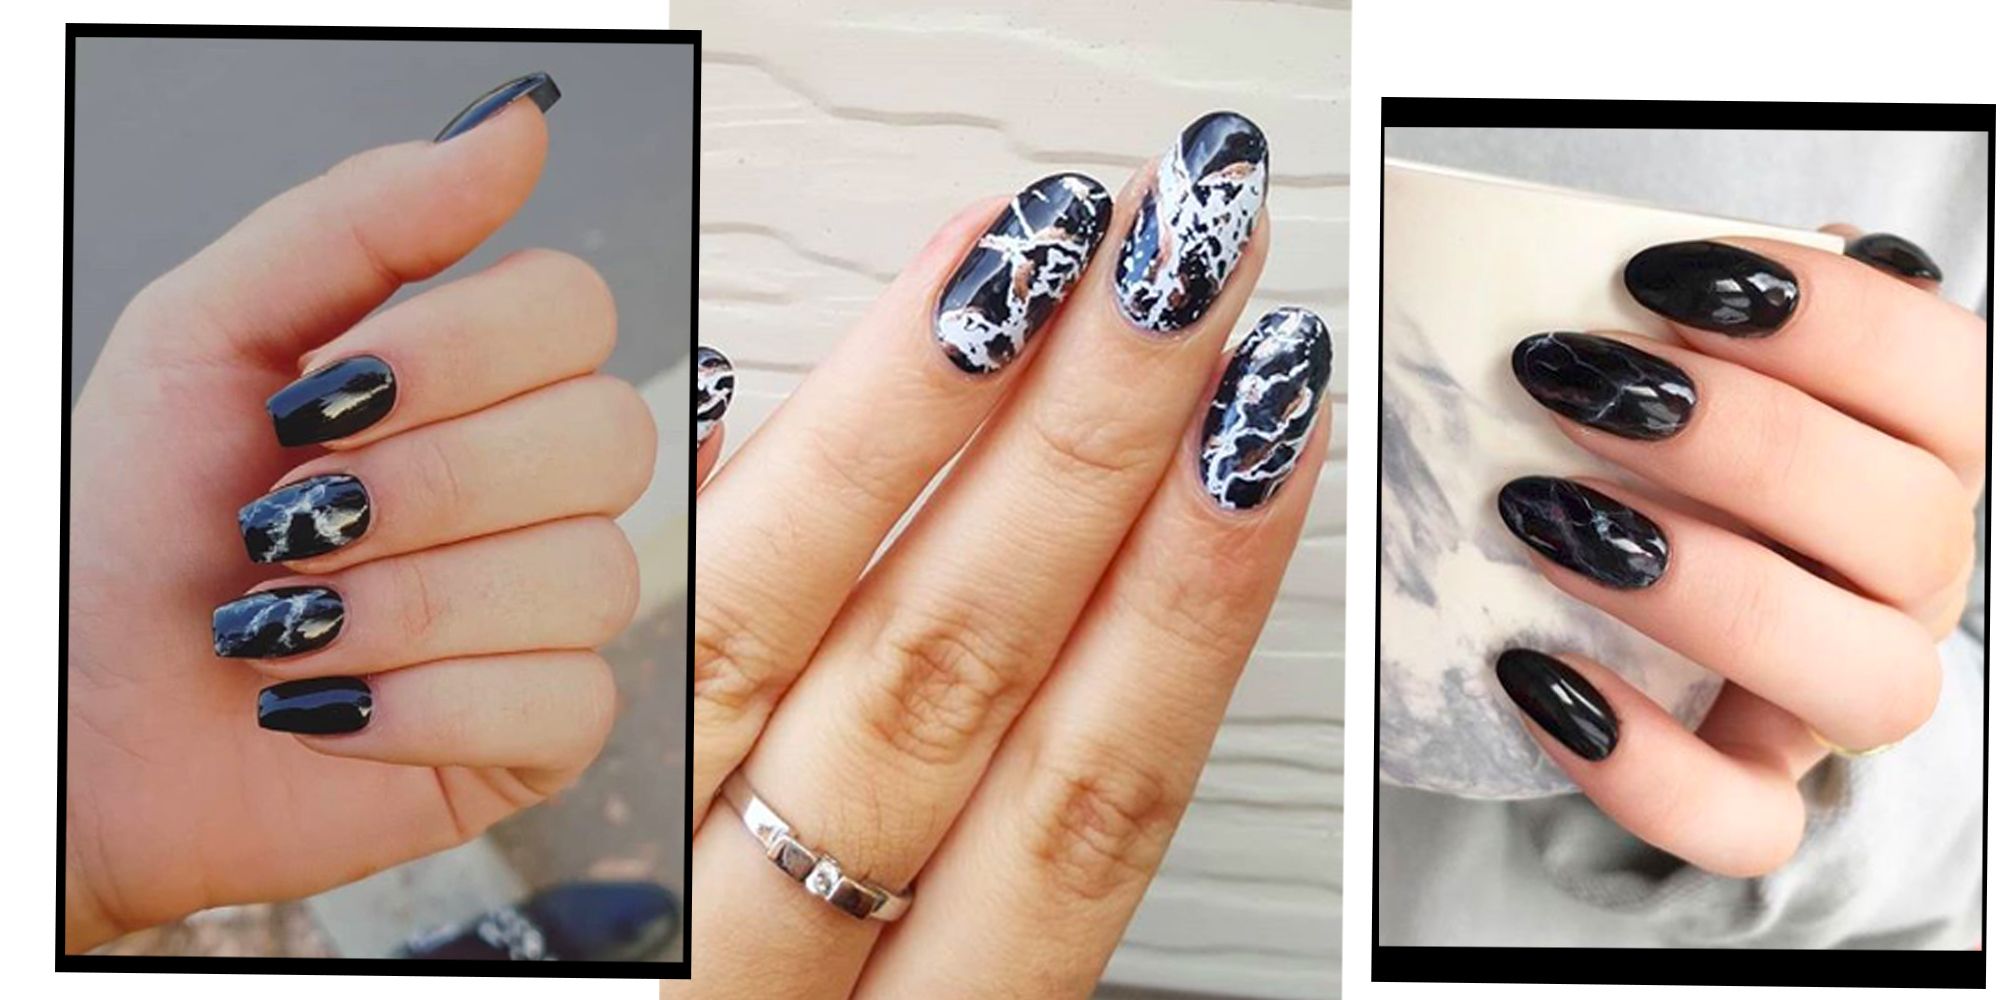
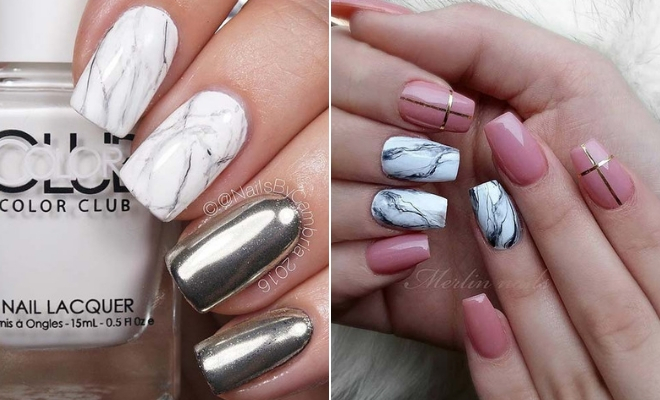
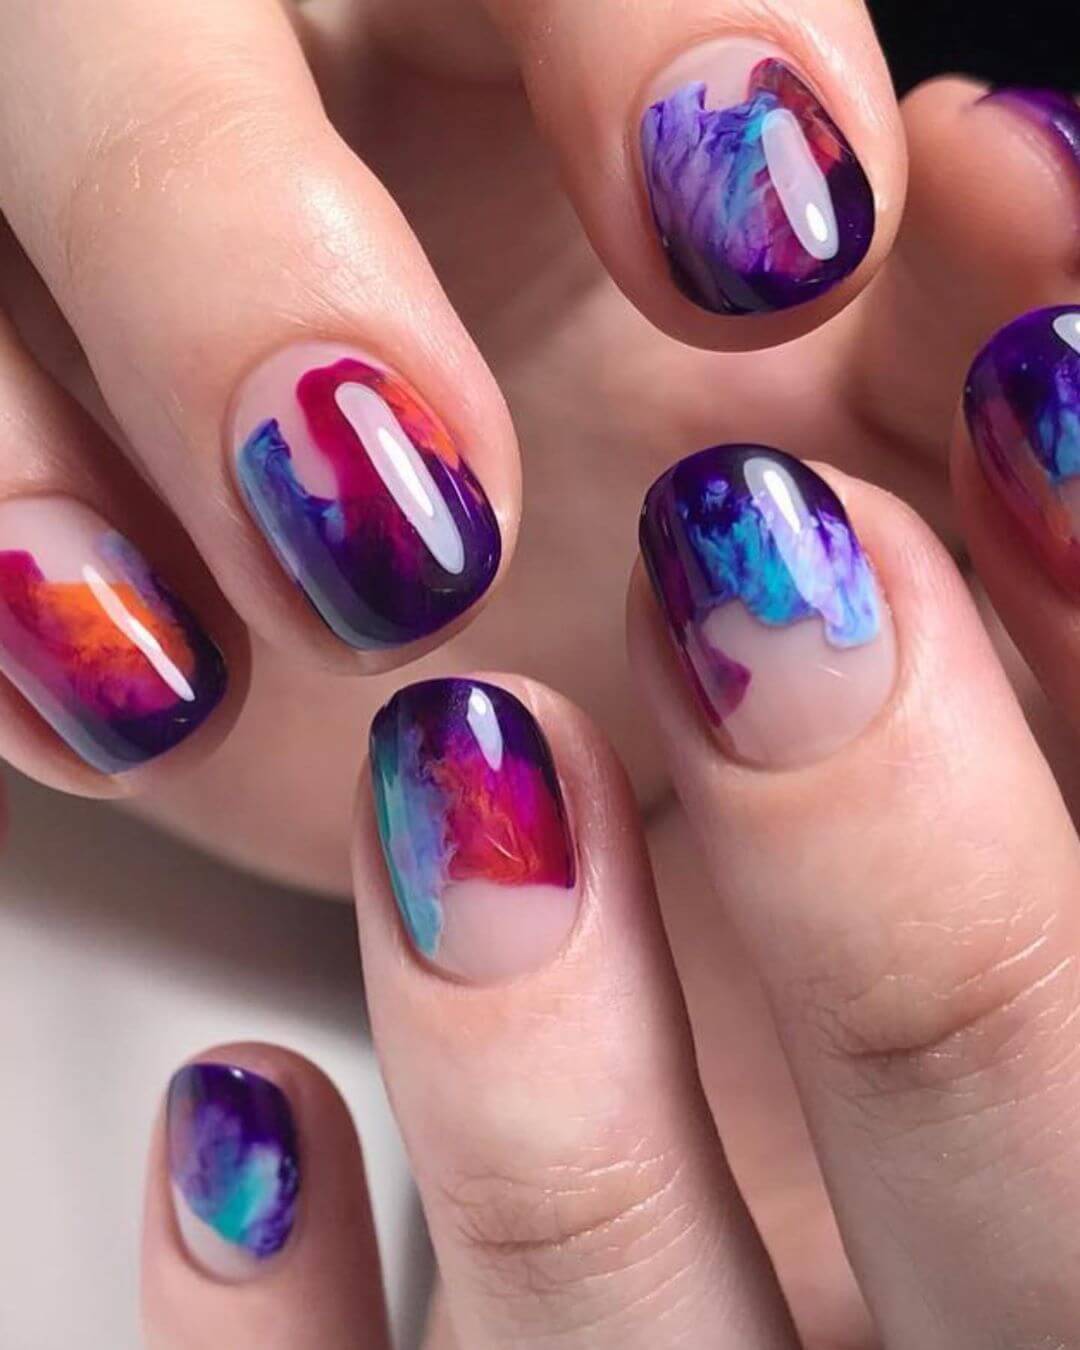
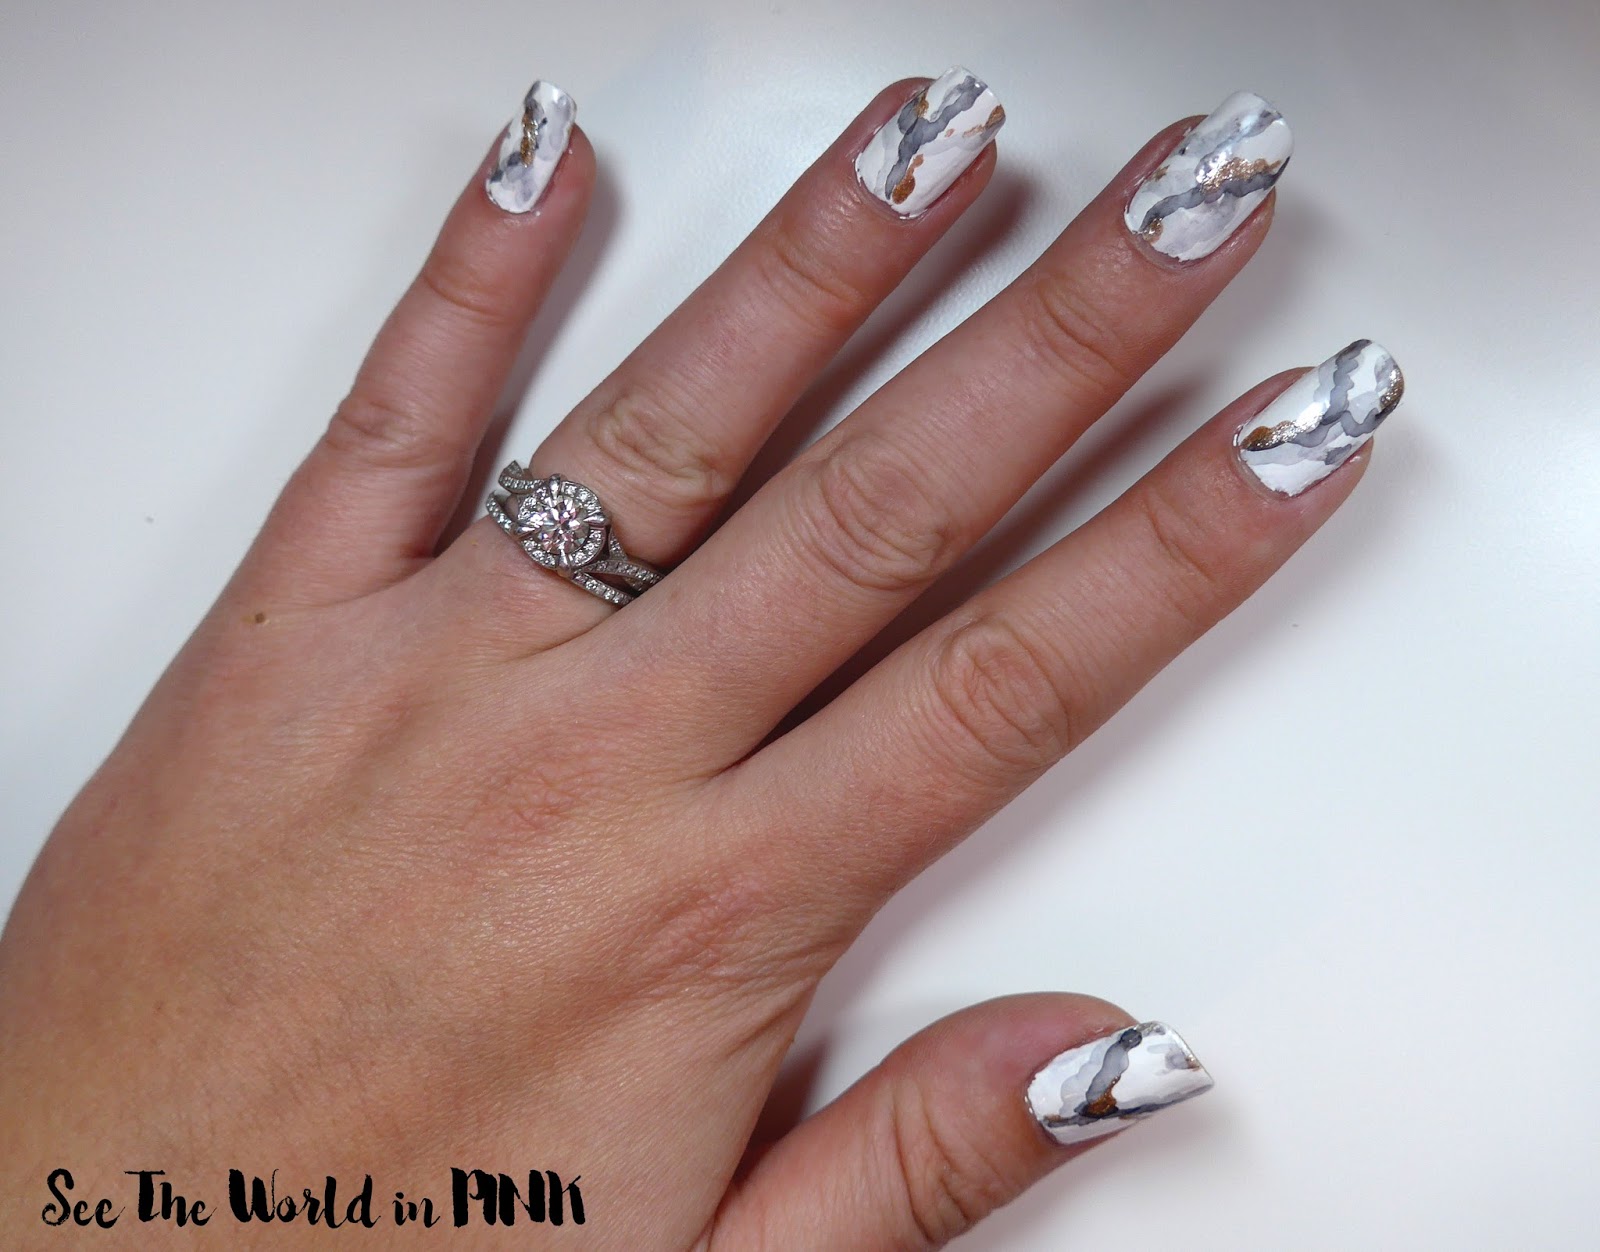
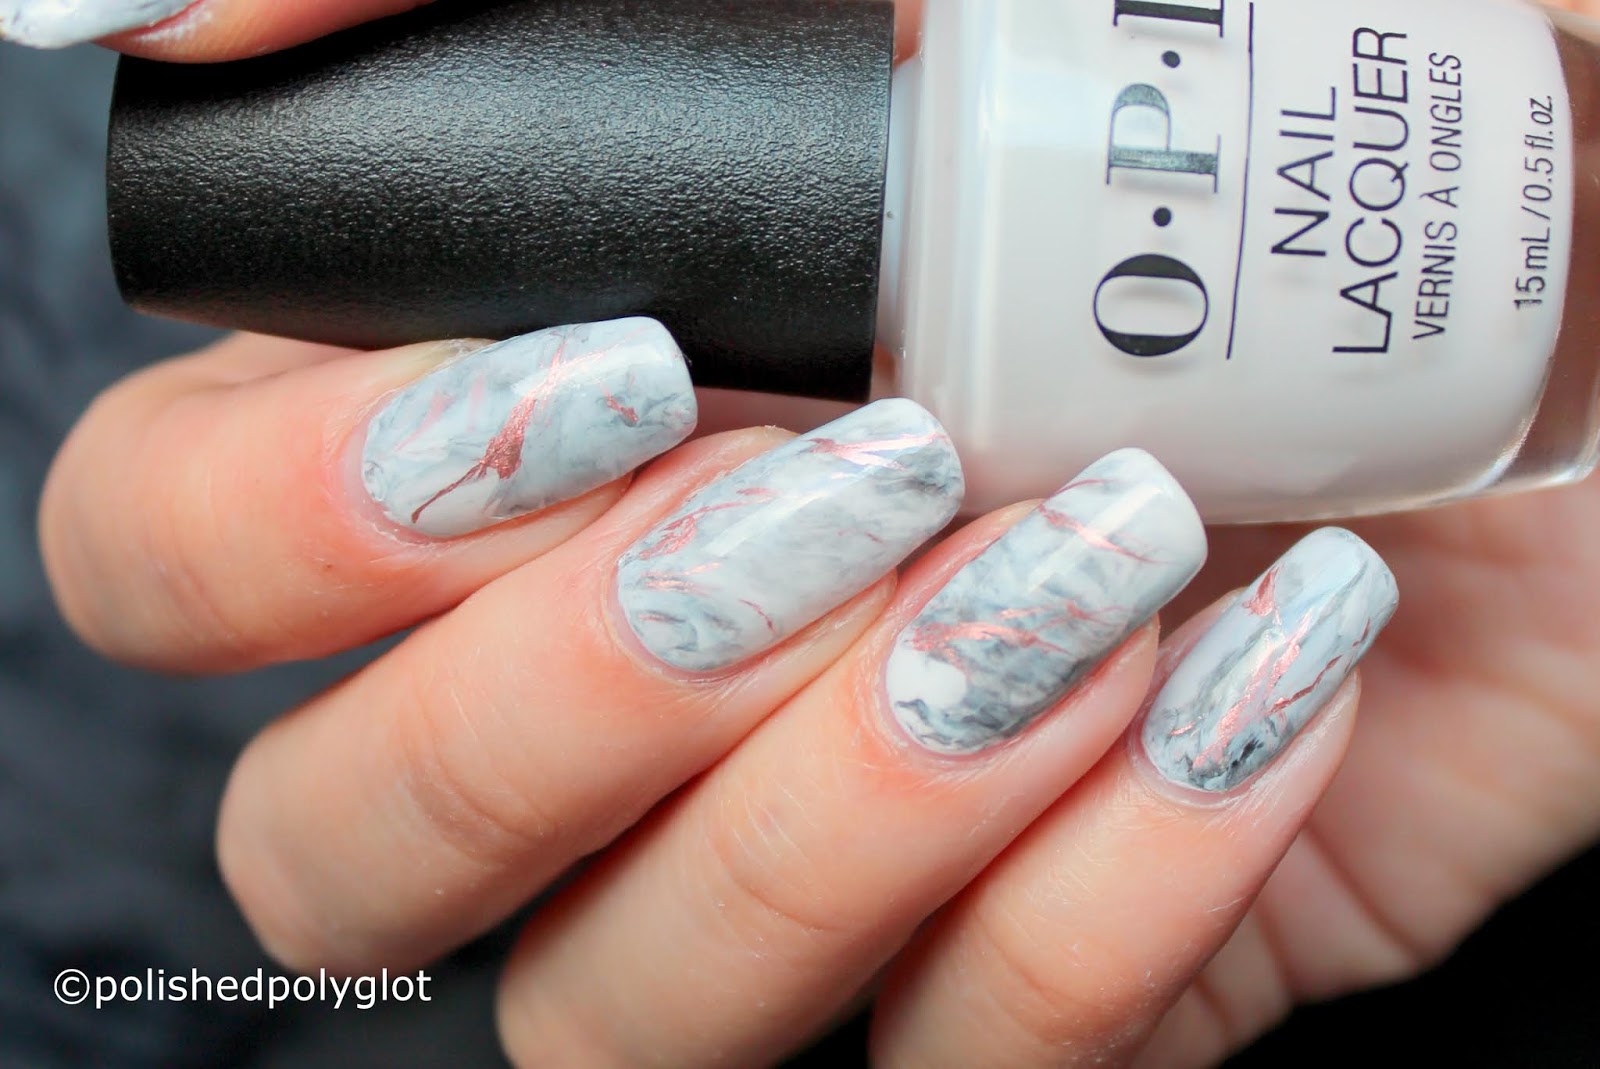
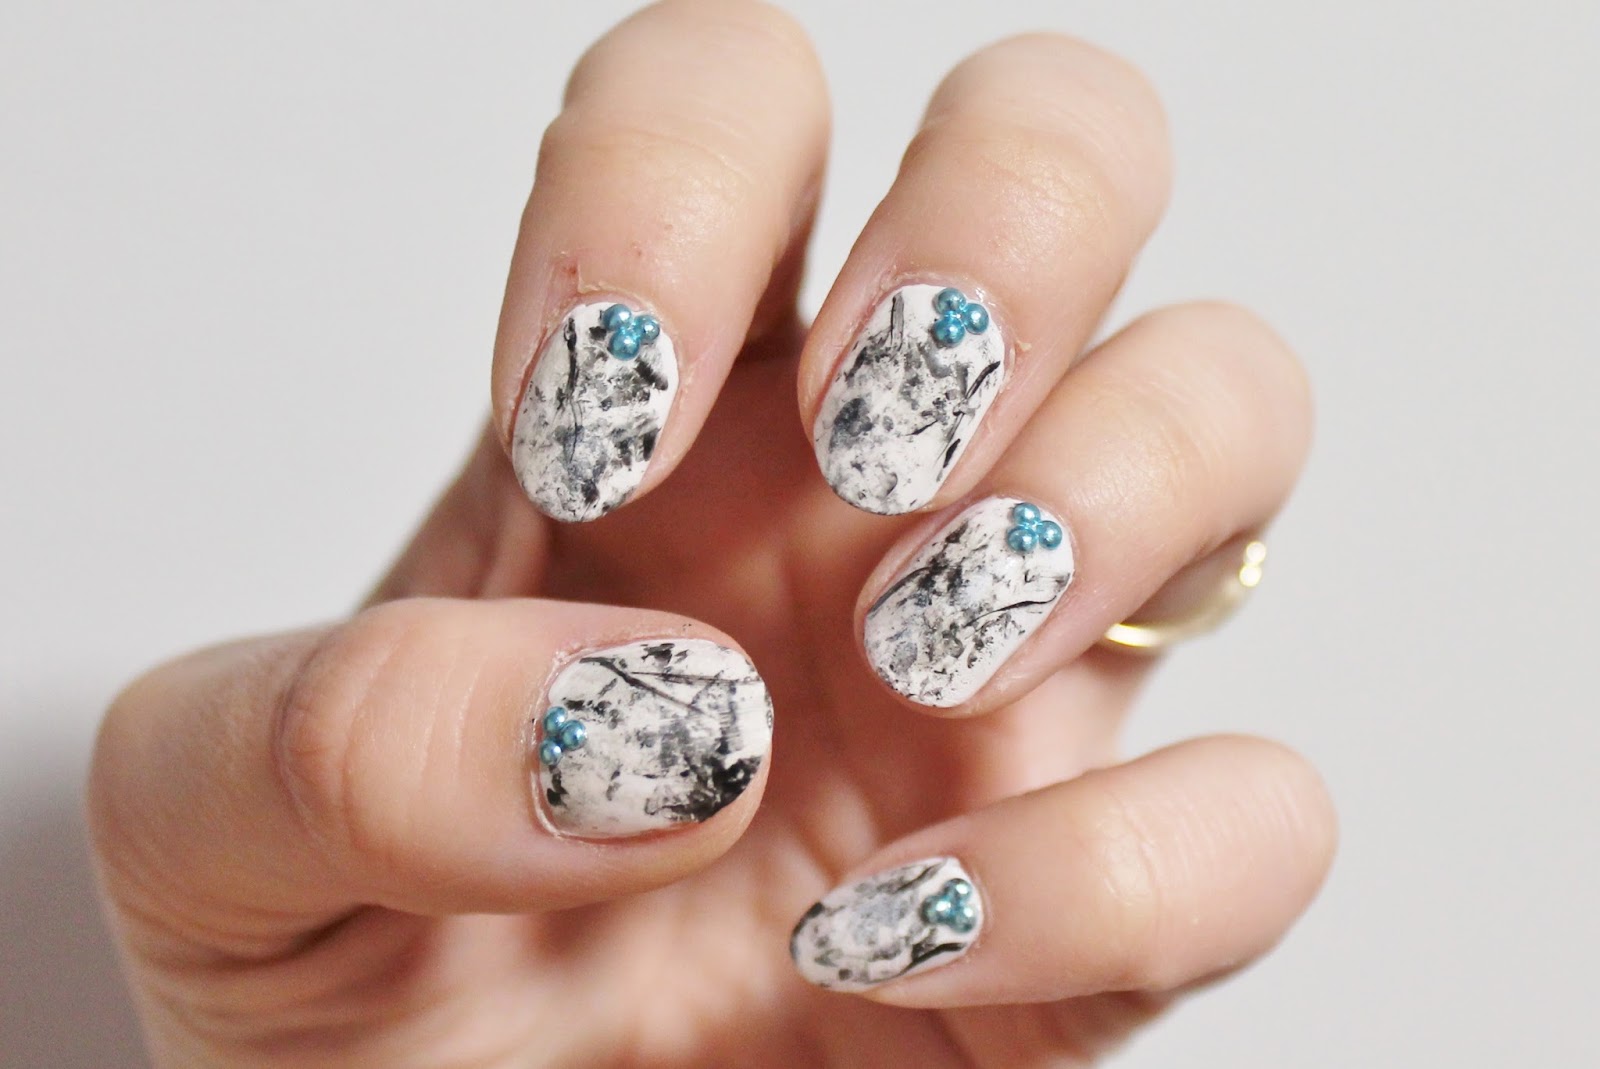
When it comes to marble nail art, the possibilities are endless. And with Gelish products, you can create stunning and intricate designs that will make your nails stand out. Here are some Gelish marble nail art designs to inspire your next manicure. 1. Classic Black and White The classic combination of black and white never goes out of style. For this design, use a black Gelish polish as the base and create a marble effect with white swirls. This design is perfect for a chic and sophisticated look. 2. Pastel Perfection Pastel colors are a must-have for the spring and summer season. Use Gelish pastel shades to create a soft and dreamy marble design on your nails. You can also add some glitter for a touch of sparkle. 3. Rainbow Marble Why settle for one or two colors when you can have a rainbow on your nails? Use a variety of Gelish colors to create a bright and colorful marble design. This design is perfect for those who love a pop of color. 4. Metallic Marble Metallic shades are a great way to add some shine and glam to your nails. Use Gelish metallic polishes to create a marble design with a touch of shimmer. This design is perfect for a night out or special occasion. 5. Ombre Marble Ombre is a popular trend that has made its way into nail art. Create a beautiful ombre marble design using Gelish polishes in different shades of the same color. This design is perfect for a subtle and elegant look. With Gelish, you can create endless marble nail art designs that will have your nails looking stunning and unique. Don't be afraid to get creative and experiment with different colors and techniques.2. Gelish Marble Nail Art Designs
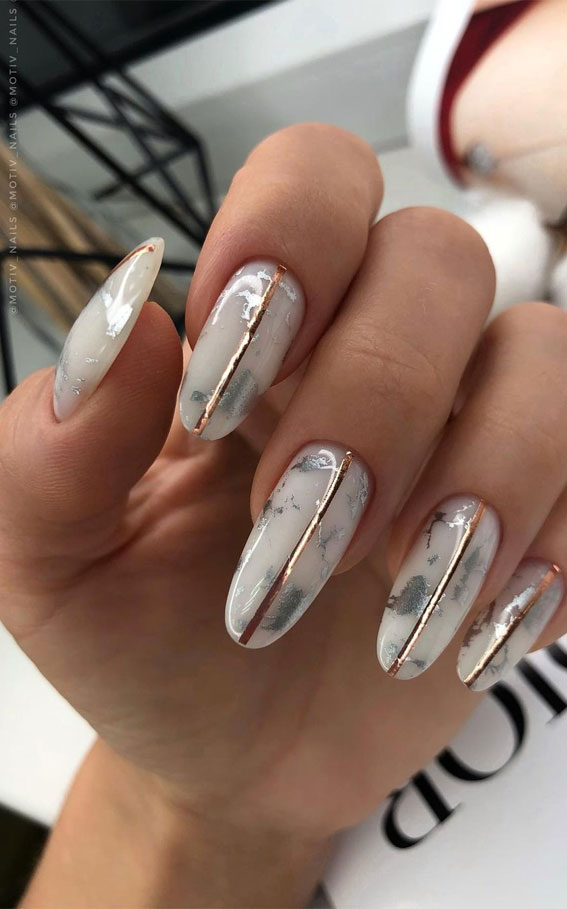

2. Gelish Marble Nail Art Designs


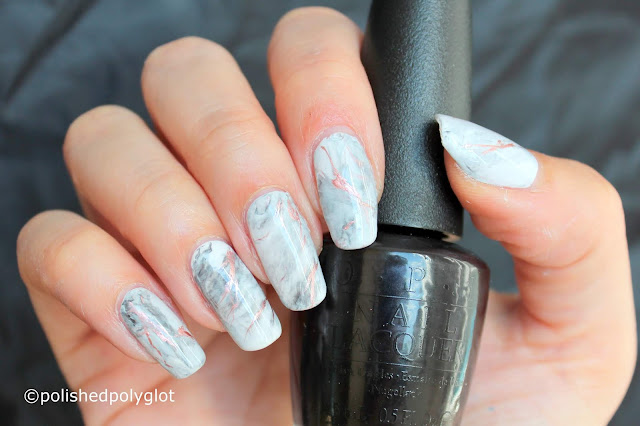
Creating a marble nail art look may seem intimidating, but with Gelish products, it's actually quite simple. Here's a step-by-step guide on how to create a marble nail art look using Gelish. Step 1: Prep Your Nails Start by prepping your nails. Trim and shape your nails, push back your cuticles, and buff the surface of your nails to create a smooth base for the polish. Step 2: Apply Base Coat Apply a thin layer of base coat on your nails and cure it under a LED or UV lamp for the recommended time. This will help the polish adhere better and prevent any staining on your natural nails. Step 3: Choose Your Colors Choose two or more Gelish colors of your choice to create the marble effect. You can also add a neutral base color to peek through the marble design. Step 4: Create the Marble Effect Apply one coat of your base color and cure it under the lamp. Next, apply a few drops of your second color on your nail. Using a small brush, swirl the two colors together to create a marble pattern. You can also add a third color for a more dynamic look. Once you're happy with the design, cure it under the lamp. Step 5: Seal the Design Once the marble design is cured, add a layer of top coat and cure it for the recommended time. This will seal the design and give your nails a glossy finish. And there you have it, a beautiful marble nail art look using Gelish products. With some practice, you'll be able to create stunning marble designs in no time.3. How to Create a Marble Nail Art Look with Gelish


3. How to Create a Marble Nail Art Look with Gelish

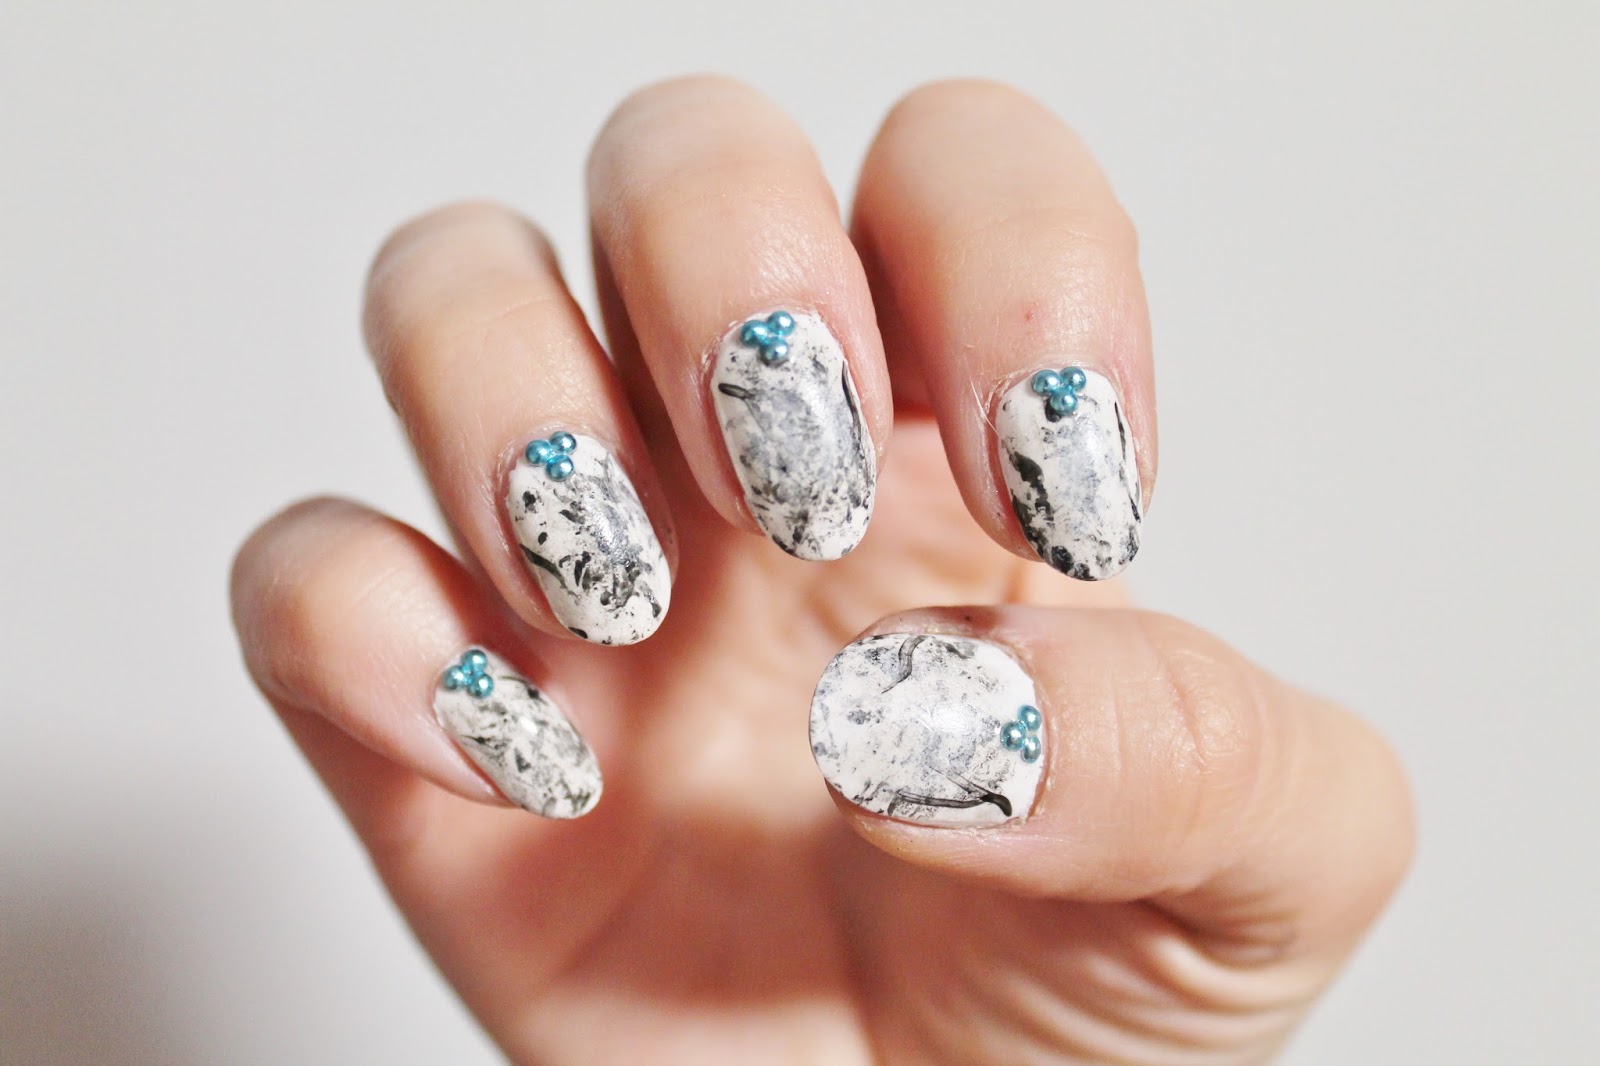
Creating marble nail art with Gelish products may seem like a daunting task, but with this step-by-step guide, you'll be able to achieve a beautiful and unique marble design on your nails. Step 1: Prep Your Nails Start by prepping your nails. Trim and shape your nails, push back your cuticles, and buff the surface of your nails to create a smooth base for the polish. Step 2: Apply Base Coat Apply a thin layer of base coat on your nails and cure it under a LED or UV lamp for the recommended time. This will help the polish adhere better and prevent any staining on your natural nails. Step 3: Choose Your Colors Choose two or more Gelish colors of your choice to create the marble effect. You can also add a neutral base color to peek through the marble design. Step 4: Create the Marble Effect Apply one coat of your base color and cure it under the lamp. Next, apply a few drops of your second color on your nail. Using a small brush, swirl the two colors together to create a marble pattern. You can also add a third color for a more dynamic look. Once you're happy with the design, cure it under the lamp. Step 5: Add Finishing Touches Once the marble design is cured, you can add some extra touches to make it stand out. You can add some glitter or rhinestones, or use a fine brush to create intricate details on the design. Once you're satisfied, add a layer of top coat and cure it under the lamp. And there you have it, a stunning marble nail art look created step-by-step with Gelish products. Don't be afraid to get creative and experiment with different colors and techniques to create your own unique marble designs.4. Gelish Marble Nail Art Step by Step


4. Gelish Marble Nail Art Step by Step
Gelish is known for its gel nail polishes, but they also have a dip powder system that allows you to achieve the marble nail art look with ease. Here's how you can create marble nail art with Gelish dip powder. Step 1: Prep Your Nails Start by prepping your nails. Trim and shape your nails, push back your cuticles, and buff the surface of your nails to create a smooth base for the dip powder. Step 2: Apply Base Coat Apply a thin layer of base coat on your nails and dip them into the Gelish dip powder of your choice. Tap off any excess powder and use a brush to remove any powder that may have stuck to your skin. Step 3: Repeat the Process Repeat this process on all your nails and cure them under a LED or UV lamp. You can also add more layers of dip powder for a more opaque and vibrant color. Step 4: Create the Marble Effect Now, it's time to create the marble effect. Take a different dip powder color and sprinkle it on your nails. Use a brush to gently swirl the colors together to create a marble effect. Once you're happy with the design, cure it under the lamp. Step 5: Seal the Design Add a layer of top coat and cure it for the recommended time. This will seal the design and give your nails a glossy finish. And there you have it, gorgeous marble nails achieved with Gelish dip powder. This system makes it easy to create stunning marble nail art without the hassle of gel polish.5. Marble Nail Art with Gelish Dip Powder

5. Marble Nail Art with Gelish Dip Powder

Gelish offers a wide range of products that make creating marble nail art a breeze. Here are some must-have Gelish products for achieving the perfect marble look. 1. Gelish Base Coat The Gelish base coat is essential for creating a smooth and long-lasting base for your marble design. 2. Gelish Colors Gelish offers a variety of colors to choose from to create your marble design. From bold and bright shades to soft pastels, there's a color for everyone. 3. Gelish Top Coat The Gelish top coat not only gives your nails a glossy finish but also seals and protects your marble design. 4. Gelish Dip Powder If you prefer using the dip powder system, Gelish offers a range of vibrant colors to create your marble design. 5. Small Brush A small brush is essential for creating the marble effect on your nails. Look for a fine brush with soft bristles for more precise swirls. With these Gelish products, you'll have everything you need to create stunning and long-lasting marble nail art looks.6. Gelish Marble Nail Art Products


6. Gelish Marble Nail Art Products
Choosing the right colors is crucial for creating beautiful marble nail art. Here are some Gelish colors that are perfect for creating gorgeous marble designs. 1. Tickle My Heart This soft pink shade is perfect for a subtle and feminine marble look. 2. Black Shadow For a classic and sophisticated look, use this black shade as your base color for a marble design. 3. Gossip Girl This bright and bold pink shade is perfect for creating a fun and vibrant marble design. 4. All That Glitters Add some sparkle to your marble design with this glittery silver shade. 5. Sheek White For a clean and crisp marble design, use this white shade as your base color. These Gelish colors are just a few of many options that are perfect for creating stunning marble nail art looks. Get creative and mix and match different shades to create your own unique designs.7. Marble Nail Art Gelish Colors

7. Marble Nail Art Gelish Colors

There are many techniques you can use to create marble nail art with Gelish products. Here are some popular techniques that can help you achieve the perfect marble look. 1. Swirling This is the most common technique for creating marble nail art. Use a small brush to swirl the colors together to create a marble pattern. 2. Water Marbling This technique involves dropping different colors of polish in a cup of water and using a toothpick to create a marble pattern. You can then dip your nails into the water to transfer the design onto them. 3. Dragging This technique involves dragging a toothpick or small brush through the wet polish to create a marble effect. You can experiment with different dragging patterns to achieve unique designs. With these techniques, you'll be able to create beautiful marble nail art looks using Gelish products. Don't be afraid to try different techniques to find the one that works best for you.8. Gelish Marble Nail Art Techniques


8. Gelish Marble Nail Art Techniques
In addition to Gelish products, there are a few supplies that can make creating marble nail art easier and more efficient. Here are some essential supplies for marble nail art with Gelish. 1. LED or UV Lamp A lamp is essential for curing your gel polish and achieving long-lasting results. Make sure to invest in a good quality lamp for best results. 2. Fine Point Brush A fine point brush is perfect for creating intricate details and swirls in your marble design. 3. Toothpicks Toothpicks can come in handy for creating marble designs, especially when using the water marbling technique. 4. Nail Polish Remover and Cotton Pads In case of any mistakes, keep some nail polish remover and cotton pads on hand to clean up any excess polish. 5. Top Coat A good top coat is essential for sealing and protecting your marble design. Look for a high-quality top coat that won't chip or peel easily.9. Marble Nail Art Gelish Supplies

9. Marble Nail Art Gelish Supplies
The beauty of marble nail art gelish
Transform your nails into works of art
 When it comes to nail art, there are endless possibilities and techniques to achieve unique and stunning designs. One particular trend that has taken the beauty world by storm is
marble nail art gelish
. This technique involves creating a marble-like effect on your nails by layering different colors of gel polish. Not only does it look mesmerizing, but it also lasts longer compared to traditional nail polish. Let's dive deeper into the world of marble nail art gelish and discover its appeal and techniques.
When it comes to nail art, there are endless possibilities and techniques to achieve unique and stunning designs. One particular trend that has taken the beauty world by storm is
marble nail art gelish
. This technique involves creating a marble-like effect on your nails by layering different colors of gel polish. Not only does it look mesmerizing, but it also lasts longer compared to traditional nail polish. Let's dive deeper into the world of marble nail art gelish and discover its appeal and techniques.
Why marble nail art gelish is a must-try
 The
marble nail art gelish
trend has gained popularity for many reasons. For one, it offers a unique and sophisticated look that instantly elevates your overall appearance. The swirls and patterns created by the gel polish mimic the natural beauty of marble, making it a perfect choice for those who love a touch of elegance. Another advantage of this technique is its durability. Gel polish is known for its long-lasting formula, and when combined with the marble effect, you can enjoy beautiful nails for weeks without the need for touch-ups.
The
marble nail art gelish
trend has gained popularity for many reasons. For one, it offers a unique and sophisticated look that instantly elevates your overall appearance. The swirls and patterns created by the gel polish mimic the natural beauty of marble, making it a perfect choice for those who love a touch of elegance. Another advantage of this technique is its durability. Gel polish is known for its long-lasting formula, and when combined with the marble effect, you can enjoy beautiful nails for weeks without the need for touch-ups.
How to achieve the perfect marble nail art gelish
 Creating marble nail art gelish may seem intimidating at first, but with the right tools and techniques, it can be easily achieved at home or by a professional nail technician. The key is to have a steady hand and a good sense of color combination. You can use a variety of tools such as a thin brush, toothpick, or even a plastic bag to create the marble effect. It's important to choose colors that complement each other and blend well. Don't be afraid to experiment with different shades and designs to find the perfect marble look for you.
Final thoughts
 In conclusion,
marble nail art gelish
is a must-try trend for those looking to add a touch of sophistication and creativity to their nails. With its unique and mesmerizing patterns, long-lasting formula, and endless color combinations, it's no wonder why it has become a favorite among nail enthusiasts. Whether you're a beginner or a pro, give this trend a try and see the beauty and elegance it can add to your nails.
In conclusion,
marble nail art gelish
is a must-try trend for those looking to add a touch of sophistication and creativity to their nails. With its unique and mesmerizing patterns, long-lasting formula, and endless color combinations, it's no wonder why it has become a favorite among nail enthusiasts. Whether you're a beginner or a pro, give this trend a try and see the beauty and elegance it can add to your nails.


