Are you a fan of the Marvel Universe? Show your love for your favorite superheroes with these easy and fun nail art designs! With just a few simple steps, you can have a unique and eye-catching look that will impress all your friends. To begin, gather your nail polish in the colors of your favorite Marvel characters. You can also use nail art tools such as a dotting tool or nail tape for more intricate designs. Start by painting your nails with a base coat to protect them and ensure your design lasts longer. Then, let's get started on our first Marvel nail art tutorial!1. "Easy Marvel Nail Art Tutorial"


1. "Easy Marvel Nail Art Tutorial"


For our first design, we will be creating a Spider-Man inspired look. Begin by painting your nails with a red base color. Once it's dry, use a thin brush to create a web pattern on each nail using white nail polish. Next, use a dotting tool to create black dots on the web design to represent Spider-Man's suit. Finish off the look with a clear top coat to seal in your design and add shine. Voila! You now have a Spider-Man inspired manicure that will surely make you feel like a superhero.2. "Step-by-Step Marvel Nail Art Tutorial"


2. "Step-by-Step Marvel Nail Art Tutorial"


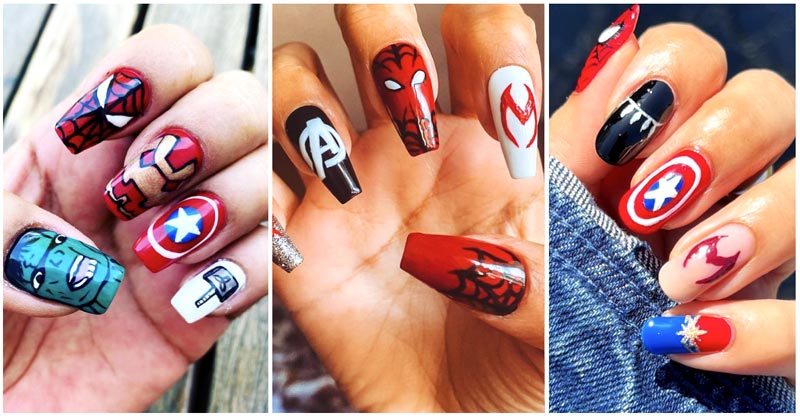
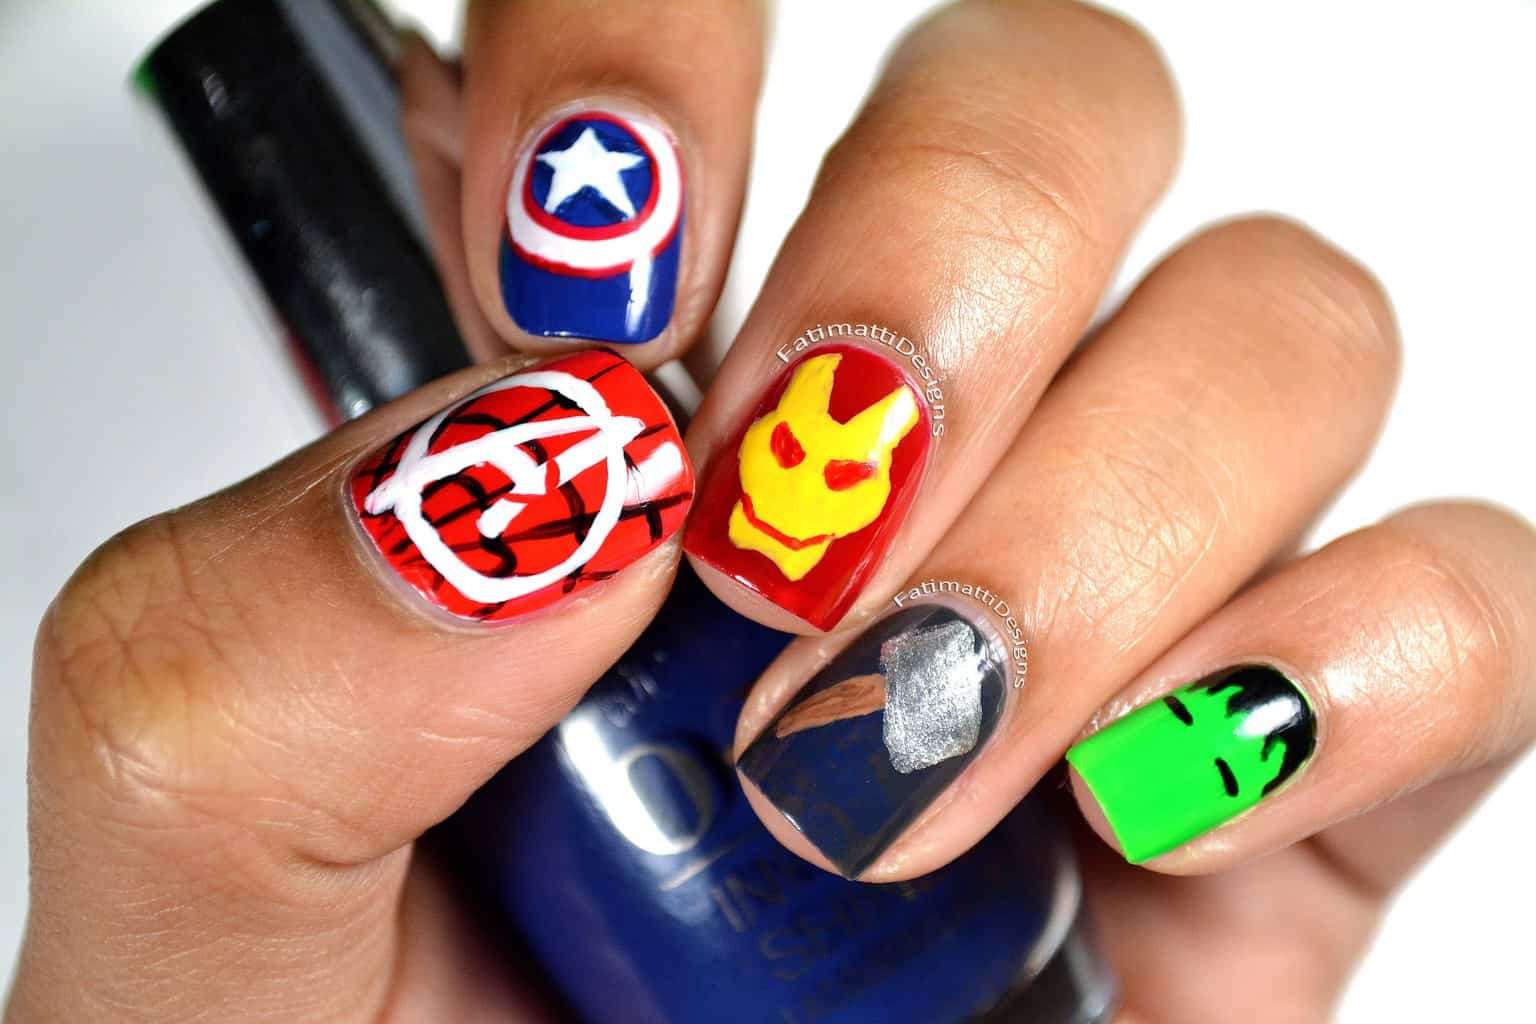
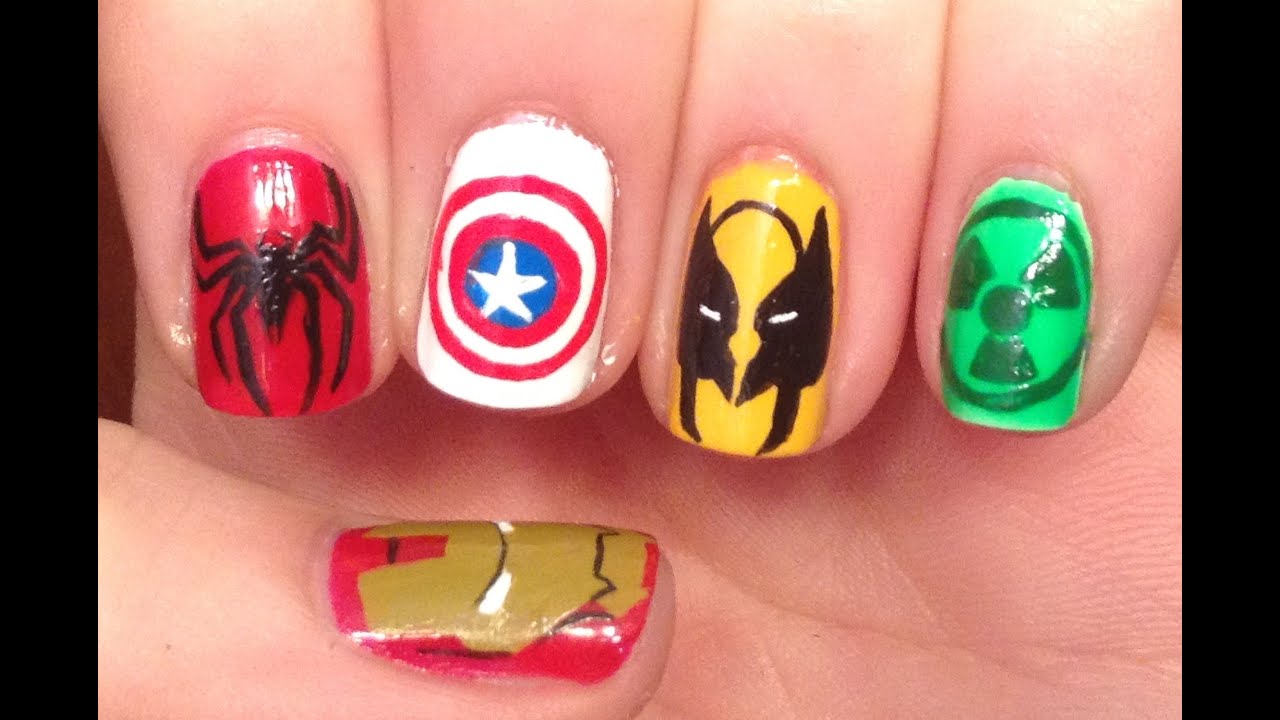
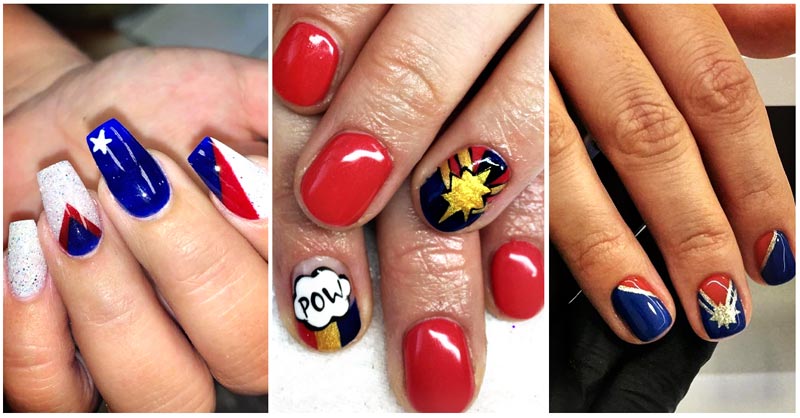
If you're a fan of the Avengers, this next design is for you. Start by painting your nails with a blue base color. Then, use nail tape to create a diagonal line on each nail using red nail polish. Once the red polish is dry, use a thin brush to create a white star on each nail. You can also use a star-shaped nail decal for a more precise design. Finish off with a clear top coat to seal in your manicure. Now you have a Captain America inspired look that is perfect for any Marvel fan!3. "DIY Marvel Nail Art Tutorial"

3. "DIY Marvel Nail Art Tutorial"
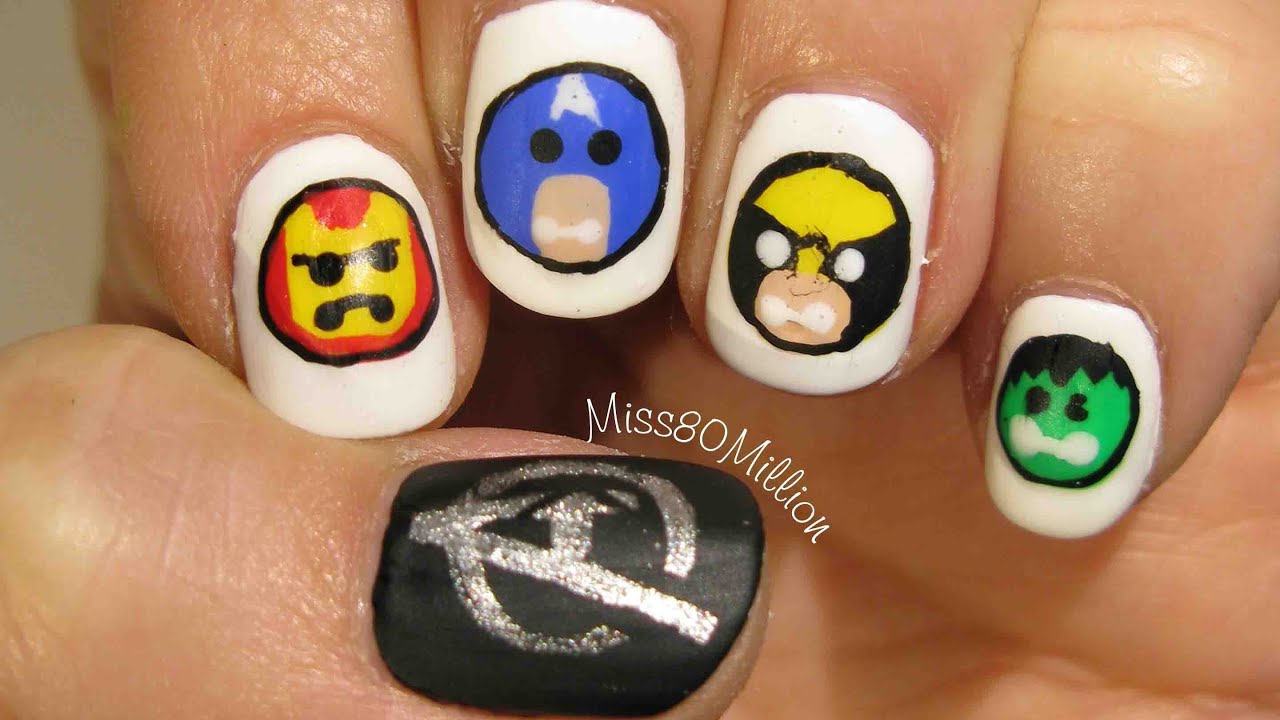
For this next design, we will be paying tribute to the entire Avengers team. Start by painting your nails with a black base color. Then, use a thin brush to create a gold lightning bolt on each nail. Next, use a dotting tool to create red dots on the lightning bolt to represent Iron Man's suit. You can also add green dots for the Hulk, blue dots for Captain America, and yellow dots for Thor. Finish off with a clear top coat and you now have a manicure that pays homage to the Avengers team!4. "Avengers Nail Art Tutorial"


4. "Avengers Nail Art Tutorial"


Next up, we have a Captain America inspired design. Start by painting your nails with a blue base color. Then, use nail tape to create a diagonal line on each nail using white nail polish. Next, use a thin brush to create a red star on each nail. You can also use a star-shaped nail decal for a more precise design. Finish off with a clear top coat to seal in your manicure. This simple yet striking design is perfect for any Captain America fan.5. "Captain America Nail Art Tutorial"

5. "Captain America Nail Art Tutorial"


For this Iron Man inspired design, start by painting your nails with a red base color. Then, use nail tape to create a diagonal line on each nail using gold nail polish. Next, use a thin brush to create a black arc reactor on each nail. Finish off with a clear top coat to seal in your design. Now you have a manicure that will make you feel like a genius billionaire playboy philanthropist just like Iron Man.6. "Iron Man Nail Art Tutorial"


6. "Iron Man Nail Art Tutorial"


Channel the power of Thor with this next design. Start by painting your nails with a silver base color. Then, use nail tape to create a diagonal line on each nail using blue nail polish. Next, use a thin brush to create a gold hammer on each nail. You can also use a hammer-shaped nail decal for a more precise design. Finish off with a clear top coat to seal in your manicure. This design is perfect for any Thor fan who wants to feel like a powerful god of thunder.7. "Thor Nail Art Tutorial"


7. "Thor Nail Art Tutorial"

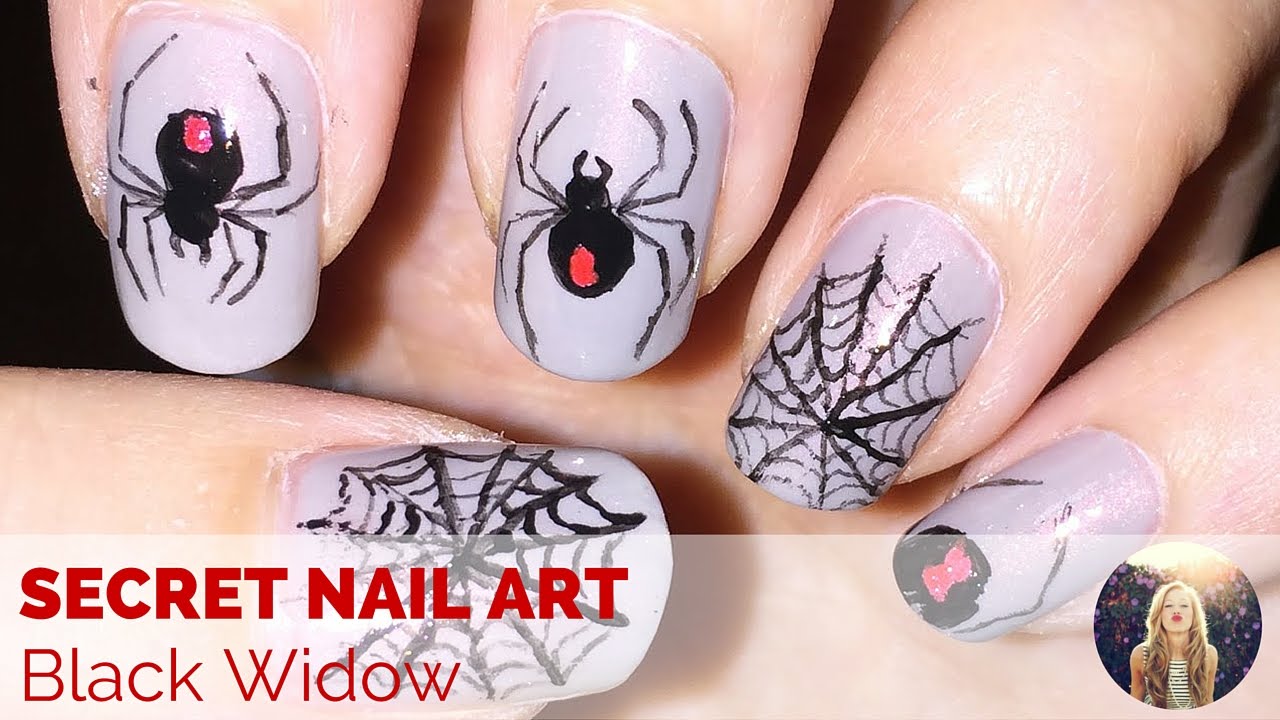
For this Black Widow inspired design, start by painting your nails with a black base color. Then, use a thin brush to create a red hourglass on each nail. Next, use a dotting tool to create white dots on the hourglass design. Finish off with a clear top coat to seal in your design. This sleek and stylish design is perfect for any Black Widow fan.8. "Black Widow Nail Art Tutorial"


8. "Black Widow Nail Art Tutorial"


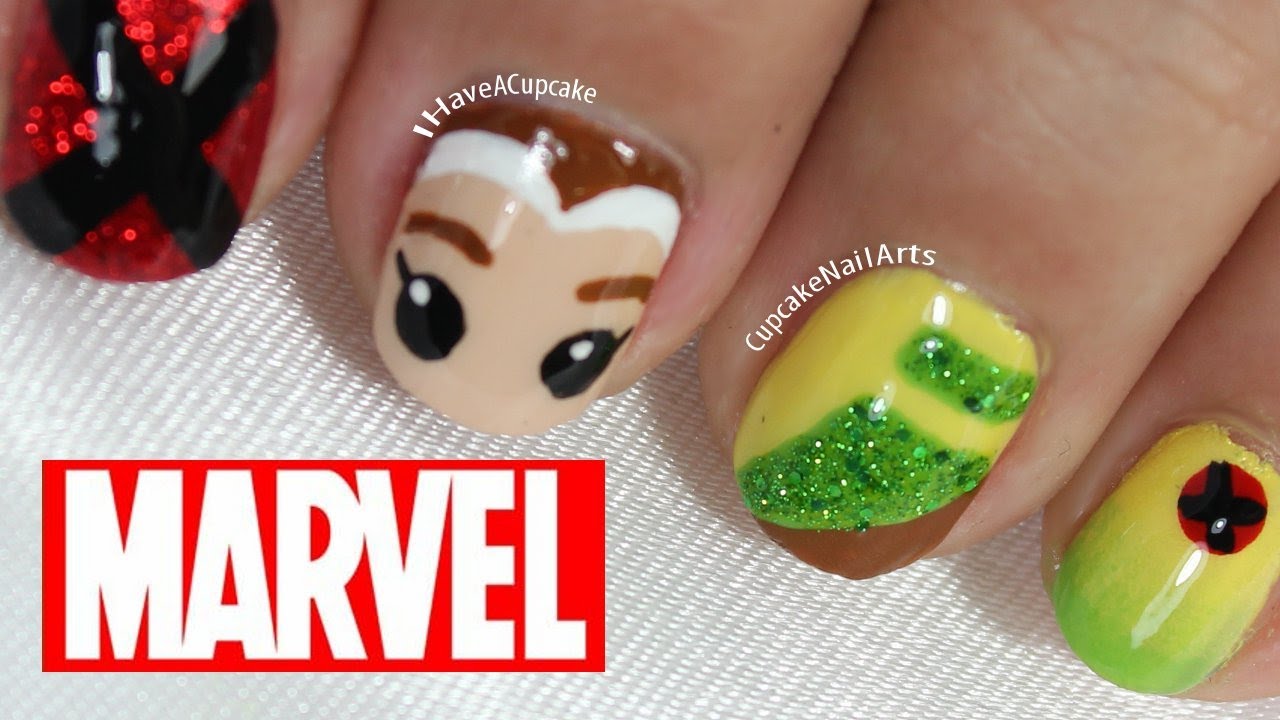
For this Spider-Man inspired design, start by painting your nails with a blue base color. Then, use a thin brush to create a red spider on each nail. Next, use a dotting tool to create black dots on the spider design to represent Spider-Man's suit. Finish off with a clear top coat to seal in your design. This design is perfect for any Spider-Man fan who wants a simple yet striking look.9. "Spider-Man Nail Art Tutorial"


9. "Spider-Man Nail Art Tutorial"


Last but not least, we have a Hulk inspired design. Start by painting your nails with a green base color. Then, use a thin brush to create a purple fist on each nail. Next, use a dotting tool to create white dots on the fist design to represent Hulk's ripped shorts. Finish off with a clear top coat to seal in your design. This fun and playful design is perfect for any Hulk fan who wants to unleash their inner rage. Now you have 10 Marvel nail art tutorials to try out and show off your love for the superhero universe. Don't be afraid to get creative and switch up the colors and designs to make them your own. Have fun and happy painting!10. "Hulk Nail Art Tutorial"


10. "Hulk Nail Art Tutorial"


Transform Your Nails with Marvel-Inspired Nail Art: A Step-by-Step Tutorial

Unleash Your Inner Superhero
 Are you a fan of the Marvel universe? Do you want to show off your love for your favorite superheroes in a unique and creative way? Look no further than your own fingertips. With this Marvel nail art tutorial, you can transform your nails into works of art that will make you feel like a superhero every time you look at them.
Gather Your Supplies
 Before we dive into the tutorial, make sure you have all the necessary supplies. You will need a base coat, top coat, white nail polish, black nail polish, and red, blue, yellow, and green nail polish. Additionally, you will need a thin nail art brush, a dotting tool, and a toothpick or small brush for clean-up.
Step 1: Apply the Base Coat
 Start by applying a layer of base coat to your nails. This will create a smooth and even surface for your nail polish to adhere to and help your manicure last longer.
Step 2: Paint Your Nails White
 Using the white nail polish, paint all of your nails except for your ring finger. This will be your accent nail, which we will come back to later. Make sure to let the white polish dry completely before moving on to the next step.
Step 3: Create the Marvel Logo
 Using the thin nail art brush and black nail polish, carefully draw a small circle in the center of your ring finger. Then, create the iconic "M" shape by drawing two diagonal lines from the top and bottom of the circle. Fill in the "M" with black nail polish.
Step 4: Add Colorful Dots
 Using the dotting tool, create a row of dots in red, blue, yellow, and green above the "M" on your ring finger. This will represent the colors of the Marvel logo. Make sure to clean your dotting tool between each color.
Step 5: Add Details
 Using the thin nail art brush and black nail polish, add details to the Marvel logo such as lines and dots. You can also add a thin white outline around the logo to make it stand out more.
Step 6: Complete Your Accent Nail
 For your accent nail, use the same colors you used for the dots on your ring finger to create a colorful gradient. You can do this by applying a small amount of each color onto a piece of foil or a plastic bag and blending them together with a toothpick or small brush. Then, use the dotting tool to create a splatter effect on your nail.
Step 7: Apply Top Coat
 Once your nails are completely dry, apply a layer of top coat to seal in your design and add shine. This will also help your nail art last longer.
Congratulations, you now have Marvel-inspired nails that are sure to make a statement. Wear them to the next movie premiere or comic convention and show off your inner superhero. Have fun experimenting with different designs and characters from the Marvel universe. The possibilities are endless!
Once your nails are completely dry, apply a layer of top coat to seal in your design and add shine. This will also help your nail art last longer.
Congratulations, you now have Marvel-inspired nails that are sure to make a statement. Wear them to the next movie premiere or comic convention and show off your inner superhero. Have fun experimenting with different designs and characters from the Marvel universe. The possibilities are endless!


