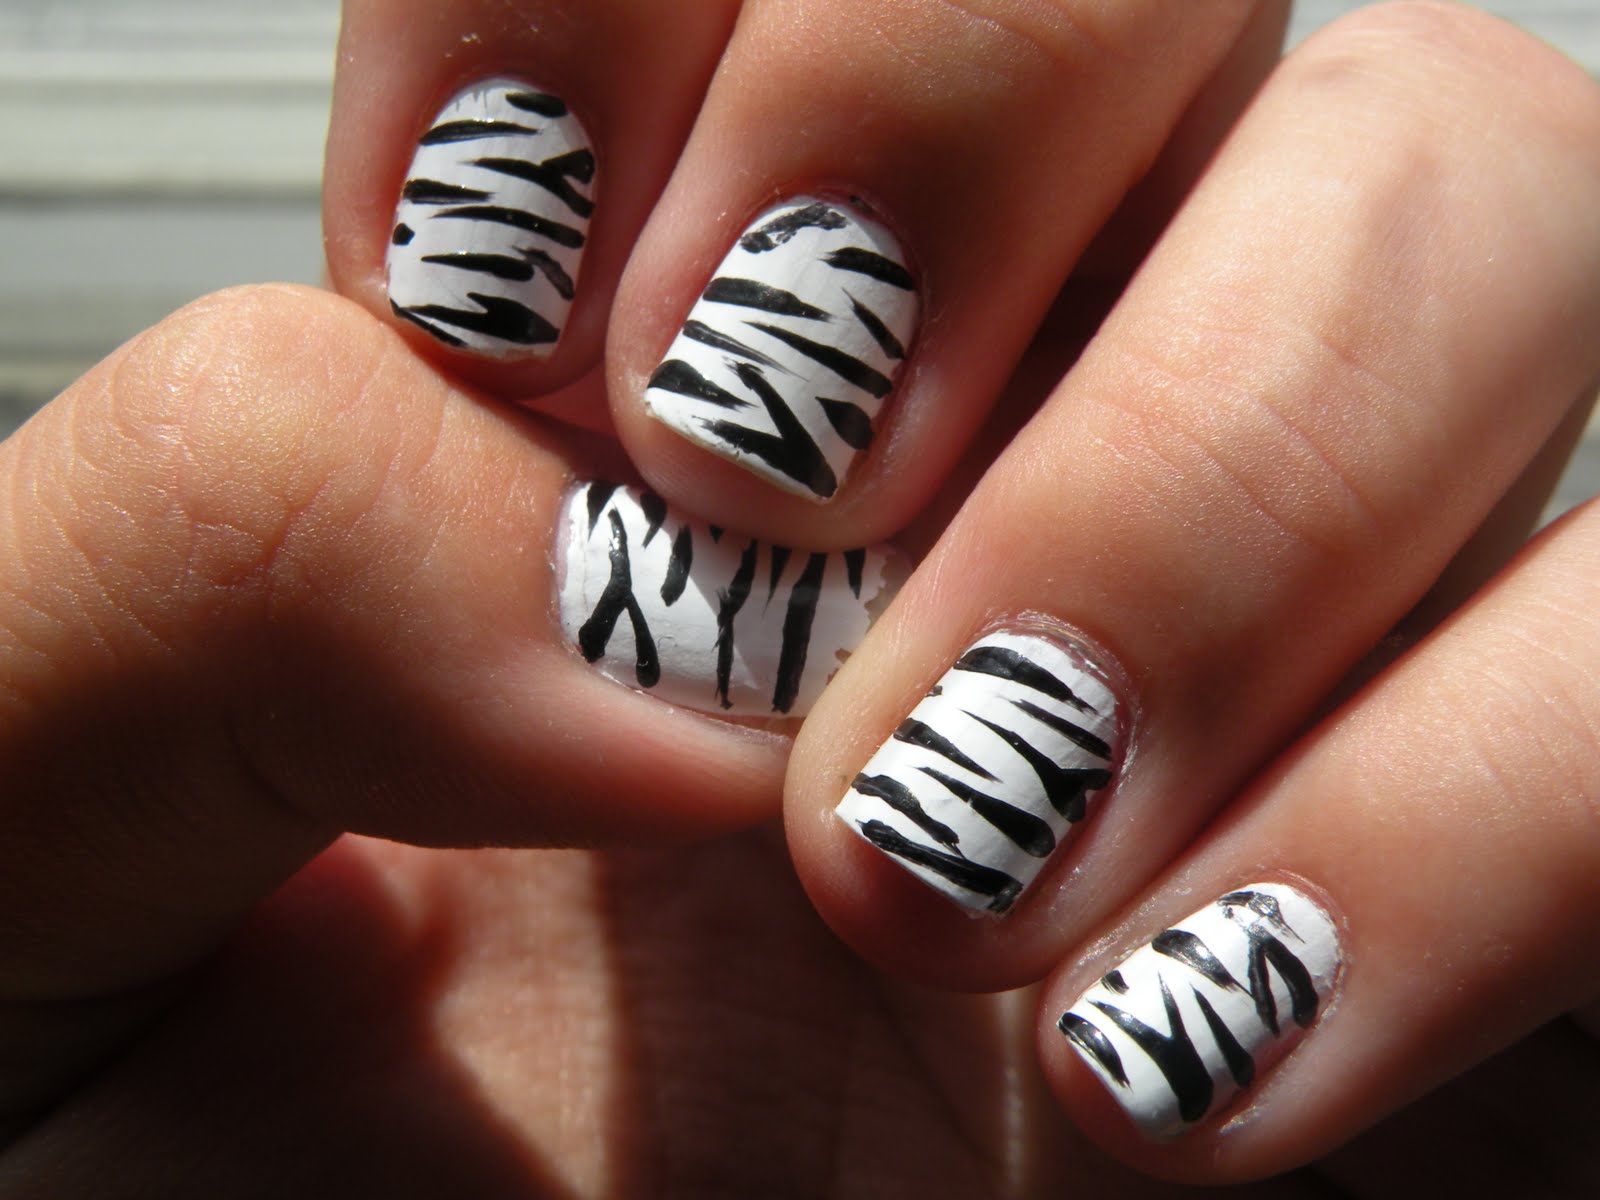
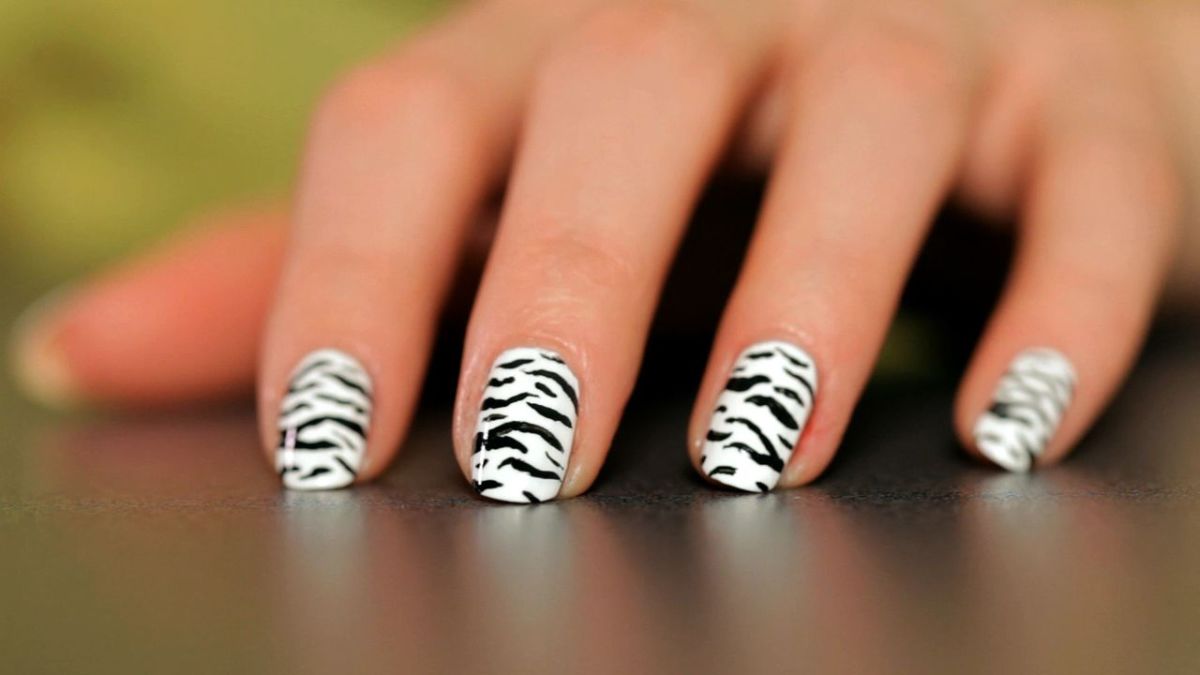
Zebra print nail art is a popular and trendy design that adds a touch of wildness to your nails. With its bold black and white stripes, this design is perfect for any occasion and can be easily created at home. Here's a step-by-step tutorial on how to achieve the perfect zebra print nail art. First, start by prepping your nails with a base coat to protect them from any staining. Then, apply two coats of your chosen nail polish, preferably in a light color, and let it dry completely. Next, using a thin nail art brush or a toothpick, create random and uneven stripes on your nails using black nail polish. These stripes should vary in thickness and direction to mimic the natural pattern of zebra stripes. Once you have created the stripes, let them dry for a few minutes before adding a top coat to seal in the design and add shine. You can also add a matte top coat for a more unique and edgy look. And there you have it, a perfect zebra print nail art!1. Zebra Print Nail Art Tutorial


1. Zebra Print Nail Art Tutorial


If you're new to nail art, trying out intricate designs can be intimidating. But don't worry, there are easy zebra nail art designs that anyone can recreate at home. These designs are perfect for beginners and require minimal tools and skills. One of the easiest ways to create zebra nail art is by using a nail stamping kit. These kits come with pre-designed plates and a stamper that allows you to transfer the design onto your nails effortlessly. Simply apply a light-colored base coat, choose a zebra print design from the plate, and stamp it onto your nails using black nail polish. Another easy zebra nail art design is the negative space technique. Start by painting your nails with a light-colored base coat and let it dry completely. Then, using striping tape, create random stripes on your nails, leaving some empty space in between. Paint over the tape with black nail polish and carefully remove the tape to reveal the zebra stripes.2. Easy Zebra Nail Art Designs

2. Easy Zebra Nail Art Designs

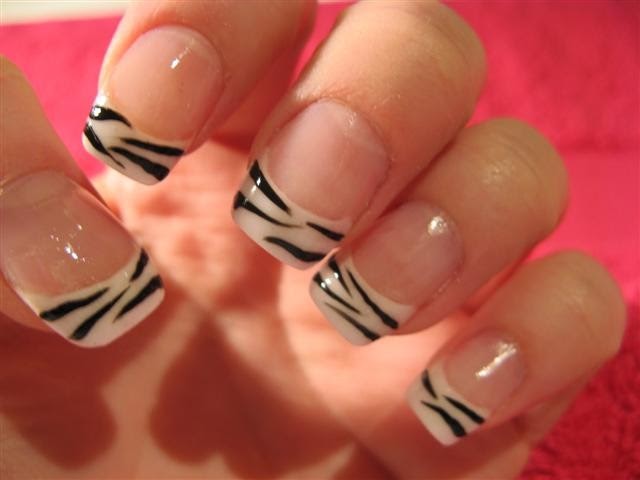
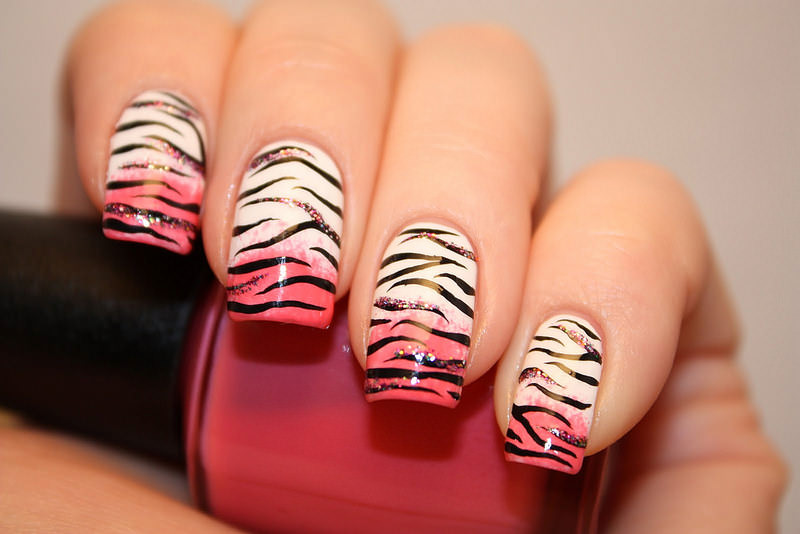
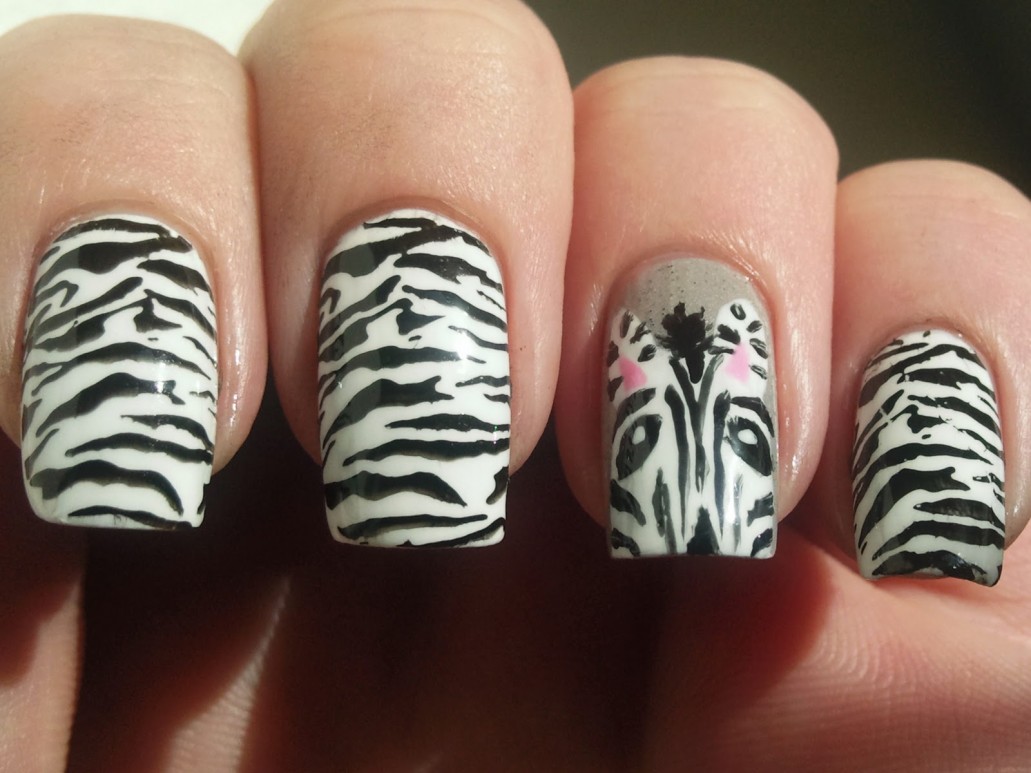
For a classic and timeless look, opt for black and white zebra nail art. This design is perfect for any occasion and can be easily dressed up or down. It's also a great option for those who prefer a monochromatic color scheme. To achieve this look, start by prepping your nails with a base coat. Then, paint your nails with a black base coat and let it dry completely. Using a thin nail art brush, create white stripes on your nails, mimicking the pattern of zebra stripes. You can also use a white nail polish with a thin brush for more precision. For a more subtle look, you can reverse the colors and use a white base coat with black stripes. You can also add some gold accents by painting thin gold stripes in between the black and white stripes. Finish off with a top coat to seal in the design.3. Black and White Zebra Nail Art
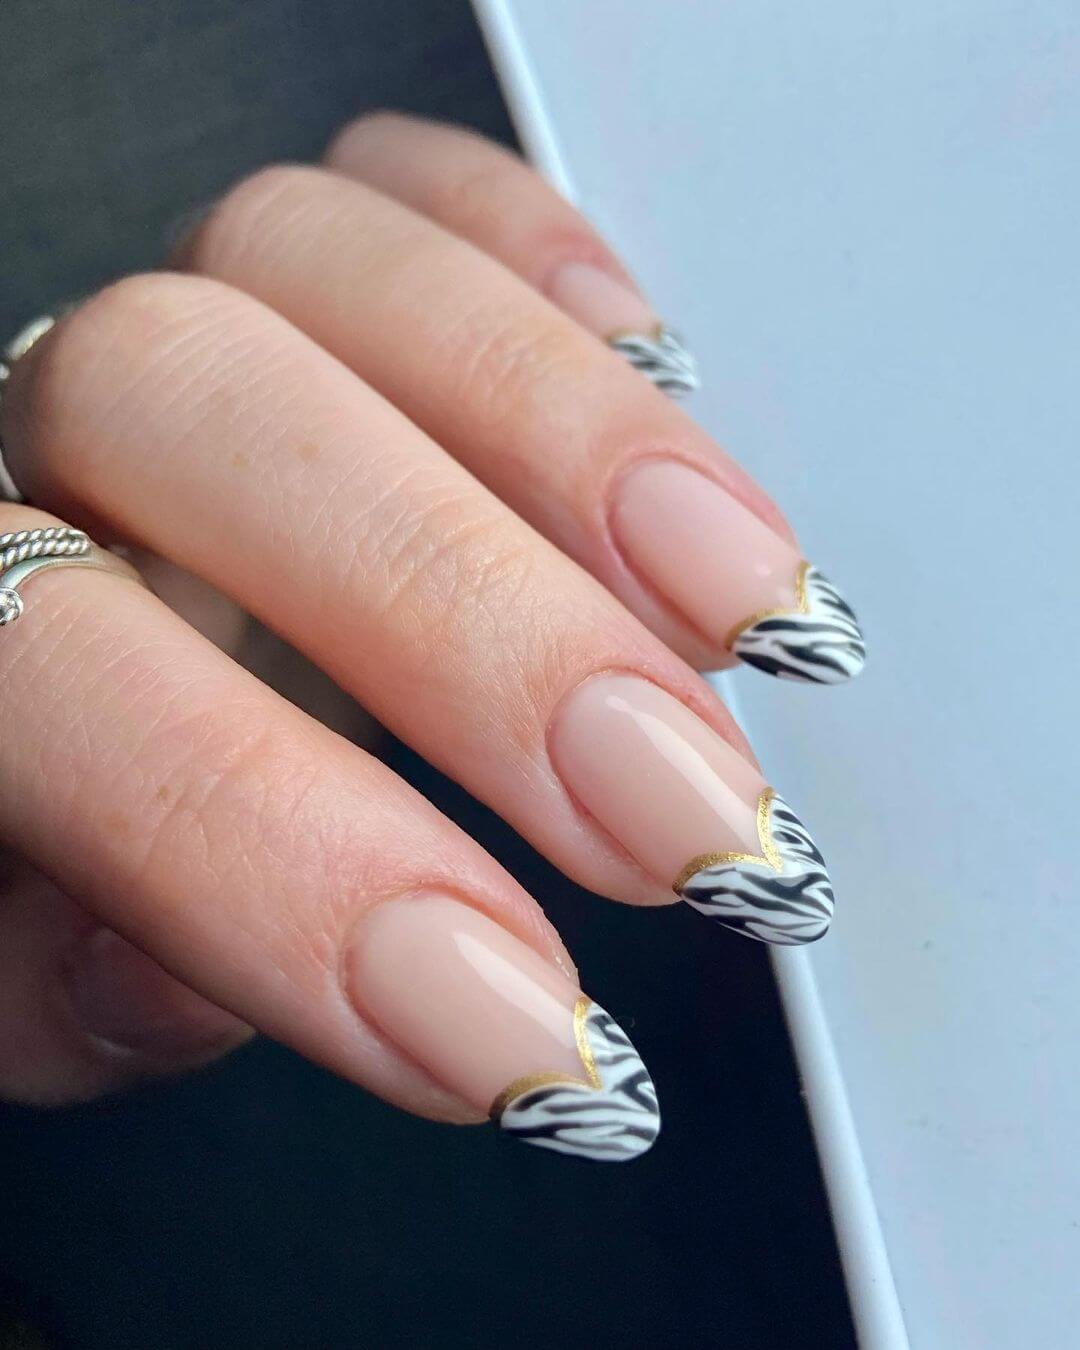

3. Black and White Zebra Nail Art
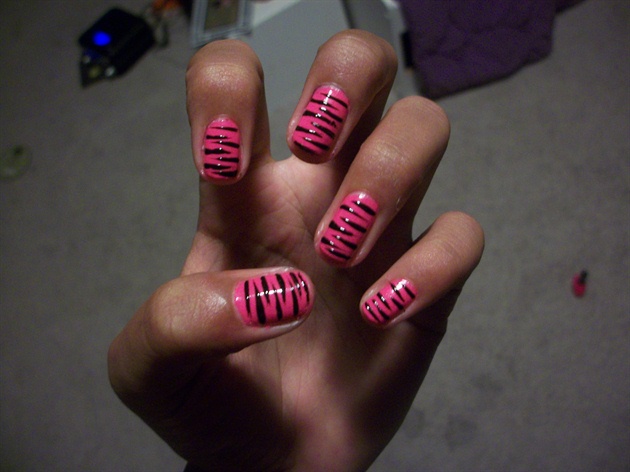

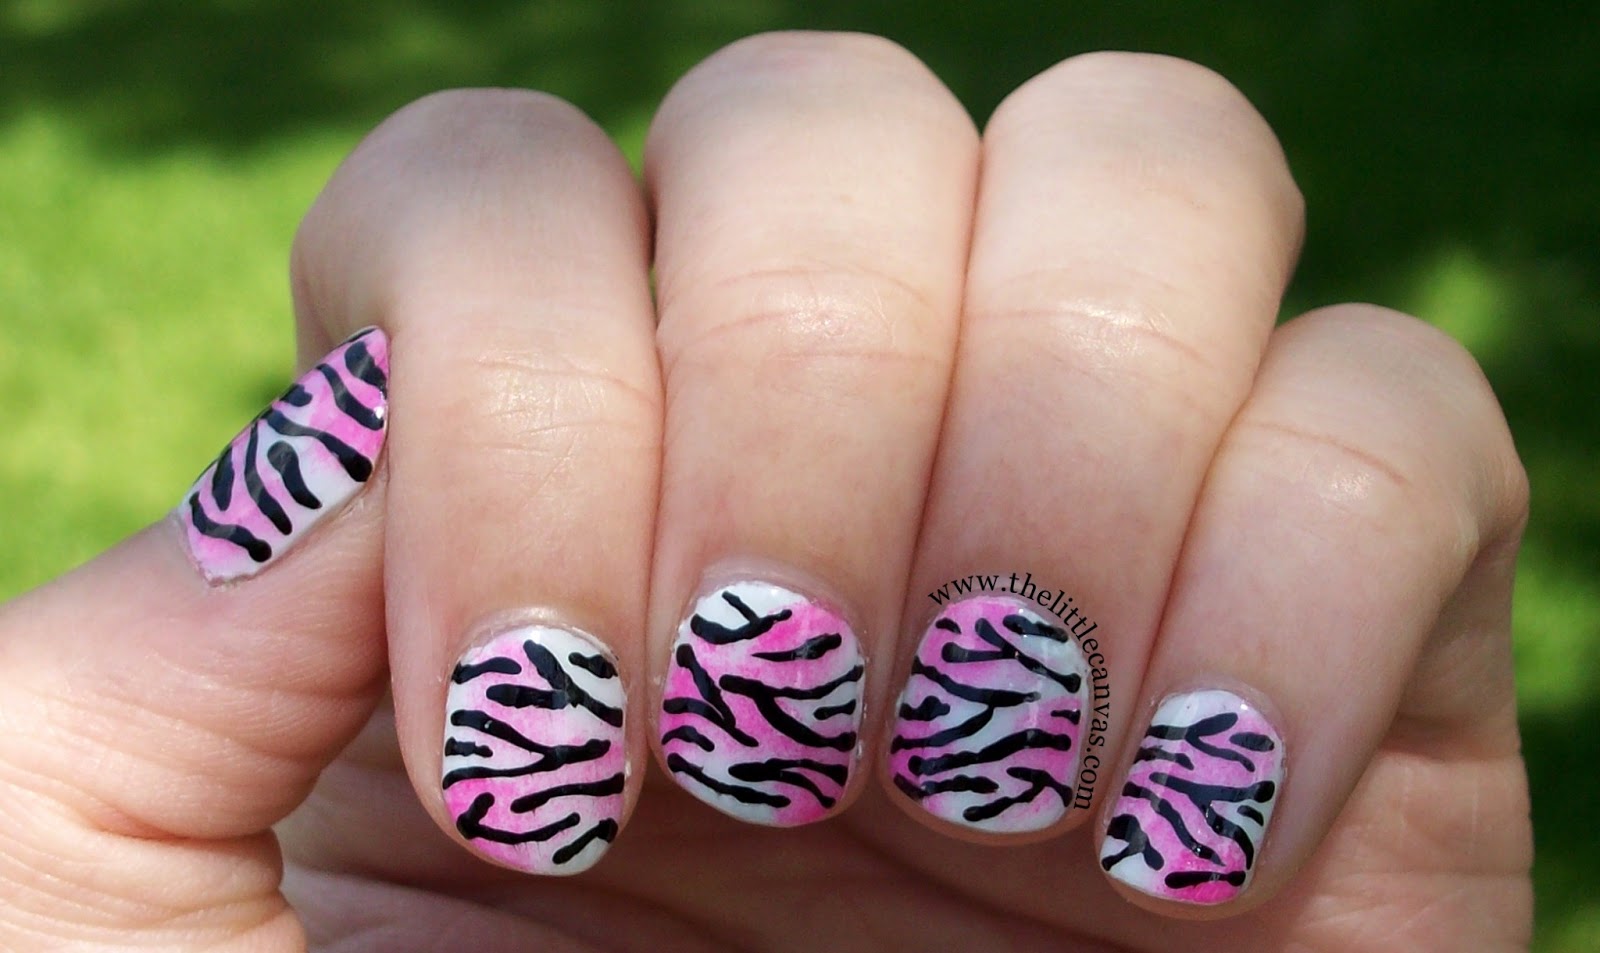
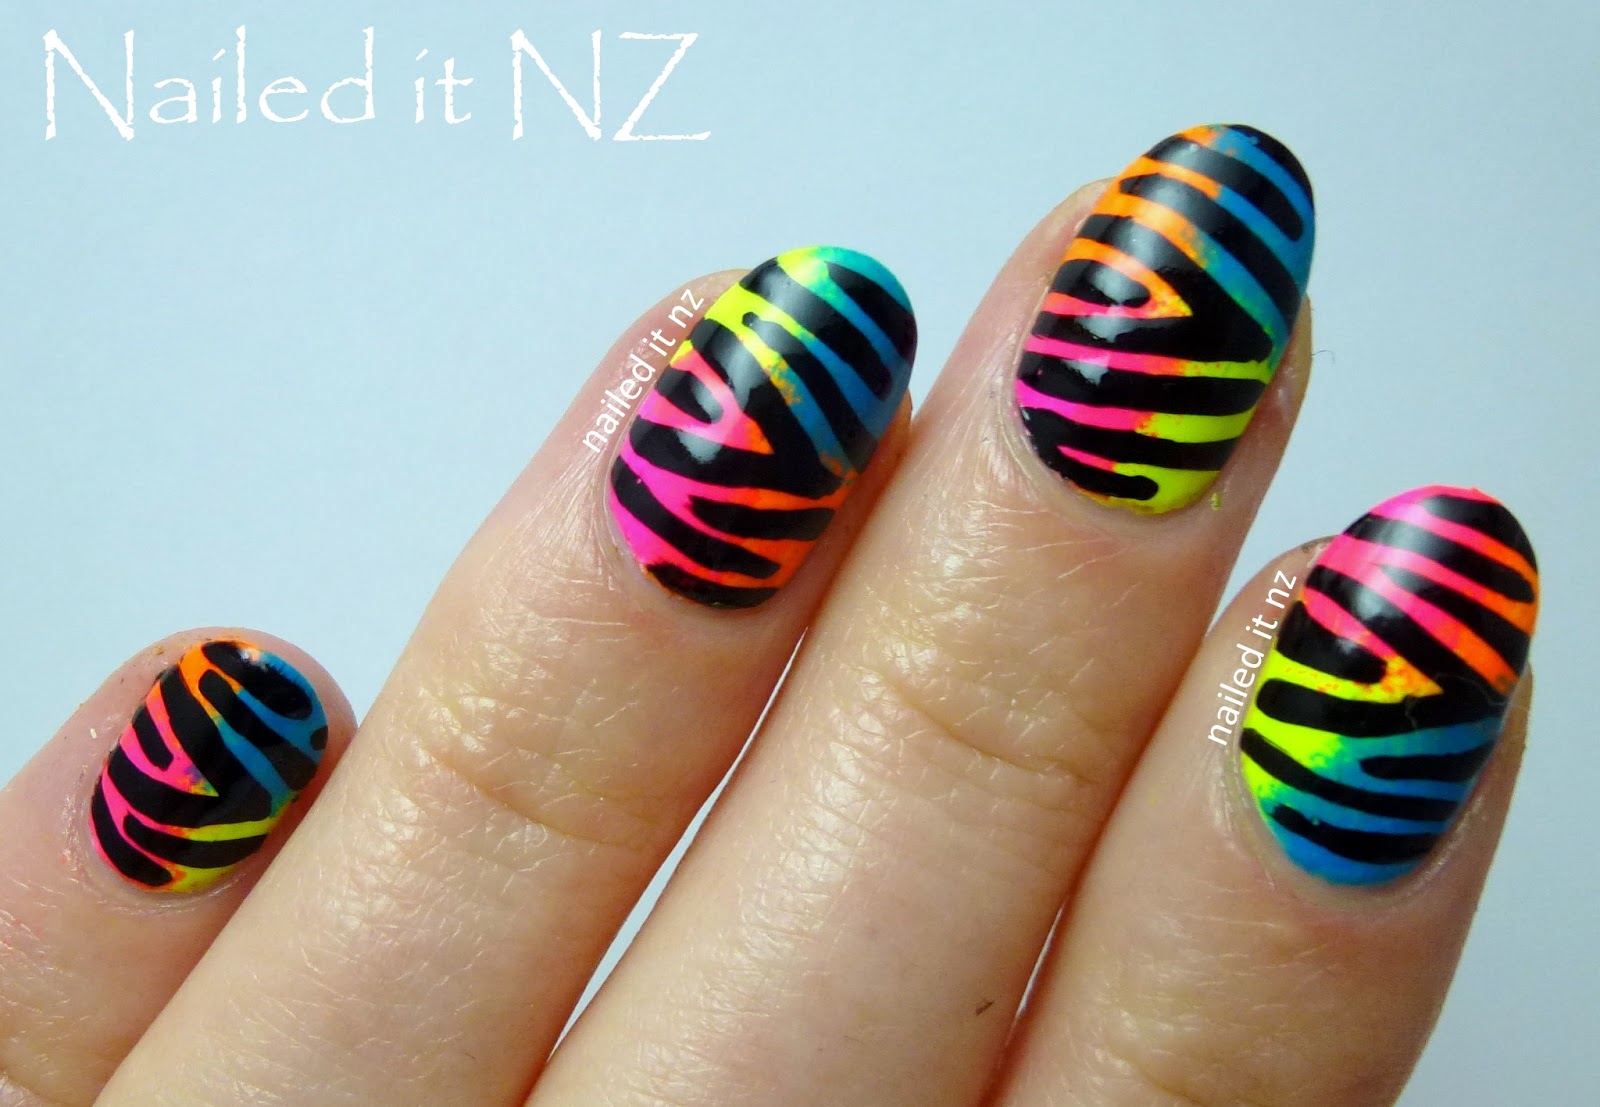
If you're a fan of stripes, then this zebra stripe nail art is perfect for you. It's a fun and playful design that adds a touch of quirkiness to your nails. Start by prepping your nails with a base coat. Then, using striping tape, create evenly spaced vertical stripes on your nails. Fill in the spaces between the tape with black nail polish and carefully remove the tape to reveal the stripes. You can also use different colors for the stripes to make the design more vibrant and unique. Finish off with a top coat for a glossy finish.4. Zebra Stripe Nail Art

4. Zebra Stripe Nail Art


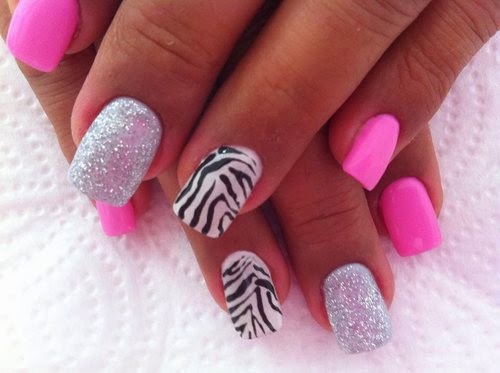
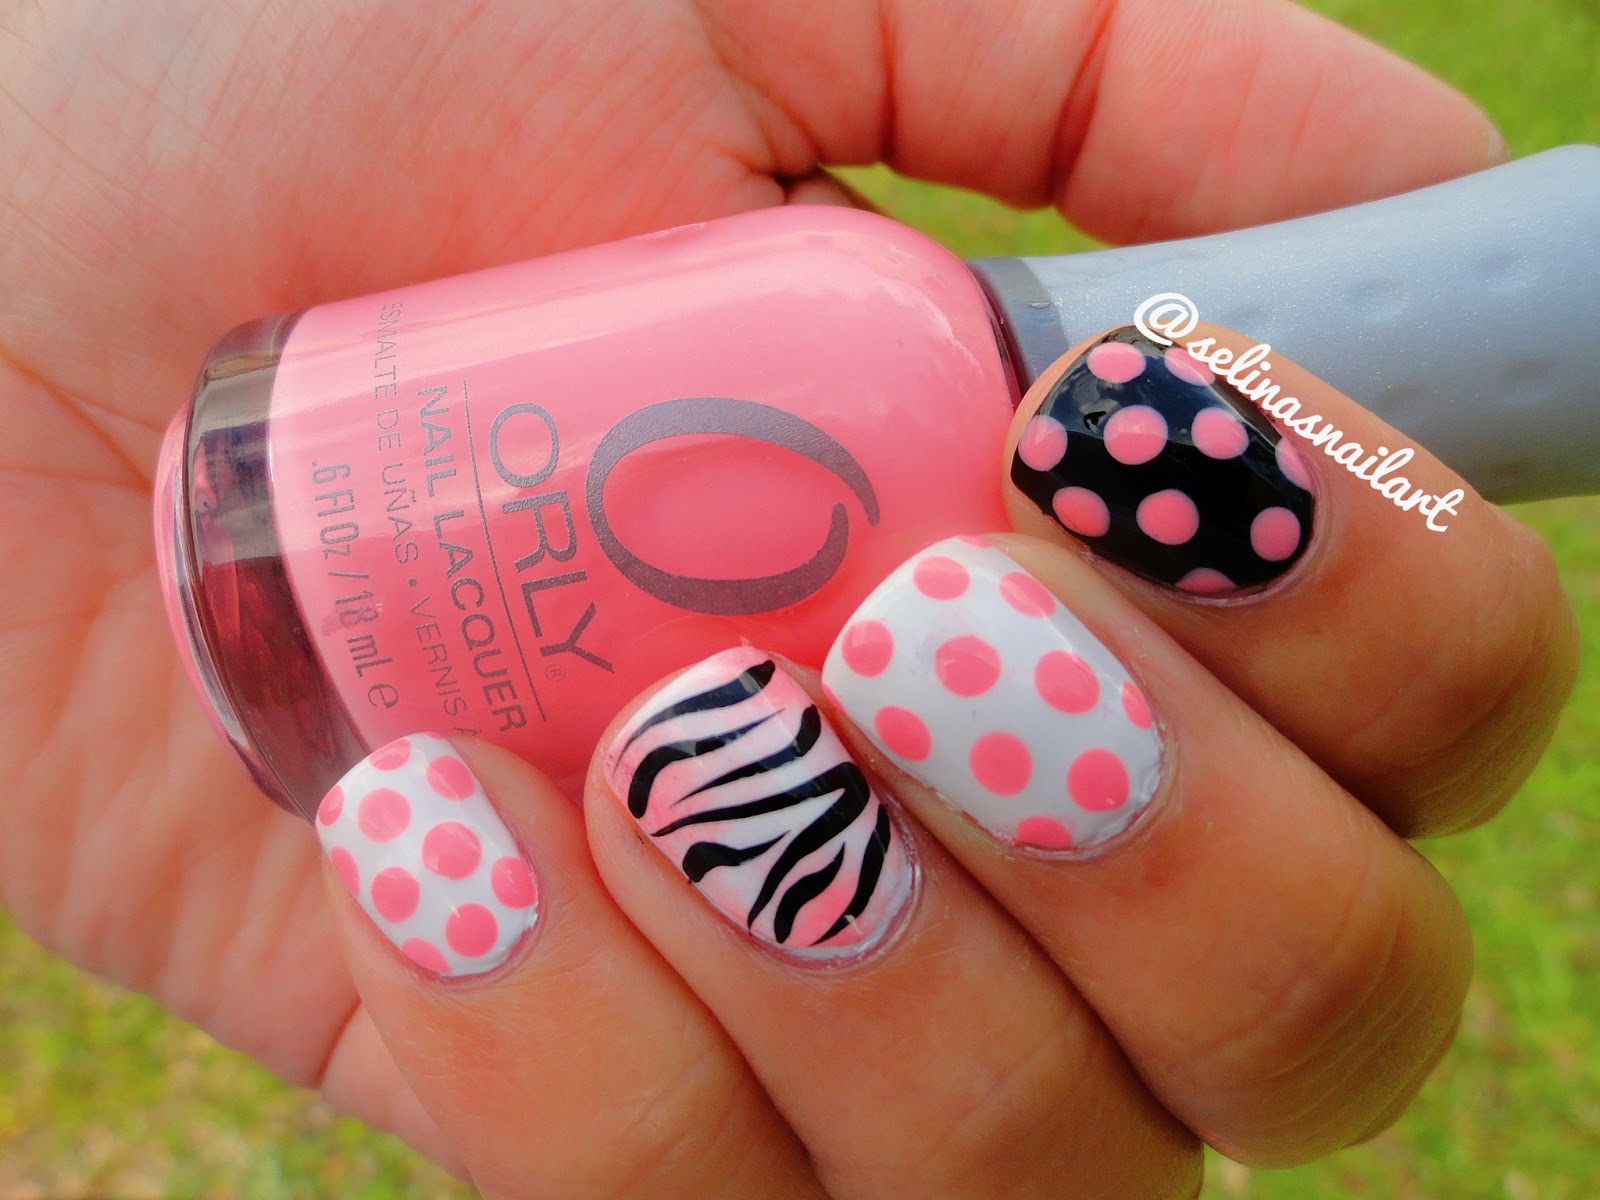
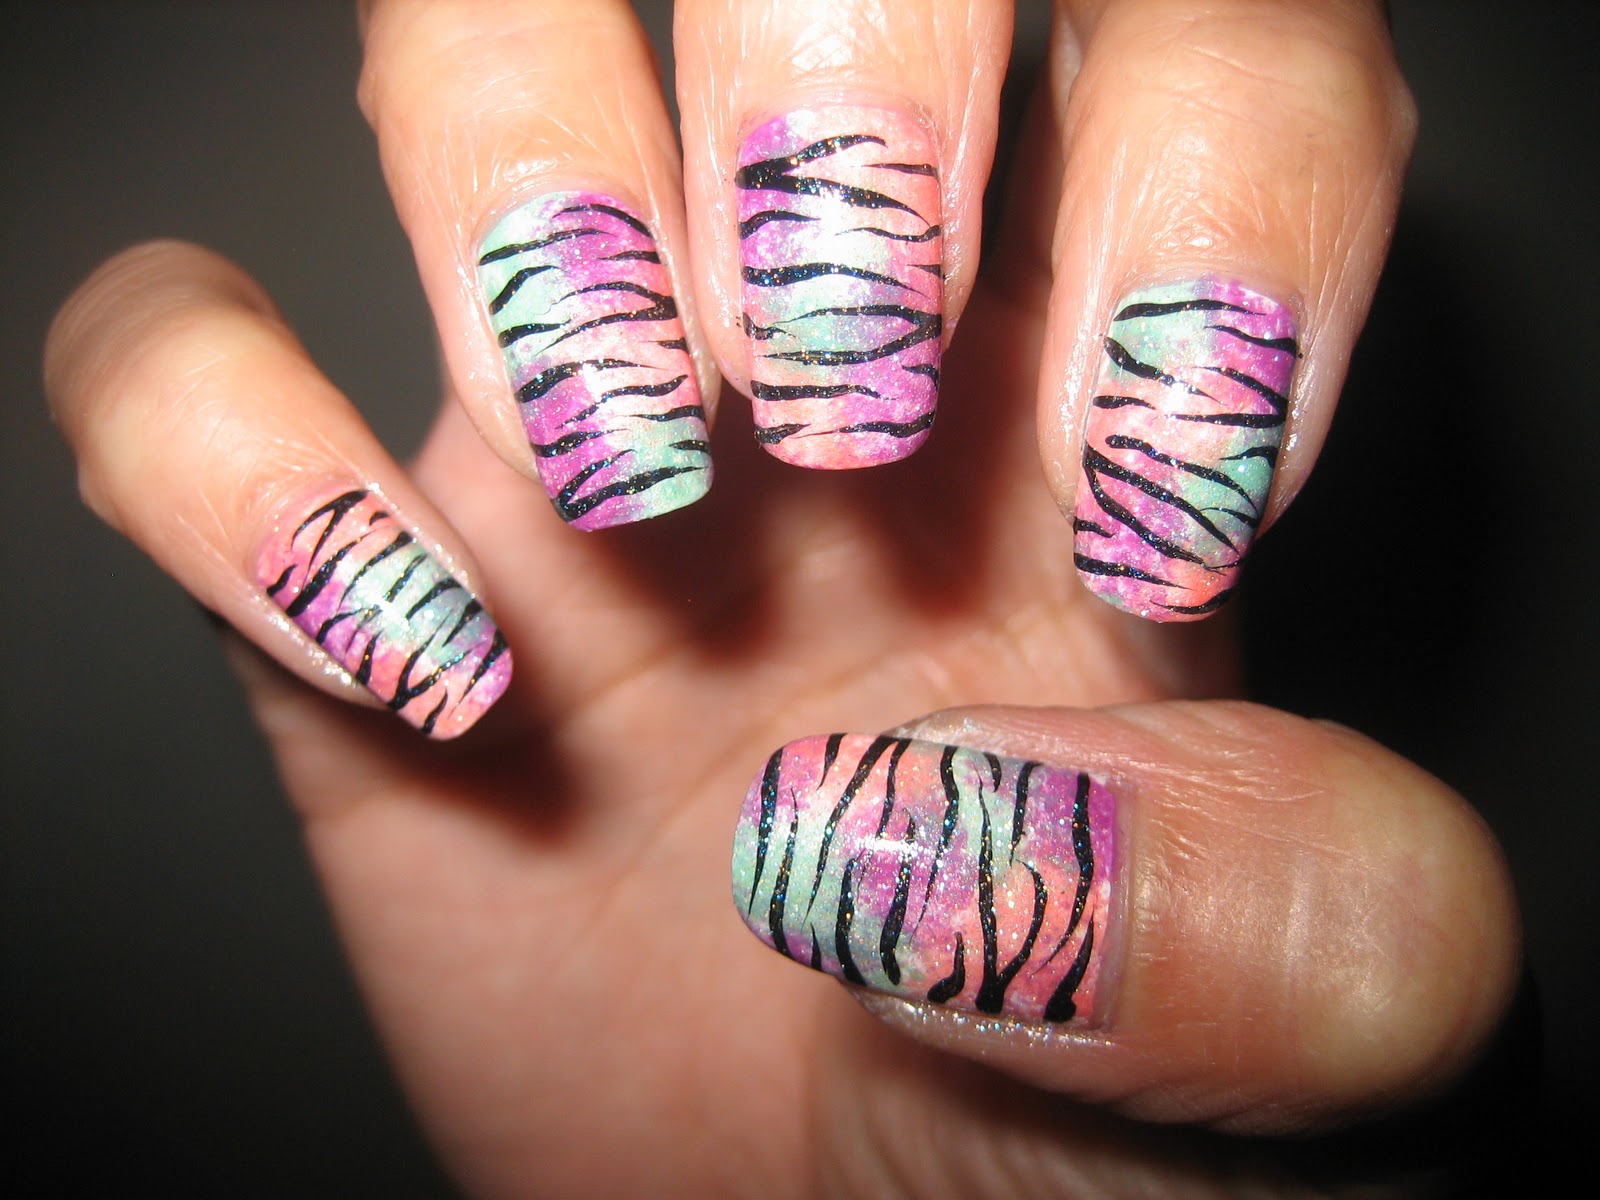
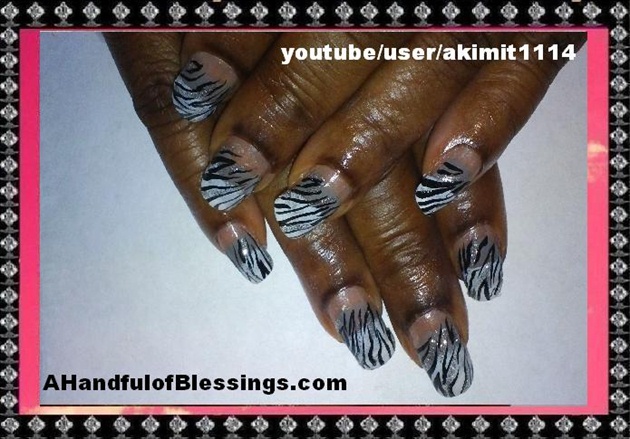
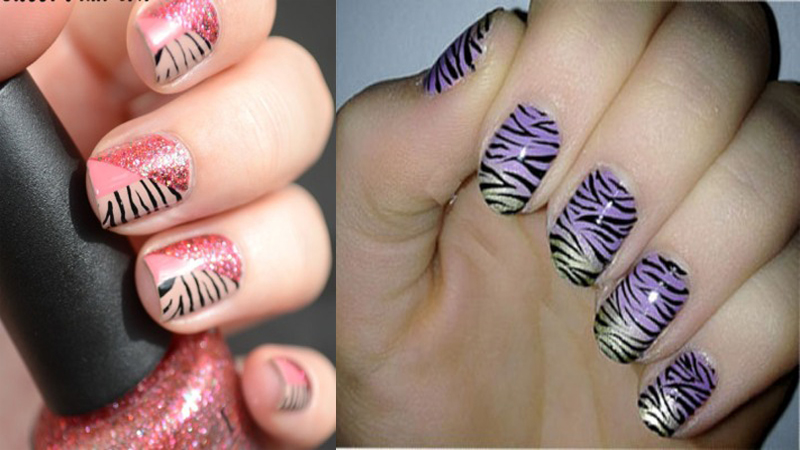
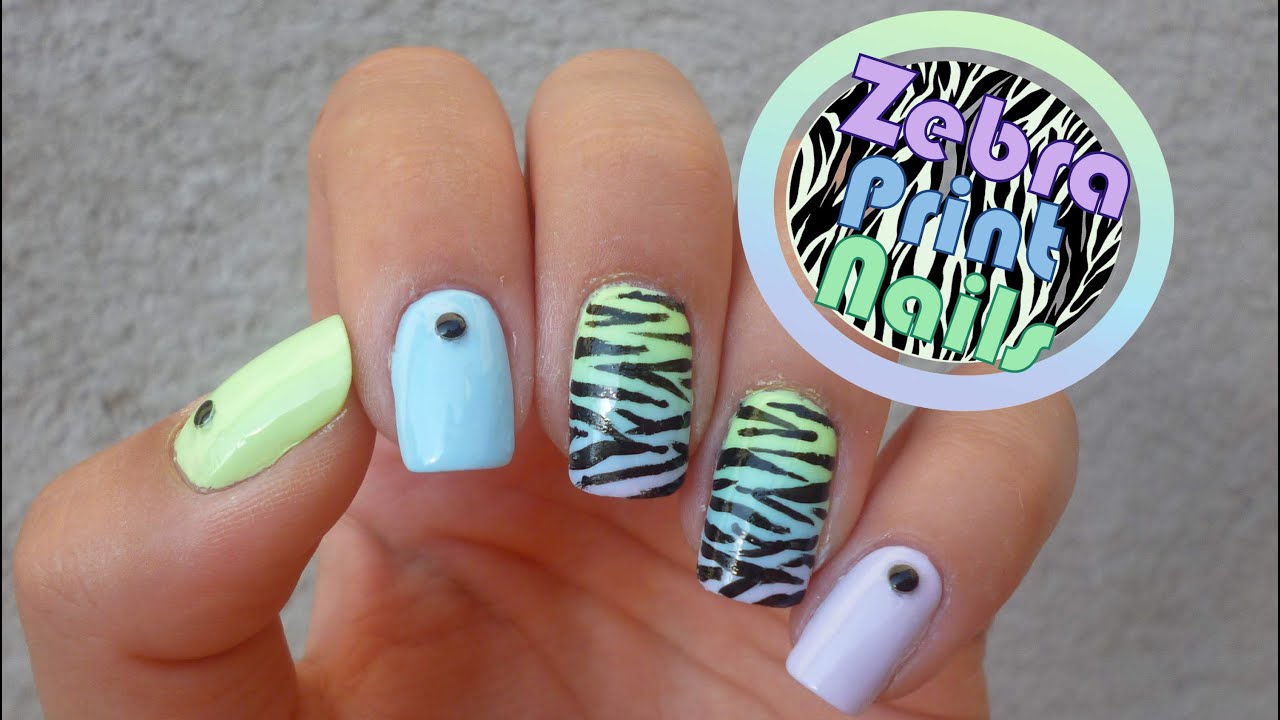
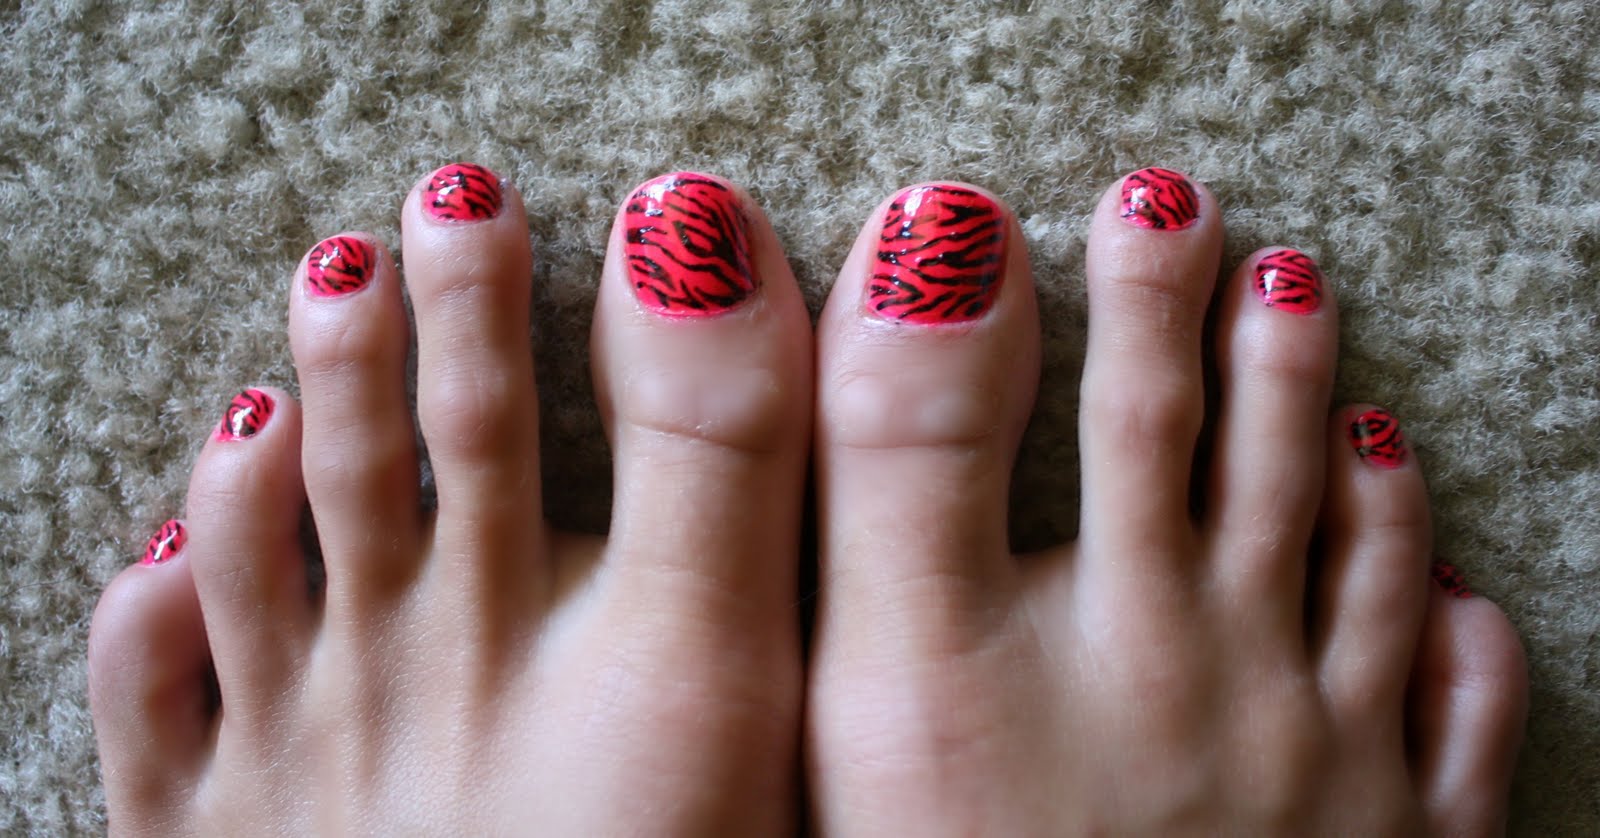
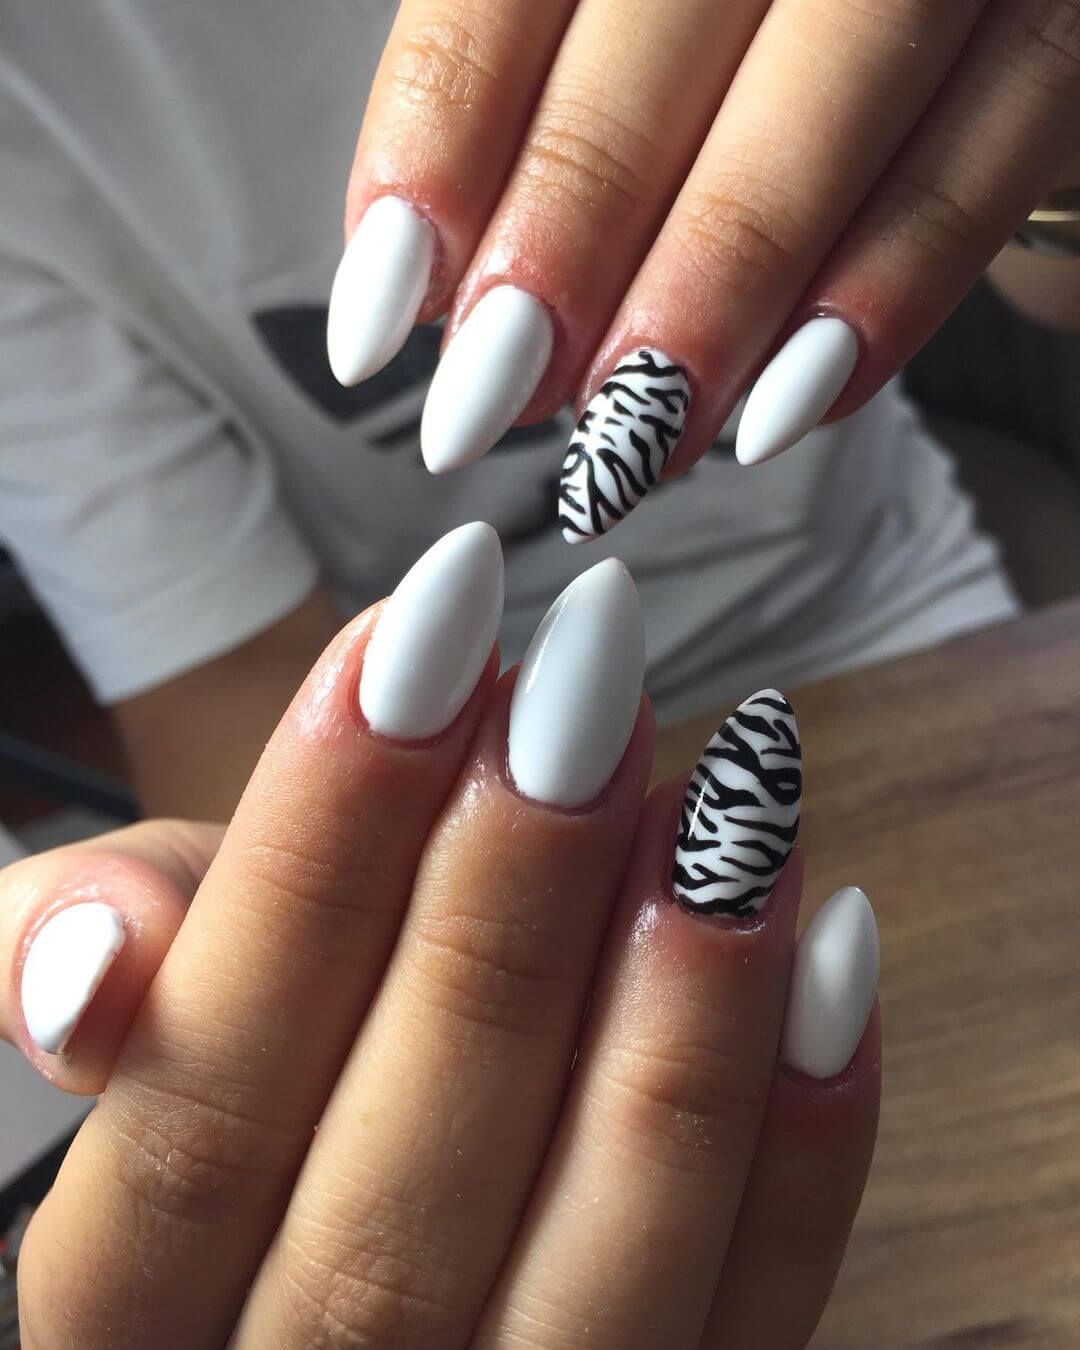
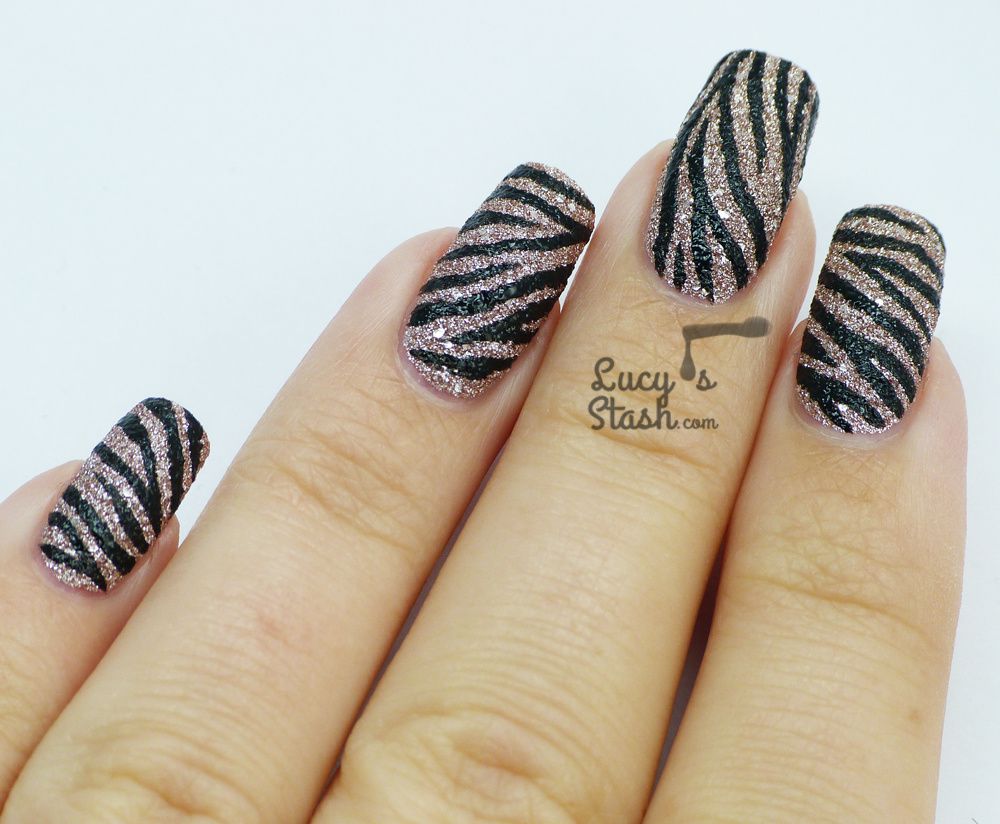
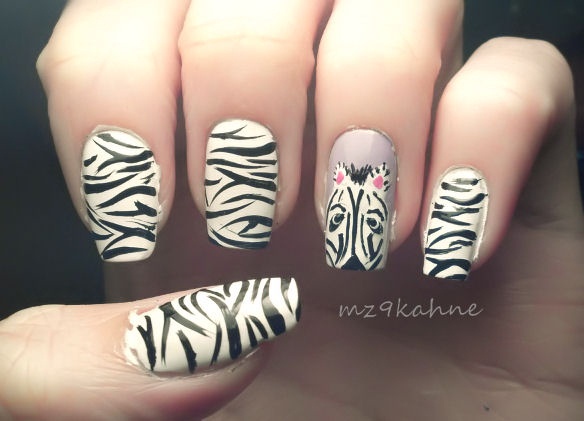
If you're looking for some inspiration for your next zebra print nail art, here are some ideas that you can try:5. Zebra Print Nail Art Ideas


5. Zebra Print Nail Art Ideas
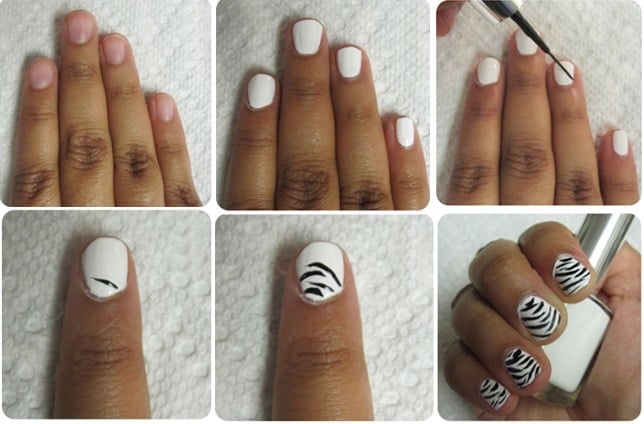
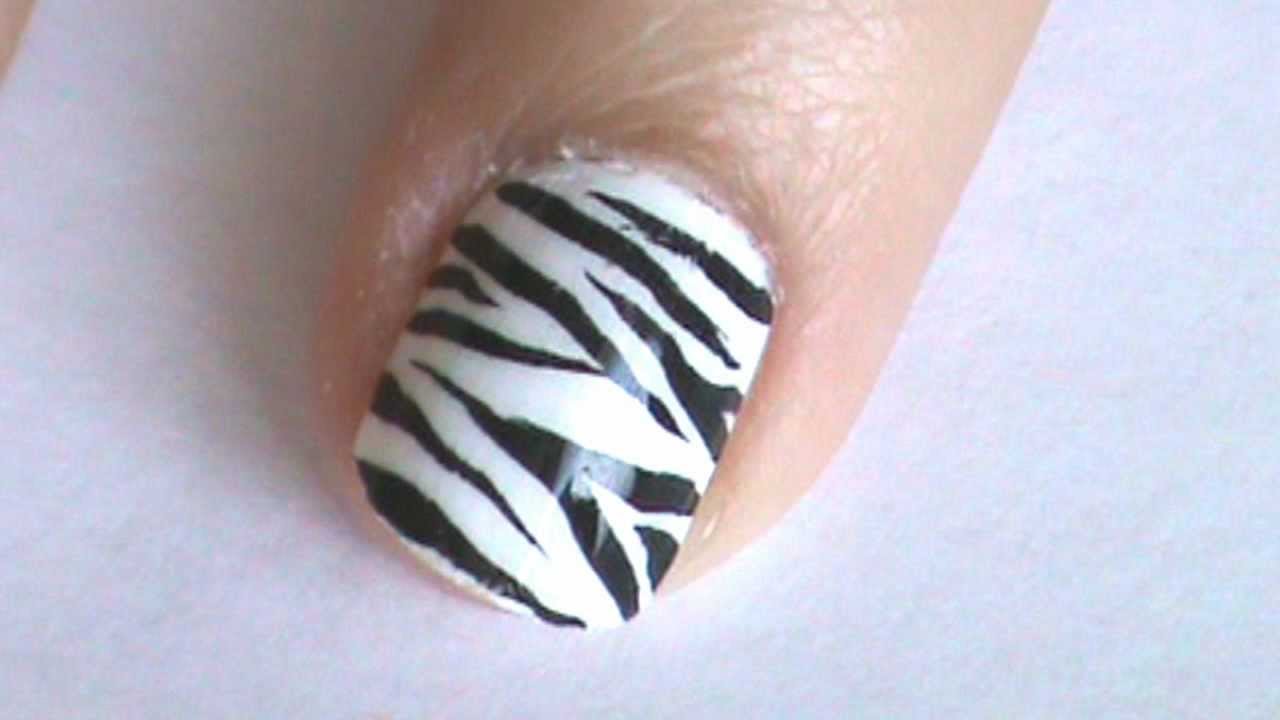
If you're a visual learner, here's a step-by-step guide on how to create zebra nail art:6. Zebra Nail Art Step by Step


6. Zebra Nail Art Step by Step

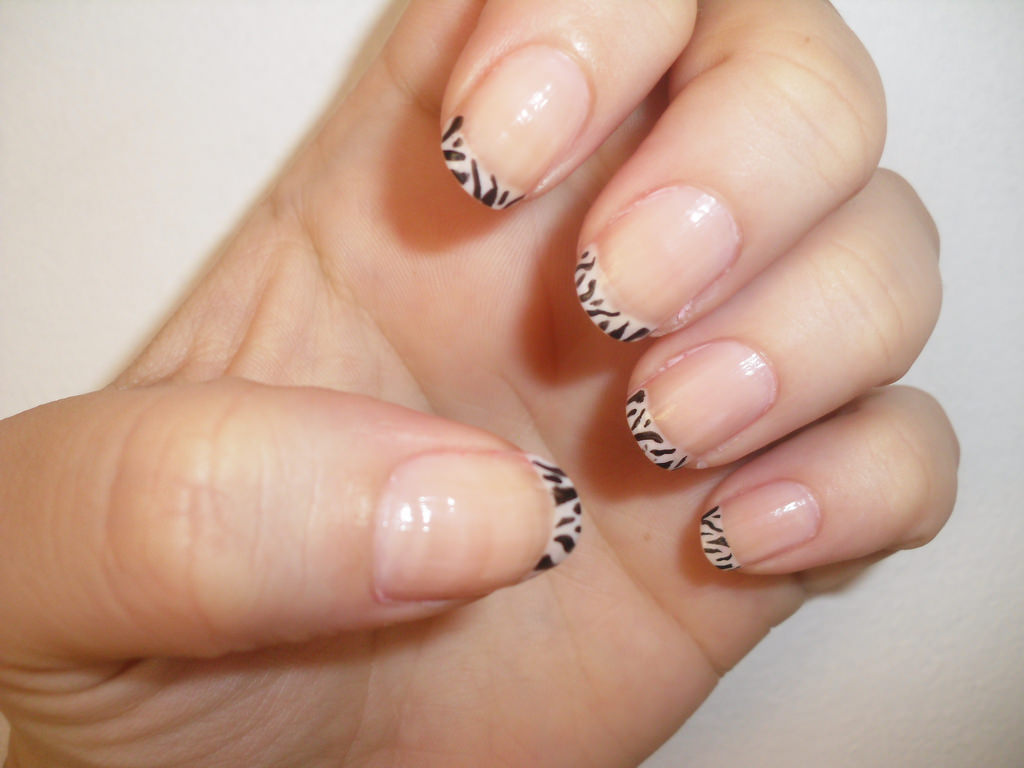
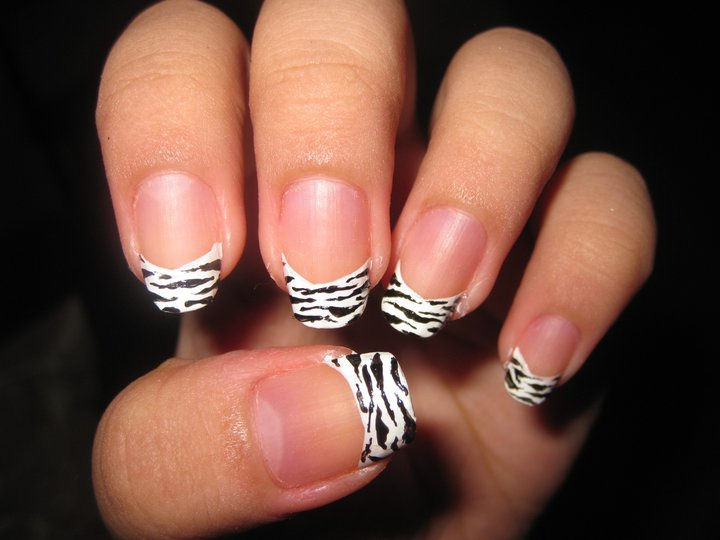
Short nails can also rock zebra nail art. With a few tweaks, you can easily adapt the design to fit your nail length. One option is to create smaller and thinner stripes to fit the size of your nails. You can also opt for a partial zebra print by painting the design on only a few nails and leaving the rest with a solid color. If you prefer a simpler look, you can create zebra stripes on just the tips of your nails, similar to a French manicure. This design is perfect for those who want a subtle and elegant zebra print.7. Zebra Nail Art for Short Nails

7. Zebra Nail Art for Short Nails


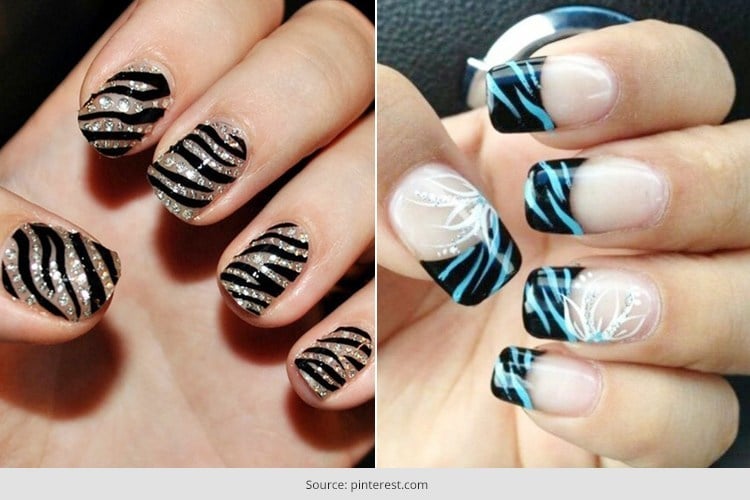
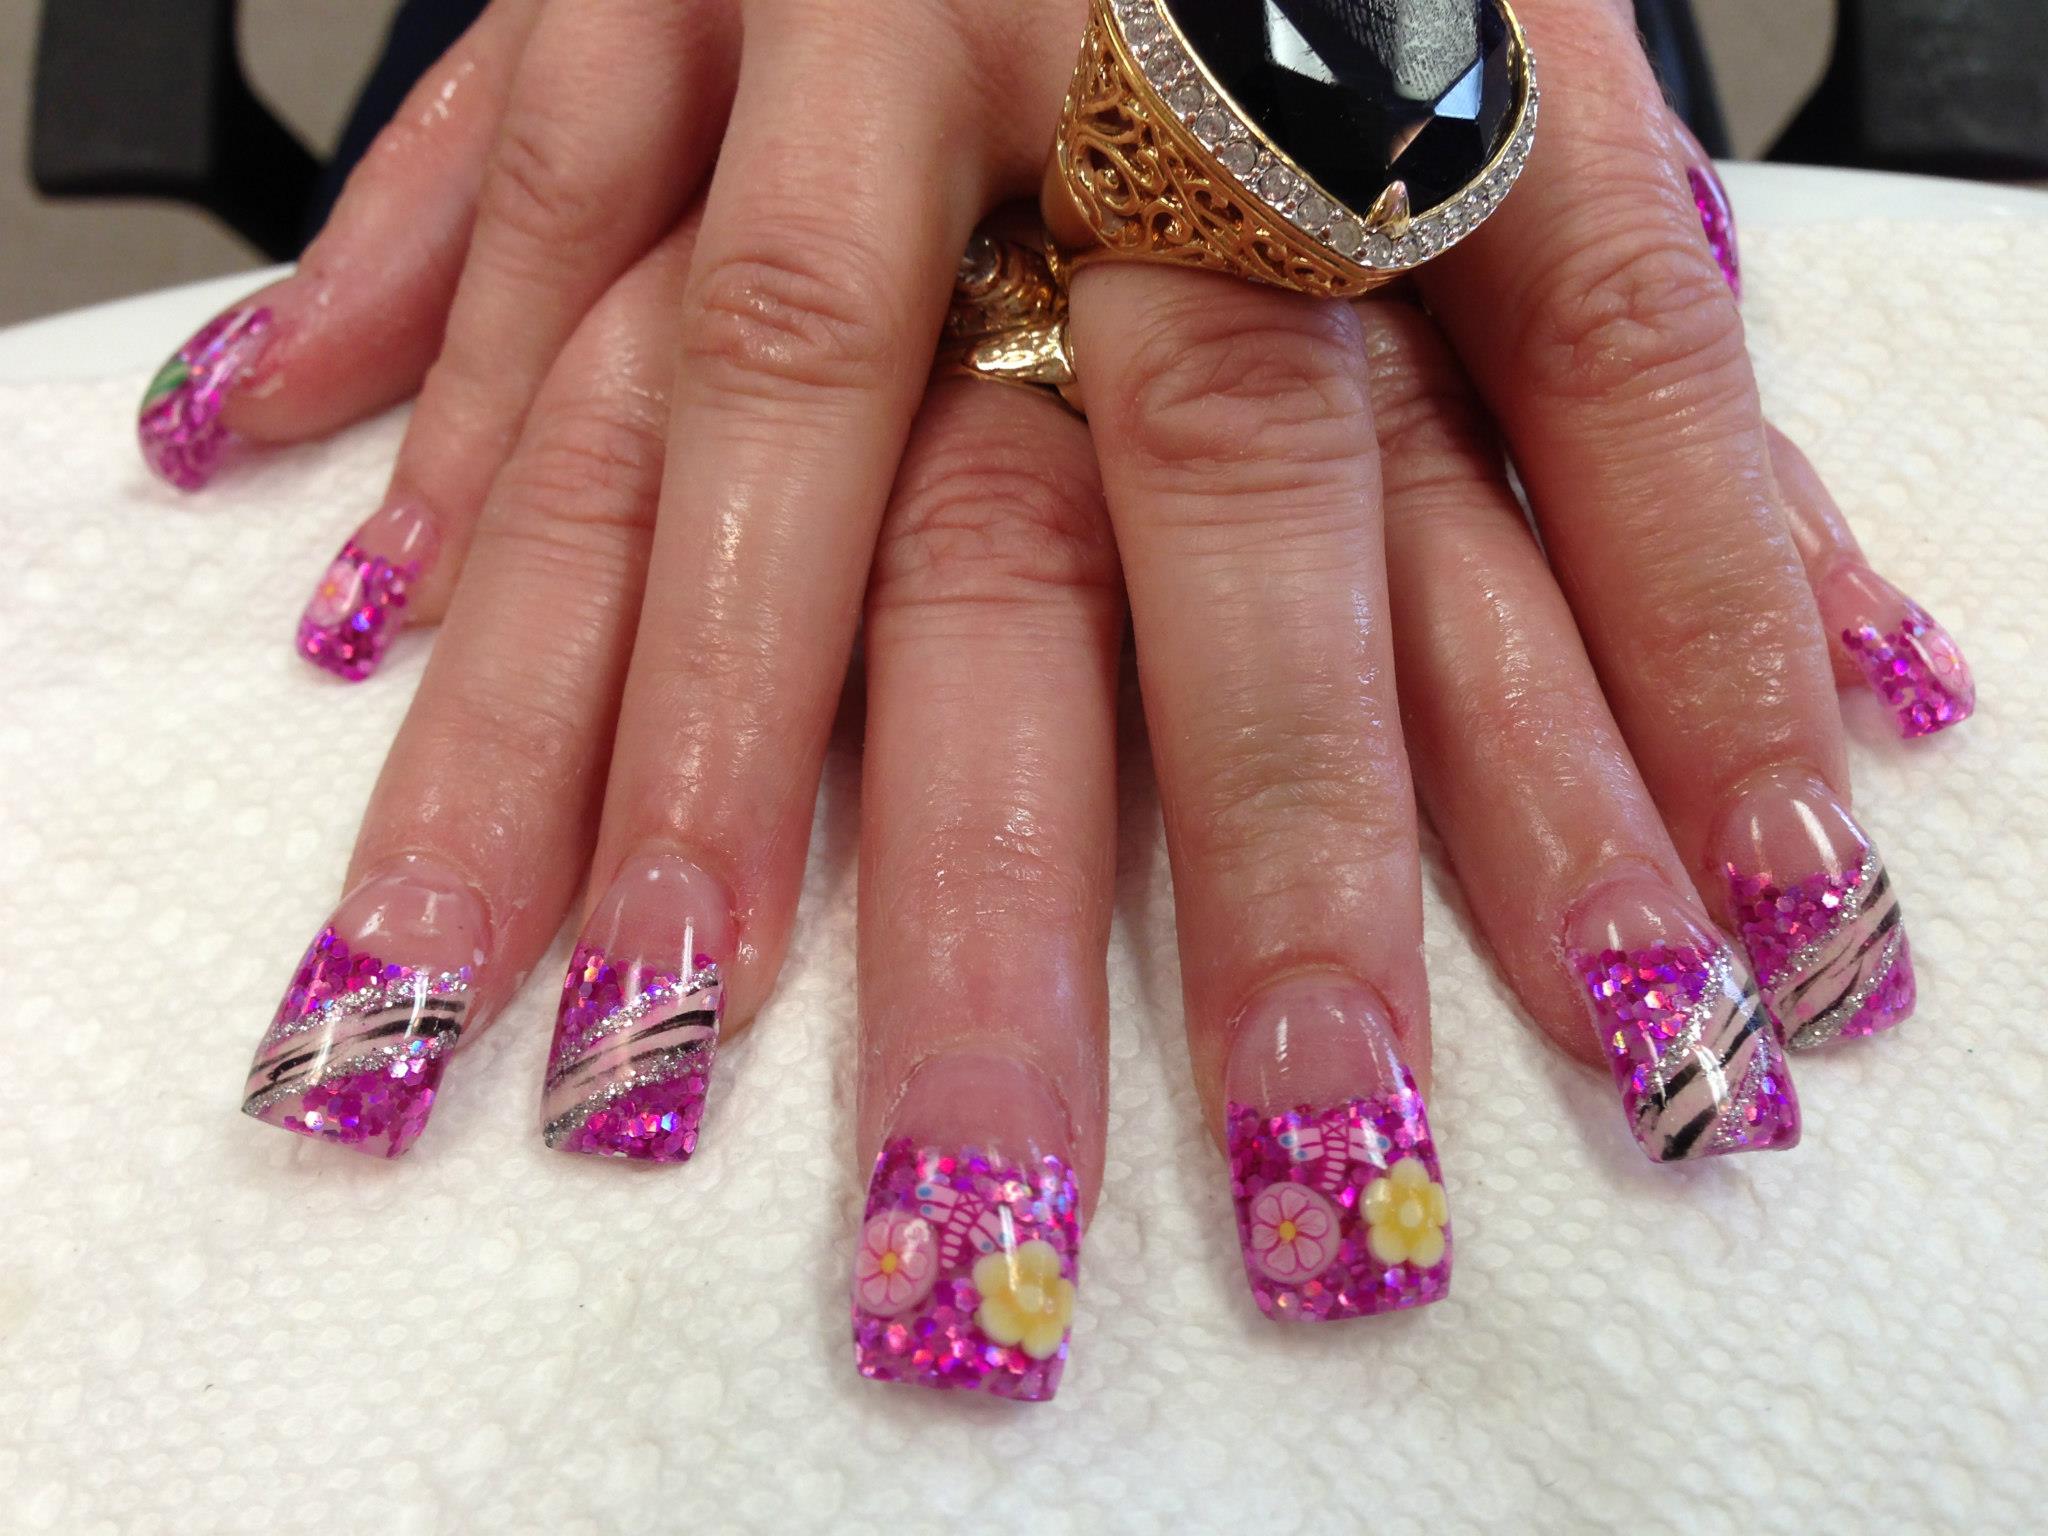
Take your zebra nail art to the next level by adding some bling with rhinestones. This is a great option for special occasions or for those who love a bit of sparkle on their nails. Start by painting your nails with a light base coat and creating zebra stripes on them. Then, using a dotting tool or tweezers, carefully place rhinestones on top of the stripes. You can also use different sizes and colors of rhinestones to create a more unique and eye-catching design. Finish off with a top coat to secure the rhinestones.8. Zebra Nail Art with Rhinestones

8. Zebra Nail Art with Rhinestones

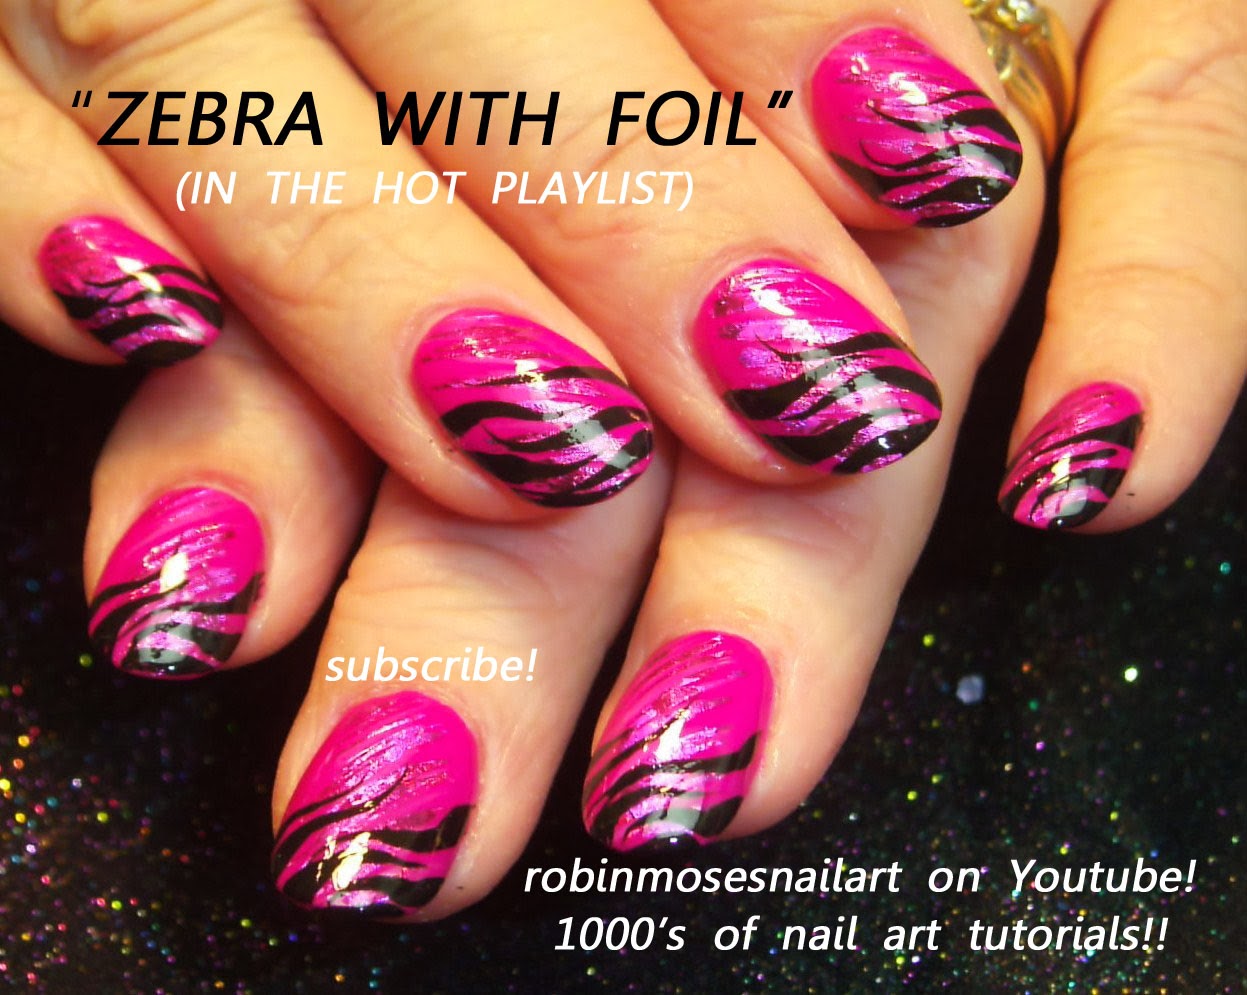
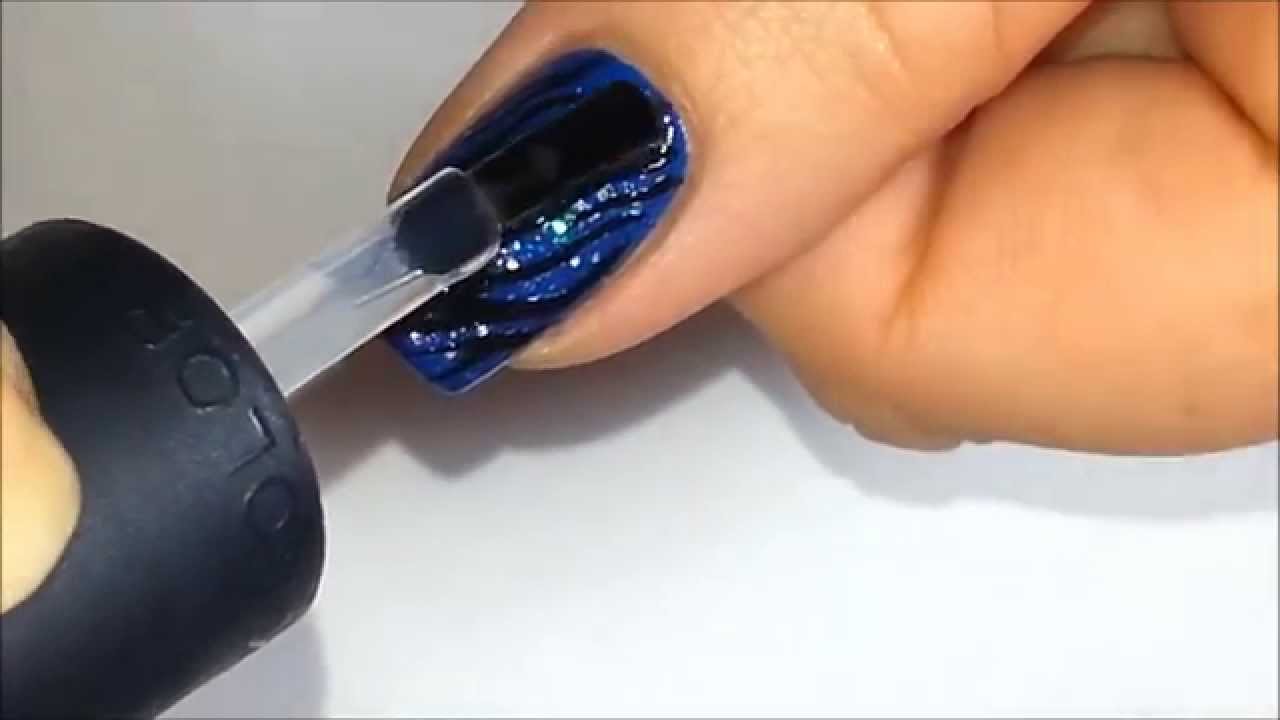
If you prefer long-lasting and chip-free nail art, then using gel polish for your zebra design is a great option. Gel polish also allows for more intricate and detailed designs. Start by prepping your nails with a base coat and curing it under a UV or LED lamp. Then, paint your nails with a light-colored gel polish and cure it. Using a thin nail art brush, create zebra stripes on your nails with black gel polish and cure it again. Finish off with a gel top coat and cure it for a long-lasting and glossy finish.9. Zebra Nail Art with Gel Polish

9. Zebra Nail Art with Gel Polish

If you're new to nail art, don't be afraid to try out zebra nail art. With its simple design and minimal tools required, it's a great option for beginners. Start by following the easy zebra nail art designs mentioned above or look for some sticker or wrap options that can easily be applied onto your nails. You can also use nail stamping kits or stencils to create the design with minimal effort. Remember to take your time and practice, and soon you'll be creating perfect zebra print nail art like a pro!10. Zebra Nail Art for Beginners
10. Zebra Nail Art for Beginners

The Modern Twist on Zebra Nail Art

Adding a Wild Touch to Your Manicure
 The world of nail art is constantly evolving, with new trends and styles emerging all the time. One trend that has stood the test of time is the zebra nail art. This classic design has been around for decades, but it has recently gained a modern twist that has taken the beauty world by storm. Incorporating
zebra
nail art
into your house design is a fun and unique way to add a touch of wildness to your style.
The world of nail art is constantly evolving, with new trends and styles emerging all the time. One trend that has stood the test of time is the zebra nail art. This classic design has been around for decades, but it has recently gained a modern twist that has taken the beauty world by storm. Incorporating
zebra
nail art
into your house design is a fun and unique way to add a touch of wildness to your style.
How to Achieve the Perfect Zebra Nail Art
 Creating the perfect
zebra nail art
may seem daunting, but with a little practice and the right tools, you can achieve a professional-looking manicure at home. Start by choosing a base color that will complement the black and white zebra stripes. Popular choices include white, black, or even a bright color like pink or blue. Then, using a thin nail art brush or a toothpick, draw thin diagonal lines across your nails to create the zebra stripes. For a more modern look, you can also experiment with different patterns and shapes, like chevrons or half-moons. Finish off with a clear top coat to seal in your design and add shine.
Creating the perfect
zebra nail art
may seem daunting, but with a little practice and the right tools, you can achieve a professional-looking manicure at home. Start by choosing a base color that will complement the black and white zebra stripes. Popular choices include white, black, or even a bright color like pink or blue. Then, using a thin nail art brush or a toothpick, draw thin diagonal lines across your nails to create the zebra stripes. For a more modern look, you can also experiment with different patterns and shapes, like chevrons or half-moons. Finish off with a clear top coat to seal in your design and add shine.
Take Your House Design to the Next Level
 Zebra nail art is not just limited to your nails. You can also incorporate this fun and stylish design into your house design. For example, you can use zebra print wallpaper or throw pillows to add a bold and playful touch to your living room or bedroom. You can also use zebra print rugs or curtains to add a pop of pattern to your home. The possibilities are endless, and incorporating
zebra
nail art
into your house design will surely make a statement and add a touch of personality to your space.
Zebra nail art is not just limited to your nails. You can also incorporate this fun and stylish design into your house design. For example, you can use zebra print wallpaper or throw pillows to add a bold and playful touch to your living room or bedroom. You can also use zebra print rugs or curtains to add a pop of pattern to your home. The possibilities are endless, and incorporating
zebra
nail art
into your house design will surely make a statement and add a touch of personality to your space.
In Conclusion
 Zebra nail art is a timeless trend that has recently gained a modern twist. It is a fun and unique way to add a touch of wildness to your style and house design. With the right tools and a little practice, you can achieve a professional-looking manicure at home. Don't be afraid to get creative and incorporate zebra print into your home decor as well. Whether on your nails or in your house, zebra print is sure to make a statement and add a touch of personality to your space.


