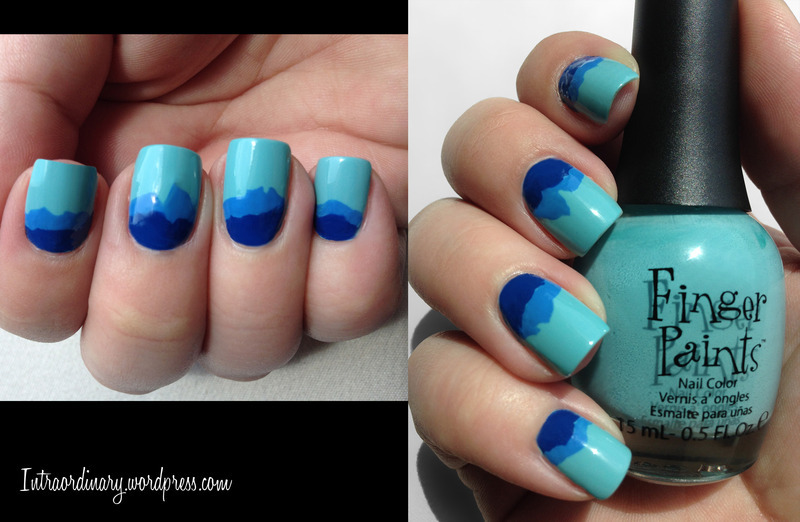
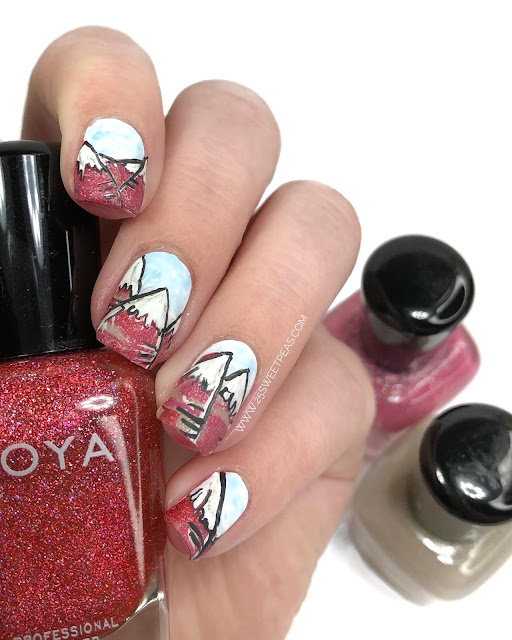
For those who are new to nail art or just want a simple but stunning design, this easy mountain nail art tutorial is perfect for you. All you need is a few basic nail polish colors and some tape to create a beautiful mountain landscape on your nails. Start by painting your nails with a light blue base color. Once it's completely dry, cut small pieces of tape into triangular shapes and place them on your nails to create the mountain peaks. You can use different sizes and angles to give your mountains a more natural look. Next, use a darker blue polish to paint the space below the tape and fill in the rest of your nails. Wait for the polish to dry completely before carefully peeling off the tape to reveal your perfect mountain silhouette. Finish off with a top coat for a glossy finish.1. "Easy Mountain Nail Art Tutorial"


1. "Easy Mountain Nail Art Tutorial"


If you're someone who likes to follow a step-by-step guide, this mountain nail art tutorial is just for you. With detailed instructions and pictures, you'll have no trouble recreating this beautiful design on your own nails. Start by painting your nails with a light grey or beige base color. Once it's dry, use a thin brush to create the outline of your mountains using a dark brown or black polish. Make sure to vary the height and width of the mountains to give them a realistic look. Next, fill in the space below the mountains with a light blue polish for the sky. You can also add some clouds using a white polish and a dotting tool. Finally, use a green polish to create some trees at the base of your mountains. Finish off with a top coat for a long-lasting finish.2. "Step-by-Step Mountain Nail Art Tutorial"


2. "Step-by-Step Mountain Nail Art Tutorial"

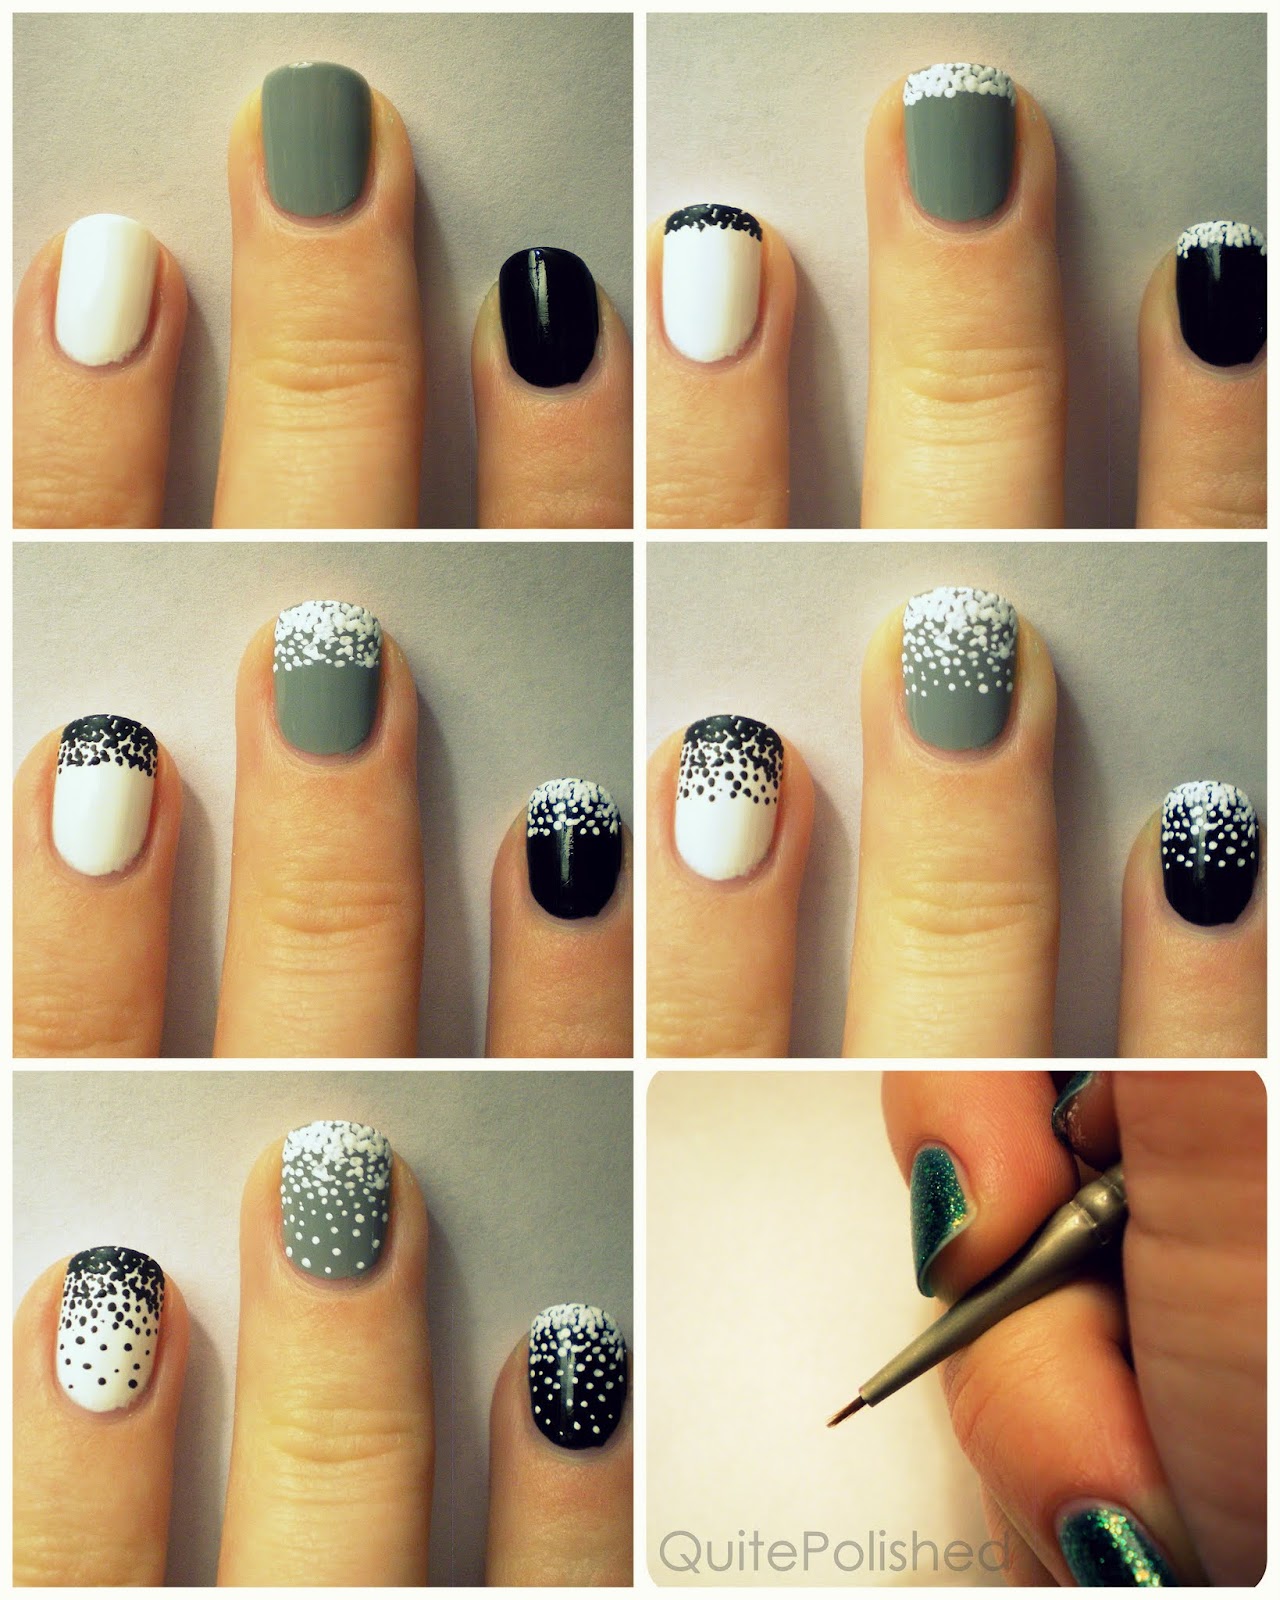
Embrace the winter season with this stunning winter mountain nail art tutorial. The combination of cool tones and snow-covered peaks will make your nails look like a winter wonderland. Start by painting your nails with a light blue base color. Once it's dry, use a sponge to create a gradient effect with a darker blue polish. Next, use a thin brush to create the outline of your mountains with a white polish. Add some snowy details to your mountains using a glittery white polish and a small brush. You can also use a dotting tool to create snowflakes in the sky. Finish off with a matte top coat to give your nails a frosty finish.3. "Winter Mountain Nail Art Tutorial"


3. "Winter Mountain Nail Art Tutorial"


Gradient nails are all the rage right now, and this mountain nail art tutorial combines two popular trends in one stunning design. The gradient effect will give your mountains a more natural and blended look. Start by painting your nails with a light pink base color. Once it's dry, use a makeup sponge to create a gradient effect with a darker pink polish. Next, use a thin brush to create the outline of your mountains with a dark brown or black polish. Fill in the space below the mountains with a light blue polish for the sky. You can also add some clouds using a white polish and a dotting tool. Finally, use a green polish to create some trees at the base of your mountains. Finish off with a top coat for a glossy finish.4. "Gradient Mountain Nail Art Tutorial"

4. "Gradient Mountain Nail Art Tutorial"
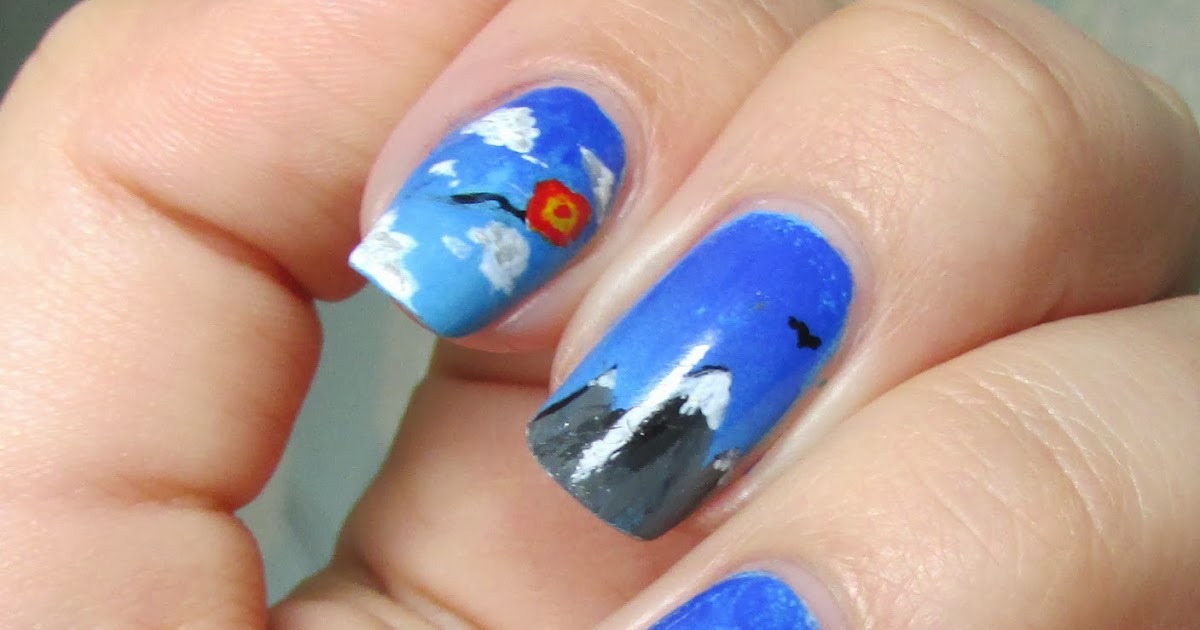
If you're dreaming of hitting the slopes, this ski resort mountain nail art tutorial will bring those ski vacation vibes right to your fingertips. With a bold color scheme and cute snowflake details, you'll feel like you're on a ski trip every time you look at your nails. Start by painting your nails with a dark blue base color. Once it's dry, use a thin brush to create the outline of your mountains with a white polish. You can also add some ski tracks using a black polish and a small brush. Next, use a sponge to create a gradient effect with a light blue polish for the sky. Add some snowflakes using a white polish and a dotting tool. Finally, use a green polish to create some trees at the base of your mountains. Finish off with a top coat for a glossy finish.5. "Ski Resort Mountain Nail Art Tutorial"

5. "Ski Resort Mountain Nail Art Tutorial"

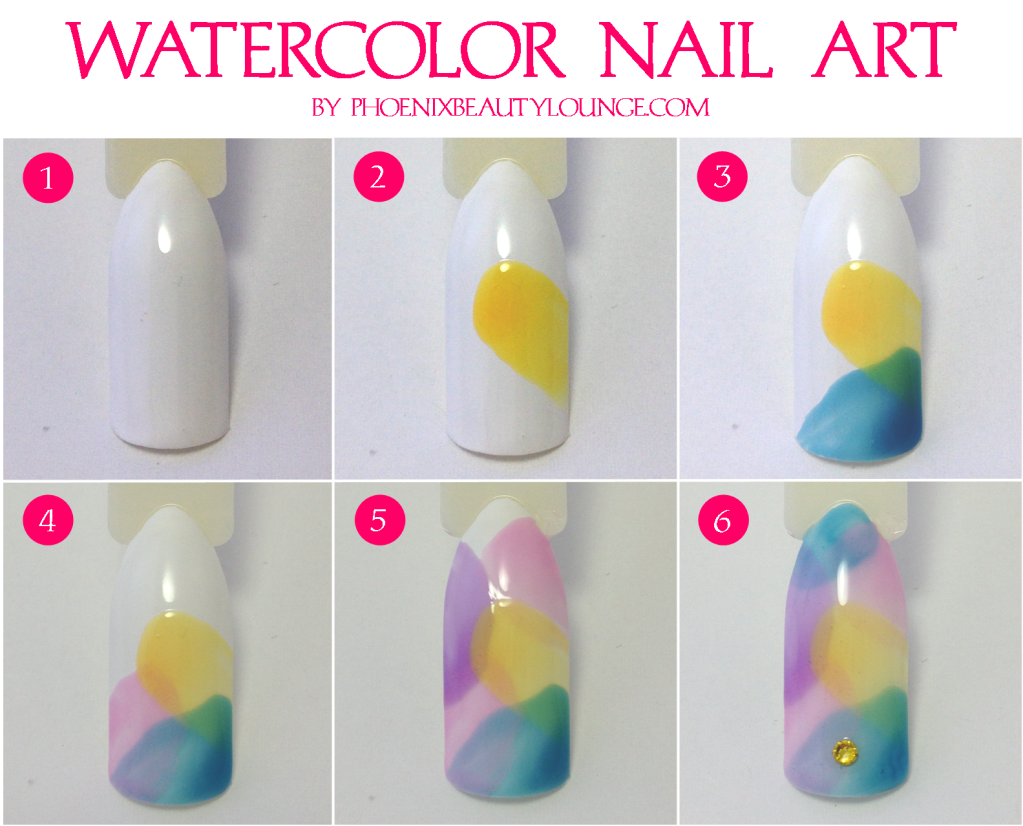
For a more artistic and abstract take on mountain nail art, try this watercolor mountain nail art tutorial. The blend of colors and the soft, dreamy effect will make your nails look like a beautiful painting. Start by painting your nails with a white base color. Once it's dry, use a makeup sponge to create a watercolor effect with various shades of blue, pink, and purple polishes. Next, use a thin brush to create the outline of your mountains with a dark brown or black polish. Add some details to your mountains using a white polish and a small brush. You can also add some clouds using a white polish and a dotting tool. Finish off with a matte top coat for a soft and dreamy finish.6. "Watercolor Mountain Nail Art Tutorial"
6. "Watercolor Mountain Nail Art Tutorial"


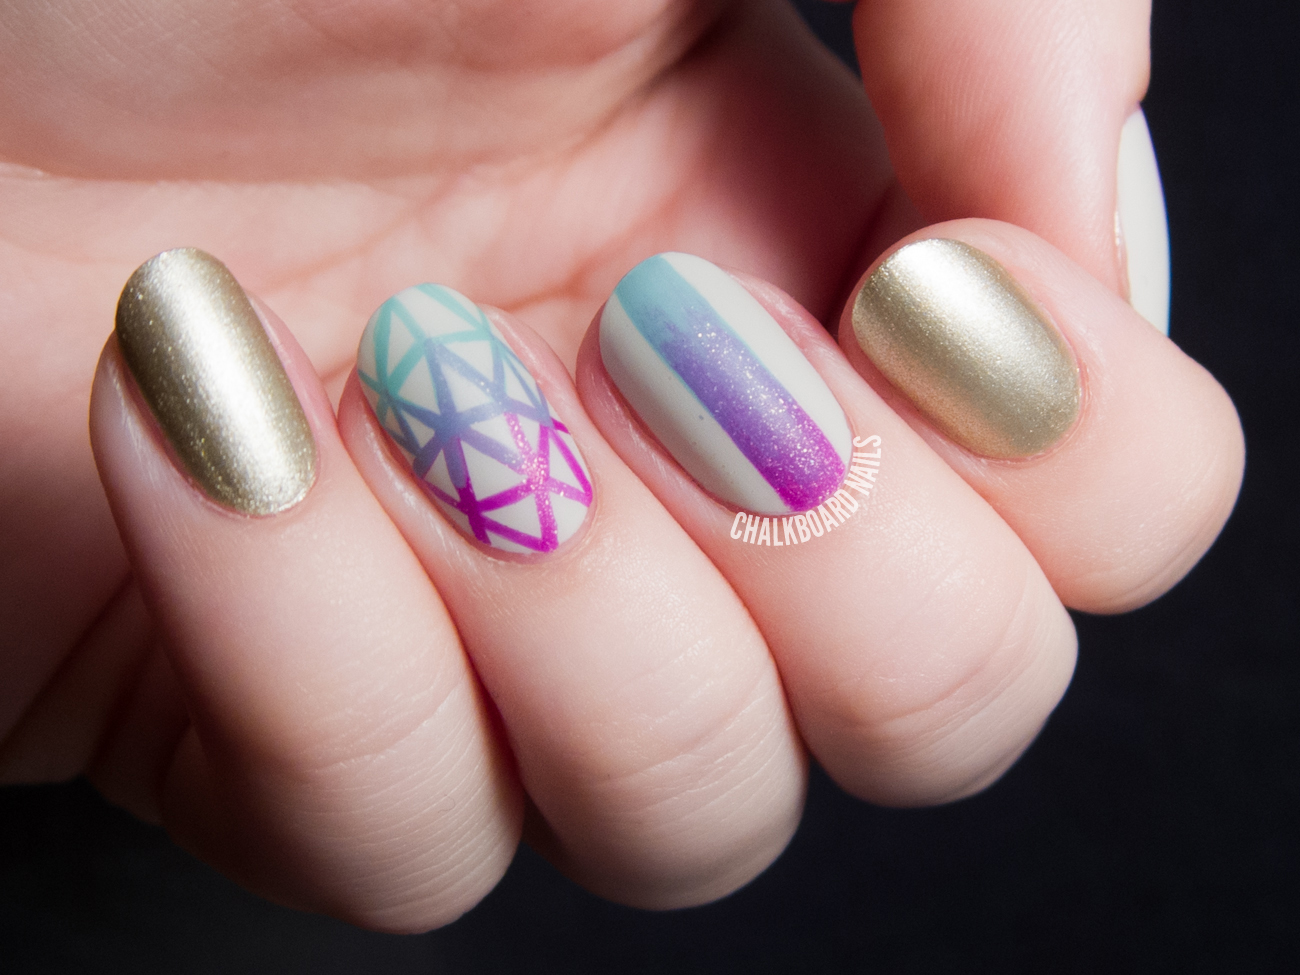
If you're a fan of geometric designs, this mountain nail art tutorial will be right up your alley. The combination of sharp lines and bold colors will make your nails stand out in a crowd. Start by painting your nails with a light blue base color. Once it's dry, use striping tape to create geometric shapes on your nails. You can use different angles and sizes to create a unique design. Next, use a thin brush to create the outline of your mountains with a dark brown or black polish. Fill in the space below the mountains with a light blue polish for the sky. Finally, use a green polish to create some trees at the base of your mountains. Finish off with a top coat for a glossy finish.7. "Geometric Mountain Nail Art Tutorial"
7. "Geometric Mountain Nail Art Tutorial"
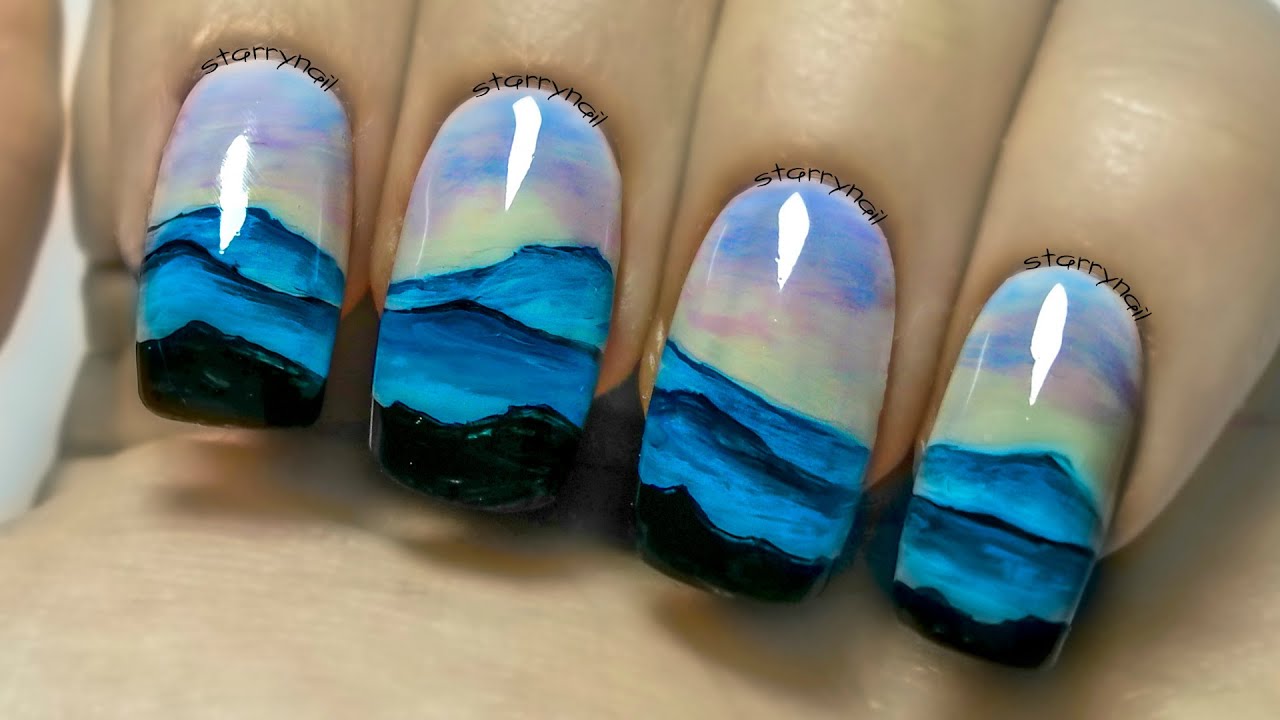
Capture the beauty of a sunset with this stunning sunset mountain nail art tutorial. The warm and vibrant colors will make your nails look like a piece of art. Start by painting your nails with a white base color. Once it's dry, use a makeup sponge to create a gradient effect with various shades of orange, pink, and purple polishes. Next, use a thin brush to create the outline of your mountains with a dark brown or black polish. Add some details to your mountains using a white polish and a small brush. You can also add some clouds using a white polish and a dotting tool. Finish off with a glossy top coat for a vibrant and eye-catching finish.8. "Sunset Mountain Nail Art Tutorial"


8. "Sunset Mountain Nail Art Tutorial"


Take your mountain nail art to the next level with this 3D mountain nail art tutorial. With a few simple materials, you can create a textured and realistic mountain design on your nails. Start by painting your nails with a light blue base color. Once it's dry, use a sponge to create a gradient effect with a darker blue polish. Next, use a thin brush to create the outline of your mountains with a white polish. Add some details to your mountains using a textured powder or sand in shades of grey or brown. You can also use small beads or rhinestones to add some sparkle and dimension. Finish off with a top coat for a long-lasting finish.9. "3D Mountain Nail Art Tutorial"

9. "3D Mountain Nail Art Tutorial"
Bring the magic of the galaxy to your nails with this stunning galaxy mountain nail art tutorial. The combination of deep blues and purples will give your nails a mesmerizing and otherworldly look. Start by painting your nails with a black base color. Once it's dry, use a sponge to create a galaxy effect with various shades of blue, purple, and pink polishes. Next, use a thin brush to create the outline of your mountains with a white polish. Add some stars using a white polish and a small brush. You can also add some glitter or holographic powder for a more sparkly effect. Finish off with a glossy top coat for a galaxy-inspired finish.10. "Galaxy Mountain Nail Art Tutorial"

10. "Galaxy Mountain Nail Art Tutorial"
Making the Mountains Pop: A Guide to Mountain Nail Art

Creating a Stunning Landscape on Your Nails
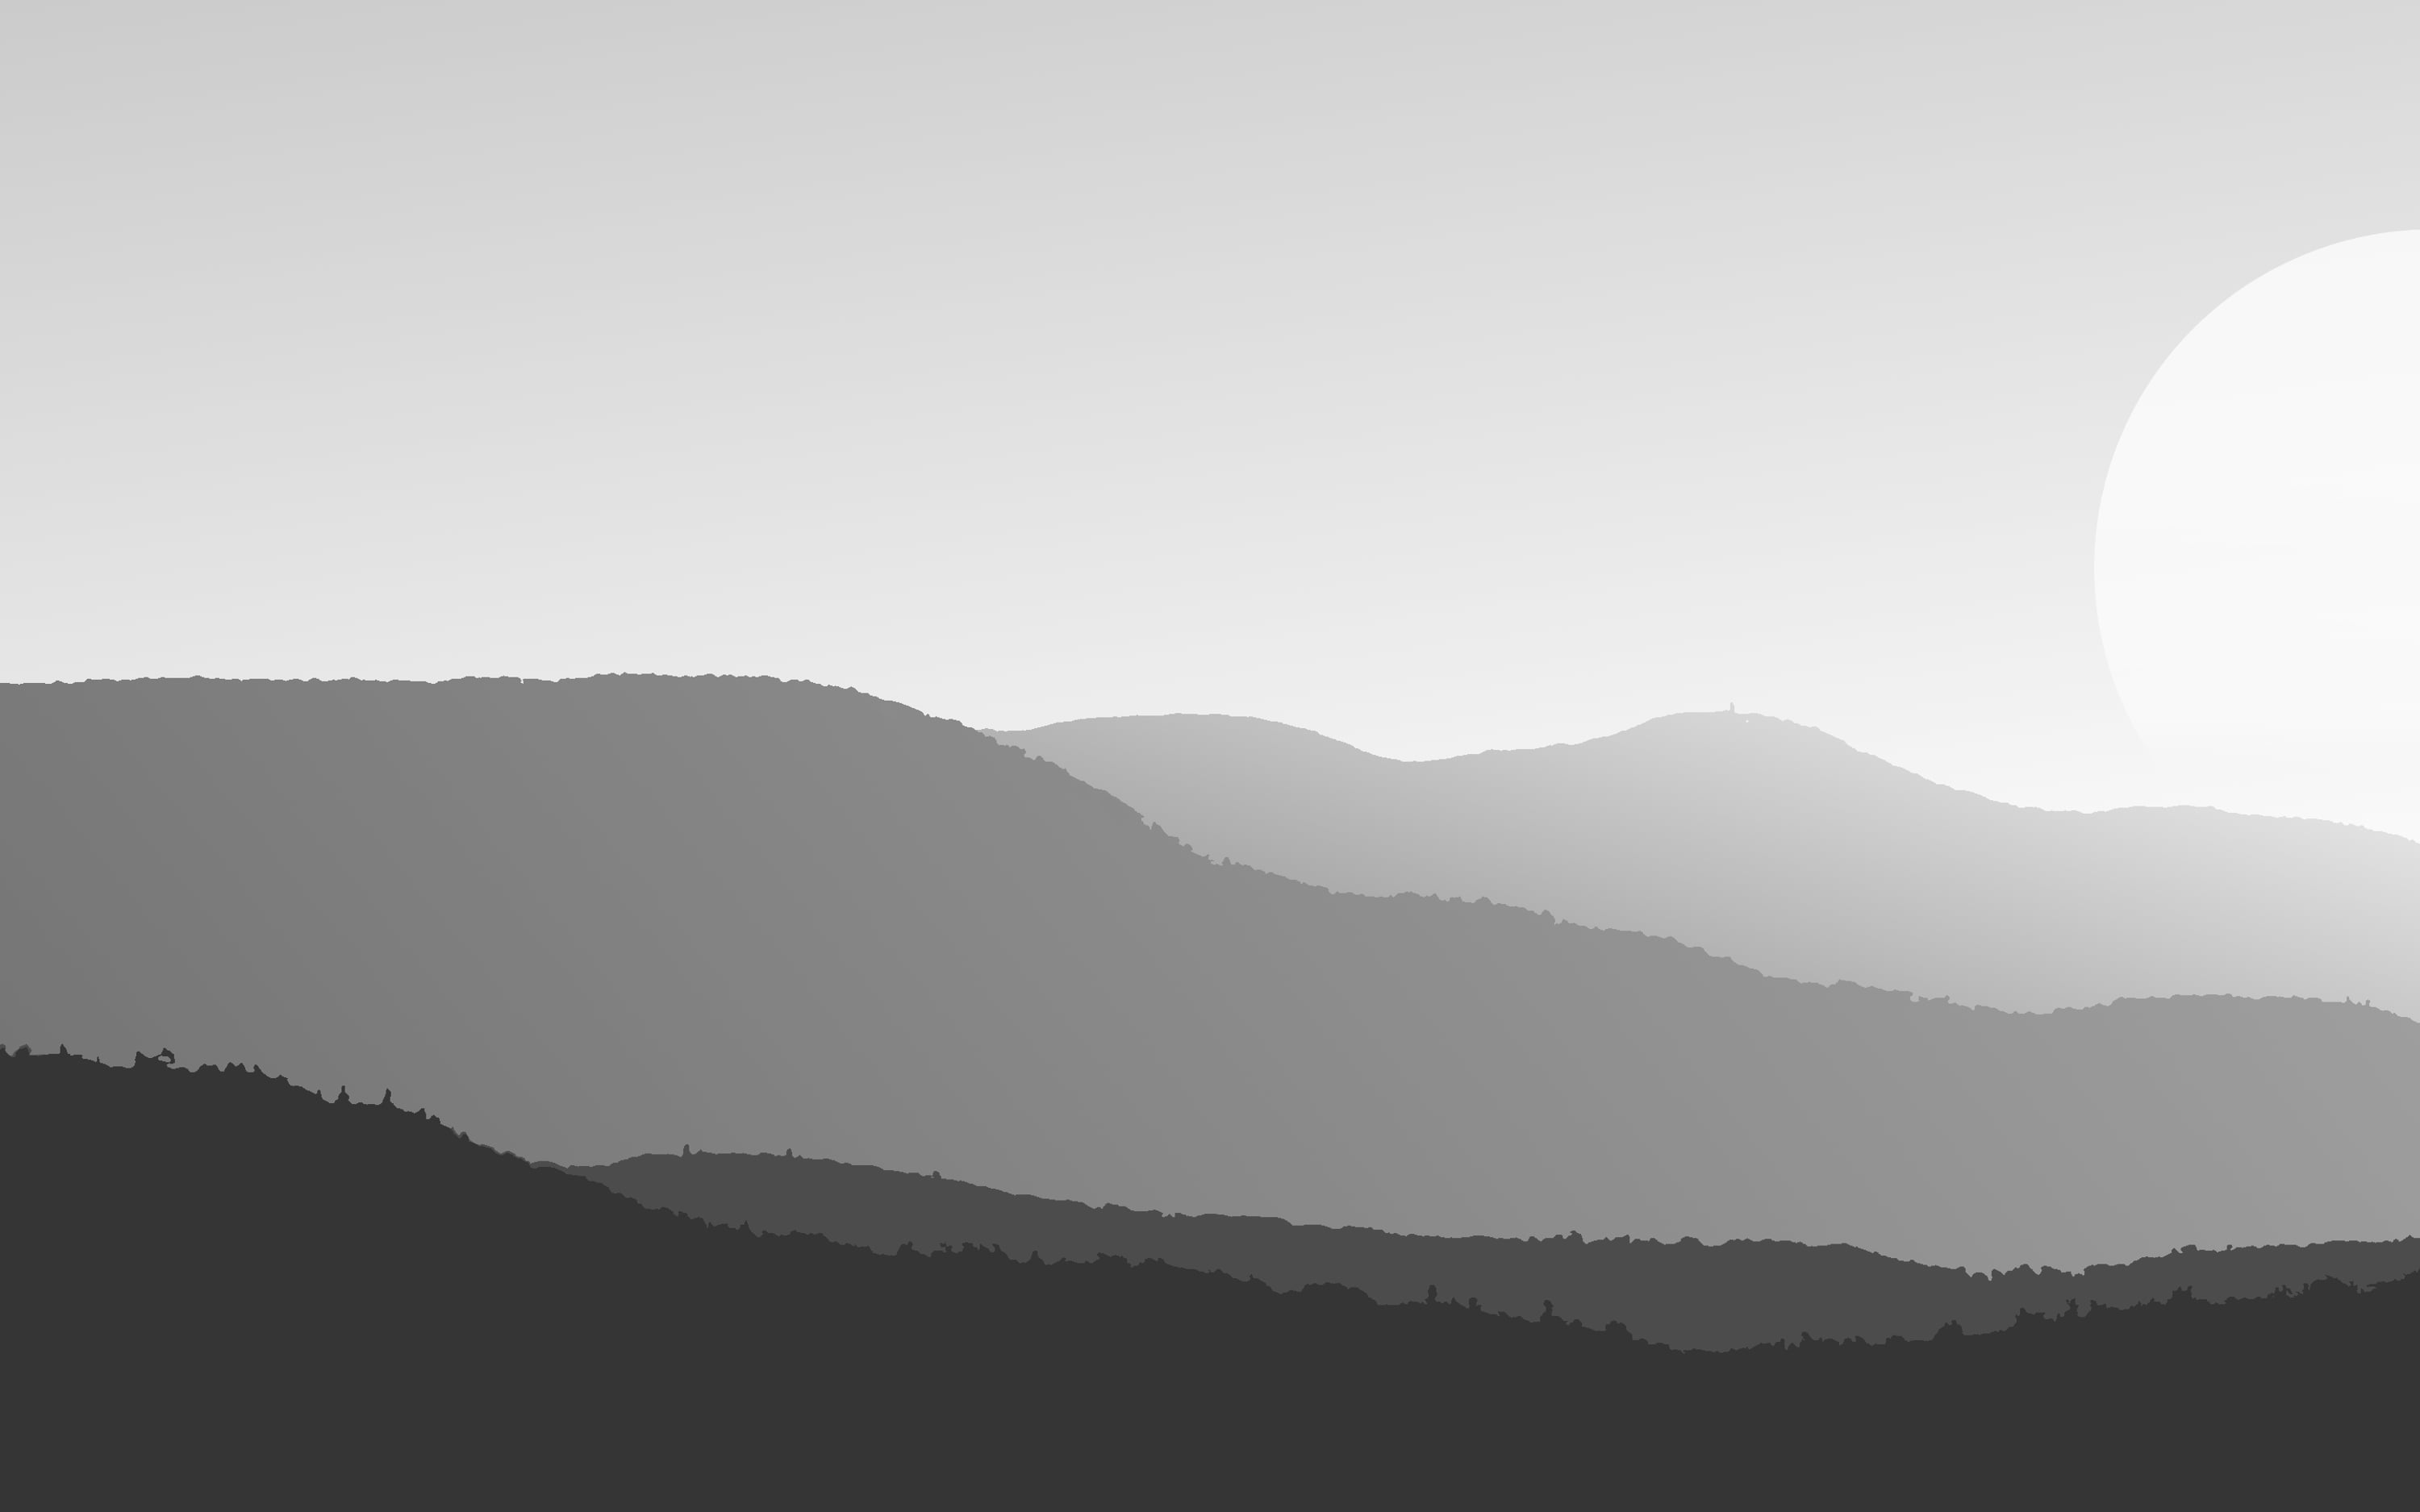
 If you're looking for a unique and eye-catching way to express your love for nature and the great outdoors, look no further than mountain nail art. This trendy and creative nail design is perfect for nature lovers and adventure seekers alike. With just a few simple steps, you can create a stunning landscape on your nails that will make you feel like you're on top of the world.
To start, gather all the necessary materials: a base coat, top coat,
nail polish
(in shades of blue, green, brown, and white), a small sponge, and a thin nail art brush. Begin by applying a base coat to protect your nails and allow the
nail polish
to adhere better. Next, paint your nails with a base color of either blue or green to represent the sky or grass. Use a sponge to gently dab on a second layer of the same color to create a textured effect.
Once the base coat is dry, it's time to create the mountains.
Mountain nail art
can be done in various styles, but for this tutorial, we'll be creating a simple and elegant mountain range. Using a thin nail art brush and a dark brown
nail polish
, draw a curved line at the tip of your nail to represent the first mountain peak. Then, create a series of smaller peaks following the same curve, gradually decreasing in size. You can also add some small lines to create depth and texture to the mountains.
Next, take a light brown
nail polish
and use it to fill in the space between the mountains to create the base of the range. You can also use the sponge technique to blend the colors and create a more natural look. Once the mountains are complete, use a white
nail polish
and the sponge to create a snowy effect at the top of the peaks.
To add the finishing touches, use the thin nail art brush and white
nail polish
to draw small clouds in the sky. You can also use the same technique to add stars or a moon if you'd like. Once your design is complete, let it dry for a few minutes before applying a top coat to seal in the design and add shine.
With this simple tutorial, you can create a stunning
mountain nail art
design that will make you feel like you're standing on top of a beautiful mountain range. Play around with different colors and techniques to make the design your own. Now, go ahead and show off your love for nature and adventure on your nails.
If you're looking for a unique and eye-catching way to express your love for nature and the great outdoors, look no further than mountain nail art. This trendy and creative nail design is perfect for nature lovers and adventure seekers alike. With just a few simple steps, you can create a stunning landscape on your nails that will make you feel like you're on top of the world.
To start, gather all the necessary materials: a base coat, top coat,
nail polish
(in shades of blue, green, brown, and white), a small sponge, and a thin nail art brush. Begin by applying a base coat to protect your nails and allow the
nail polish
to adhere better. Next, paint your nails with a base color of either blue or green to represent the sky or grass. Use a sponge to gently dab on a second layer of the same color to create a textured effect.
Once the base coat is dry, it's time to create the mountains.
Mountain nail art
can be done in various styles, but for this tutorial, we'll be creating a simple and elegant mountain range. Using a thin nail art brush and a dark brown
nail polish
, draw a curved line at the tip of your nail to represent the first mountain peak. Then, create a series of smaller peaks following the same curve, gradually decreasing in size. You can also add some small lines to create depth and texture to the mountains.
Next, take a light brown
nail polish
and use it to fill in the space between the mountains to create the base of the range. You can also use the sponge technique to blend the colors and create a more natural look. Once the mountains are complete, use a white
nail polish
and the sponge to create a snowy effect at the top of the peaks.
To add the finishing touches, use the thin nail art brush and white
nail polish
to draw small clouds in the sky. You can also use the same technique to add stars or a moon if you'd like. Once your design is complete, let it dry for a few minutes before applying a top coat to seal in the design and add shine.
With this simple tutorial, you can create a stunning
mountain nail art
design that will make you feel like you're standing on top of a beautiful mountain range. Play around with different colors and techniques to make the design your own. Now, go ahead and show off your love for nature and adventure on your nails.


