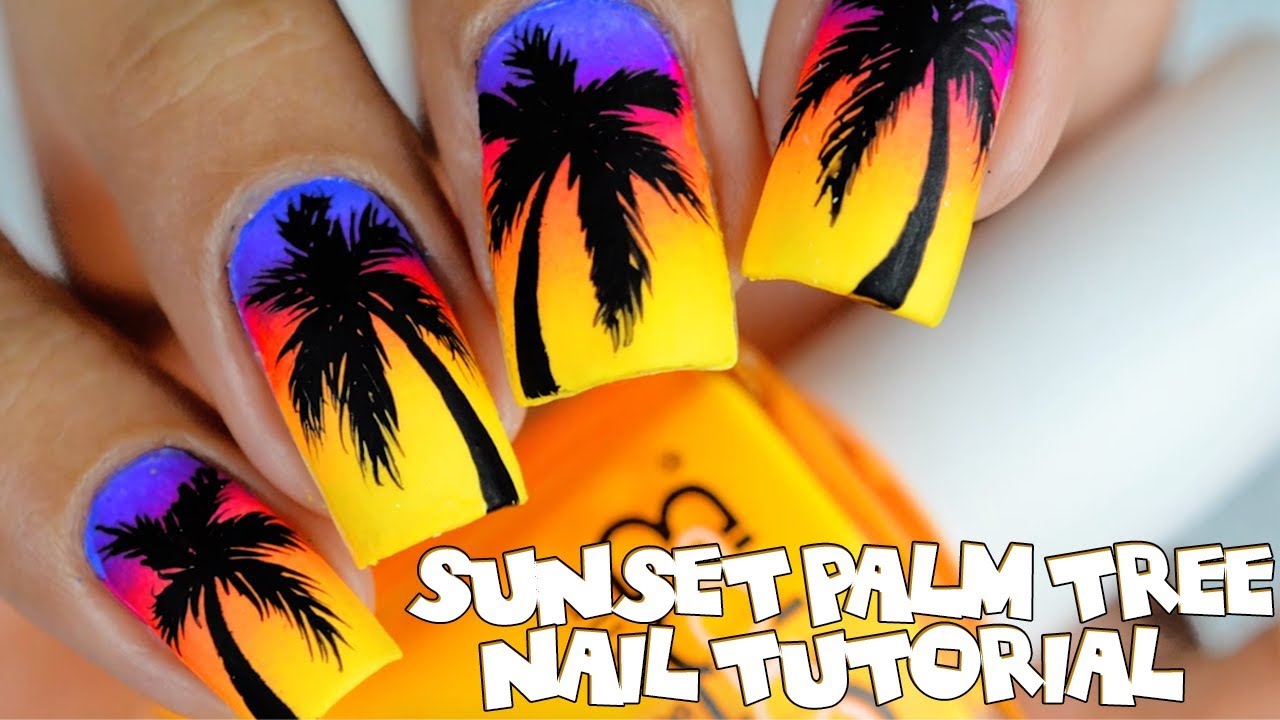
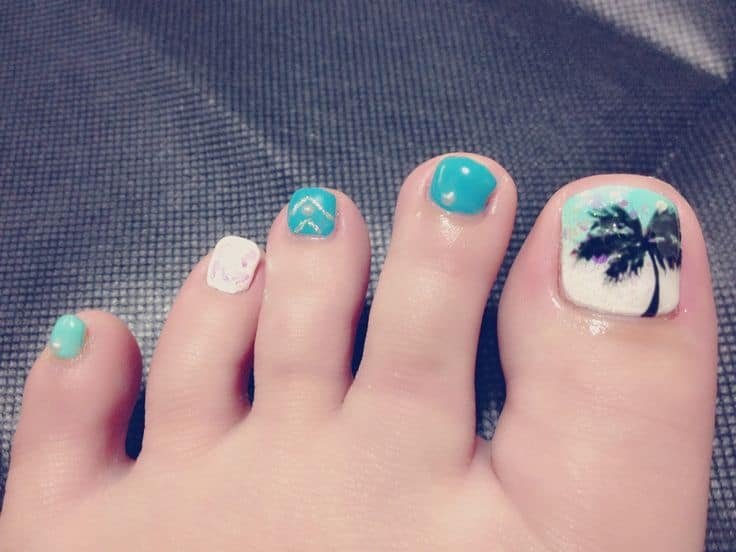
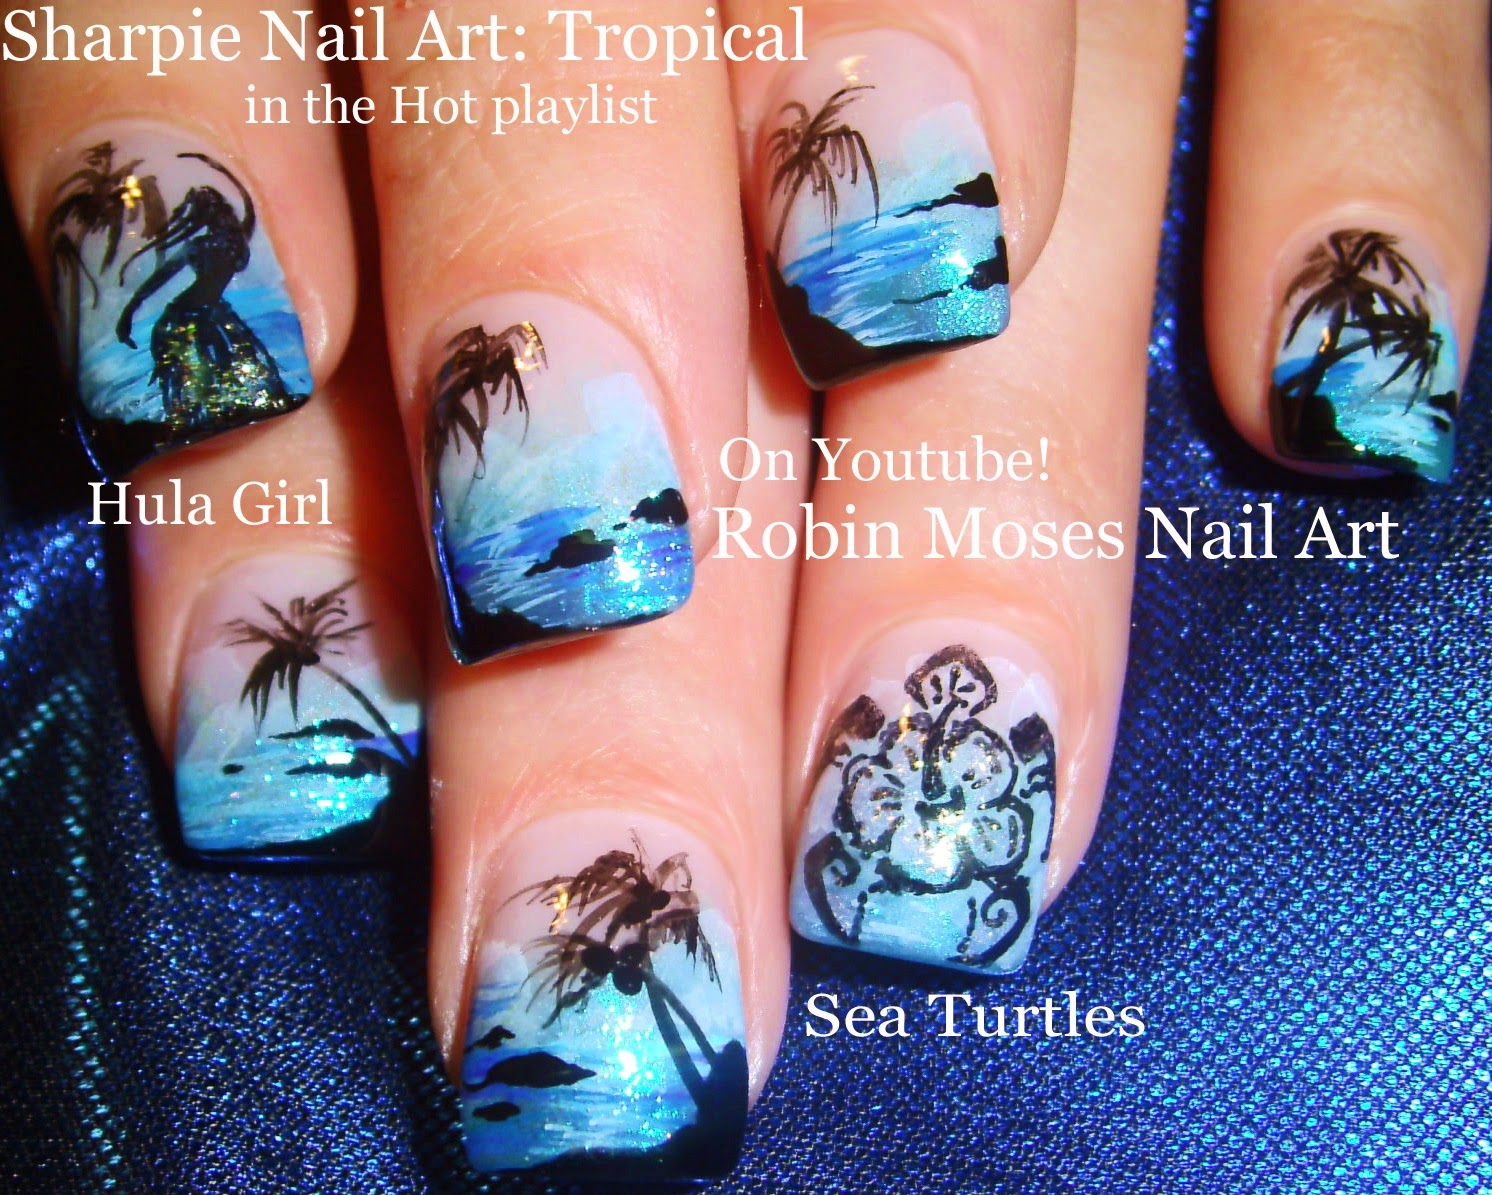
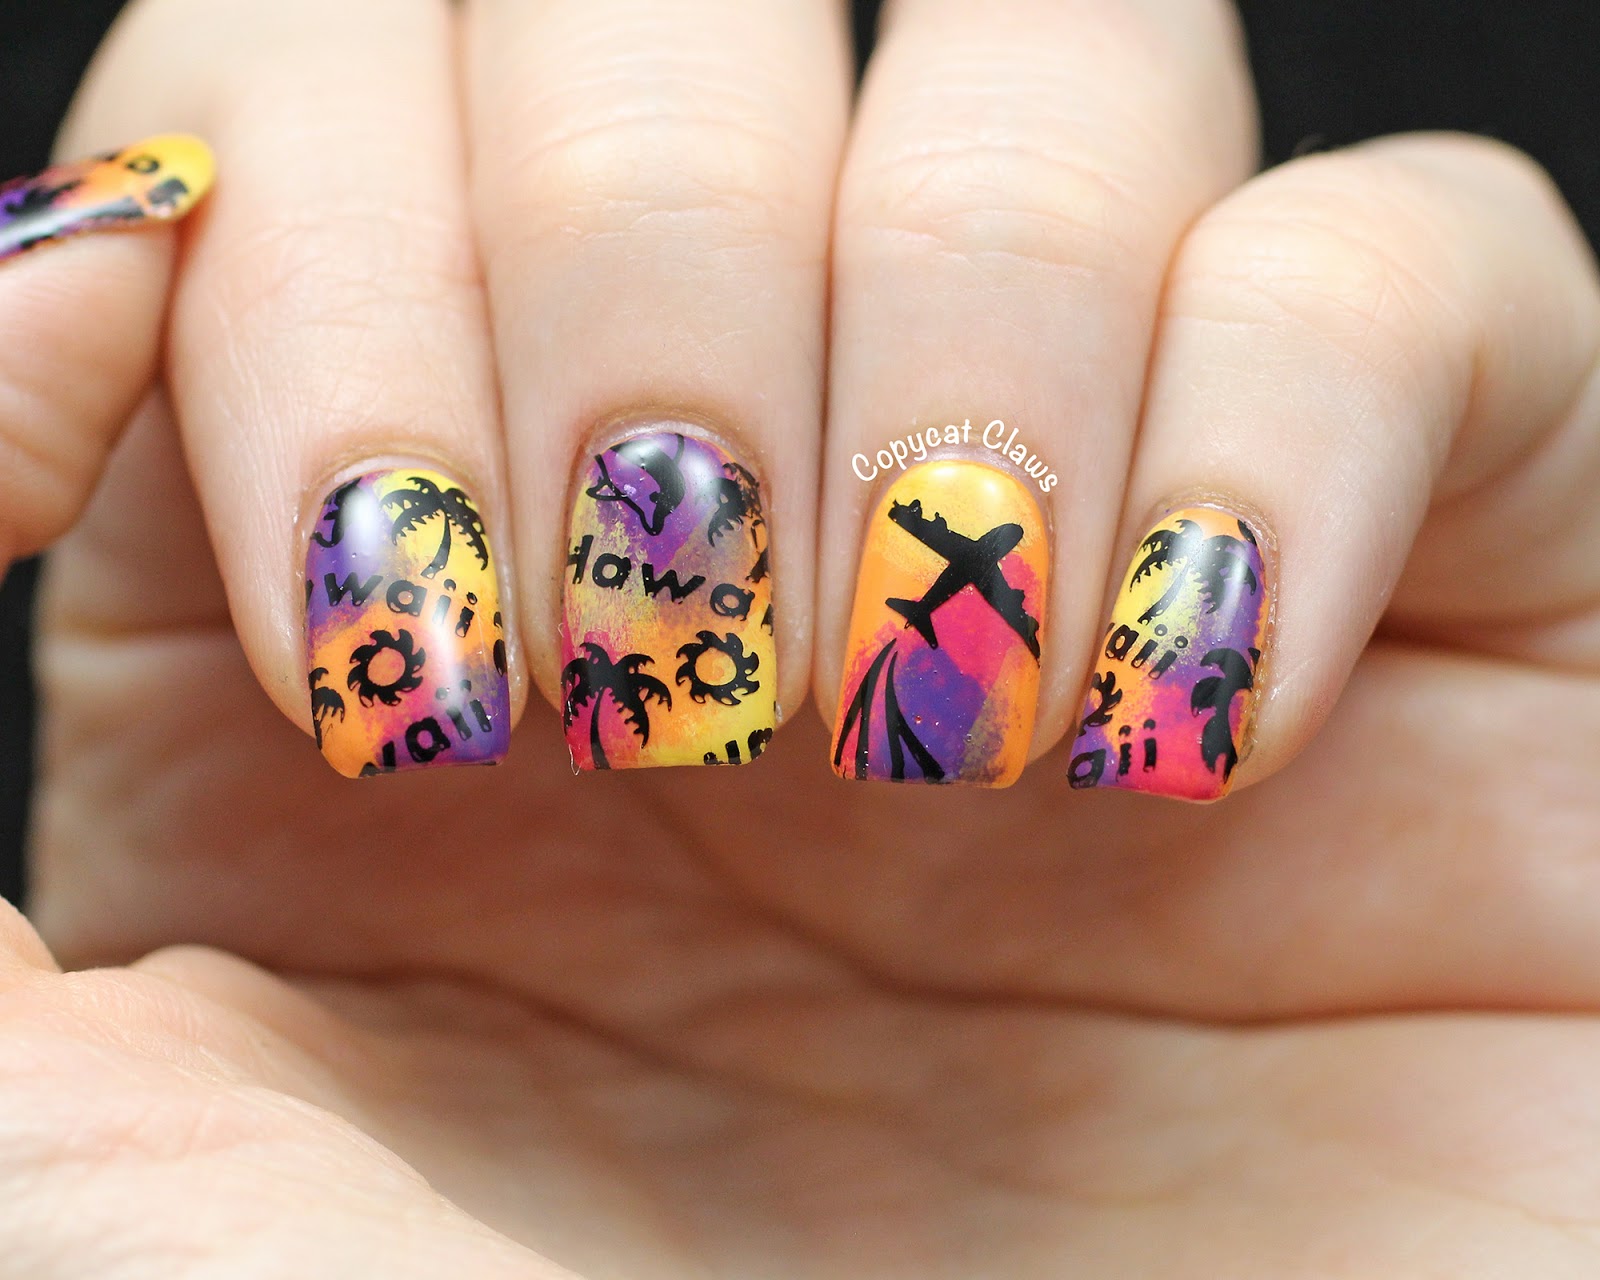
Heading to Hawaii for a much-needed vacation? Want to add some tropical flair to your look? Look no further than these beach-themed nail art designs that are perfect for your Hawaii getaway. 1. Hawaiian Sunset Nails: Capture the stunning beauty of a Hawaiian sunset with this nail art design. Paint your nails a deep purple or blue and add a gradient of oranges, pinks, and yellows using a makeup sponge. Finish with a top coat for a glossy finish. 2. Palm Tree Paradise: Bring a touch of the tropics to your nails with this easy palm tree design. Start with a nude or light blue base and use a thin brush to paint on palm trees in black. Add a pop of color with green leaves and coconuts. 3. Flower Power: Nothing says Hawaii like beautiful tropical flowers. Use a small brush or toothpick to create hibiscus flowers in different colors on a white or light pink base. Add some yellow accents for the center of the flowers. 4. Hawaiian Print Nails: Embrace the bold and colorful prints of Hawaii with this nail art design. Start with a white base and use a thin brush to paint on hula dancers, surfboards, pineapples, and other fun Hawaiian motifs. 5. Tropical Fruit Nails: Hawaii is known for its delicious tropical fruits, so why not showcase them on your nails? Use bright colors like yellow, orange, and pink to create designs of pineapples, mangoes, and passionfruit.Beach-Themed Nail Art for Your Hawaii Vacation


Beach-Themed Nail Art for Your Hawaii Vacation


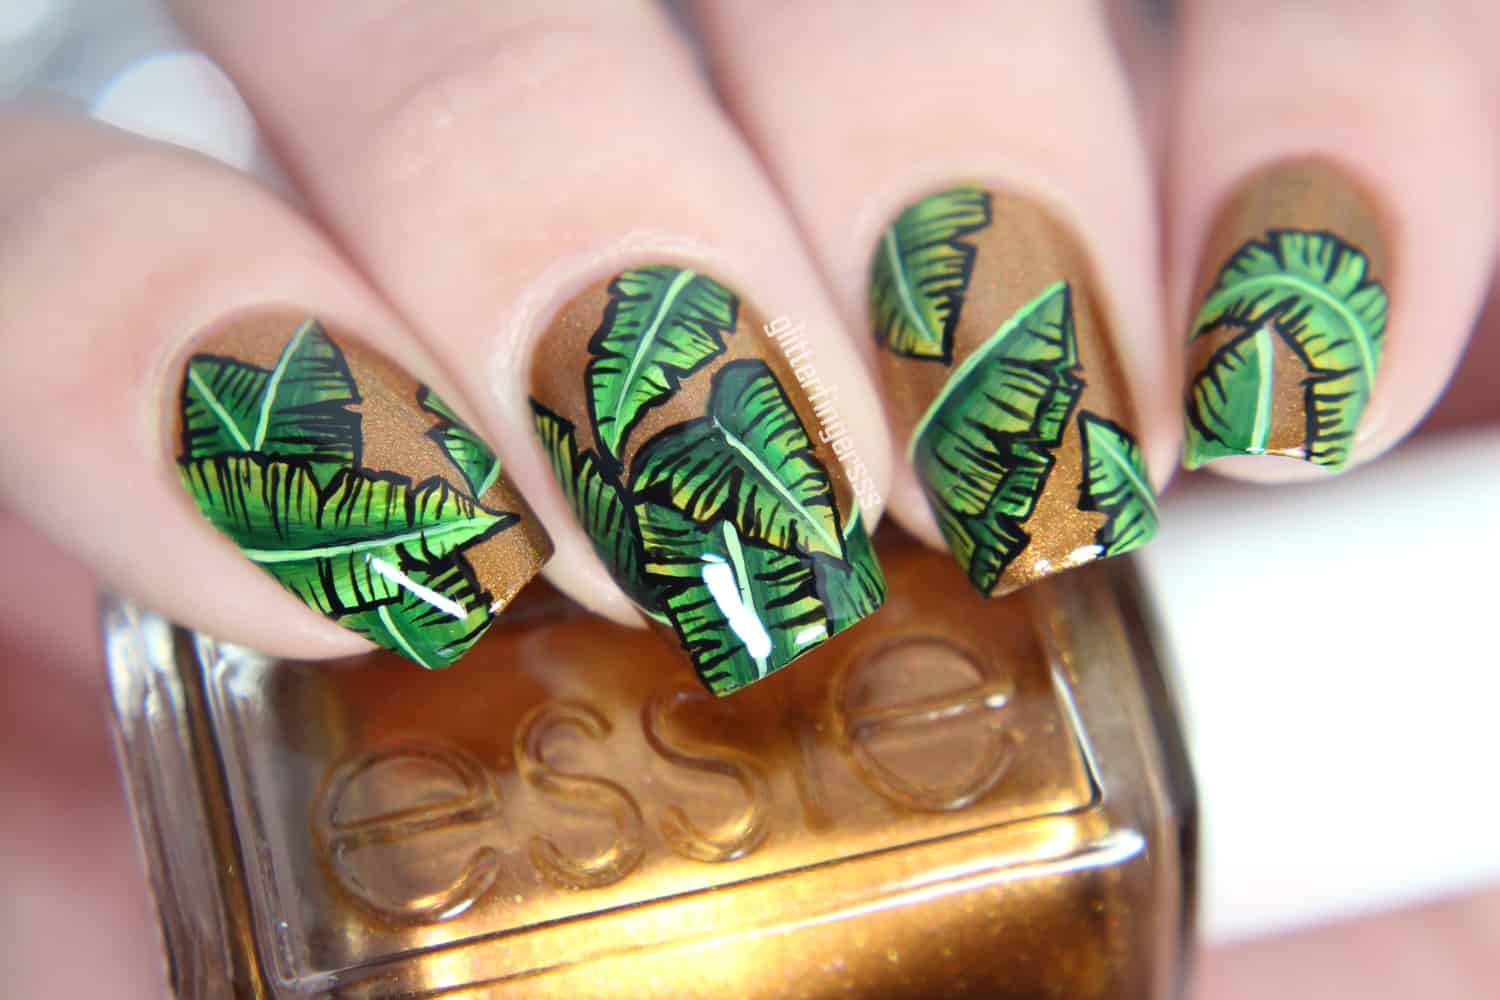
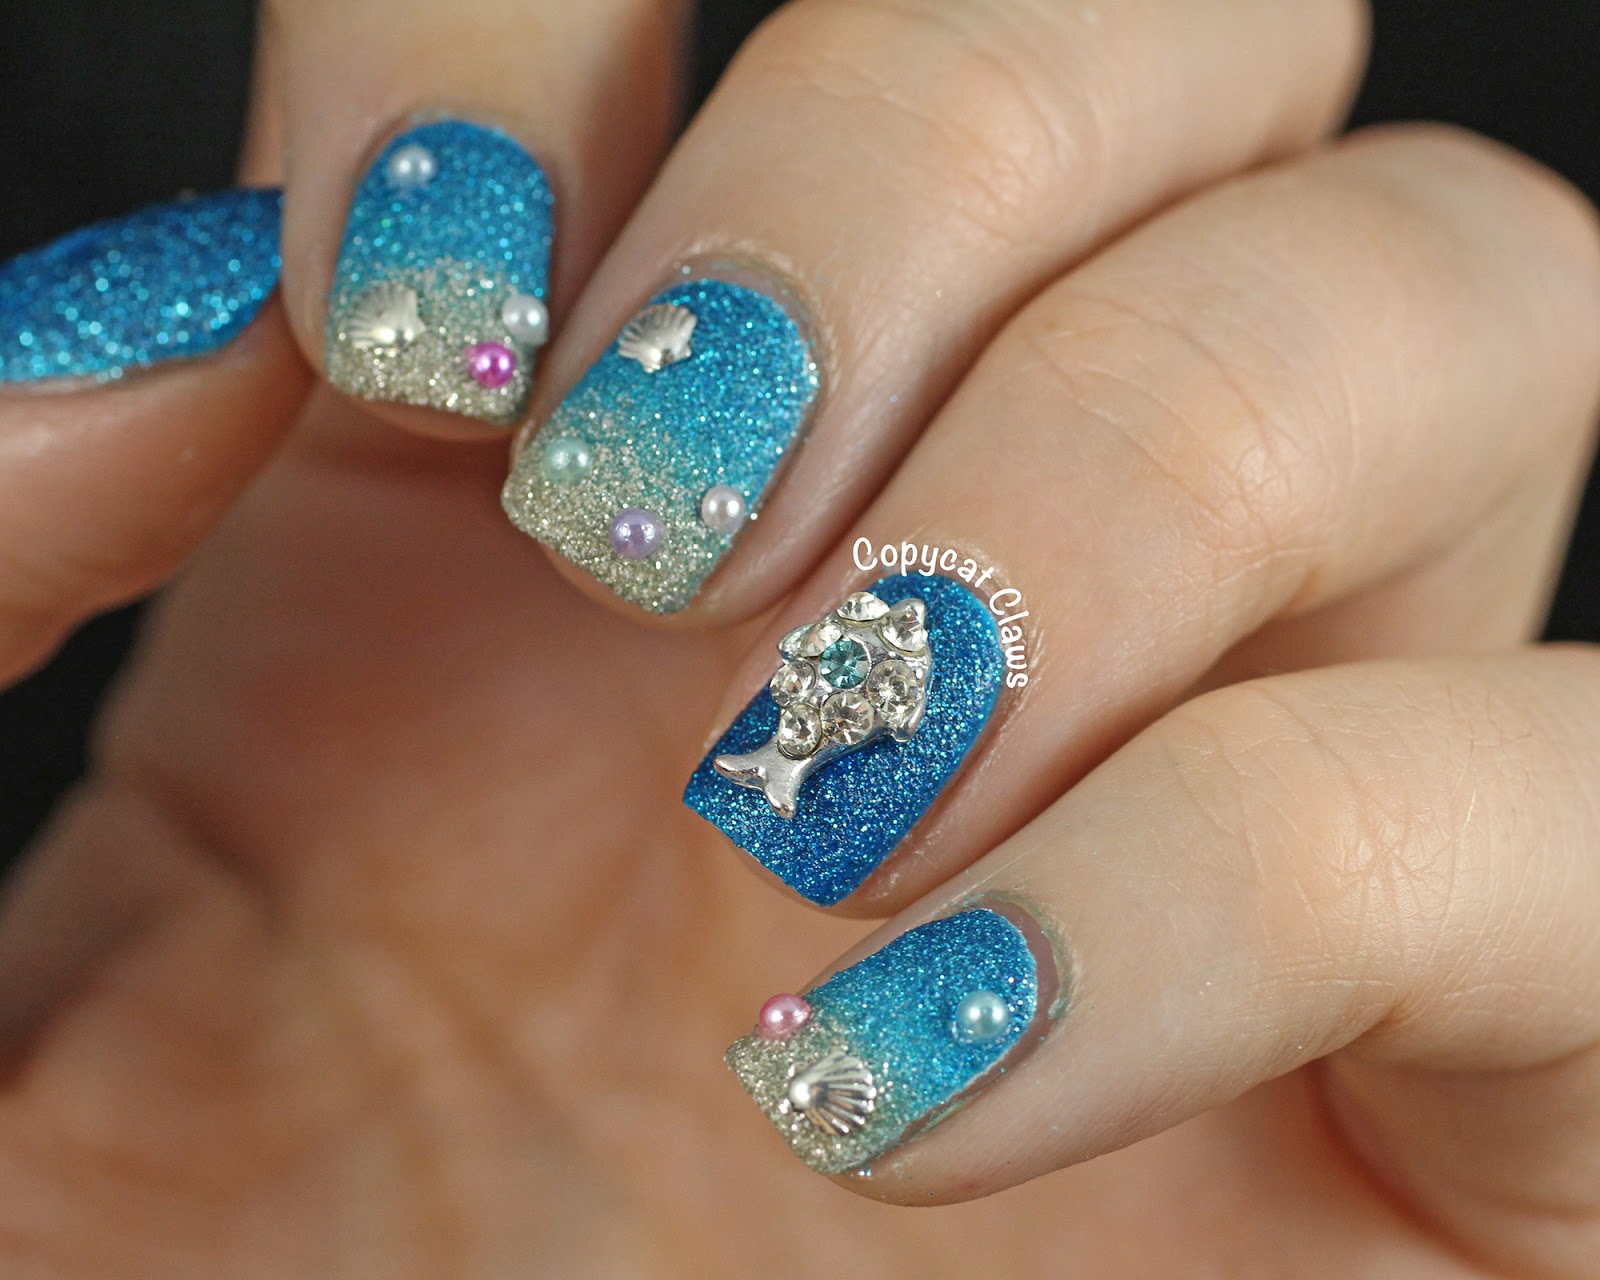
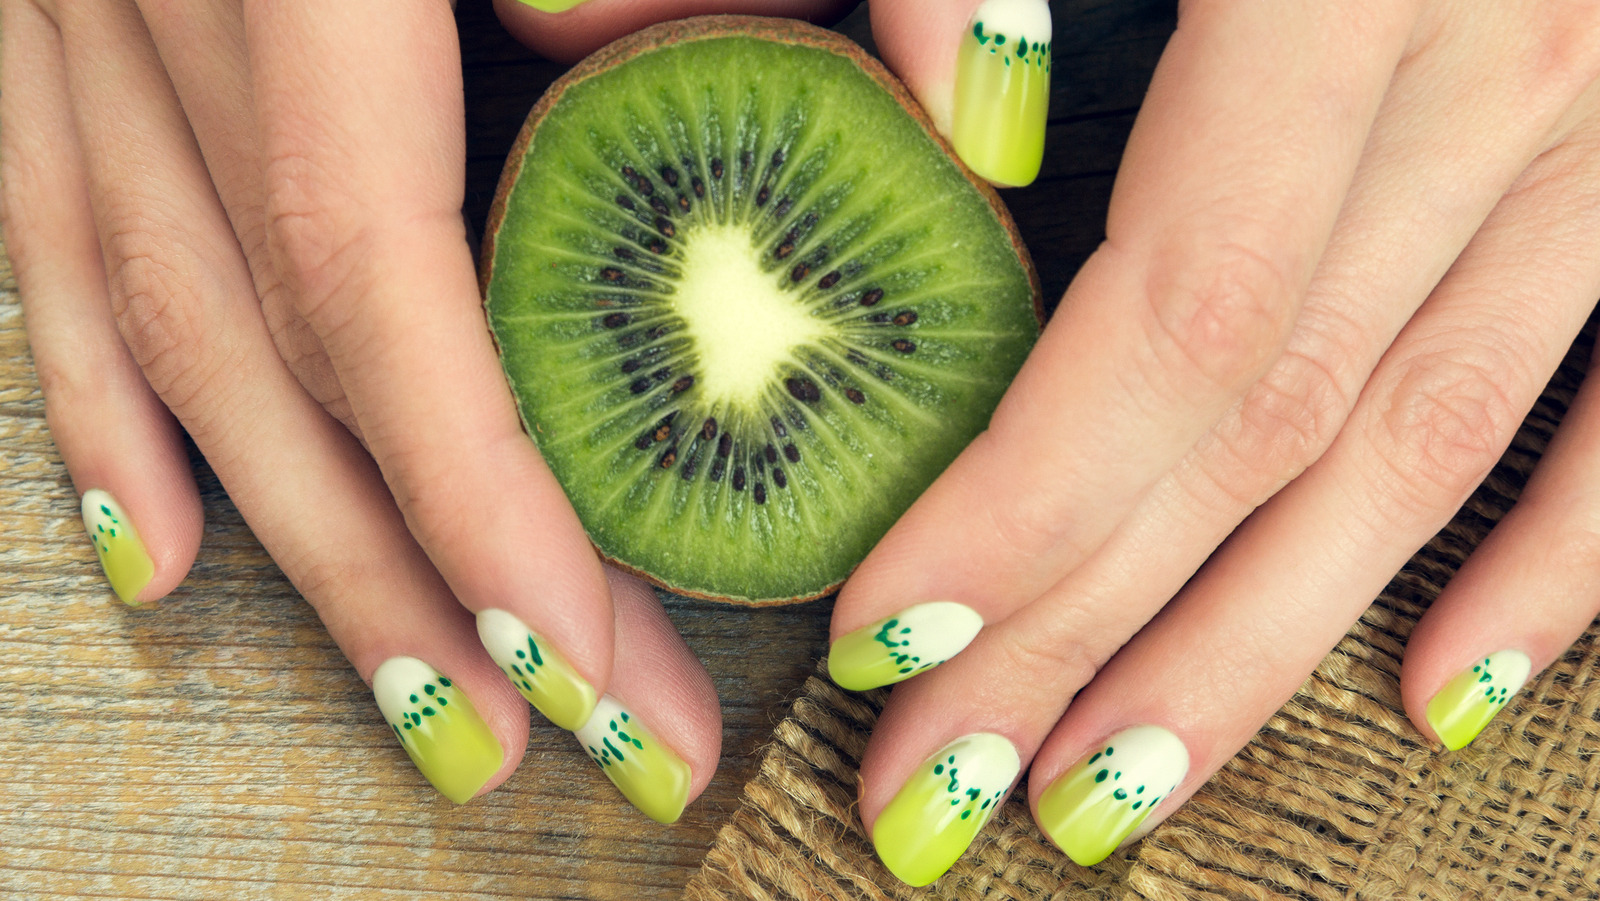
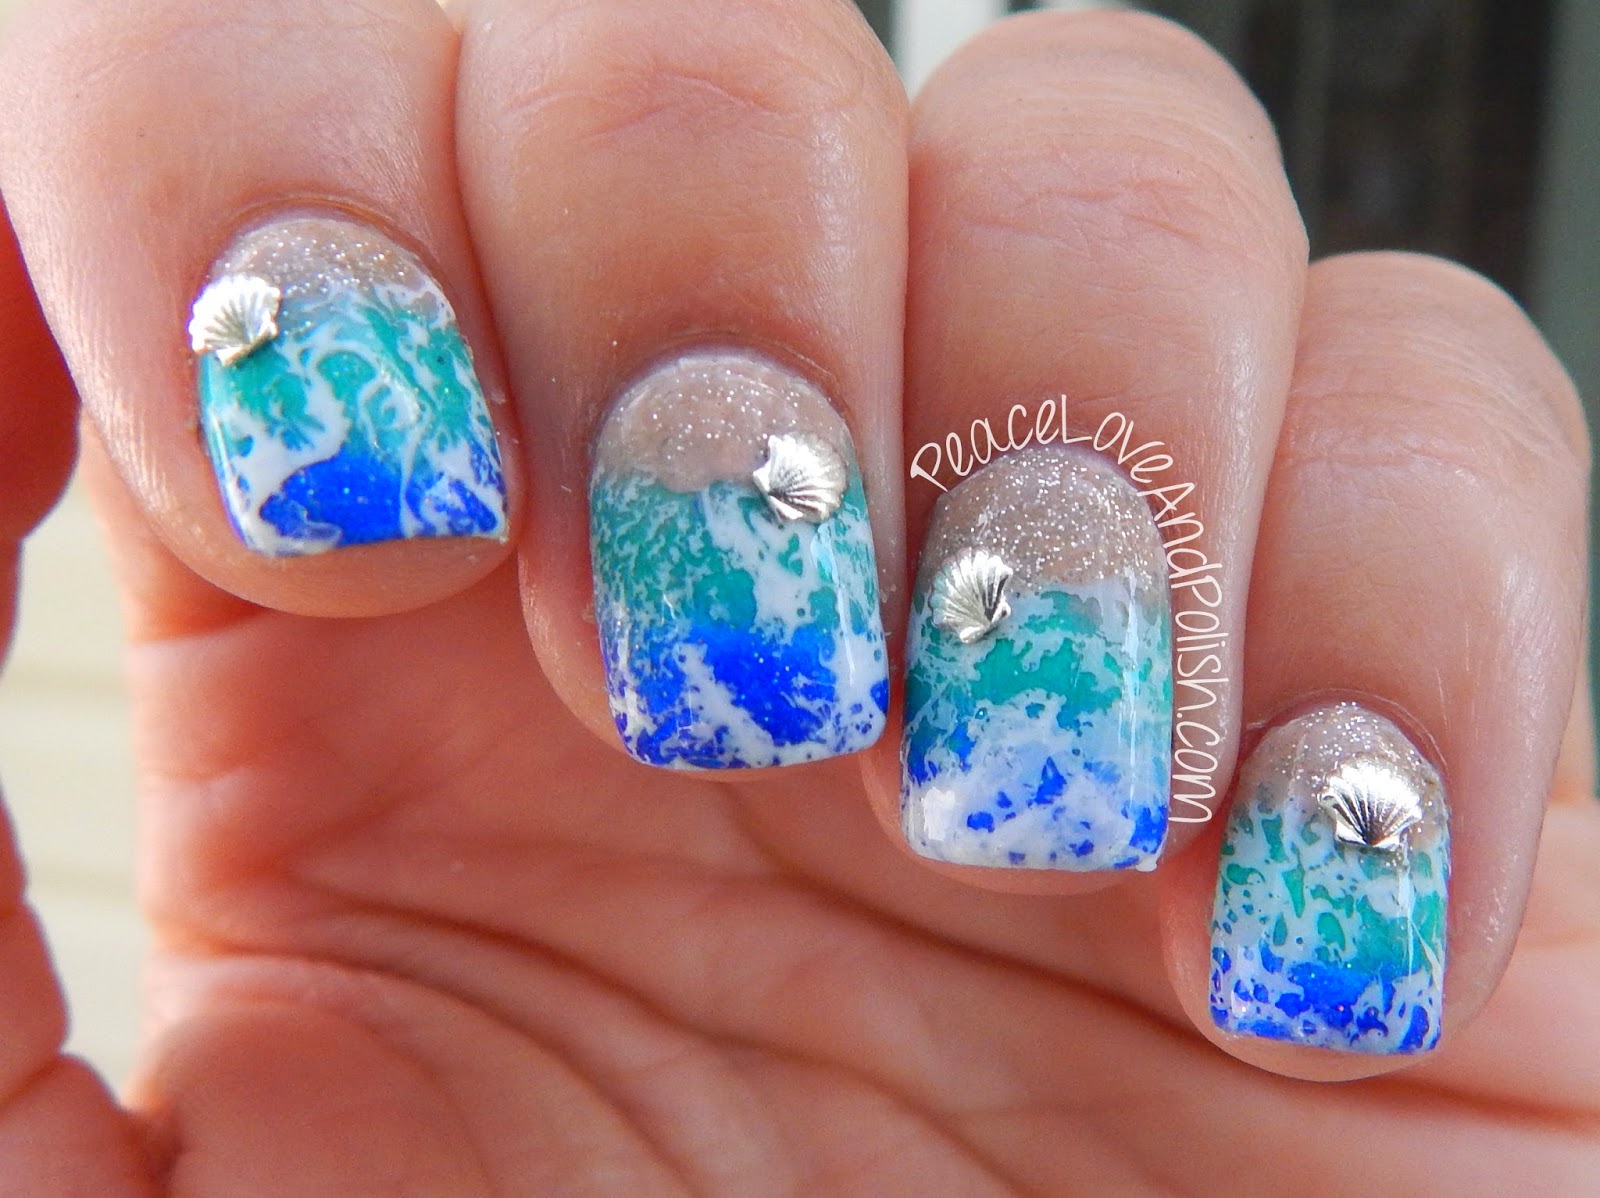
Heading to Hawaii for a much-needed vacation? Want to add some tropical flair to your look? Look no further than these 10 nail art designs that are perfect for your Hawaii getaway. 6. Seashell Nails: Get beachy vibes with this seashell nail art design. Start with a light blue base and use a toothpick to create white seashells on your nails. Add some gold accents for a touch of sparkle. 7. Ocean Waves: Capture the beauty of the ocean with this simple yet stunning nail art design. Use a light blue base and add white waves using a thin brush or toothpick. For an extra touch, add a small gold seashell near the base of your nails. 8. Tropical Leaf Tips: Add a twist to the classic French manicure with this tropical leaf tip design. Start with a nude or light pink base and add green tropical leaves to the tips of your nails using a thin brush. 9. Hawaiian Flower Nail Art Tutorial: Want to create a stunning Hawaiian flower nail art design? Check out tutorials online for step-by-step instructions on how to create different types of tropical flowers like plumeria, orchids, and bird of paradise. 10. Beachy Ombre: Ombre nails are all the rage and what better place to rock them than in Hawaii? Use shades of blue, green, and purple to create a gradient look that mimics the colors of the ocean.10 Tropical Nail Designs Perfect for Your Hawaii Vacation


10 Tropical Nail Designs Perfect for Your Hawaii Vacation

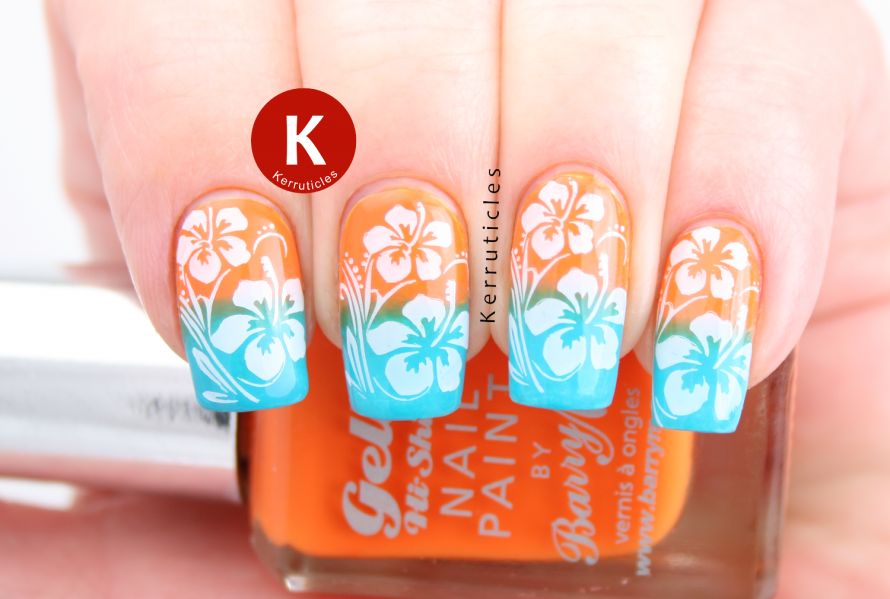


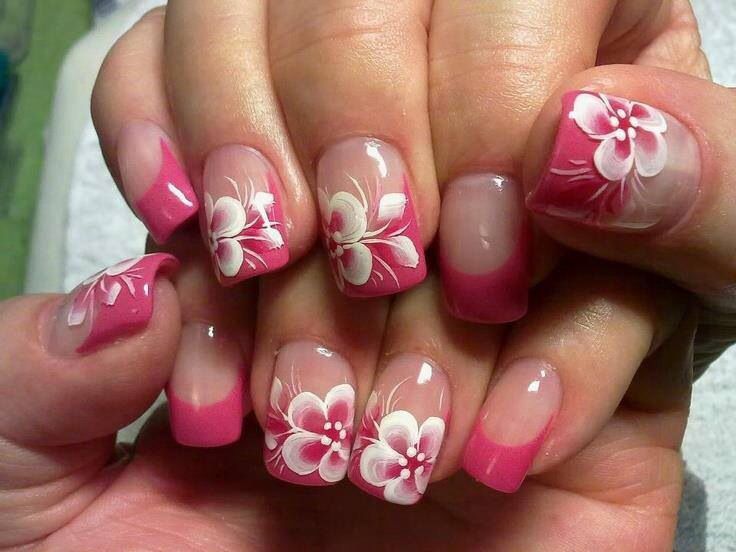
Want to add a touch of Hawaii to your nails? Follow these easy steps to create a stunning Hawaiian flower nail art design. Step 1: Start by painting your nails with a light pink or white base color. Let it dry completely before moving on to the next step. Step 2: Using a thin brush or toothpick, create a tropical flower on each nail. You can choose to do all the same flower or mix it up with different types like plumeria, hibiscus, and orchids. Step 3: Add small yellow accents in the center of each flower for added detail. Step 4: Use a green nail polish to create leaves around the flowers. You can add as many or as little as you'd like. Step 5: Finish with a top coat for a glossy and long-lasting finish. And there you have it, beautiful Hawaiian flower nails!Hawaiian Flower Nail Art Tutorial


Hawaiian Flower Nail Art Tutorial


.jpg)
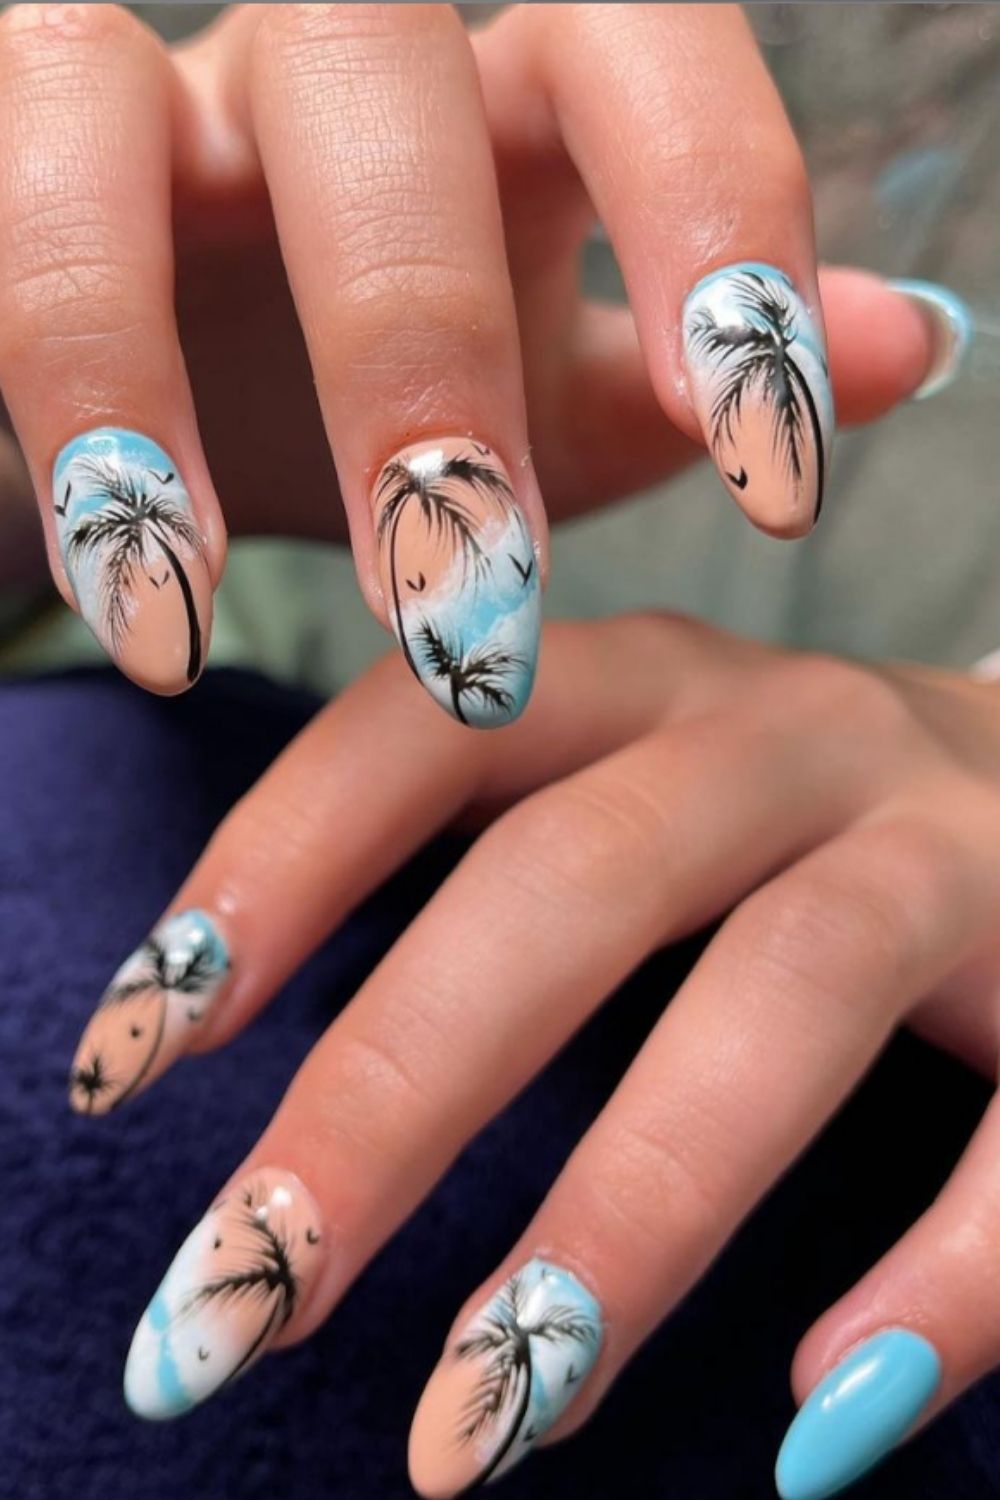
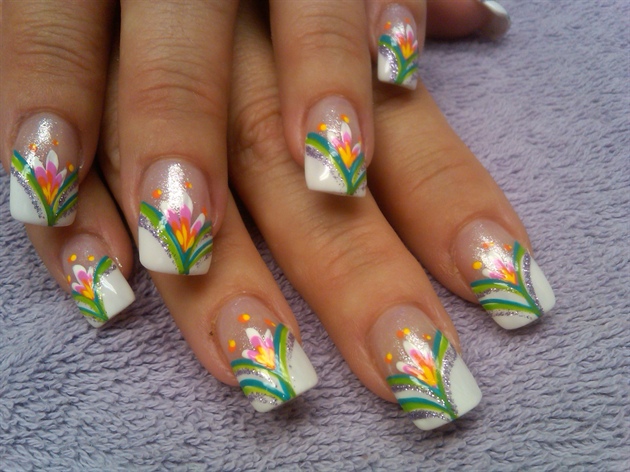
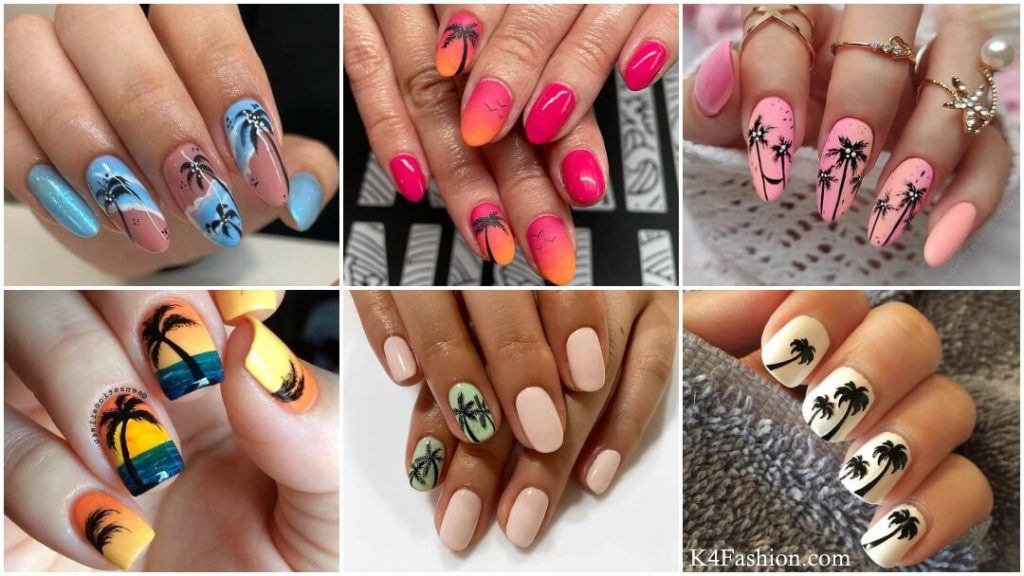
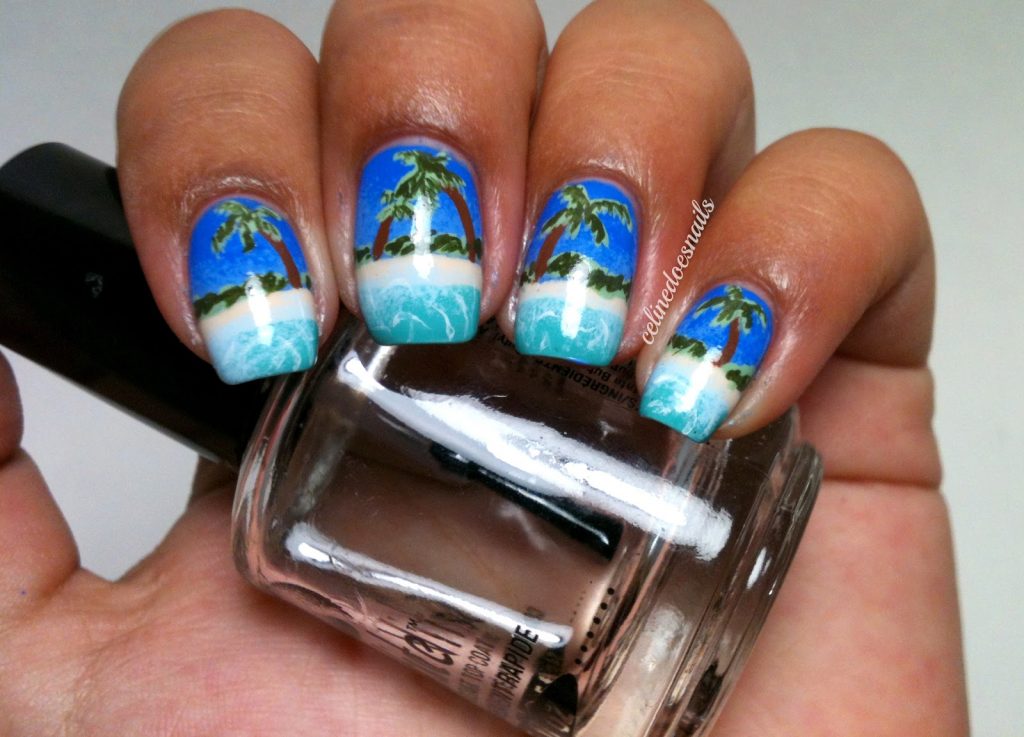
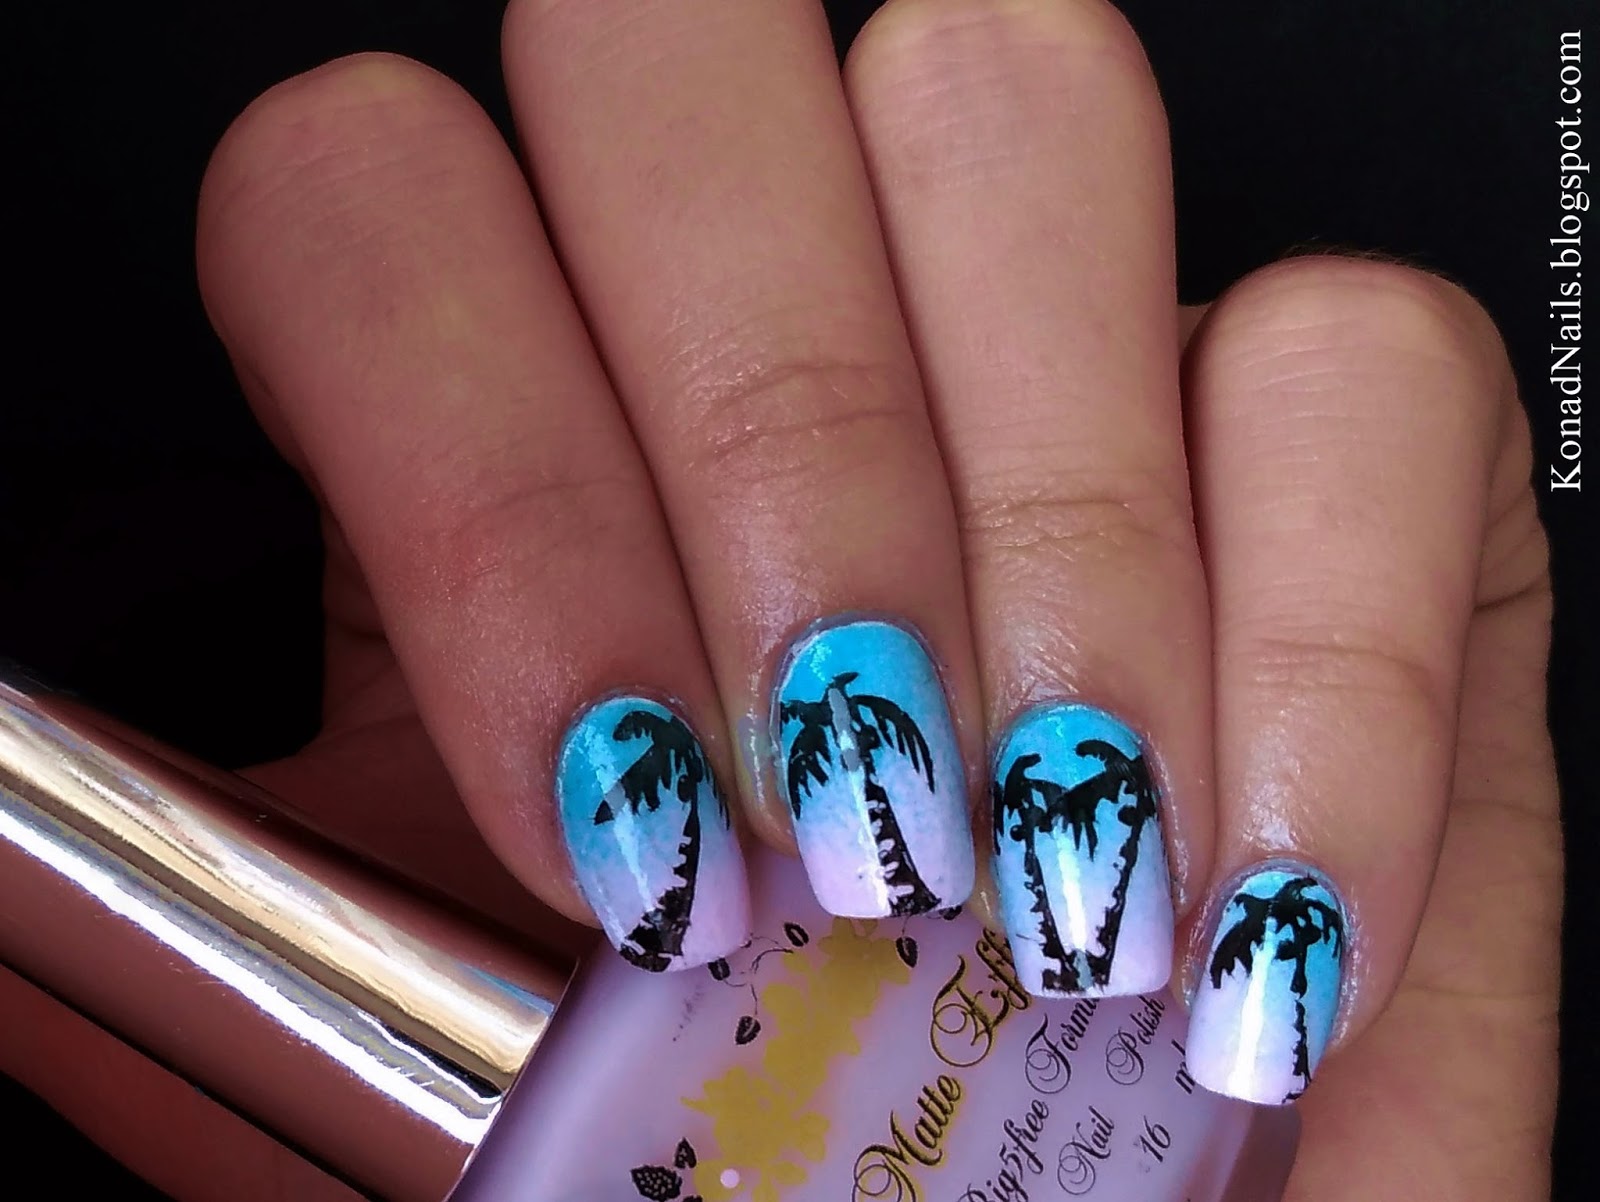
Looking for a simple yet cute nail art design for your Hawaii vacation? Look no further than this easy palm tree design. Step 1: Start with a nude or light blue base color. Let it dry completely before moving on to the next step. Step 2: Using a thin brush, create a black palm tree on each nail. You can make them all the same or mix it up with different sizes and angles. Step 3: Add small green leaves to the top of the palm tree for some color and detail. Step 4: Finish with a top coat for a glossy finish. And there you have it, cute and easy palm tree nails for your Hawaii trip!Easy Palm Tree Nail Art for Your Hawaii Trip


Easy Palm Tree Nail Art for Your Hawaii Trip


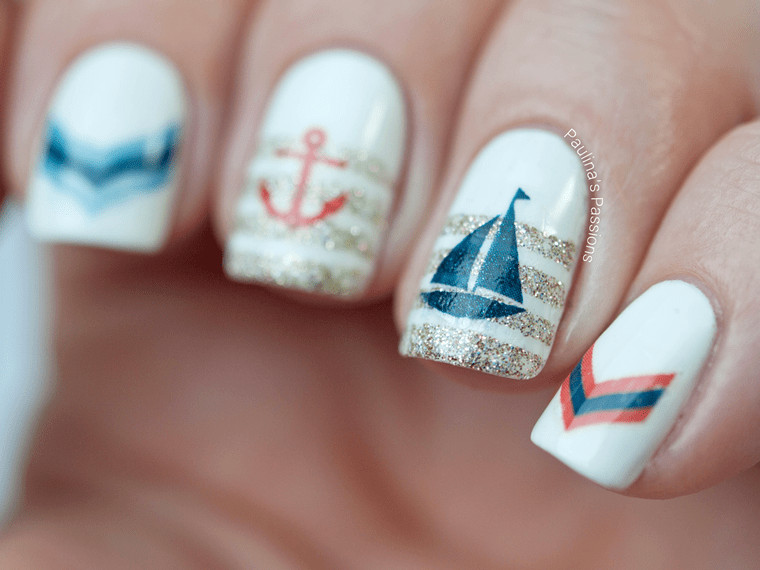
Heading to Hawaii and want to show off your tropical spirit on your nails? Here are some other Hawaii-inspired nail designs to try on your vacation. 11. Tropical Sunset Gradient: Create a stunning gradient of colors on your nails to mimic the colors of a Hawaiian sunset. Use shades of orange, pink, and purple to create this look. 12. Hawaiian Flag Nails: Show some love for the beautiful state of Hawaii by creating a Hawaiian flag design on your nails. Use a blue base and add a white stripe and red stripe using a thin brush or tape. 13. Pineapple French Tips: Add a tropical twist to the classic French manicure by adding yellow pineapples to the tips of your nails. 14. Hawaiian Print Accent Nail: Paint all your nails a solid color and add a Hawaiian print accent nail for a fun and bold look. 15. Beachy Vibes: Use a light blue base and add white wave designs to mimic the ocean. Add a small gold seashell near the base of your nails for a touch of bling.Hawaii-Inspired Nail Designs to Try on Your Vacation


Hawaii-Inspired Nail Designs to Try on Your Vacation


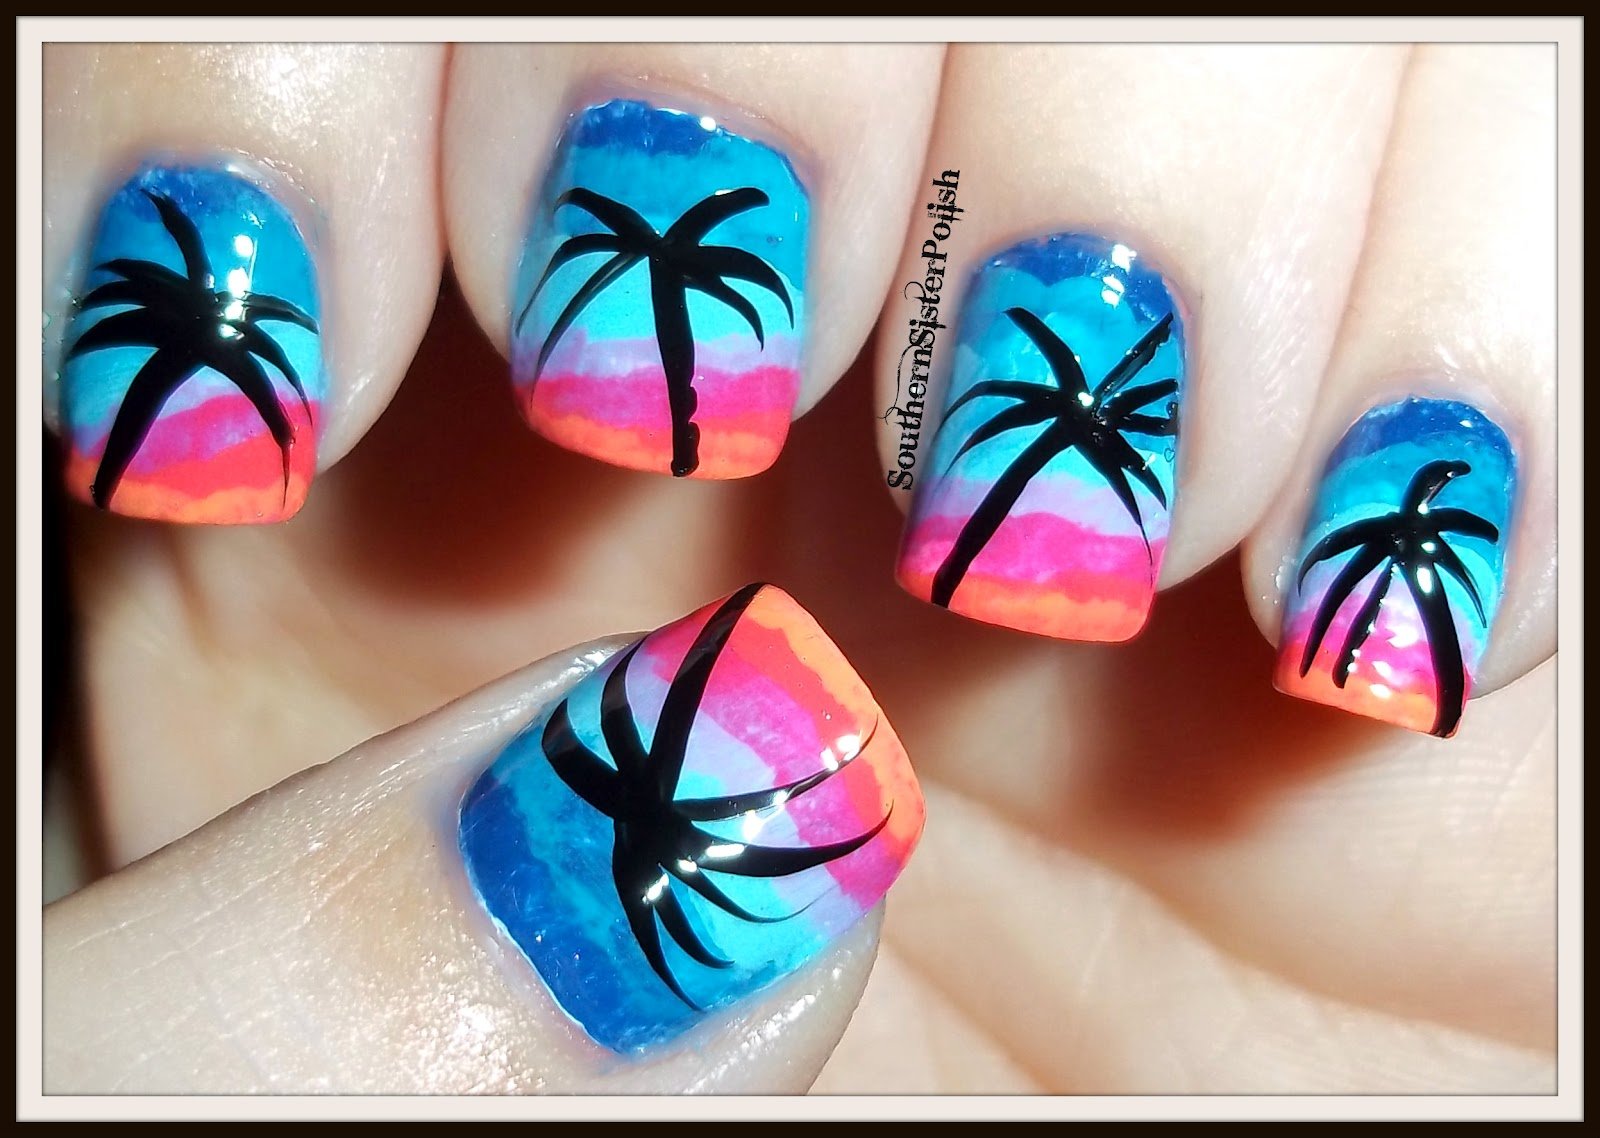
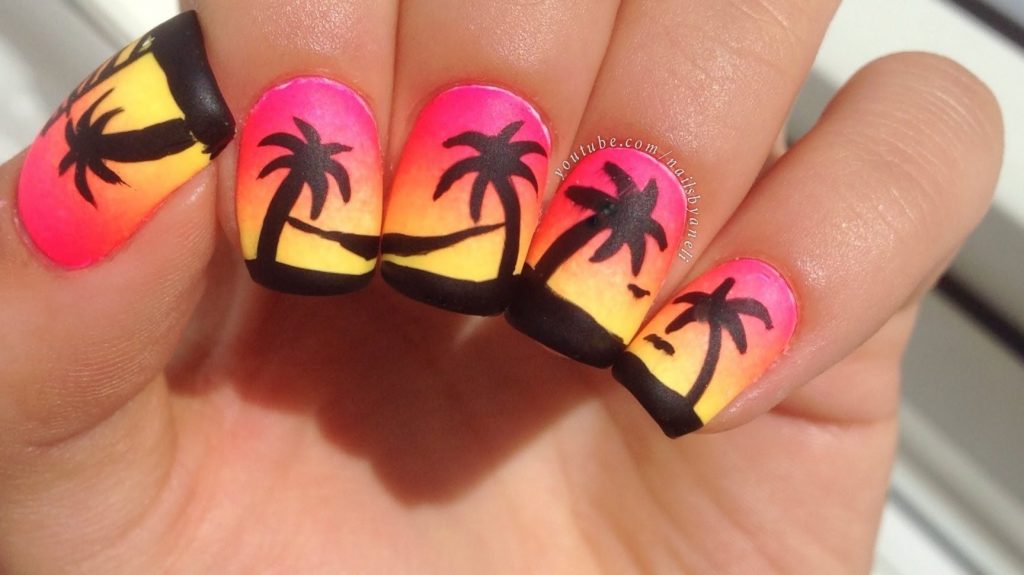
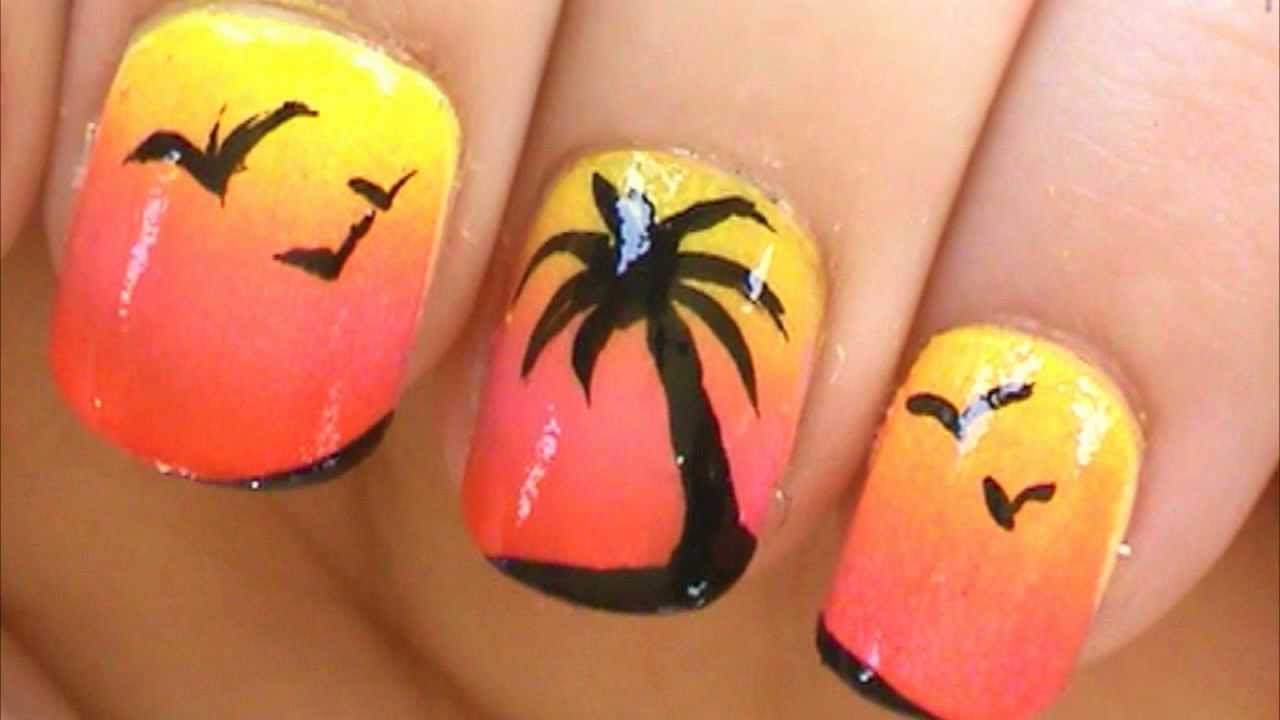
Capture the beauty of a Hawaiian sunset on your nails with this colorful nail art design. Step 1: Start with a dark blue or purple base color. Let it dry completely before moving on to the next step. Step 2: Using a makeup sponge, create a gradient of colors on your nails. Start with orange at the bottom, followed by pink, and finish with yellow at the top. Step 3: Use a thin brush or toothpick to add black palm trees to the bottom of your nails. Step 4: Finish with a top coat for a glossy finish. And there you have it, a stunning sunset nail art design for your Hawaii getaway.Colorful Sunset Nail Art for Your Hawaii Getaway


Colorful Sunset Nail Art for Your Hawaii Getaway


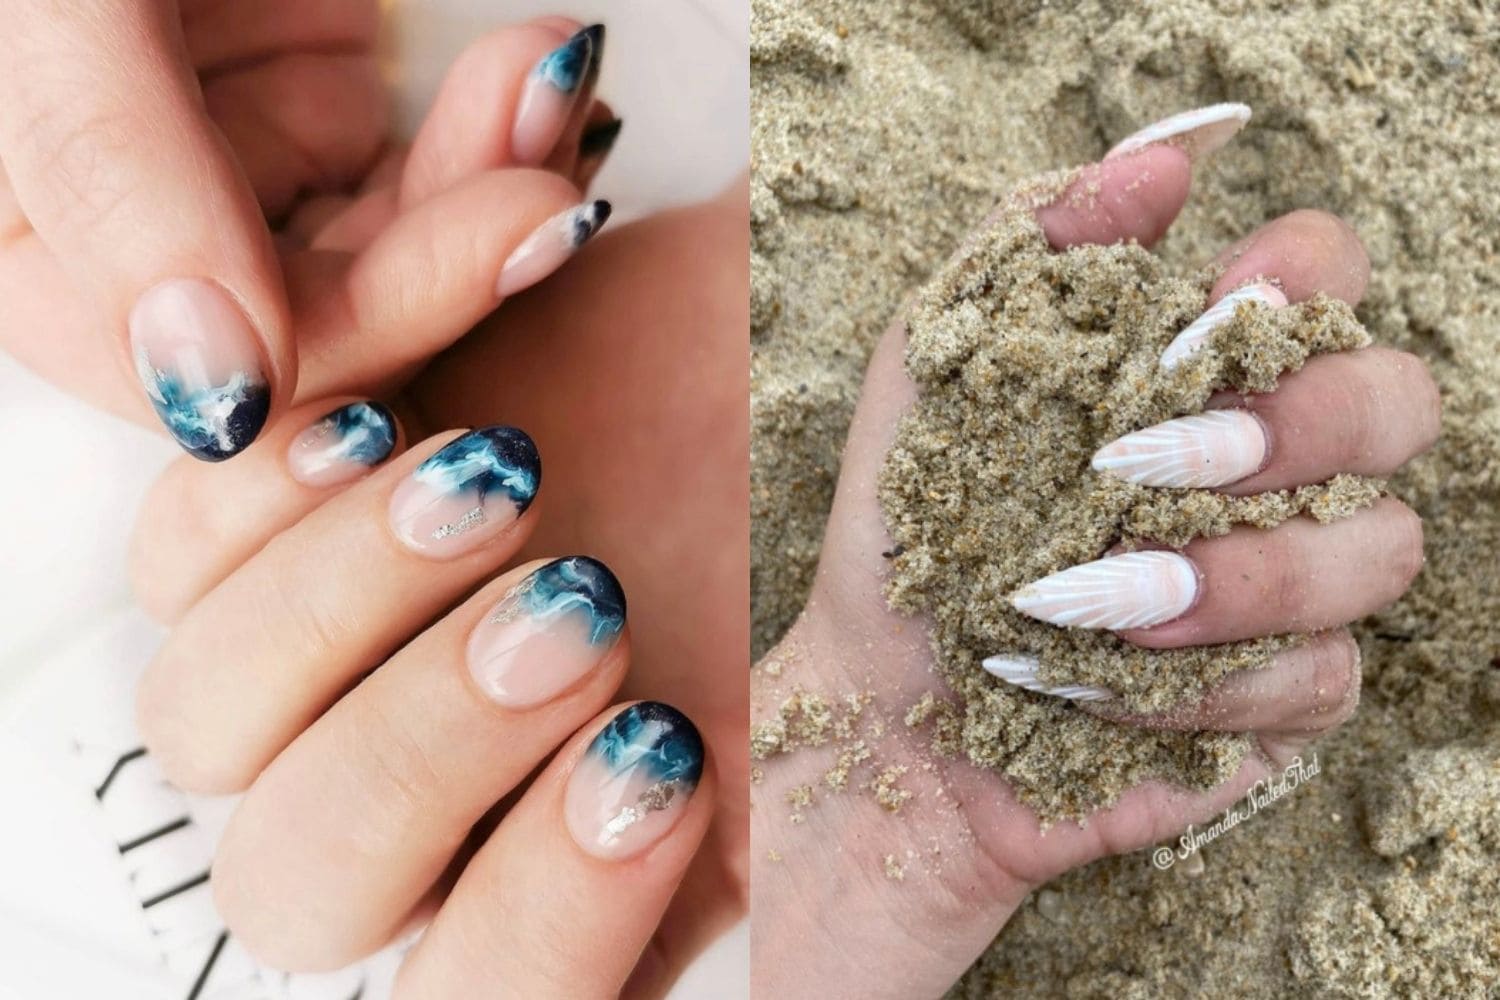
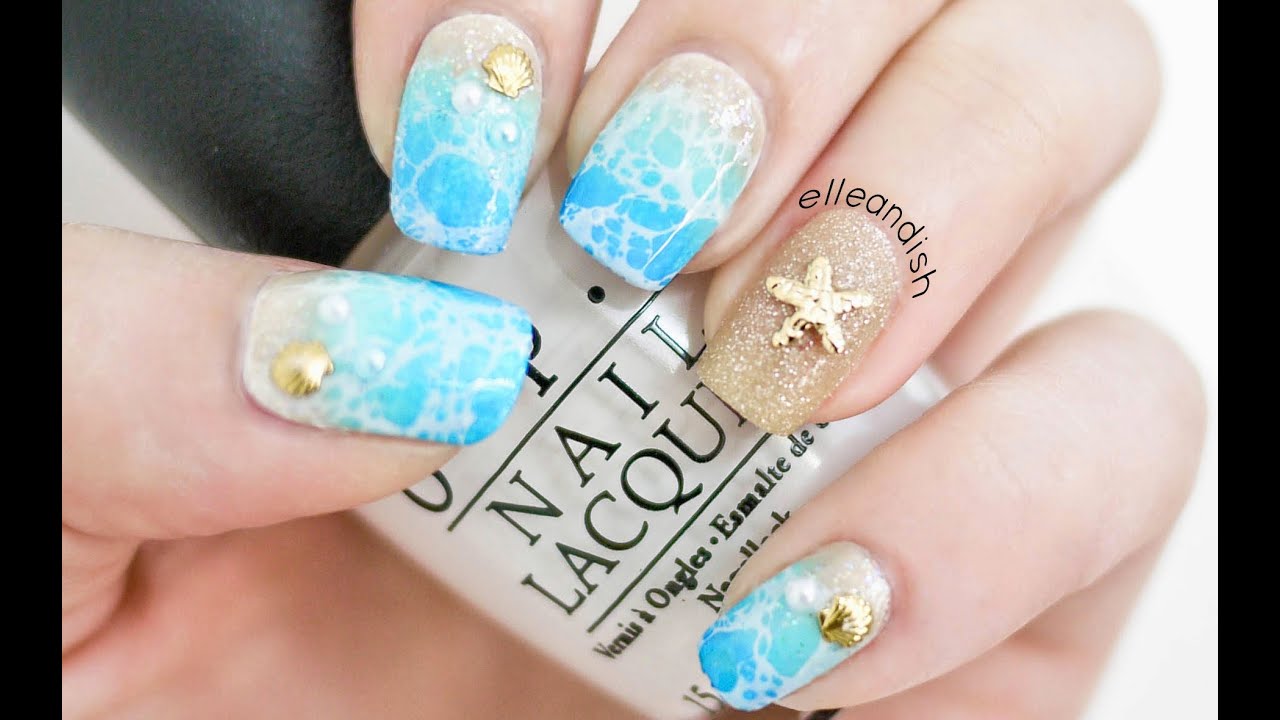
Want to add a touch of the beach to your nails for your Hawaii vacation? Try out this seashell nail art design. Step 1: Start with a light blue base color. Let it dry completely before moving on to the next step. Step 2: Using a toothpick, create white seashells on your nails. You can add as many or as little as you'd like. Step 3: Add small gold accents to the seashells for a touch of sparkle. Step 4: Finish with a top coat for a glossy finish. And there you have it, beachy seashell nails for your Hawaii vacation.Seashell Nail Art for a Beachy Look on Your Hawaii Vacation


Seashell Nail Art for a Beachy Look on Your Hawaii Vacation


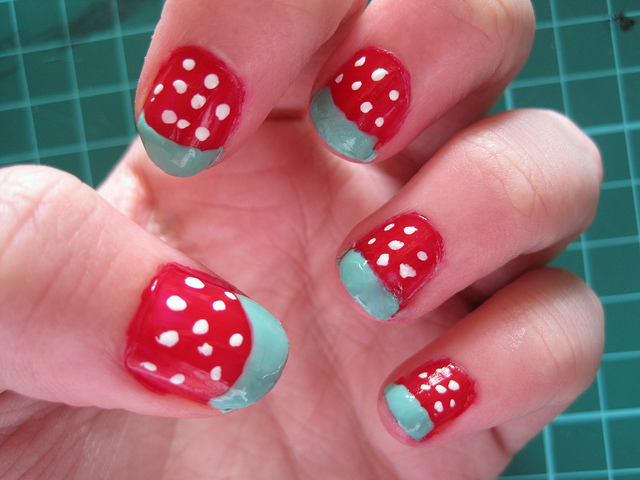
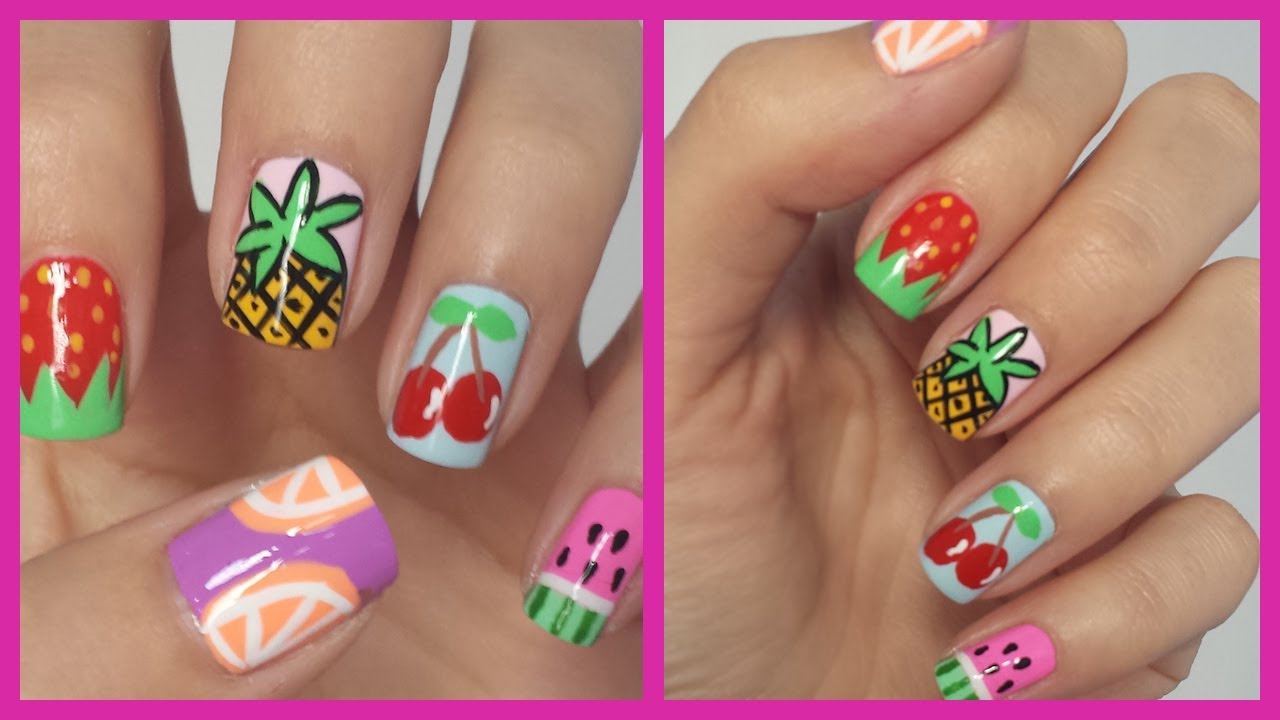
Embrace the delicious tropical fruits of Hawaii with this colorful and fun nail art design. Step 1: Start with a nude or light pink base color. Let it dry completely before moving on to the next step. Step 2: Using bright shades like yellow, orange, and pink, create designs of pineapples, mangoes, and passionfruit on your nails. Step 3: Add small details like green leaves and brown stems to complete the look. Step 4: Finish with a top coat for a glossy and long-lasting finish. And there you have it, fun and fruity nails for your Hawaii adventure.Tropical Fruit Nail Art for Your Hawaii Adventure


Tropical Fruit Nail Art for Your Hawaii Adventure

.jpg)

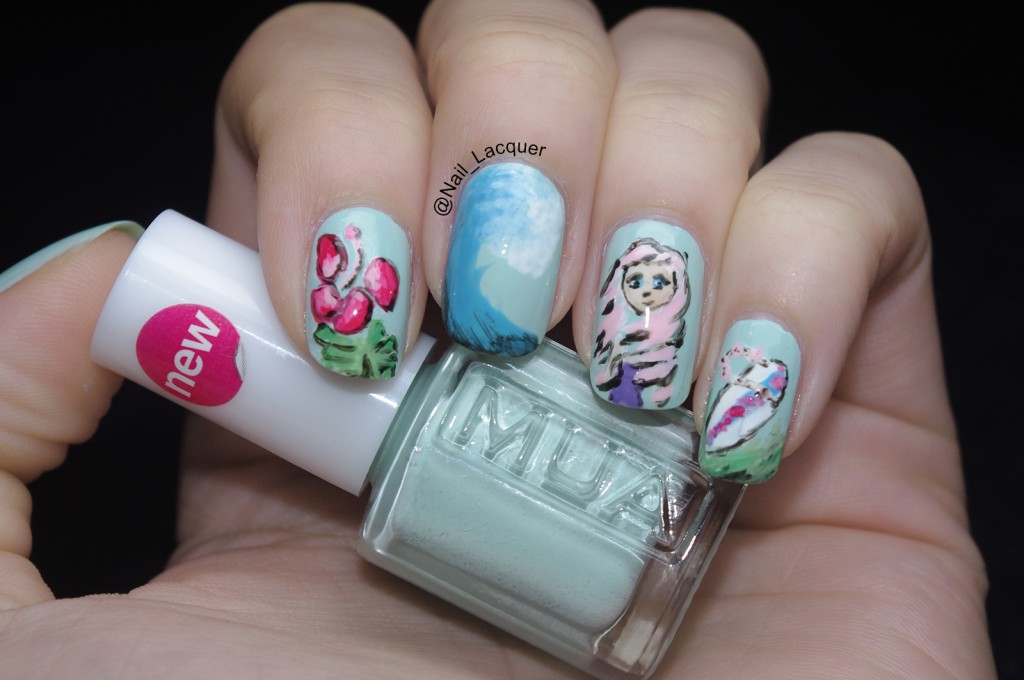
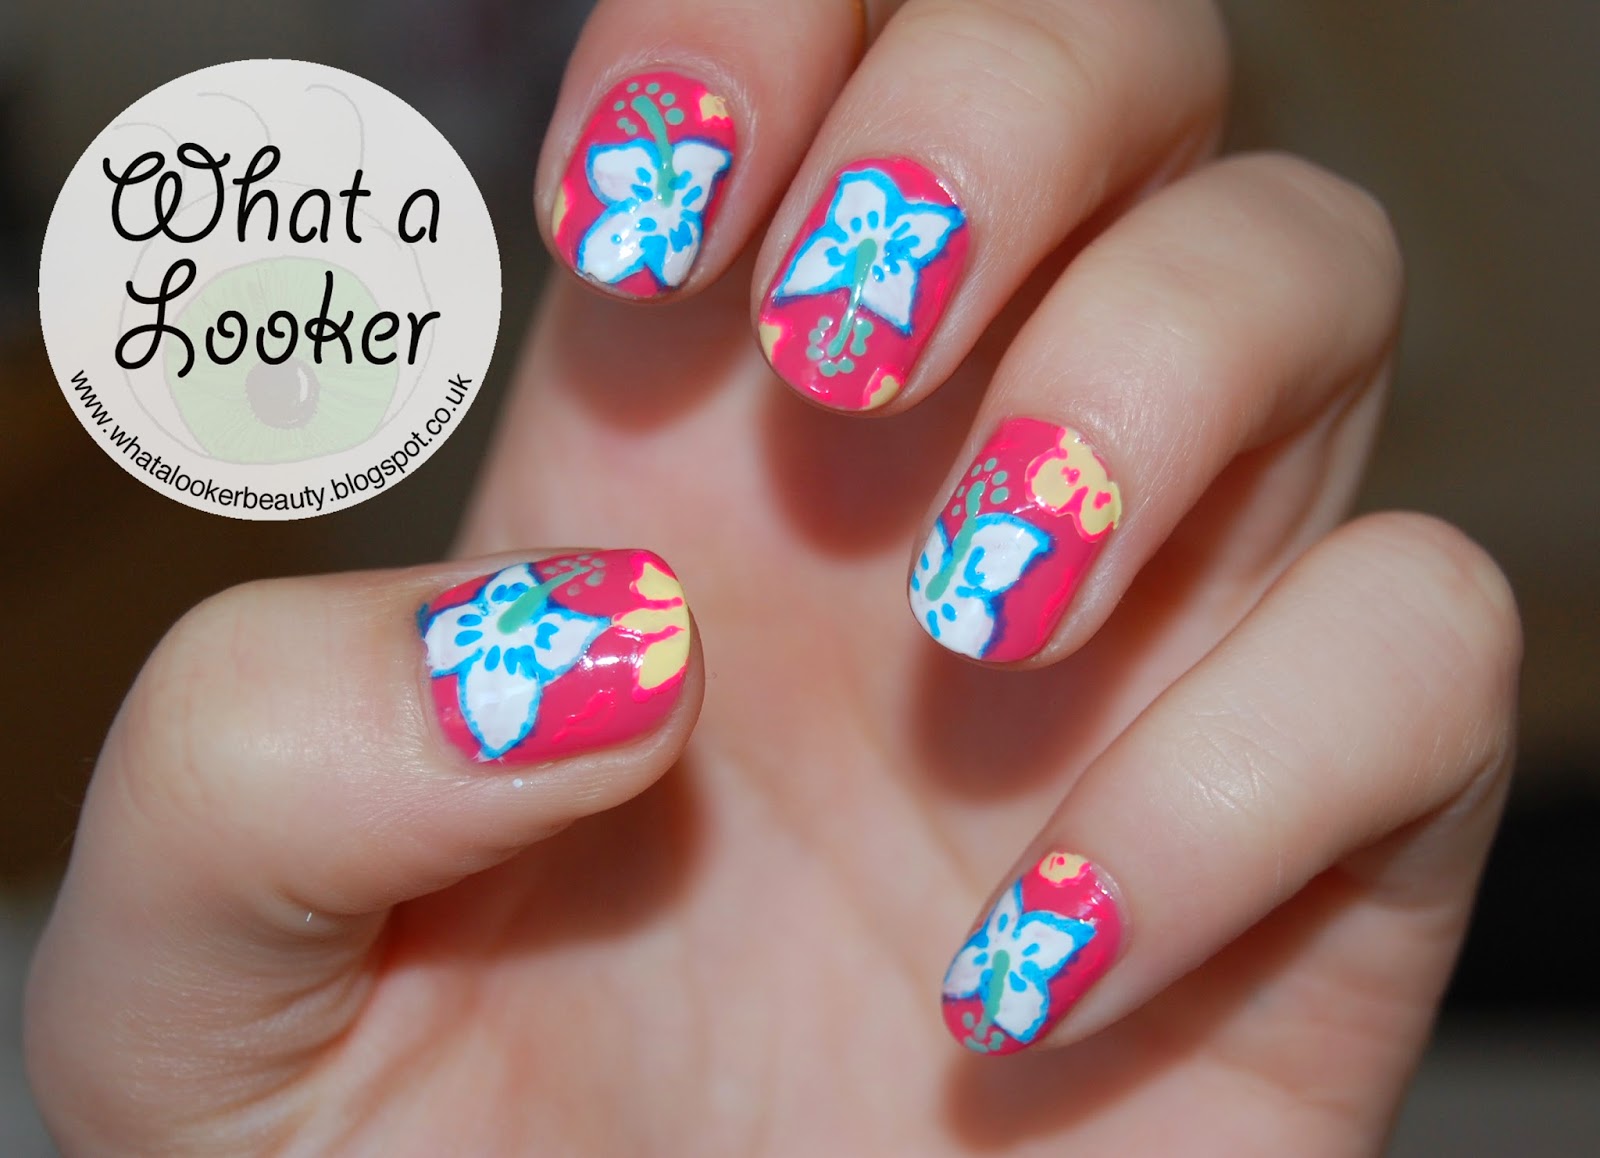
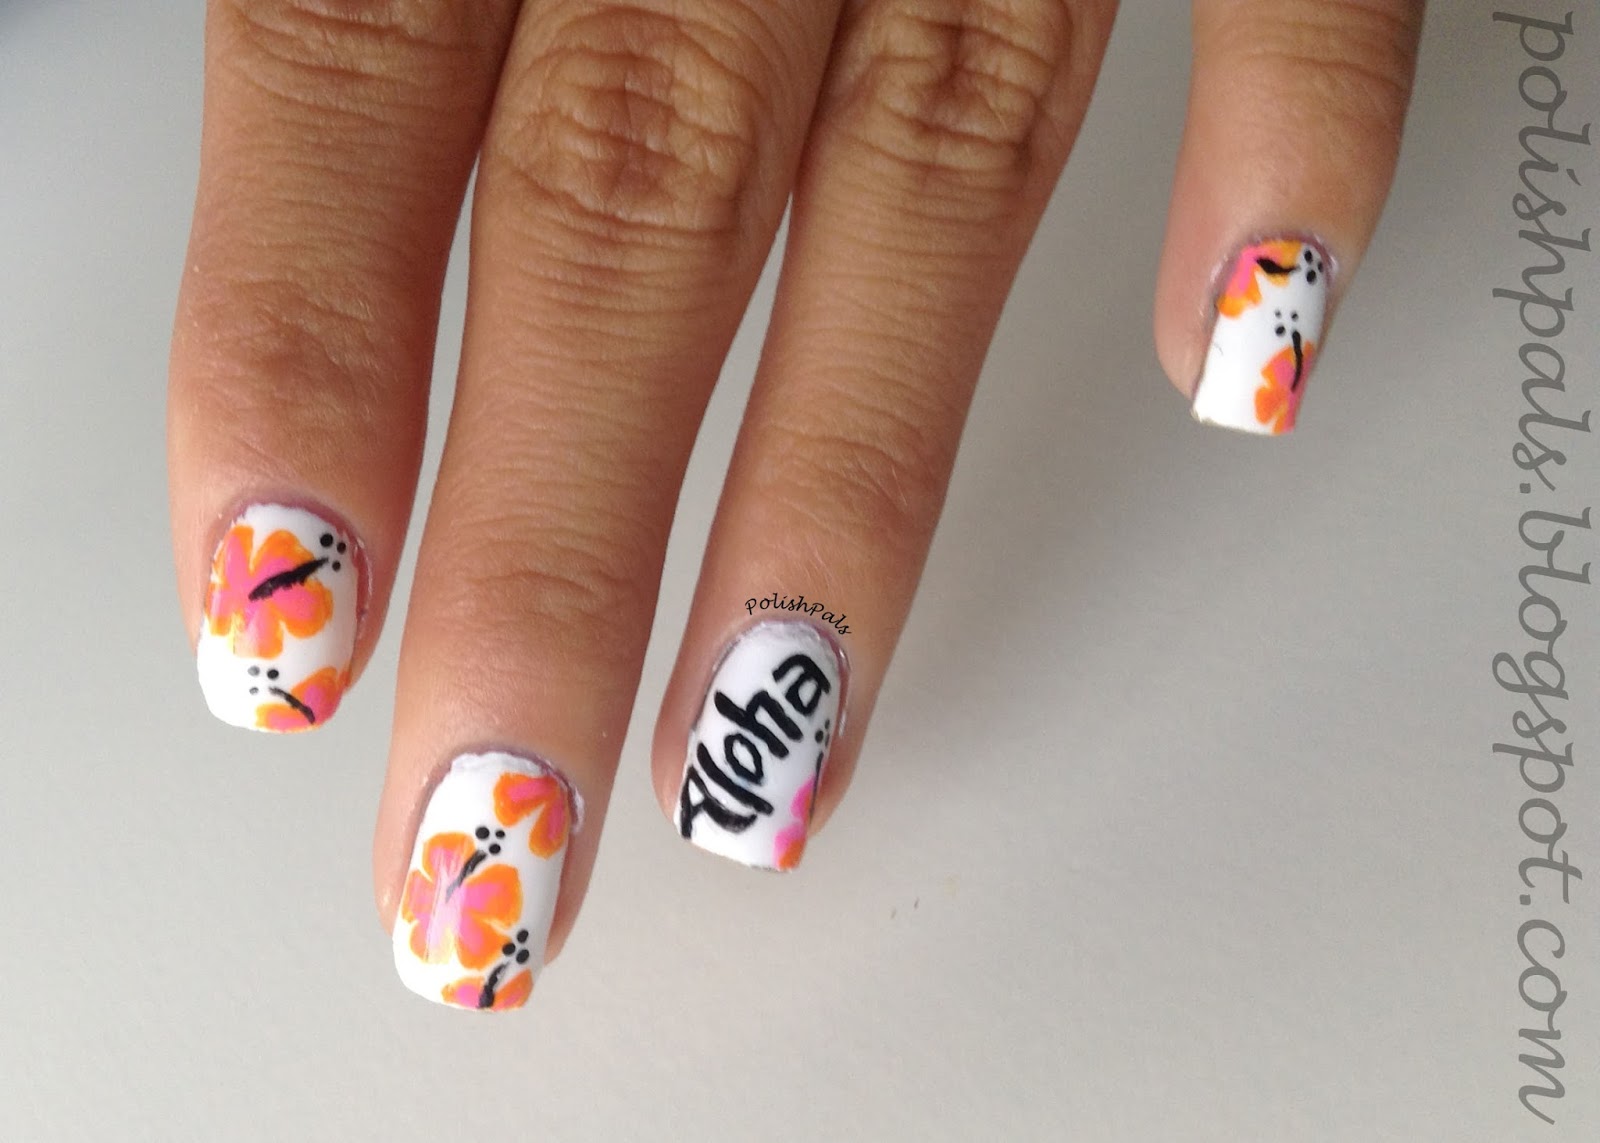
Get playful and colorful with this Hawaiian print nail art design for your Hawaii vacation. Step 1: Start with a white base color. Let it dry completely before moving on to the next step. Step 2: Use a thin brush or toothpick to create Hawaiian print designs on your nails. You can choose to do all the same design or mix it up with different patterns like palm trees, hula dancers, surfboards, and pineapples. Step 3: Add small details like yellow accents for the center of flowers or green leaves for added color. Step 4: Finish with a top coat for a glossy and long-lasting finish. And there you have it, fun and colorful Hawaiian print nails for your vacation.Hawaiian Print Nail Art for a Fun Vacation Look


Hawaiian Print Nail Art for a Fun Vacation Look


.jpg)

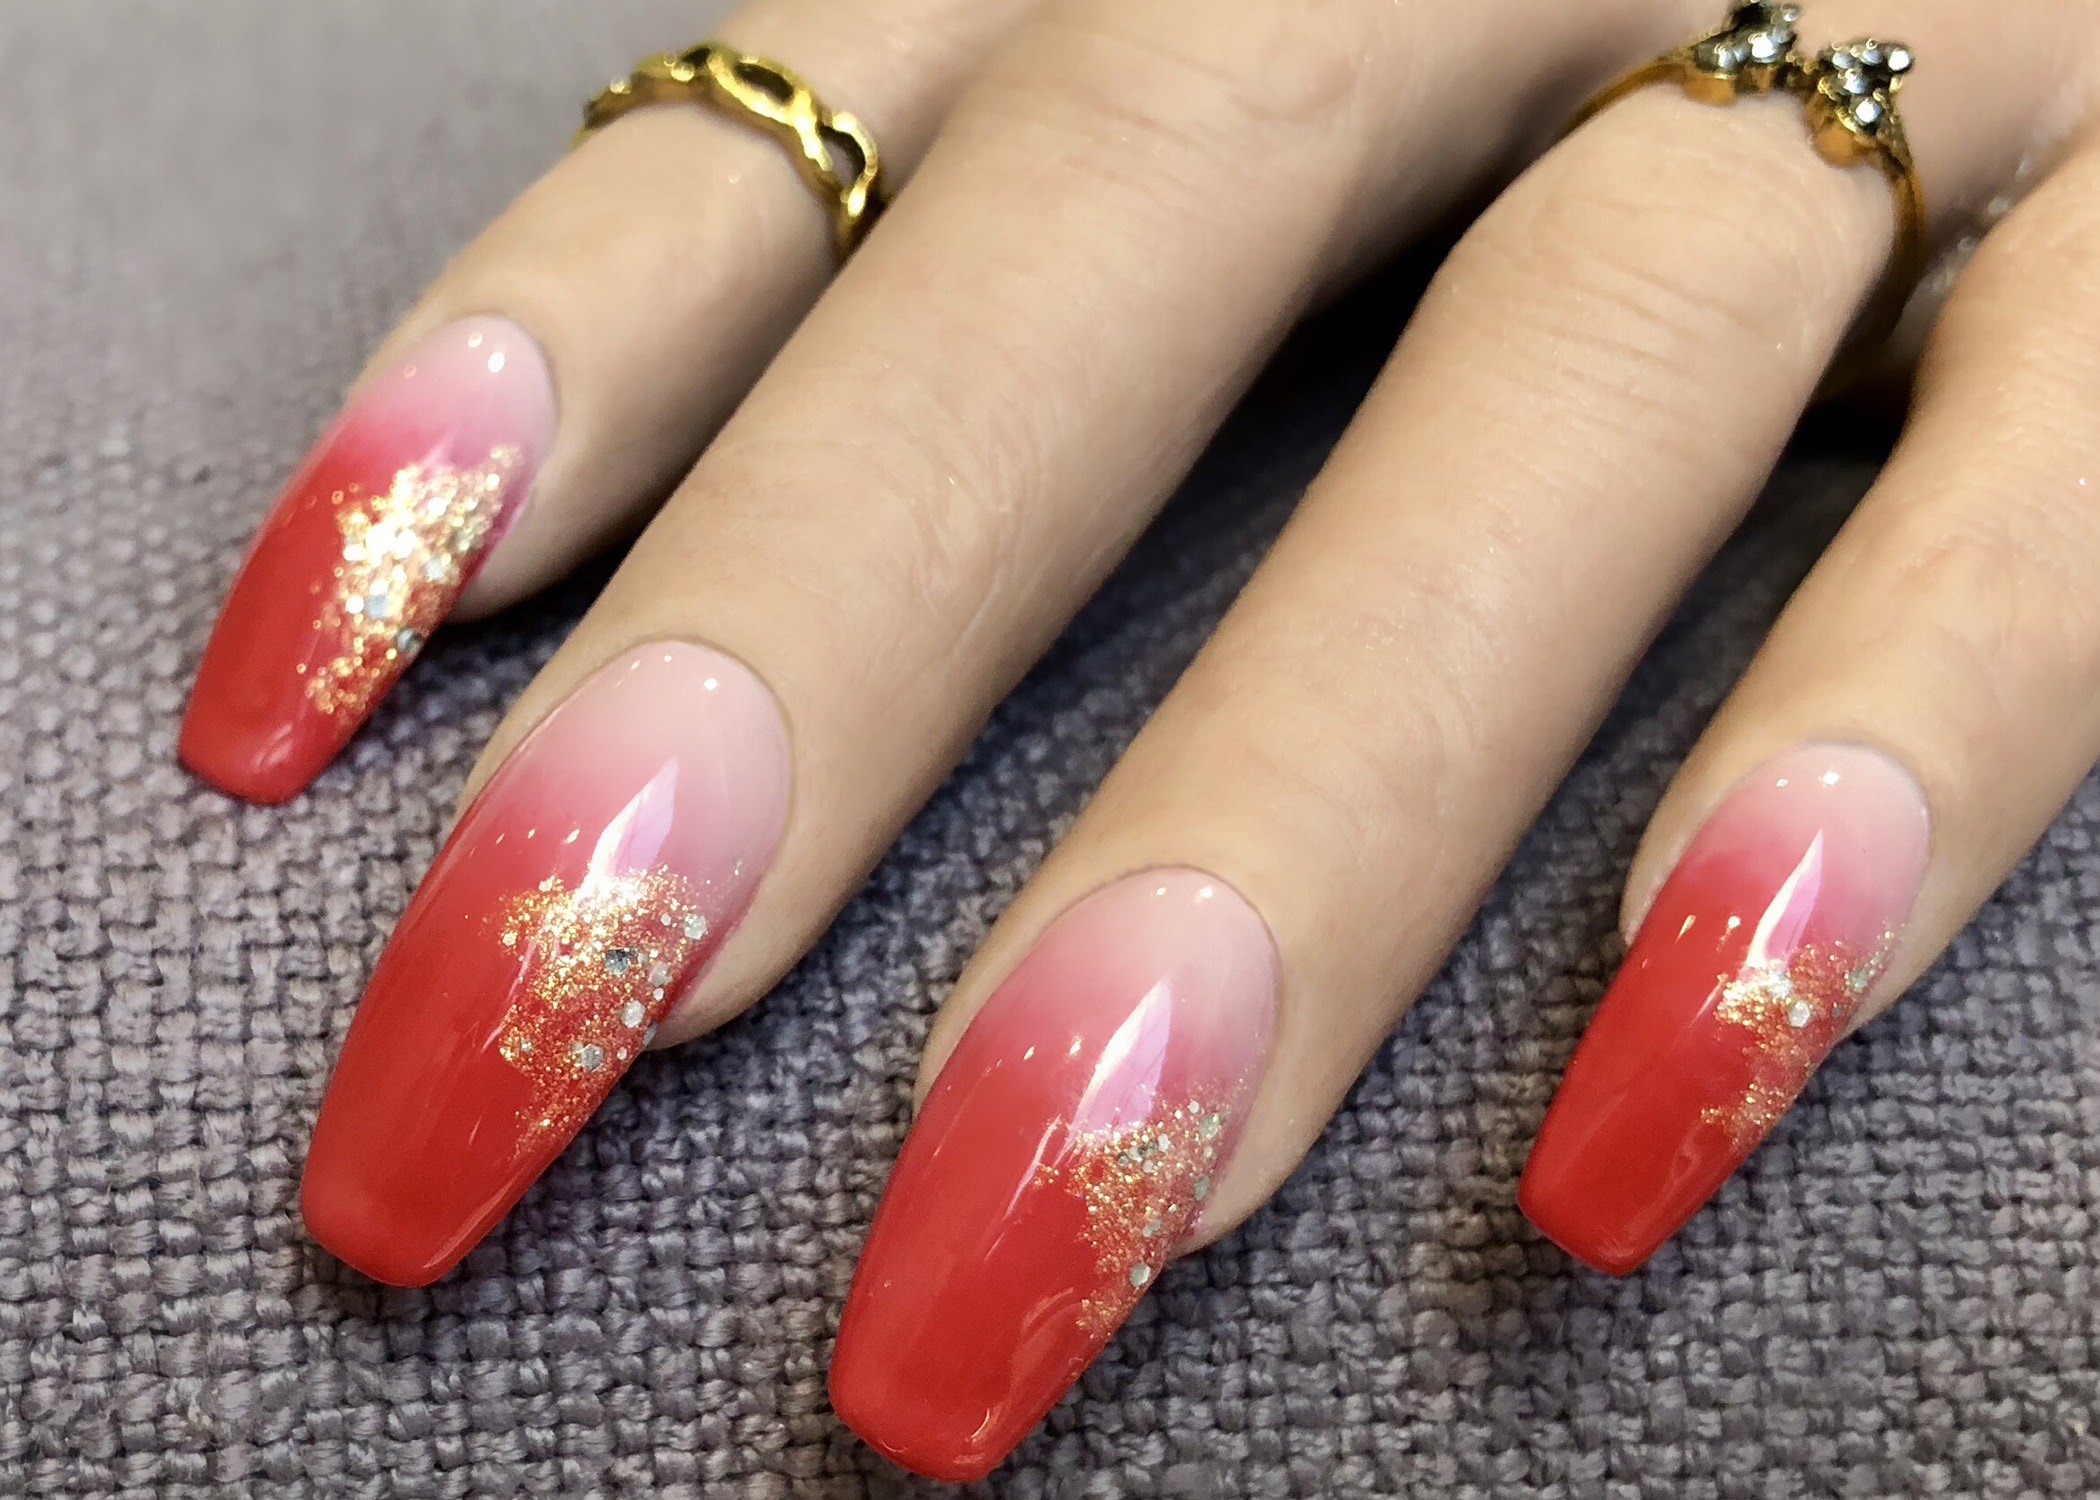
Ombre nails are a popular trend and what better place to rock them than in Hawaii? Here's how to create a beachy ombre look. Step 1: Start with a light blue or green base color. Let it dry completely before moving on to the next step. Step 2: Using a makeup sponge, create a gradient of colors on your nails. Start with a lighter shade of blue or green at the bottom and gradually add a darker shade towards the top. Step 3: Finish with a top coat for a glossy finish. And there you have it, beachy ombre nails for your Hawaii vacation.Beachy Ombre Nail Art for Your Hawaii Vacation


Beachy Ombre Nail Art for Your Hawaii Vacation


Nail Art for Your Perfect Hawaii Vacation

Get Ready to Hit the Beach in Style
 If you're planning a vacation to Hawaii, you're probably already dreaming of the beautiful beaches, warm sunshine, and delicious fruity drinks. But don't forget to pack your nail polish, because your nails can be the perfect accessory to complete your island look.
Nail art
has become increasingly popular in recent years, and what better place to show off your
creative
and
colorful
designs than on the beaches of Hawaii?
If you're planning a vacation to Hawaii, you're probably already dreaming of the beautiful beaches, warm sunshine, and delicious fruity drinks. But don't forget to pack your nail polish, because your nails can be the perfect accessory to complete your island look.
Nail art
has become increasingly popular in recent years, and what better place to show off your
creative
and
colorful
designs than on the beaches of Hawaii?
The Basics of Hawaiian Nail Art
 When it comes to
nail art for your Hawaii vacation
, there are a few key elements to keep in mind. First and foremost, the colors and designs should reflect the island's vibrant culture and natural beauty. Think
bright
floral patterns
,
tropical fruits
, and
ocean-inspired designs
. Don't be afraid to mix and match different elements to create a unique and eye-catching look.
When it comes to
nail art for your Hawaii vacation
, there are a few key elements to keep in mind. First and foremost, the colors and designs should reflect the island's vibrant culture and natural beauty. Think
bright
floral patterns
,
tropical fruits
, and
ocean-inspired designs
. Don't be afraid to mix and match different elements to create a unique and eye-catching look.
DIY or Leave it to the Professionals?
 If you're feeling
crafty
, you can try your hand at creating your own Hawaiian nail art. There are plenty of tutorials and inspiration on social media platforms like
Instagram
and
Pinterest
. However, if you want to ensure a flawless and long-lasting result, it may be worth
investing
in a professional manicure. Many nail salons in Hawaii offer specialized
nail art services
that will leave you with stunning and vacation-ready nails.
If you're feeling
crafty
, you can try your hand at creating your own Hawaiian nail art. There are plenty of tutorials and inspiration on social media platforms like
Instagram
and
Pinterest
. However, if you want to ensure a flawless and long-lasting result, it may be worth
investing
in a professional manicure. Many nail salons in Hawaii offer specialized
nail art services
that will leave you with stunning and vacation-ready nails.
Accessorize Your Nails
 To take your Hawaiian nail art to the next level, consider adding some
nail accessories
. Small
seashells
,
beads
, and
rhinestones
can add an extra touch of island charm to your nails. You can even incorporate
real flowers
into your design for a truly tropical feel.
To take your Hawaiian nail art to the next level, consider adding some
nail accessories
. Small
seashells
,
beads
, and
rhinestones
can add an extra touch of island charm to your nails. You can even incorporate
real flowers
into your design for a truly tropical feel.
Don't Forget the Essentials
 Before you start painting your nails, make sure to prep them properly. Use a
nail buffer
to smooth out any rough edges and apply a base coat to protect your nails from staining. After applying your
nail art
, finish off with a
top coat
to seal in your design and add shine.
Before you start painting your nails, make sure to prep them properly. Use a
nail buffer
to smooth out any rough edges and apply a base coat to protect your nails from staining. After applying your
nail art
, finish off with a
top coat
to seal in your design and add shine.
Final Thoughts
 Hawaii is known for its laid-back and
colorful
vibe, and your nails can be a reflection of that. Whether you opt for a simple
palm tree
design or go all out with a
hula dancer
on your nails, your
nail art
will surely make a statement on your
Hawaii vacation
. So don't forget to pack your polish and get ready to show off your
island-inspired
nails.
Hawaii is known for its laid-back and
colorful
vibe, and your nails can be a reflection of that. Whether you opt for a simple
palm tree
design or go all out with a
hula dancer
on your nails, your
nail art
will surely make a statement on your
Hawaii vacation
. So don't forget to pack your polish and get ready to show off your
island-inspired
nails.


