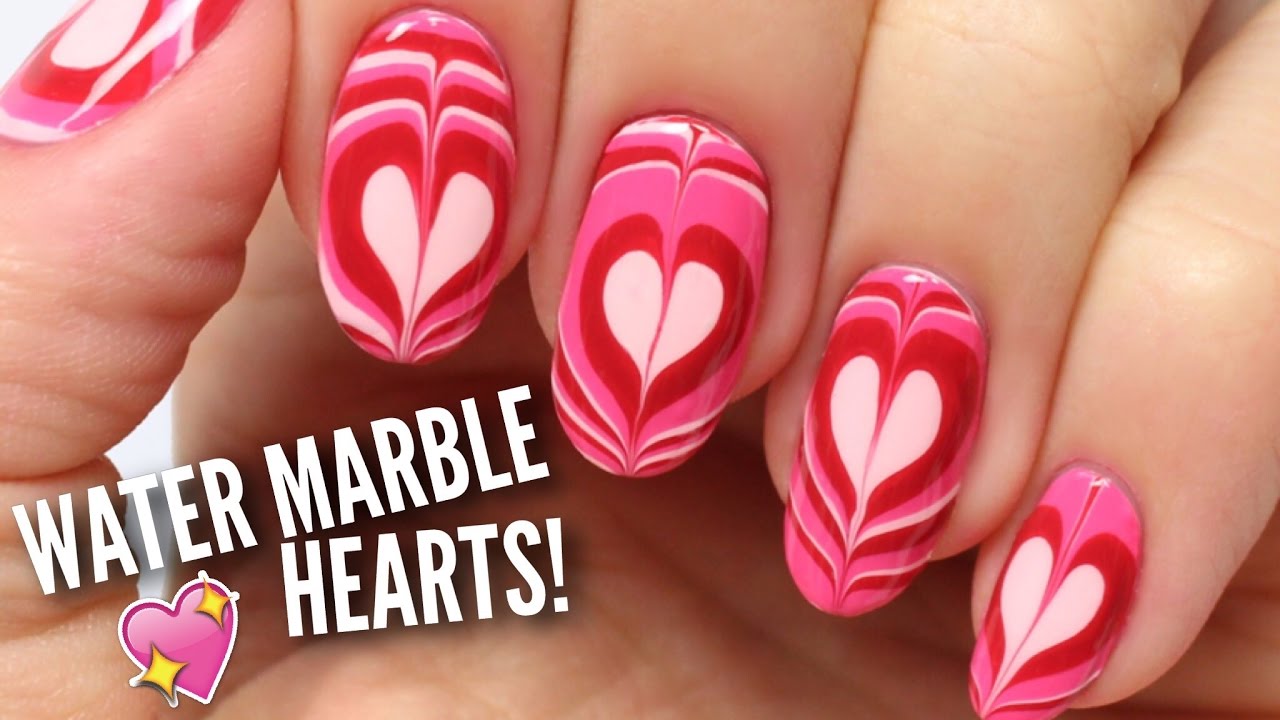
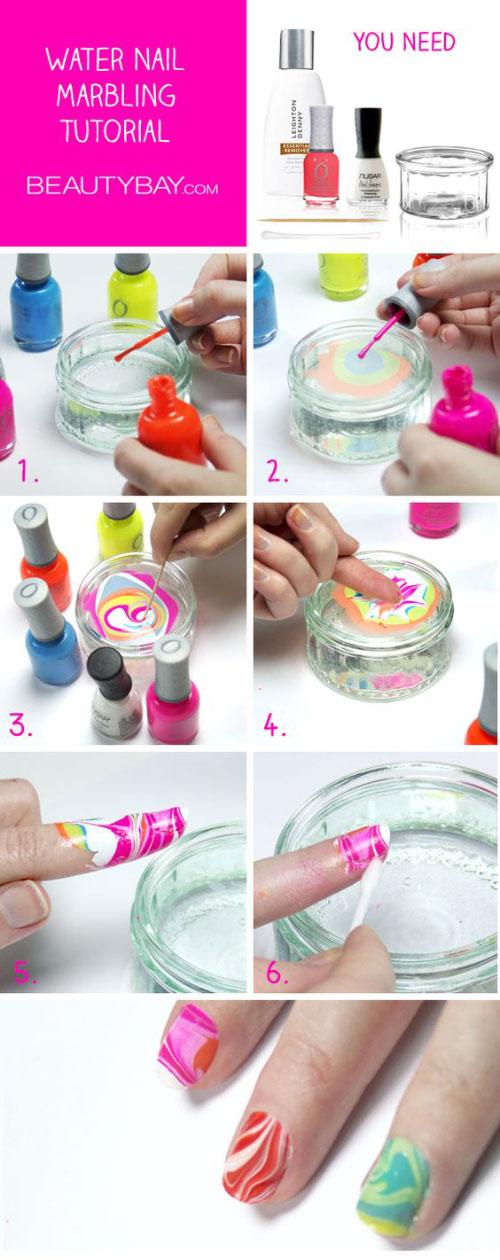
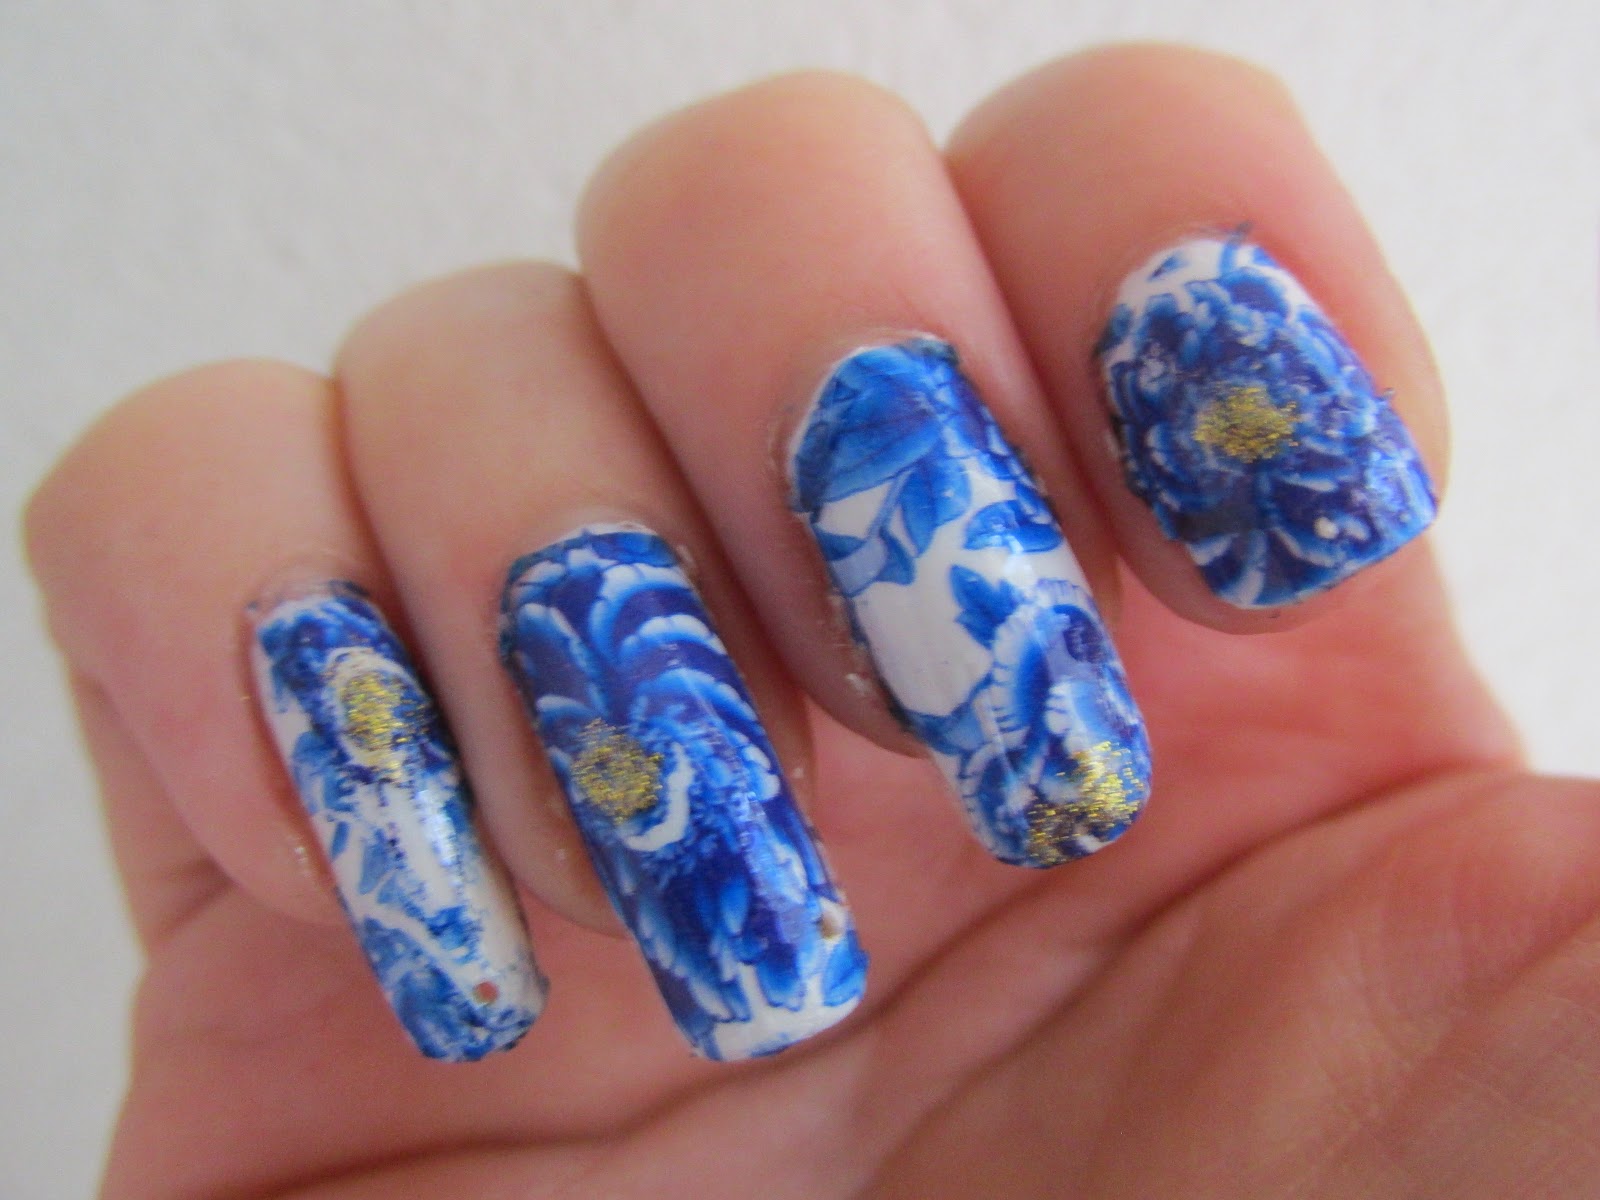
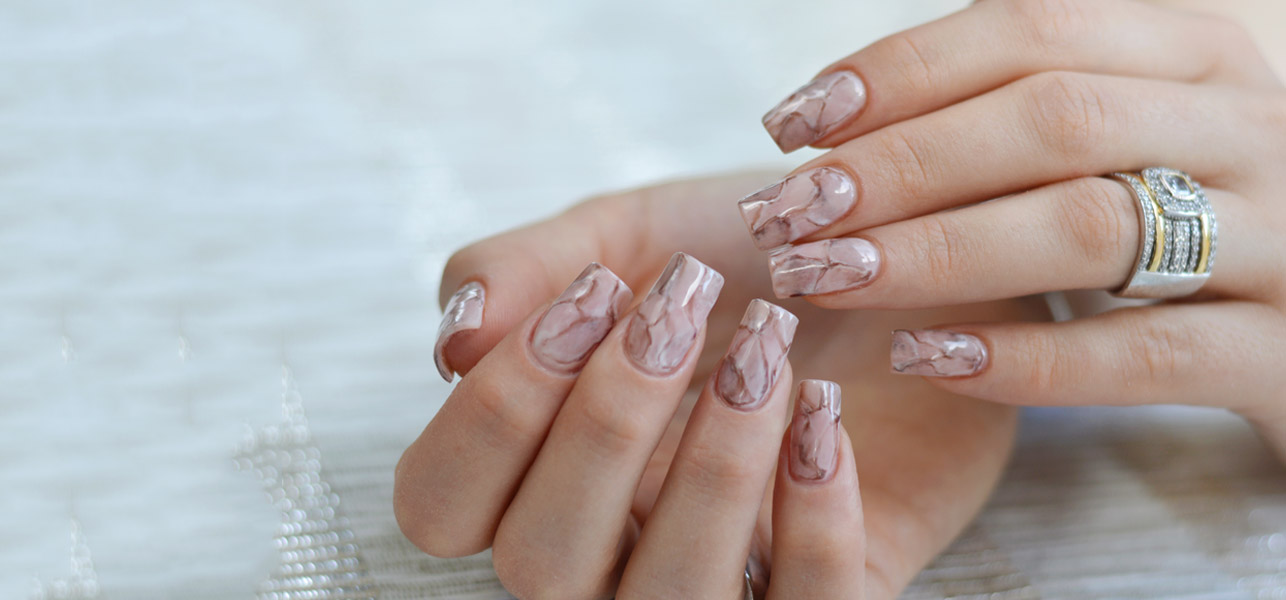
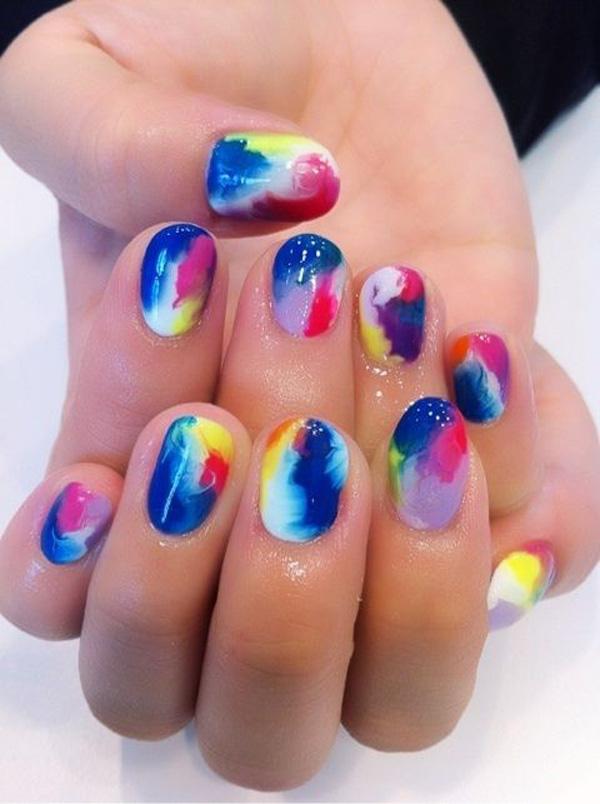
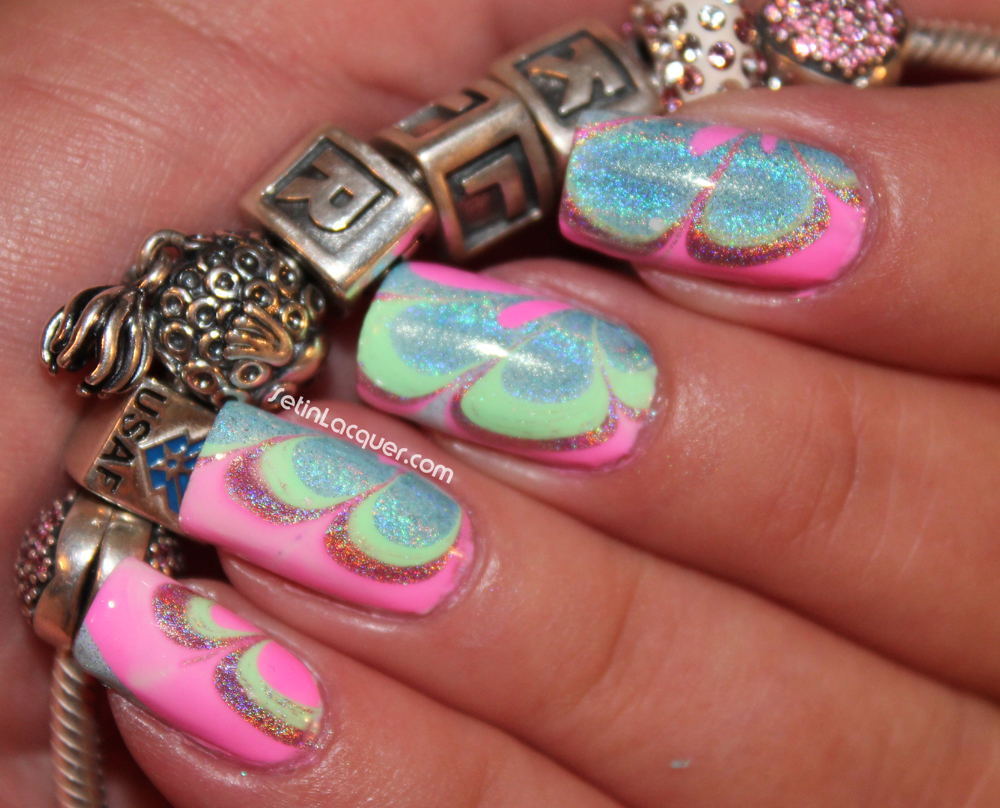
Water marble nail art has become a popular trend in the nail industry, and for good reason. It's a unique and creative way to create stunning designs on your nails, and it's surprisingly easy to do. In this tutorial, we'll show you step by step how to achieve perfect water marble nail art using a simple household item - a water cup. First, gather all the necessary materials. You'll need several nail polish colors of your choice, a small bowl or cup filled with room temperature water, a toothpick or a small brush, and some tape or liquid latex to protect your skin from the nail polish. Start by applying a base coat to your nails. This will help protect your nails and make the nail polish last longer. Once the base coat is dry, apply a white nail polish as your base color. This will make the colors of the water marble design pop. Next, take your chosen nail polish colors and start creating swirls in the water by dropping a few drops of each color onto the surface of the water. Use the toothpick or small brush to create patterns by dragging it through the nail polish drops. Once you're satisfied with the design, carefully dip your nail into the water, making sure to submerge it completely. You may need to use the toothpick to remove any excess nail polish from the water's surface before dipping your nail. Keep your finger in the water for a few seconds and then slowly remove it. Use a cotton swab or a toothpick to remove any excess nail polish from your skin. Repeat this process for each nail. Once all your nails are done, clean up any excess nail polish around your nails with a cleanup brush dipped in nail polish remover. This will give your nails a clean and professional look. Finish off with a top coat to seal in your design and add shine. And voila, you now have a stunning water marble nail art design that will surely turn heads.Water Marble Nail Art Tutorial

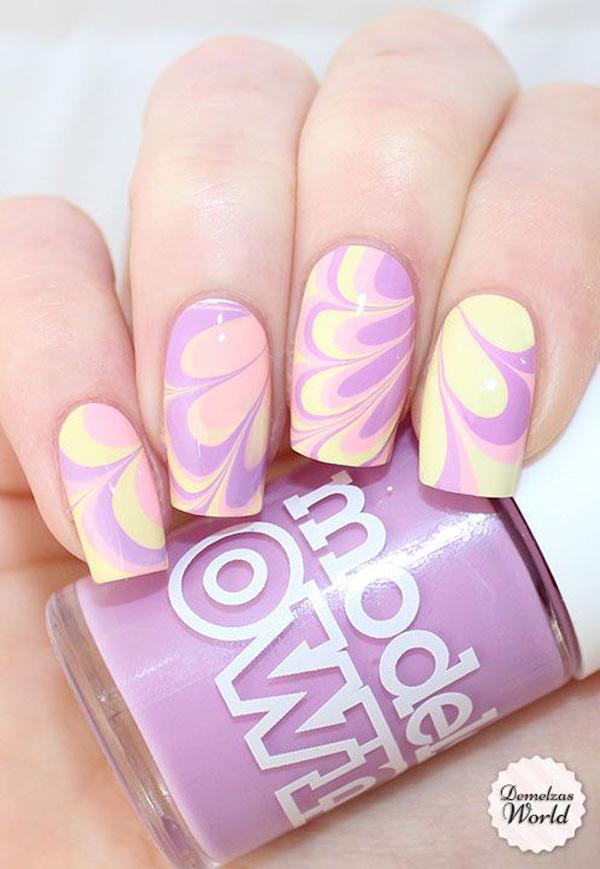

Water Marble Nail Art Tutorial


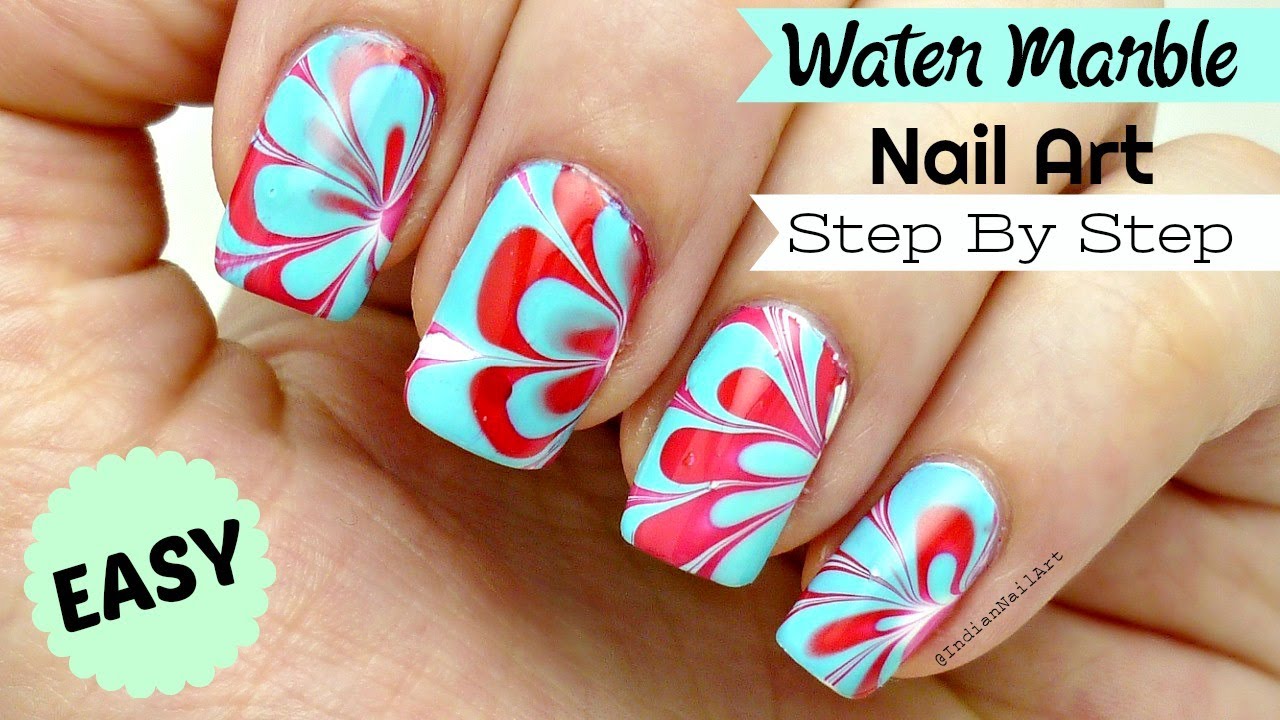
If you're new to water marble nail art, the process can seem intimidating. But with some practice and patience, you'll be able to create beautiful designs on your nails in no time. Here's a step by step guide on how to do water marble nail art. Start by gathering all the necessary materials - nail polish, a small bowl or cup filled with room temperature water, a toothpick or small brush, and tape or liquid latex to protect your skin. Apply a base coat to your nails to protect them and make the nail polish last longer. Once dry, apply a white nail polish as your base color. This will help the colors of the water marble design stand out. Next, create swirls in the water by dropping a few drops of your chosen nail polish colors onto the surface of the water. Use a toothpick or small brush to create patterns by dragging it through the nail polish drops. When you're satisfied with the design, carefully dip your nail into the water, making sure to fully submerge it. Use a toothpick to remove any excess nail polish from the water's surface before dipping your nail. Keep your finger in the water for a few seconds and then slowly remove it. Use a cotton swab or toothpick to remove any excess nail polish from your skin. Repeat this process for each nail. Once all your nails are done, use a cleanup brush dipped in nail polish remover to clean up any excess nail polish around your nails. This will give your nails a clean and professional finish. Finally, seal in your design with a top coat and add some shine. And there you have it, gorgeous water marble nail art!How to Do Water Marble Nail Art


How to Do Water Marble Nail Art


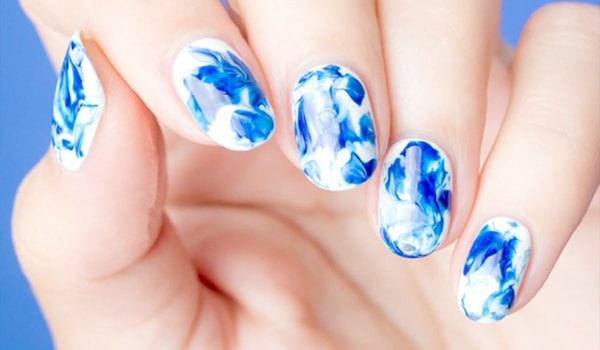
Water marble nail art may look complicated, but with this easy method, you'll be able to achieve stunning designs on your nails with minimal effort. Here's how to do an easy water marble nail art. Start by preparing all your materials - nail polish, a small bowl or cup filled with room temperature water, a toothpick or small brush, and tape or liquid latex. Apply a base coat to your nails and let it dry. Then, apply a white nail polish as your base color. This will help the colors of the water marble design stand out. Take your chosen nail polish colors and drop a few drops of each onto the surface of the water, creating swirls using a toothpick or small brush. Carefully dip your nail into the water, making sure to fully submerge it. Use a toothpick to remove any excess nail polish from the water's surface before dipping your nail. Once all your nails are done, clean up any excess nail polish with a cleanup brush dipped in nail polish remover. Seal in your design with a top coat and enjoy your easy water marble nail art!Easy Water Marble Nail Art


Easy Water Marble Nail Art


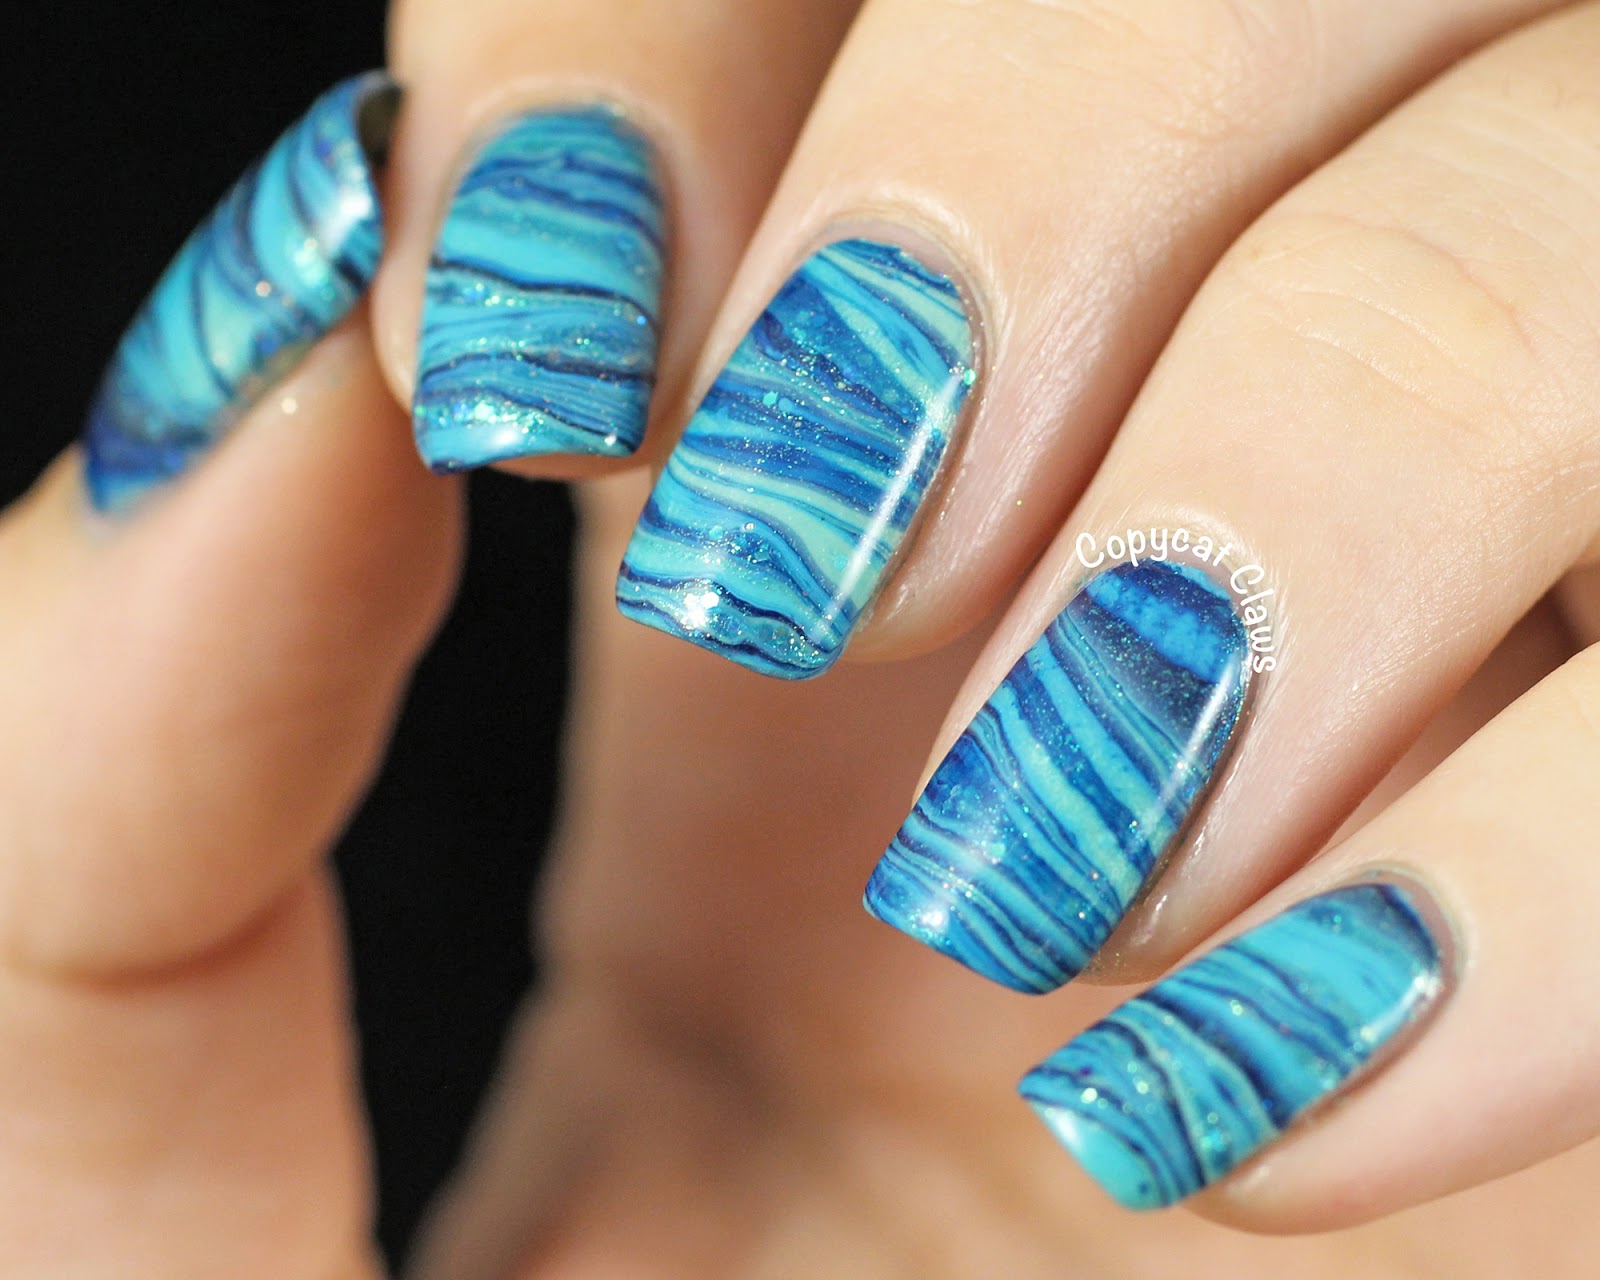
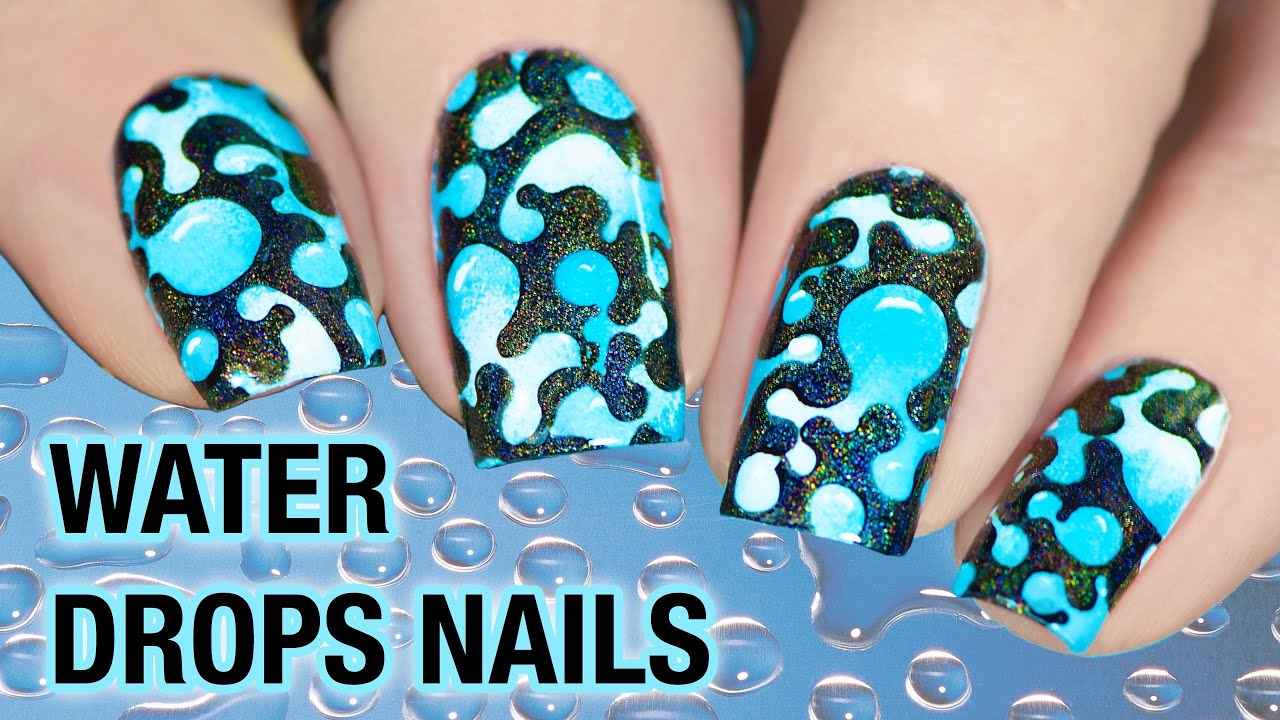
If you're wondering how to create nail art using a water cup, this tutorial will guide you through the process step by step. First, gather all the necessary materials - nail polish, a small bowl or cup filled with room temperature water, a toothpick or small brush, and tape or liquid latex. Apply a base coat to your nails and let it dry. Then, apply a white nail polish as your base color. Drop a few drops of your chosen nail polish colors onto the water's surface, creating swirls with a toothpick or small brush. Carefully dip your nail into the water, making sure to fully submerge it. Use a toothpick to remove any excess nail polish from the water's surface before dipping your nail. Clean up any excess nail polish with a cleanup brush dipped in nail polish remover. Finish off with a top coat and admire your amazing nail art in a water cup!Nail Art in Water Cup Tutorial


Nail Art in Water Cup Tutorial


Creating your own water marble nail art is not only fun but also a great way to express your creativity. Here's how to do a DIY water marble nail art. Gather all the materials you'll need - nail polish, a small bowl or cup filled with room temperature water, a toothpick or small brush, and tape or liquid latex. Start by applying a base coat to your nails and let it dry. Then, apply a white nail polish as your base color. Take your chosen nail polish colors and drop a few drops onto the water's surface, creating swirls with a toothpick or small brush. Carefully dip your nail into the water, making sure to fully submerge it. Use a toothpick to remove any excess nail polish from the water's surface before dipping your nail. Once all your nails are done, use a cleanup brush dipped in nail polish remover to clean up any excess nail polish. Finish off with a top coat to seal in your design and add shine. And there you have it, a beautiful DIY water marble nail art that you can proudly show off.DIY Water Marble Nail Art


DIY Water Marble Nail Art


Water marble nail art may seem daunting for beginners, but with this tutorial, you'll be able to create stunning designs in no time. Here's how to do water marble nail art for beginners. First, gather all the necessary materials - nail polish, a small bowl or cup filled with room temperature water, a toothpick or small brush, and tape or liquid latex. Apply a base coat to your nails and let it dry. Then, apply a white nail polish as your base color. Take your chosen nail polish colors and drop a few drops onto the water's surface, creating swirls with a toothpick or small brush. Carefully dip your nail into the water, making sure to fully submerge it. Use a toothpick to remove any excess nail polish from the water's surface before dipping your nail. Once all your nails are done, use a cleanup brush dipped in nail polish remover to clean up any excess nail polish. Finish off with a top coat to seal in your design and add shine. And there you have it, a beautiful water marble nail art perfect for beginners.Water Marble Nail Art for Beginners

Water Marble Nail Art for Beginners
If you're looking for a unique way to create nail art, using a water cup is a great option. Here's how to do nail art using a water cup. Start by gathering all the necessary materials - nail polish, a small bowl or cup filled with room temperature water, a toothpick or small brush, and tape or liquid latex. Apply a base coat to your nails and let it dry. Then, apply a white nail polish as your base color. Drop a few drops of your chosen nail polish colors onto the water's surface, creating swirls with a toothpick or small brush. Carefully dip your nail into the water, making sure to fully submerge it. Use a toothpick to remove any excess nail polish from the water's surface before dipping your nail. Clean up any excess nail polish with a cleanup brush dipped in nail polish remover. Finish off with a top coat to seal in your design and add shine. And there you have it, unique and stunning nail art created with a water cup.Nail Art Using Water Cup


Nail Art Using Water Cup


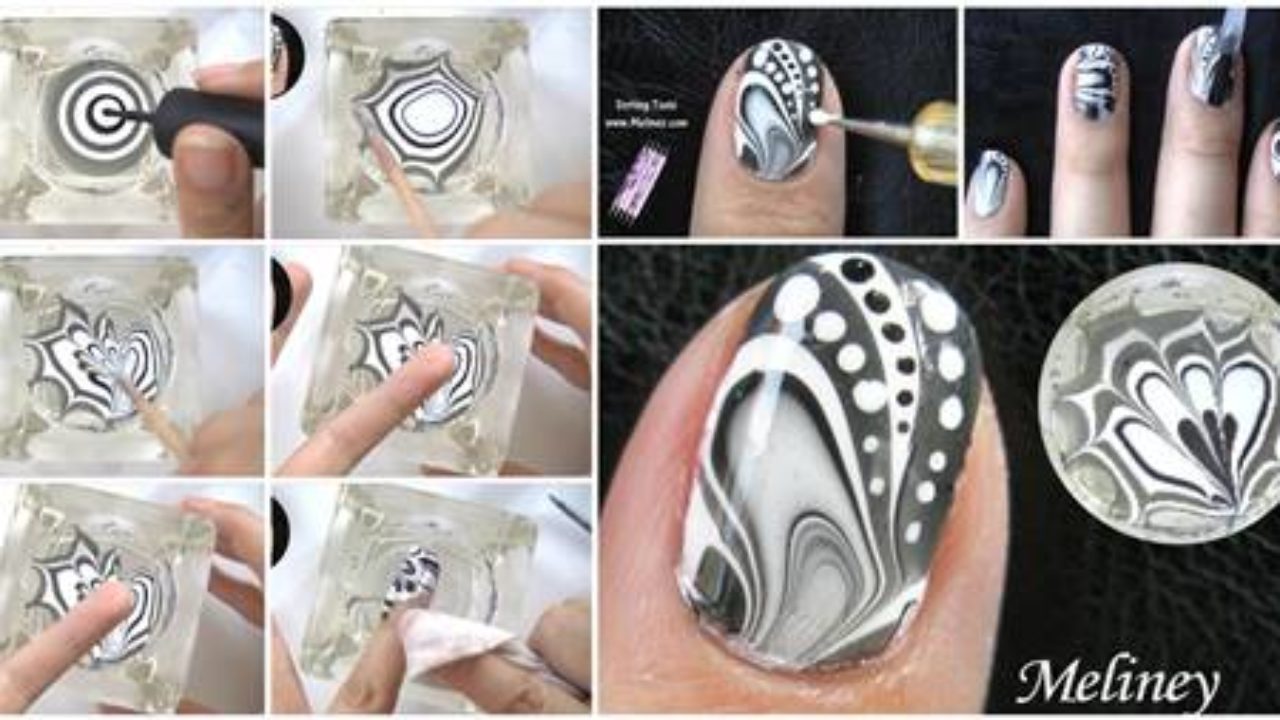
If you're a visual learner, this step by step tutorial on how to do water marble nail art will be perfect for you. Start by gathering all the necessary materials - nail polish, a small bowl or cup filled with room temperature water, a toothpick or small brush, and tape or liquid latex. Apply a base coat to your nails and let it dry. Then, apply a white nail polish as your base color. Take your chosen nail polish colors and drop a few drops onto the water's surface, creating swirls with a toothpick or small brush. Carefully dip your nail into the water, making sure to fully submerge it. Use a toothpick to remove any excess nail polish from the water's surface before dipping your nail. Clean up any excess nail polish with a cleanup brush dipped in nail polish remover. Finish off with a top coat to seal in your design and add shine. And that's it, a step by step guide to achieving perfect water marble nail art.Step by Step Water Marble Nail Art

Step by Step Water Marble Nail Art


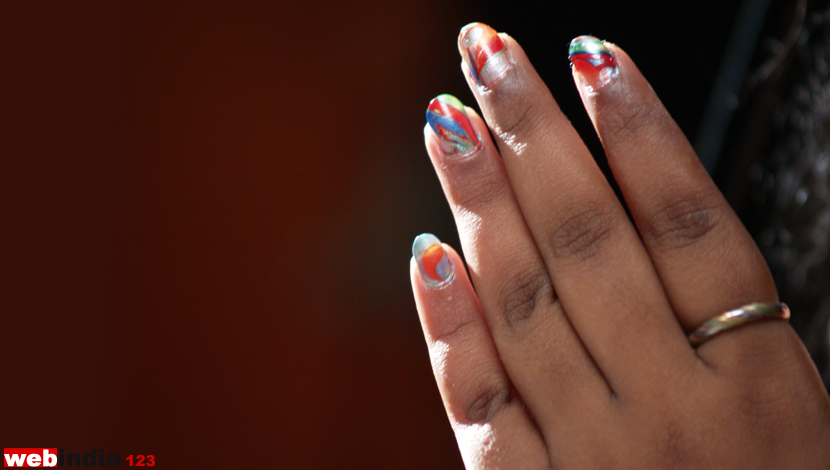
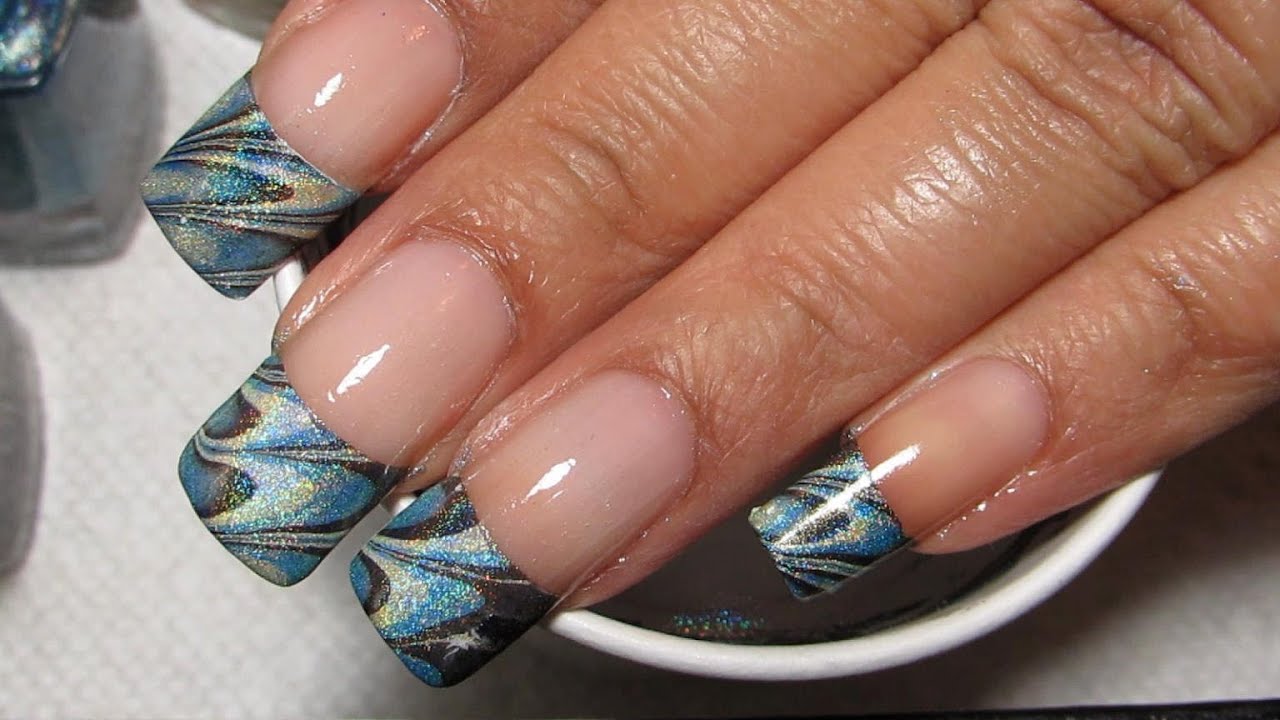
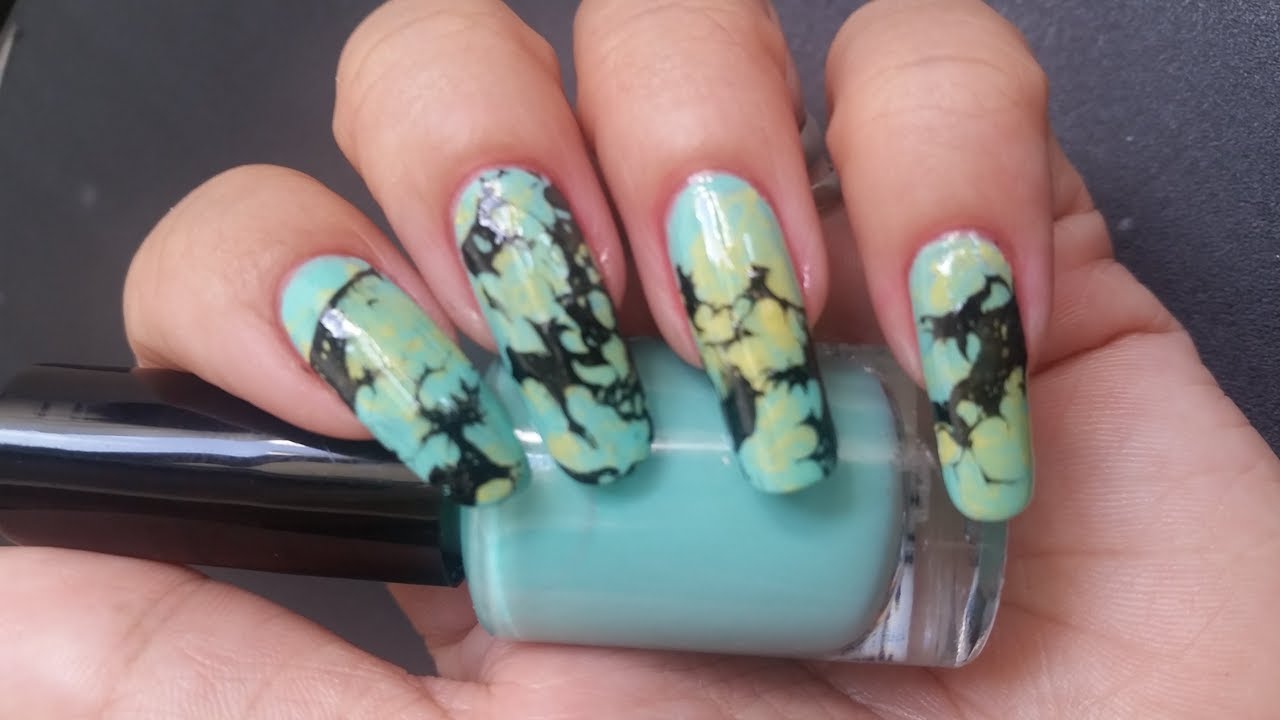
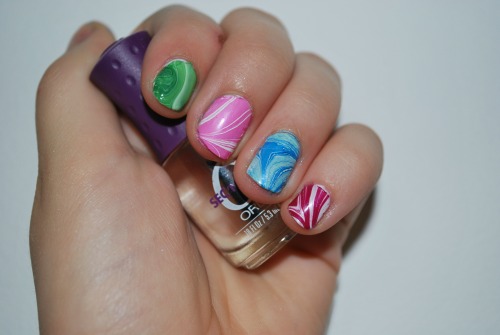
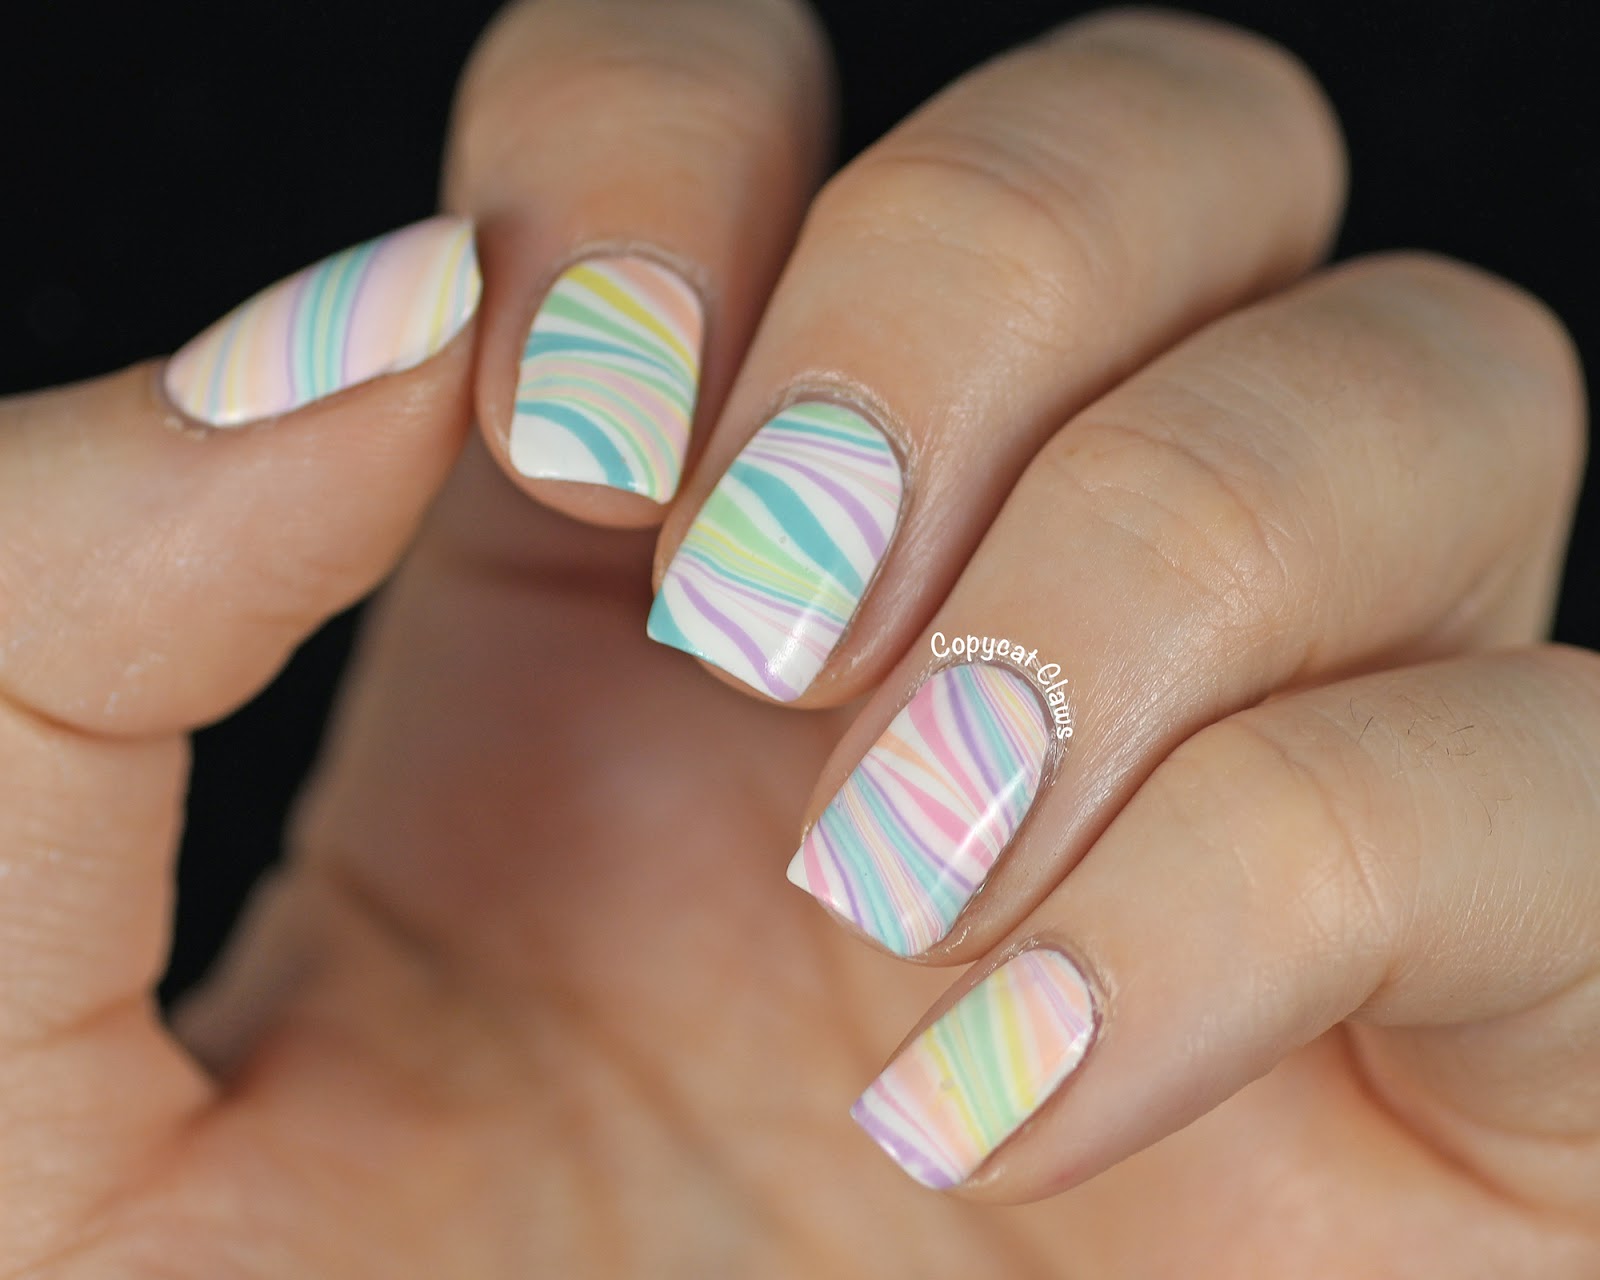
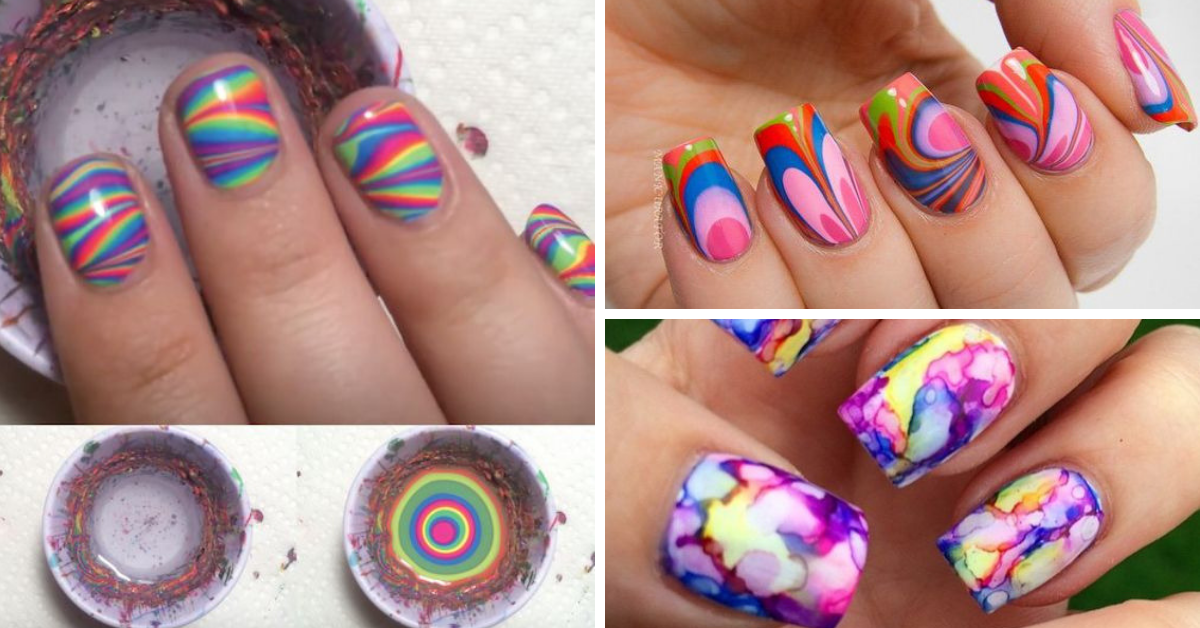
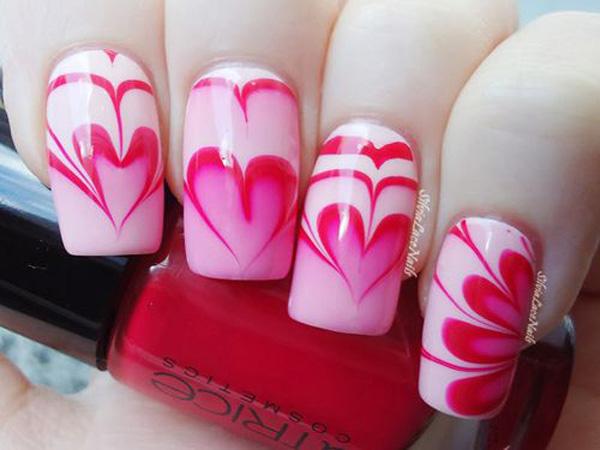
One of the best things about water marble nail art is the endless design possibilities. Here are a few water marble nail art designs to inspire you. Start by gathering all the necessary materials - nail polish, a small bowl or cup filled with room temperature water, a toothpick or small brush, and tape or liquid latex. Apply a base coat to your nails and let it dry. Then, apply a white nail polish as your base color. Take your chosen nail polish colors and drop a few drops onto the water's surface, creating swirls with a toothpick or small brush. Carefully dip your nail into the water, making sure to fully submerge it. Use a toothpick to remove any excess nail polish from the water's surface before dipping your nail. Clean up any excess nail polish with a cleanup brush dipped in nail polish remover. Finish off with a top coat to seal in your design and add shine. And there you have it, a beautiful water marble nail art design that will surely turn heads.Water Marble Nail Art Designs

Water Marble Nail Art Designs
.JPG)
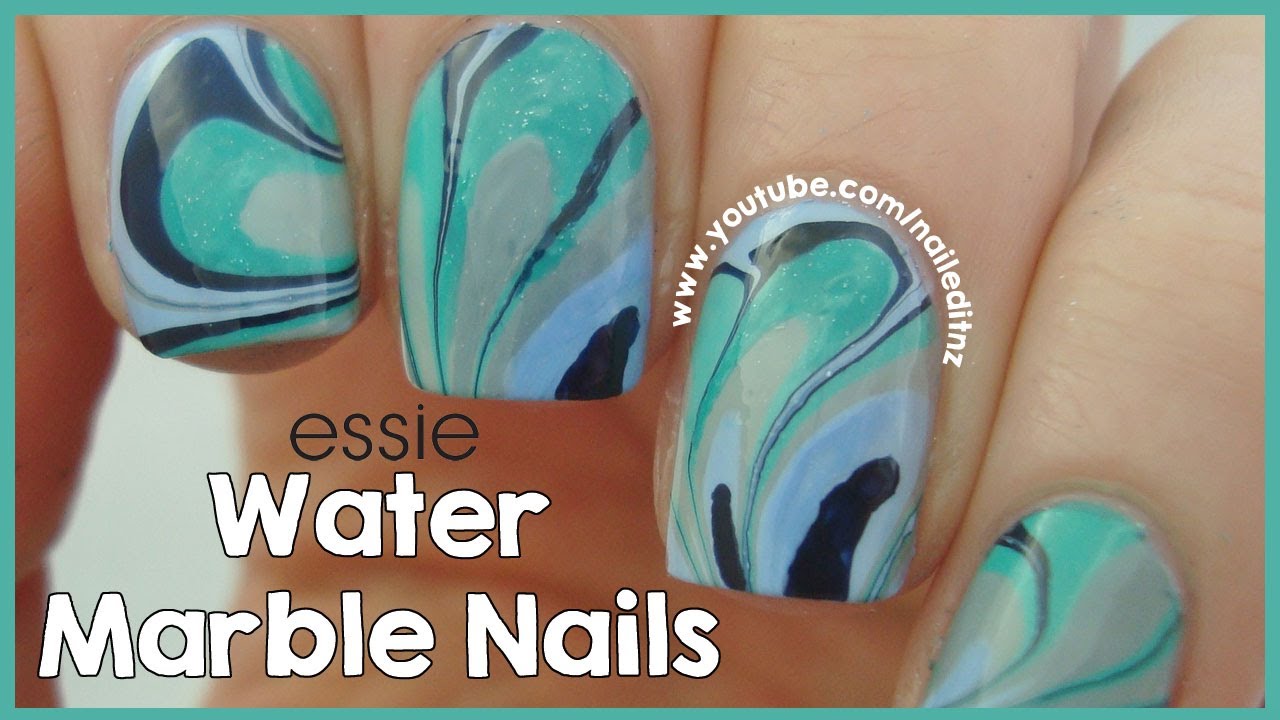
The technique of creating nail art using a water cup may seem tricky, but with practice, you'll be able to master it. Here's how to do nail art in a water cup technique. Start by gathering all the necessary materials - nail polish, a small bowl or cup filled with room temperature water, a toothpick or small brush, and tape or liquid latex. Apply a base coat to your nails and let it dry. Then, apply a white nail polish as your base color. Drop a few drops of your chosen nail polish colors onto the water's surface, creating swirls with a toothpick or small brush. Carefully dip your nail into the water, making sure to fully submerge it. Use a toothpick to remove any excess nail polish from the water's surface before dipping your nail. Clean up any excess nail polish with a cleanup brush dipped in nail polish remover. Finish off with a top coat to seal in your design and add shine. And there you have it, a stunning nail art design created using the water cup technique.Nail Art in Water Cup Technique


Nail Art in Water Cup Technique

The Latest Trend in House Design: Nail Art in Water Cup

What is Nail Art in Water Cup?
 Nail art has become a popular trend in recent years, with people using various techniques and tools to decorate their nails. However, the latest trend that has taken the world by storm is nail art in water cup. This technique involves creating unique and intricate designs on the nails by using water as a medium. The result is a stunning and eye-catching look that has everyone talking.
How Does It Work?
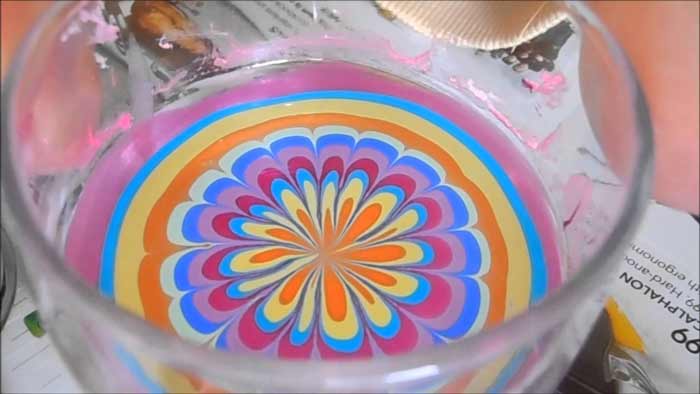
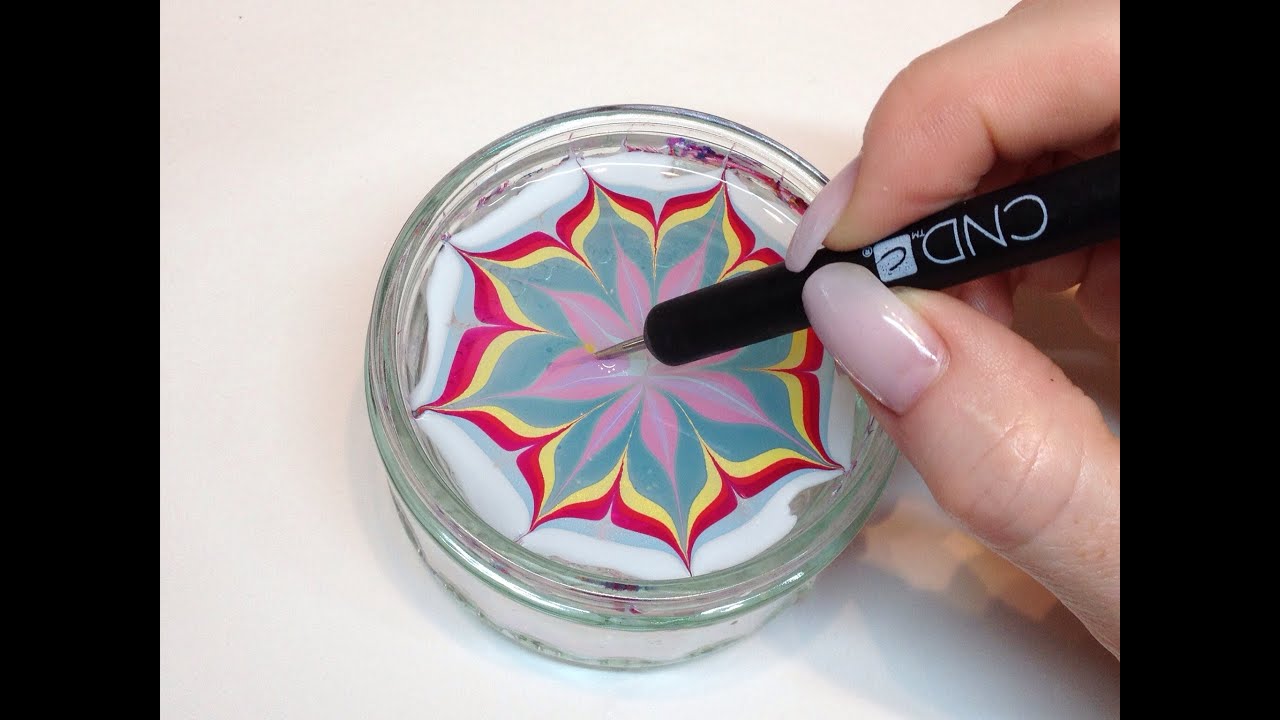
 Nail art in water cup may seem like a complicated process, but it is actually quite simple. First, you need to choose your desired nail polish colors and a cup of room-temperature water. Then, using a toothpick or a needle, you create swirls and patterns on the surface of the water by dropping small droplets of nail polish. Once you have your desired design, you dip your finger into the water, and the design will transfer onto your nail. You can repeat this process with different colors and patterns to create a unique and personalized look.
Why Is It the Next Big Thing in House Design?
 Nail art in water cup is not just limited to nails; it has now made its way into the world of house design. People are using this technique to create stunning and one-of-a-kind designs on their walls, furniture, and even household objects. This trend has gained popularity because of its versatility and affordability. With just some nail polish, water, and a few household items, you can transform your home into a work of art.
The Benefits of Nail Art in Water Cup
 Aside from being a unique and creative way to decorate your home, nail art in water cup also has several other benefits. Firstly, it is a great way to express your creativity and personality. You can experiment with different colors and designs to create a look that is truly unique to you. Additionally, it is a cost-effective way to decorate your home, as you can use materials that you already have at home. Lastly, this technique is easy to learn, making it accessible to everyone, regardless of their artistic abilities.
In conclusion,
nail art in water cup is a fun and innovative way to add a personal touch to your house design. Whether you want to add some flair to your nails or transform your home into a work of art, this trend is definitely worth trying out. So, grab your favorite nail polish colors and get ready to unleash your creativity with nail art in water cup.
Aside from being a unique and creative way to decorate your home, nail art in water cup also has several other benefits. Firstly, it is a great way to express your creativity and personality. You can experiment with different colors and designs to create a look that is truly unique to you. Additionally, it is a cost-effective way to decorate your home, as you can use materials that you already have at home. Lastly, this technique is easy to learn, making it accessible to everyone, regardless of their artistic abilities.
In conclusion,
nail art in water cup is a fun and innovative way to add a personal touch to your house design. Whether you want to add some flair to your nails or transform your home into a work of art, this trend is definitely worth trying out. So, grab your favorite nail polish colors and get ready to unleash your creativity with nail art in water cup.


