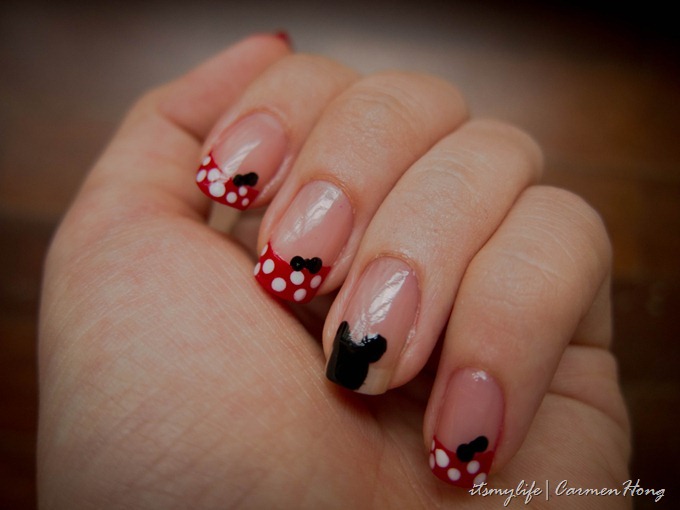
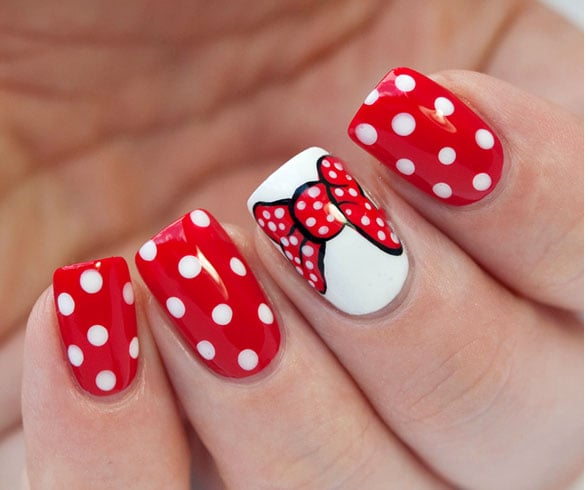
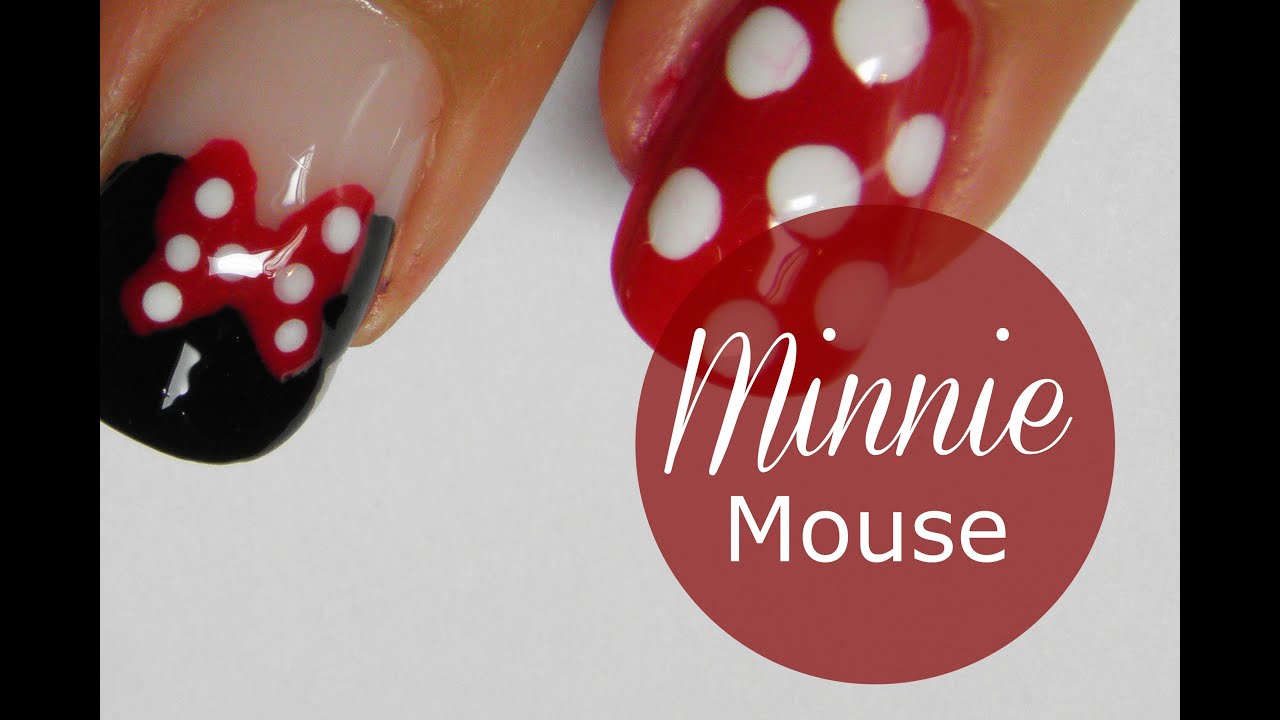
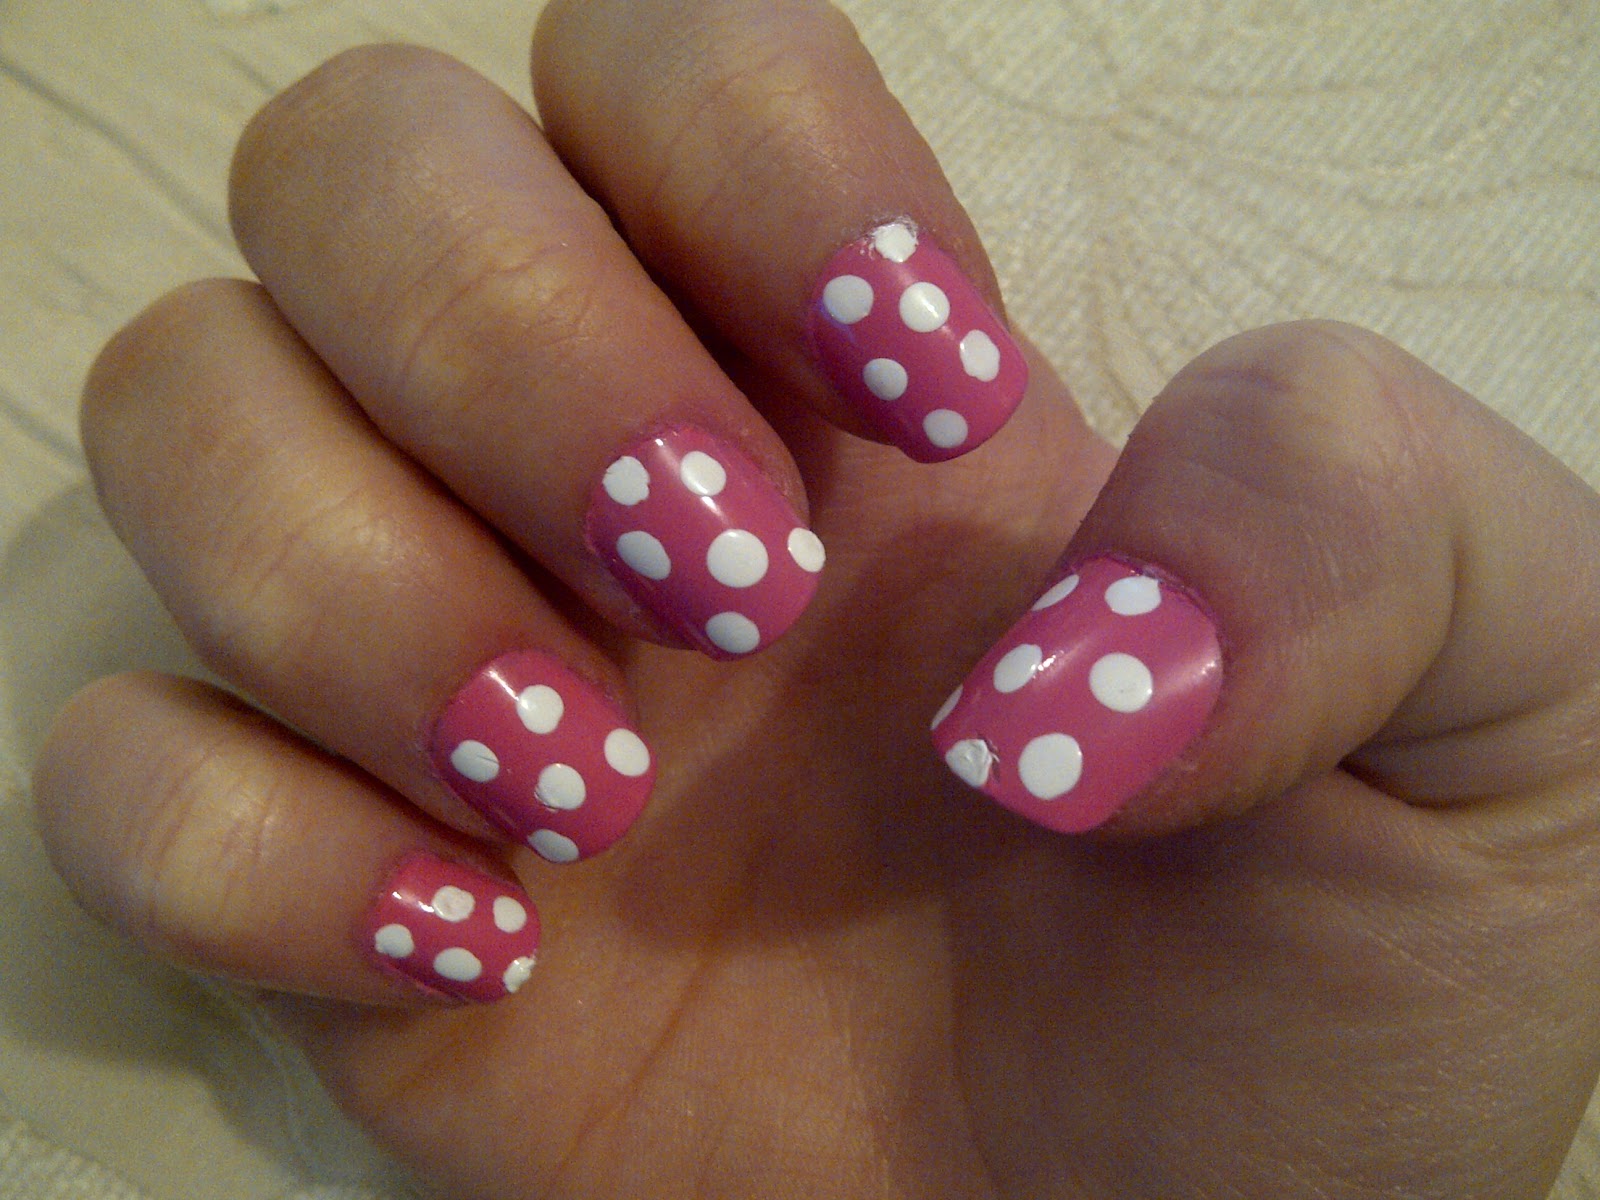
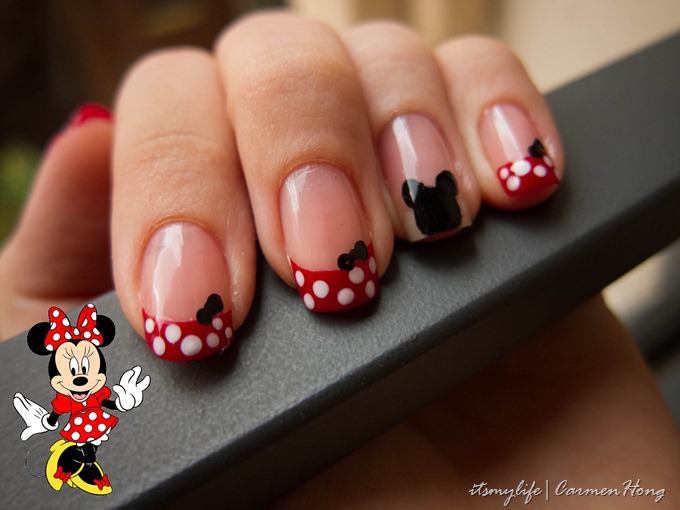
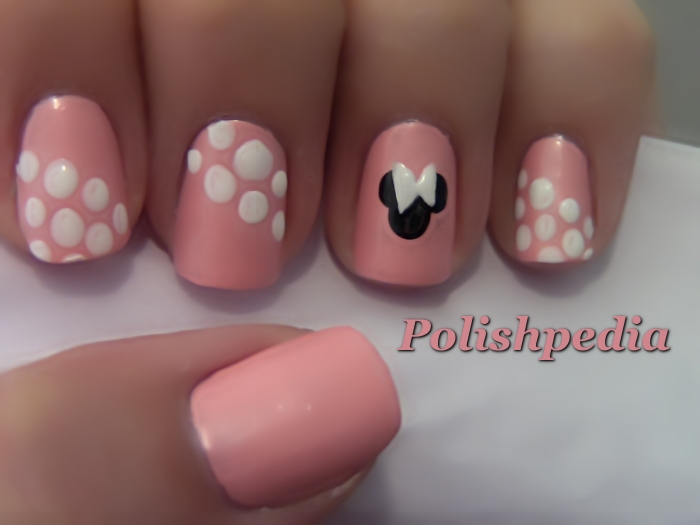
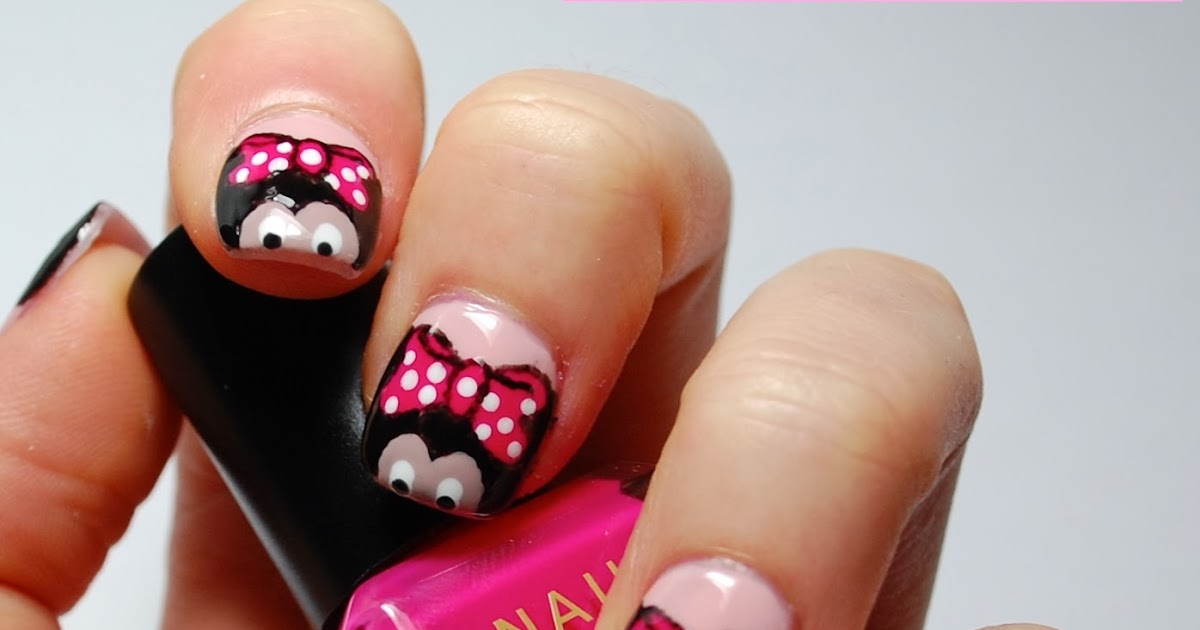
If you're a fan of Disney's beloved character, Minnie Mouse, then you'll love incorporating her iconic style into your nail art. With her signature polka dot dress and bow, Minnie is the perfect inspiration for a fun and playful manicure. In this tutorial, we'll show you how to recreate Minnie's adorable look on your nails. To start, you'll need a base coat, red and white nail polish, black nail polish, and a top coat. You can also use a dotting tool or toothpick to create the polka dots. Begin by applying the base coat to protect your nails and allow it to dry completely before moving on to the next step. Next, paint all of your nails with the red polish. This will be the base color for Minnie's dress. Make sure to apply two coats for an opaque finish. Once the red polish is dry, take your white nail polish and create a half-moon shape at the base of your nail. This will be Minnie's iconic polka dot dress. You can use a small brush or the polish brush to create the shape. Using your dotting tool or toothpick, create black polka dots on the white half-moon shape. This will give the illusion of Minnie's dress. You can also use a bobby pin or the end of a pen as a dotting tool if you don't have one on hand. To finish off the look, add Minnie's signature bow by using the black polish to create a small heart shape on your ring finger. This can be done with a small brush or a toothpick. Then, use the red polish to fill in the heart and create the bow's center. You can also use a red rhinestone for a more 3D effect. Once all of your nails are dry, apply a top coat to seal in your design and give it a glossy finish. And just like that, you have an adorable Minnie Mouse manicure!1. Minnie Mouse Nail Art Tutorial


1. Minnie Mouse Nail Art Tutorial


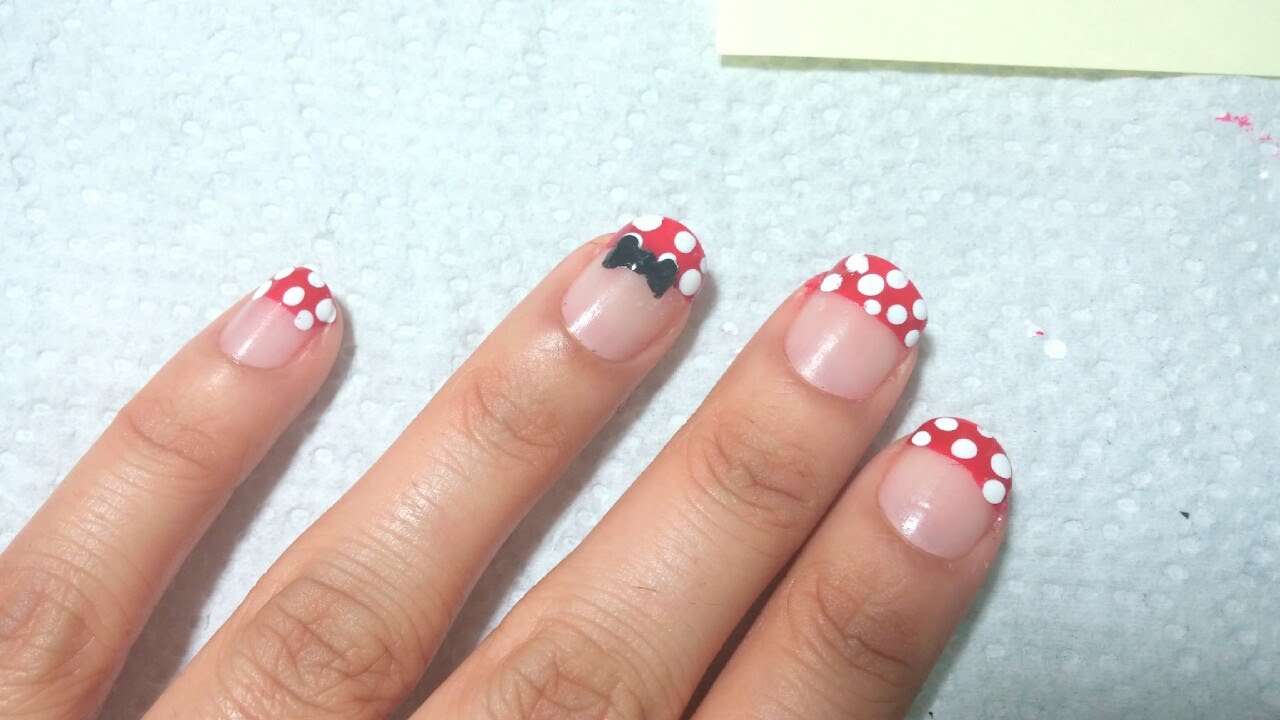
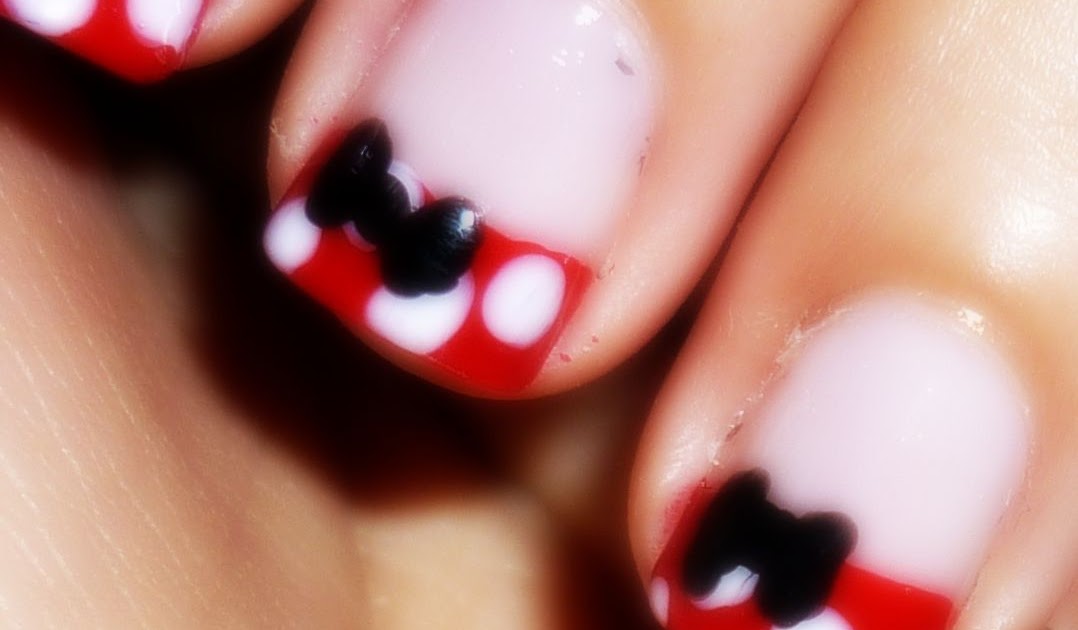
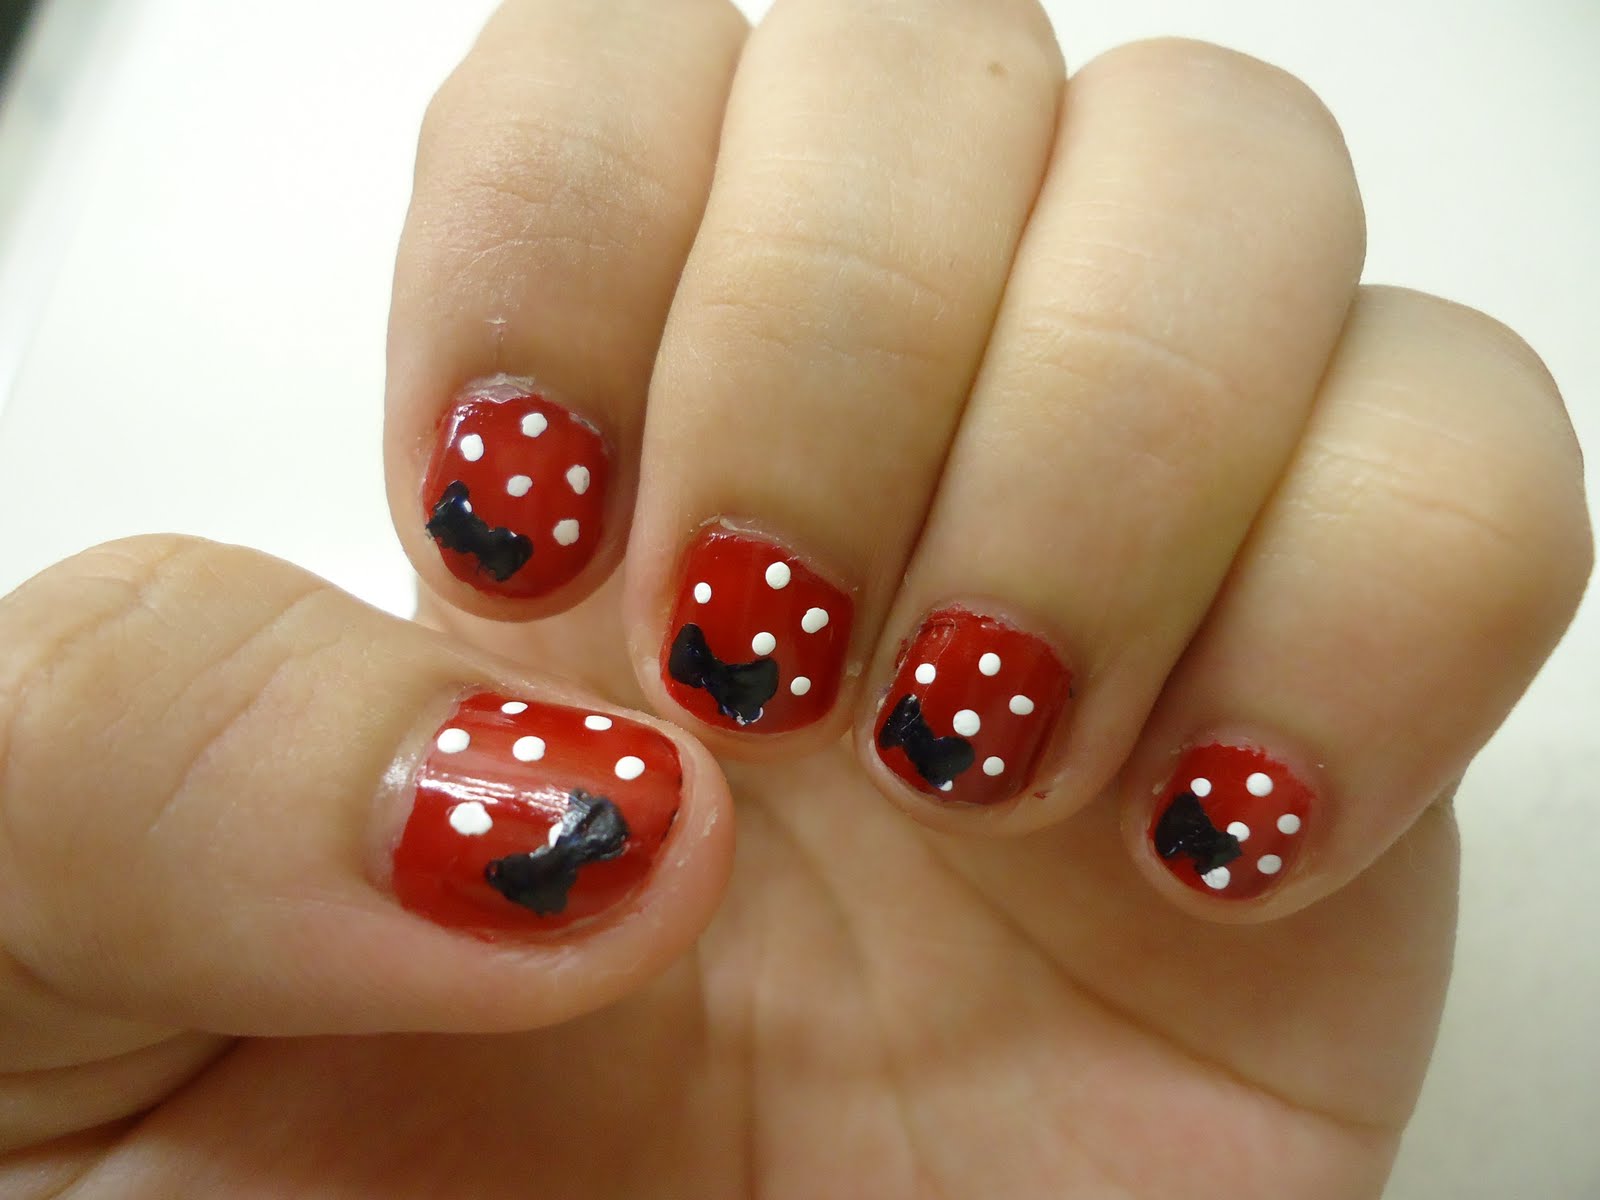
If you're looking for a quick and easy way to create a Minnie Mouse inspired manicure, this tutorial is for you. With just a few simple steps, you can have cute Minnie nails in no time. Start by applying a base coat to protect your nails. Once it's dry, paint all of your nails with a light pink polish. This will be the base color for Minnie's bow. Next, using a black nail polish and a thin brush, create a small bow shape on your ring finger. You can also use a toothpick or bobby pin for this step. Make sure to leave a small gap in the center of the bow. Then, fill in the gap with a red polish to create the bow's center. You can also use a small red rhinestone for a more 3D effect. For the remaining nails, use a white nail polish to create small polka dots. You can use a dotting tool or toothpick for this step. Place the dots randomly on each nail to create a playful look. Once all of your nails are dry, finish off with a top coat to seal in your design and give it a shiny finish. And just like that, you have a cute and easy Minnie Mouse manicure!2. Easy Minnie Mouse Nail Art Tutorial


2. Easy Minnie Mouse Nail Art Tutorial


If you're new to nail art, don't worry! This step-by-step tutorial will guide you through the process of creating a Minnie Mouse inspired manicure. Follow along and you'll have perfect Minnie nails in no time. Start by applying a base coat to protect your nails. Then, paint all of your nails with a light pink polish. This will be the base color for Minnie's bow. Next, using a black nail polish and a thin brush, create a small bow shape on your ring finger. Make sure to leave a small gap in the center of the bow. You can also use a toothpick or bobby pin for this step. Then, fill in the gap with a red polish to create the bow's center. You can also use a small red rhinestone for a more 3D effect. For the remaining nails, use a white nail polish to create small polka dots. You can use a dotting tool or toothpick for this step. Place the dots randomly on each nail to create a playful look. Once all of your nails are dry, finish off with a top coat to seal in your design and give it a shiny finish. And just like that, you have a cute Minnie Mouse manicure!3. Step-by-Step Minnie Mouse Nail Art Tutorial


3. Step-by-Step Minnie Mouse Nail Art Tutorial


Looking for a cute and girly Minnie Mouse manicure? This tutorial is for you. With soft pink tones and a touch of glitter, this design is perfect for any Disney fan. Start by applying a base coat to protect your nails. Then, paint all of your nails with a light pink polish. This will be the base color for Minnie's bow. Next, using a black nail polish and a thin brush, create a small bow shape on your ring finger. Make sure to leave a small gap in the center of the bow. You can also use a toothpick or bobby pin for this step. Then, fill in the gap with a red polish to create the bow's center. You can also use a small red rhinestone for a more 3D effect. For the remaining nails, use a white nail polish to create small polka dots. You can use a dotting tool or toothpick for this step. Place the dots randomly on each nail to create a playful look. To add some sparkle, use a glitter polish on your middle finger. You can also use loose glitter and a clear top coat for this step. Just make sure to apply the glitter only on the tips of your nails for a subtle touch. Finish off with a top coat to seal in your design and give it a glossy finish. And just like that, you have a cute and sparkly Minnie Mouse manicure!4. Cute Minnie Mouse Nail Art Tutorial


4. Cute Minnie Mouse Nail Art Tutorial
If you're new to nail art, don't be intimidated by creating a Minnie Mouse inspired manicure. This tutorial is perfect for beginners and will guide you through the process step by step. Start by applying a base coat to protect your nails. Then, paint all of your nails with a light pink polish. This will be the base color for Minnie's bow. Next, using a black nail polish and a thin brush, create a small bow shape on your ring finger. Make sure to leave a small gap in the center of the bow. You can also use a toothpick or bobby pin for this step. Then, fill in the gap with a red polish to create the bow's center. You can also use a small red rhinestone for a more 3D effect. For the remaining nails, use a white nail polish to create small polka dots. You can use a dotting tool or toothpick for this step. Place the dots randomly on each nail to create a playful look. Once all of your nails are dry, finish off with a top coat to seal in your design and give it a shiny finish. And just like that, you have a cute and easy Minnie Mouse manicure!5. Minnie Mouse Nail Art Tutorial for Beginners

5. Minnie Mouse Nail Art Tutorial for Beginners
Looking for a precise and professional-looking Minnie Mouse manicure? Using a dotting tool can help you achieve perfectly round polka dots for a flawless design. To start, apply a base coat to protect your nails. Then, paint all of your nails with a light pink polish. This will be the base color for Minnie's bow. Next, using a black nail polish and a dotting tool, create small polka dots on all of your nails. Start by placing one dot in the center of each nail, then add more dots around it to create a cluster. This will give the illusion of Minnie's dress. For the accent nail, use the dotting tool to create a small bow shape with the black polish. Then, fill in the gap with a red polish for the bow's center. You can also use a small red rhinestone for a more 3D effect. Finish off with a top coat to seal in your design and give it a glossy finish. And just like that, you have a cute and professional-looking Minnie Mouse manicure!6. Minnie Mouse Nail Art Tutorial with Dotting Tool


6. Minnie Mouse Nail Art Tutorial with Dotting Tool
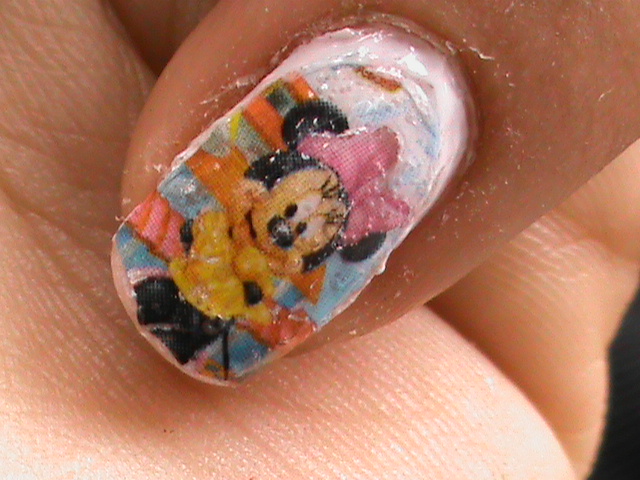
If you're not confident in your freehand nail art skills, using stickers can help you achieve a perfect Minnie Mouse manicure. This tutorial will show you how to use nail stickers to create a cute and easy design. Start by applying a base coat to protect your nails. Then, paint all of your nails with a light pink polish. This will be the base color for Minnie's bow. Next, take a Minnie Mouse nail sticker and place it on your ring finger. Gently press it down to adhere it to your nail. You can find these stickers at most beauty supply stores or online. For the remaining nails, use a white nail polish to create small polka dots. You can use a dotting tool or toothpick for this step. Place the dots randomly on each nail to create a playful look. Once all of your nails are dry, finish off with a top coat to seal in your design and give it a shiny finish. And just like that, you have a cute and easy Minnie Mouse manicure with stickers!7. Minnie Mouse Nail Art Tutorial with Stickers

7. Minnie Mouse Nail Art Tutorial with Stickers
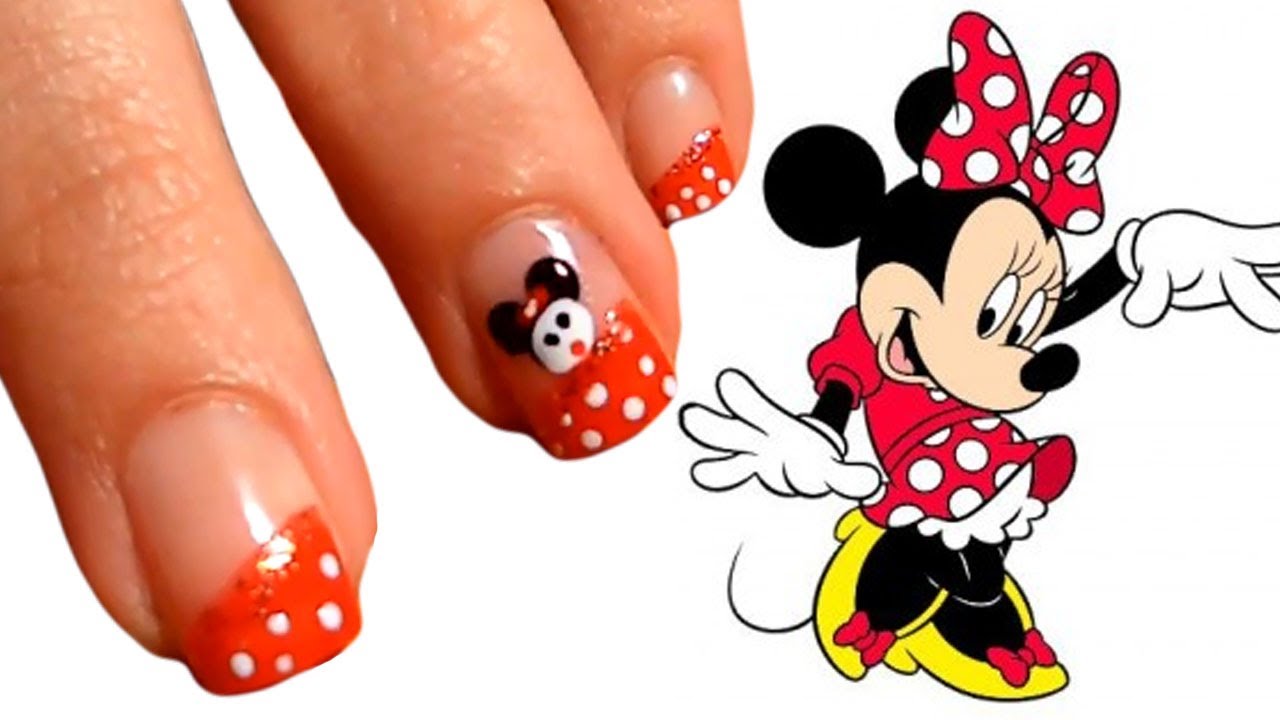
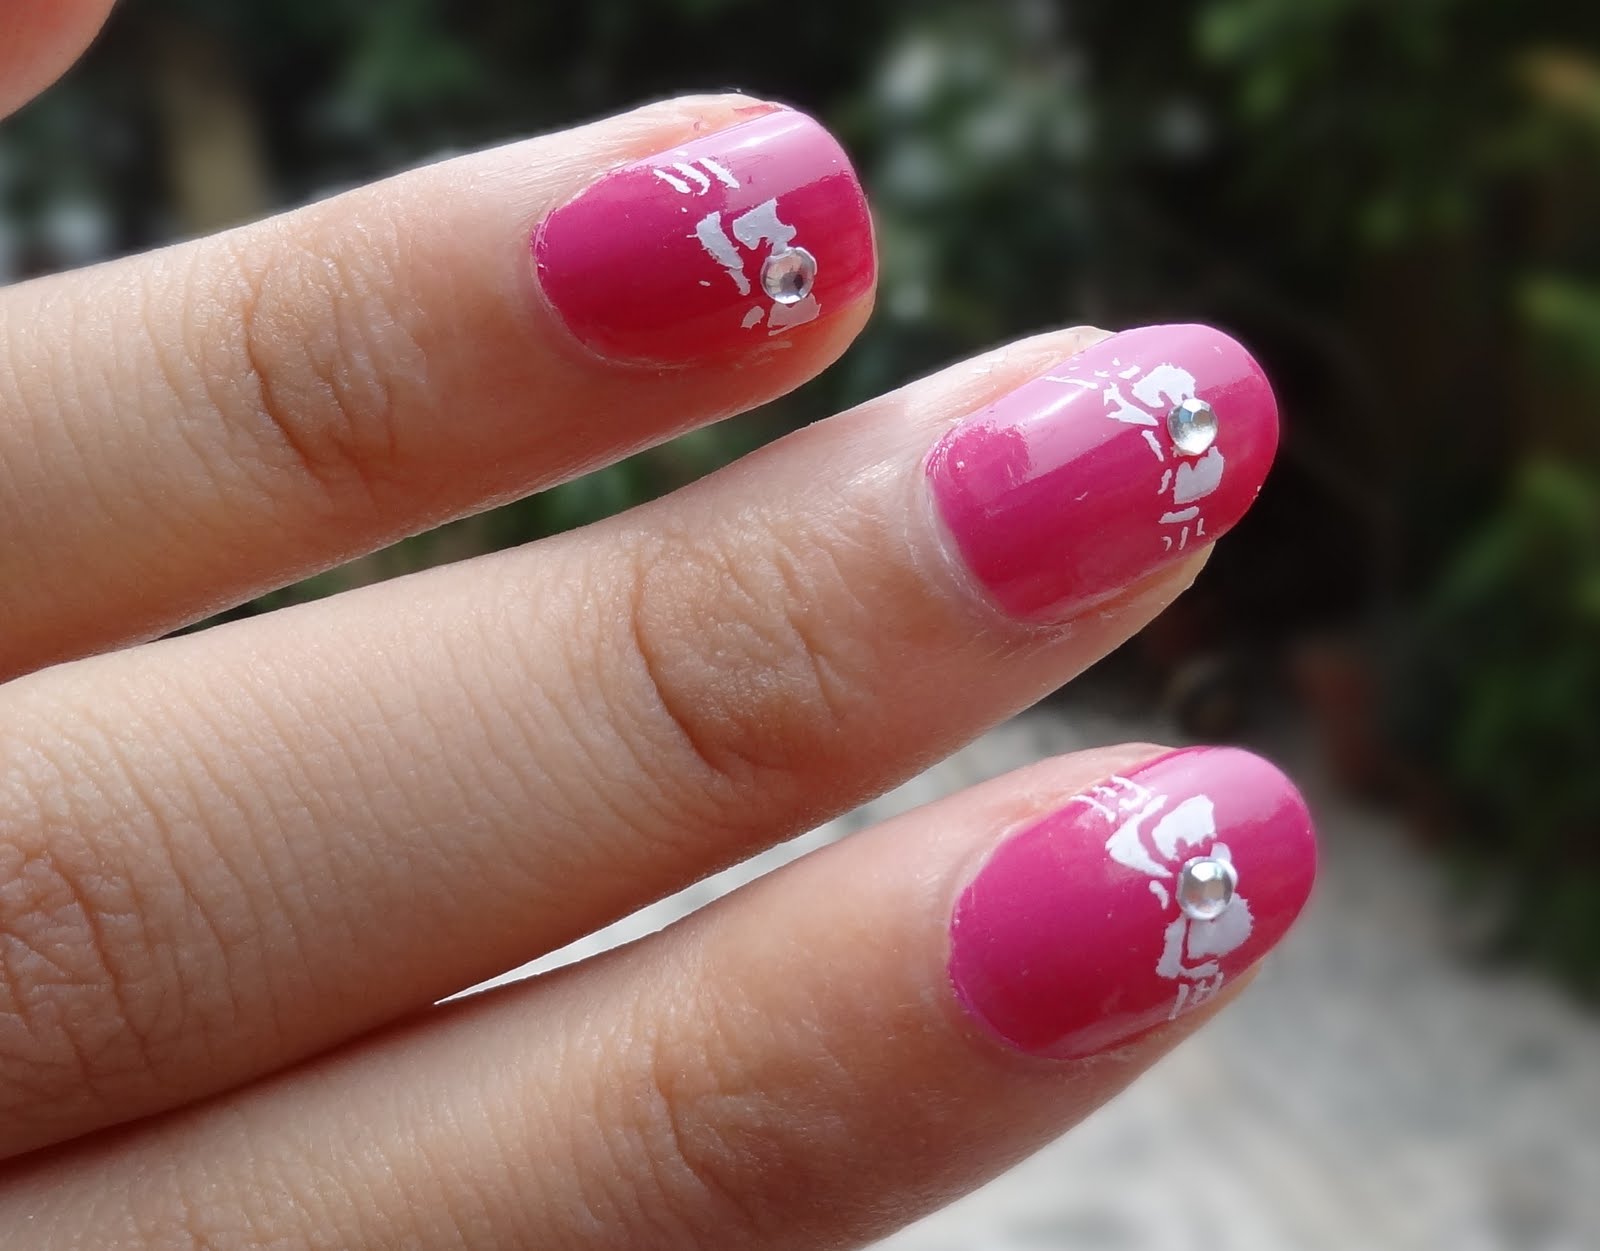
To add some bling to your Minnie Mouse manicure, try incorporating rhinestones into your design. This tutorial will show you how to create a sparkly and glamorous Minnie-inspired look. Start by applying a base coat to protect your nails. Then, paint all of your nails with a light pink polish. This will be the base color for Minnie's bow. Next, using a black nail polish and a thin brush, create a small bow shape on your ring finger. Make sure to leave a small gap in the center of the bow. You can also use a toothpick or bobby pin for this step. Then, fill in the gap with a red polish to create the bow's center. Now, take a small red rhinestone and place it in the center of the bow. You can use a toothpick or tweezers to help with placement. For the remaining nails, use a white nail polish to create small polka dots. You can use a dotting tool or toothpick for this step. Place the dots randomly on each nail to create a playful look. Finish off with a top coat to seal in your design and give it a glossy finish. And just like that, you have a glamorous Minnie Mouse manicure with rhinestones!8. Minnie Mouse Nail Art Tutorial with Rhinestones

8. Minnie Mouse Nail Art Tutorial with Rhinestones

To add some sparkle to your Minnie Mouse manicure, try incorporating glitter into your design. This tutorial will show you how to create a fun and glittery Minnie-inspired look. Start by applying a base coat to protect your nails. Then, paint all of your nails with a light pink polish. This will be the base color for Minnie's bow. Next, using a black nail polish and a thin brush, create a small bow shape on your ring finger. Make sure to leave a small gap in the center of the bow. You can also use a toothpick or bobby pin for this step. Then, fill in the gap with a red polish to create the bow's center. Now, take a glitter polish and apply it to the tips of your ring finger. You can also use loose glitter and a clear top coat for this step. For the remaining nails, use a white nail polish to create small polka dots. You can use a dotting tool or toothpick for this step. Place the dots randomly on each nail to create a playful look. Finish off with a top coat to seal in your design and give it a shiny finish. And just like that, you have a fun and glittery Minnie Mouse manicure!9. Minnie Mouse Nail Art Tutorial with Glitter


9. Minnie Mouse Nail Art Tutorial with Glitter


If you're looking for a quick and easy way to create a Minnie Mouse manicure, nail stamping is the perfect technique. This tutorial will show you how to use nail stamps to recreate Minnie's iconic look. Start by applying a base coat to protect your nails. Then, paint all of your nails with a light pink polish. This will be the base color for Minnie's bow. Next, take a Minnie Mouse nail stamp and apply it to your ring finger. Gently press down to transfer the design onto your nail. You can find these stamps at most beauty supply stores or online. For the remaining nails, use a white nail polish to create small polka dots. You can use a dotting tool or toothpick for this step. Place the dots randomly on each nail to create a playful look. Finish off with a top coat to seal in your design and give it a glossy finish. And just like that, you have a cute and easy Minnie Mouse manicure with nail stamps!10. Minnie Mouse Nail Art Tutorial with Nail Stamping

10. Minnie Mouse Nail Art Tutorial with Nail Stamping


The Magic of Nail Art Minnie Tutorial

Unleashing Your Creativity through Nail Art
 Nail art has taken the world by storm, with new trends and designs emerging every day. One of the most popular styles is the Minnie nail art, which features the iconic Disney character Minnie Mouse. This fun and playful design is perfect for any Disney lover or someone looking to add a touch of cuteness to their nails. In this article, we will guide you through a step-by-step tutorial on how to achieve the perfect Minnie nail art look.
The Basics of Nail Art
Before we dive into the Minnie nail art tutorial, it's essential to understand the basics of nail art. Nail art is a creative way of painting, decorating, and embellishing your nails. It allows you to express your personality and style through your nails. With the right tools and techniques, anyone can achieve beautiful and intricate designs on their nails.
The Tools You'll Need
To create a flawless Minnie nail art, you will need a few essential tools. These include a base coat, topcoat, dotting tool, thin nail art brush, black and red nail polish, and white nail polish. You can also add some glitter or rhinestones for extra sparkle and dimension.
Step-by-Step Tutorial
Nail art has taken the world by storm, with new trends and designs emerging every day. One of the most popular styles is the Minnie nail art, which features the iconic Disney character Minnie Mouse. This fun and playful design is perfect for any Disney lover or someone looking to add a touch of cuteness to their nails. In this article, we will guide you through a step-by-step tutorial on how to achieve the perfect Minnie nail art look.
The Basics of Nail Art
Before we dive into the Minnie nail art tutorial, it's essential to understand the basics of nail art. Nail art is a creative way of painting, decorating, and embellishing your nails. It allows you to express your personality and style through your nails. With the right tools and techniques, anyone can achieve beautiful and intricate designs on their nails.
The Tools You'll Need
To create a flawless Minnie nail art, you will need a few essential tools. These include a base coat, topcoat, dotting tool, thin nail art brush, black and red nail polish, and white nail polish. You can also add some glitter or rhinestones for extra sparkle and dimension.
Step-by-Step Tutorial
Step 1: Prep Your Nails
 The first step to any nail art design is to prep your nails. Start by shaping and buffing your nails to your desired shape and length. Then, apply a base coat to protect your nails and make the nail polish last longer.
Step 2: Paint Your Nails
 Using a white nail polish, paint all your nails except for the ring finger. This finger will be your accent nail for the Minnie design.
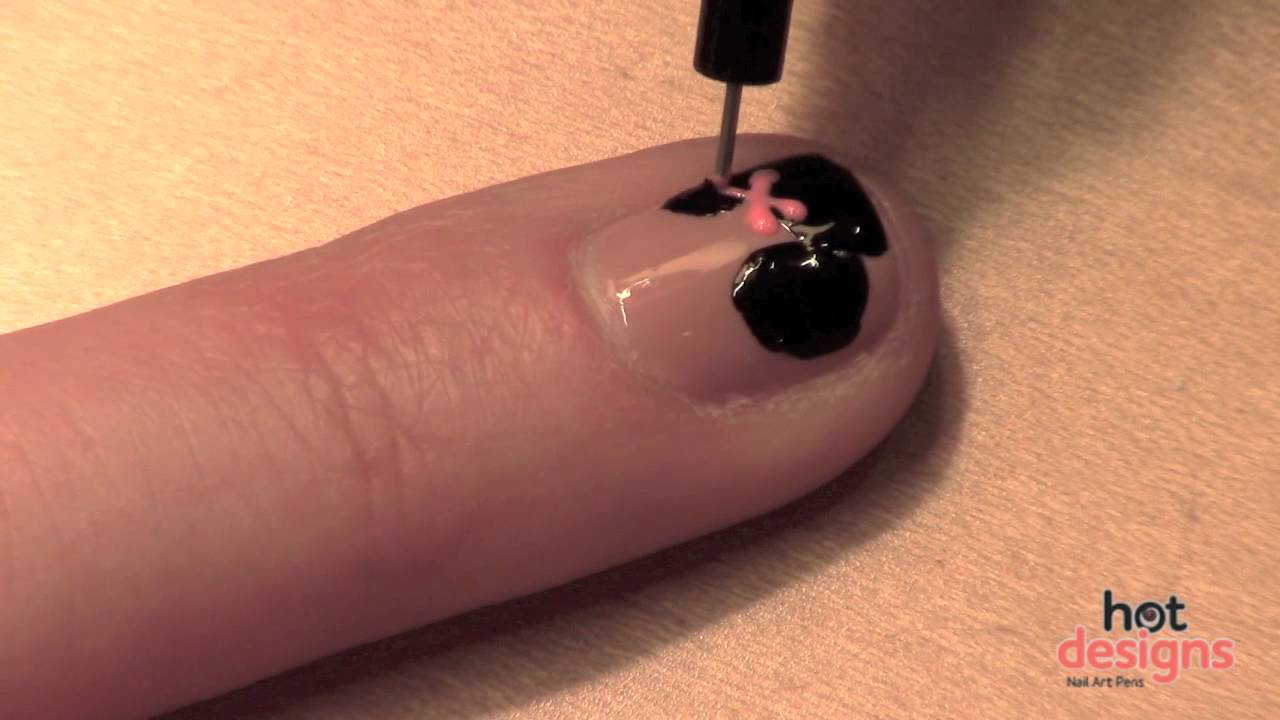
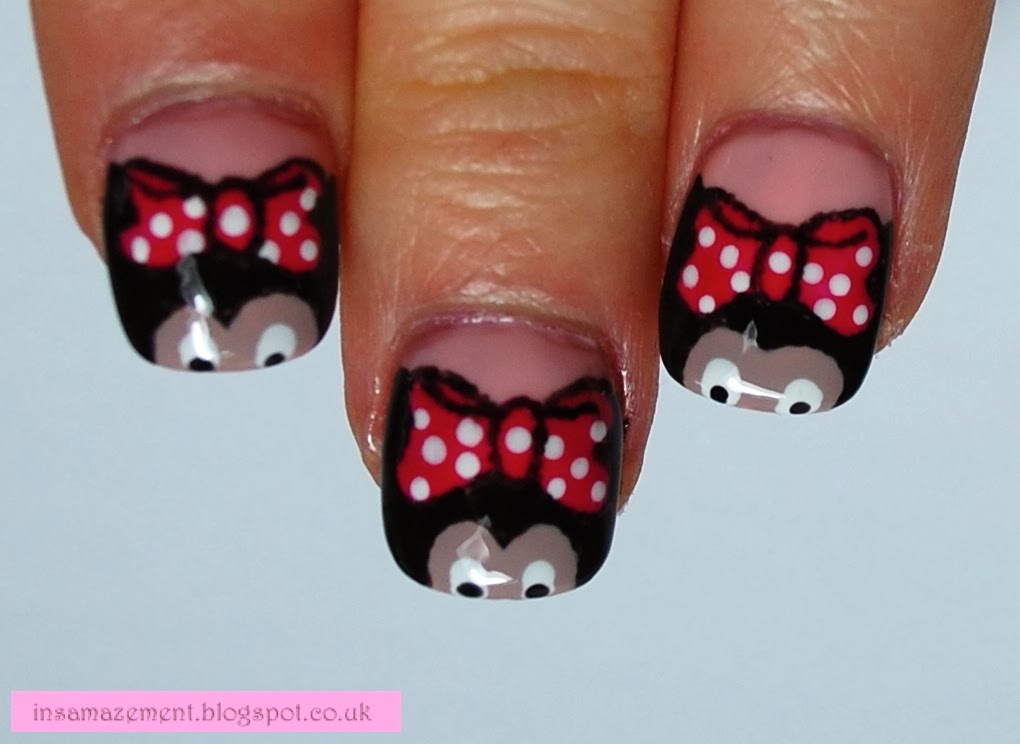
Step 3: Create Minnie's Face
 Using a thin nail art brush and black nail polish, create a small circle on your accent nail. This will be Minnie's head. Then, using the dotting tool and the same black polish, create two larger dots for her ears.
Step 4: Add Minnie's Bow
 Using the dotting tool and red nail polish, create a small bow in between Minnie's ears. You can also use a thin nail art brush for more precise lines.
Step 5: Finishing Touches
 Once the design is dry, add a topcoat to seal and protect your nails. You can also add some glitter or rhinestones to add some extra flair to your Minnie nail art.
Final Thoughts
Nail art is a fun and creative way to express yourself through your nails. The Minnie nail art tutorial we've shared with you is just one of the many designs you can try. So grab your tools and let your imagination run wild with different colors, patterns, and designs. With practice, you'll be able to create stunning and unique nail art looks that will make heads turn.
Once the design is dry, add a topcoat to seal and protect your nails. You can also add some glitter or rhinestones to add some extra flair to your Minnie nail art.
Final Thoughts
Nail art is a fun and creative way to express yourself through your nails. The Minnie nail art tutorial we've shared with you is just one of the many designs you can try. So grab your tools and let your imagination run wild with different colors, patterns, and designs. With practice, you'll be able to create stunning and unique nail art looks that will make heads turn.


