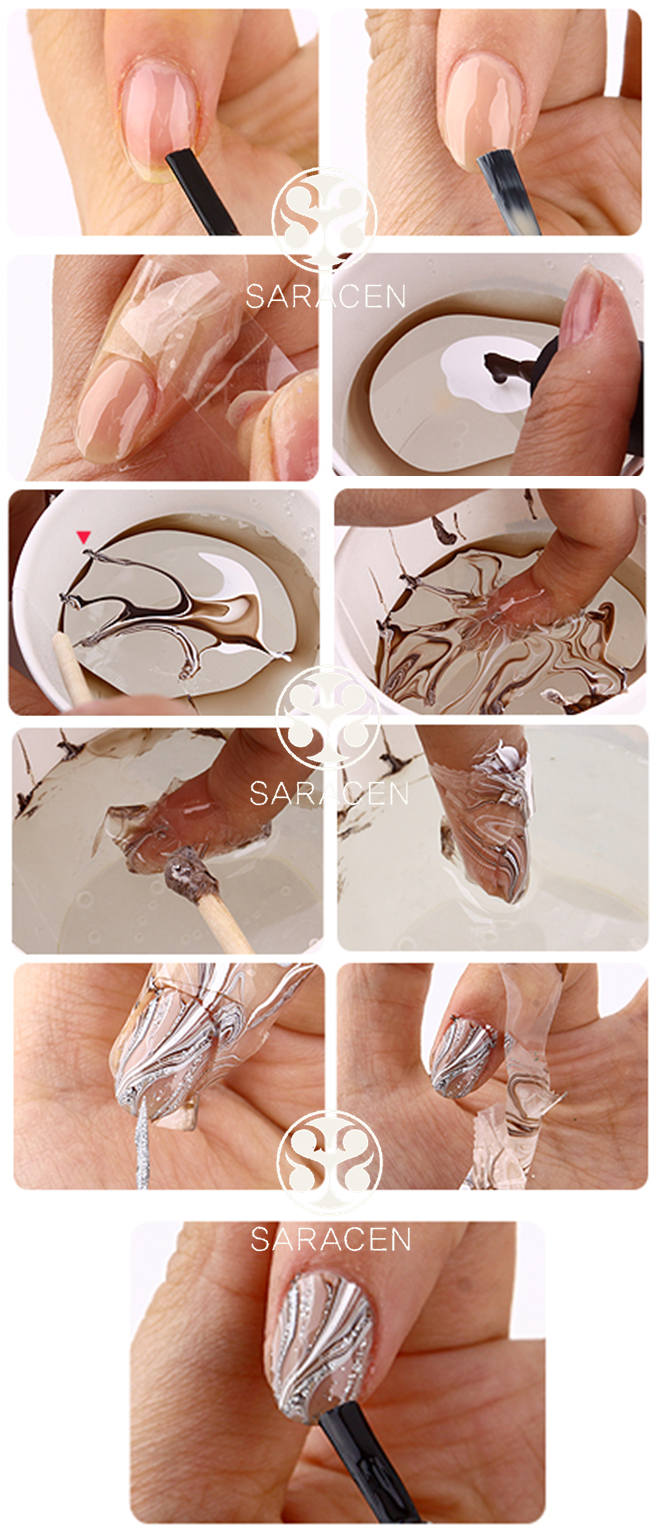
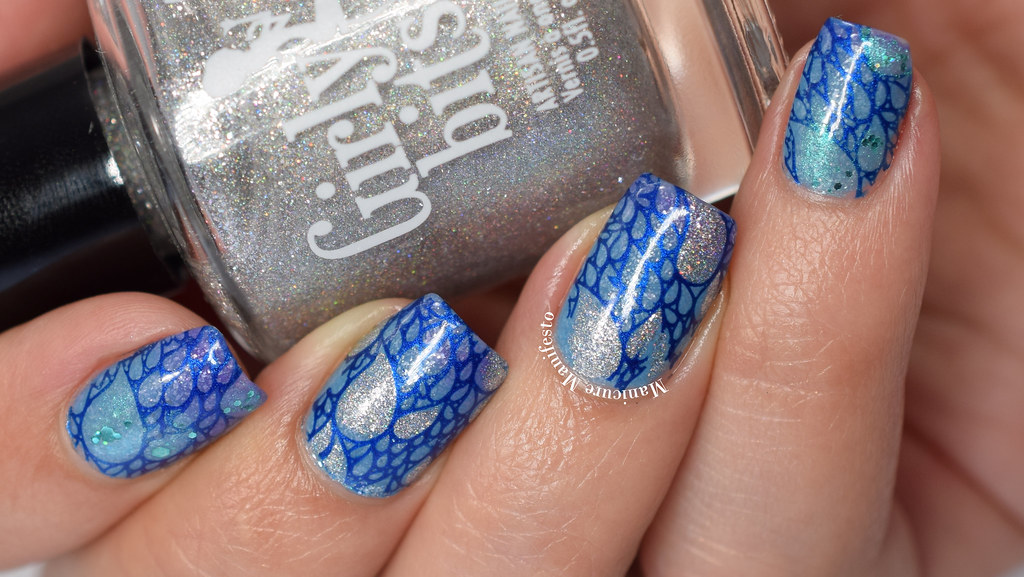
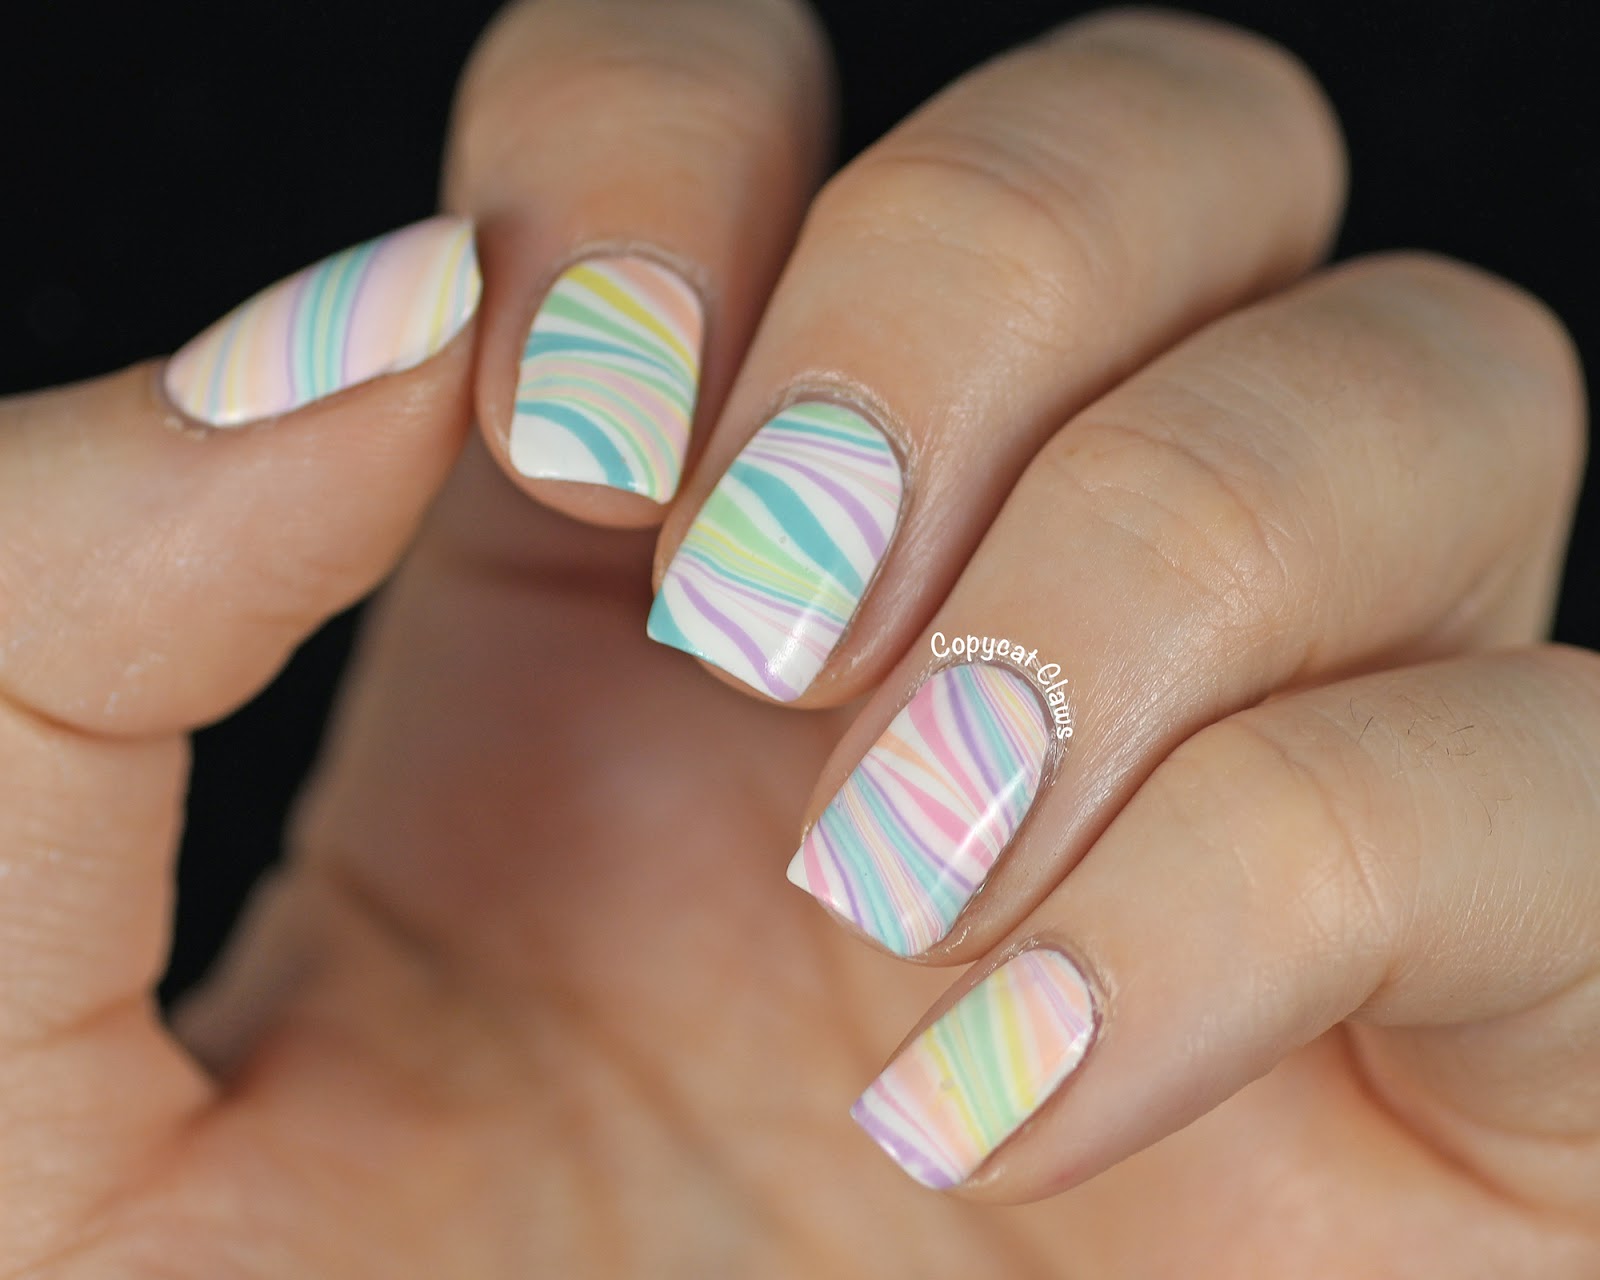
Water marble nail art is a popular and mesmerizing technique that involves creating colorful swirls on the surface of water and then transferring them onto your nails. It may seem intimidating at first, but with the right tools and a little practice, you can achieve stunning results. In this tutorial, we'll show you how to create beautiful water marble nail art using nail polish. To start, you'll need a few supplies: nail polish in your desired colors, a small cup or bowl filled with room temperature water, a toothpick or small brush, and some tape or liquid latex to protect your skin from excess polish. Begin by prepping your nails with a base coat to protect them and help the polish adhere better. Then, apply a base color of your choice and let it dry completely before moving on to the water marble technique. Choose your first nail polish color and add a drop into the water. It should spread out and create a film on the surface. Then, add a drop of your second color directly into the center of the first color. Continue adding drops of alternating colors until you have created a target-like pattern. Using a toothpick or small brush, gently drag the colors from the center of the target outwards, creating a swirl pattern. Be careful not to over-mix the colors or they may become muddy. Once you're happy with the design, dip your nail into the water at a 45-degree angle, making sure to fully submerge the nail. Use a toothpick to remove any excess polish from the surface of the water before removing your finger. Once you've finished all your nails, clean up any excess polish around your cuticles with a cotton swab dipped in nail polish remover. Then, seal your design with a top coat to protect it and give it a glossy finish. Water marble nail art may take a bit of practice, but the results are well worth it. Experiment with different color combinations and patterns to create unique designs that will make your nails stand out.Water Marble Nail Art Tutorial


Water Marble Nail Art Tutorial


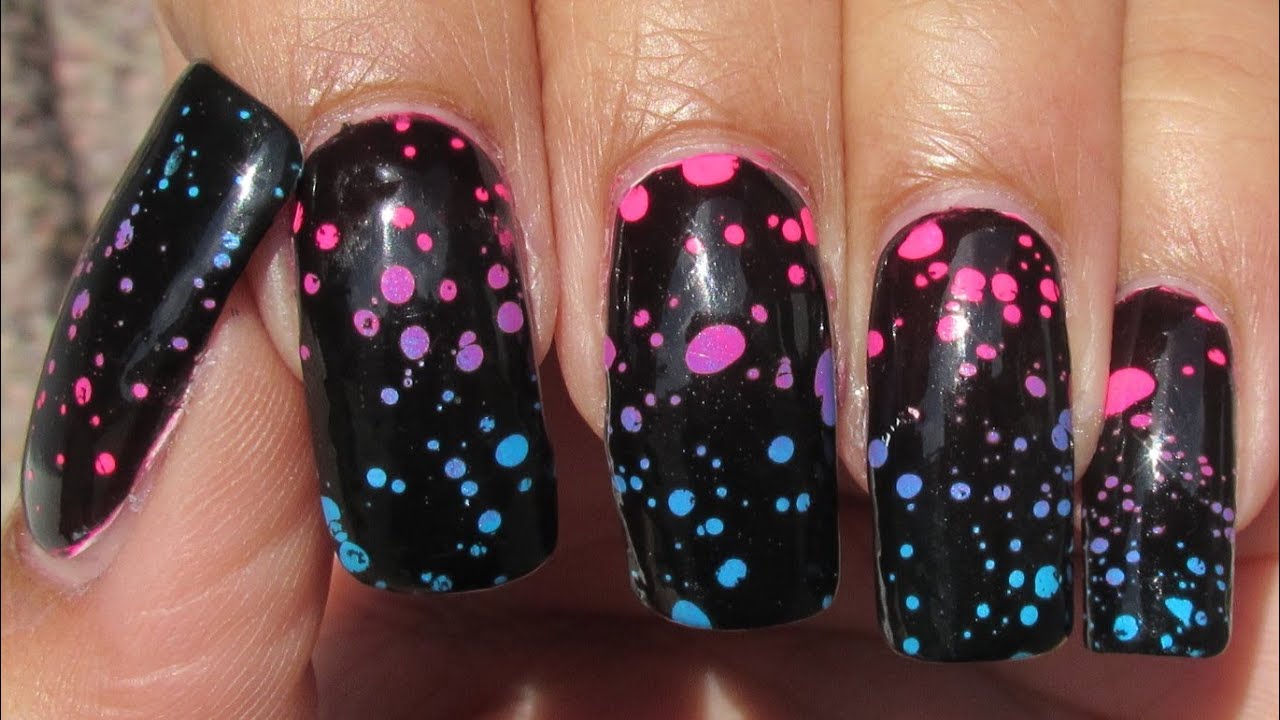
If you're a fan of nail art, you've probably heard of the technique of using nail polish in water to create stunning designs. But did you know that there are many different ways to use this method? In this ultimate guide, we'll cover everything you need to know about using nail polish in water for your nail art. The most common technique for using nail polish in water is water marbling, which we covered in our previous tutorial. But there are other techniques you can try, such as drip marbling, where you drop small amounts of polish onto the surface of the water and then use a toothpick or brush to create designs, or "dry water marble" where you use a plastic bag instead of water to create the design. Another fun way to use nail polish in water is to create a "smoke effect" by adding drops of polish onto the surface of the water and then blowing on it with a straw to create swirls. You can then dip your nail into the design or use a brush to transfer it onto your nail. When using nail polish in water, it's important to use room temperature water and to work quickly before the polish starts to dry. You can also use a spray bottle filled with water to keep the surface wet while you work. Experiment with different techniques and have fun creating unique designs with nail polish in water.Nail Polish in Water: The Ultimate Guide


Nail Polish in Water: The Ultimate Guide
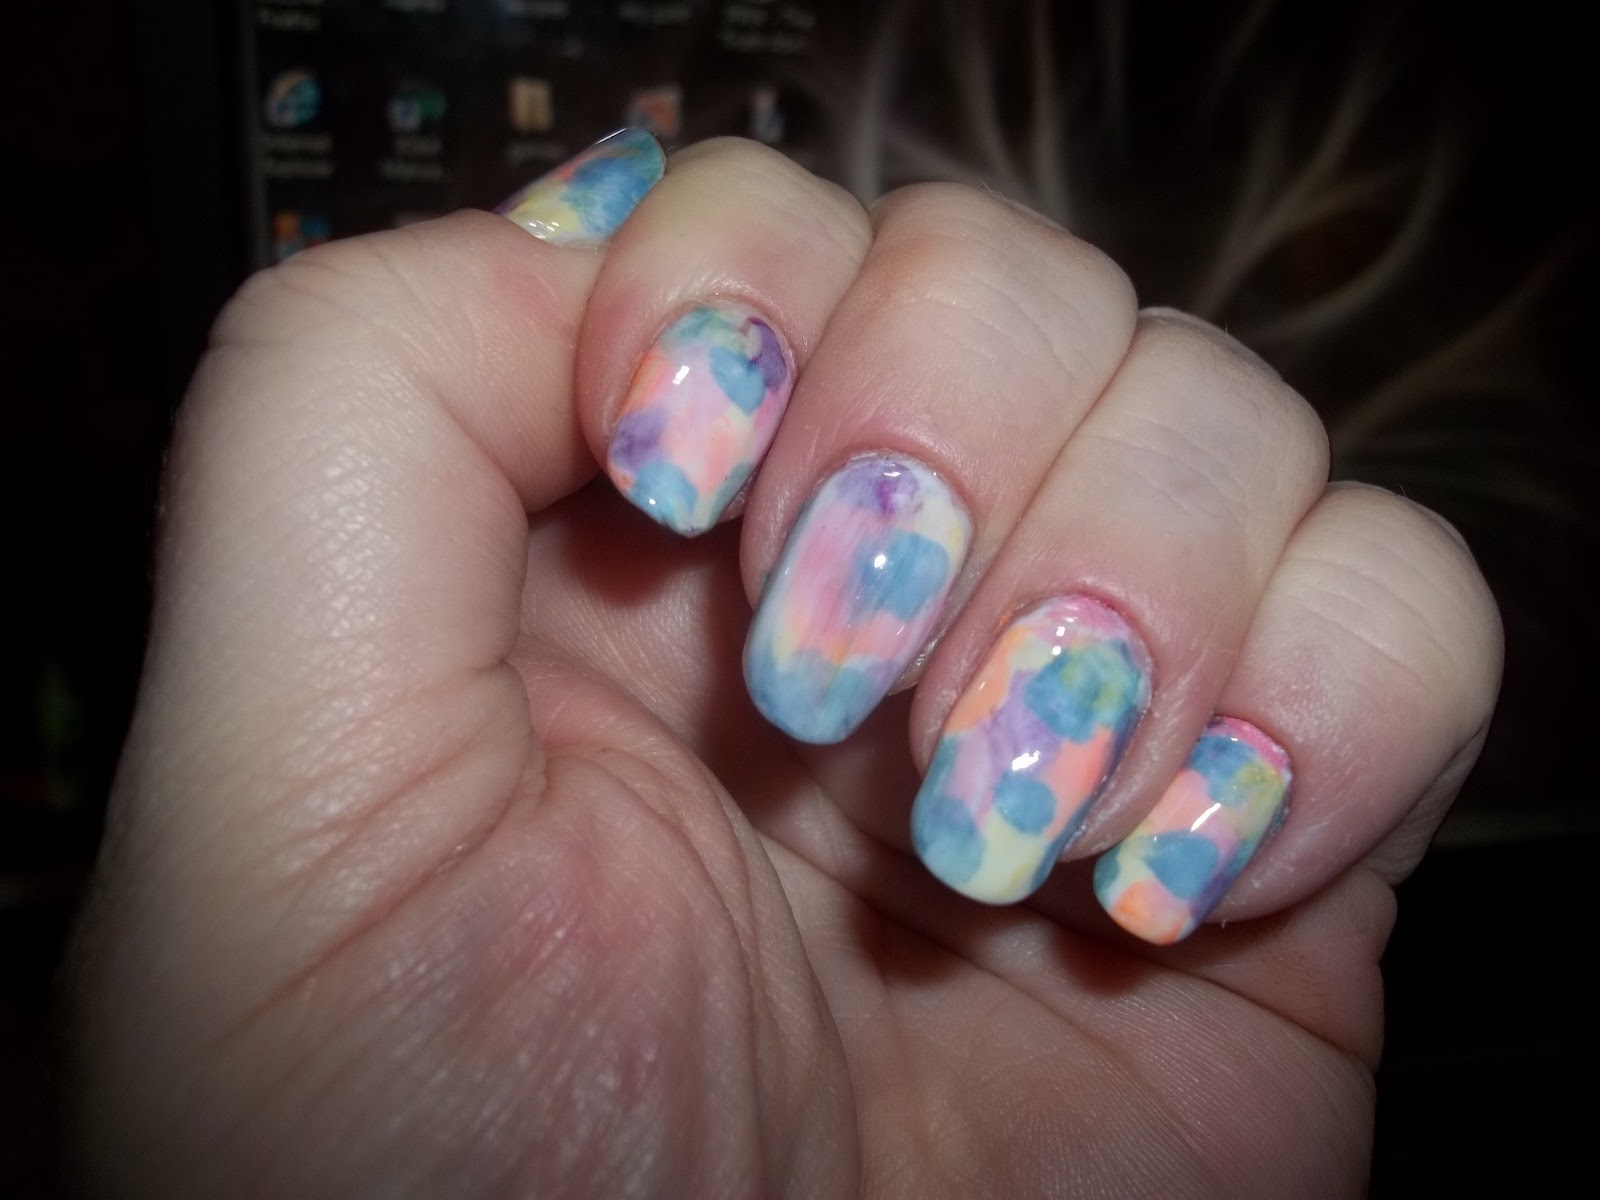
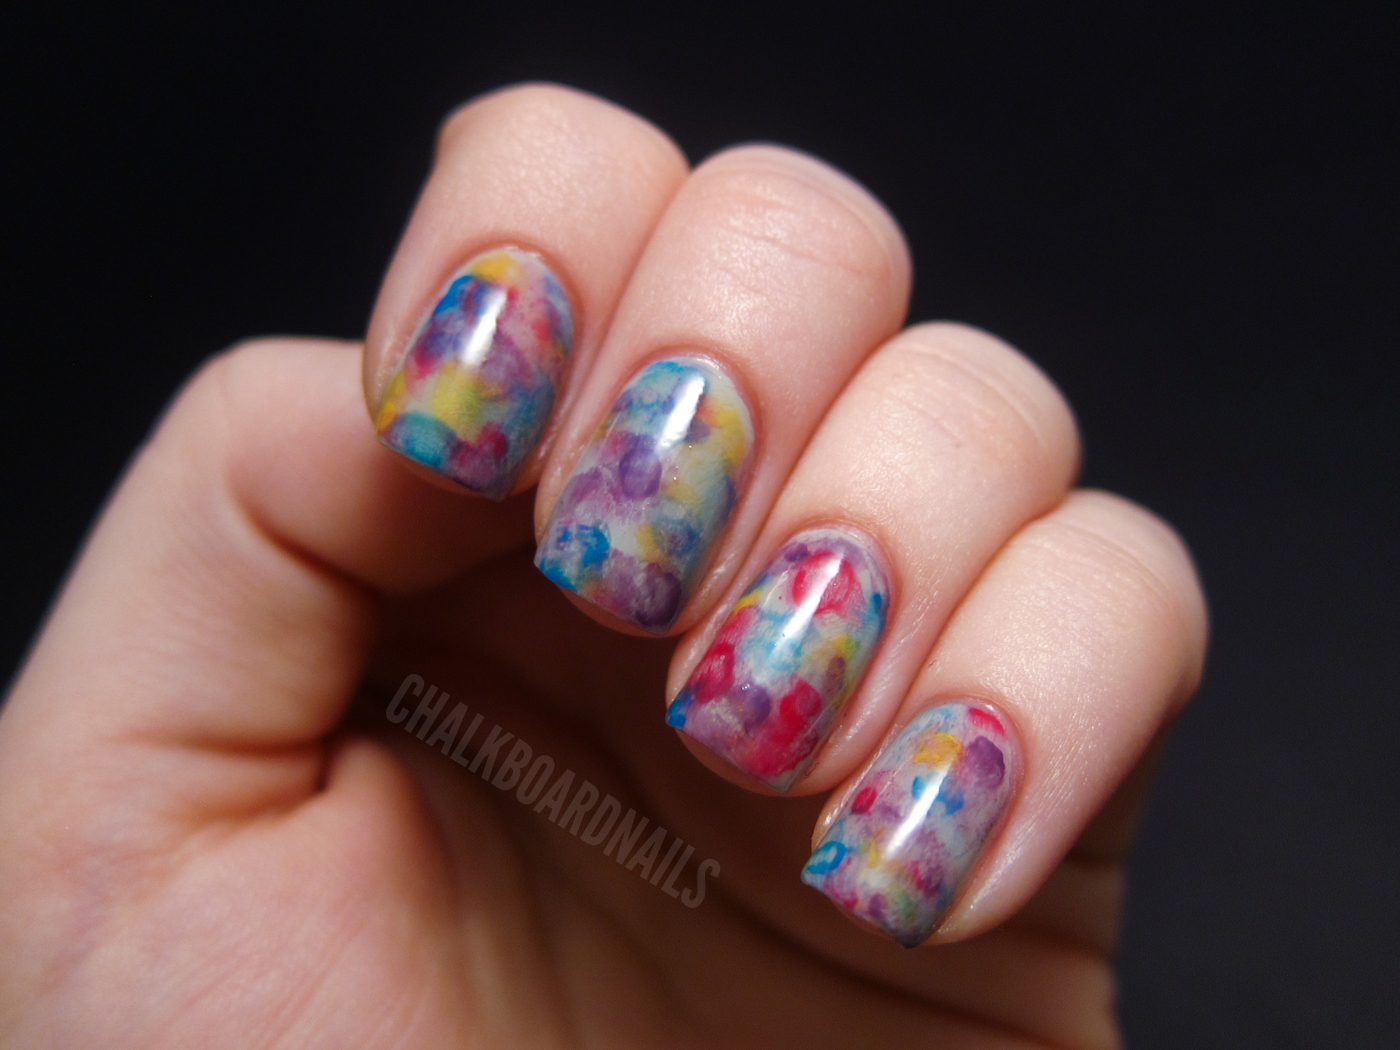
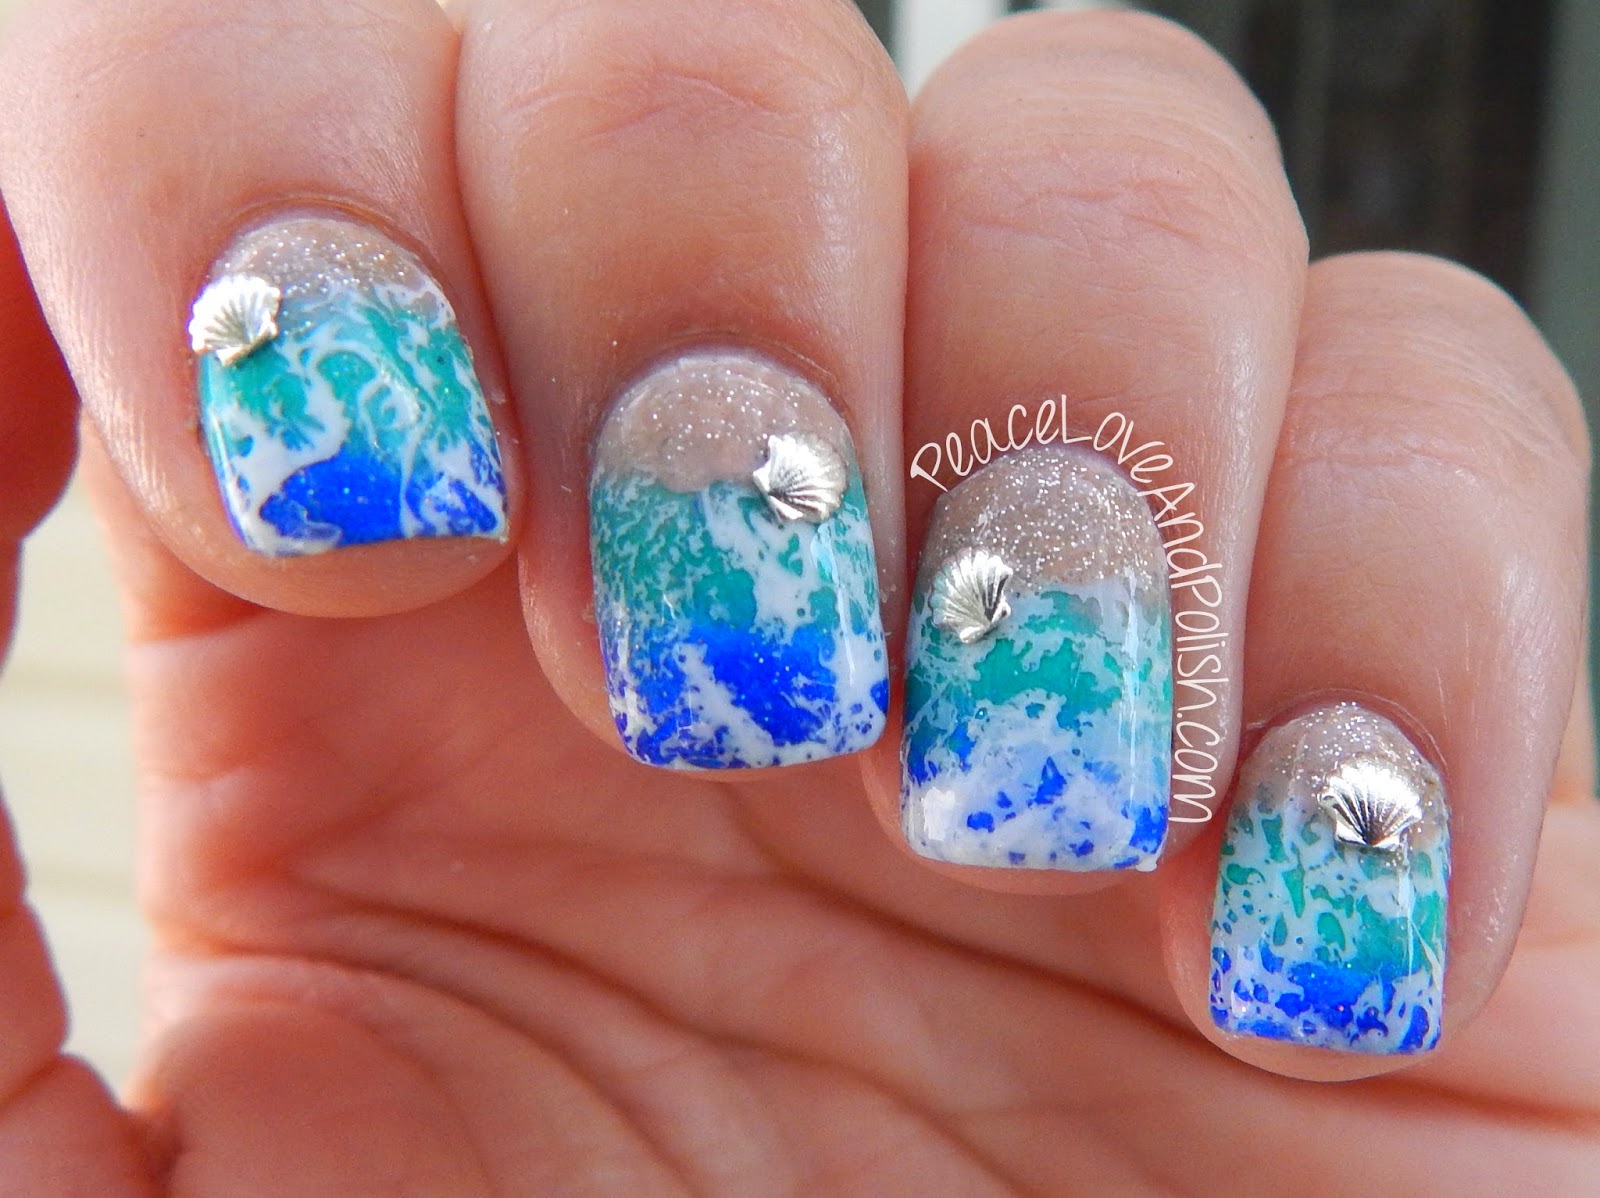
Watercolor nail art is a beautiful and delicate technique that involves creating a soft, blended effect on your nails. It's perfect for creating a subtle, yet eye-catching look. In this tutorial, we'll show you how to create stunning watercolor nail art using nail polish and water. Start by prepping your nails with a base coat to protect them and help the polish adhere better. Then, apply a base color of your choice and let it dry completely before moving on to the watercolor technique. Choose your desired colors and add a drop of each into a small cup or bowl filled with room temperature water. The colors should spread and create a film on the surface. Use a toothpick or small brush to gently swirl the colors together, creating a marbled effect. Then, carefully dip your nail into the design, making sure to fully submerge it. Use a toothpick to remove any excess polish from the surface of the water before removing your finger. Repeat this process for each nail. Once your nails are dry, you can add a top coat to seal and protect the design. You can also use a white or light-colored base to make the watercolor effect pop even more. Watercolor nail art is a simple yet stunning technique that allows you to create a unique design every time. Have fun playing with different color combinations and patterns to achieve the perfect watercolor look.How to Create Stunning Watercolor Nail Art


How to Create Stunning Watercolor Nail Art


If you're looking for a creative and fun way to do your nails, why not try using water and nail polish? This technique allows you to create unique and beautiful designs with just a few simple tools. In this tutorial, we'll show you how to create nail art using water and nail polish. To start, you'll need a small cup or bowl filled with room temperature water, nail polish in your desired colors, a toothpick or small brush, and some tape or liquid latex to protect your skin from excess polish. Begin by prepping your nails with a base coat to protect them and help the polish adhere better. Then, apply a base color of your choice and let it dry completely before moving on to the water technique. Add drops of your chosen nail polish colors into the water. Use a toothpick or small brush to create designs by dragging the colors and creating swirls. You can also use a toothpick to create small dots or lines in the design. Once you're happy with the design, carefully dip your nail into the water at a 45-degree angle, making sure to fully submerge the nail. Use a toothpick to remove any excess polish from the surface of the water before removing your finger. After you've finished all your nails, clean up any excess polish around your cuticles with a cotton swab dipped in nail polish remover. Then, seal your design with a top coat to protect it and give it a glossy finish. Nail art using water and nail polish is a fun and creative way to achieve unique and stunning designs on your nails. Experiment with different colors and techniques to create a look that is all your own.Nail Art Using Water and Nail Polish


Nail Art Using Water and Nail Polish


Water marble nail art is a popular technique that uses water and nail polish to create beautiful designs on your nails. However, you don't need to go to a salon to achieve this look. In this tutorial, we'll show you how to create DIY water marble nail art with nail polish at home. Start by prepping your nails with a base coat to protect them and help the polish adhere better. Then, apply a base color of your choice and let it dry completely before moving on to the water marble technique. Choose your first nail polish color and add a drop into the water. Then, add a drop of your second color directly into the center of the first color. Continue adding drops of alternating colors until you have created a target-like pattern. Using a toothpick or small brush, gently drag the colors from the center of the target outwards, creating a swirl pattern. Be careful not to over-mix the colors or they may become muddy. Once you're happy with the design, dip your nail into the water at a 45-degree angle, making sure to fully submerge the nail. Use a toothpick to remove any excess polish from the surface of the water before removing your finger. Once you've finished all your nails, clean up any excess polish around your cuticles with a cotton swab dipped in nail polish remover. Then, seal your design with a top coat to protect it and give it a glossy finish. With a little practice, you can achieve salon-worthy water marble nail art at home using just nail polish and water. Have fun experimenting with different color combinations and patterns to create unique designs.DIY Water Marble Nail Art with Nail Polish


DIY Water Marble Nail Art with Nail Polish


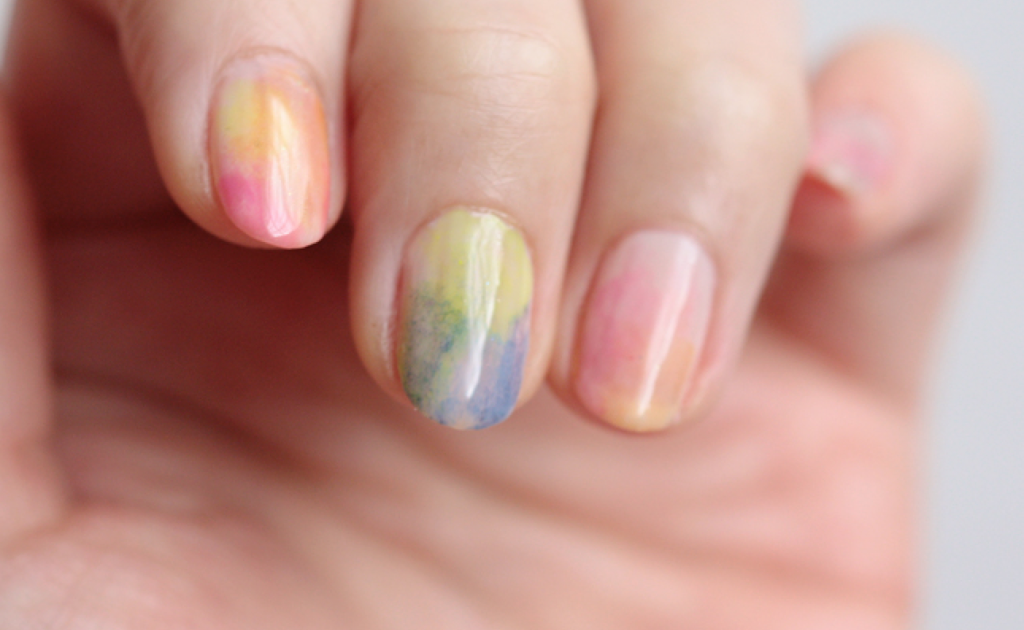
Watercolor nail art is a popular technique that creates a soft, blended effect on your nails. It's perfect for achieving a subtle yet eye-catching look. In this tutorial, we'll show you how to create watercolor nail art using nail polish and water. Start by prepping your nails with a base coat to protect them and help the polish adhere better. Then, apply a white or light-colored base to make the watercolor effect pop. Choose your desired colors and add a drop of each into a small cup or bowl filled with room temperature water. Use a toothpick or small brush to gently swirl the colors together, creating a marbled effect. Then, carefully dip your nail into the design, making sure to fully submerge it. Use a toothpick to remove any excess polish from the surface of the water before removing your finger. Repeat this process for each nail. Once your nails are dry, you can add a top coat to seal and protect the design. You can also experiment with different color combinations and patterns to achieve the perfect watercolor look. Watercolor nail art is a simple yet stunning technique that allows you to create a unique design every time. Have fun playing with different color combinations and patterns to achieve the perfect watercolor look.Watercolor Nail Art with Nail Polish and Water


Watercolor Nail Art with Nail Polish and Water

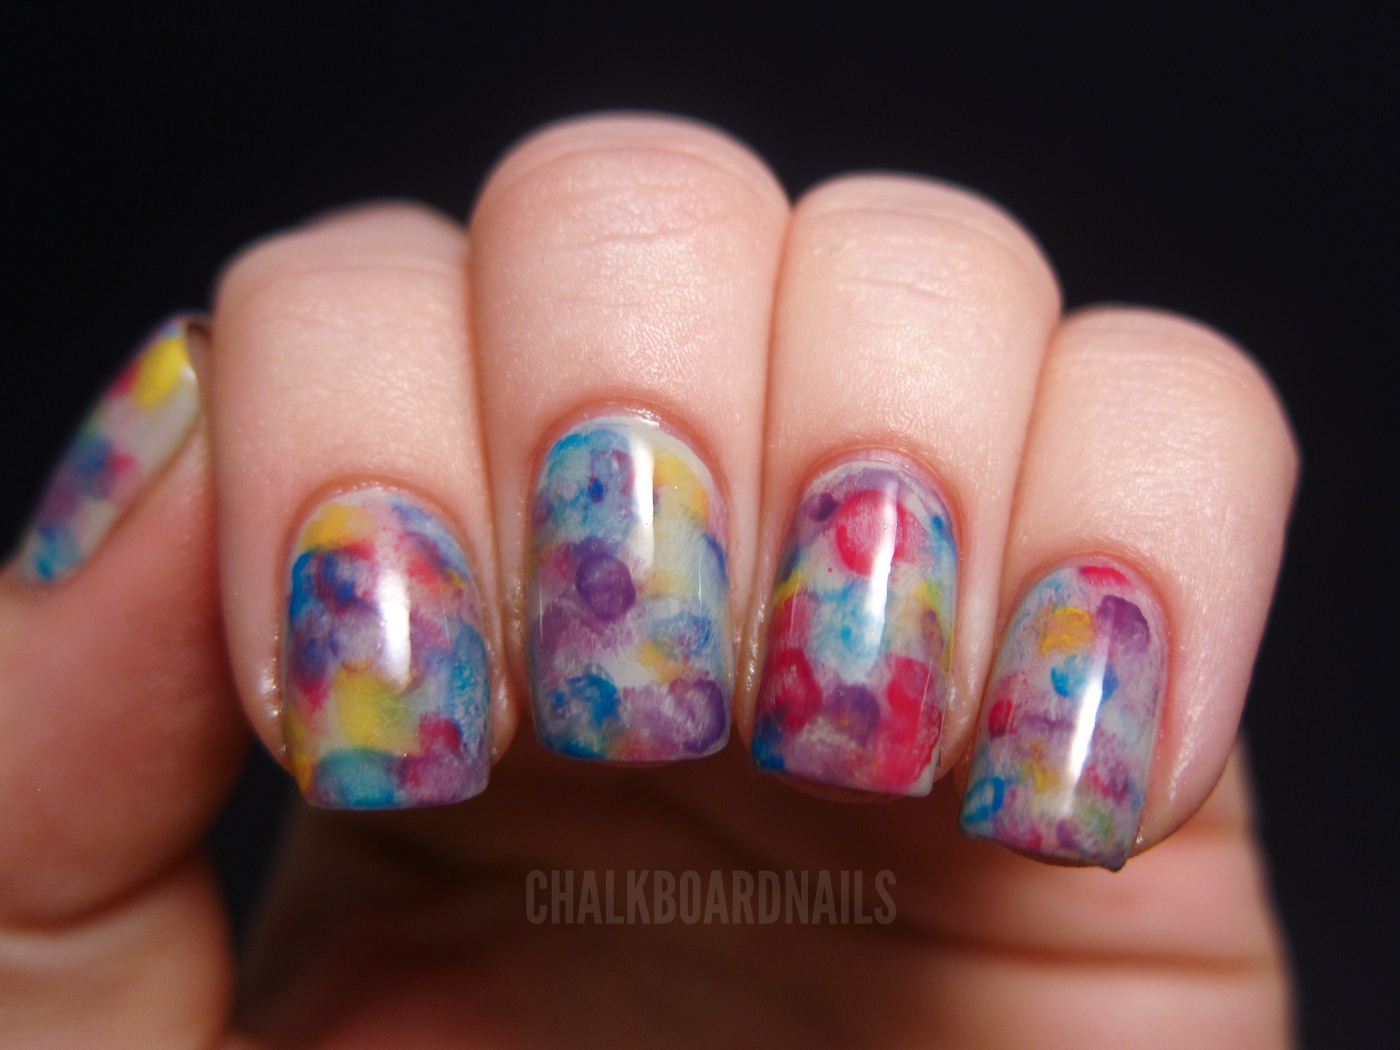
Water marble nail art may seem intimidating, but with the right tools and a little practice, you can achieve stunning results. In this tutorial, we'll show you an easy way to create water marble nail art using just nail polish and water. Start by prepping your nails with a base coat to protect them and help the polish adhere better. Then, apply a base color of your choice and let it dry completely before moving on to the water marble technique. Choose your desired colors and add a drop of each into a small cup or bowl filled with room temperature water. The colors should spread and create a film on the surface. Use a toothpick or small brush to gently swirl the colors together, creating a marbled effect. Then, carefully dip your nail into the design, making sure to fully submerge it. Use a toothpick to remove any excess polish from the surface of the water before removing your finger. Repeat this process for each nail. Once your nails are dry, you can add a top coat to seal and protect the design. You can also use a white or light-colored base to make the water marble effect stand out even more. With this easy method, you can create stunning water marble nail art using just nail polish and water. Have fun experimenting with different color combinations and patterns to achieve unique designs.Easy Water Marble Nail Art with Nail Polish


Easy Water Marble Nail Art with Nail Polish


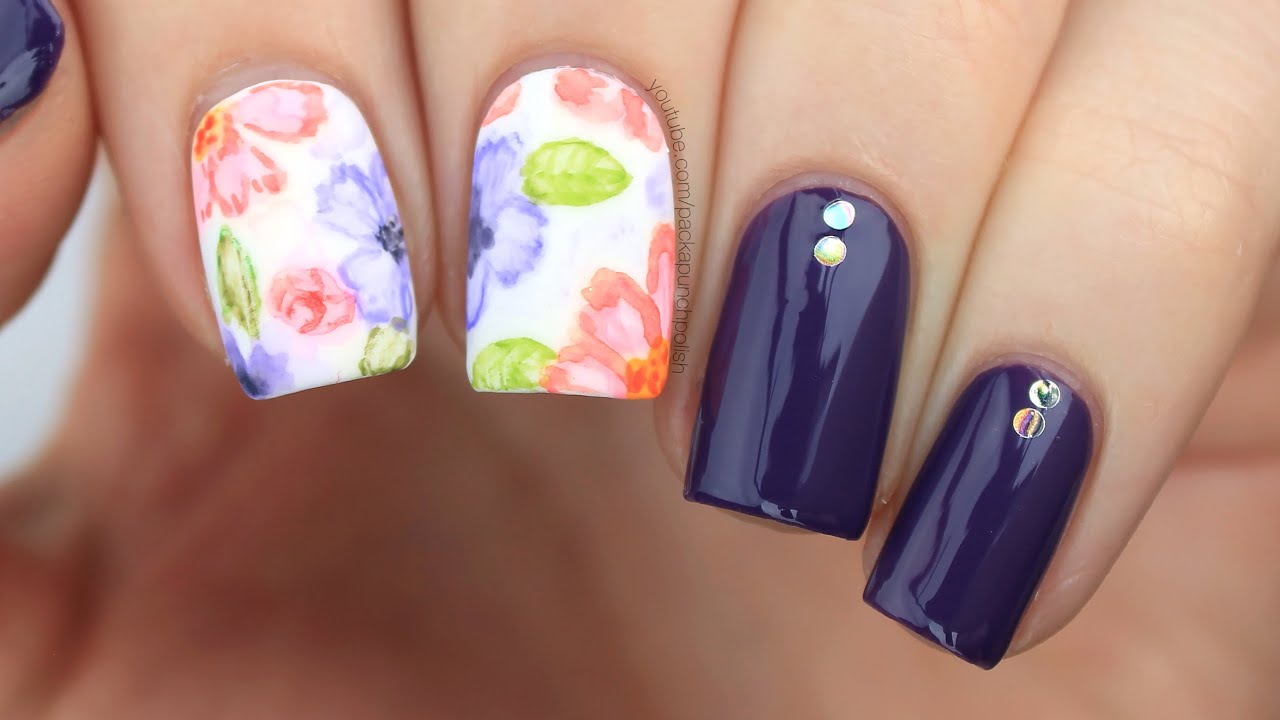
Watercolor nail art is a beautiful and delicate technique that involves creating a soft, blended effect on your nails. It's perfect for creating a subtle, yet eye-catching look. In this tutorial, we'll show you how to create stunning watercolor nails using nail polish and water. Start by prepping your nails with a base coat to protect them and help the polish adhere better. Then, apply a white or light-colored base to make the watercolor effect pop. Choose your desired colors and add a drop of each into a small cup or bowl filled with room temperature water. Use a toothpick or small brush to gently swirl the colors together, creating a marbled effect. Then, carefully dip your nail into the design, making sure to fully submerge it. Use a toothpick to remove any excess polish from the surface of the water before removing your finger. Repeat this process for each nail. Once your nails are dry, you can add a top coat to seal and protect the design. You can also experiment with different color combinations and patterns to achieve the perfect watercolor look. Watercolor nail art is a simple yet stunning technique that allows you to create a unique design every time. Have fun playing with different color combinations and patterns to achieve the perfect watercolor look.Nail Art Tutorial: Watercolor Nails with Nail Polish
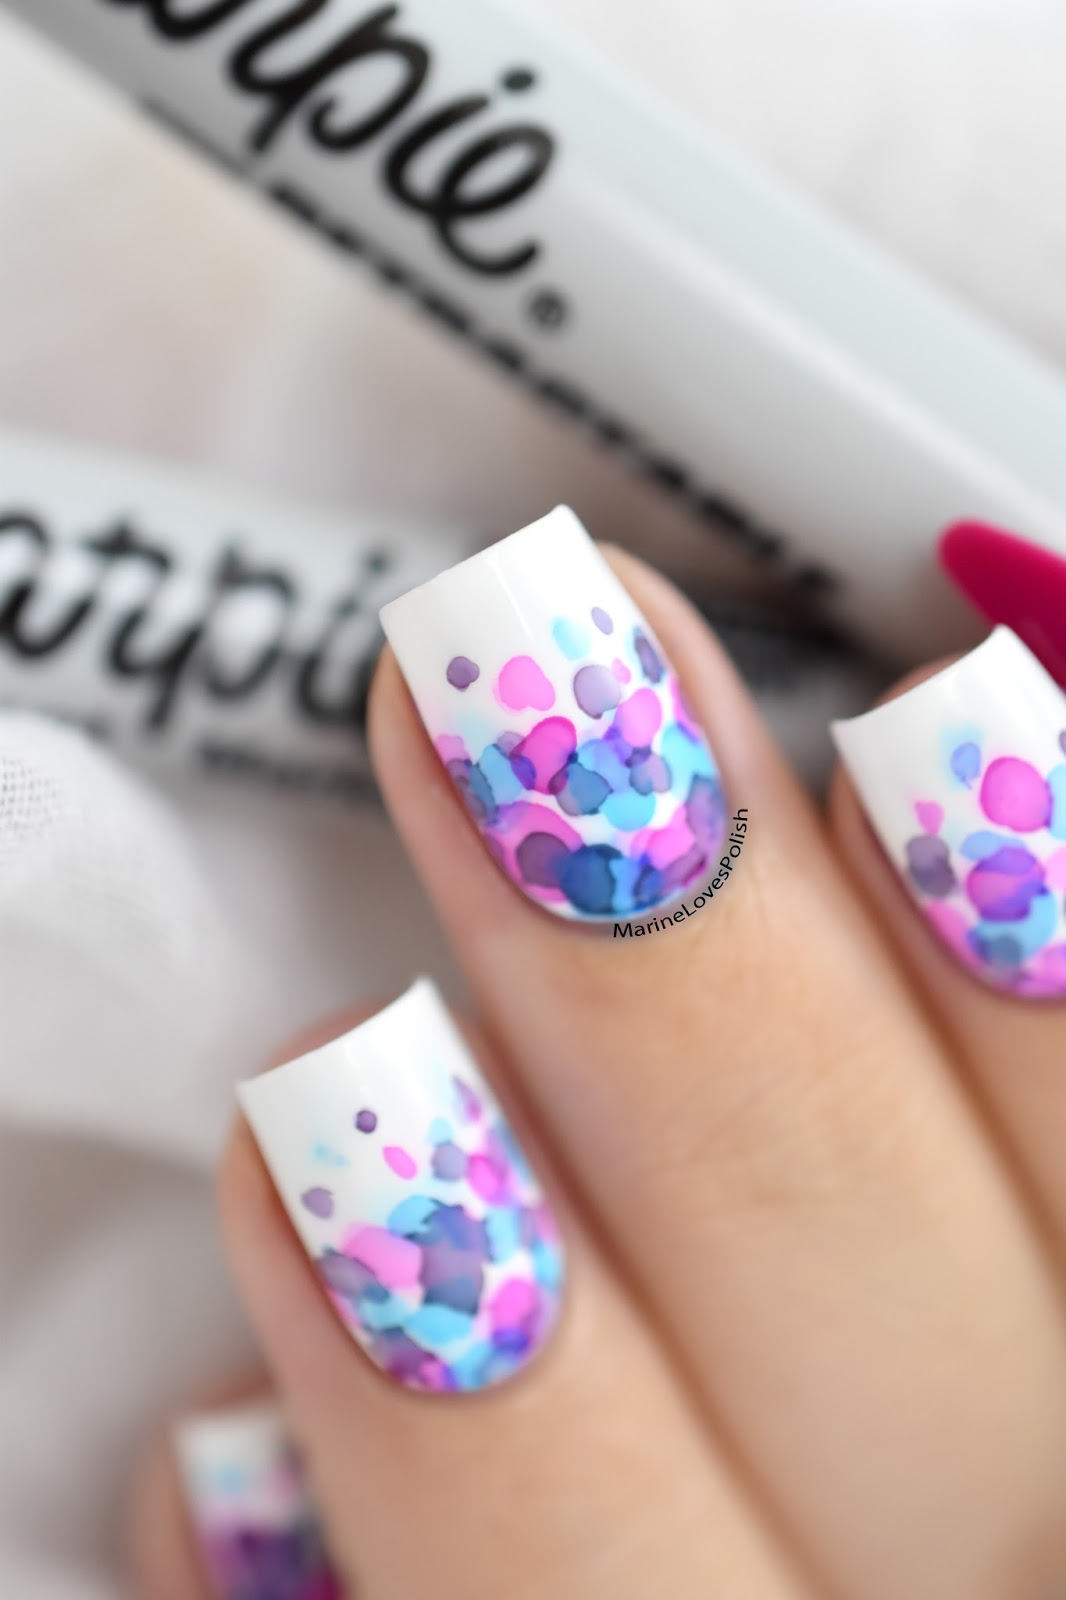

Nail Art Tutorial: Watercolor Nails with Nail Polish

Water marble nail art is a popular and mesmerizing technique that involves creating colorful swirls on the surface of water and then transferring them onto your nails. It may seem intimidating at first, but with the right tools and a little practice, you can achieve stunning results. In this tutorial, we'll show you how to do water marble nail art with nail polish. To start, you'll need a few supplies: nail polish in your desired colors, a small cup or bowl filled with room temperature water, a toothpick or small brush, and some tape or liquid latex to protect your skin from excess polish. Begin by prepping your nails with a base coat to protect them and help the polish adhere better. Then, apply a base color of your choice and let it dry completely before moving on to the water marble technique. Choose your first nail polish color and add a drop into the water. It should spread out and create a film on the surface. Then, add a drop of your second color directly into the center of the first color. Continue adding drops of alternating colors until you have created a target-like pattern. Using a toothpick or small brush, gently drag the colors from the center of the target outwards, creating a swirl pattern. Be careful not to over-mix the colors or they may become muddy. Once you're happy with the design, dip your nail into the water at a 45-degree angle, making sure to fully submerge the nail. Use a toothpick to remove any excess polish from the surface of the water before removing your finger. Once you've finished all your nails, clean up any excess polish around your cuticles with a cotton swab dipped in nail polish remover. Then, seal your design with a top coat to protect it and give it a glossy finish. With a little practice, you can achieve stunning water marble nail art using just nail polish and water. Experiment with different color combinations and patterns to create unique designs that will make your nails stand out.How to Do Water Marble Nail Art with Nail Polish


How to Do Water Marble Nail Art with Nail Polish
Nail Art Using Water and Nail Polish: Tips and Tricks


Nail Art Using Water and Nail Polish: Tips and Tricks


The Magic of Nail Art Nail Polish in Water

Revolutionizing Nail Design
 In recent years, nail art has become a popular trend, with individuals expressing their creativity through colorful and intricate designs on their nails. From simple polka dots to elaborate floral patterns, the possibilities are endless. And now, with the introduction of nail art nail polish in water, the game has been taken to a whole new level. This innovative technique allows for stunning and unique designs that are sure to make a statement.
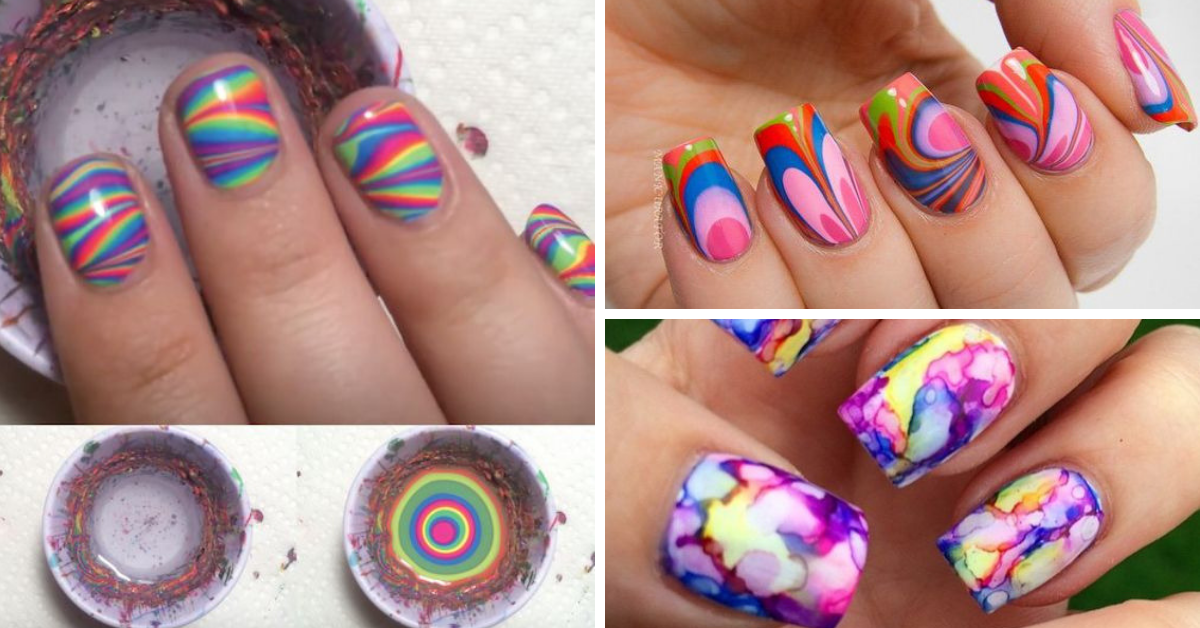
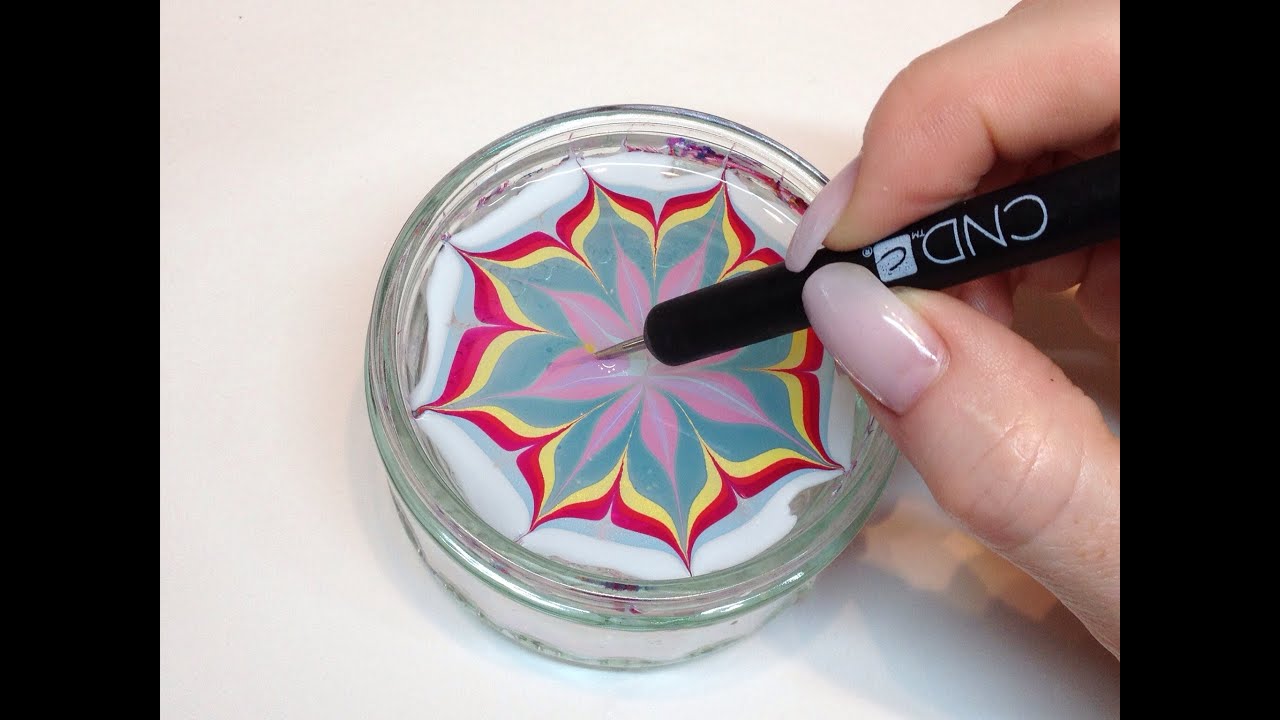
How it Works
 Using nail art nail polish in water is a fun and simple process. First, a base color is painted onto the nails. Then, the desired colors of nail polish are dropped into a bowl of room temperature water, creating a vibrant and colorful layer on the surface. Using a toothpick or a nail art tool, the colors can be swirled and blended to create a beautiful marbled effect. Finally, the nail is dipped into the water, transferring the design onto the nail. The excess polish is then removed from the surrounding skin using a clean-up brush and nail polish remover.
Unleashing Your Creativity
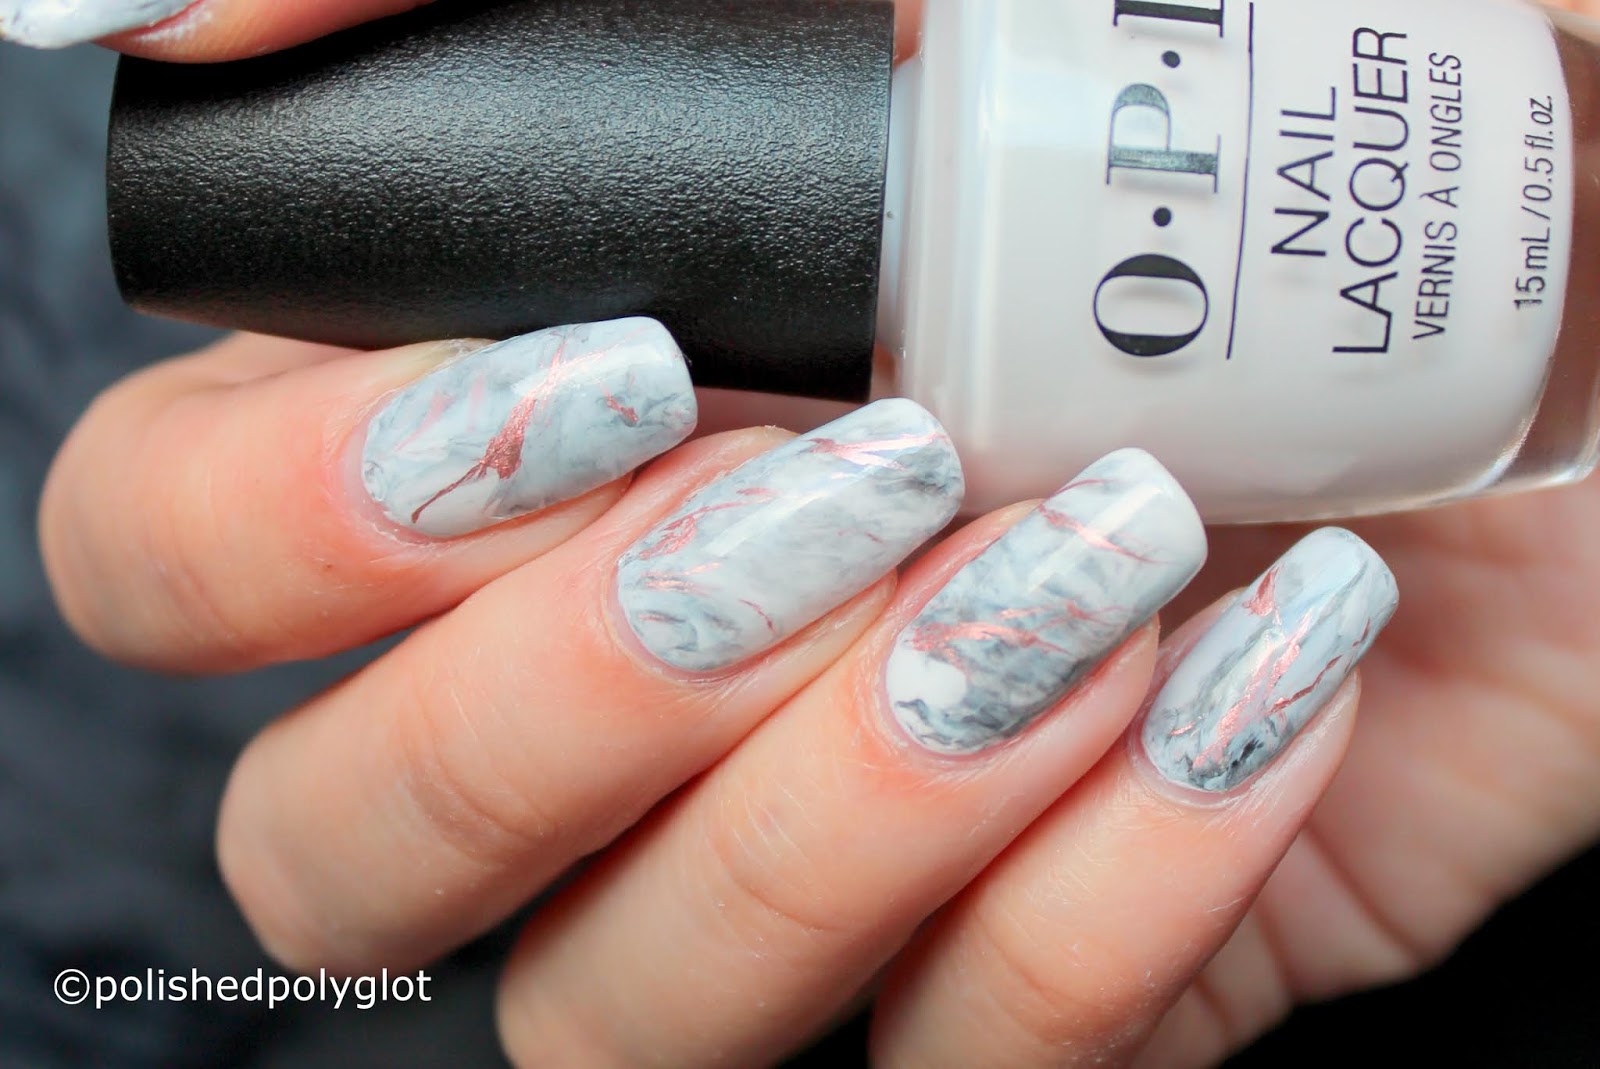
 The beauty of nail art nail polish in water is that it allows for endless possibilities and creativity. The swirling and blending of colors creates a unique design each time, making it impossible to replicate the same design twice. With this technique, you can let your imagination run wild and create a one-of-a-kind design that reflects your personal style.
Featured Keywords: nail art nail polish in water, nail design, popular trend, innovative technique
The beauty of nail art nail polish in water is that it allows for endless possibilities and creativity. The swirling and blending of colors creates a unique design each time, making it impossible to replicate the same design twice. With this technique, you can let your imagination run wild and create a one-of-a-kind design that reflects your personal style.
Featured Keywords: nail art nail polish in water, nail design, popular trend, innovative technique
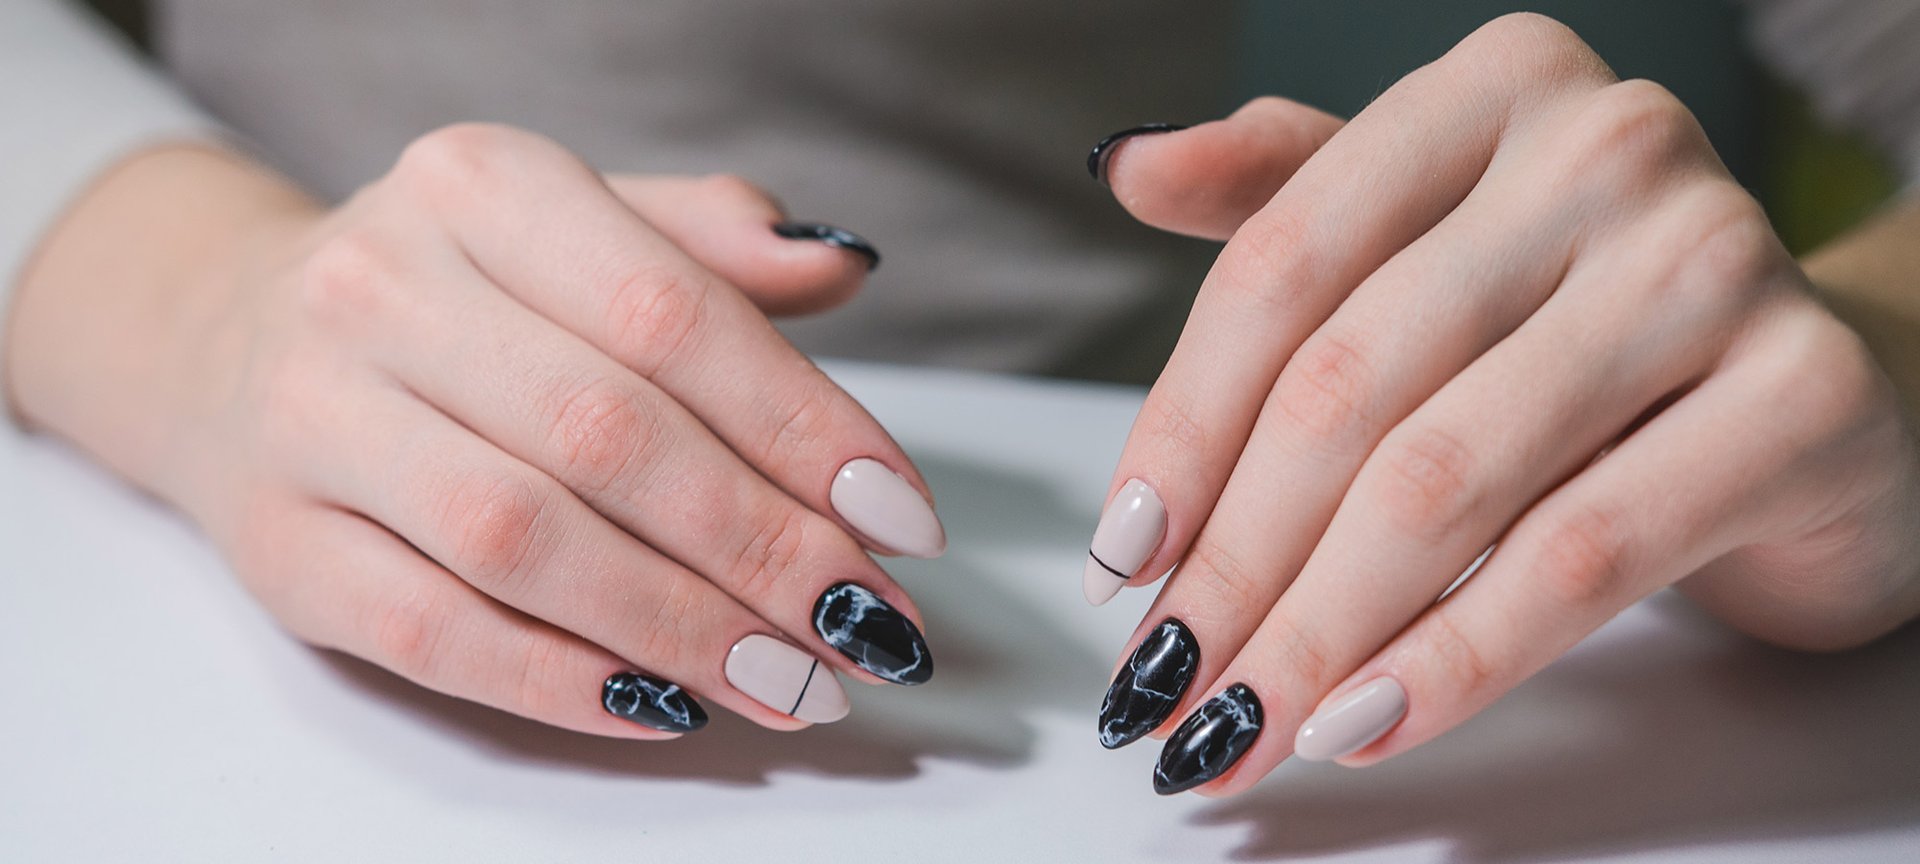
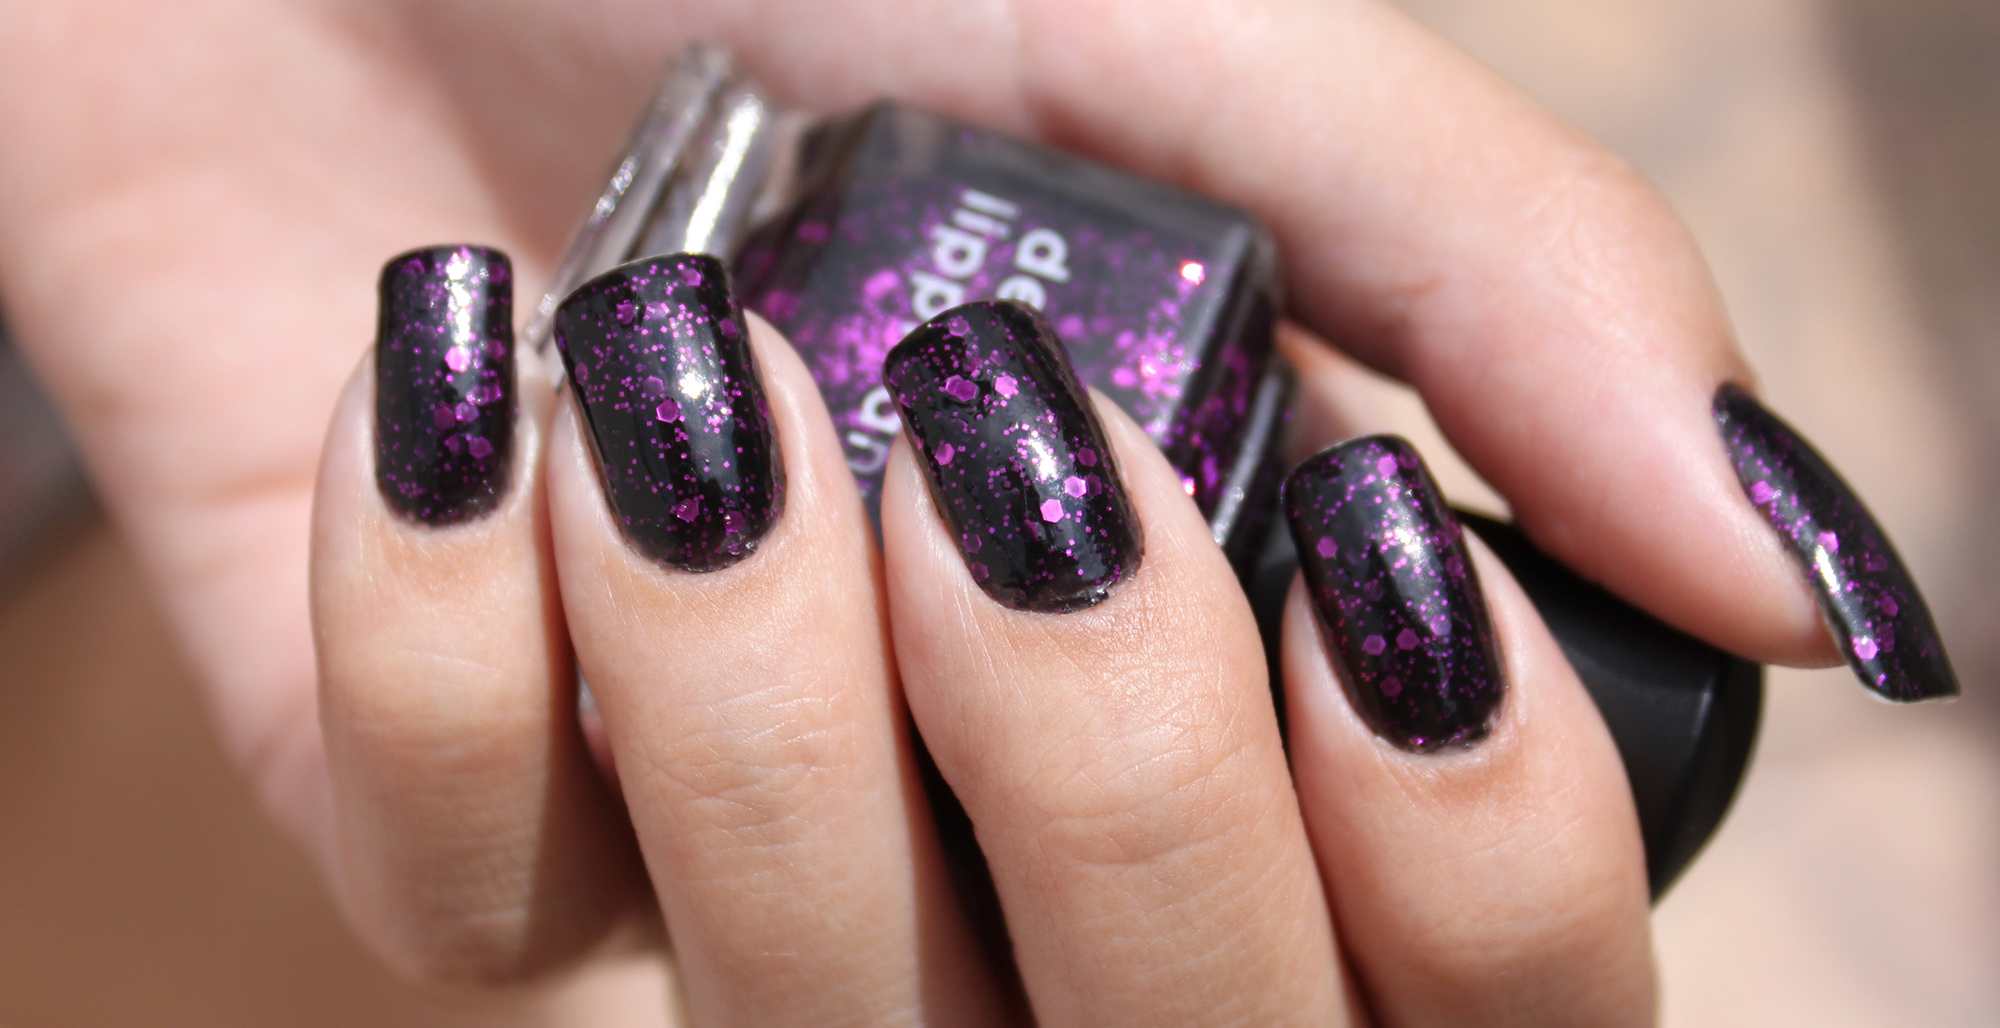
Perfect for Any Occasion
 Nail art nail polish in water is a perfect choice for any occasion. Whether you want to add a touch of glamour to your daily look or make a statement at a special event, this technique has got you covered. With a wide range of colors and designs to choose from, you can easily match your nails to any outfit or theme.
Related Main Keywords: nail art, colorful designs, unique, creativity
Nail art nail polish in water is a perfect choice for any occasion. Whether you want to add a touch of glamour to your daily look or make a statement at a special event, this technique has got you covered. With a wide range of colors and designs to choose from, you can easily match your nails to any outfit or theme.
Related Main Keywords: nail art, colorful designs, unique, creativity
Conclusion
 In conclusion, nail art nail polish in water is a game-changer in the world of nail design. It offers a simple and fun way to create stunning and unique designs that are sure to turn heads. So why stick to plain old nail polish when you can unleash your creativity and make a splash with nail art nail polish in water? Try it out for yourself and see the magic happen.


