Nail art has become a popular trend in recent years, with countless designs and techniques to choose from. But for beginners, it can seem like a daunting task to achieve those intricate and flawless designs. However, with the right practice and techniques, anyone can master the art of nail design. Here are 10 tips for beginners to help you perfect your nail art skills.1. How to Practice Nail Art: Tips for Beginners


1. How to Practice Nail Art: Tips for Beginners


1. Start with the Basics: Before attempting complex designs, it's essential to master the basics. Practice painting a solid color on each nail evenly and without any smudges. 2. Invest in Good Quality Tools: Quality tools make a significant difference in the outcome of your nail art. Invest in a good set of nail brushes, dotting tools, and striping tapes. 3. Practice on False Nails: If you're new to nail art, practicing on false nails is a great way to perfect your skills. You can also reuse them to practice different designs. 4. Experiment with Different Techniques: There are various techniques to create nail art, such as water marbling, stamping, and freehand painting. Try them all to find the one that works best for you. 5. Use Nail Polish Thinner: A common mistake beginners make is using thick nail polish that can make it challenging to create precise designs. Thin out your nail polish with a thinner for a smoother and more manageable application. 6. Practice on a Flat Surface: Place a piece of paper or a plastic mat under your hand while practicing to avoid smudging your work. This also allows you to create designs on a flat surface, which is easier than on a curved nail. 7. Take Your Time: Nail art requires patience and precision. Don't rush through it, and take your time to achieve the desired result. 8. Use Top Coat: To preserve your nail art and make it last longer, always use a top coat to seal your design. It also gives a glossy finish to your nails. 9. Practice, Practice, Practice: Like any skill, nail art also requires practice to perfect it. Set aside some time each week to try out new designs and techniques. 10. Don't Get Discouraged: Remember that everyone starts as a beginner, and it takes time and practice to improve your skills. Don't get discouraged by your initial results and keep practicing.2. 10 Tips for Perfecting Your Nail Art Skills


2. 10 Tips for Perfecting Your Nail Art Skills


1. Use Cotton Swabs: Keep cotton swabs handy while practicing nail art to clean up any mistakes or smudges. Dip them in nail polish remover and gently clean up the edges of your design. 2. Use Tape for Straight Lines: If you struggle with creating straight lines, use tape as a guide. Place it on your nail in the desired design and paint over it. Once the polish is dry, carefully remove the tape to reveal a clean and straight design. 3. Create a Nail Art Journal: Keep track of your progress by creating a nail art journal. Take pictures of your designs and make notes on the techniques and tools used. This will help you track your improvement and give you inspiration for future designs. 4. Use Scotch Tape for Geometric Designs: For geometric designs, cut small pieces of scotch tape and place them on your nail to create the desired shape. Paint over them and remove the tape once the polish is dry. 5. Clean Your Brushes: After each use, clean your nail art brushes with nail polish remover to prevent them from getting clogged and to maintain their shape. 6. Get Inspired: Follow nail art accounts on social media for inspiration and ideas. You can also join online communities to share your designs and get feedback from other nail art enthusiasts. 7. Use Stencils: Stencils are a great tool for beginners to create intricate designs with ease. Simply place the stencil on your nail and paint over it with your desired color. 8. Practice on Friends and Family: Offer to do your friends' and family's nails to practice different designs and techniques. This will also give you a chance to showcase your skills. 9. Take Breaks: If you find yourself getting frustrated or stuck on a design, take a break and come back to it later. It's essential to have a clear and focused mind while practicing nail art. 10. Have Fun: Most importantly, have fun with your nail art practice. Don't stress about creating the perfect design and enjoy the process of learning and improving.3. Nail Art Practice Tips and Tricks


3. Nail Art Practice Tips and Tricks

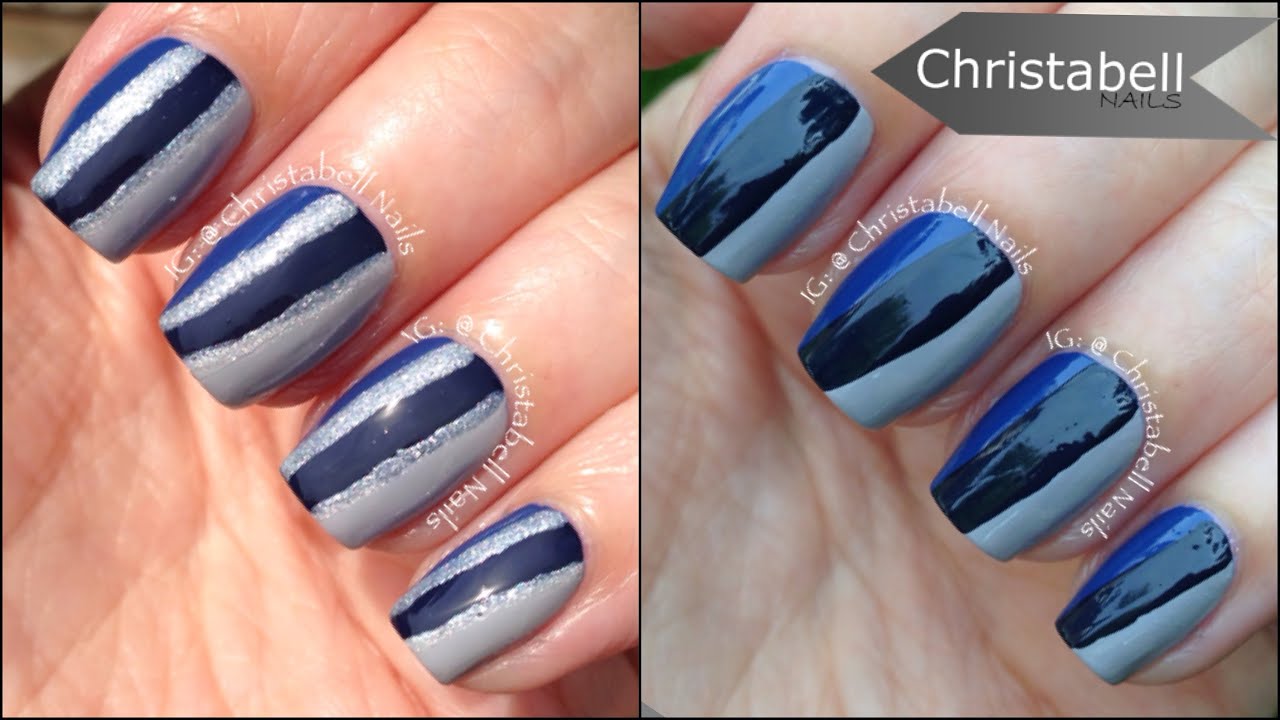


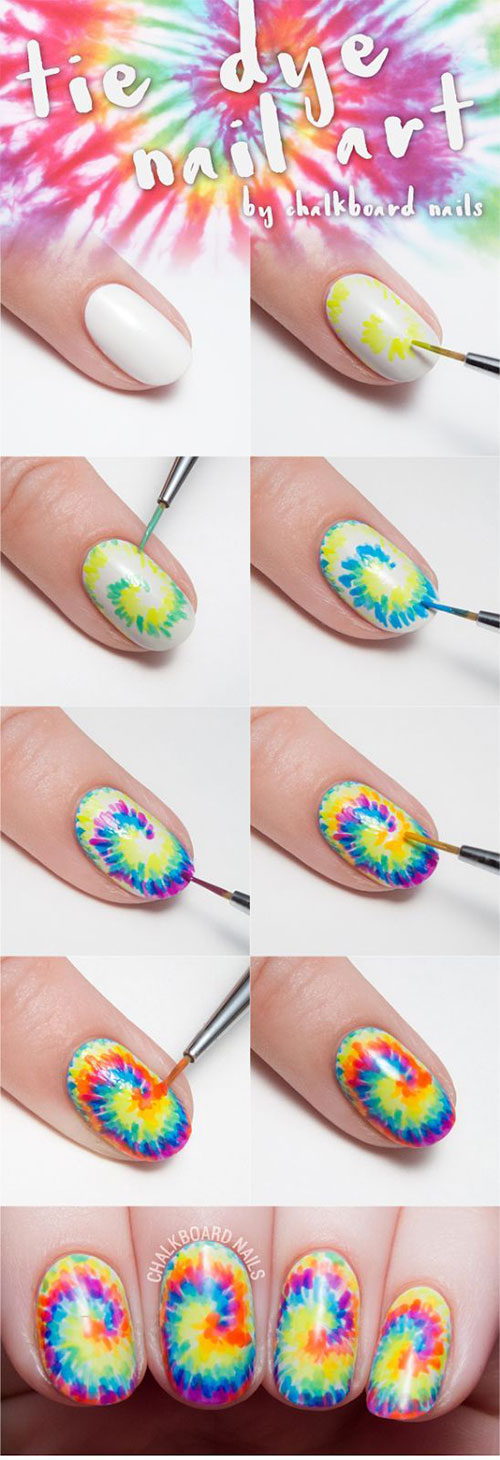
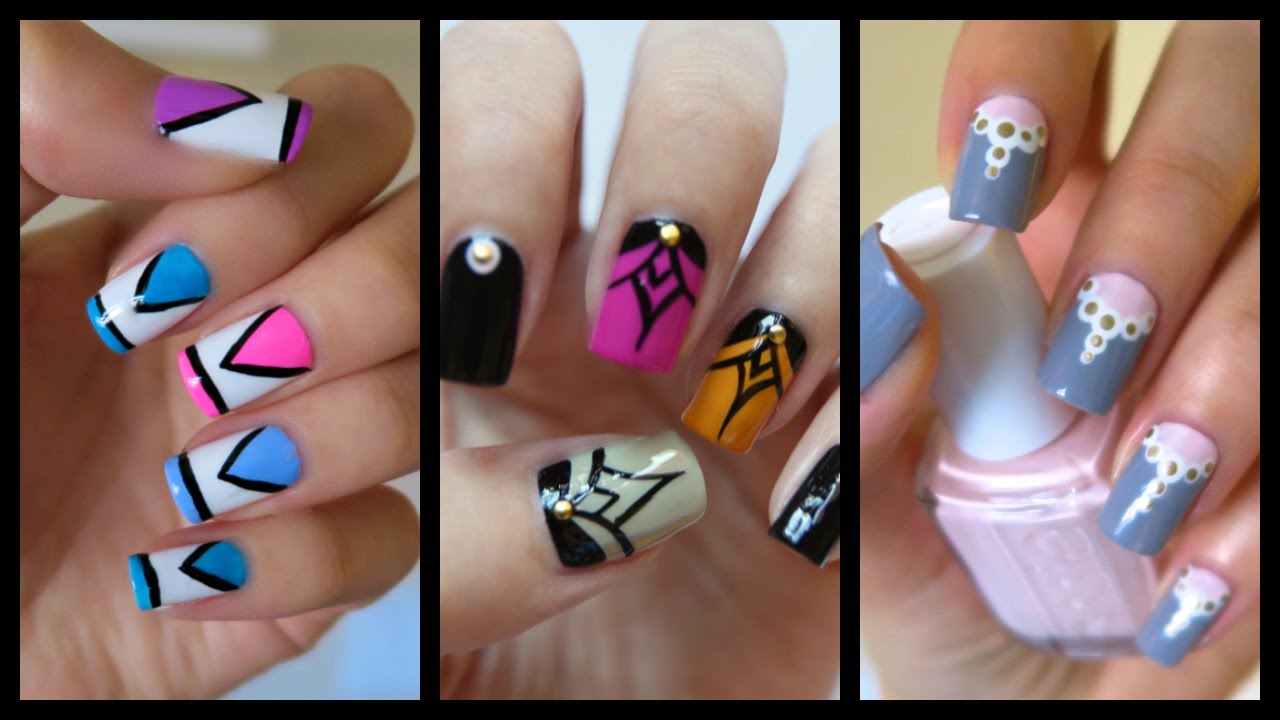
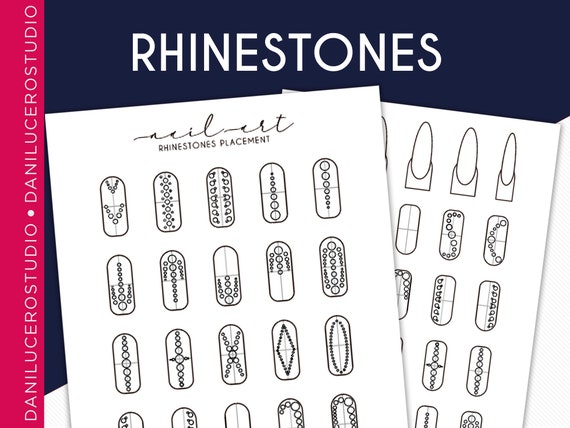
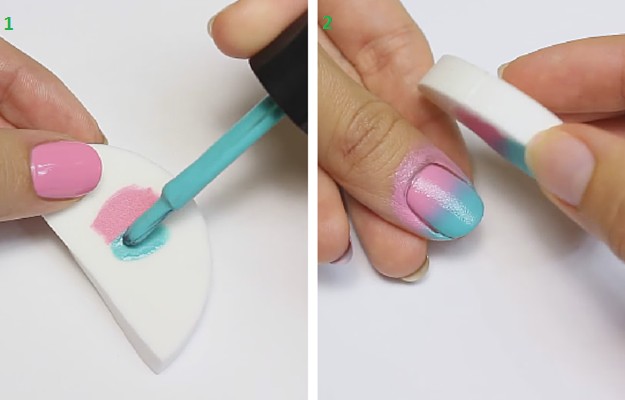
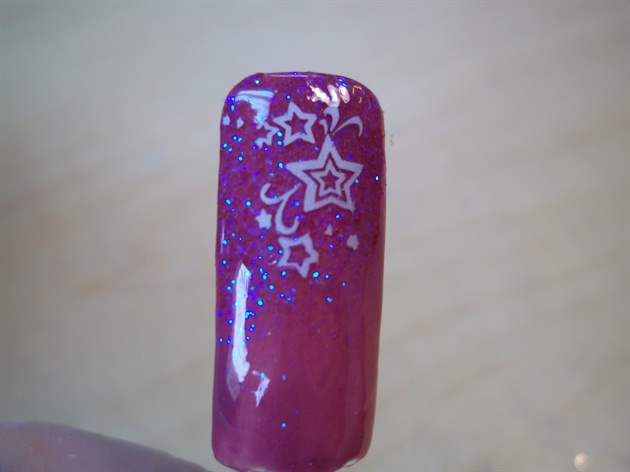
1. Create a Clean Canvas: Before starting any nail design, make sure your nails are clean and free of any old polish. Use a nail polish remover to remove any residue. 2. Use Base Coat: Always use a base coat before applying any polish. It protects your nails from staining and helps the polish adhere better. 3. Use Acetone for Clean Up: For stubborn polish stains, use pure acetone to clean your nails. Soak a cotton ball in acetone and hold it on your nail for a few seconds. Then, wipe away the polish with a gentle motion. 4. Create a Gradient Effect: To create a gradient effect, paint two or three colors on a makeup sponge and dab it onto your nail. This creates a smooth transition between colors. 5. Use Q-tips for Smudging: If you accidentally smudge your nail art, use a Q-tip dipped in nail polish remover to gently smudge out the mistake and blend it into the design. 6. Add Embellishments: Take your nail art to the next level by adding embellishments such as rhinestones, studs, or glitter. Apply them with tweezers for precise placement. 7. Use Clear Nail Polish as Glue: Clear nail polish can also be used as glue for small embellishments. Simply apply a drop of clear polish on your nail and place the embellishment on top. 8. Make Your Own Dotting Tool: If you don't have a dotting tool, use the end of a bobby pin or a toothpick to create dots in your design. 9. Use Striping Tape for Precision: Striping tape is a thin, adhesive tape that can be used to create precise lines in nail art. Simply place the tape on your nail before painting and remove it once the polish is dry. 10. Practice on Paper: If you're trying out a new design, practice first on a piece of paper to get a feel for the technique and the amount of polish needed.4. Mastering Nail Art: Tips and Techniques


4. Mastering Nail Art: Tips and Techniques


1. Do Remove Old Polish: Always start with a clean canvas by removing any old polish from your nails. 2. Don't Rush: Take your time while practicing nail art. Rushing can lead to smudges and mistakes. 3. Do Use Thin Layers: When layering different colors, use thin layers to prevent the polish from becoming too thick and taking longer to dry. 4. Don't Use Old Polish: Old and clumpy nail polish can ruin your design. Make sure to use fresh and smooth polish for the best results. 5. Do Seal Your Design: Always use a top coat to seal your design and make it last longer. 6. Don't Use Dirty Tools: Clean your brushes and tools after each use to prevent build-up and maintain their shape. 7. Do Experiment: Don't be afraid to try out new techniques and designs. Nail art is all about creativity and self-expression. 8. Don't Overdo It: Stick to one or two designs on each nail to avoid a cluttered and messy look. 9. Do Take Care of Your Nails: Keep your nails healthy by regularly moisturizing and using cuticle oil to prevent dryness and breakage. 10. Don't Get Discouraged: Remember that practice makes perfect, and everyone starts as a beginner. Keep practicing and have fun with it.5. Nail Art Practice: Dos and Don'ts


5. Nail Art Practice: Dos and Don'ts

1. Mistake: Uneven Polish Application 2. Mistake: Smudges 3. Mistake: Air Bubbles 4. Mistake: Streaky Polish 5. Mistake: Messy Cuticles 6. Mistake: Smearing Nail Art 7. Mistake: Uneven or Thick Nail Polish 8. Mistake: Stains on Your Nails 9. Mistake: Overworking Your Design 10. Mistake: Using Too Much Polish6. Nail Art Practice: Common Mistakes and How to Fix Them
Fix: Start with a thin layer of polish in the center of your nail and then paint the sides. This prevents the polish from pooling at the edges and creates an even application.
Fix: Use a cotton swab dipped in nail polish remover to gently clean up smudges and mistakes.
Fix: Roll your nail polish bottle between your palms before using it to prevent air bubbles from forming.
Fix: Use thin layers and let each layer dry before applying the next. This will prevent streaks and create an even and smooth application.
Fix: Use a small brush dipped in nail polish remover to clean up any polish that has gotten onto your cuticles.
Fix: Make sure your design is completely dry before adding a top coat. This will prevent smearing and ruining your design.
Fix: Use a nail polish thinner to thin out your polish and make it easier to apply. You can also use a brush to mix the polish and thin it out.
Fix: Always use a base coat before applying any polish to prevent staining. If you do get stains, use a cotton ball soaked in nail polish remover to gently remove them.
Fix: Don't keep going over your design once it's complete. This can cause smudging and ruin your hard work.
Fix: Use thin layers of polish and build up the color if needed. Too much polish can lead to a messy and uneven application.


6. Nail Art Practice: Common Mistakes and How to Fix Them

Practice is crucial in mastering any skill, and nail art is no exception. It takes time and patience to perfect your designs and techniques. The more you practice, the easier it becomes to create intricate and flawless designs. Practice also allows you to experiment with different tools and techniques, giving you a chance to find what works best for you. So don't get discouraged if your first few attempts don't turn out as expected. Keep practicing, and you'll see a significant improvement in your nail art skills.7. The Importance of Practice in Nail Art


7. The Importance of Practice in Nail Art


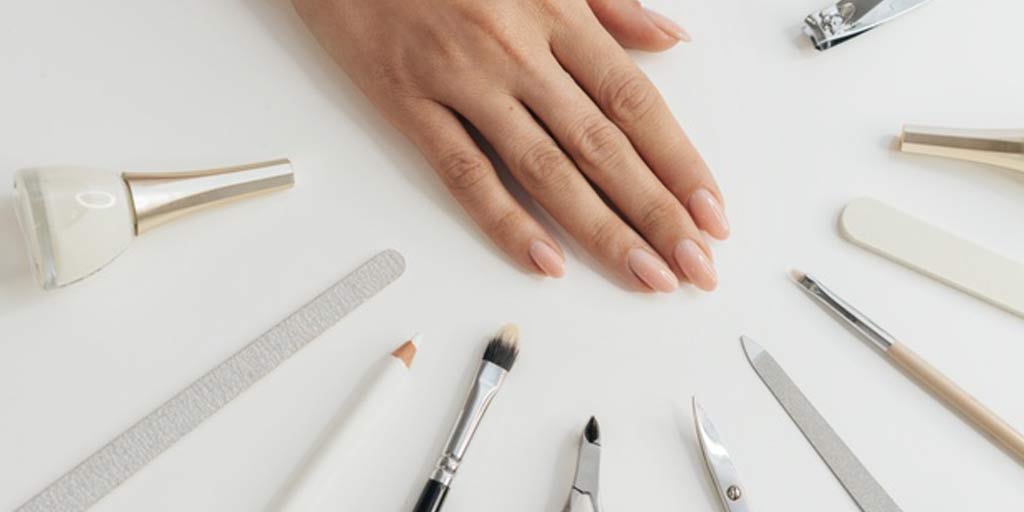
1. Nail Polish: Use a variety of colors and finishes to create different designs. 2. Brushes: Invest in a set of nail art brushes with different tip sizes for precision and versatility. 3. Dotting Tools: These are used to create dots and other small details in your designs. 4. Striping Tape: Use this to create straight lines and geometric designs. 5. Cotton Swabs: Perfect for cleaning up mistakes and smudges. 6. Nail Polish Remover: Always have a bottle of nail polish remover handy to clean up mistakes and start with a clean canvas. 7. Top Coat: Use a top coat to seal your design and make it last longer. 8. False Nails: These are great for practicing different designs and techniques. 9. Embellishments: Rhinestones, studs, and glitter can add a unique touch to your nail art. 10. Nail Polish Thinner: Use this to thin out thick nail polish for easier application.8. Nail Art Practice Tools and Supplies


8. Nail Art Practice Tools and Supplies
1. Get Inspired: Look for inspiration in everything around you, from nature to fashion to art. Don't be afraid to think outside the box and create something unique. 2. Start with a Theme: Having a theme in mind can help you narrow down your design options and create a cohesive look. 3. Use Colors That Complement Each Other: Choose colors that go well together for a harmonious design. You can also use contrasting colors for a bold and eye-catching look. 4. Combine Different Techniques: Don't be limited to just one technique. Combine different techniques to create a more intricate and unique design. 5. Practice on Paper First: If you're trying out a new design, practice first on a piece of paper to get a feel for the technique and the amount of polish needed. 6. Don't Be Afraid to Experiment: Nail art is all about creativity, so don't be afraid to try out new techniques and designs. You never know, you might discover a new favorite. 7. Take Your Time: Creating your own design takes time and patience. Don't rush through it, and take breaks if needed. 8. Share Your Designs: Share your designs on social media or with friends and family. This will not only showcase your skills but also give you valuable feedback and inspiration. 9. Don't Be Too Hard on Yourself: Remember that everyone has their own unique style and skill level. Don't compare yourself to others and be proud of your own creations. 10. Have Fun: Most importantly, have fun while creating your own nail art designs. Let your creativity and imagination run wild.9. Tips for Creating Your Own Nail Art Designs


9. Tips for Creating Your Own Nail Art Designs


1. Set Goals: Set achievable goals for yourself, such as mastering a new technique or creating a specific design. This will give you a sense of accomplishment and motivation to keep practicing. 2. Join Online Communities: Joining online communities of other nail art enthusiasts can give you inspiration, support, and motivation to keep practicing.10. How to Stay Motivated While Practicing Nail Art


10. How to Stay Motivated While Practicing Nail Art

Take Care of Your Nails

Proper nail care is the key to achieving stunning nail art designs.
 Nail art has become a popular trend in recent years, with more and more people experimenting with different designs and techniques. However, one crucial factor that often gets overlooked is the health and care of our nails. Without a strong and healthy foundation, our nail art designs won't have the desired effect. Here are some essential tips to keep in mind for optimal nail care and to make your nail art practice more effective.
1. Keep Your Nails Clean
Clean nails are the first step to achieving beautiful nail art.
Make sure to remove any old polish and dirt from your nails before starting your nail art practice. Use a gentle nail polish remover and cotton pads to avoid damaging your nails. It's also essential to wash your hands thoroughly to remove any remaining residue. This will ensure that your nails are clean and free of any oil or dirt that may prevent the nail polish from adhering correctly.
Nail art has become a popular trend in recent years, with more and more people experimenting with different designs and techniques. However, one crucial factor that often gets overlooked is the health and care of our nails. Without a strong and healthy foundation, our nail art designs won't have the desired effect. Here are some essential tips to keep in mind for optimal nail care and to make your nail art practice more effective.
1. Keep Your Nails Clean
Clean nails are the first step to achieving beautiful nail art.
Make sure to remove any old polish and dirt from your nails before starting your nail art practice. Use a gentle nail polish remover and cotton pads to avoid damaging your nails. It's also essential to wash your hands thoroughly to remove any remaining residue. This will ensure that your nails are clean and free of any oil or dirt that may prevent the nail polish from adhering correctly.
2. Moisturize Your Nails
 Just like our skin, our nails need moisture to stay healthy and strong. Dry and brittle nails are more prone to breaking, which can hinder your nail art practice.
Make sure to moisturize your nails daily with a nail oil or lotion to keep them hydrated and nourished.
This will also help prevent any hangnails or cuticles from forming, which can be painful and unsightly.
Just like our skin, our nails need moisture to stay healthy and strong. Dry and brittle nails are more prone to breaking, which can hinder your nail art practice.
Make sure to moisturize your nails daily with a nail oil or lotion to keep them hydrated and nourished.
This will also help prevent any hangnails or cuticles from forming, which can be painful and unsightly.
3. Use a Base Coat
 Investing in a good quality base coat is essential for both the health of your nails and the longevity of your nail art designs.
A base coat not only protects your nails from staining but also provides a smooth and even surface for your nail polish to adhere to. This will ensure that your nail art design looks neat and stays intact for longer.
Investing in a good quality base coat is essential for both the health of your nails and the longevity of your nail art designs.
A base coat not only protects your nails from staining but also provides a smooth and even surface for your nail polish to adhere to. This will ensure that your nail art design looks neat and stays intact for longer.
4. Be Gentle With Your Nails
 It's crucial to handle your nails with care to avoid any damage or breakage.
Avoid using your nails as tools to open cans or packages, as this can cause them to chip or break.
Also, try to limit your exposure to harsh chemicals or water, as this can weaken your nails and make them more prone to damage. Using gloves while doing household chores is a great way to protect your nails.
In conclusion,
proper nail care is the foundation for achieving stunning nail art designs.
By following these simple tips, you can ensure that your nails are healthy and ready for any nail art practice session. Remember to always be gentle and patient with your nails, and they will reward you with beautiful and long-lasting designs. Keep practicing and experimenting, and you'll be a nail art pro in no time!
It's crucial to handle your nails with care to avoid any damage or breakage.
Avoid using your nails as tools to open cans or packages, as this can cause them to chip or break.
Also, try to limit your exposure to harsh chemicals or water, as this can weaken your nails and make them more prone to damage. Using gloves while doing household chores is a great way to protect your nails.
In conclusion,
proper nail care is the foundation for achieving stunning nail art designs.
By following these simple tips, you can ensure that your nails are healthy and ready for any nail art practice session. Remember to always be gentle and patient with your nails, and they will reward you with beautiful and long-lasting designs. Keep practicing and experimenting, and you'll be a nail art pro in no time!


