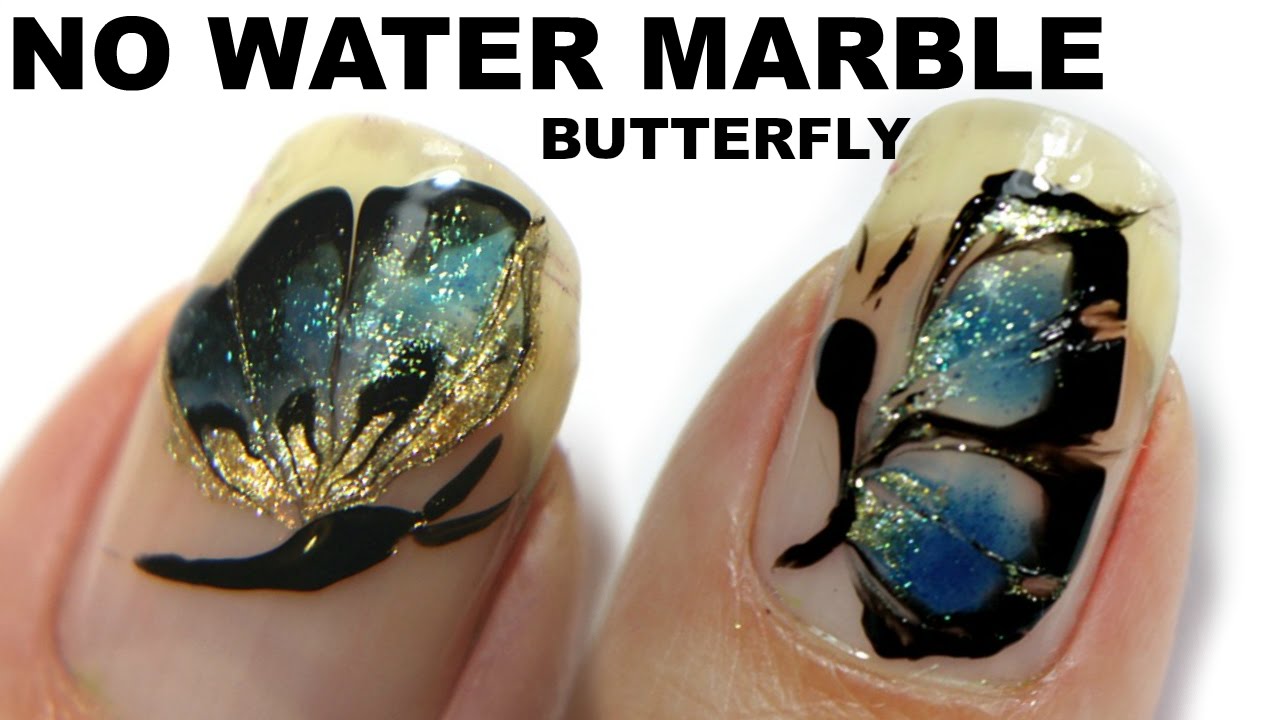
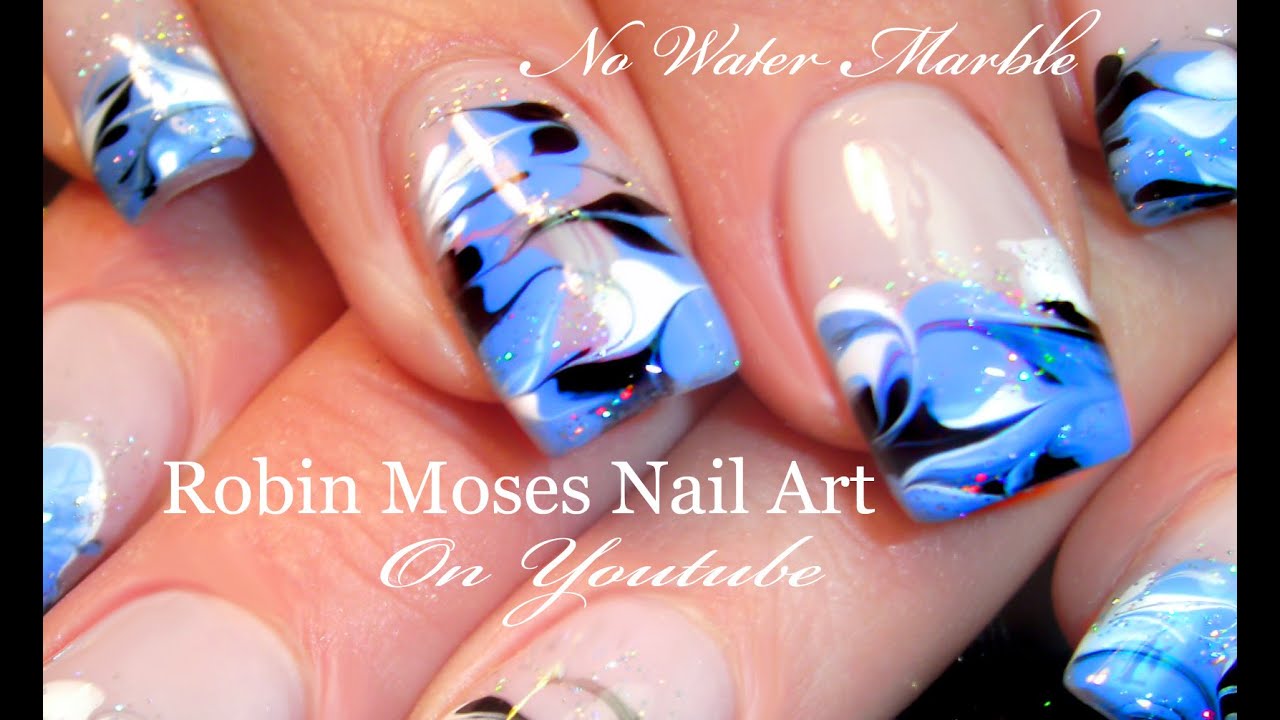
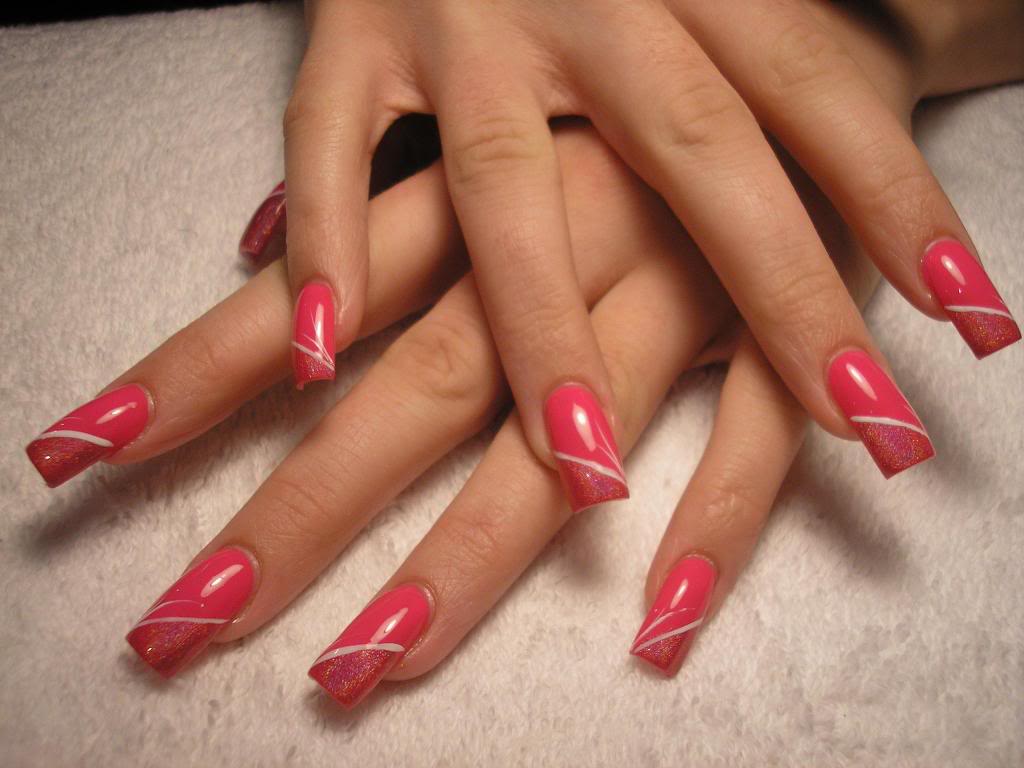
If you love the look of marble nails but don't want to deal with the mess and hassle of using water, then this tutorial is perfect for you. With just a few simple steps, you can achieve beautiful marble swirls without needing a single drop of water. To begin, start with a base coat to protect your nails. Then, apply a white or light-colored polish as your base color. This will help the swirls stand out and give a clean canvas for the design. Let the base color dry completely before moving on to the next step. Next, using a toothpick or a thin nail art brush, create small dots of different colored polishes on a paper plate or any other surface that you can easily clean. Make sure the dots are close together but not touching. Now, take your toothpick or brush and gently swirl the colors together, creating a marbled effect. Don't overdo it or the colors will mix together too much and lose the swirl effect. Once you're happy with the design, let it dry for a few minutes. Finally, take a clean toothpick or brush and dip it in acetone or nail polish remover. Use it to clean up any excess polish around your nails. Finish with a top coat to seal in your design and give it a glossy finish.1. No Water Marble Nail Art Tutorial


1. No Water Marble Nail Art Tutorial


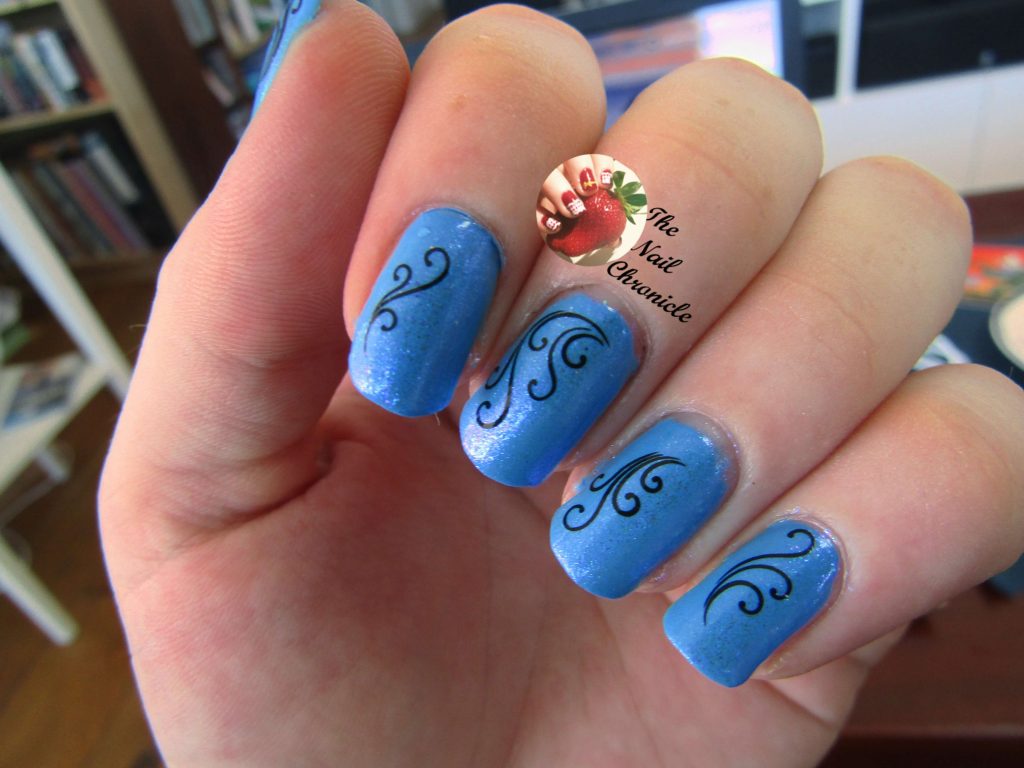
If you're new to nail art or just want a simple yet eye-catching design, this easy swirl nail art tutorial is for you. With just a few tools and some bold colors, you can create a fun and playful look in no time. Start by applying a base coat to protect your nails and prevent staining. Then, choose two or three contrasting colors for your swirls. Blue and pink or purple and yellow make a great color combination for this look. Using a nail art brush or a striper brush, create vertical lines on your nail with one of the colors. These lines don't have to be perfect, as they will be covered up by the swirls. Repeat this step with your other colors, creating a striped effect on your nails. Next, take a dotting tool or a toothpick and dip it in one of your colors. Then, start at the base of your nail and gently drag the tool towards the tip, creating a swirl as you go. Continue this motion until you reach the top of your nail. Repeat with your other colors until your nail is filled with swirls. Finish with a top coat to protect your design and give it a shiny finish. This easy swirl nail art can be easily customized with different colors and is perfect for beginners.2. Easy Swirl Nail Art Tutorial


2. Easy Swirl Nail Art Tutorial


Creating beautiful swirl nail art doesn't have to involve messy water marbling techniques. With this no water needed swirl nail art tutorial, you can achieve a stunning design without any hassle. Start with a base coat to protect your nails and help the design last longer. Then, choose two or three complementary colors for your swirls. Green and gold or purple and silver are great color combinations for this look. Take a dotting tool or a toothpick and dip it in one of your colors. Create a small dot at the base of your nail, then drag the tool towards the tip, creating a swirl as you go. Repeat this step with your other colors, creating swirls all over your nail. You can vary the size and placement of the swirls for a more interesting look. Let the design dry for a few minutes before applying a top coat to protect it and give it a glossy finish. This no water needed swirl nail art is perfect for those who want a unique and colorful design without the mess of water marbling.3. No Water Needed: Swirl Nail Art


3. No Water Needed: Swirl Nail Art


If you've always admired the look of water marbled nails but don't want to deal with the hassle, then this tutorial is for you. With just a few tools and some patience, you can create a stunning swirl nail art design without using any water. Start with a base coat to protect your nails and prevent staining. Then, apply a white or light-colored polish as your base. This will help the swirls stand out and give a clean canvas for the design. Let it dry completely before moving on to the next step. Next, take a striping brush or a nail art brush and dip it in one of your colors. Create a thin line from the base of your nail to the tip, making sure to leave some space for the other colors. Repeat this step with your other colors, creating a striped effect on your nail. Now, take a dotting tool or a toothpick and dip it in one of your colors. Create a small dot at the base of your nail, then drag the tool towards the tip, creating a swirl as you go. Repeat this step with your other colors, creating swirls all over your nail. You can vary the size and placement of the swirls for a more interesting look. Finish with a top coat to protect your design and give it a glossy finish. This no water swirl nail art is perfect for those who want a unique and intricate design without the mess of water marbling.4. How to Create Swirl Nail Art Without Water


4. How to Create Swirl Nail Art Without Water


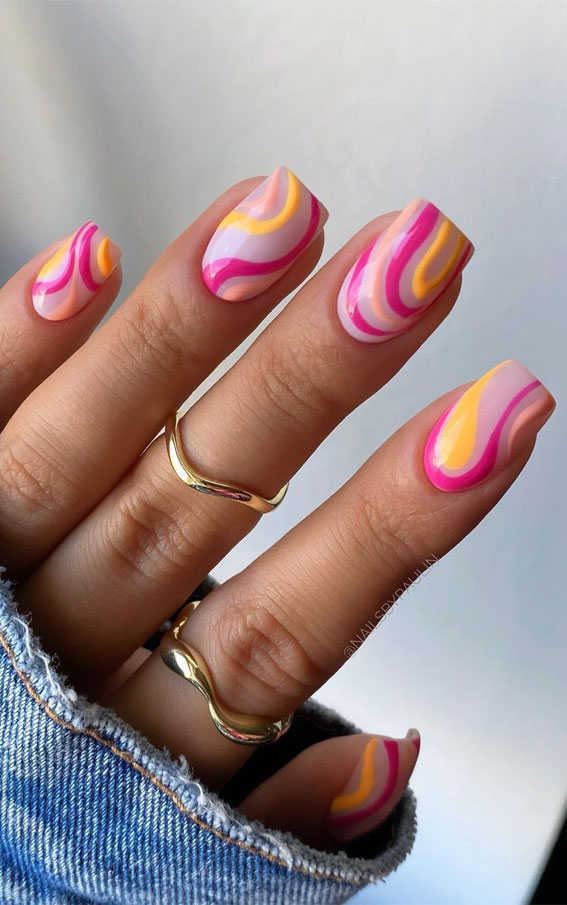
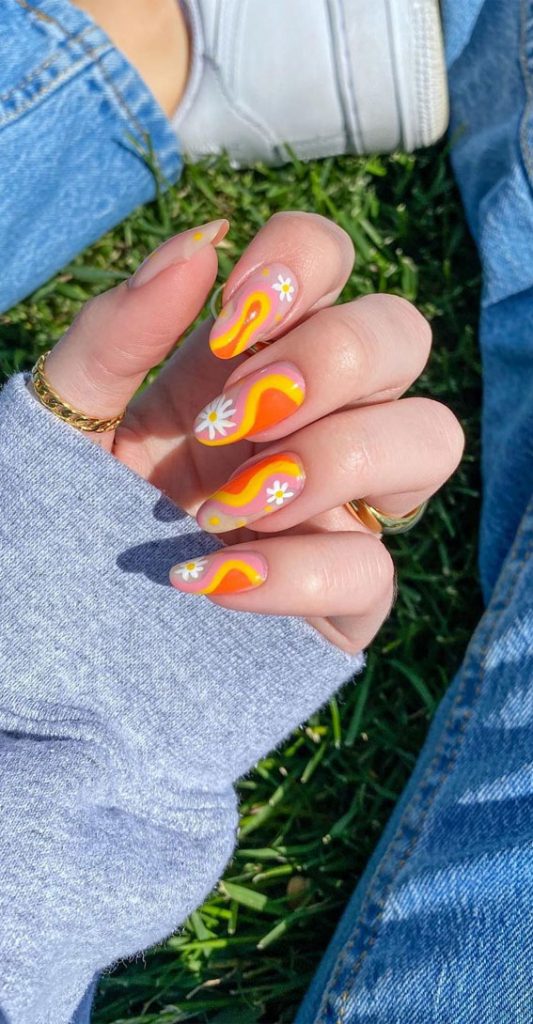
Creating intricate and detailed nail art doesn't have to be difficult or involve water marbling. With this no water needed easy nail art swirls tutorial, you can achieve a beautiful and unique design with just a few tools. To begin, start with a base coat to protect your nails and prevent staining. Then, choose two or three complementary colors for your swirls. Pink and orange or blue and green make great color combinations for this look. Take a dotting tool or a toothpick and dip it in one of your colors. Create a small dot at the base of your nail, then drag the tool towards the tip, creating a swirl as you go. Repeat this step with your other colors, creating swirls all over your nail. You can vary the size and placement of the swirls for a more interesting look. Let the design dry for a few minutes before applying a top coat to protect it and give it a glossy finish. This easy no water needed swirl nail art is perfect for beginners and can be easily customized with different colors.5. No Water Needed: Easy Nail Art Swirls


5. No Water Needed: Easy Nail Art Swirls


:max_bytes(150000):strip_icc()/072922-beauty-nail-art-lead-2000-21de3481261e48a995c855269f9846ad.jpg)


If you love to create your own nail art but don't want to deal with the mess and hassle of water marbling, then this DIY no water swirl nail art tutorial is perfect for you. With just a few tools and some creativity, you can achieve a stunning swirl design without any water. Start with a base coat to protect your nails and prevent staining. Then, choose two or three vibrant colors for your swirls. Red and yellow or purple and green make great color combinations for this look. Using a nail art brush or a striper brush, create vertical lines on your nail with one of the colors. These lines don't have to be perfect, as they will be covered up by the swirls. Repeat this step with your other colors, creating a striped effect on your nails. Next, take a dotting tool or a toothpick and dip it in one of your colors. Create a small dot at the base of your nail, then drag the tool towards the tip, creating a swirl as you go. Repeat this step with your other colors, creating swirls all over your nail. You can vary the size and placement of the swirls for a more interesting look. Finish with a top coat to protect your design and give it a glossy finish. This DIY no water swirl nail art is perfect for those who want a unique and colorful design without the mess of water marbling.6. DIY No Water Swirl Nail Art


6. DIY No Water Swirl Nail Art


This no water needed colorful swirl nail art tutorial is perfect for those who want a fun and playful design on their nails. With just a few tools and some bold colors, you can achieve a unique and eye-catching look without using any water. Start with a base coat to protect your nails and help the design last longer. Then, choose two or three contrasting colors for your swirls. Orange and blue or pink and green make great color combinations for this look. Using a dotting tool or a toothpick, create small dots of different colors on a paper plate or any other surface that you can easily clean. Make sure the dots are close together but not touching. Next, take your dotting tool or toothpick and gently swirl the colors together, creating a marbled effect. Don't overdo it or the colors will mix together too much and lose the swirl effect. Once you're happy with the design, let it dry for a few minutes. Finally, take a clean toothpick or brush and dip it in acetone or nail polish remover. Use it to clean up any excess polish around your nails. Finish with a top coat to seal in your design and give it a glossy finish.7. No Water Needed: Colorful Swirl Nail Art

7. No Water Needed: Colorful Swirl Nail Art


If you're looking for a step-by-step tutorial on how to achieve a stunning swirl nail art design without using any water, then this guide is for you. With just a few tools and some patience, you can create a beautiful and unique look on your nails. Start with a base coat to protect your nails and prevent staining. Then, choose two or three complementary colors for your swirls. Purple and blue or pink and yellow make great color combinations for this look. Using a nail art brush or a striper brush, create vertical lines on your nail with one of the colors. These lines don't have to be perfect, as they will be covered up by the swirls. Repeat this step with your other colors, creating a striped effect on your nails. Next, take a dotting tool or a toothpick and dip it in one of your colors. Create a small dot at the base of your nail, then drag the tool towards the tip, creating a swirl as you go. Repeat this step with your other colors, creating swirls all over your nail. You can vary the size and placement of the swirls for a more interesting look. Finish with a top coat to protect your design and give it a glossy finish. This step-by-step no water swirl nail art tutorial is perfect for those who want a detailed and intricate design without the mess of water marbling.8. Step-by-Step No Water Swirl Nail Art Tutorial


8. Step-by-Step No Water Swirl Nail Art Tutorial


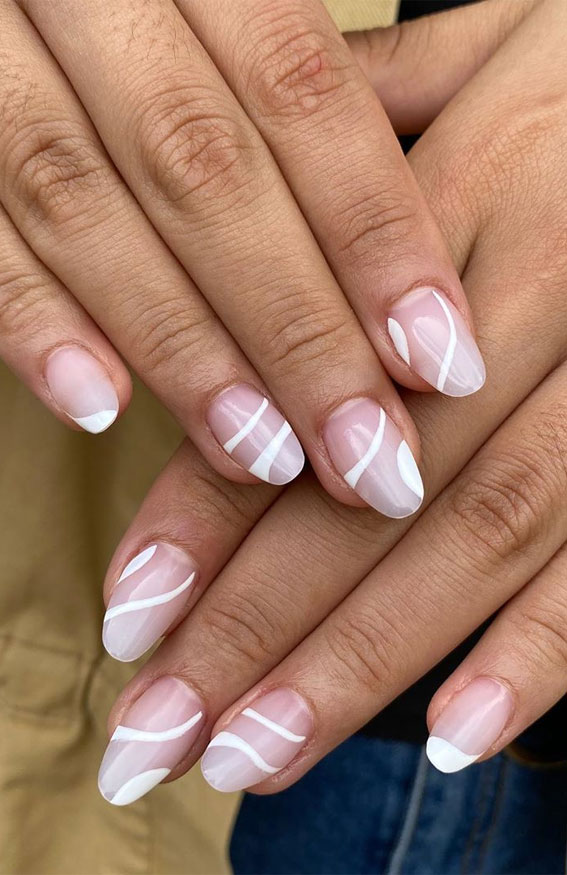
If you want a more elegant and sophisticated look for your nails, then this no water needed swirl nail art tutorial is perfect for you. With just a few tools and some neutral colors, you can achieve a stunning and chic design without using any water. Start with a base coat to protect your nails and help the design last longer. Then, choose two or three neutral colors for your swirls. Nude and grey or beige and white make great color combinations for this look. Take a dotting tool or a toothpick and dip it in one of your colors. Create a small dot at the base of your nail, then drag the tool towards the tip, creating a swirl as you go. Repeat this step with your other colors, creating swirls all over your nail. You can vary the size and placement of the swirls for a more interesting look. Let the design dry for a few minutes before applying a top coat to protect it and give it a glossy finish. This elegant no water needed swirl nail art is perfect for special occasions or for those who prefer a more subtle design.9. No Water Needed: Elegant Swirl Nail Art

9. No Water Needed: Elegant Swirl Nail Art

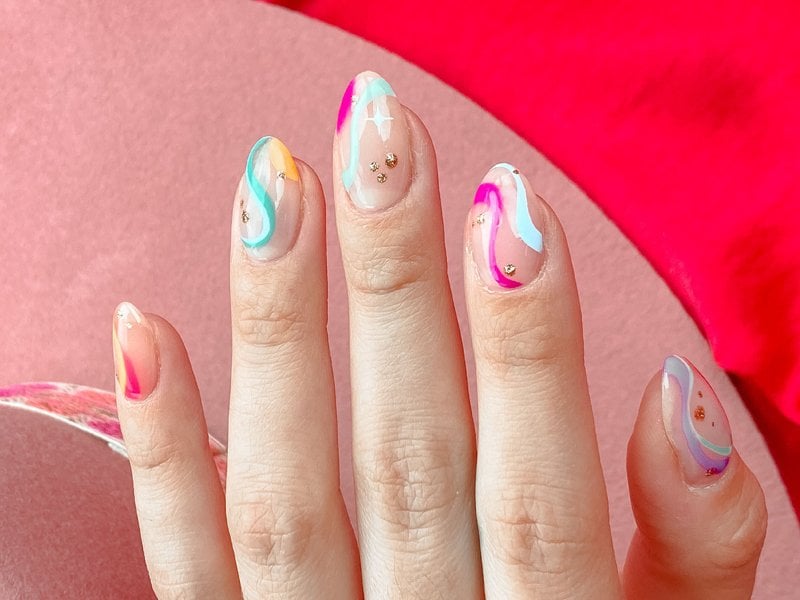
If you're new to nail art and want to try out a no water swirl design, then this tutorial is perfect for you. With just a few tools and some bright colors, you can achieve a fun and playful look on your nails.10. No Water Swirl Nail Art Designs for Beginners

10. No Water Swirl Nail Art Designs for Beginners


The Latest Trend in Nail Art: Swirls Without Water
/image11-eb489b94971c450c9c3e15de8482beb3.jpg)
Introduction
 Nail art has become a popular form of self-expression and creativity in the beauty world. From simple designs to intricate details, there are endless possibilities when it comes to decorating your nails. One of the latest trends in nail art is creating swirl designs without using water. This technique not only saves time and effort, but it also allows for more control and precision in creating unique and eye-catching designs. Let's dive into the world of nail art swirls without water and discover how you can achieve this trend for yourself.
The Traditional Way of Creating Swirls
 Traditionally, creating swirl designs on nails involved using water and nail polish. This technique, also known as water marbling, requires dropping multiple colors of nail polish into a cup of water and then swirling them together with a toothpick or a small brush. The nail is then dipped into the water, allowing the pattern to transfer onto the nail. While this technique can produce stunning results, it can also be messy and time-consuming.
The No Water Method
 The no water method of creating swirl nail art eliminates the need for water and simplifies the process. Instead, you can use a thin brush or a dotting tool to create the swirls directly on the nail. This allows for more control and precision in creating intricate designs. The result is a clean and defined swirl pattern without the hassle of dealing with water.
How to Achieve Swirls Without Water
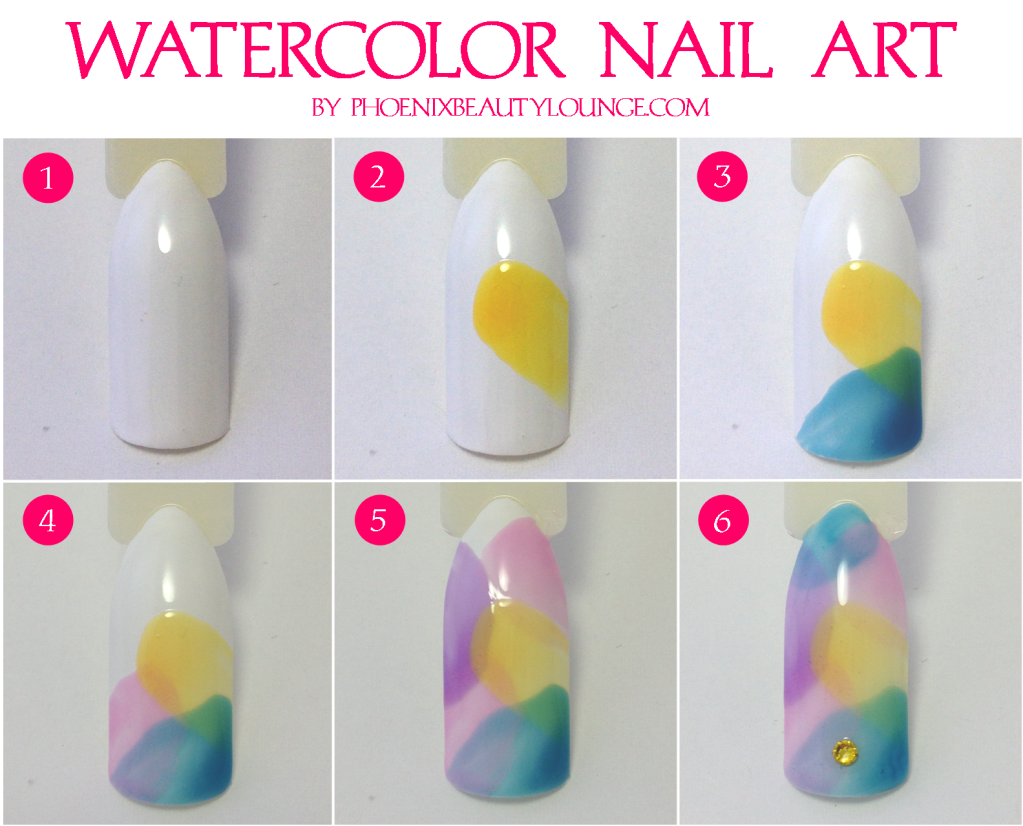
 To achieve swirl nail art without water, start by applying a base coat to your nails. Then, choose your desired colors and make sure they are easily accessible. Dip your brush or dotting tool into the first color and create a small dot on your nail. Without lifting the tool, rotate it in a circular motion to spread the color out, creating a swirl shape. Repeat this step with different colors until you achieve the desired design. For more complex designs, you can use tape or nail vinyls to create clean lines and shapes.
Benefits of Swirl Nail Art Without Water
 Aside from the obvious time-saving and mess-free benefits, there are many other advantages to creating swirl nail art without water. This technique allows for more control and precision, making it easier to create intricate designs. It also requires fewer materials, as you don't need a cup of water or multiple brushes. Plus, the final result is a clean and defined swirl pattern that is sure to turn heads.
In conclusion, nail art swirls without water is the latest trend in the world of nail art. This technique offers a simpler and more controlled way of creating unique and eye-catching designs on your nails. Whether you're a beginner or a seasoned nail artist, give this trend a try and see the beautiful results for yourself.
Aside from the obvious time-saving and mess-free benefits, there are many other advantages to creating swirl nail art without water. This technique allows for more control and precision, making it easier to create intricate designs. It also requires fewer materials, as you don't need a cup of water or multiple brushes. Plus, the final result is a clean and defined swirl pattern that is sure to turn heads.
In conclusion, nail art swirls without water is the latest trend in the world of nail art. This technique offers a simpler and more controlled way of creating unique and eye-catching designs on your nails. Whether you're a beginner or a seasoned nail artist, give this trend a try and see the beautiful results for yourself.


