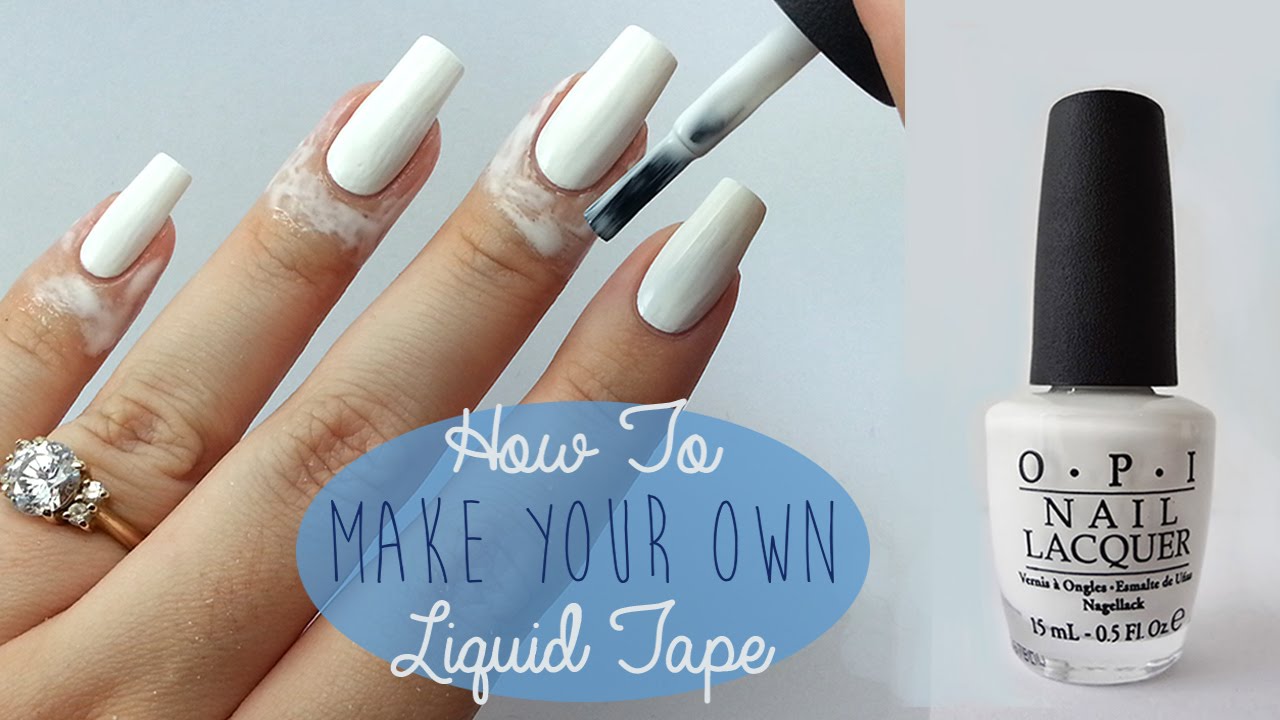
If you're looking to take your nail art game to the next level, look no further than liquid latex. This versatile product has become a must-have for any nail art enthusiast, thanks to its ability to create clean and precise designs. So, whether you're a beginner or a pro, here's a step-by-step guide on how to create stunning nail art using liquid latex. First, start by preparing your nails. Apply a base coat and let it dry completely. This will help your nail polish adhere better and make it last longer. Next, apply a thin layer of liquid latex around the edges of your nails, making sure to cover the skin around your nail bed. This will act as a barrier and protect your skin from excess polish. Now, it's time to get creative! Use your favorite nail polish and create your desired design on your nails. You can use bold and bright colors to make your design stand out, or keep it simple with a classic black and white look. Once you're done with your design, carefully peel off the liquid latex using a pair of tweezers. This will reveal a clean and precise design, with no mess around your nails. Finish off with a top coat for a glossy finish and voila! You've just created stunning nail art using liquid latex.1. How to Create Stunning Nail Art Using Liquid Latex


1. How to Create Stunning Nail Art Using Liquid Latex


Are you new to the world of nail art? Don't worry, we've got you covered. Liquid latex is a beginner-friendly product that can help you achieve flawless designs. Here's a quick tutorial on how to use liquid latex for your nail art. Start by prepping your nails with a base coat and letting it dry. Next, apply a thin layer of liquid latex around your nails, making sure to cover the skin around your nail bed. Using a nail art brush, create your desired design on your nails. You can experiment with different patterns, shapes, and colors to create a unique look. Once your design is complete, carefully remove the liquid latex using a pair of tweezers. This will reveal a clean and precise design, with no mess around your nails. Finish off with a top coat for a glossy finish, and you're all set! This tutorial is perfect for beginners, as liquid latex makes it easy to correct any mistakes and create a professional-looking design.2. Liquid Latex Nail Art Tutorial for Beginners


2. Liquid Latex Nail Art Tutorial for Beginners


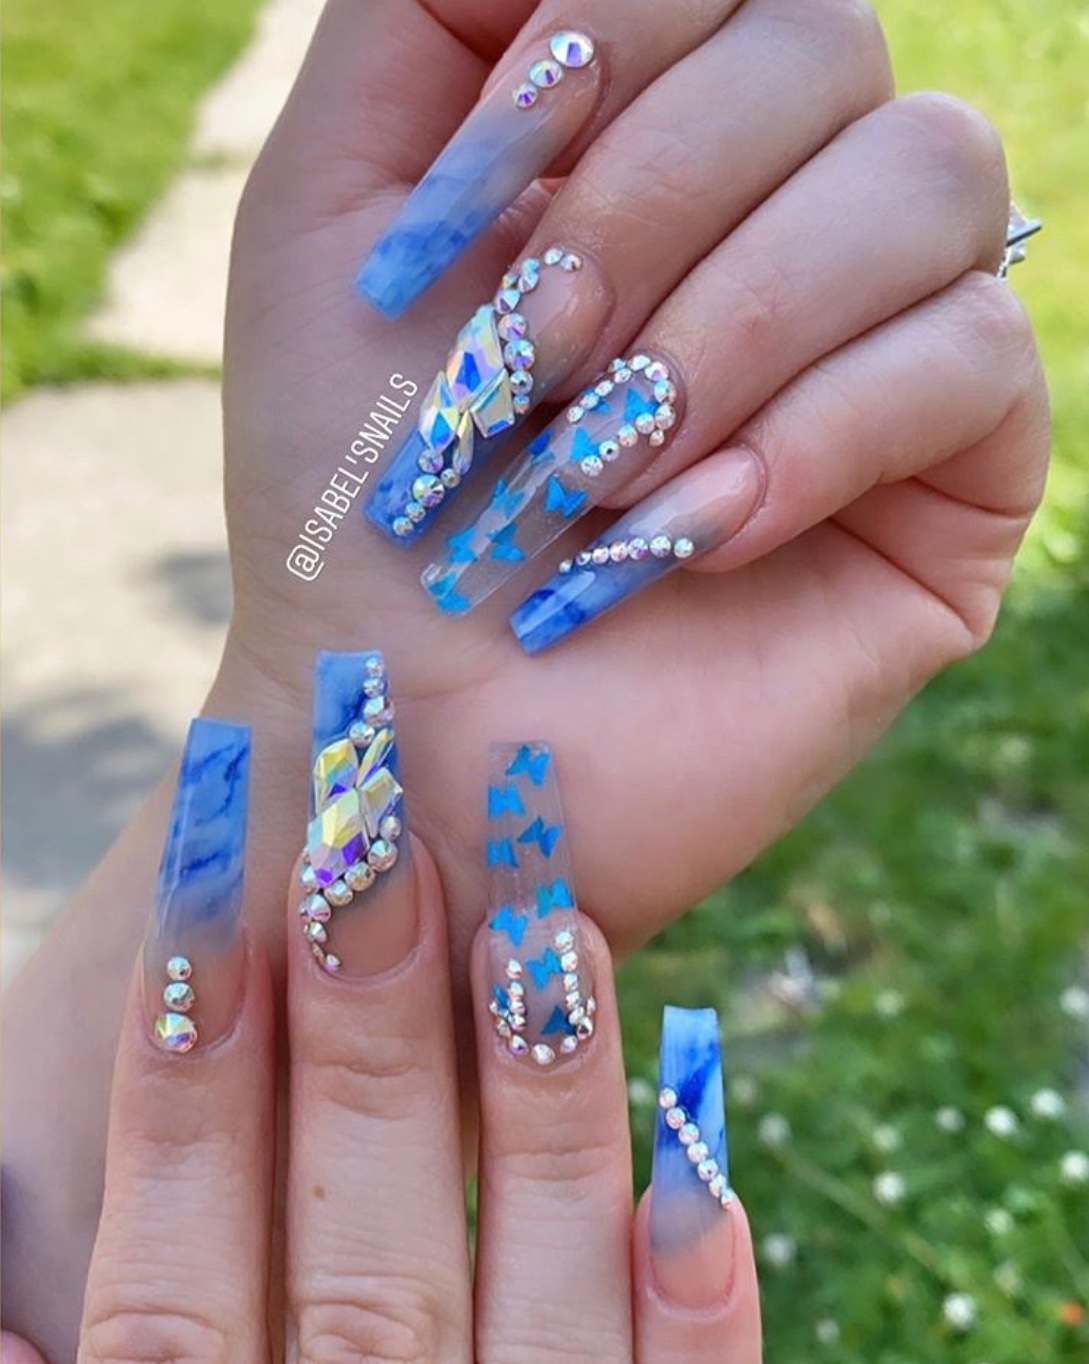
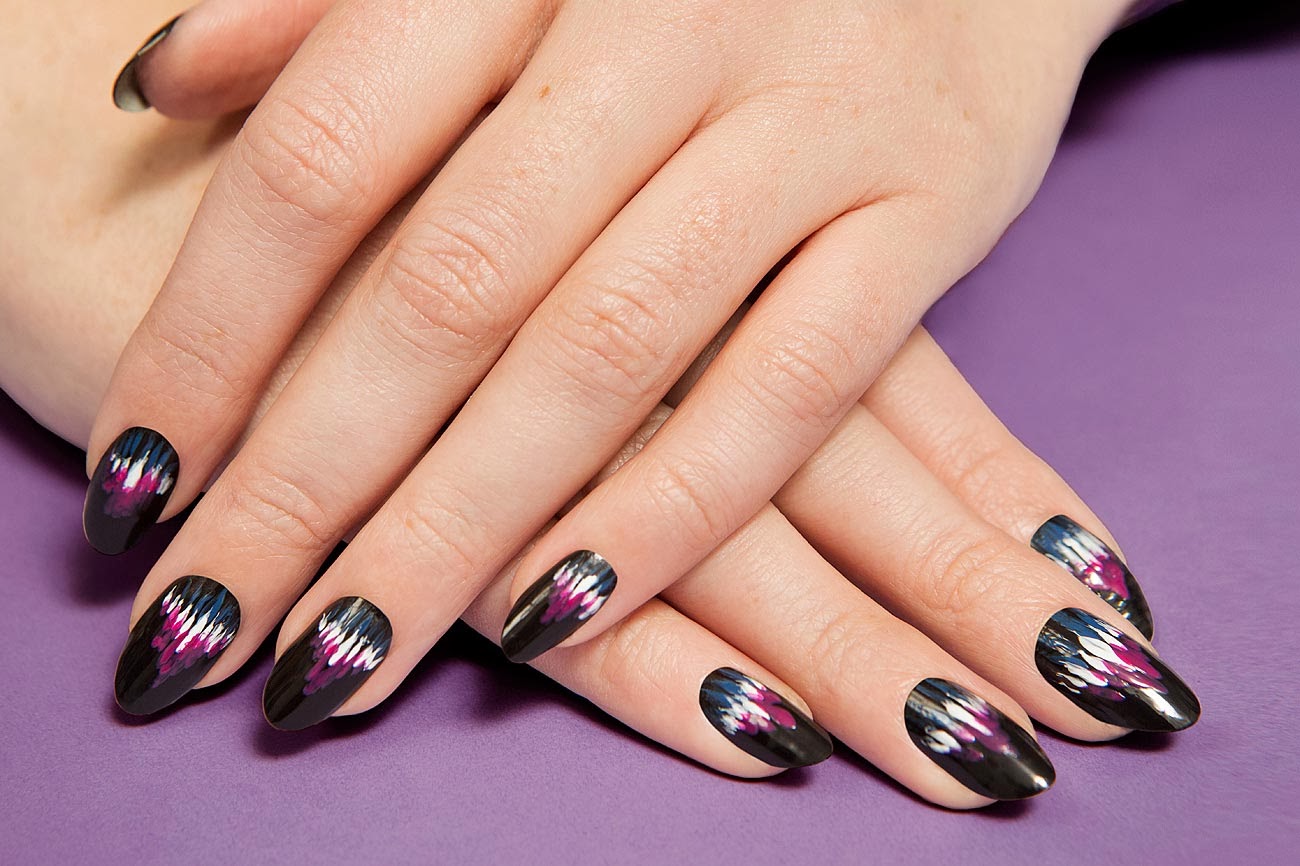
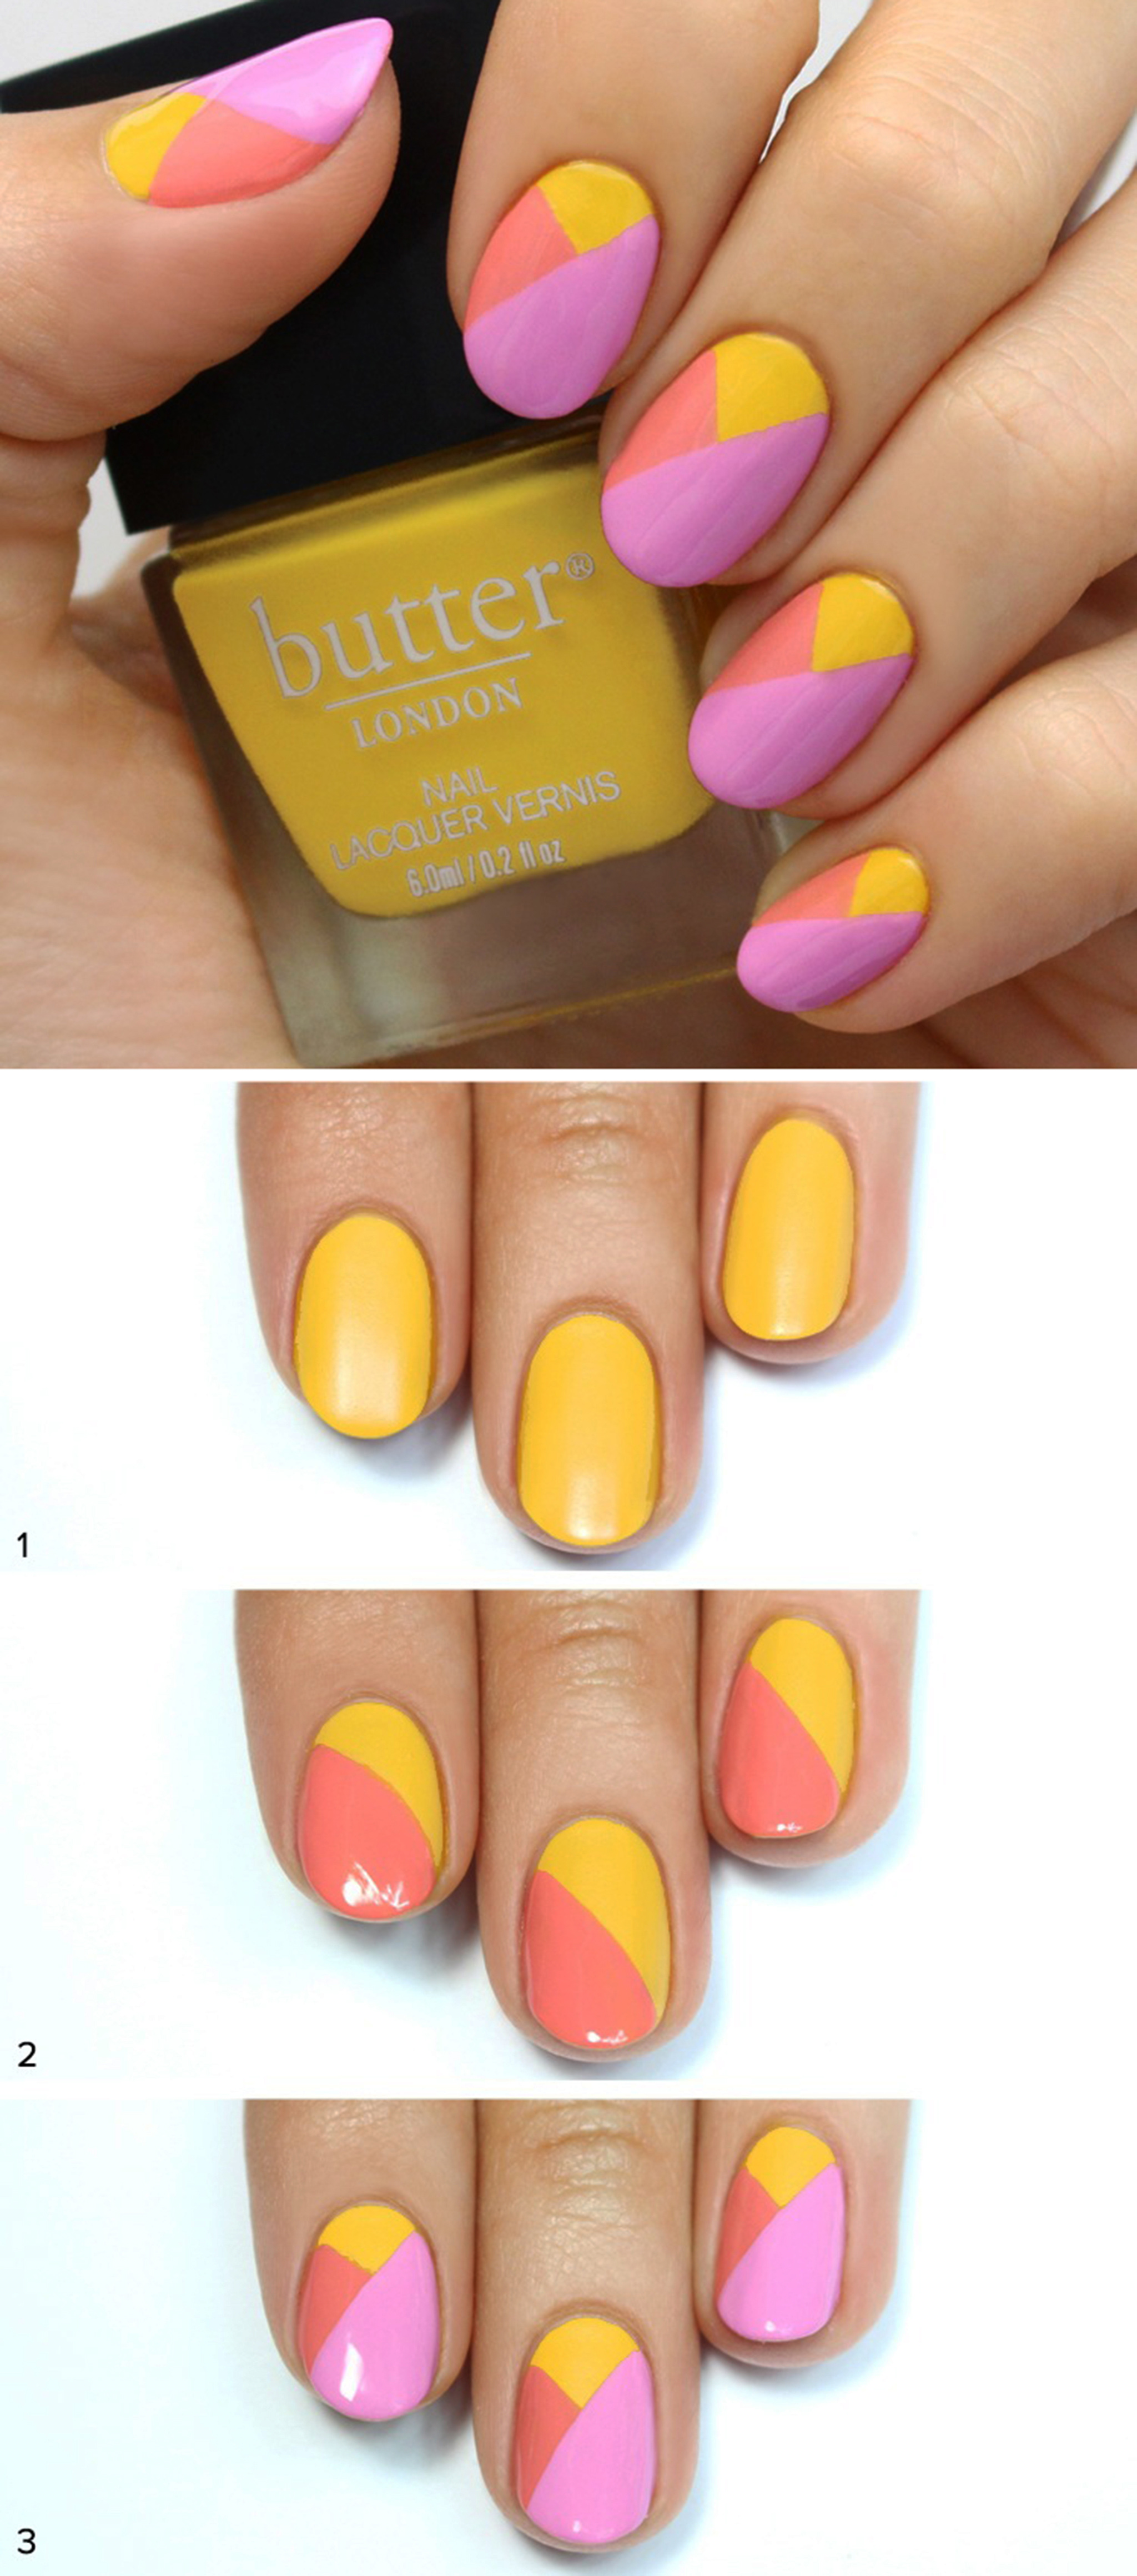
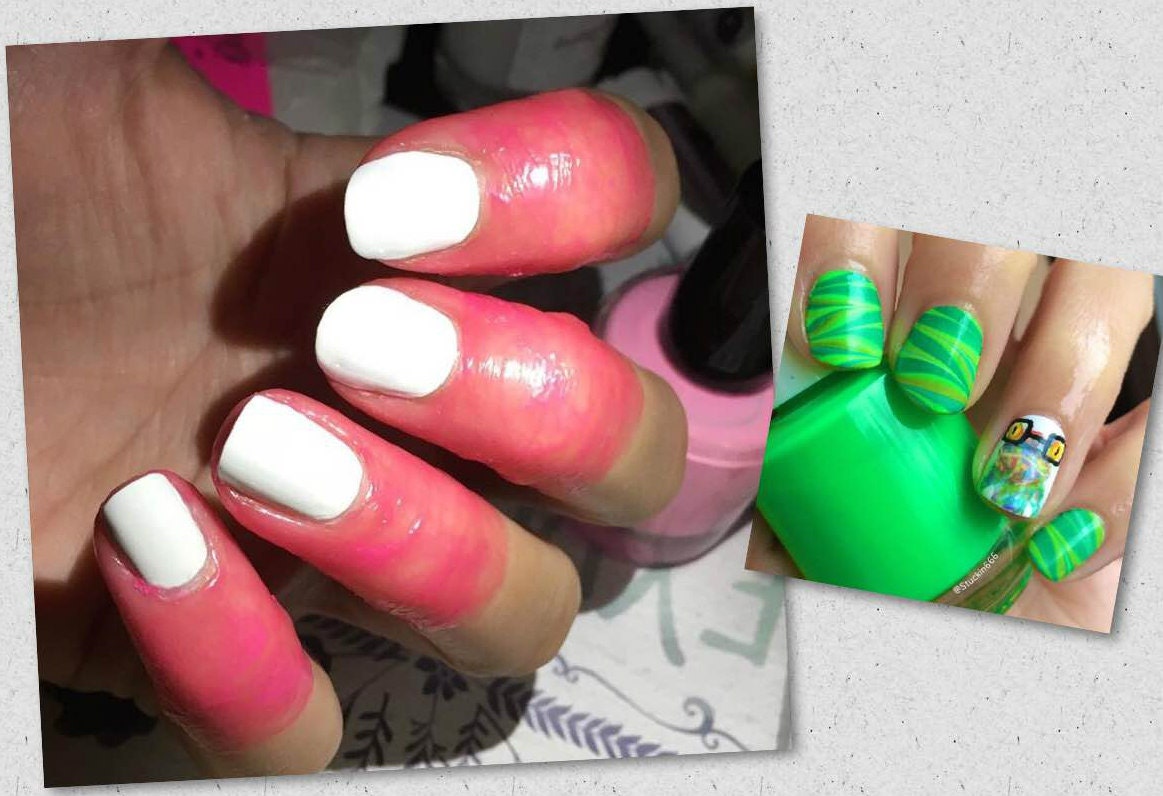
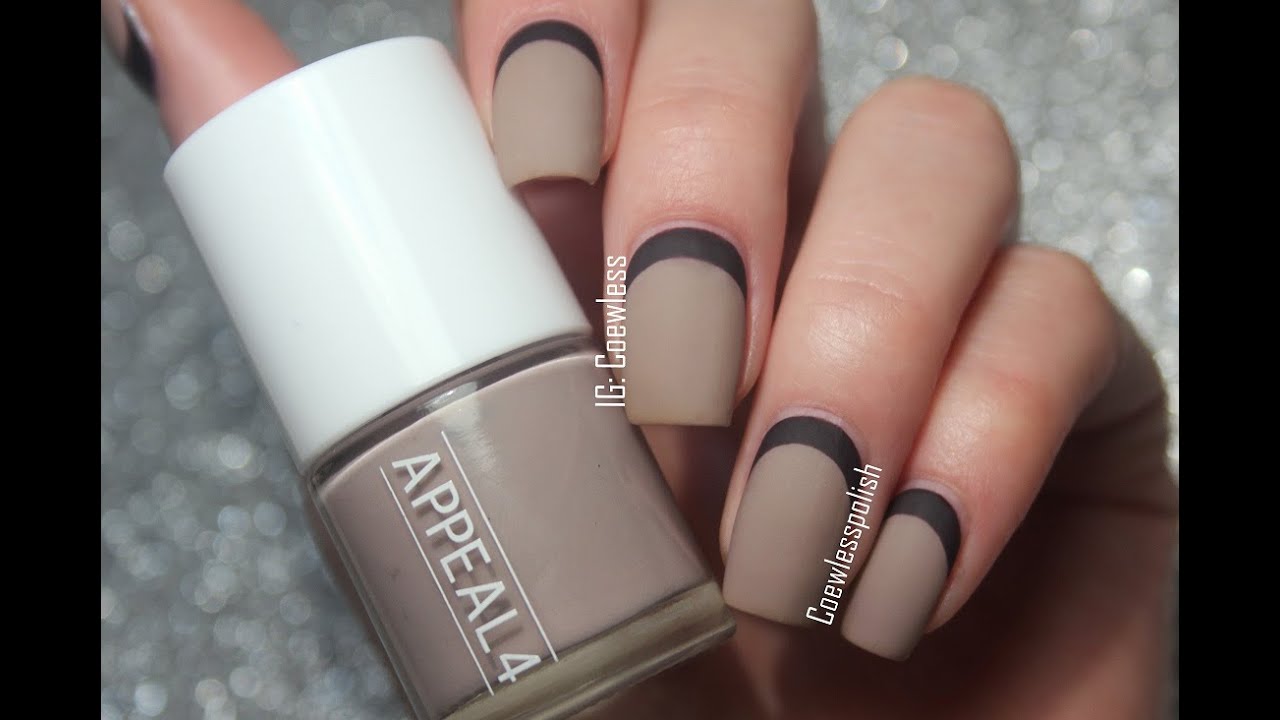
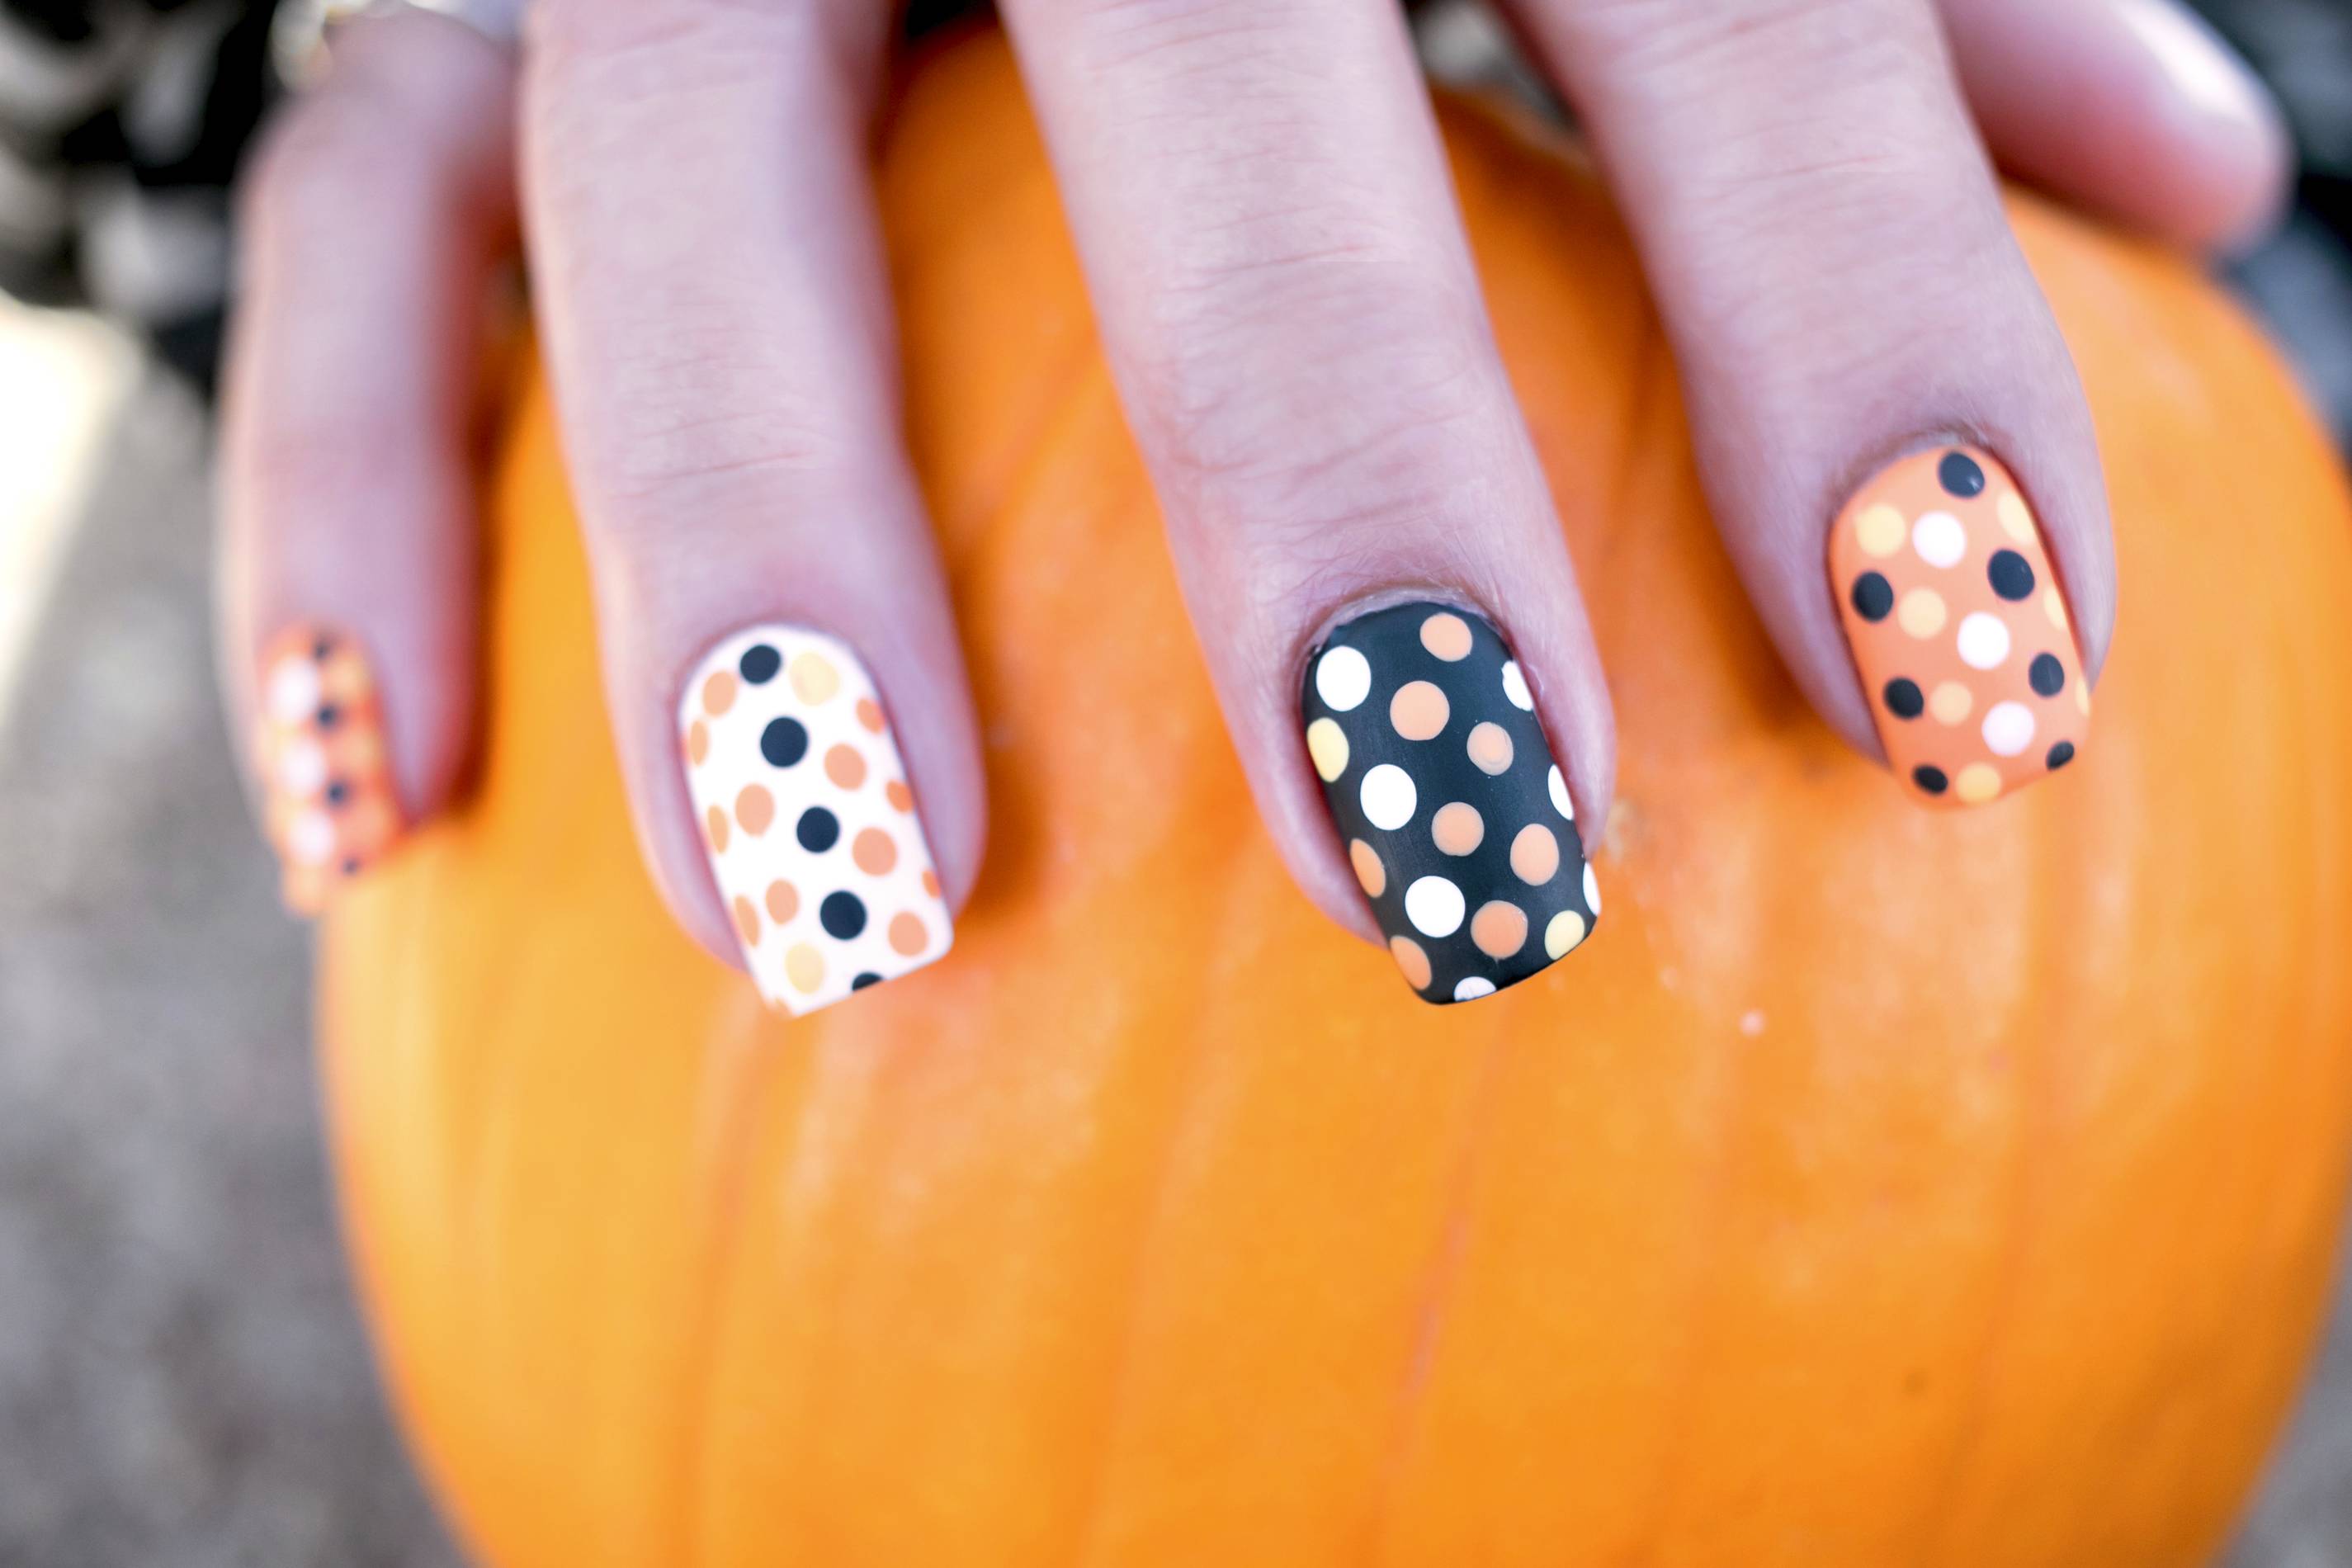
Looking for some inspiration for your next nail art design? Look no further! Here are 10 creative nail art designs using liquid latex that will take your manicure game to the next level. 1. Geometric Patterns: Use liquid latex to create clean lines and precise shapes for a modern and chic look. 2. Marble Nails: Create a marbled effect using different colors and a toothpick, and then peel off the liquid latex for a flawless finish. 3. Negative Space Nails: Use liquid latex to create negative space designs, where some parts of your natural nail are left exposed. 4. Glitter Gradient: Apply liquid latex around your nails to protect your skin, and then create a glitter gradient using a sponge for a glamorous look. 5. Striped Nails: Use liquid latex to create clean and precise stripes on your nails, and then peel off for a professional finish. 6. Floral Designs: Use liquid latex to create a barrier around your nails and then paint on intricate floral designs for a feminine and romantic look. 7. Ombre Nails: Create a gradient effect using two or more colors and a sponge, and then peel off the liquid latex for a clean and effortless look. 8. Drip Nails: Use liquid latex to create a drippy effect on your nails, perfect for a spooky Halloween look. 9. Foil Nails: Apply liquid latex around your nails and then press on foil for a metallic and eye-catching design. 10. Glitter Cuticles: Create a glittery cuticle effect by applying liquid latex around your nails and then dusting on glitter.3. 10 Creative Nail Art Designs Using Liquid Latex


3. 10 Creative Nail Art Designs Using Liquid Latex


Aside from creating clean and precise designs, liquid latex has many other benefits that make it a must-have product for any nail art enthusiast. Here are a few reasons why you should add liquid latex to your nail art kit. 1. Easy to Use: Liquid latex is beginner-friendly and easy to use, making it perfect for all skill levels. 2. Mess-Free: Liquid latex acts as a barrier and protects your skin from excess polish, making it easy to clean up any mistakes. 3. Saves Time: With liquid latex, you can create intricate designs without the need for precision and time-consuming clean-up. 4. Versatile: Liquid latex can be used for various nail art techniques, from creating clean lines to protecting your skin from glitter and foil. 5. Affordable: Liquid latex is an affordable product that can help you achieve professional-looking designs without breaking the bank.4. The Benefits of Using Liquid Latex for Nail Art


4. The Benefits of Using Liquid Latex for Nail Art


To achieve flawless nail art using liquid latex, it's essential to follow the correct steps. Here's a step-by-step guide to perfecting your liquid latex nail art. Step 1: Prep your nails by applying a base coat and letting it dry completely. Step 2: Apply a thin layer of liquid latex around your nails, making sure to cover the skin around your nail bed. Step 3: Use your desired nail polish and create your desired design on your nails. Step 4: Once your design is complete, carefully remove the liquid latex using a pair of tweezers. Step 5: Finish off with a top coat for a glossy finish, and you're all set! Following these steps will help you achieve flawless and clean nail art using liquid latex.5. Step-by-Step Guide to Perfecting Your Liquid Latex Nail Art


5. Step-by-Step Guide to Perfecting Your Liquid Latex Nail Art

As with any other beauty product, there are always hacks and tips to make your life easier. Here are some nail art hacks using liquid latex that will help you achieve clean and easy designs. 1. Use a Makeup Sponge: Instead of using a brush, use a makeup sponge to create gradient effects with your nail polish. 2. Apply Petroleum Jelly: Before applying liquid latex, apply petroleum jelly on your skin around your nails. This will make it easier to remove the liquid latex once your design is complete. 3. Use Tape: If you don't have liquid latex on hand, you can use tape to create a barrier around your nails. 4. Clean Up with a Brush: Use a small brush dipped in nail polish remover to clean up any mistakes around your nails. 5. Let it Dry Completely: Make sure to let your base coat and liquid latex dry completely before moving on to the next step. This will prevent any smudging or smearing of your design.6. Nail Art Hacks: Using Liquid Latex for Clean and Easy Designs

6. Nail Art Hacks: Using Liquid Latex for Clean and Easy Designs


With the endless possibilities and versatility of liquid latex, it can be overwhelming to choose just one design to try. Here are five must-try nail art ideas using liquid latex that will elevate your manicure game. 1. Splatter Paint Nails: Create a splatter paint effect on your nails using a straw and your favorite nail polish colors. 2. Galaxy Nails: Create a galaxy-inspired look using a sponge and different shades of blue, purple, and black nail polish. 3. Animal Print Nails: Use liquid latex to create different animal print patterns, such as leopard or zebra, for a fun and playful look. 4. Neon Nails: Create a neon-themed look using bright and bold colors with a white base coat for a pop of color. 5. Stamping Nails: Use liquid latex to protect your skin from excess stamping polish and create intricate designs on your nails.7. 5 Must-Try Nail Art Ideas Using Liquid Latex

7. 5 Must-Try Nail Art Ideas Using Liquid Latex

Now that you have all the information you need to create stunning nail art using liquid latex, here are some tips and tricks to ensure you get flawless results every time. 1. Use a Clean Brush: Make sure to clean your nail art brush after each use to prevent any dried polish or debris from affecting your design. 2. Experiment with Different Designs: Don't be afraid to experiment with different designs and techniques to find what works best for you. 3. Pay Attention to Dry Time: Make sure to let each layer of polish dry completely before moving on to the next step, or you may end up with a smudged design. 4. Keep it Simple: If you're a beginner, start with simple designs and gradually work your way up to more intricate ones. 5. Practice, Practice, Practice: As with any skill, practice makes perfect. Don't get discouraged if your first few attempts don't turn out as expected. Keep practicing, and you'll soon become a pro at liquid latex nail art.8. Liquid Latex Nail Art: Tips and Tricks for Flawless Results


8. Liquid Latex Nail Art: Tips and Tricks for Flawless Results


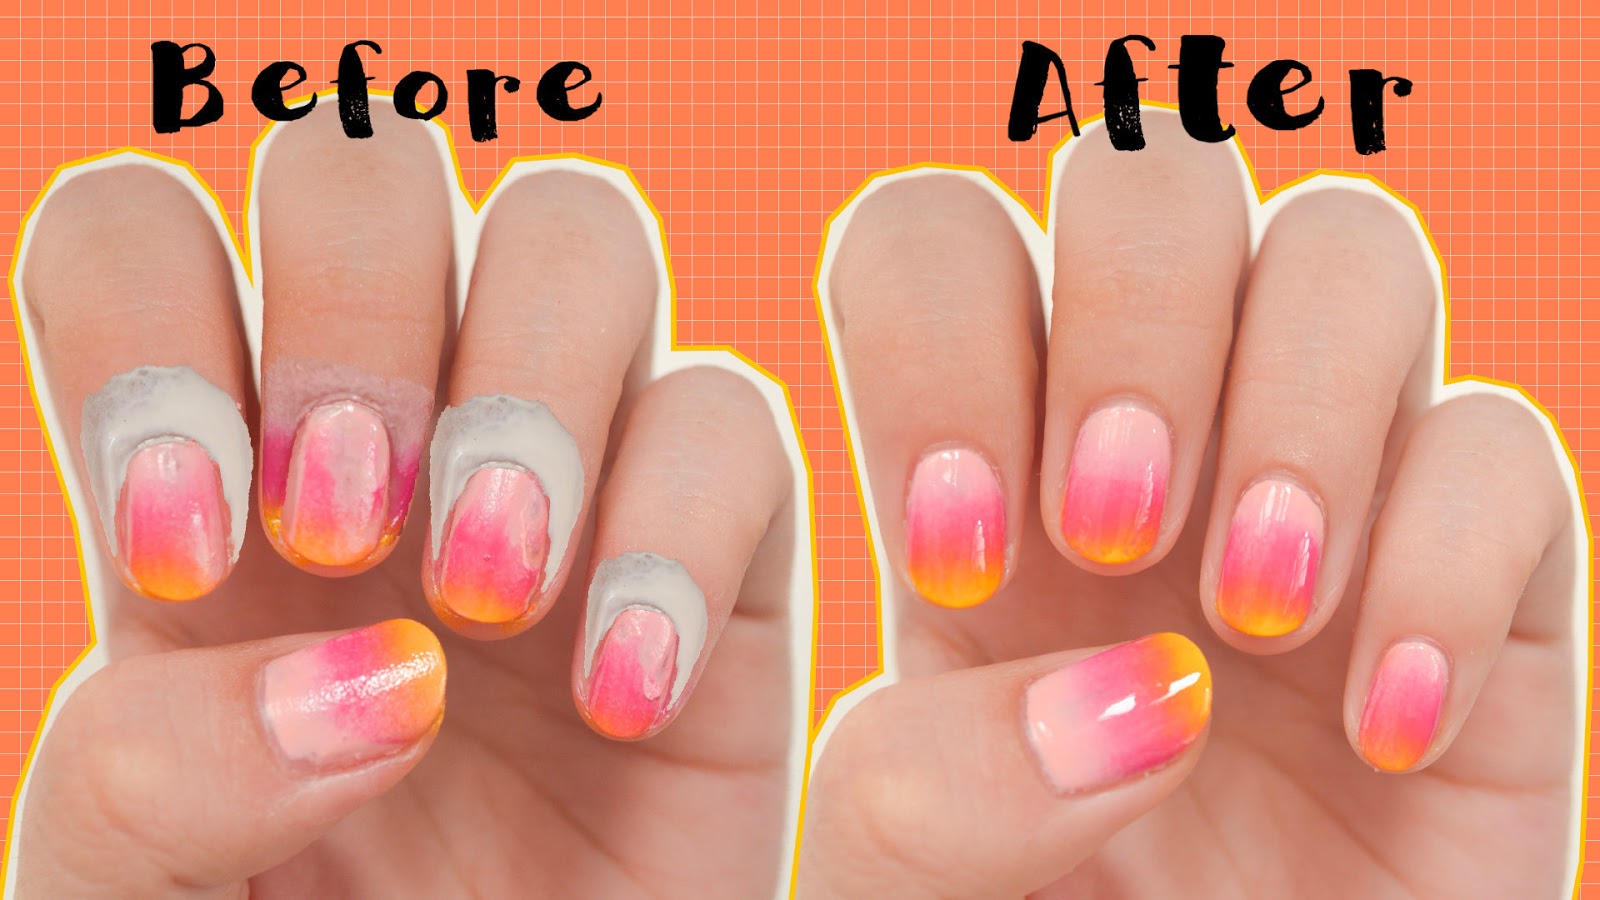
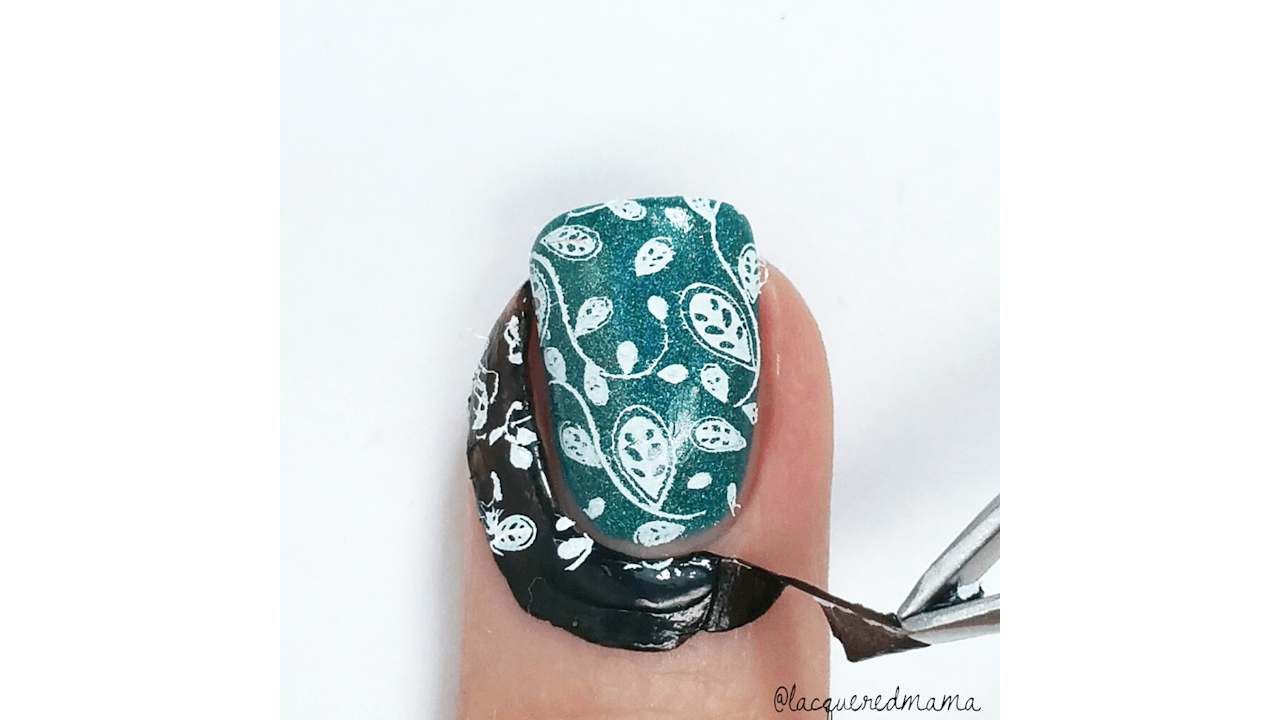
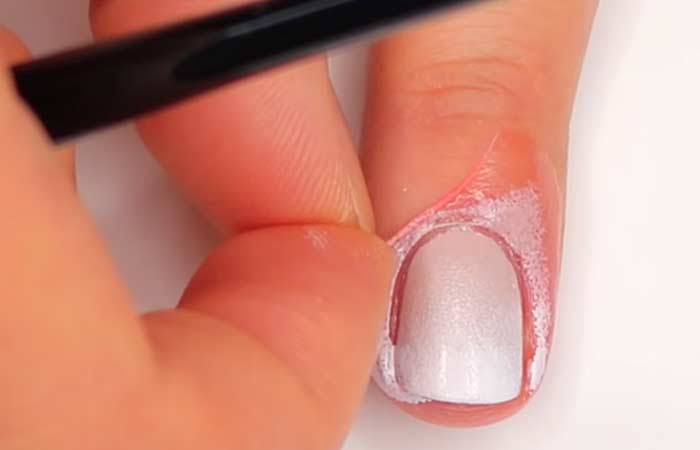
Removing liquid latex from your nails is a crucial step in your nail art process. Here's a quick and easy way to remove liquid latex from your nails after creating your design. Step 1: Soak a cotton pad or ball in warm water and place it on top of the liquid latex on your nail. Step 2: Let it sit for a few seconds to soften the latex. Step 3: Using a pair of tweezers, gently peel off the liquid latex from your nail. Step 4: Finish off by washing your hands with warm water and soap to remove any remaining residue.9. How to Remove Liquid Latex from Your Nails After Nail Art


9. How to Remove Liquid Latex from Your Nails After Nail Art

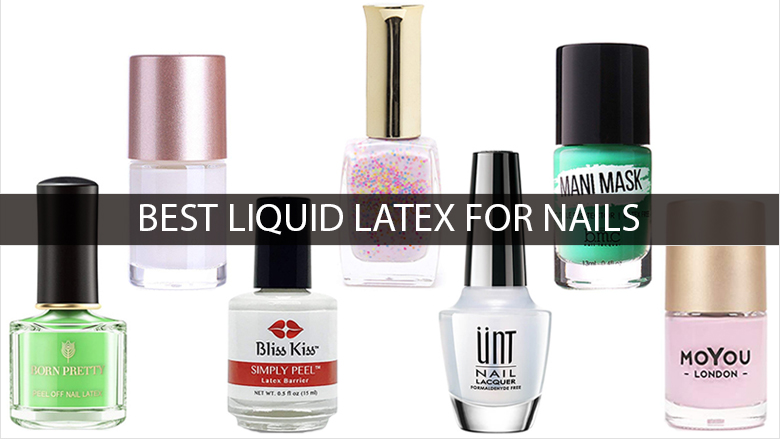
Now that you're familiar with liquid latex and its benefits, here are some of the best liquid latex products that you can add to your nail art kit. 1. Simply Peel Liquid Latex: This peel-off liquid latex is perfect for creating clean and precise nail art designs. 2. Liquid Palisade by Kiesque: This liquid latex product dries quickly and peels off easily, making it ideal for creating intricate designs. 3. Nail Art Liquid Latex Barrier by Twinkled T: This liquid latex product comes in a convenient pen form, making it easy to apply and control. 4. Bliss Kiss Simply Neat Miracle Mat: This multitasking product can be used as a liquid latex barrier for nail art, as well as a nail polish remover mat. 5. Glisten & Glow Liquid Latex: This liquid latex product is perfect for beginners, as it is easy to apply and remove.10. The Best Liquid Latex Products for Nail Art Enthusiasts


10. The Best Liquid Latex Products for Nail Art Enthusiasts


Nail Art Using Liquid Latex: The Ultimate Guide
Introduction to Nail Art
 Nail art has become a popular trend in the beauty industry, with people constantly looking for unique and creative ways to adorn their nails. From simple designs to intricate patterns, there are endless possibilities when it comes to nail art. However, achieving a flawless nail art look can be challenging, especially for beginners. That's where liquid latex comes in. This versatile product has revolutionized the world of nail art, making it easier and more convenient for anyone to create stunning designs. In this article, we will delve into the world of nail art using liquid latex and explore the endless possibilities it offers.
What is Liquid Latex?
 Liquid latex is a type of liquid rubber that is often used for special effects in the film industry. However, it has gained popularity in the beauty industry for its use in creating nail art. The liquid latex is applied around the edges of the nail to create a barrier, preventing the nail polish from getting on the skin. Once the nail art is complete, the latex is peeled off, leaving behind a clean and polished design.
The Benefits of Using Liquid Latex for Nail Art
 Using liquid latex for nail art has several benefits that make it a must-have product for any nail art enthusiast. Firstly, it makes the process of creating nail art much more manageable, especially for beginners. The latex acts as a protective barrier, ensuring that your nail art stays clean and precise. Additionally, it allows for easy cleanup, saving you time and effort. Moreover, liquid latex is skin-friendly and does not cause any irritation, making it suitable for all skin types.
How to Use Liquid Latex for Nail Art
 Using liquid latex for nail art is a simple and straightforward process. Here's a step-by-step guide on how to use it:
Step 1:
Begin by prepping your nails as you would for any other manicure. File and shape your nails, and apply a base coat to protect your natural nails.
Step 2:
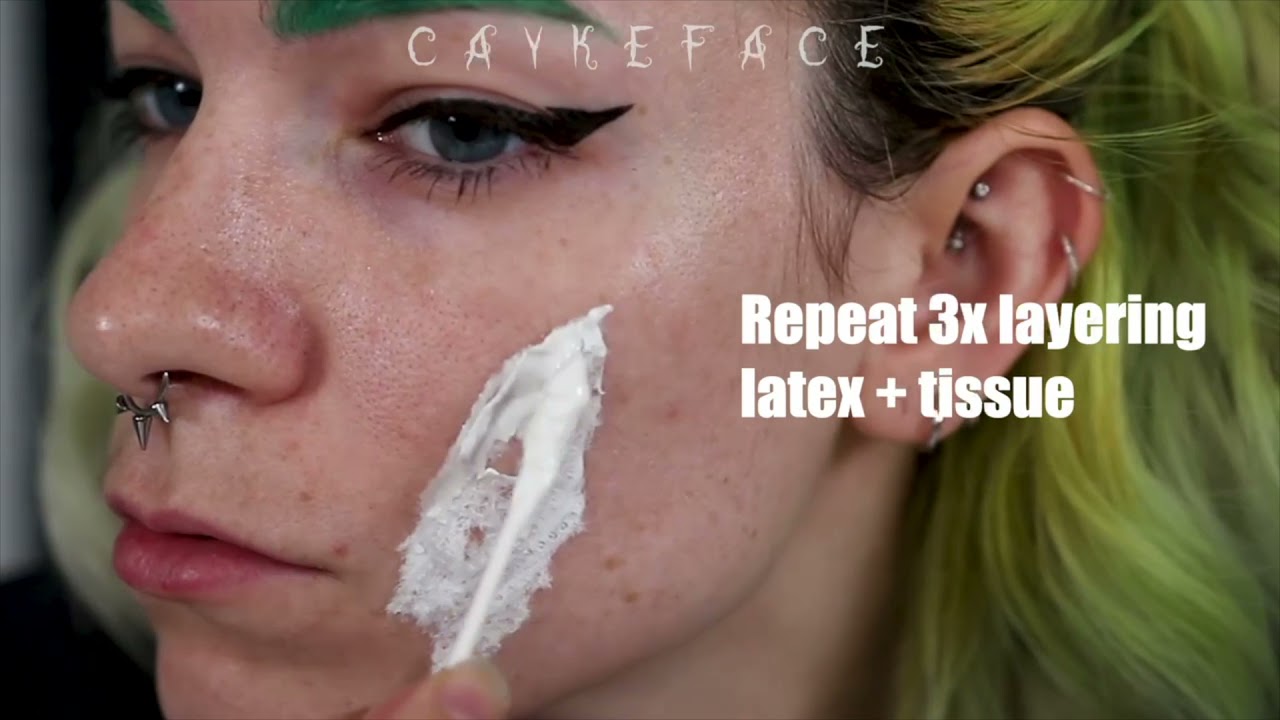
Apply a thin layer of liquid latex around the edges of your nails using a brush or an applicator. Make sure to cover the skin around your nails completely.
Step 3:
Wait for the latex to dry completely. This should only take a few minutes.
Step 4:
Apply your desired nail polish on your nails, covering the latex barrier as well.
Step 5:
Once your nail art is complete, gently peel off the liquid latex using tweezers or your fingers. This will reveal a clean and precise nail art design.
Using liquid latex for nail art is a simple and straightforward process. Here's a step-by-step guide on how to use it:
Step 1:
Begin by prepping your nails as you would for any other manicure. File and shape your nails, and apply a base coat to protect your natural nails.
Step 2:
Apply a thin layer of liquid latex around the edges of your nails using a brush or an applicator. Make sure to cover the skin around your nails completely.
Step 3:
Wait for the latex to dry completely. This should only take a few minutes.
Step 4:
Apply your desired nail polish on your nails, covering the latex barrier as well.
Step 5:
Once your nail art is complete, gently peel off the liquid latex using tweezers or your fingers. This will reveal a clean and precise nail art design.
Conclusion
 Liquid latex has undoubtedly revolutionized the world of nail art, making it easier and more convenient to achieve professional-looking designs. With its numerous benefits and easy application process, it's no wonder that this product has become a must-have for any nail art enthusiast. So, the next time you want to experiment with nail art, don't forget to incorporate liquid latex into your routine for flawless and stunning results.


