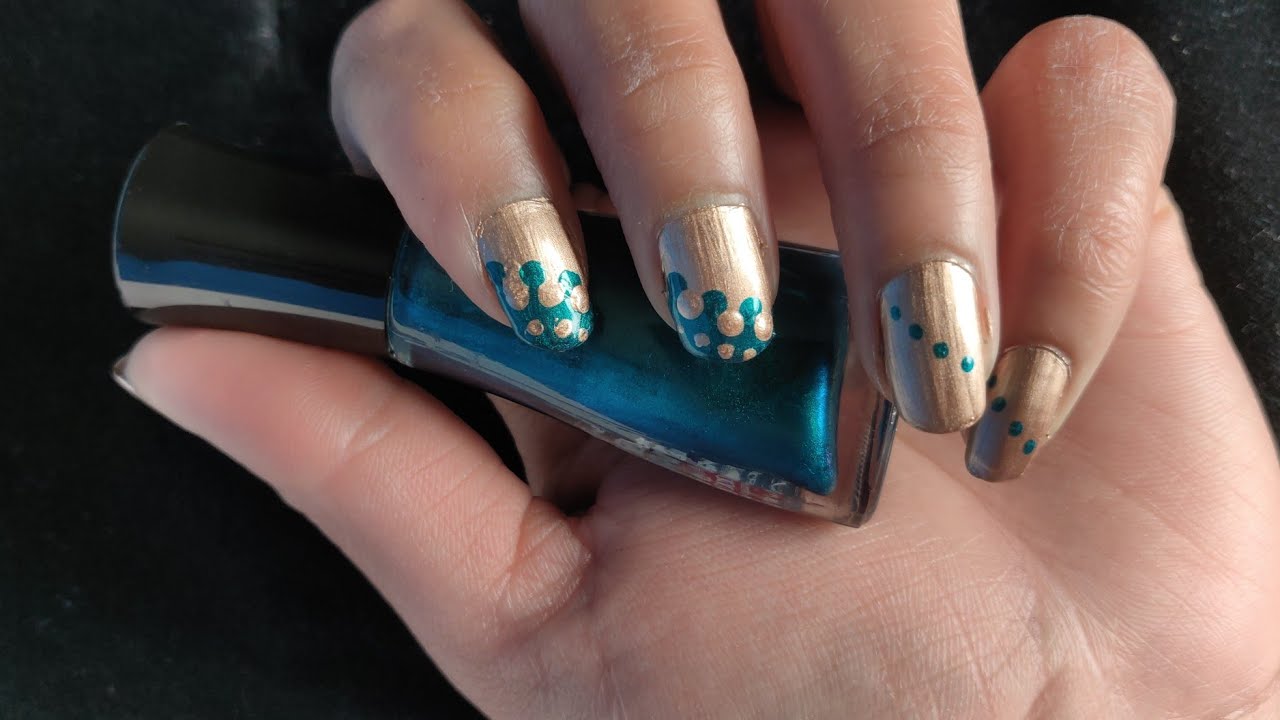
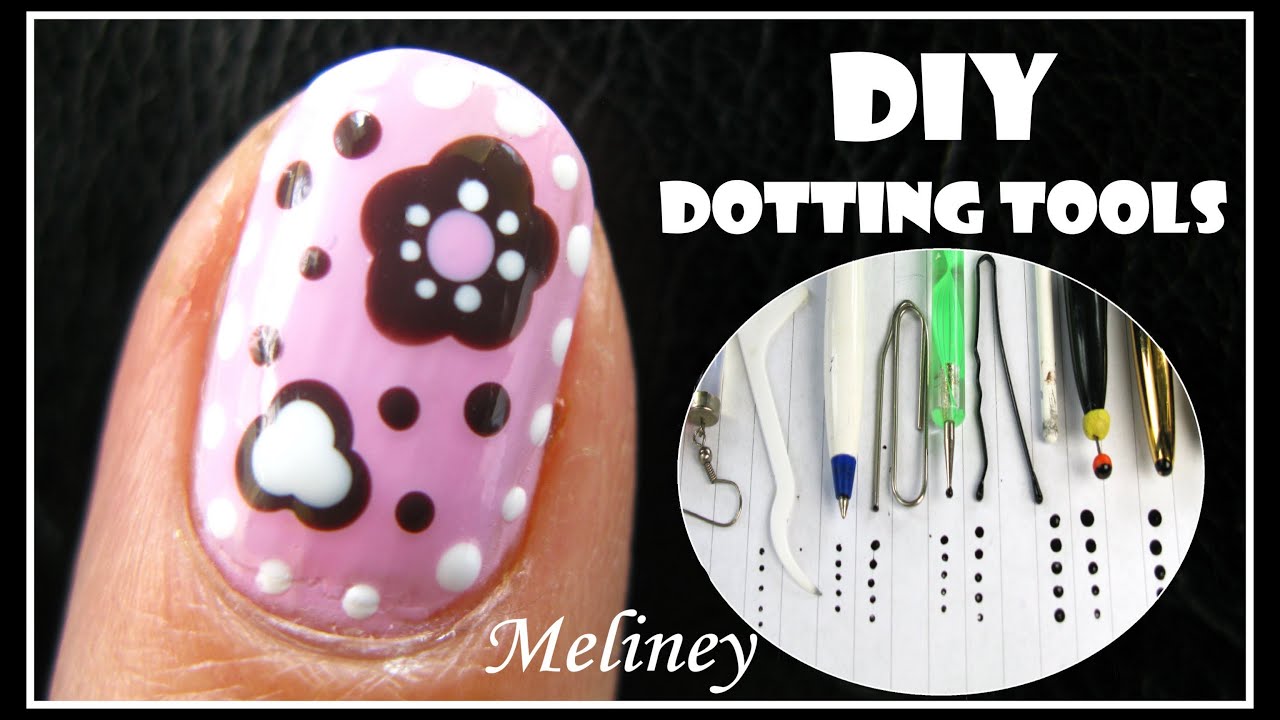
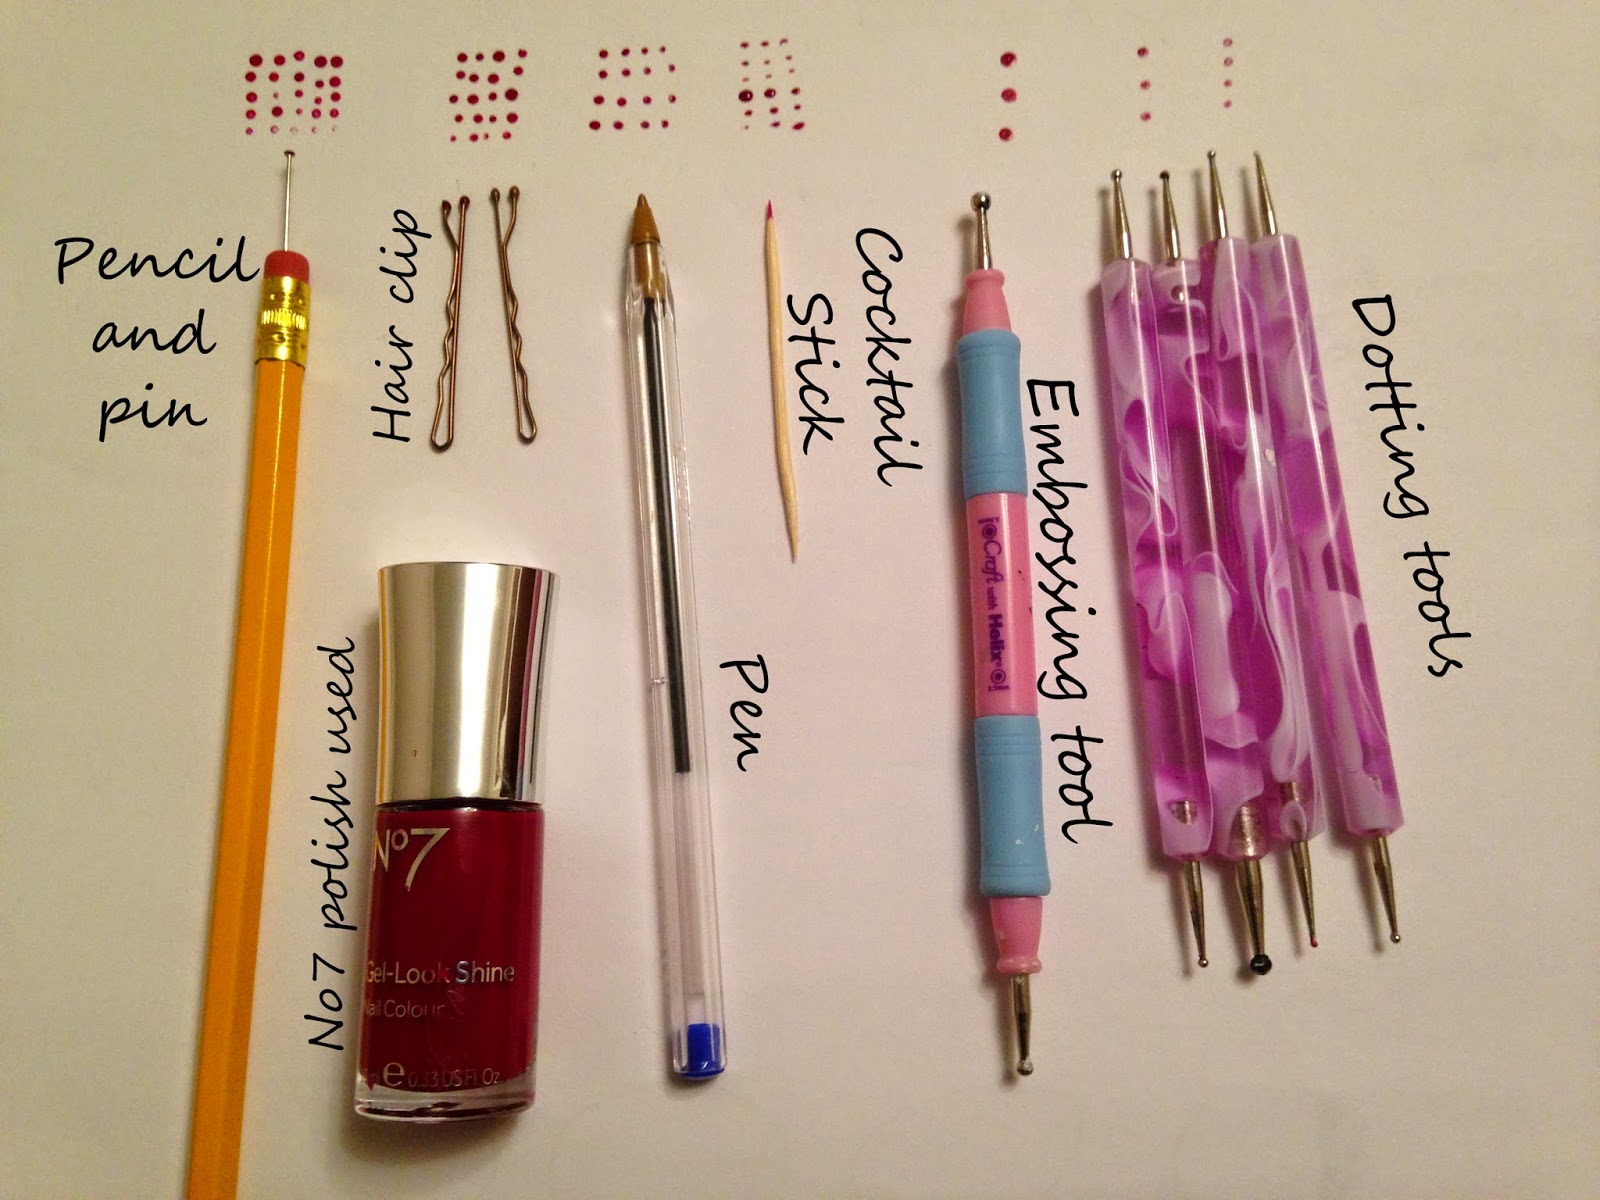
Are you new to the world of nail art and looking for simple yet stunning designs to try? Look no further than dotting tools! These versatile tools can help you create beautiful nail art designs with ease. Here’s a step by step guide on how to use dotting tools for easy nail art designs that even beginners can master. To start off, gather your nail art dotting tools along with your favorite nail polish colors. You can also use a bobby pin or toothpick if you don’t have dotting tools on hand. Make sure to have a base coat and top coat ready as well. Begin by applying a base coat to protect your nails. Let it dry completely before moving on to the fun part – creating your nail art! Choose a featured color for your design and paint your nails with it. Once it’s dry, it’s time to bring out the dotting tools. Dip the largest dotting tool into a contrasting color and gently dab it onto your nail to create a dot. You can also use the same color for a more subtle effect. Experiment with different sizes of dotting tools to create different sizes of dots. You can also use multiple colors to create a fun and colorful design. Let your creativity run wild! Once you’re happy with your design, let it dry completely and then apply a top coat to seal in your design and add shine. Voila! You now have a beautiful and easy dotting tool nail art design.1. How to Create Easy Dotting Tool Nail Art Designs for Beginners


1. How to Create Easy Dotting Tool Nail Art Designs for Beginners


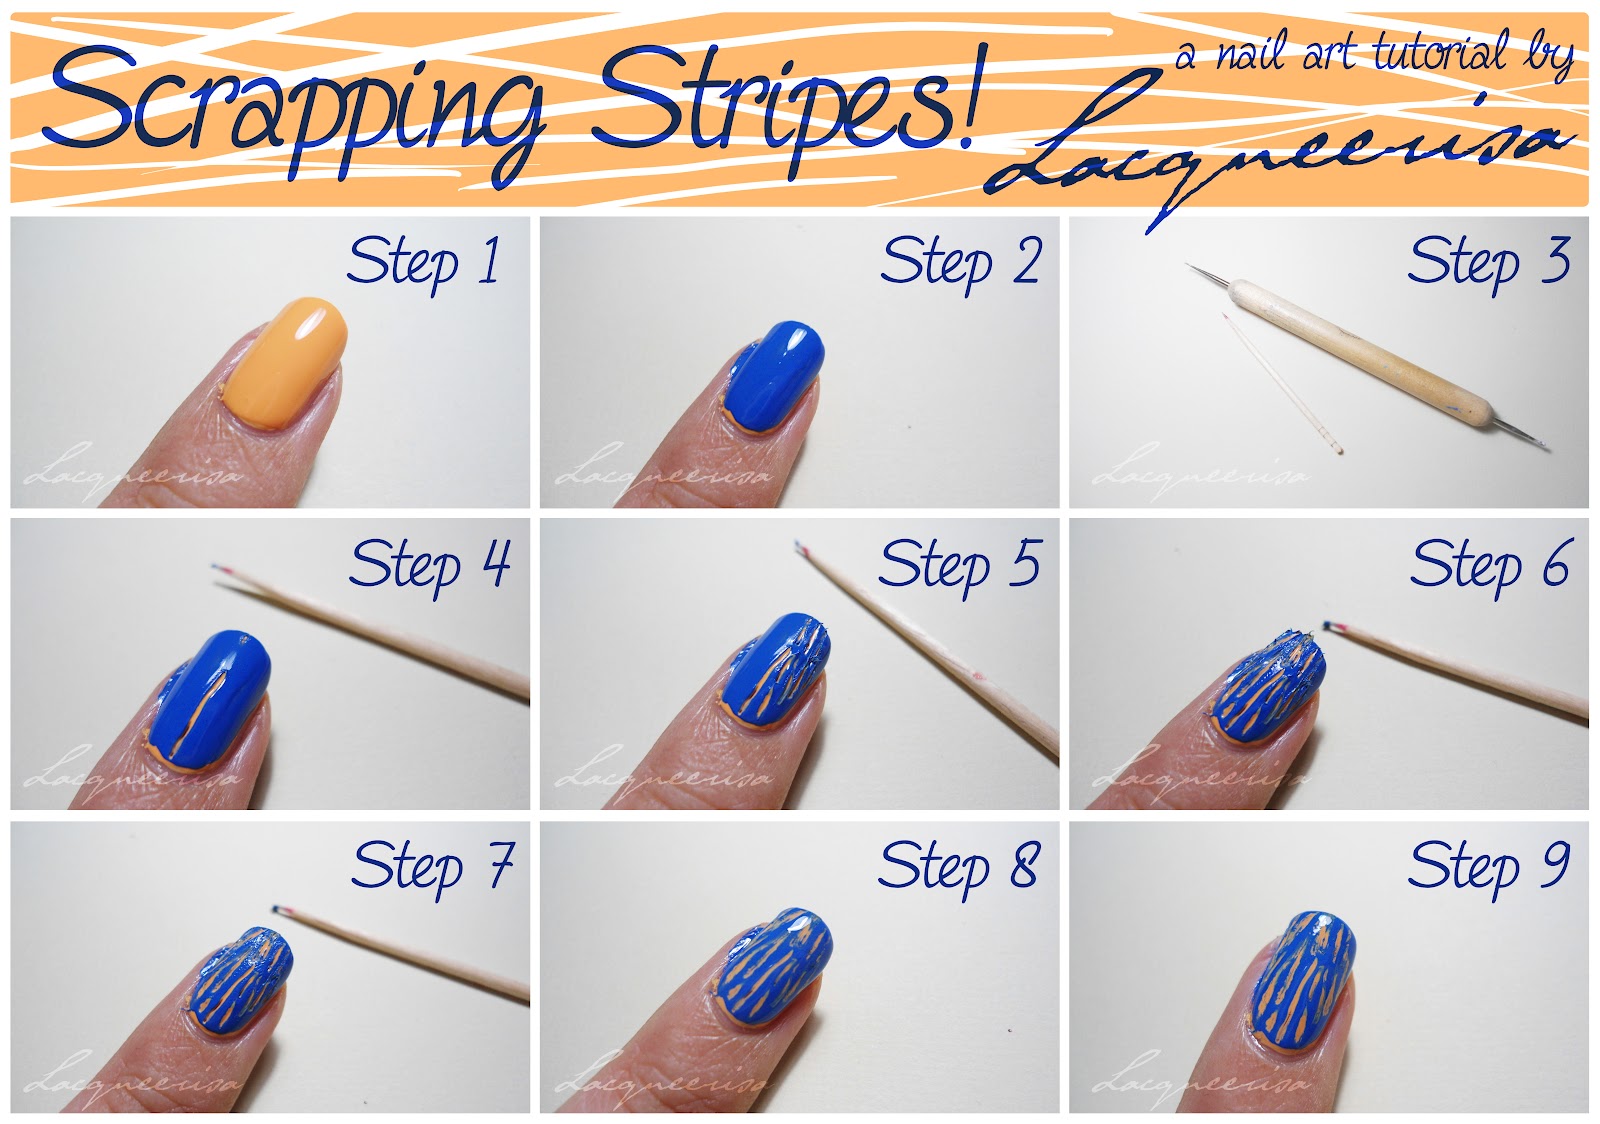
Ready to take your nail art game to the next level? Dotting tools are the perfect tool to create intricate and detailed designs on your nails. Follow this step by step guide to create stunning nail art with dotting tools. Start by preparing your nails with a base coat and letting it dry. Then, choose the color palette for your design and pick out the dotting tools you’ll be using. It’s best to have a range of sizes to create different dot sizes. Start off with a simple design, such as a polka dot pattern. Dip the dotting tool into your chosen color and gently press it onto your nail. Repeat this process with different colors and sizes until you achieve your desired design. For a more intricate design, try creating flowers or geometric shapes using a combination of dotting tools. Remember to let each layer of color dry before adding another one on top. Once your design is complete, let it dry completely before applying a top coat to seal in your design. And there you have it – a stunning nail art design using dotting tools!2. Step by Step Guide to Nail Art with Dotting Tools


2. Step by Step Guide to Nail Art with Dotting Tools


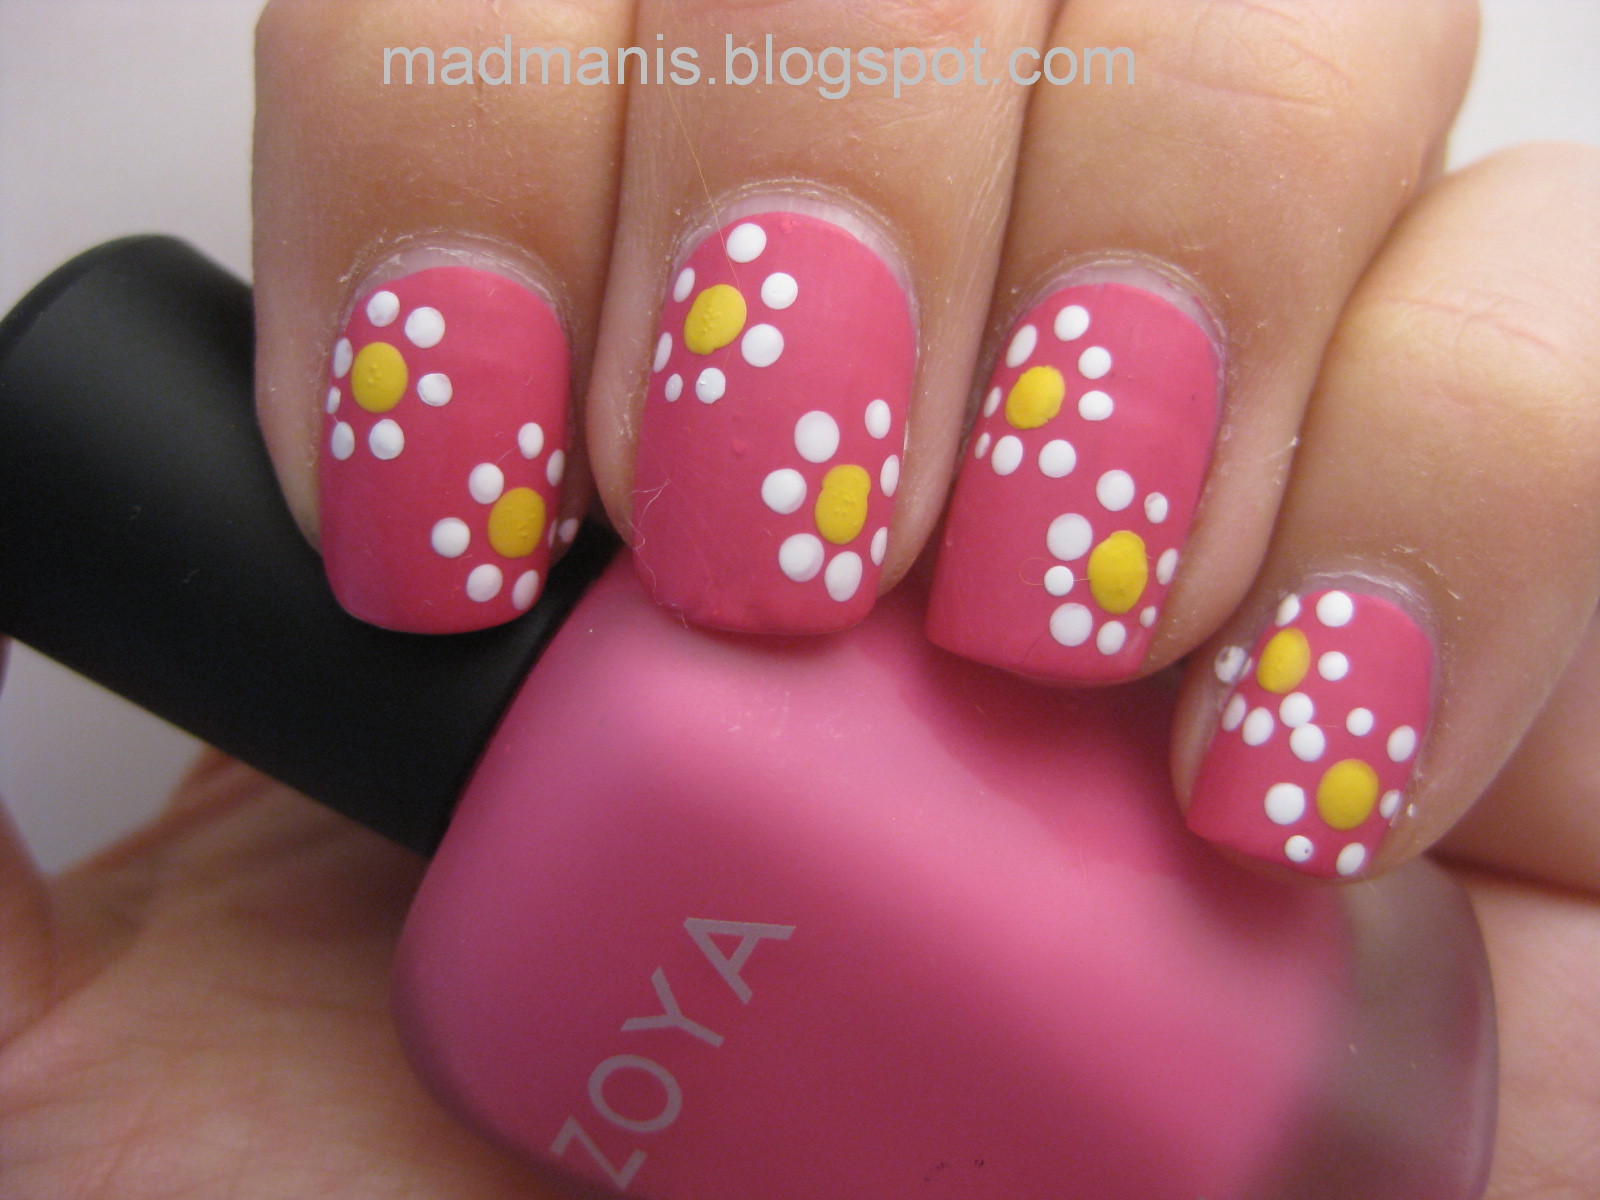
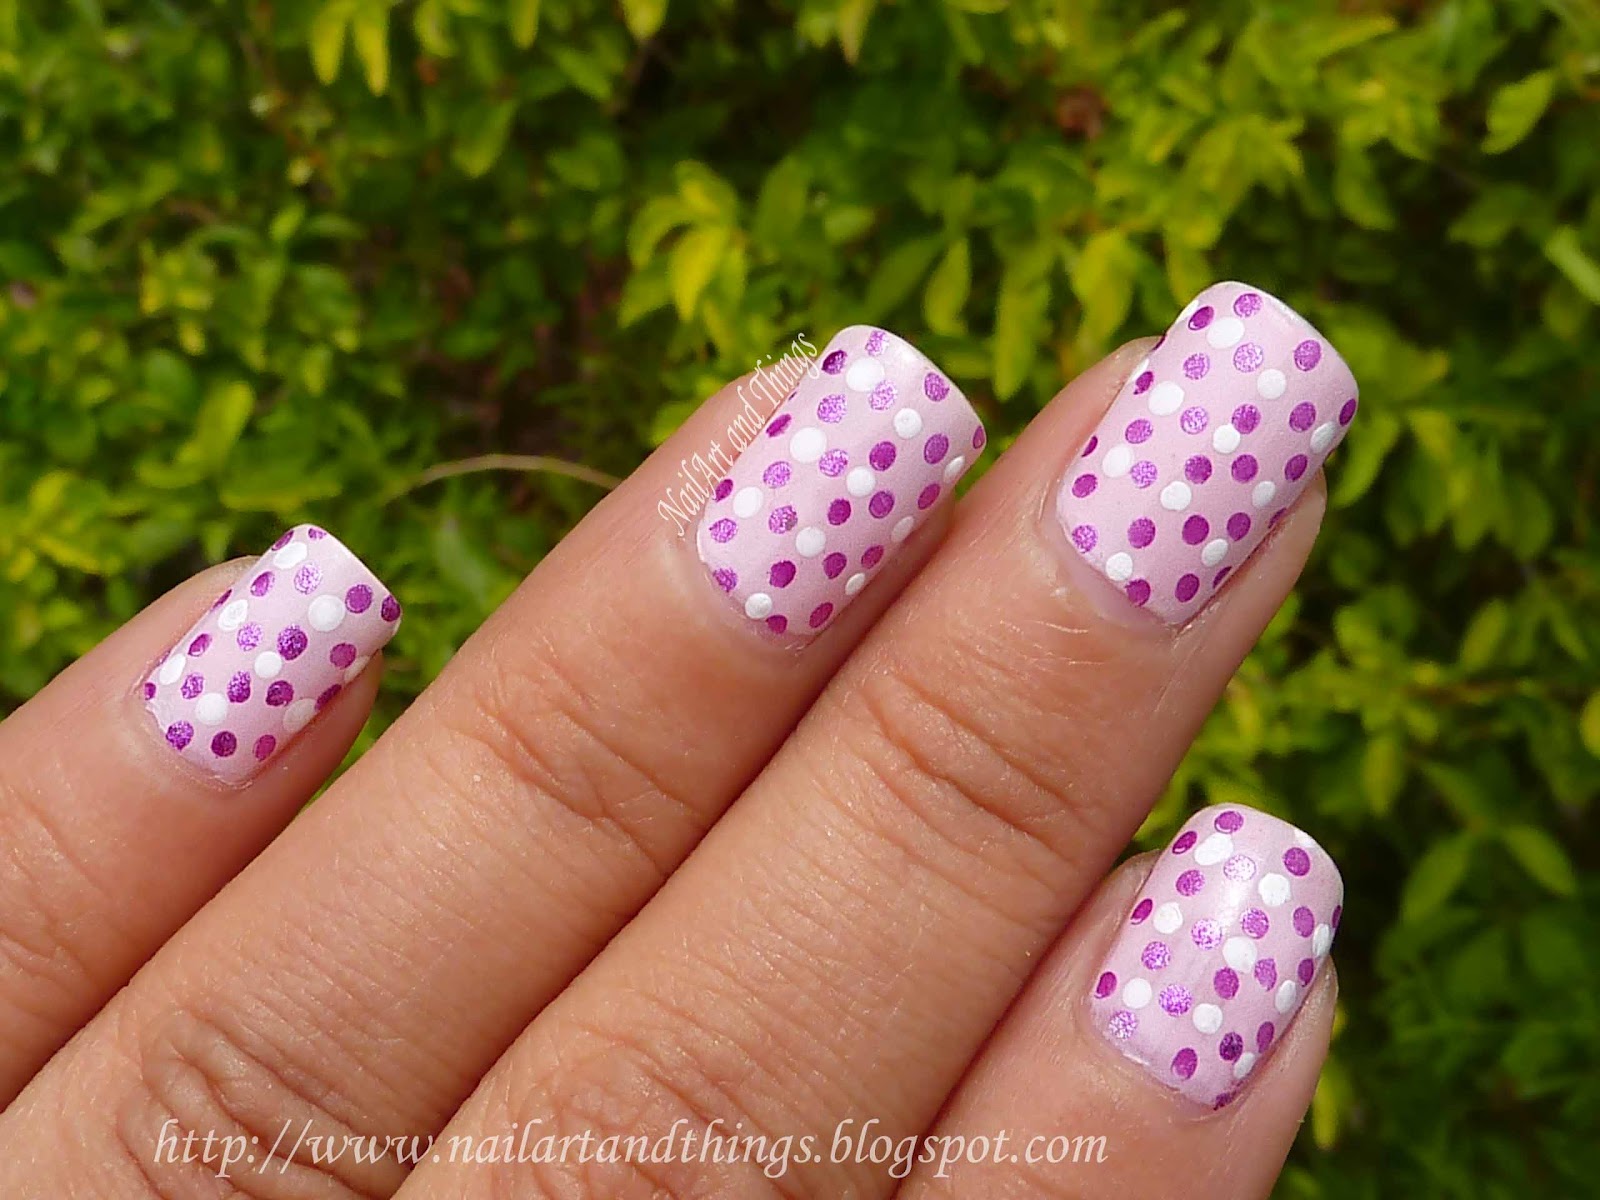
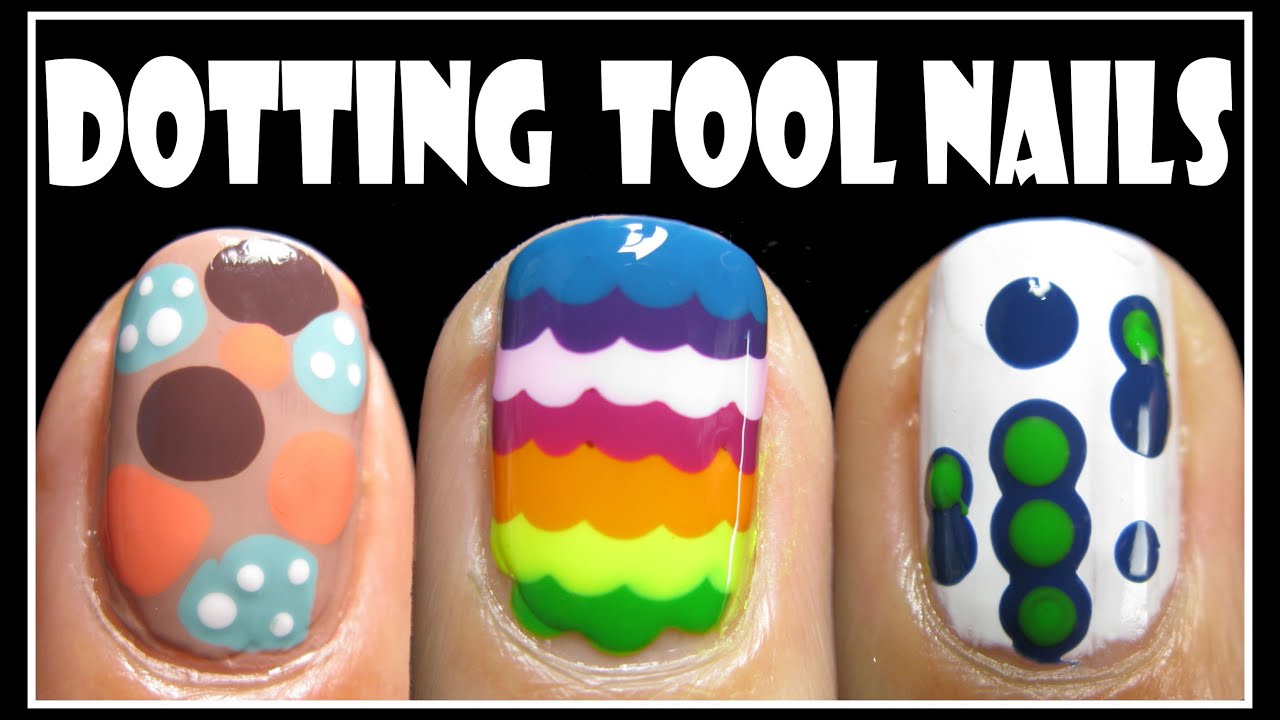
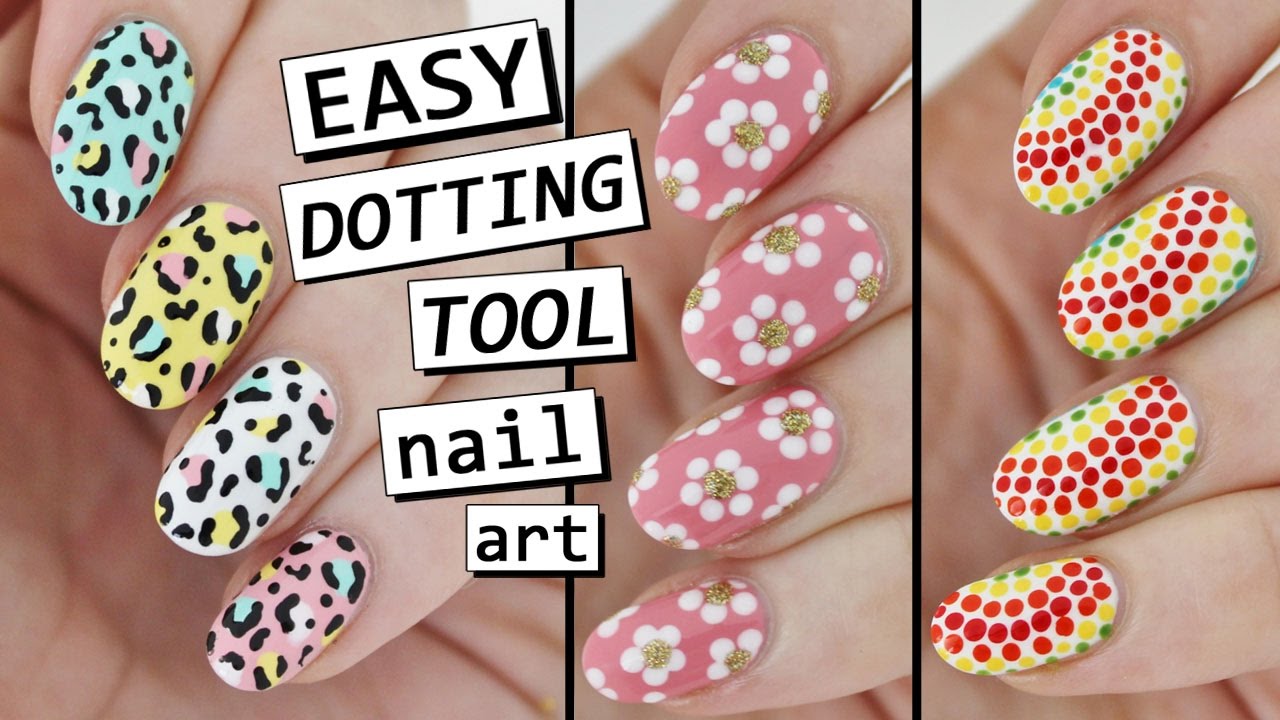
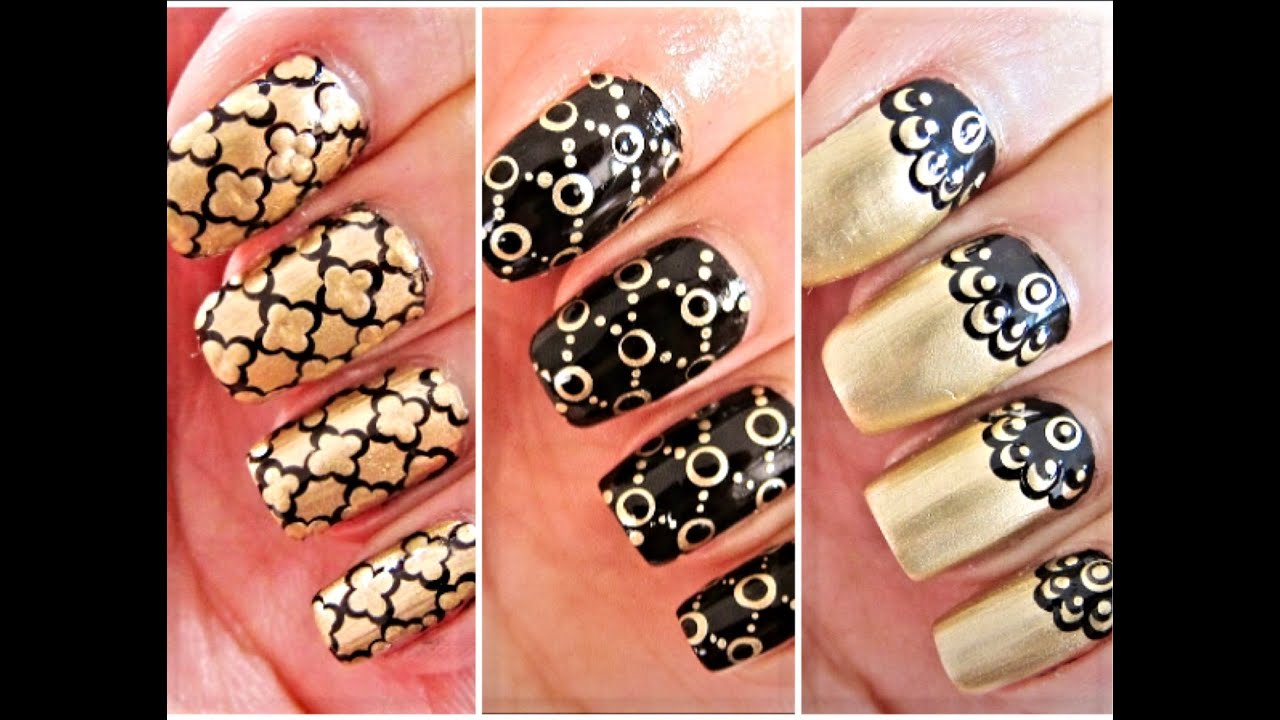
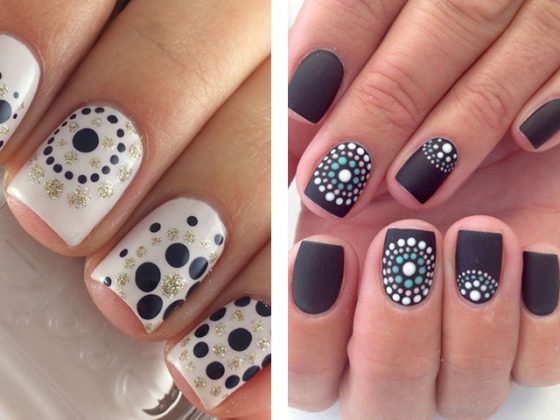
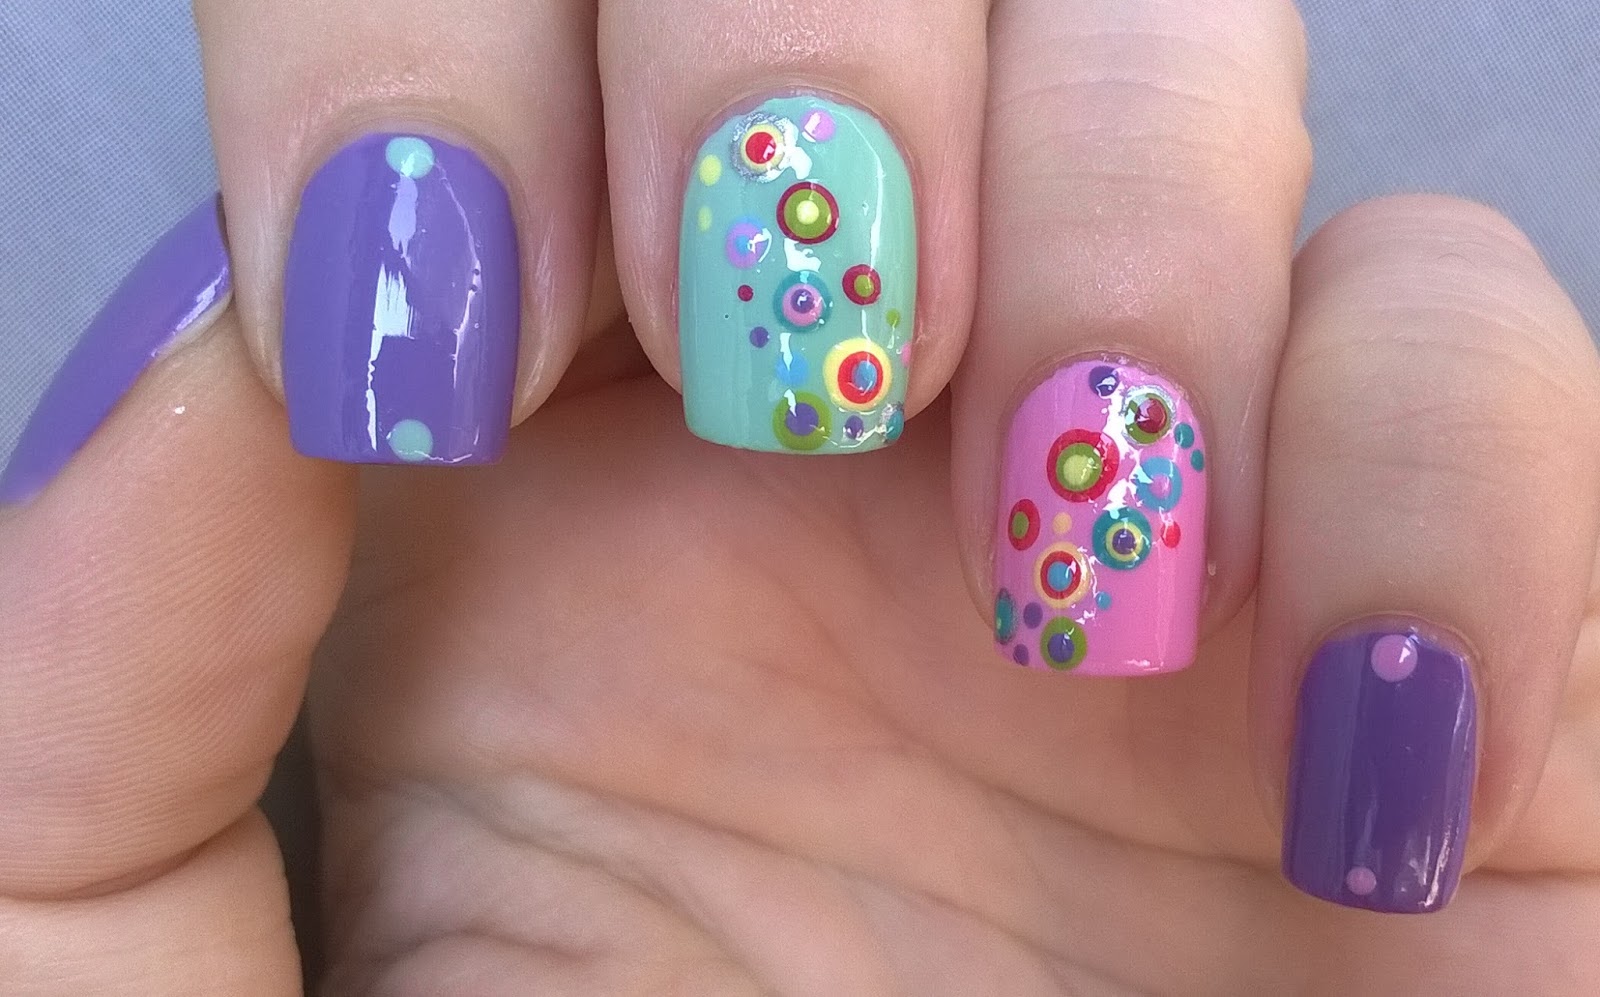
Are you new to the world of nail art and looking for some inspiration? Look no further than these 10 simple dotting tool nail art ideas that are perfect for beginners. 1. Polka Dot Nails: Create a classic and fun look by using dotting tools to create different sized dots in a contrasting color. 2. Rainbow Nails: Use dotting tools to create a rainbow design on your nails using a variety of colors. 3. Floral Nails: Create cute and delicate flowers on your nails using dotting tools to dot different colors in a circular pattern. 4. Geometric Nails: Use dotting tools to create geometric shapes on your nails for a modern and edgy look. 5. Galaxy Nails: Create a dreamy and out-of-this-world design by using dotting tools to create a galaxy effect on your nails. 6. Animal Print Nails: Use dotting tools to create different animal prints, such as leopard or zebra, for a bold and trendy look. 7. Fruit Nails: Create cute fruit designs, such as strawberries or watermelons, using dotting tools for a fun and playful look. 8. Ombré Nails: Use dotting tools to create a gradient effect by dotting different shades of the same color onto your nails. 9. Heart Nails: Create a romantic and sweet look by using dotting tools to create hearts on your nails. 10. Abstract Nails: Let your creativity run wild and create abstract designs using dotting tools for a unique and eye-catching look.3. 10 Simple Dotting Tool Nail Art Ideas for Beginners


3. 10 Simple Dotting Tool Nail Art Ideas for Beginners


Looking for a fun and easy way to create unique nail art designs? Look no further than dotting tools! This nail art tutorial will show you how to use dotting tools to create fun and playful designs on your nails. Start by preparing your nails with a base coat and letting it dry. Then, choose your desired nail polish colors and dotting tools. It’s always a good idea to have a range of sizes to create different dot sizes. For a simple yet eye-catching design, try creating a rainbow on your nails using dotting tools. Start with a white base and use dotting tools to create dots in different colors in a curved pattern. Finish off with a top coat to seal in your design. For a more intricate design, try creating flowers on your nails using dotting tools. Use a smaller dotting tool to create the center of the flower in a contrasting color, and then use a larger dotting tool to create petals around it. Once you’re comfortable with using dotting tools, the possibilities are endless. Have fun and experiment with different designs and color combinations to create your own unique nail art.4. Nail Art Tutorial: Using Dotting Tools for Fun Designs


4. Nail Art Tutorial: Using Dotting Tools for Fun Designs
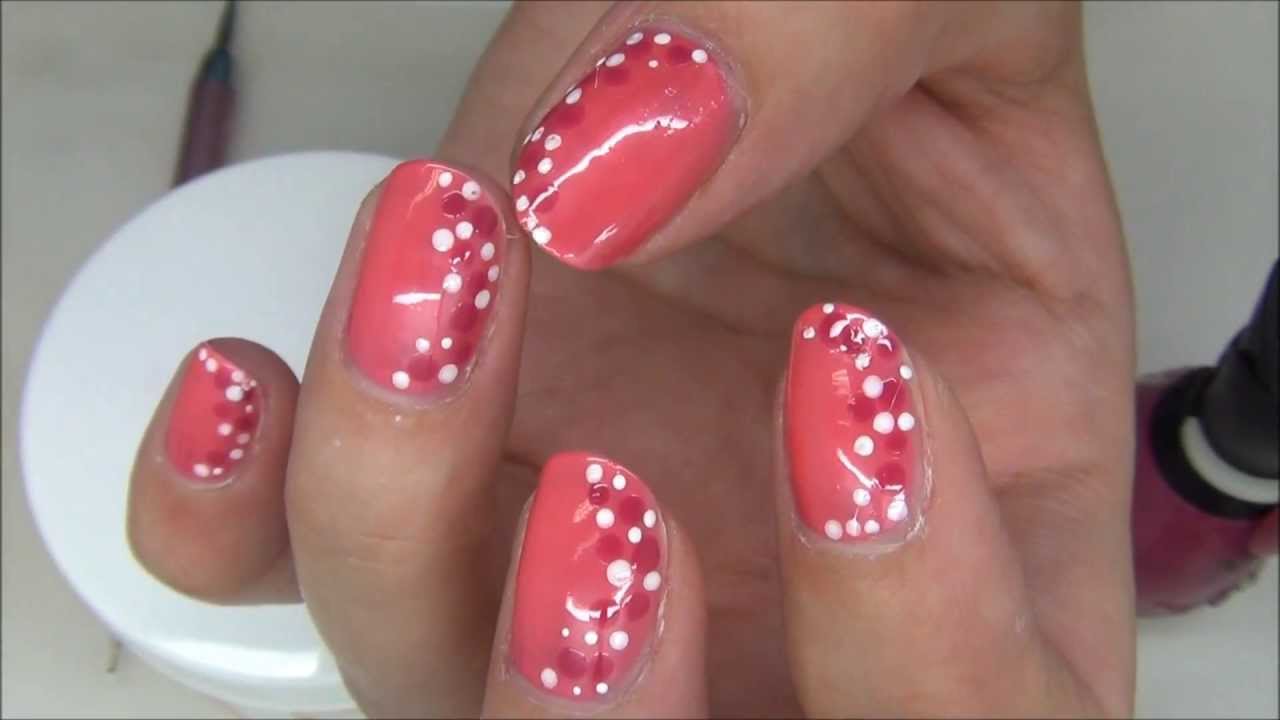
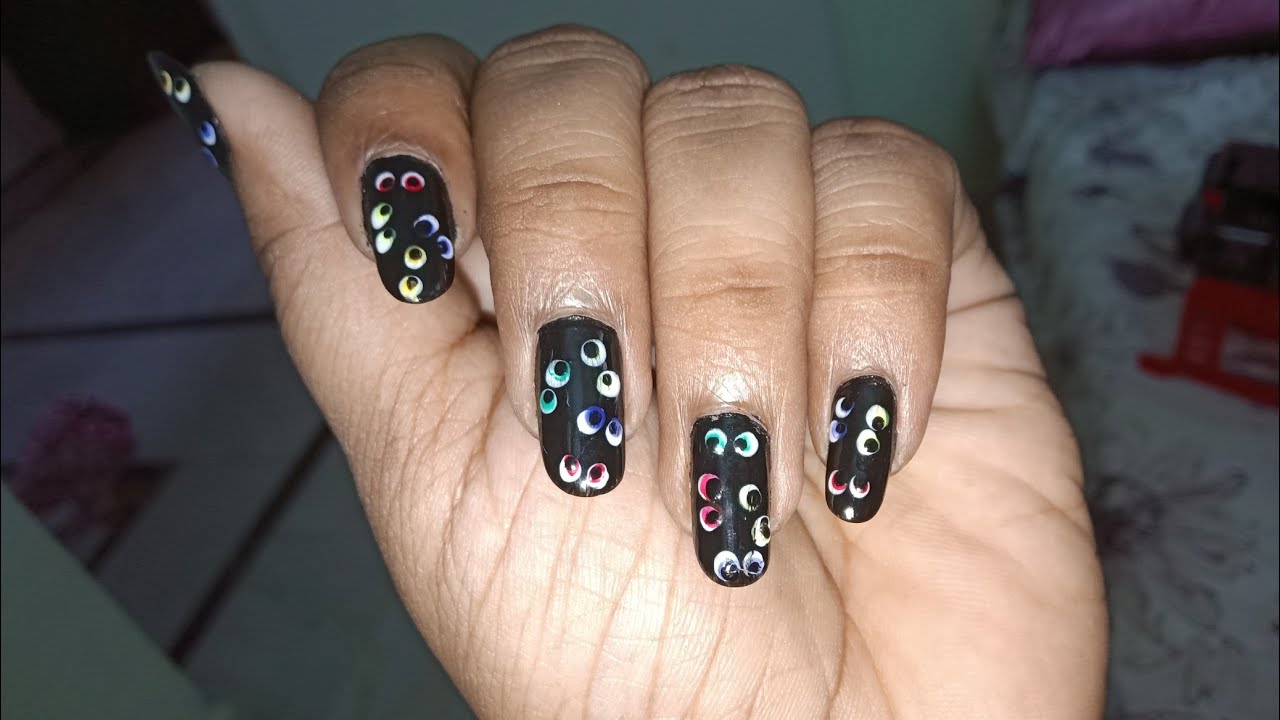
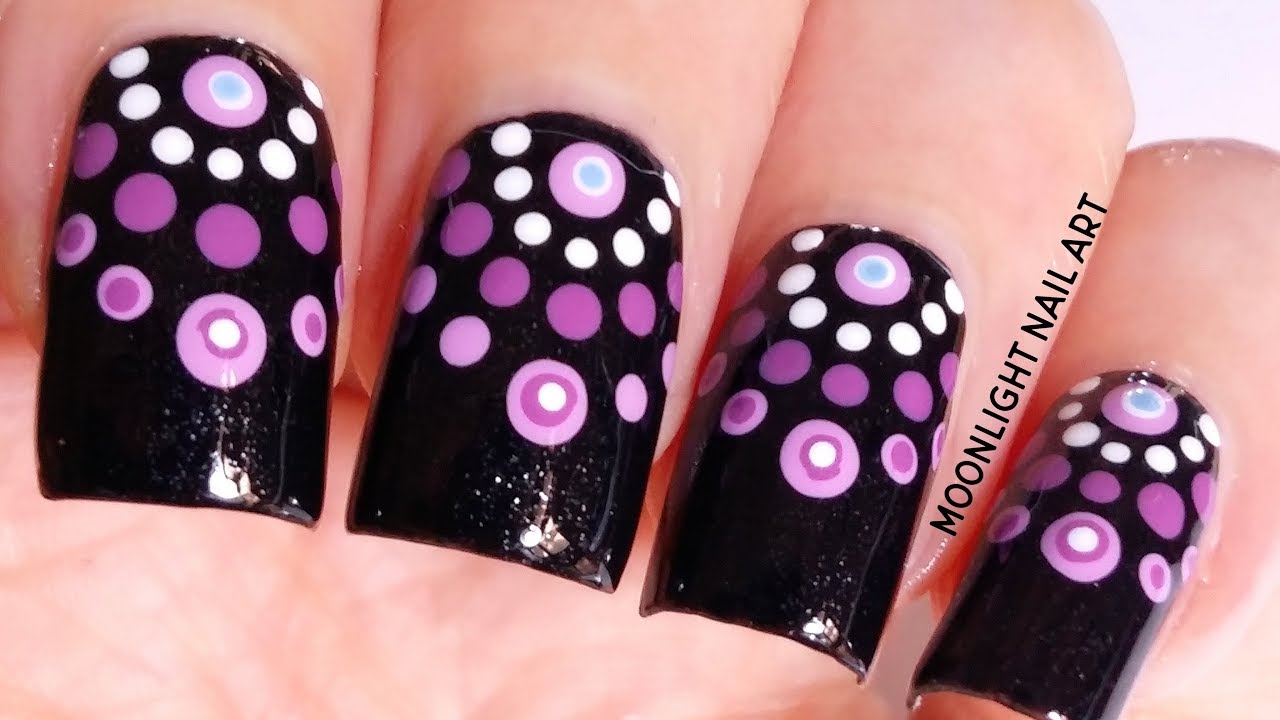

Whether you’re a beginner or a seasoned pro, dotting tools are a must-have for any nail art enthusiast. Here are some easy dotting tool nail art designs that are suitable for every skill level. 1. Dotted French Tips: Create a twist on the classic French manicure by using dotting tools to create dots along the tips of your nails. 2. Dotted Accent Nail: Keep it simple with a dotted accent nail by using dotting tools to create a single dot on one nail. 3. Dotted Stripes: Create a playful look by using dotting tools to create dots in a striped pattern on your nails. 4. Dotted Hearts: Show some love with a cute and romantic design by using dotting tools to create hearts on your nails. 5. Dotted Ombré: Create a gradient effect by using dotting tools to create small dots in different shades of the same color on your nails. 6. Dotted Flowers: Create delicate and feminine flowers on your nails using dotting tools and different colors. 7. Dotted Galaxy: Get a dreamy and out-of-this-world look by using dotting tools to create a galaxy design on your nails. 8. Dotted Animal Print: Use dotting tools to create different animal prints, such as leopard or zebra, for a bold and trendy look. 9. Dotted Abstract: Let your creativity shine by creating abstract designs using dotting tools for a unique and eye-catching look. 10. Dotted Rainbow: Create a colorful and fun look by using dotting tools to create a rainbow design on your nails.5. Easy Dotting Tool Nail Art Designs for Every Skill Level
5. Easy Dotting Tool Nail Art Designs for Every Skill Level

Ready to take your nail art game to the next level? Dotting tools are the perfect tool to create intricate and detailed designs on your nails. Follow this step by step guide to create stunning nail art with dotting tools. Start by preparing your nails with a base coat and letting it dry. Then, choose the color palette for your design and pick out the dotting tools you’ll be using. It’s best to have a range of sizes to create different dot sizes. Start off with a simple design, such as a polka dot pattern. Dip the dotting tool into your chosen color and gently press it onto your nail. Repeat this process with different colors and sizes until you achieve your desired design. For a more intricate design, try creating flowers or geometric shapes using a combination of dotting tools. Remember to let each layer of color dry before adding another one on top. Once your design is complete, let it dry completely before applying a top coat to seal in your design. And there you have it – a stunning nail art design using dotting tools!6. Step by Step Guide to Creating Stunning Nail Art with Dotting Tools


6. Step by Step Guide to Creating Stunning Nail Art with Dotting Tools

Looking for some inspiration for your next nail art design? Look no further than these 10 creative dotting tool nail art ideas that you can easily recreate at home. 1. Abstract Dots: Let your creativity run wild and create abstract designs using dotting tools for a unique and eye-catching look. 2. Colorful Dots: Use dotting tools to create dots in a variety of bright and bold colors for a fun and playful look. 3. Tribal Dots: Use dotting tools to create tribal-inspired designs on your nails for a trendy and edgy look. 4. Dotted French Manicure: Put a twist on the classic French manicure by using dotting tools to create dots along the tips of your nails. 5. Dotted Ombré: Create a gradient effect by using dotting tools to create small dots in different shades of the same color on your nails. 6. Dotted Stripes: Create a playful look by using dotting tools to create dots in a striped pattern on your nails. 7. Dotted Hearts: Show some love with a cute and romantic design by using dotting tools to create hearts on your nails. 8. Dotted Animal Print: Use dotting tools to create different animal prints, such as leopard or zebra, for a bold and trendy look. 9. Dotted Galaxy: Get a dreamy and out-of-this-world look by using dotting tools to create a galaxy design on your nails. 10. Dotted Flowers: Create delicate and feminine flowers on your nails using dotting tools and different colors.7. 10 Creative Dotting Tool Nail Art Ideas to Try at Home

7. 10 Creative Dotting Tool Nail Art Ideas to Try at Home
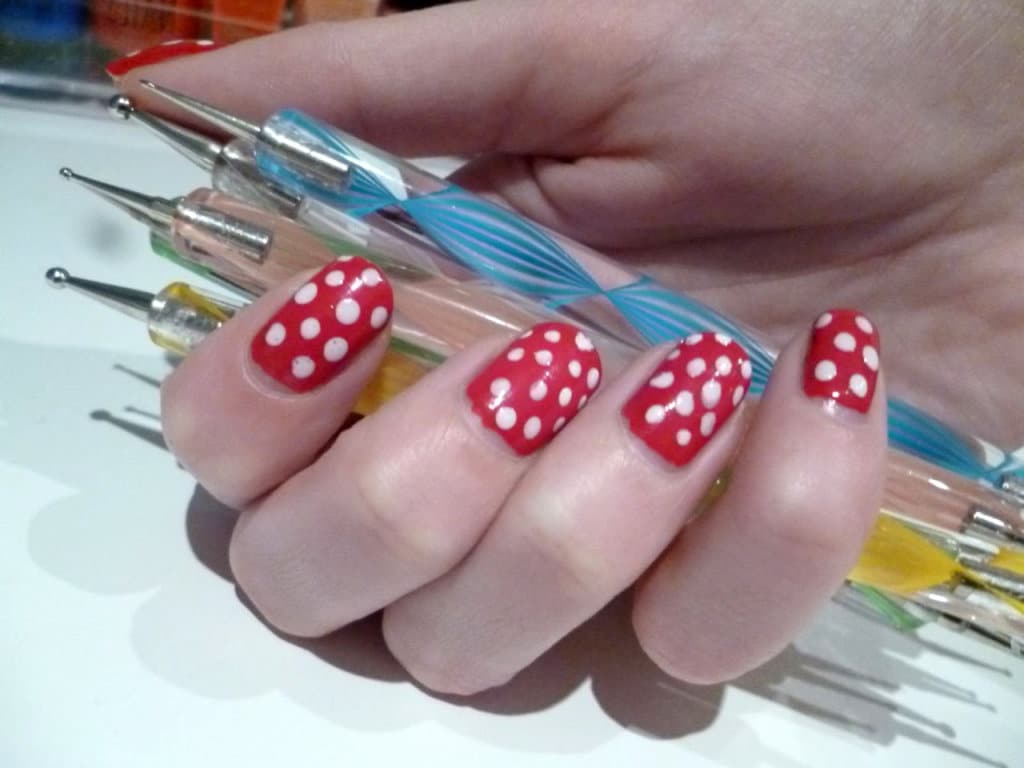

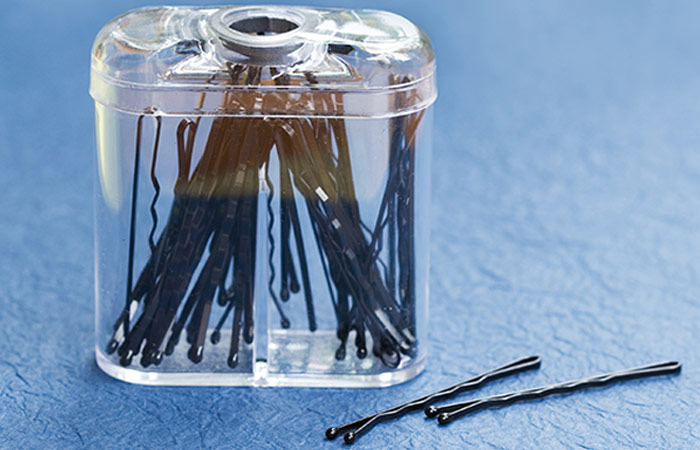
Using dotting tools for nail art can seem intimidating at first, but with a few tips and tricks, you can create perfect designs every time. Here are some tips to keep in mind when using dotting tools for nail art. - Start with a small dot and gradually increase the size for a more natural and effortless look. - Mix and match different sizes of dotting tools to create a variety of dot sizes and designs. - Dip the dotting tool into nail polish remover before switching to a different color to avoid mixing colors or creating a messy design. - Use a toothpick or bobby pin if you don’t have dotting tools on hand. - Practice on a piece of paper before trying a design on your nails to get a feel for the dotting tool. With these tips, you’ll be creating perfect nail art designs with dotting tools in no time!8. Nail Art with Dotting Tools: Tips and Tricks for Perfect Designs
8. Nail Art with Dotting Tools: Tips and Tricks for Perfect Designs


Ready to unleash your creative side and try some nail art with dotting tools? Follow this step by step tutorial to create a stunning design on your nails. Start by preparing your nails with a base coat and letting it dry. Then, choose your desired nail polish colors and dotting tools. It’s always a good idea to have a range of sizes to create different dot sizes. For a simple yet eye-catching design, try creating a rainbow on your nails using dotting tools. Start with a white base and use dotting tools to create dots in different colors in a curved pattern. Finish off with a top coat to seal in your design. For a more intricate design, try creating flowers on your nails using dotting tools. Use a smaller dotting tool to create the center of the flower in a contrasting color, and then use a larger dotting tool to create petals around it. Once you’re comfortable with using dotting tools, the possibilities are endless. Have fun and experiment with different designs and color combinations to create your own unique nail art.9. Step by Step Tutorial for Nail Art with Dotting Tools
9. Step by Step Tutorial for Nail Art with Dotting Tools


Dotting tools are an essential tool for any nail art enthusiast. With a little practice and creativity, you can create stunning designs using dotting tools. Here’s a comprehensive guide to mastering the art of nail art with dotting tools. - Start with simple designs, such as polka dots or stripes, to get a feel for using dotting tools. - Experiment with different sizes and colors of dotting tools to create different dot sizes and designs. - Use a toothpick or bobby pin if you don’t have dotting tools on hand. - Let each layer of color dry completely before adding another one on top to avoid smudging. - Have fun and be creative! There are no rules when it comes to nail art, so let your imagination run wild. With this guide, you’ll be a pro at creating stunning nail art with dotting tools in no time.10. Mastering the Art of Nail Art with Dotting Tools: A Comprehensive Guide

10. Mastering the Art of Nail Art with Dotting Tools: A Comprehensive Guide


Nail Art with Dotting Tools Step by Step: Elevate Your Nail Game

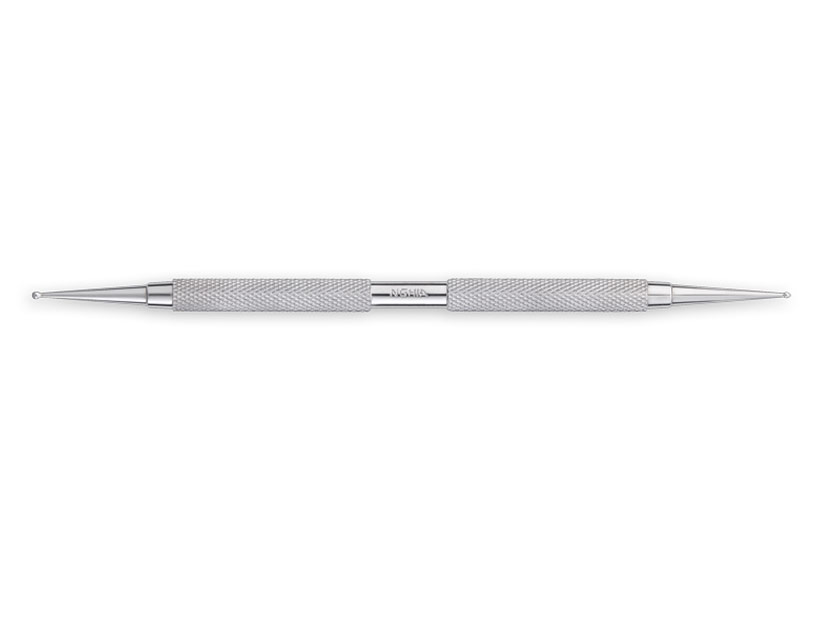
What are Dotting Tools?
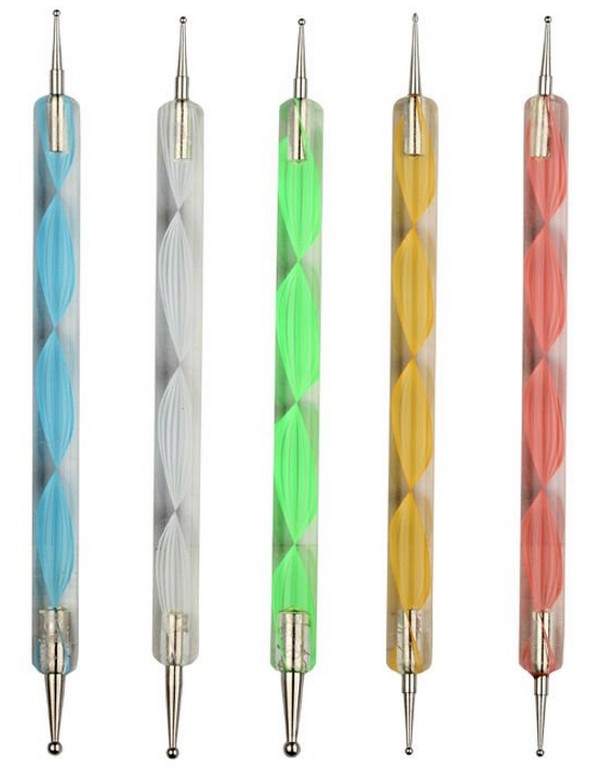
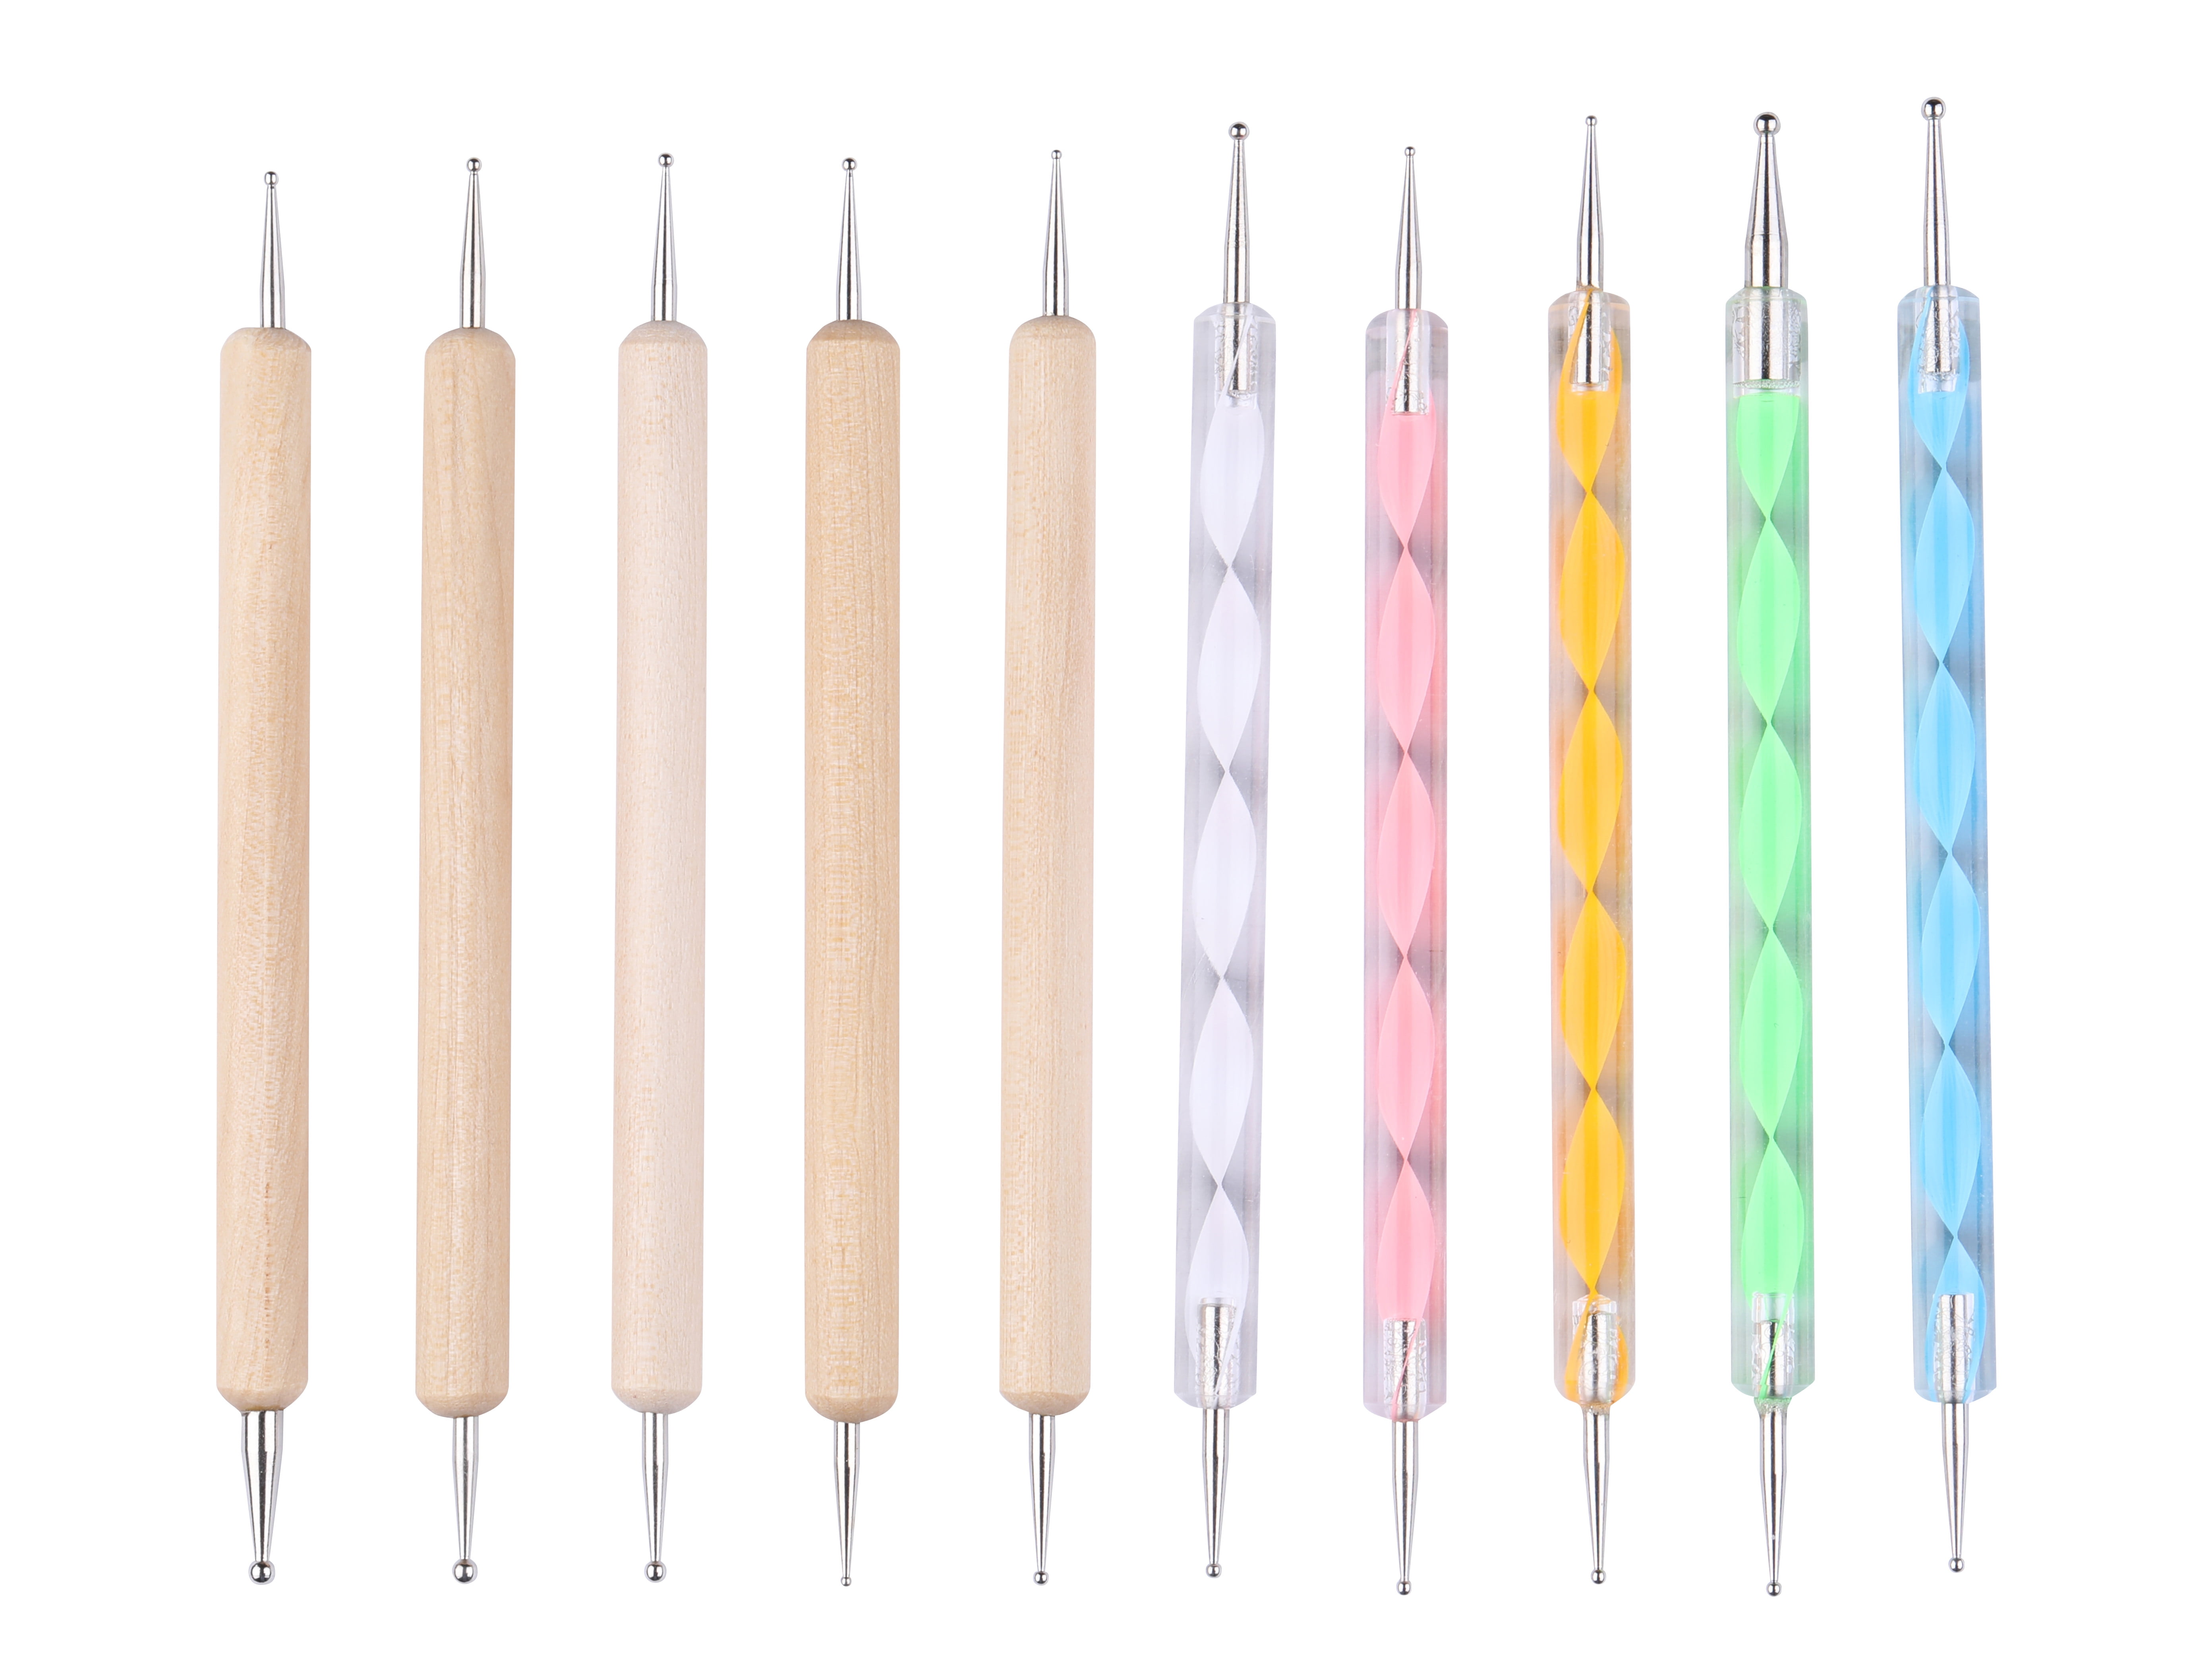
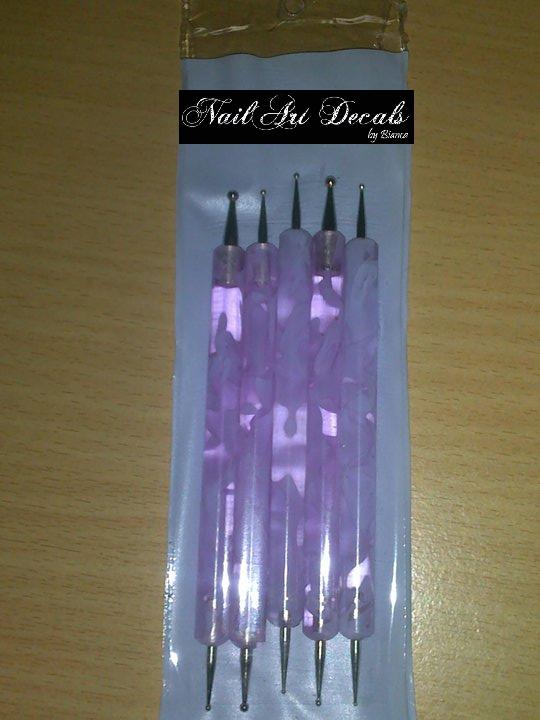
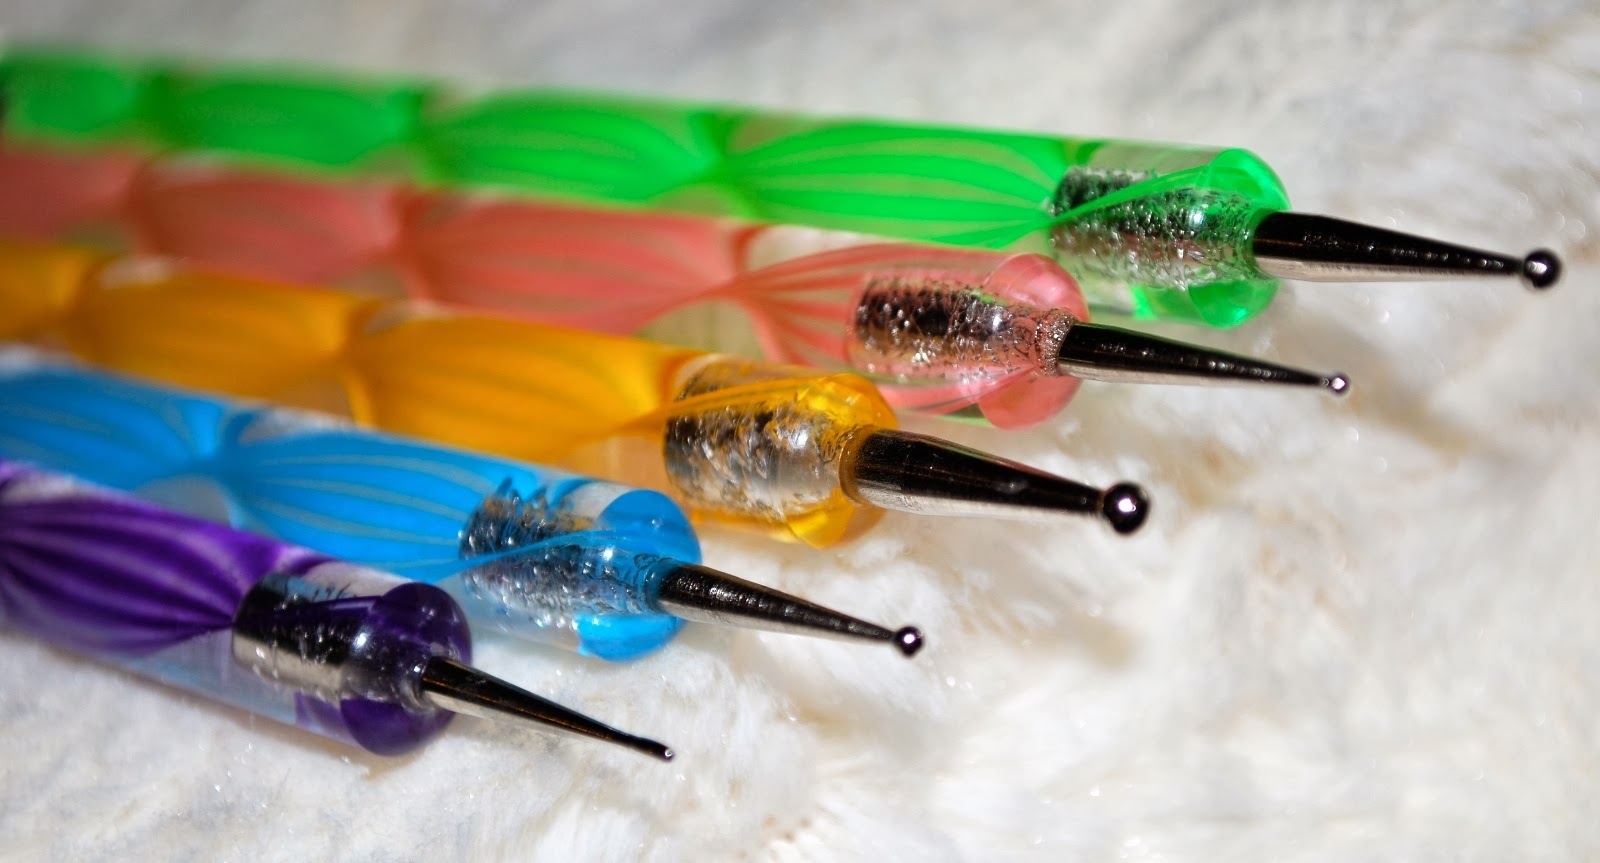
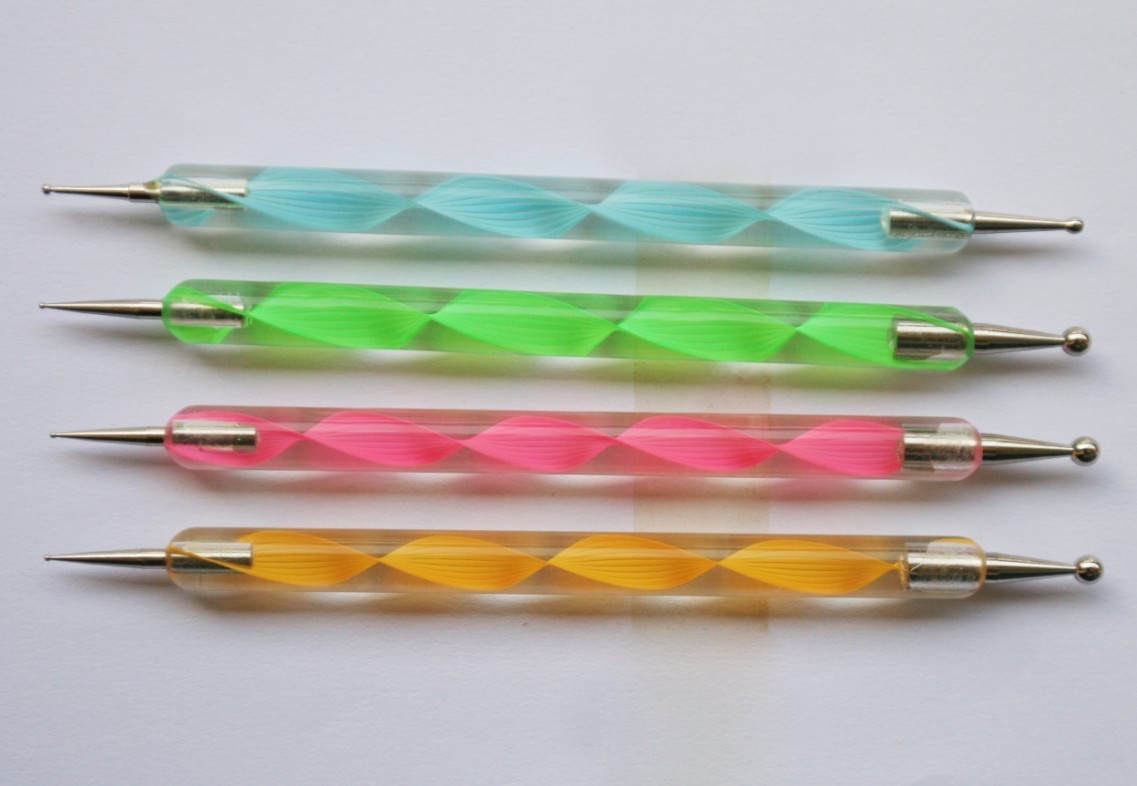
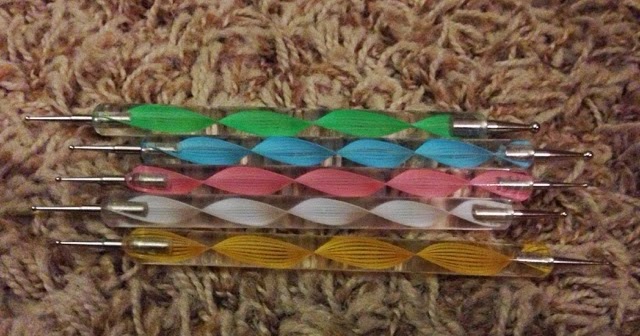
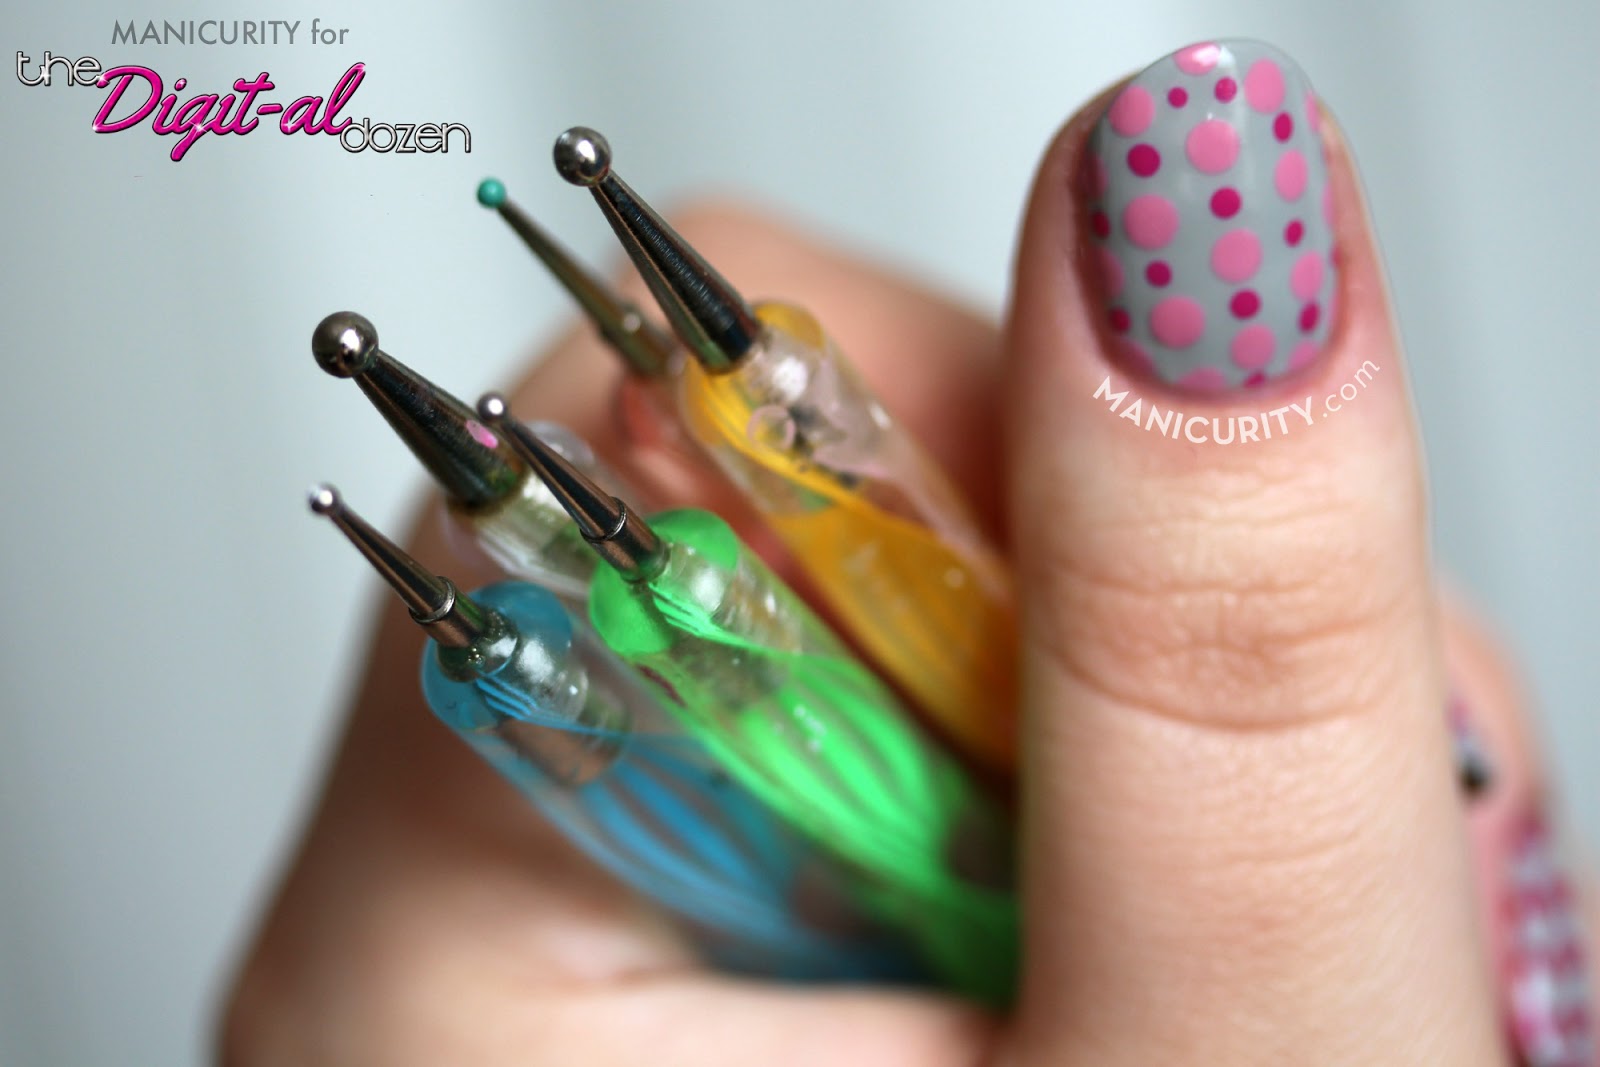
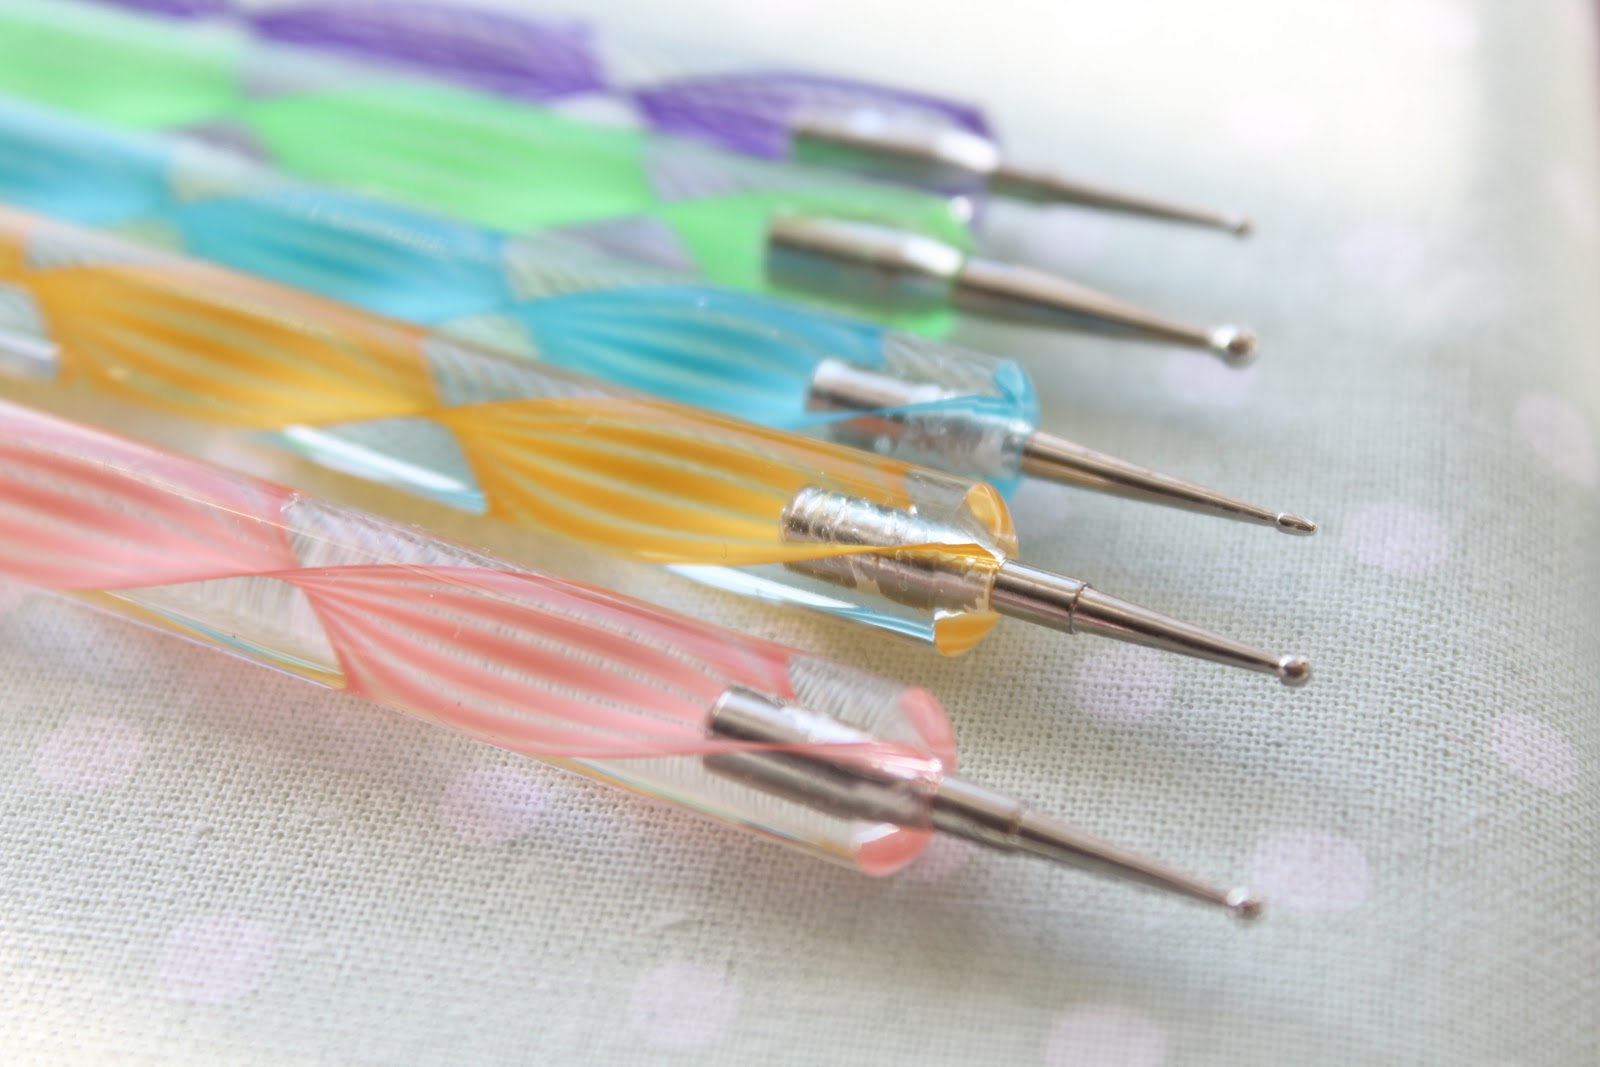
 Dotting tools are small, double-ended tools that are used to create intricate nail designs. One end is usually pointed, while the other end has a round ball or dotting tip. These tools come in various sizes, making it easy to create different sized dots on your nails. They are a must-have for any nail art enthusiast and can take your nail game to the next level.
Step by Step Guide to Nail Art with Dotting Tools
 Now that you know what dotting tools are, let's dive into how you can use them to create beautiful nail art designs. Follow these simple steps to achieve a professional-looking manicure at home:
Step 1:
Prepare Your Nails
Before starting any nail art, it's essential to prep your nails. Start by removing any old nail polish and shaping your nails. Then, push back your cuticles and trim any hangnails. Finally, apply a base coat to protect your nails and allow the design to last longer.
Step 2:
Choose Your Design
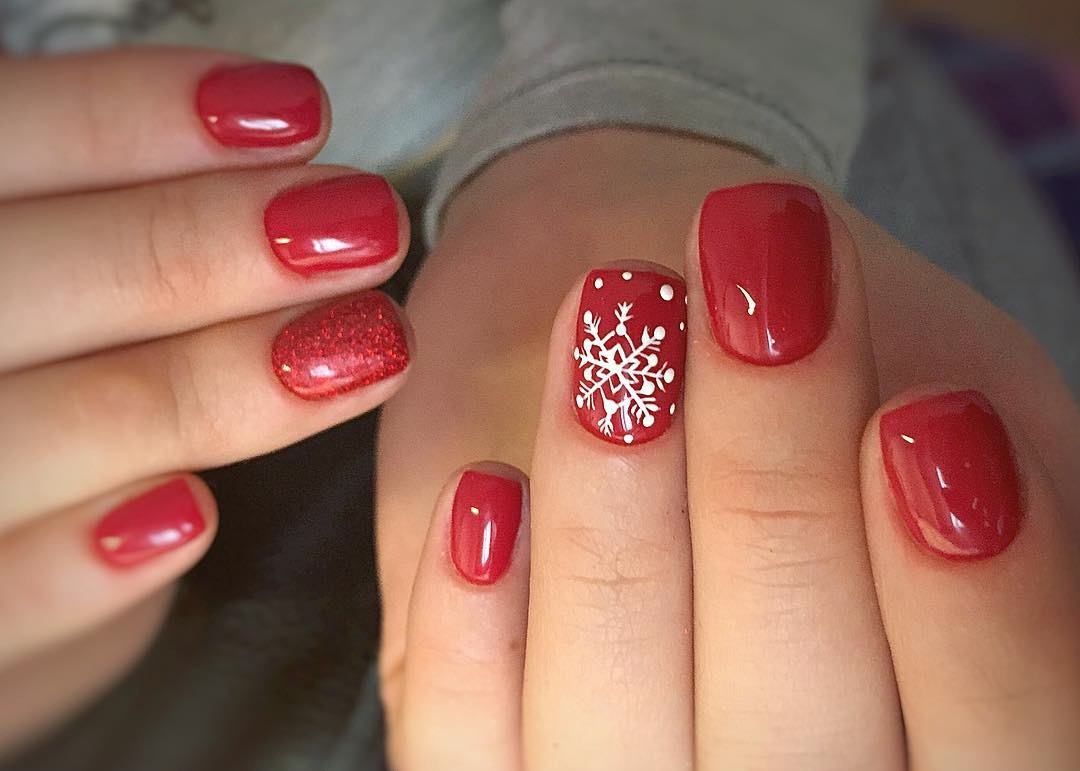
The options are endless when it comes to nail art with dotting tools. You can create polka dots, flowers, hearts, or any other design you can imagine. It's best to have a design in mind before starting to ensure a cohesive look.
Step 3:
Pick Your Colors
Choose the colors you want to use for your design. You can go for a monochromatic look or use different colors to create a more vibrant look. Make sure to have a flat surface to place your nail polishes on for easy access.
Step 4:
Practice on Paper
Before jumping into your nails, it's a good idea to practice your design on paper first. This will help you get a feel for the dotting tool and how much pressure you need to create the perfect dot.
Step 5:
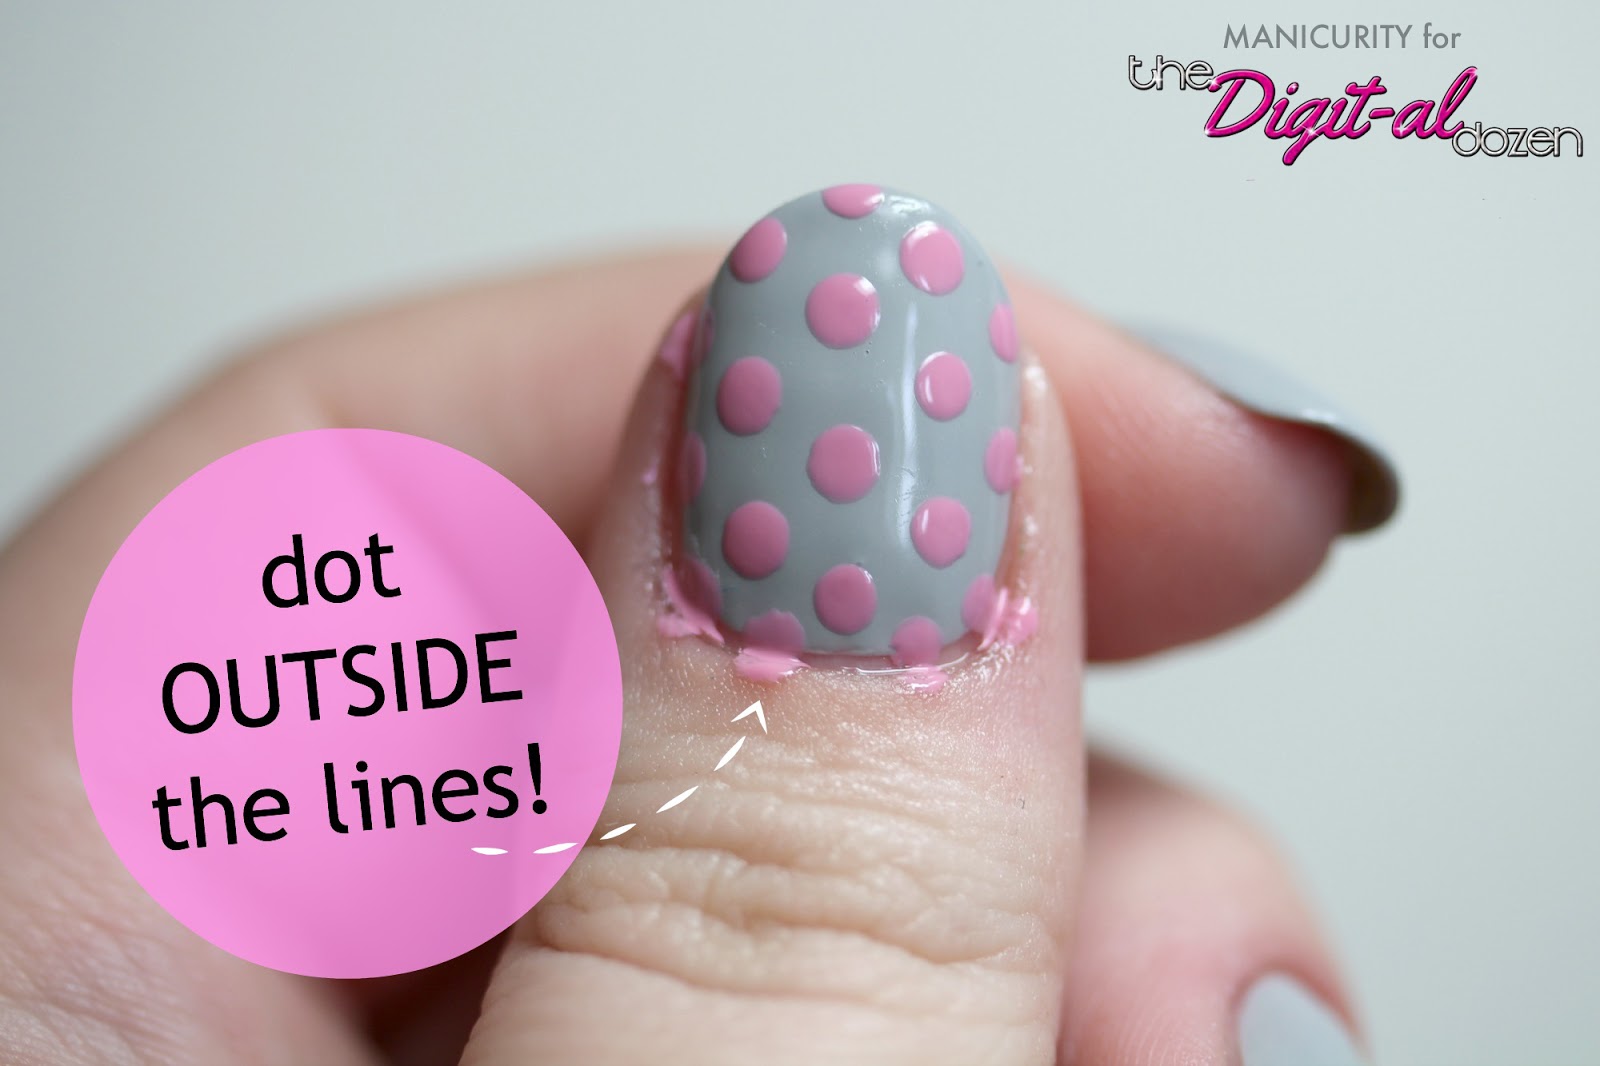
Start Dotting
Now it's time to start creating your design on your nails. Dip the dotting tool into your chosen nail polish and start dotting onto your nails. You can vary the sizes and placement of the dots to create a unique and eye-catching design.
Step 6:
Clean Up
Once you're happy with your design, let it dry for a few minutes. Then, use a small brush dipped in nail polish remover to clean up any excess polish around your nails.
Step 7:
Finish with Top Coat
To seal in your design and make it last longer, apply a top coat over your nails. This will also give your nails a shiny and professional finish.
Now that you know what dotting tools are, let's dive into how you can use them to create beautiful nail art designs. Follow these simple steps to achieve a professional-looking manicure at home:
Step 1:
Prepare Your Nails
Before starting any nail art, it's essential to prep your nails. Start by removing any old nail polish and shaping your nails. Then, push back your cuticles and trim any hangnails. Finally, apply a base coat to protect your nails and allow the design to last longer.
Step 2:
Choose Your Design
The options are endless when it comes to nail art with dotting tools. You can create polka dots, flowers, hearts, or any other design you can imagine. It's best to have a design in mind before starting to ensure a cohesive look.
Step 3:
Pick Your Colors
Choose the colors you want to use for your design. You can go for a monochromatic look or use different colors to create a more vibrant look. Make sure to have a flat surface to place your nail polishes on for easy access.
Step 4:
Practice on Paper
Before jumping into your nails, it's a good idea to practice your design on paper first. This will help you get a feel for the dotting tool and how much pressure you need to create the perfect dot.
Step 5:
Start Dotting
Now it's time to start creating your design on your nails. Dip the dotting tool into your chosen nail polish and start dotting onto your nails. You can vary the sizes and placement of the dots to create a unique and eye-catching design.
Step 6:
Clean Up
Once you're happy with your design, let it dry for a few minutes. Then, use a small brush dipped in nail polish remover to clean up any excess polish around your nails.
Step 7:
Finish with Top Coat
To seal in your design and make it last longer, apply a top coat over your nails. This will also give your nails a shiny and professional finish.
Final Thoughts
 Nail art with dotting tools is a fun and creative way to elevate your nail game. With a little practice and patience, you can create beautiful and unique designs that will make your nails stand out. So, grab your dotting tools and start creating your own nail art masterpieces!


