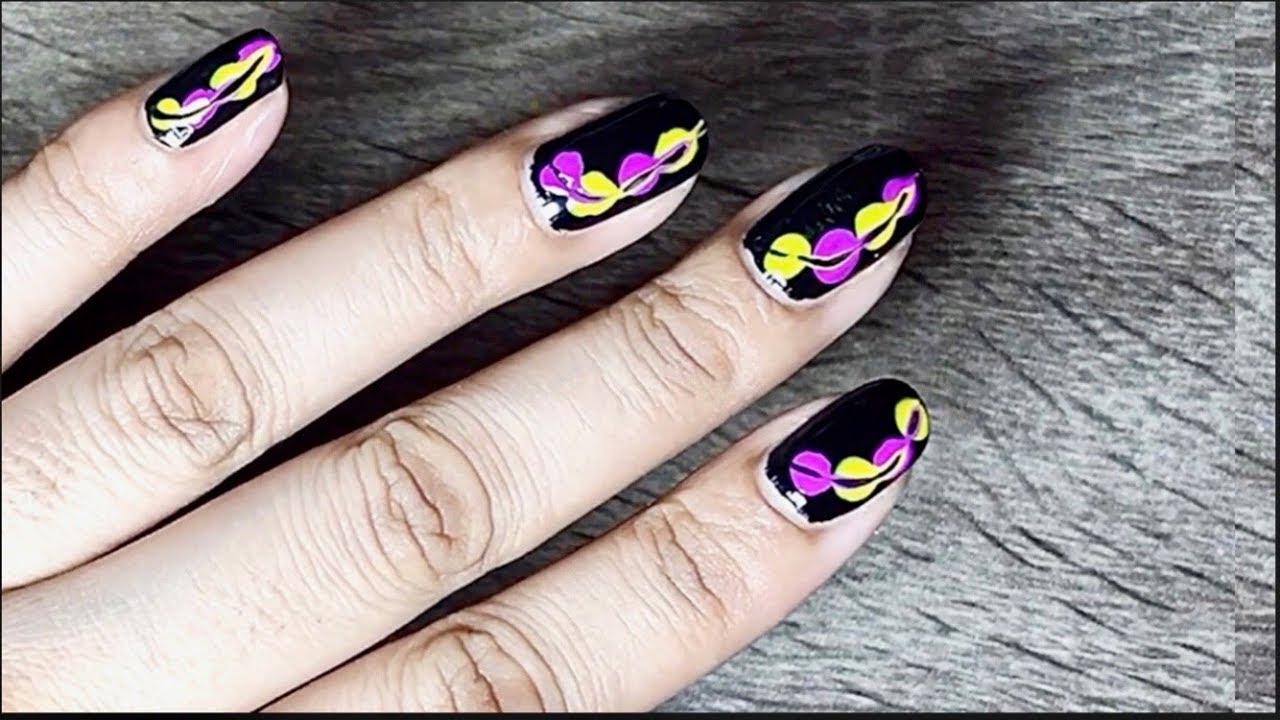
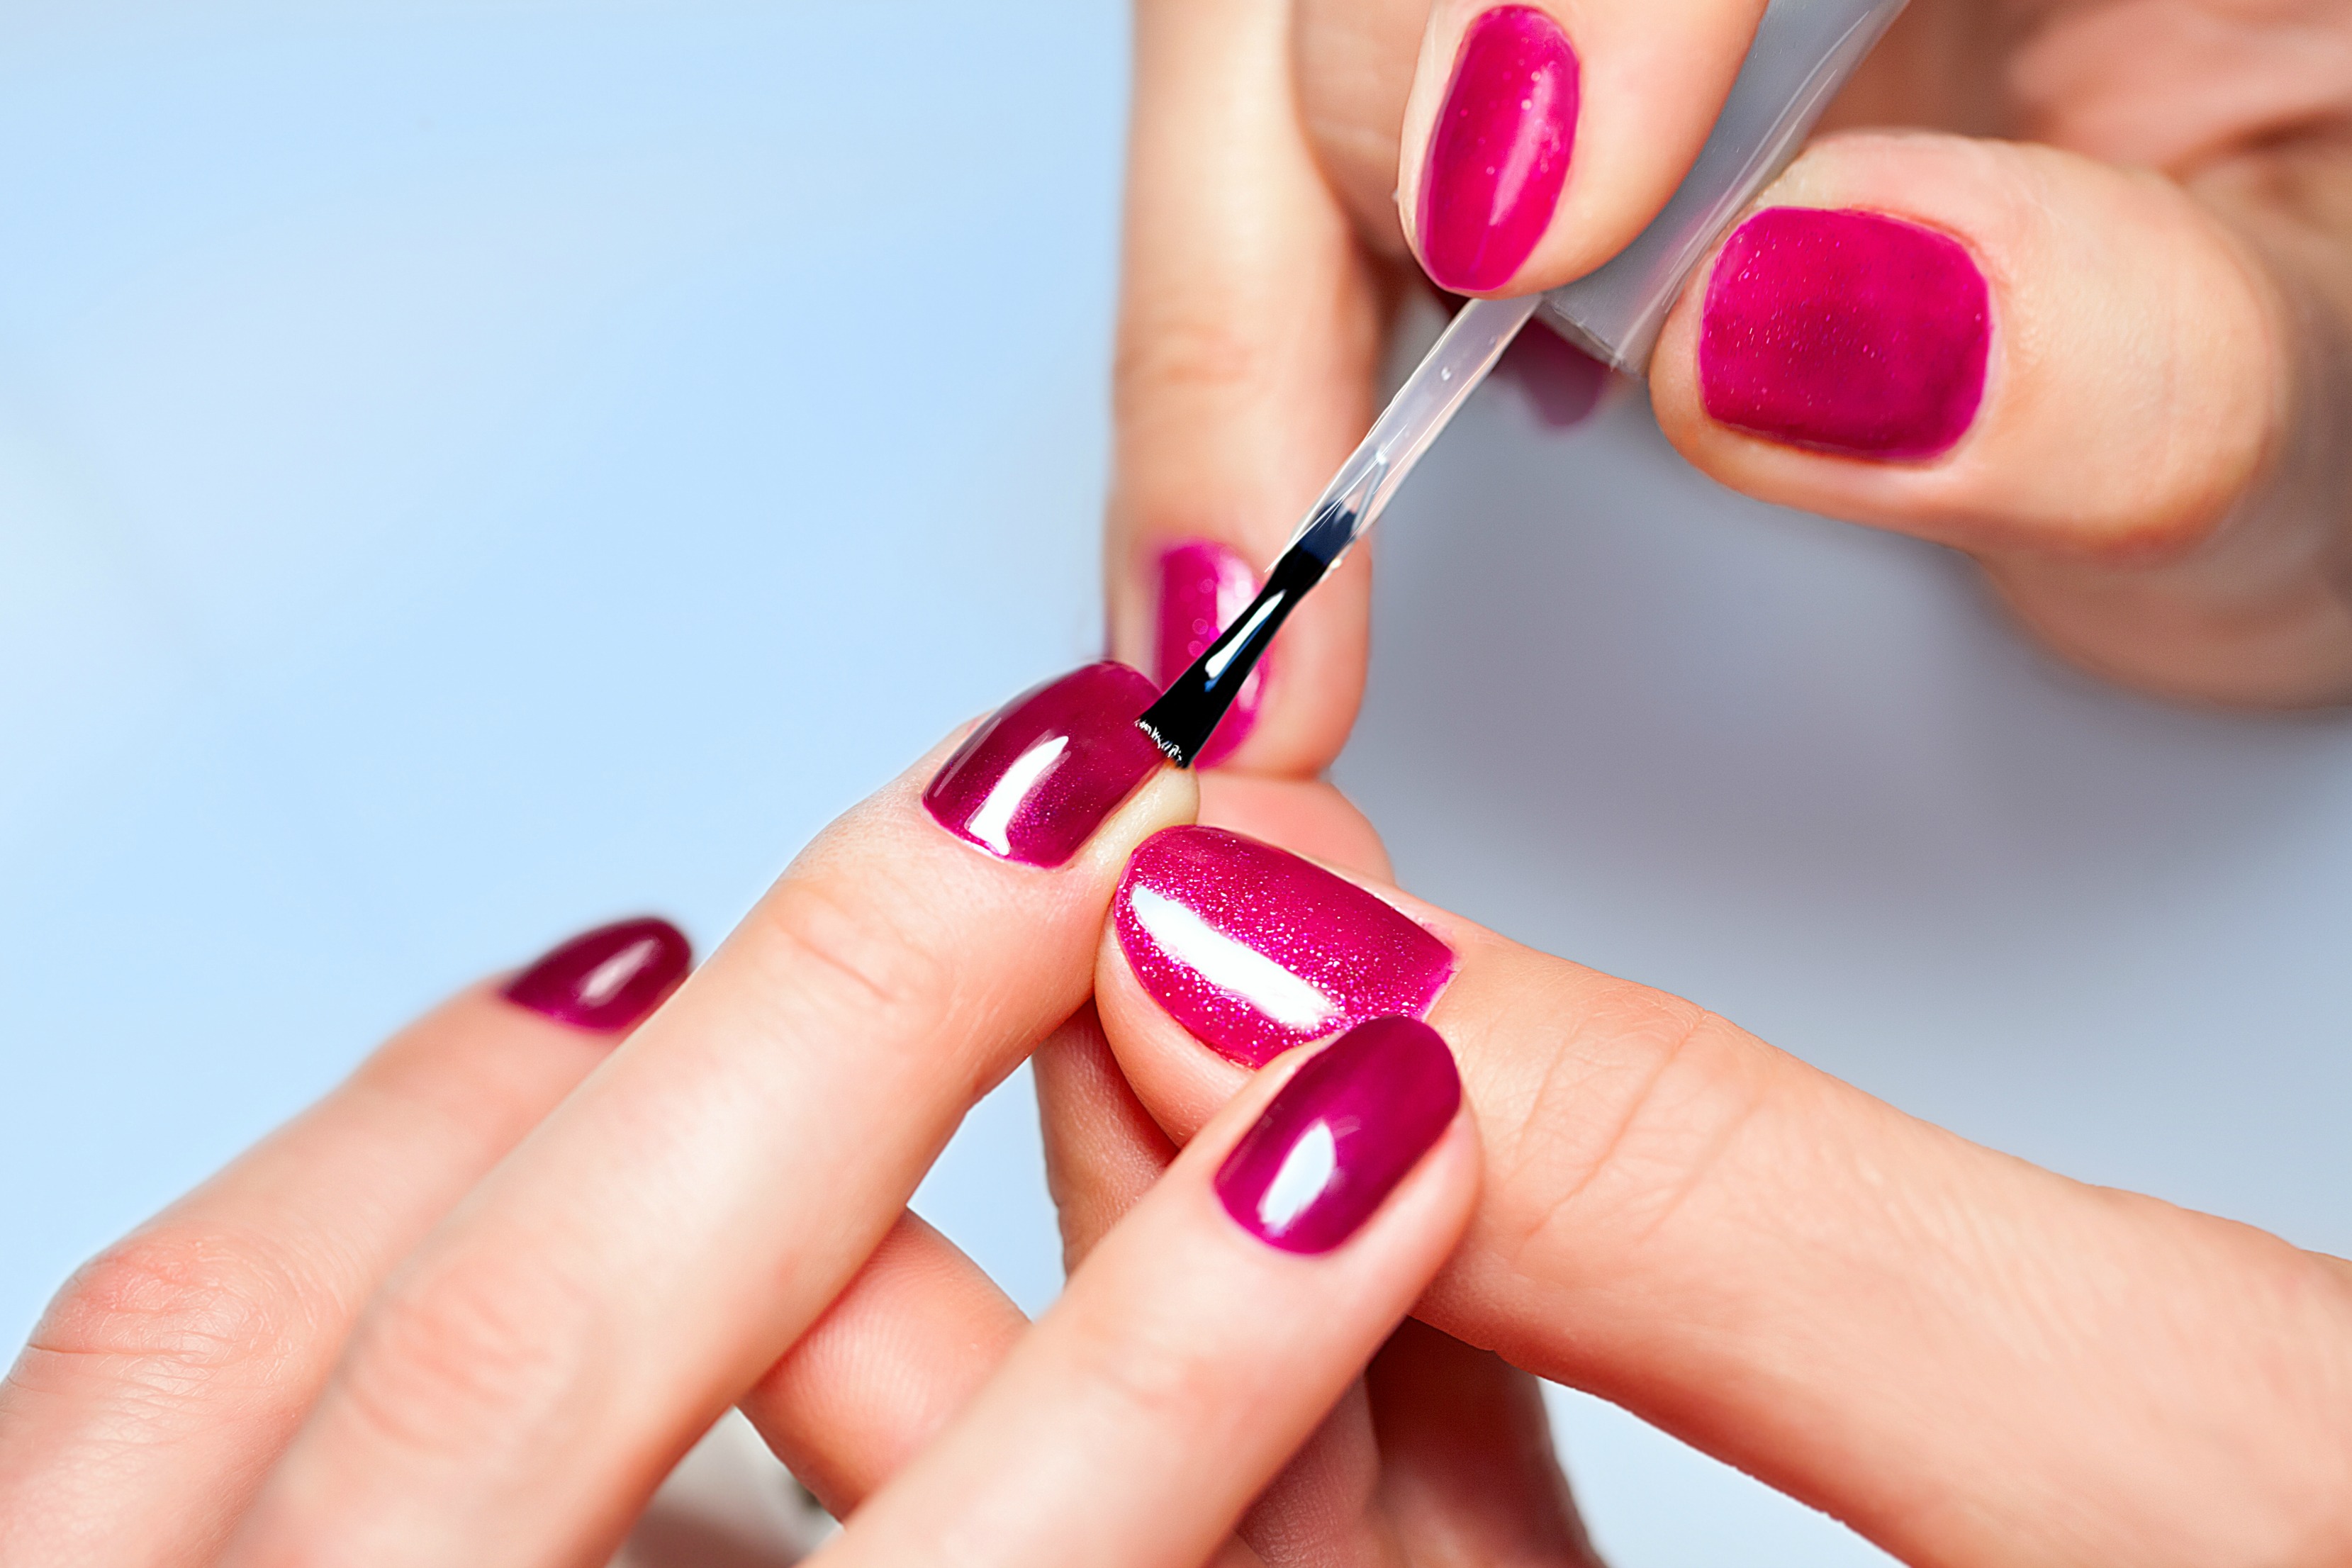
Creating beautiful nail art doesn't have to be difficult or expensive. In fact, you can create stunning designs using everyday household items like a toothpick. This is a perfect technique for beginners who are just starting to experiment with nail art. So grab your favorite nail polish and a toothpick and let's get started! First, apply a base coat to protect your nails and allow it to dry completely. Then, choose two contrasting nail polish colors and place a few drops of each onto a piece of paper. Using the toothpick, dip the tip into one color and create small dots on your nails. Then, clean the toothpick and repeat with the other color. You can also create lines or swirls by dragging the toothpick through the dots. Finish with a top coat and voila, you have a simple yet eye-catching nail art!1. Easy Nail Art for Beginners Using Toothpick

1. Easy Nail Art for Beginners Using Toothpick


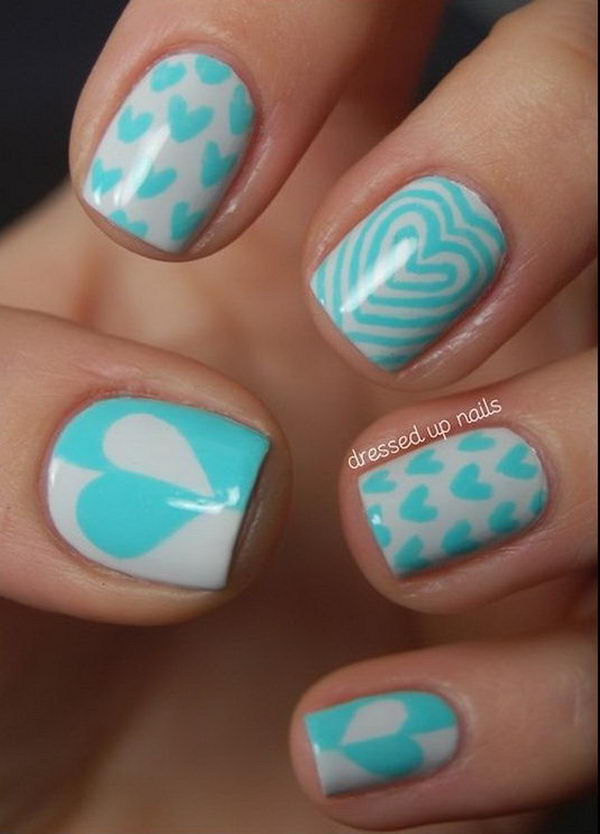
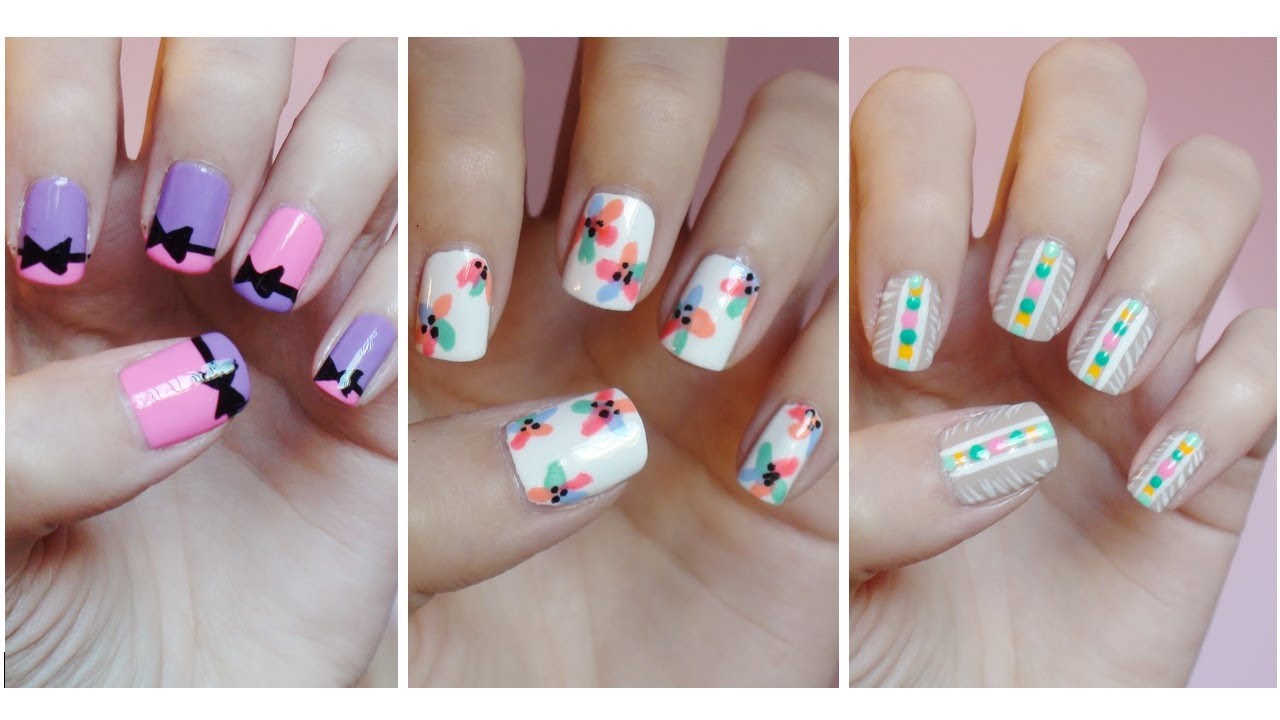
If you're new to nail art, it can be intimidating to try out complex designs. But don't worry, there are plenty of simple designs that even beginners can master. One easy design is the classic French manicure with a twist. Instead of a white tip, use a bright color like pink or blue for a fun and modern look. Another simple design is the half-moon or reverse French manicure. Simply paint your nails with a base color, let it dry, and then use a sticker or reinforcement label to create a half-moon shape at the base of your nail. Paint over it with a different color and remove the sticker to reveal a clean and polished design.2. Simple Nail Art Designs for Beginners


2. Simple Nail Art Designs for Beginners


:max_bytes(150000):strip_icc()/072922-beauty-nail-art-lead-2000-21de3481261e48a995c855269f9846ad.jpg)


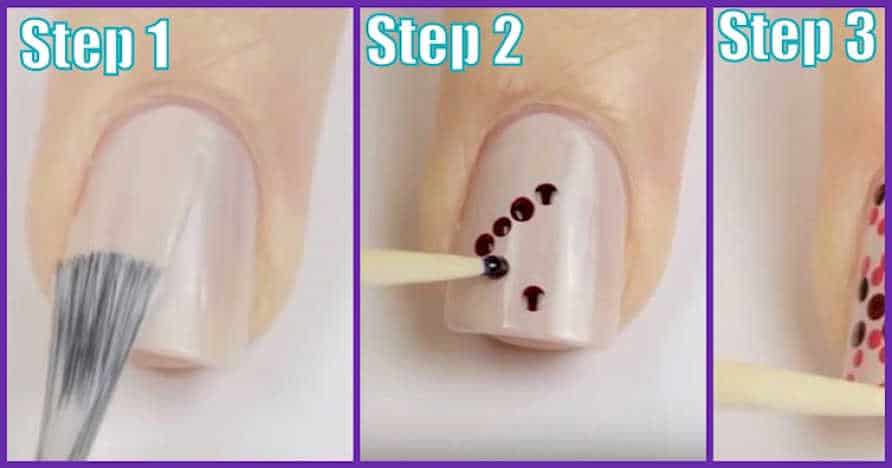
If you're feeling overwhelmed by all the different nail art techniques, a step by step guide can be a helpful tool. Start by choosing a design that you want to try, such as a polka dot or striped design. Then, gather all the necessary supplies and follow these steps: Step 1: Apply a base coat to protect your nails. Step 2: Paint your nails with a base color and let it dry completely. Step 3: Use a toothpick, doting tool, or nail art brush to create your desired design. Step 4: Clean up any mistakes with a small brush dipped in nail polish remover. Step 5: Finish with a top coat to seal in your design and add shine. Remember, practice makes perfect, so don't get discouraged if your first attempt doesn't turn out exactly how you want it. Keep trying and have fun!3. Nail Art for Beginners: Step by Step Guide


3. Nail Art for Beginners: Step by Step Guide


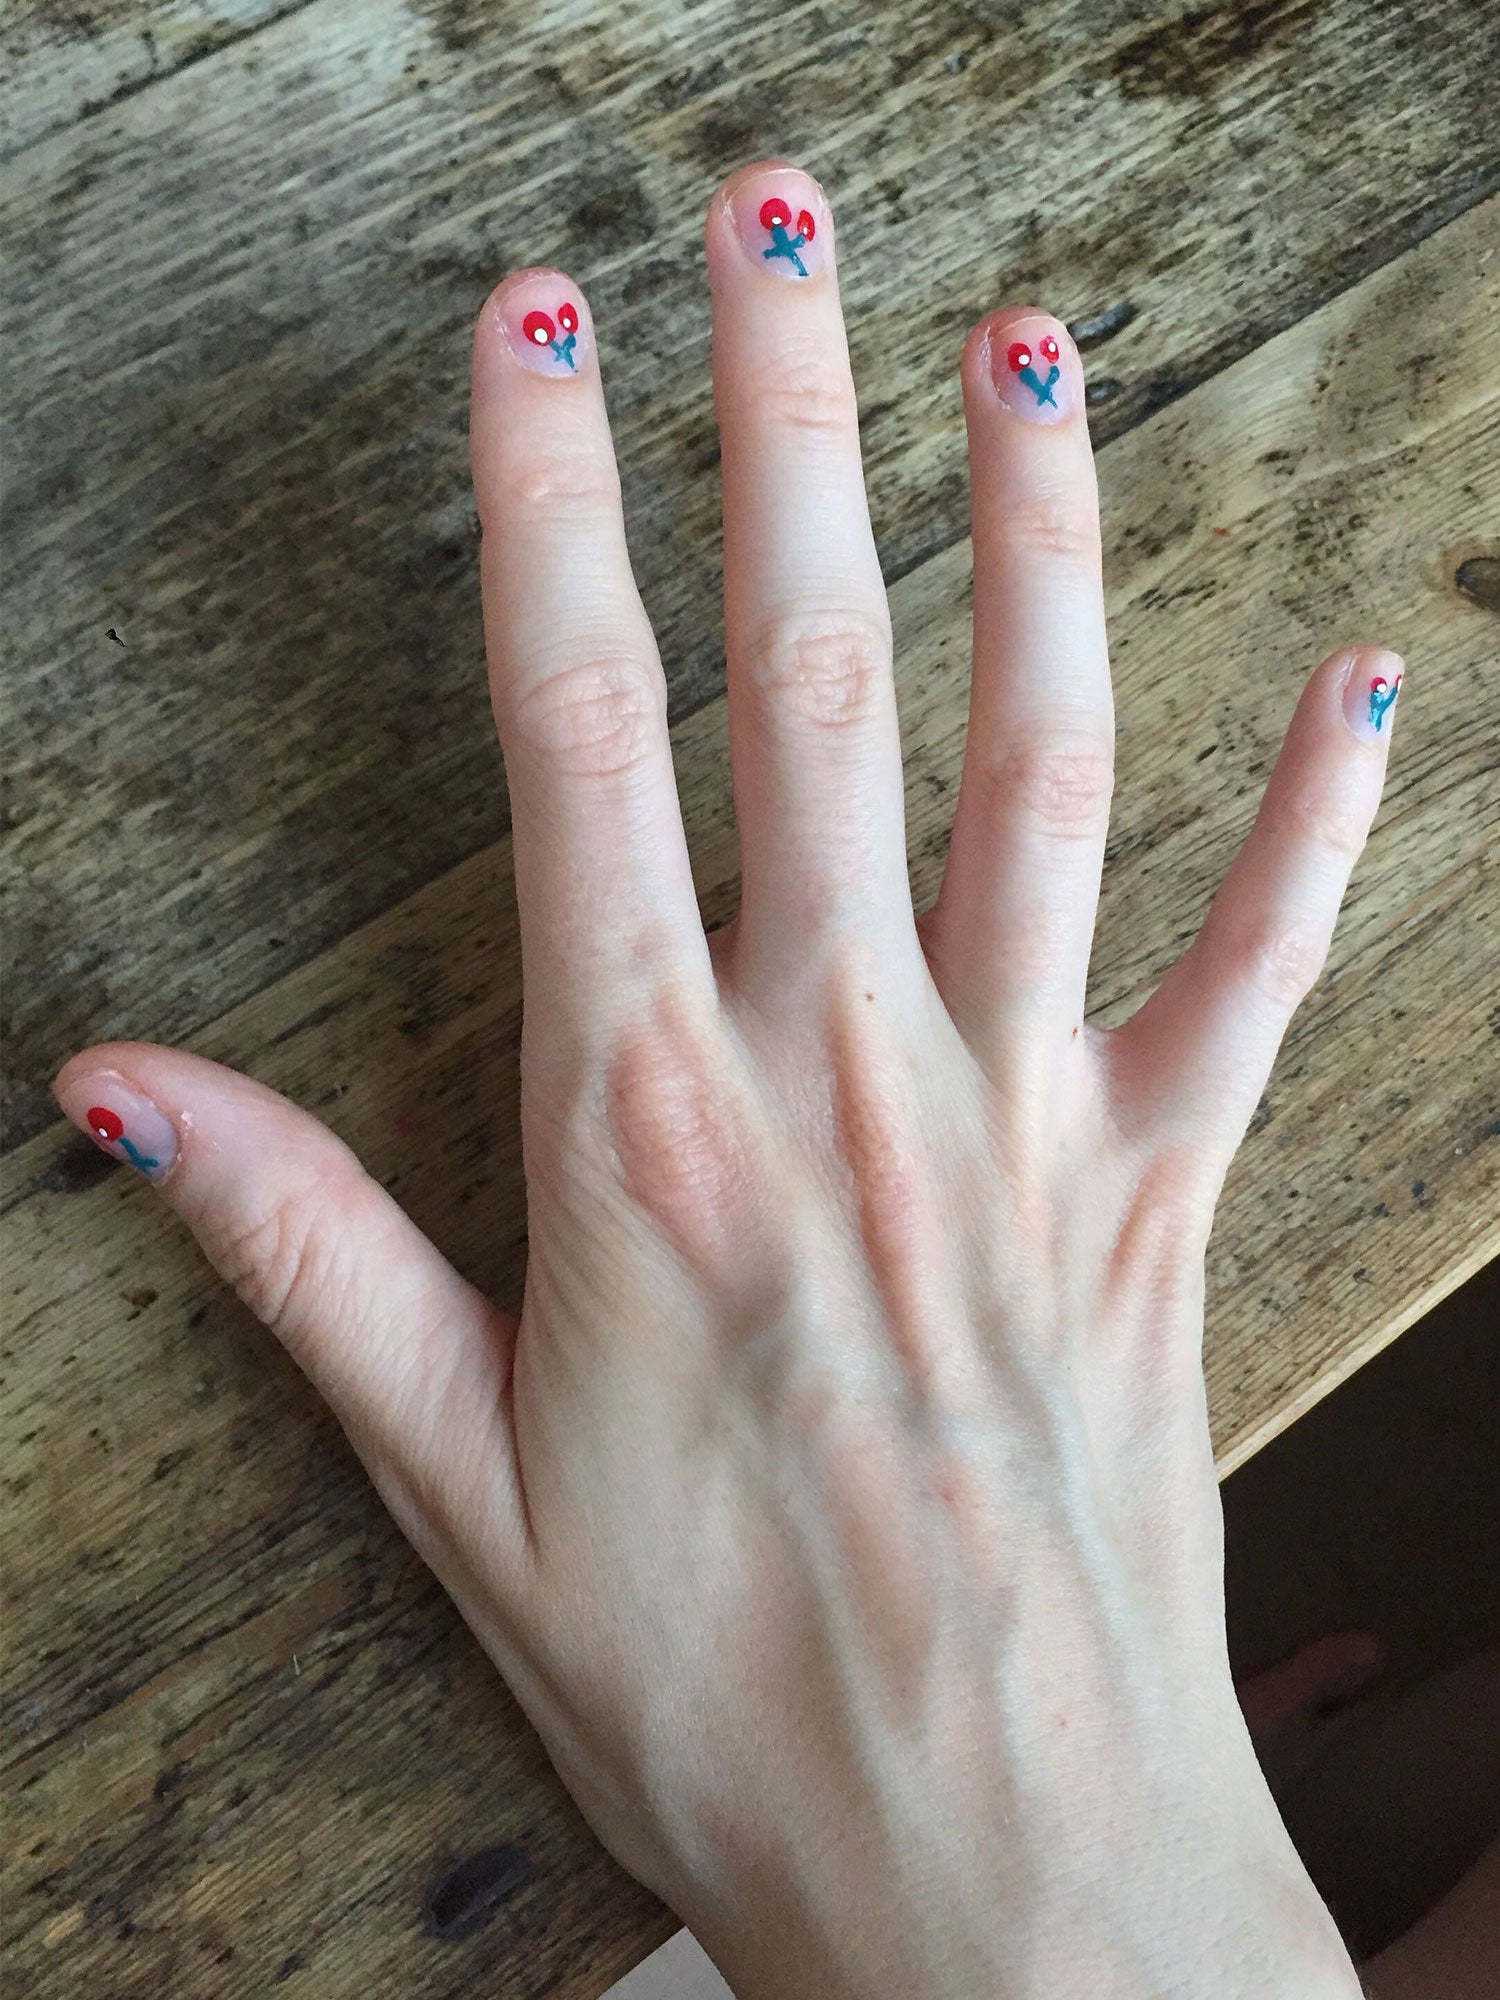
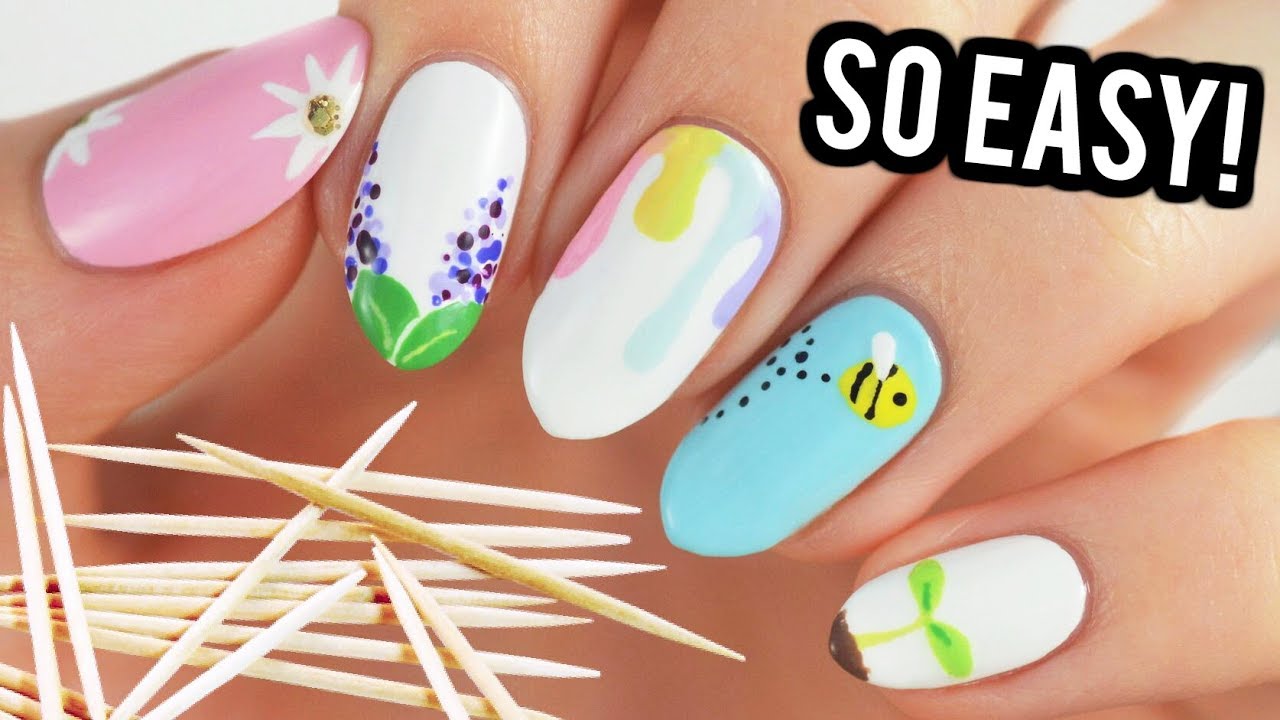
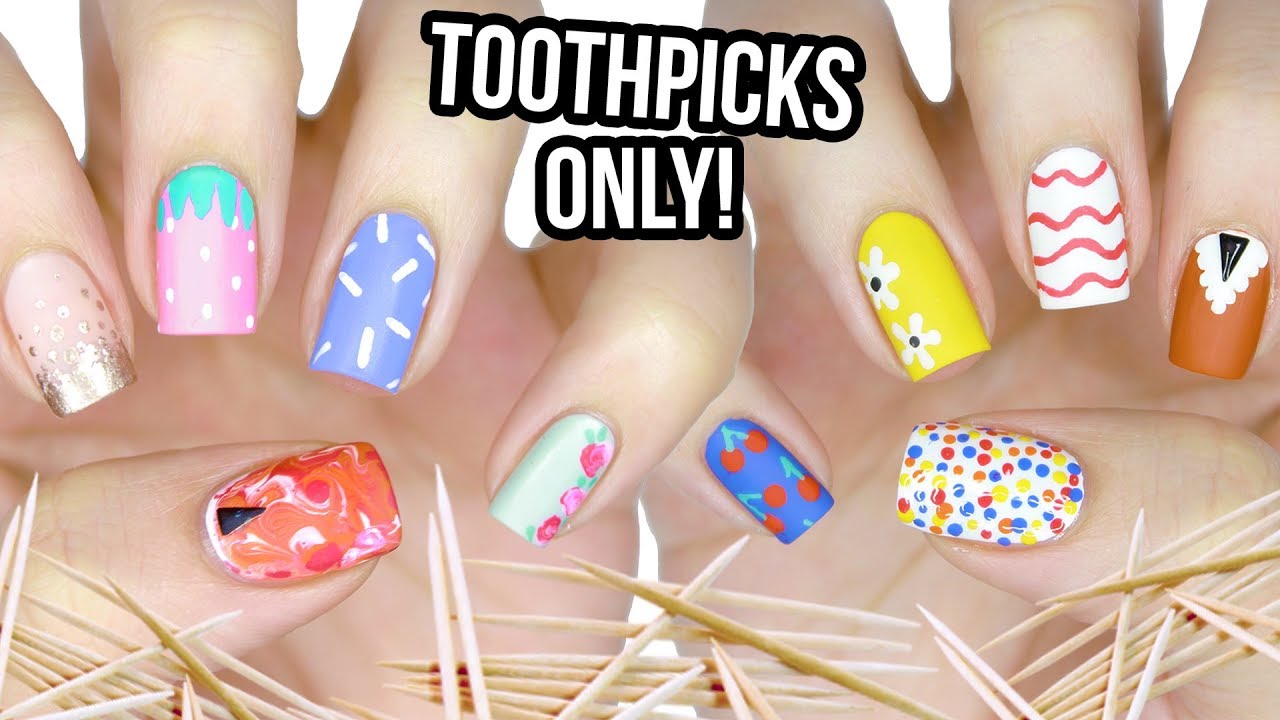
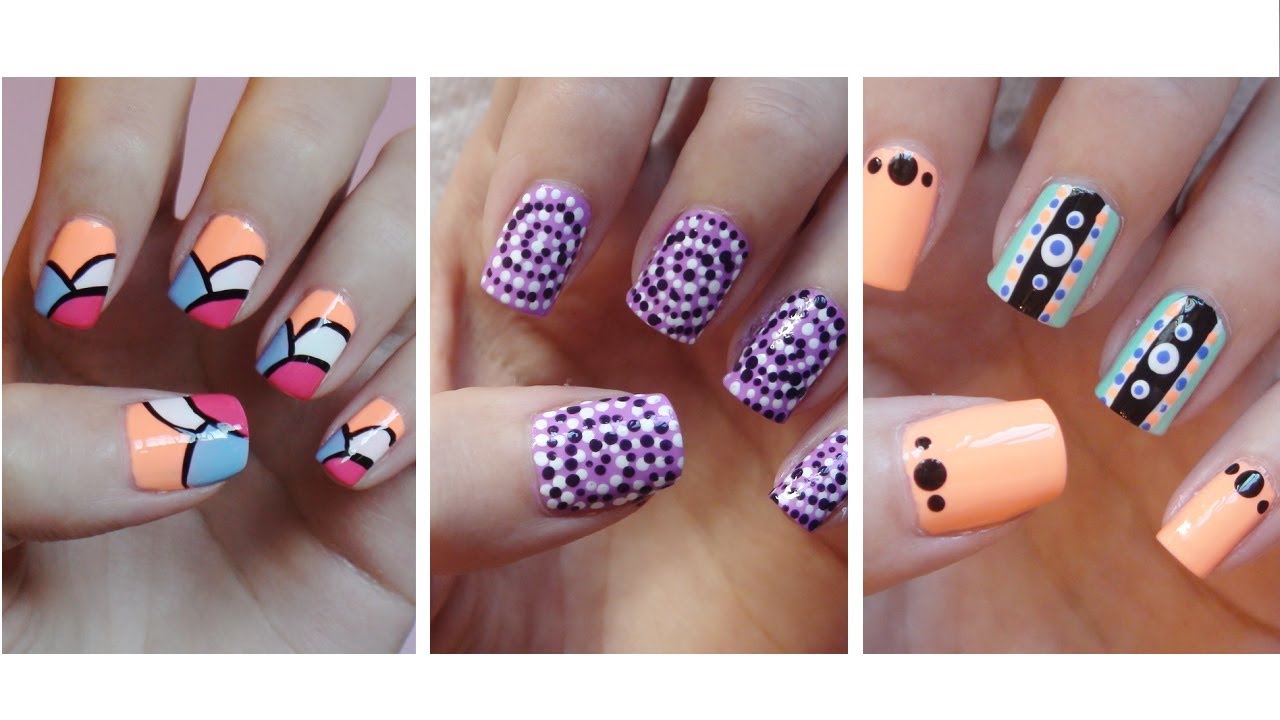
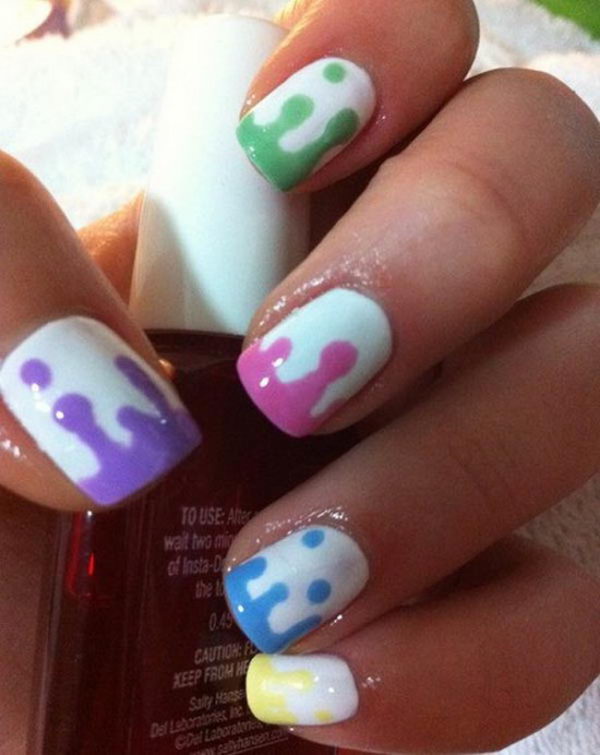
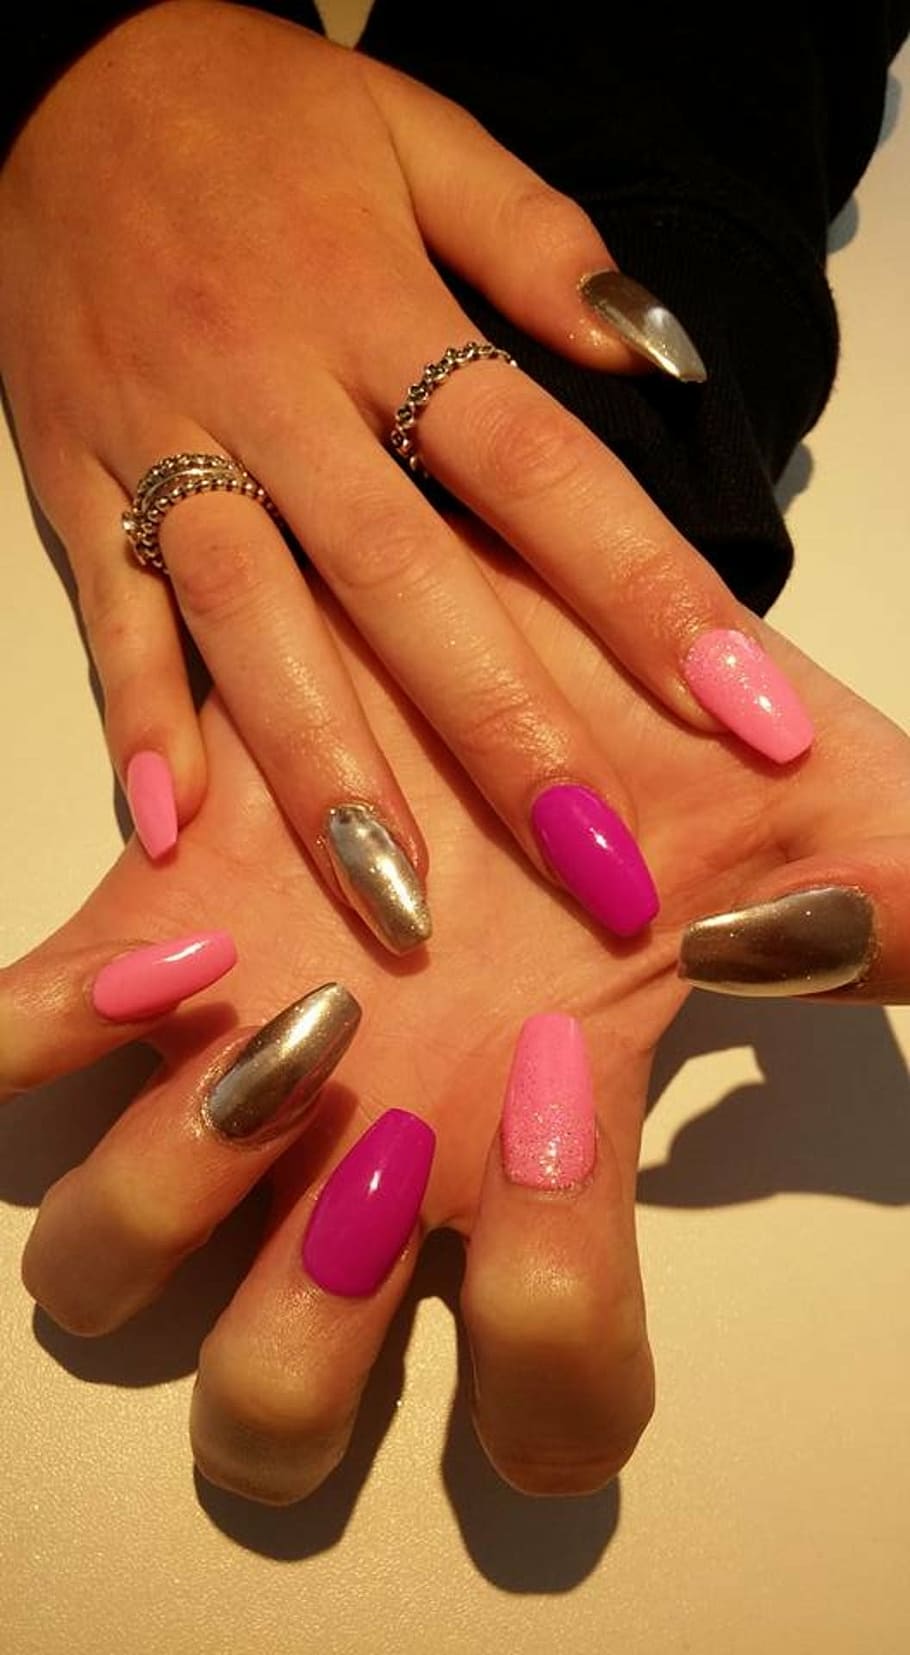
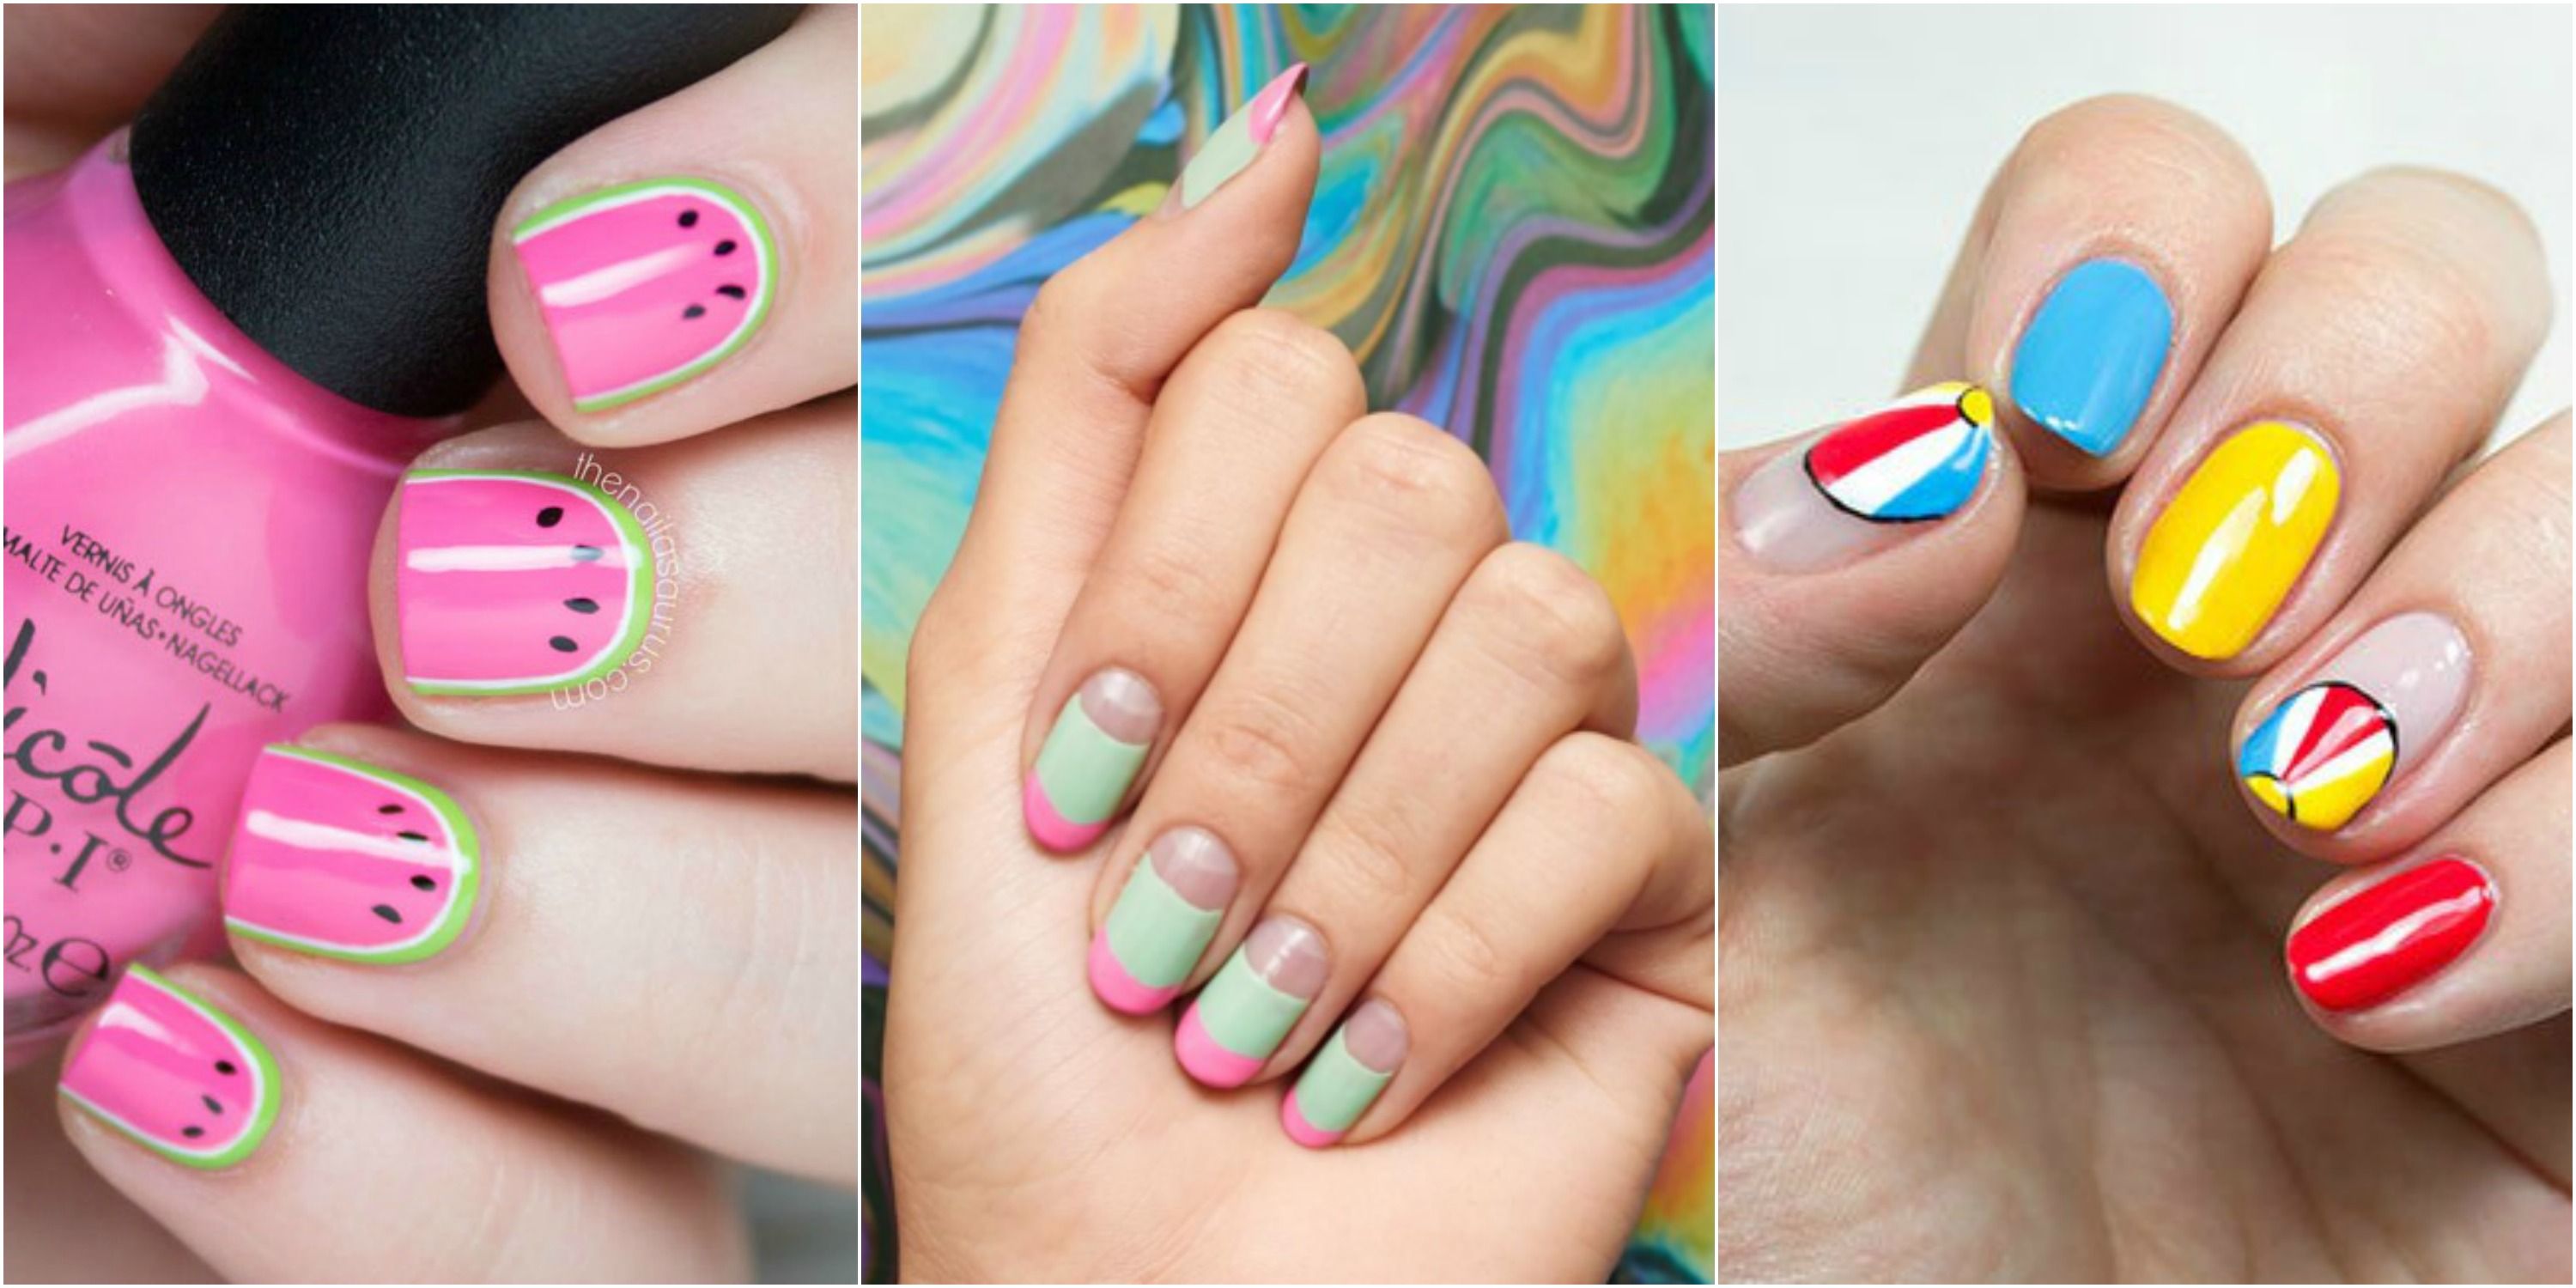
If you're struggling to come up with ideas for your first nail art designs, here are 10 easy and beginner-friendly options to try: 1. Floral nails using a toothpick or nail art brush. 2. Glitter gradient nails using a makeup sponge. 3. Geometric nails using striping tape. 4. Watercolor nails using a plastic bag or plastic wrap. 5. Abstract nails using a dotting tool or toothpick. 6. Marble nails using a water marble technique. 7. Gradient nails using a makeup sponge. 8. Animal print nails using a nail art brush. 9. Ombre nails using a makeup sponge. 10. Polka dot nails using a toothpick or dotting tool.4. 10 Easy Nail Art Designs for Beginners

4. 10 Easy Nail Art Designs for Beginners

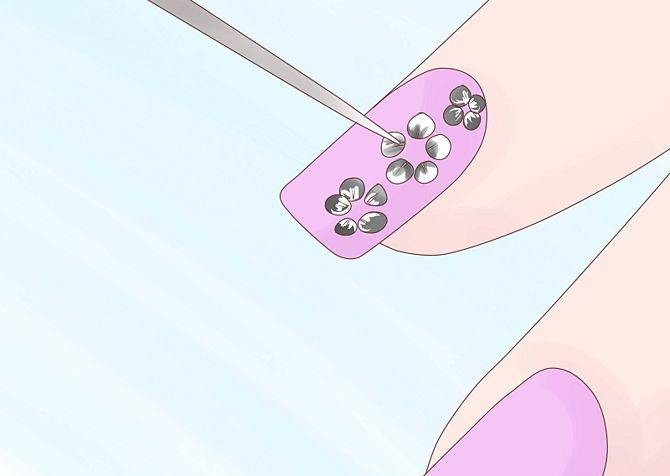
As a beginner, it's important to have the right tools and techniques for creating nail art. Some essential tools to have in your collection include nail polish in various colors, nail art brushes in different sizes, dotting tools, striping tape, and makeup sponges. When it comes to techniques, start with simple designs like polka dots or stripes and gradually work your way up to more complex designs. Practice on a plastic bag or piece of paper before trying it on your nails to get a feel for the technique. And don't be afraid to experiment and have fun with different colors and designs!5. Nail Art for Beginners: Tools and Techniques

5. Nail Art for Beginners: Tools and Techniques


As a beginner, it's important to keep a few tips and tricks in mind to make your nail art journey smoother: - Use a base coat to protect your nails and prevent staining. - Clean up any mistakes with a small brush dipped in nail polish remover. - Apply a thin layer of top coat to seal in your design and prevent chipping. - Use cuticle oil to moisturize your nails and keep them healthy. - Have patience and don't get discouraged if your design doesn't turn out perfectly on the first try.6. Beginner's Guide to Nail Art: Tips and Tricks


6. Beginner's Guide to Nail Art: Tips and Tricks


If you're just starting out with nail art, it can be overwhelming to know what supplies to get. Here are some basic supplies that every beginner should have in their collection: - Nail polish in various colors. - Base coat and top coat. - Nail art brushes in different sizes. - Dotting tools for creating small dots and other designs. - Striping tape for creating clean lines and geometric designs. - Makeup sponges for creating gradient and ombre designs.7. Nail Art for Beginners: Basic Supplies You Need
7. Nail Art for Beginners: Basic Supplies You Need
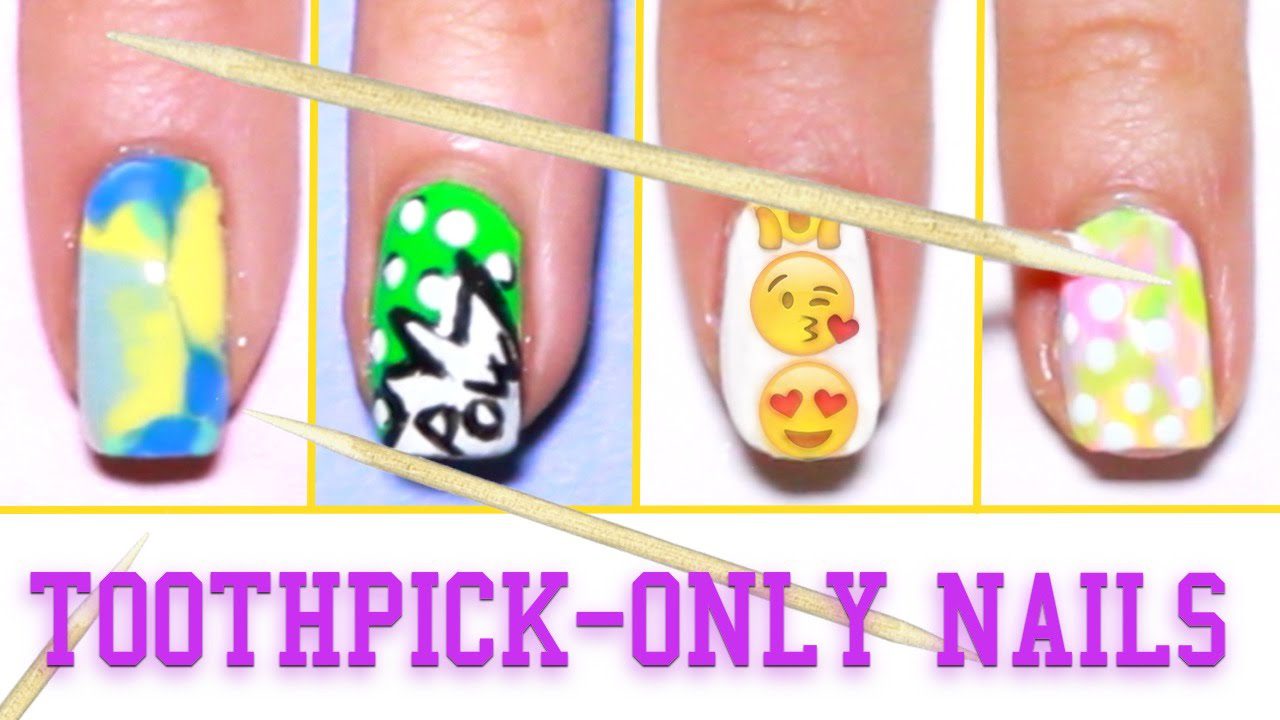
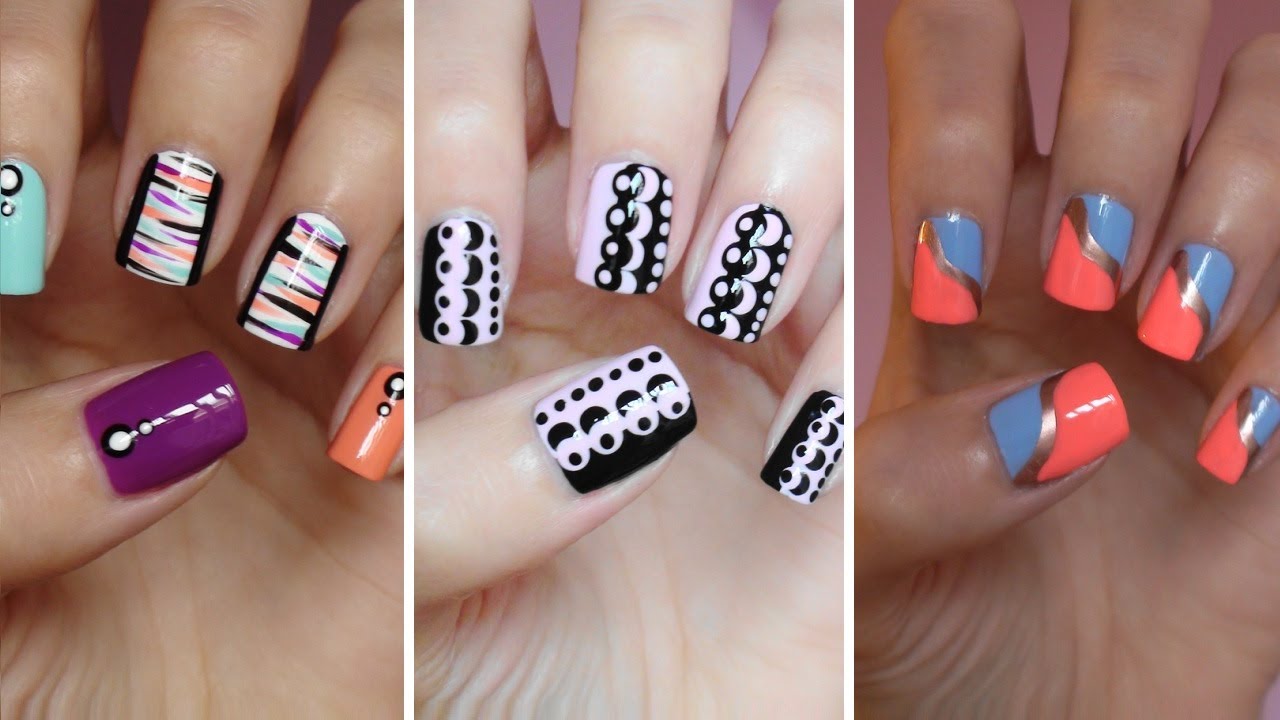
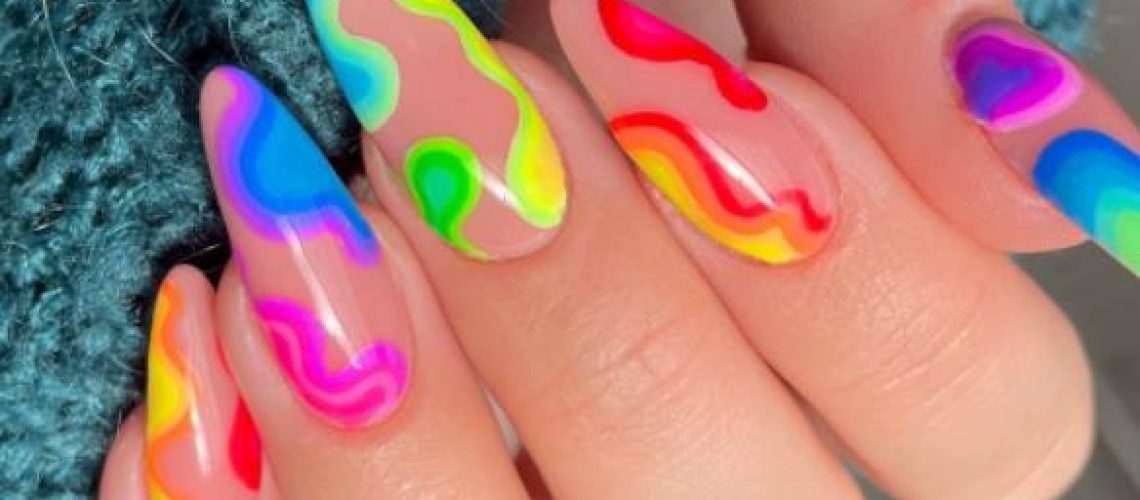
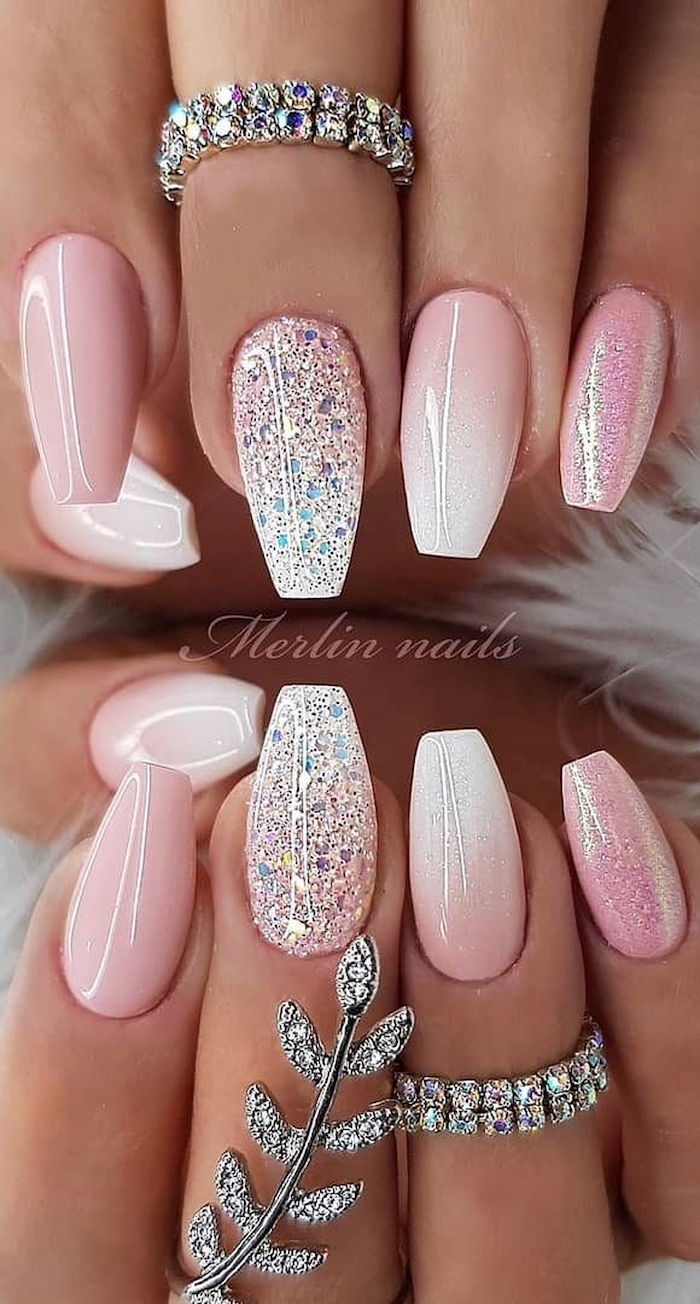
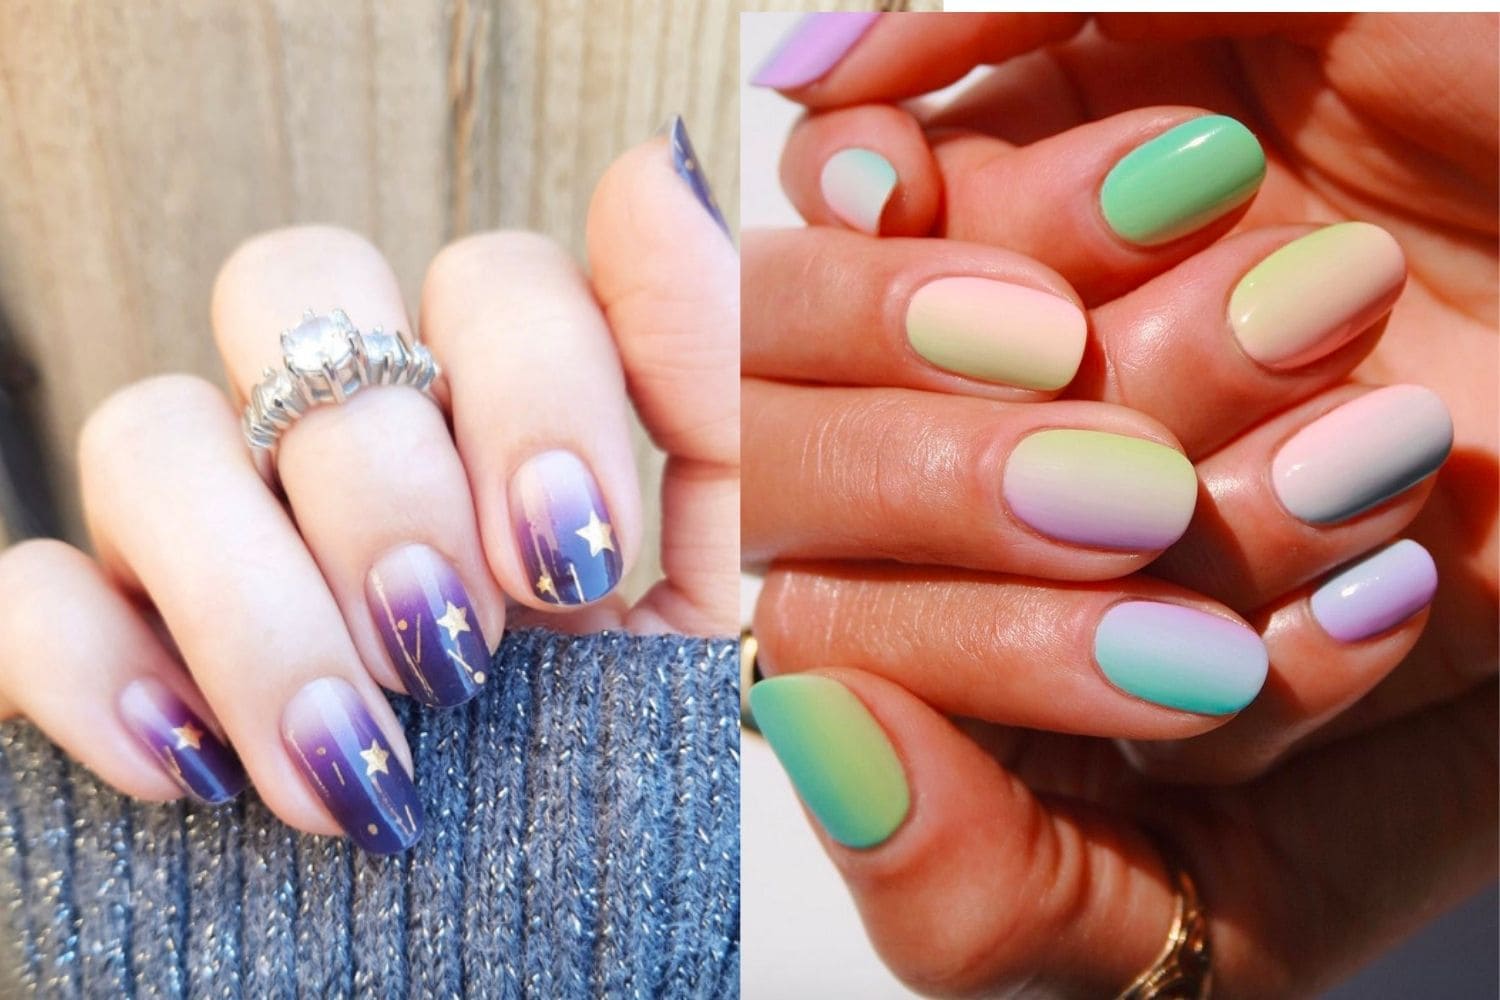
Still looking for some inspiration for your next nail art design? Here are 15 ideas that are perfect for beginners: 1. Galaxy nails using a sponge to create a gradient effect. 2. Striped nails using striping tape in different colors. 3. Flamingo nails using a nail art brush and toothpick. 4. Leopard print nails using a nail art brush and toothpick. 5. Tie-dye nails using a plastic bag or plastic wrap. 6. Cactus nails using a nail art brush. 7. Sunset nails using a sponge and various colors. 8. Tropical nails using a toothpick and nail art brush. 9. Emoji nails using a nail art brush and toothpick. 10. Galaxy French manicure using a sponge and different colors. 11. Polka dot gradient nails using a toothpick and makeup sponge. 12. Pineapple nails using a nail art brush and toothpick. 13. Watermelon nails using a nail art brush and toothpick. 14. Gingham nails using striping tape and a toothpick. 15. Neon splatter nails using a straw to create a splatter effect.8. 15 Nail Art Ideas for Beginners

8. 15 Nail Art Ideas for Beginners


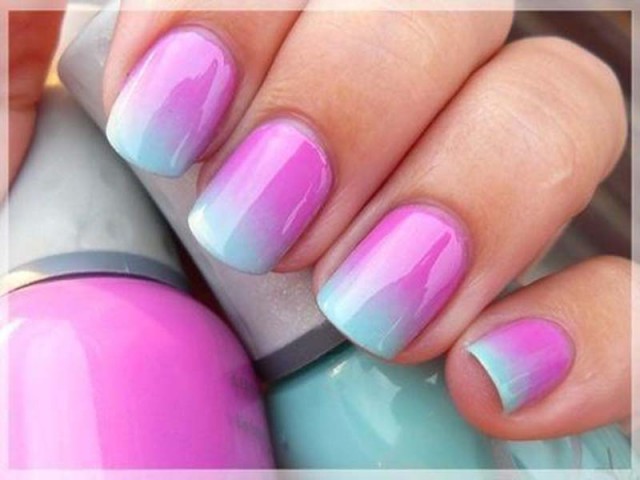
Ombre nails are a popular and trendy design that is surprisingly easy to achieve for beginners. Here's how to create your own ombre nails: Step 1: Apply a base coat and let it dry completely. Step 2: Choose two complementary colors and place a small amount of each onto a piece of paper. Step 3: Use a makeup sponge to dab the two colors onto your nails, starting at the cuticle and moving towards the tip. Step 4: Repeat until you achieve the desired level of color saturation. Step 5: Clean up any excess polish on your skin with a small brush dipped in nail polish remover. Step 6: Finish with a top coat to seal in the design.9. Nail Art for Beginners: How to Create Ombre Nails


9. Nail Art for Beginners: How to Create Ombre Nails
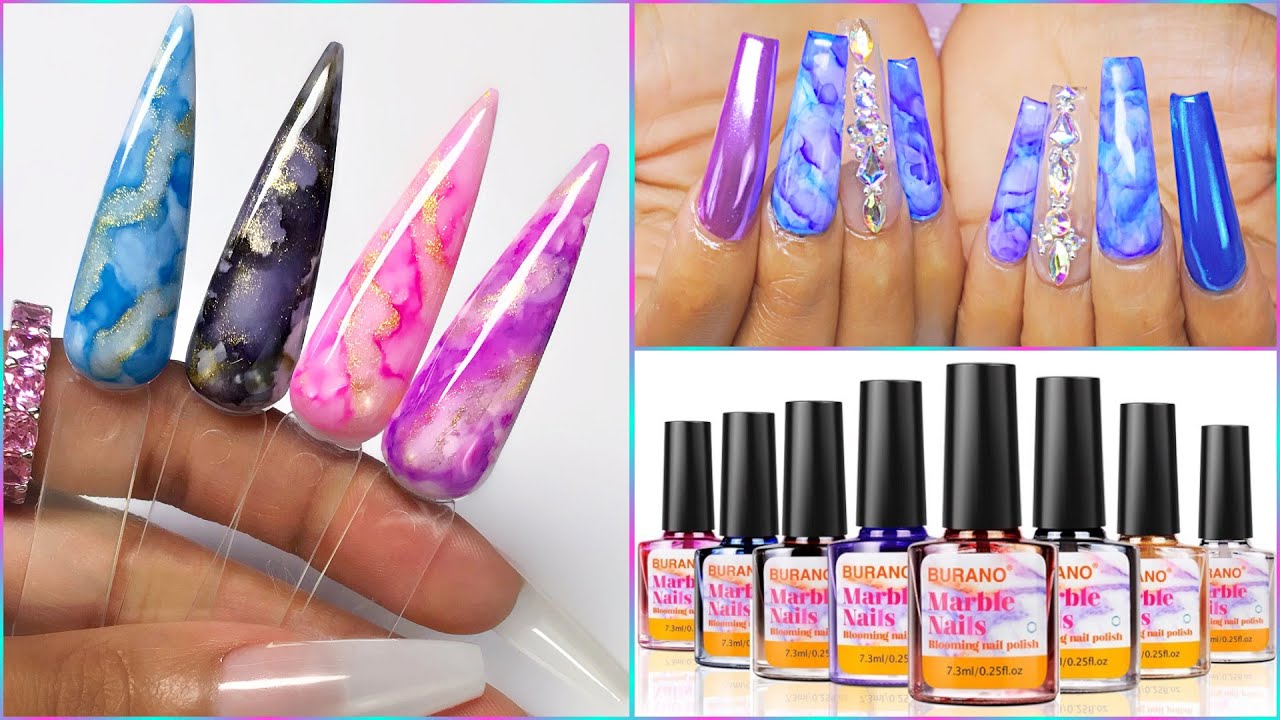
Marble nails are a fun and unique design that looks more complicated than it actually is. Here's how to create your own marble nails: Step 1: Apply a base coat and let it dry completely. Step 2: Choose two or three complementary colors and place a few drops of each onto a piece of paper. Step 3: Use a toothpick or nail art brush to create swirls or lines with the different colors. Step 4: Dip your nails into the design, making sure to cover the entire nail. Step 5: Use a toothpick or nail art brush to clean up any excess polish around your nails. Step 6: Finish with a top coat to seal in the design and add shine. Creating beautiful nail art is a fun and creative way to express your personal style. With these easy and beginner-friendly designs, you'll be able to create stunning nails without breaking the bank. So go ahead and experiment with different colors, techniques, and tools to find what works best for you. Happy nail art-ing!10. Nail Art for Beginners: Marble Nail Tutorial
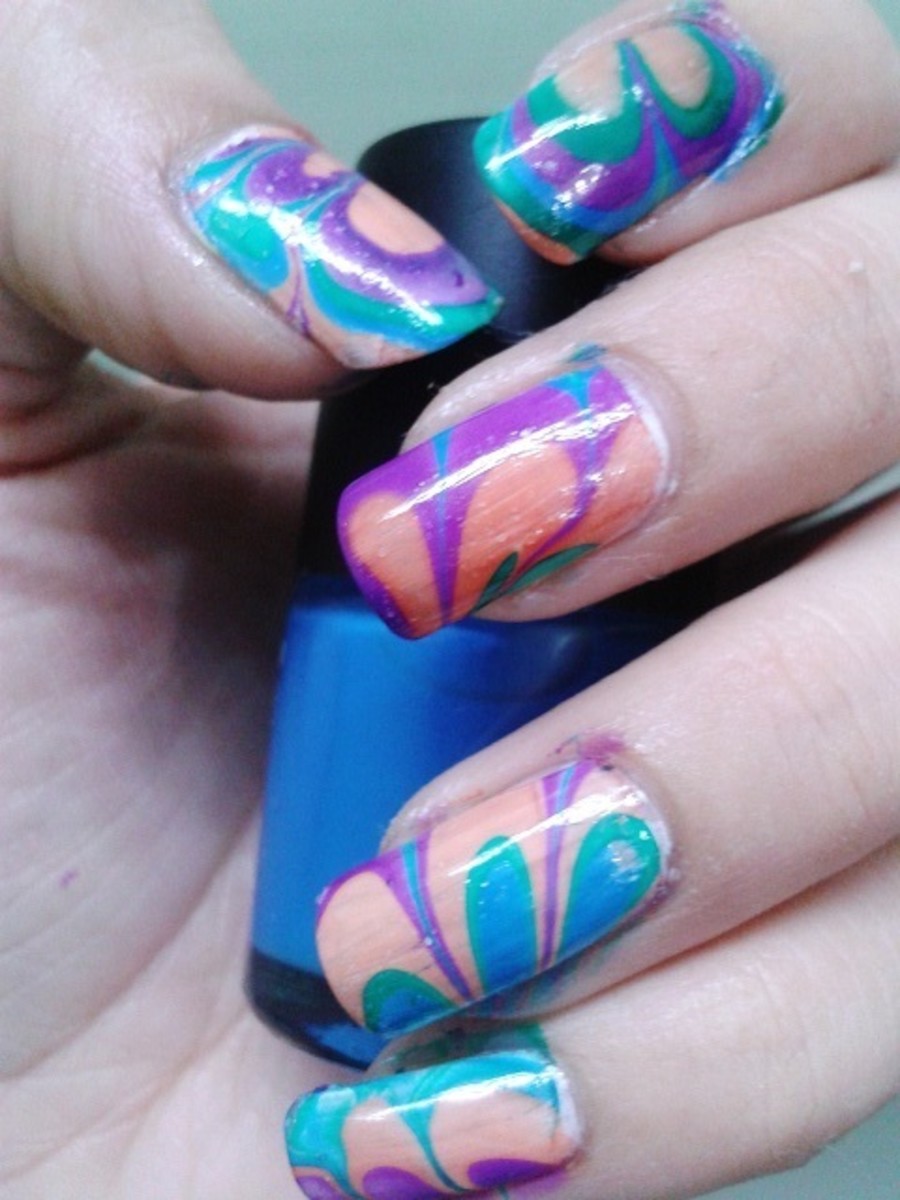
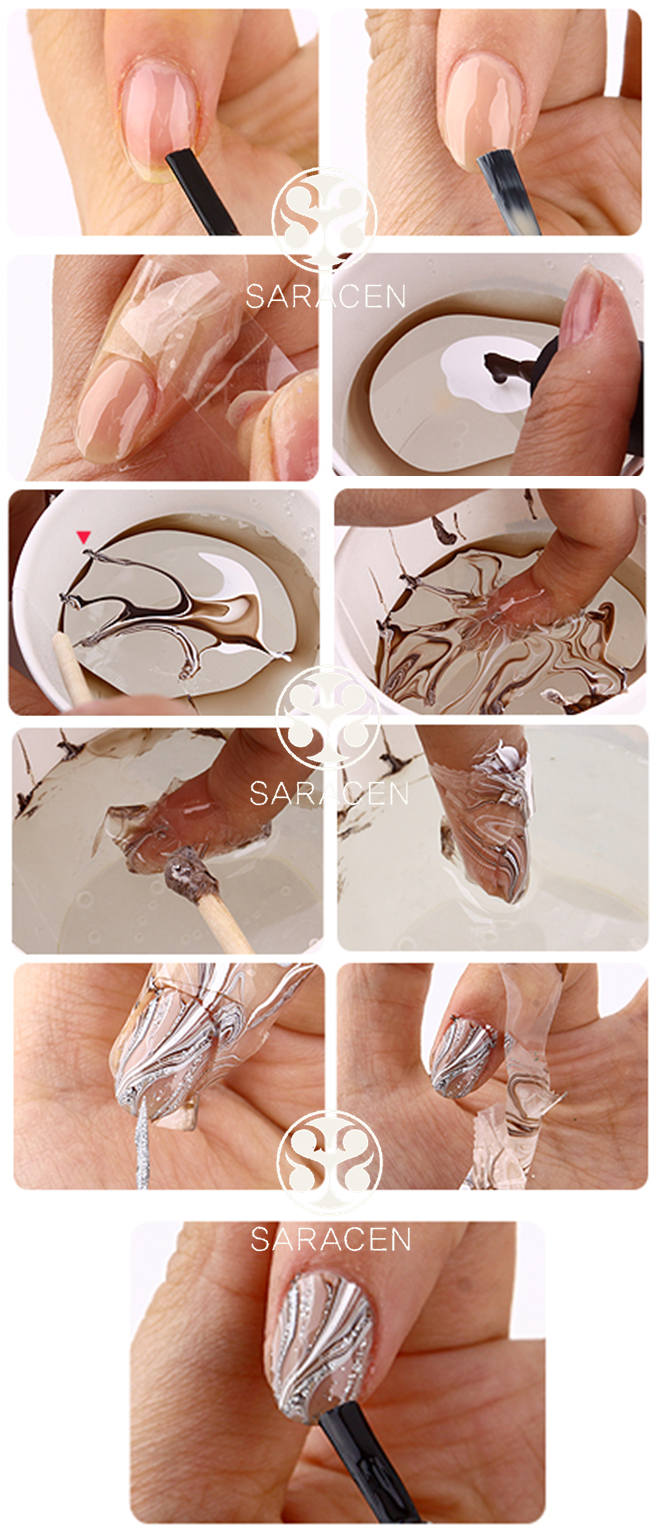
10. Nail Art for Beginners: Marble Nail Tutorial

Taking your Nail Polish Game to the Next Level with Nail Polish Art for Beginners

What is Nail Polish Art?
 Nail polish art, also known as nail art, is a form of self-expression through decorative designs and patterns on your nails using
nail polish
. It has gained popularity in recent years, with social media platforms showcasing elaborate and intricate designs created by both amateurs and professionals alike.
Nail polish art, also known as nail art, is a form of self-expression through decorative designs and patterns on your nails using
nail polish
. It has gained popularity in recent years, with social media platforms showcasing elaborate and intricate designs created by both amateurs and professionals alike.
Why Try Nail Polish Art?
 If you're tired of the same old solid nail colors and want to add a touch of creativity and personality to your nails, then nail polish art is perfect for you. It allows you to express your individuality and creativity through your nails, making a statement without saying a word.
Getting Started with Nail Polish Art
 Beginners
often feel intimidated by nail polish art, thinking it requires advanced skills and expensive tools. However, with the right techniques and a few basic tools, anyone can create beautiful nail designs.
Here are some tips to get you started:
1. Start with simple designs: It's essential to start with simple designs and gradually work your way up to more complex ones. This will help you gain confidence and improve your skills.
2. Invest in essential tools: While you don't need expensive tools, investing in a few essential supplies such as
nail polish
, a top coat, base coat, dotting tools, and striping tape will make the process easier and more enjoyable.
3. Practice makes perfect: As with any skill, practice is crucial. Don't be discouraged if your first few attempts don't turn out as expected. Keep practicing, and you'll see improvement with each design.
Beginners
often feel intimidated by nail polish art, thinking it requires advanced skills and expensive tools. However, with the right techniques and a few basic tools, anyone can create beautiful nail designs.
Here are some tips to get you started:
1. Start with simple designs: It's essential to start with simple designs and gradually work your way up to more complex ones. This will help you gain confidence and improve your skills.
2. Invest in essential tools: While you don't need expensive tools, investing in a few essential supplies such as
nail polish
, a top coat, base coat, dotting tools, and striping tape will make the process easier and more enjoyable.
3. Practice makes perfect: As with any skill, practice is crucial. Don't be discouraged if your first few attempts don't turn out as expected. Keep practicing, and you'll see improvement with each design.
Where to Find Inspiration?
 There are several sources of inspiration for nail polish art, including social media platforms like Instagram and Pinterest, which are filled with endless nail design ideas. You can also find inspiration in nature, fashion, and even everyday objects.
Conclusion
 Nail polish art is a fun and creative way to express yourself and add a unique touch to your overall look. With the right tools, techniques, and inspiration, anyone can create beautiful nail designs. So why not give it a try and take your nail polish game to the next level?


