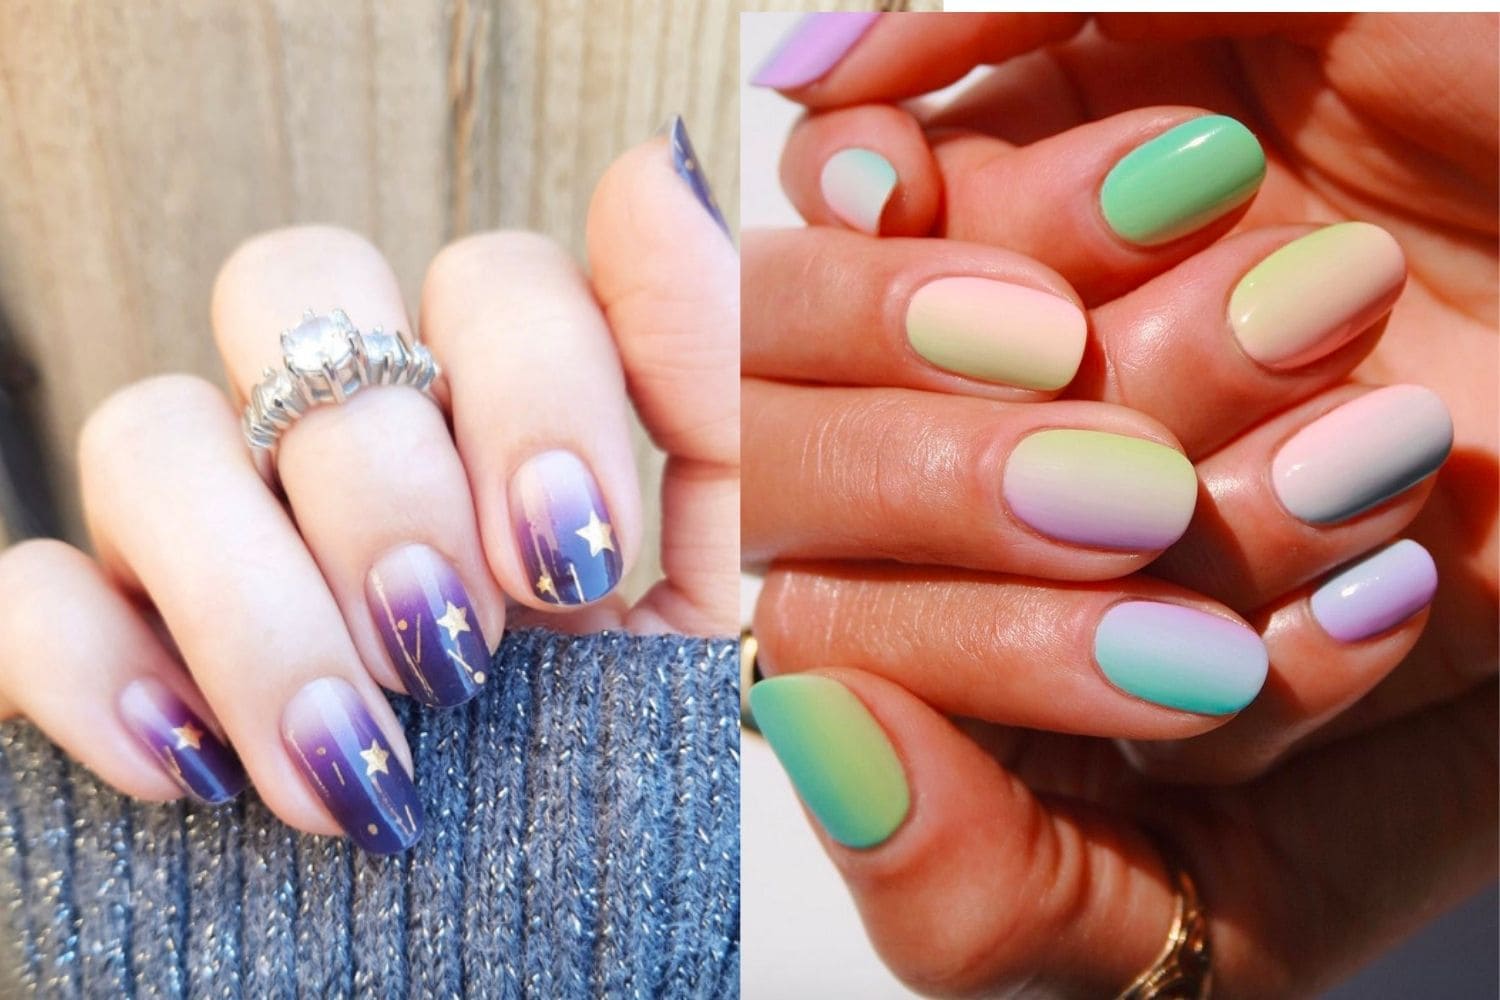
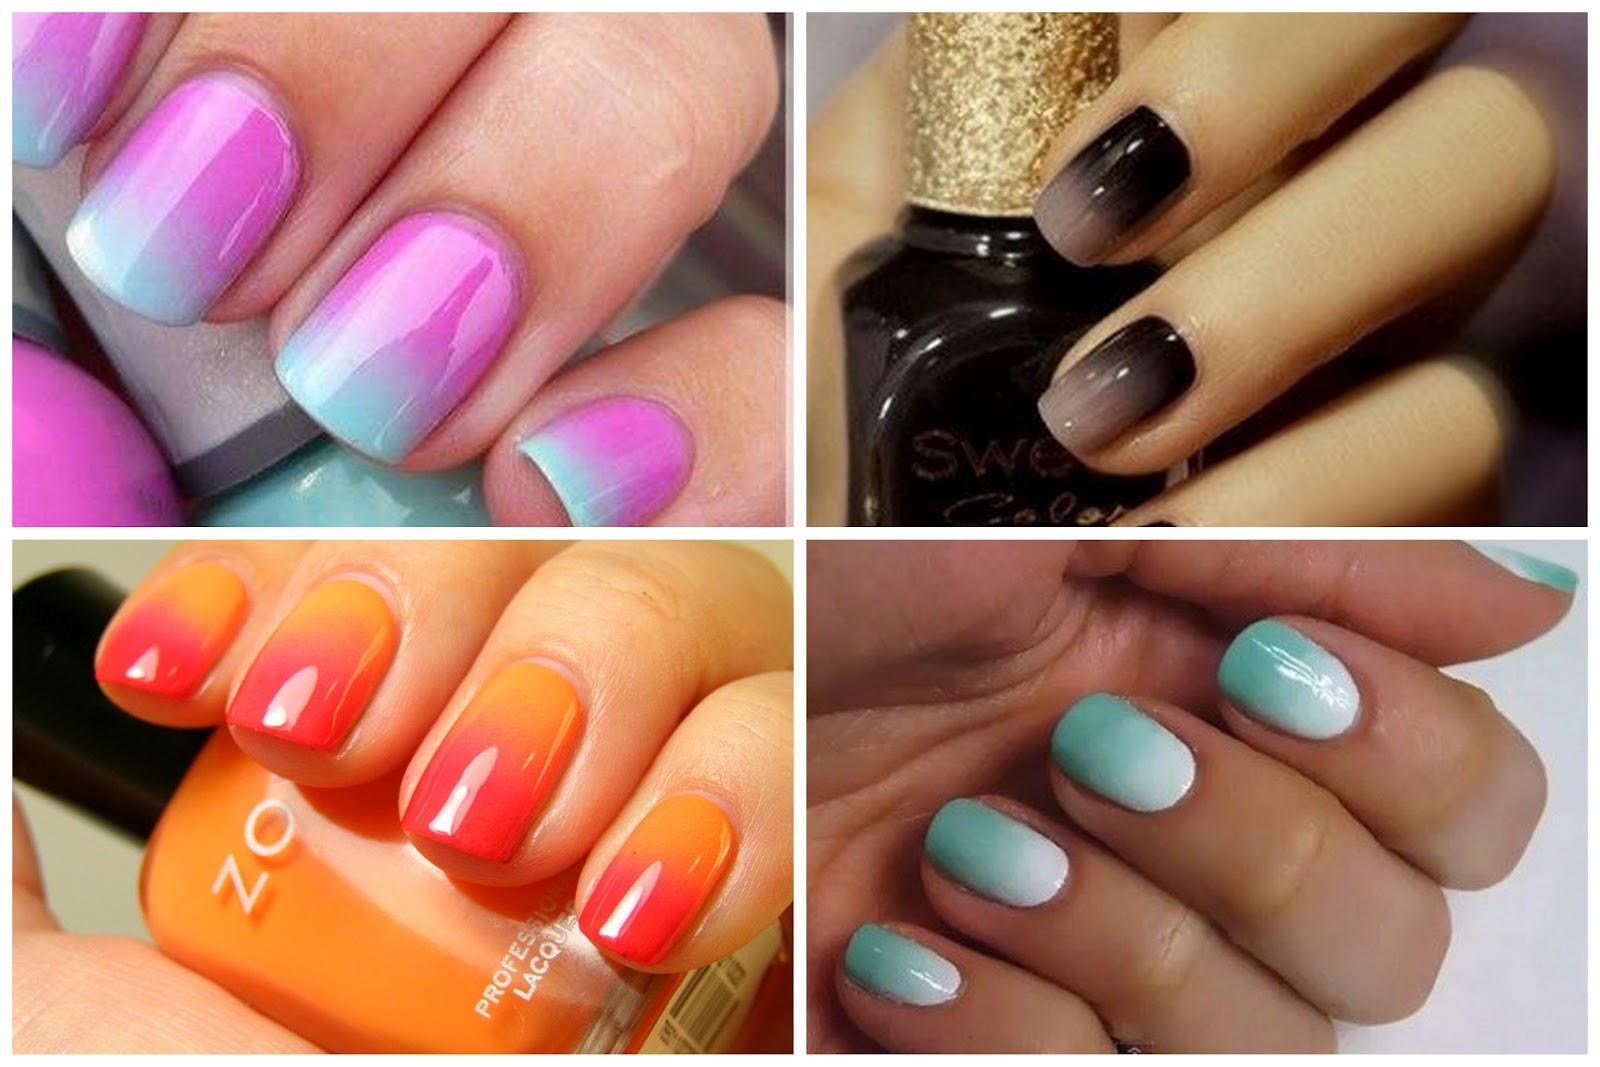
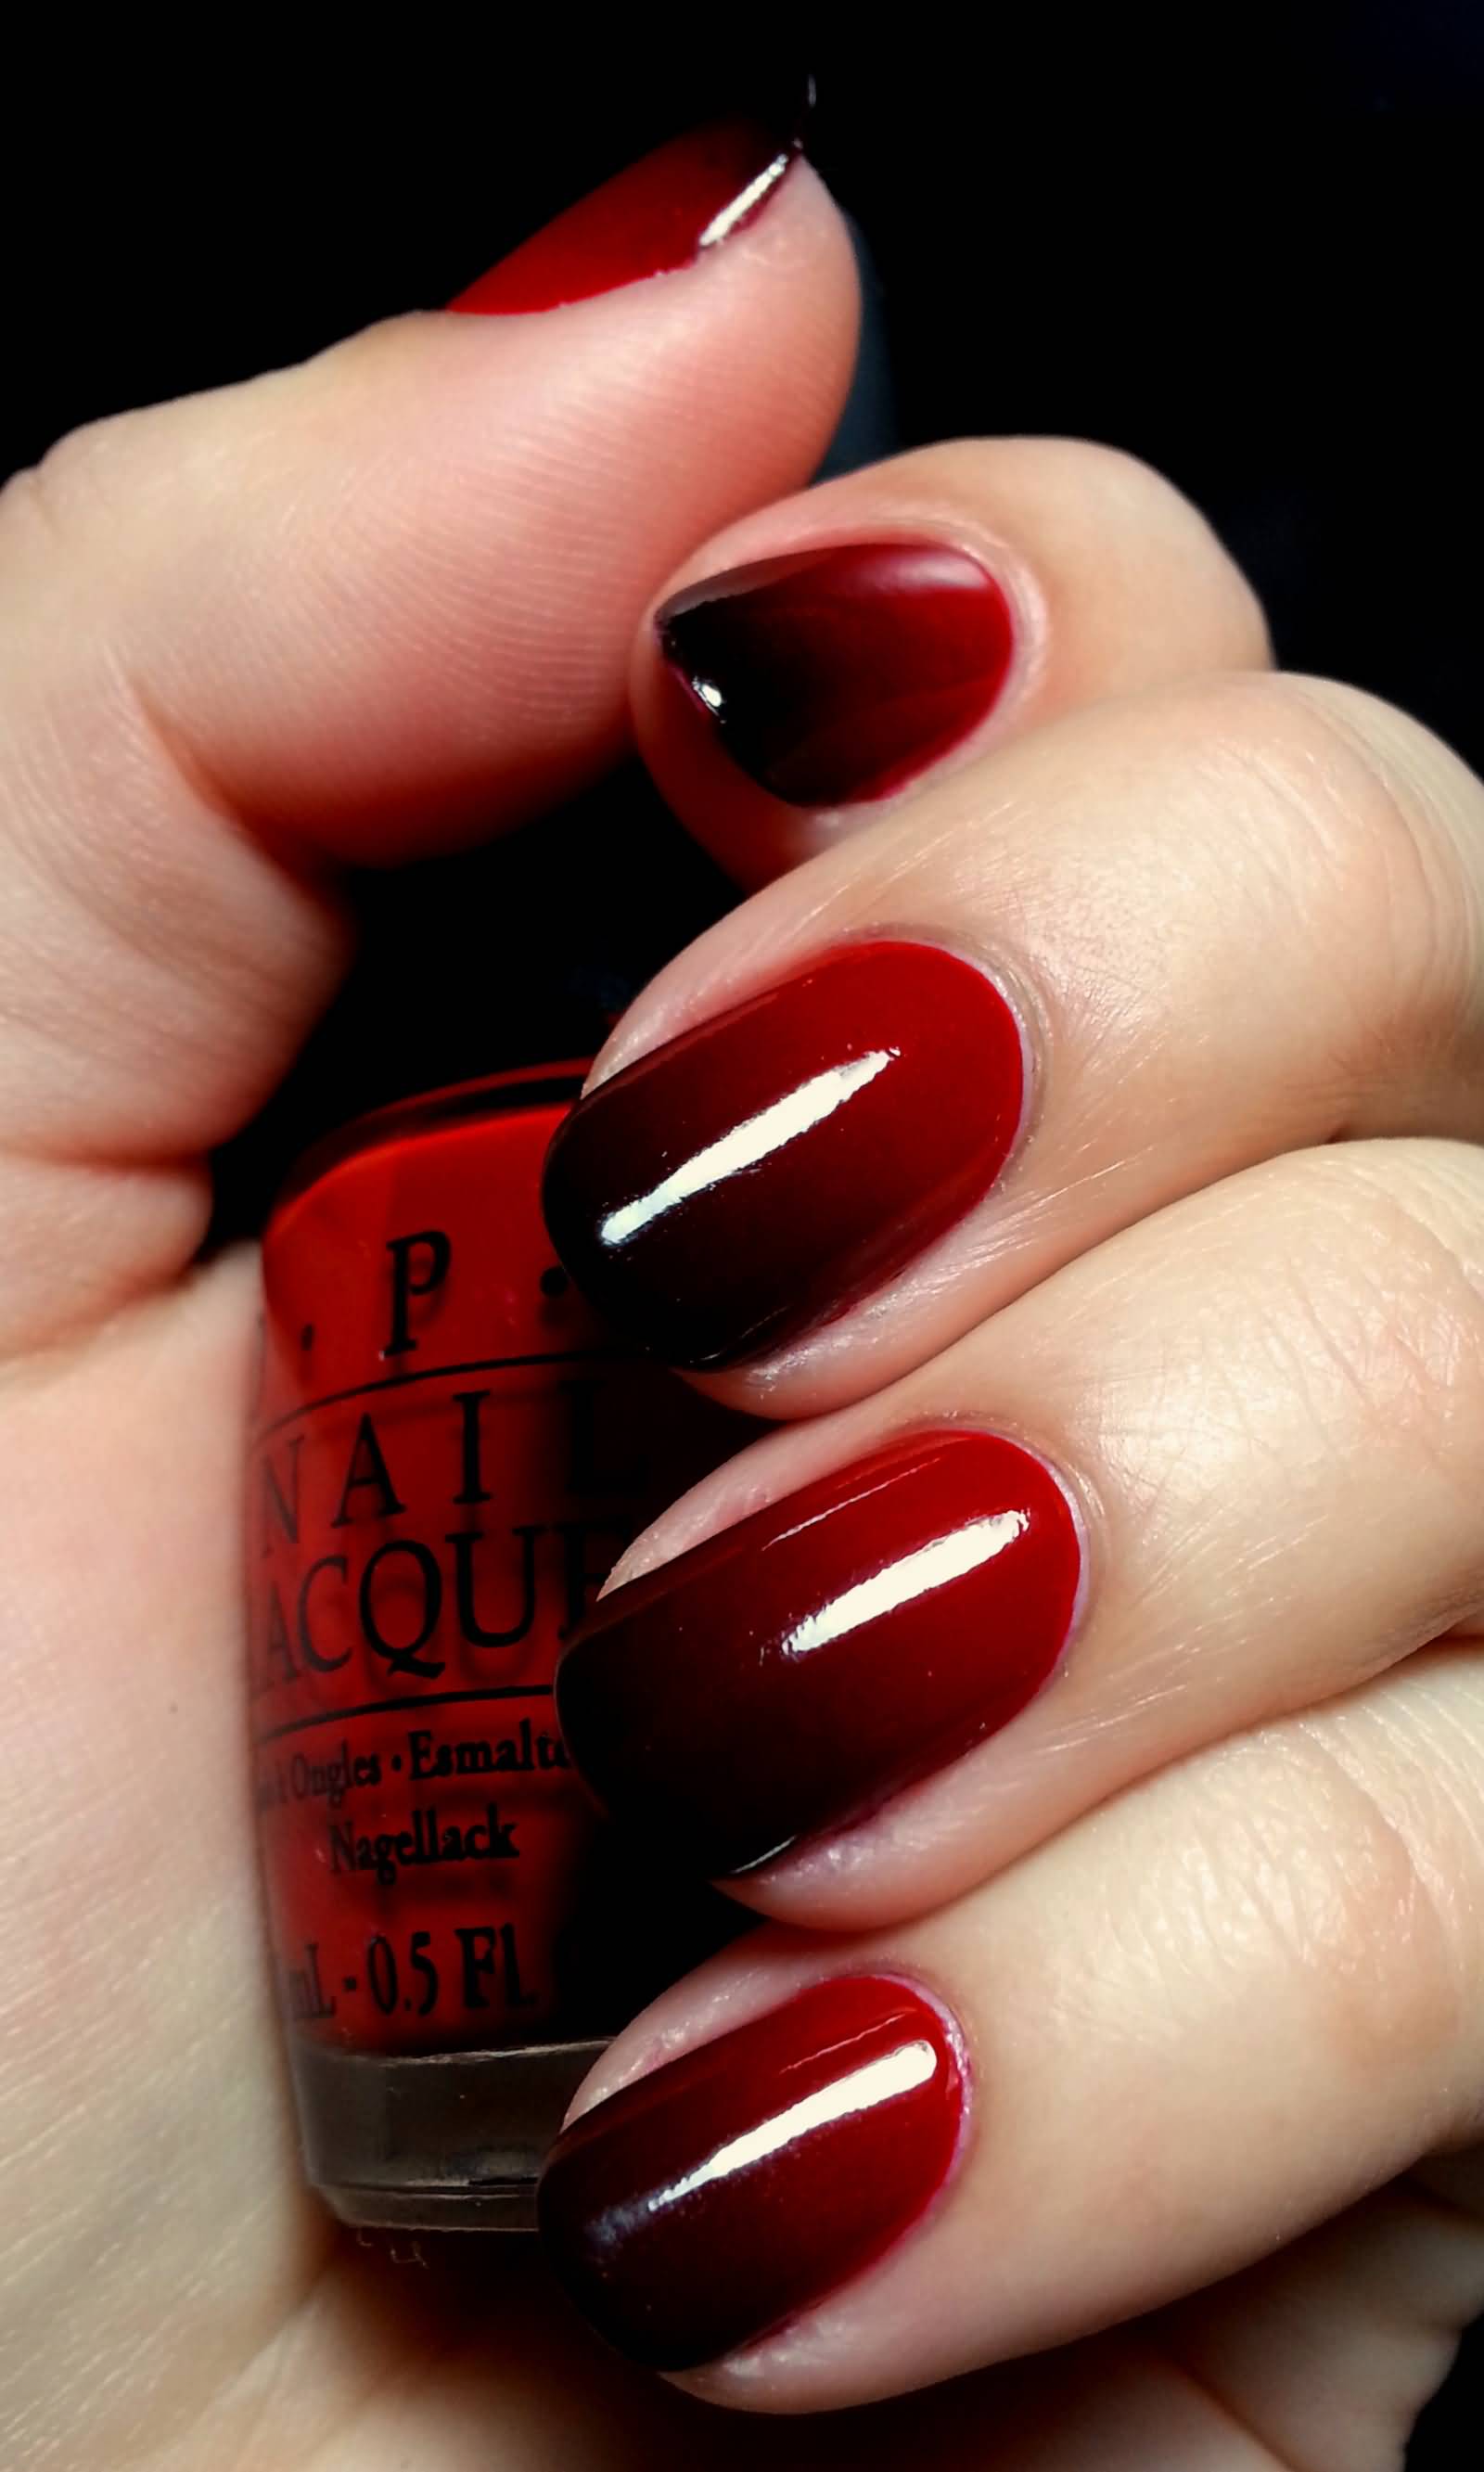
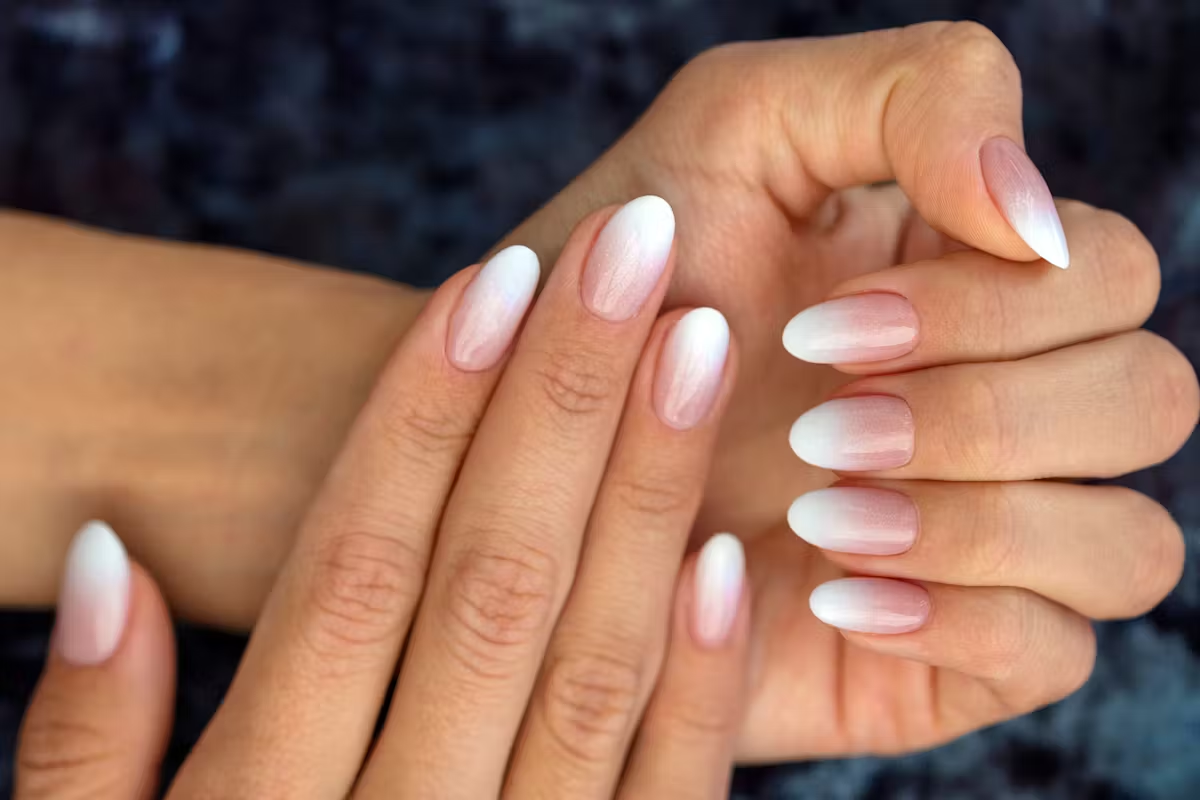
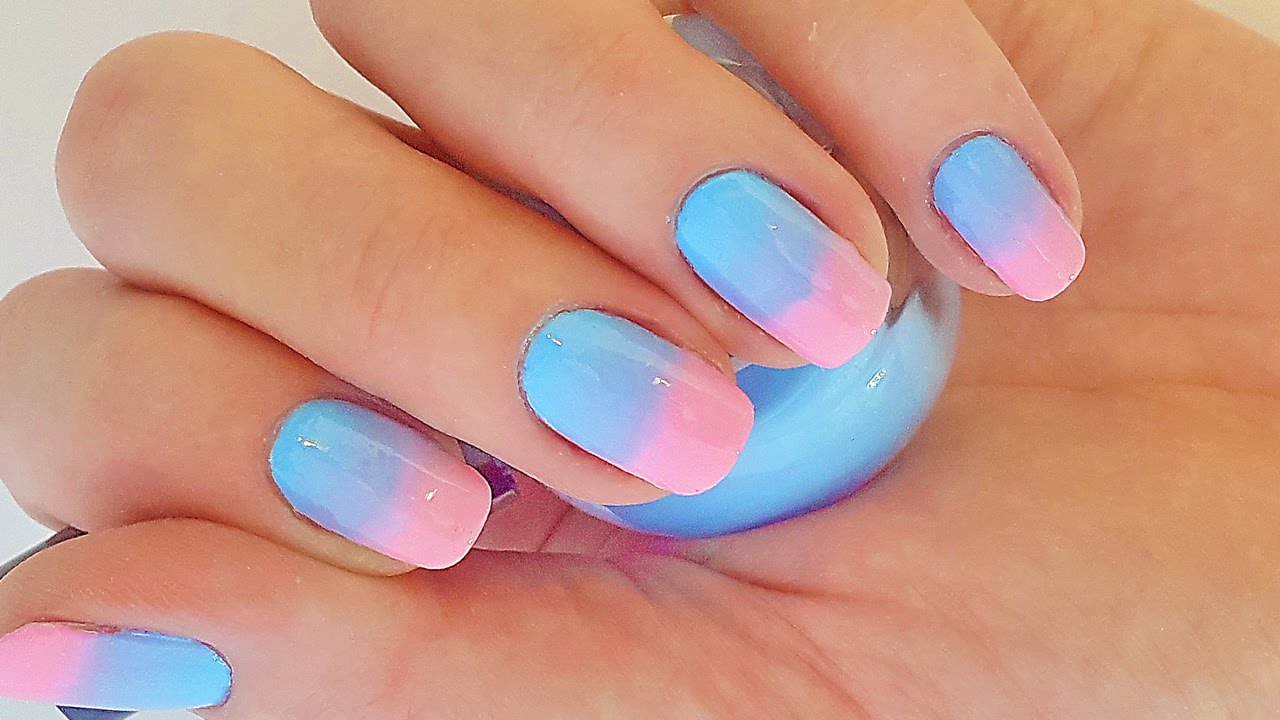
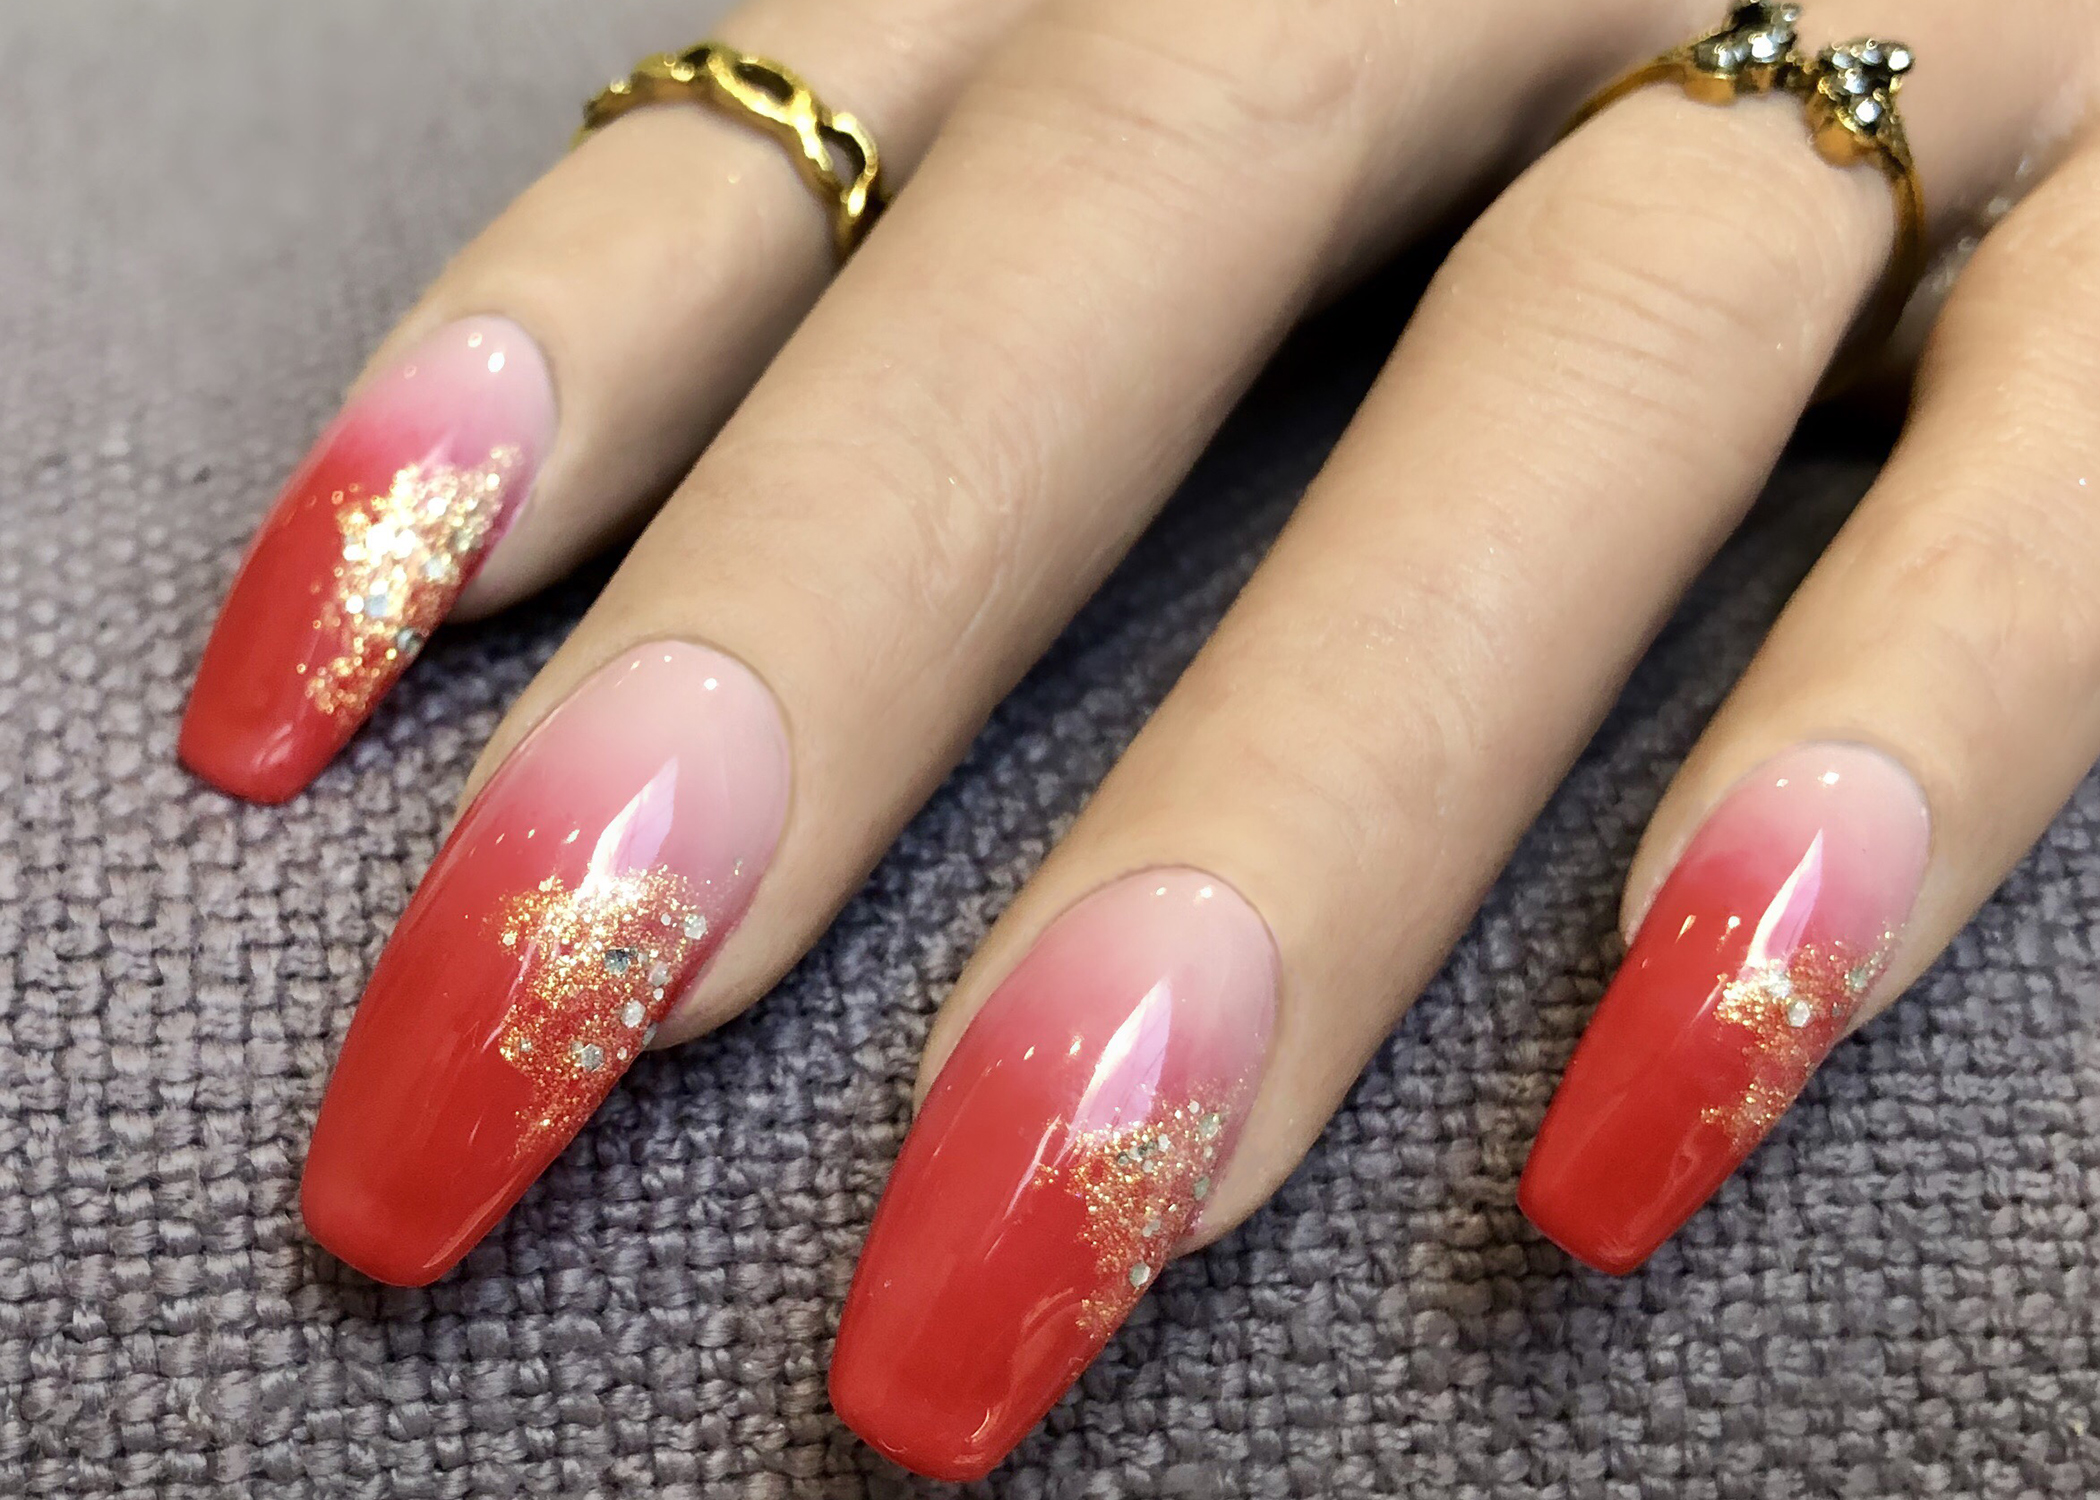
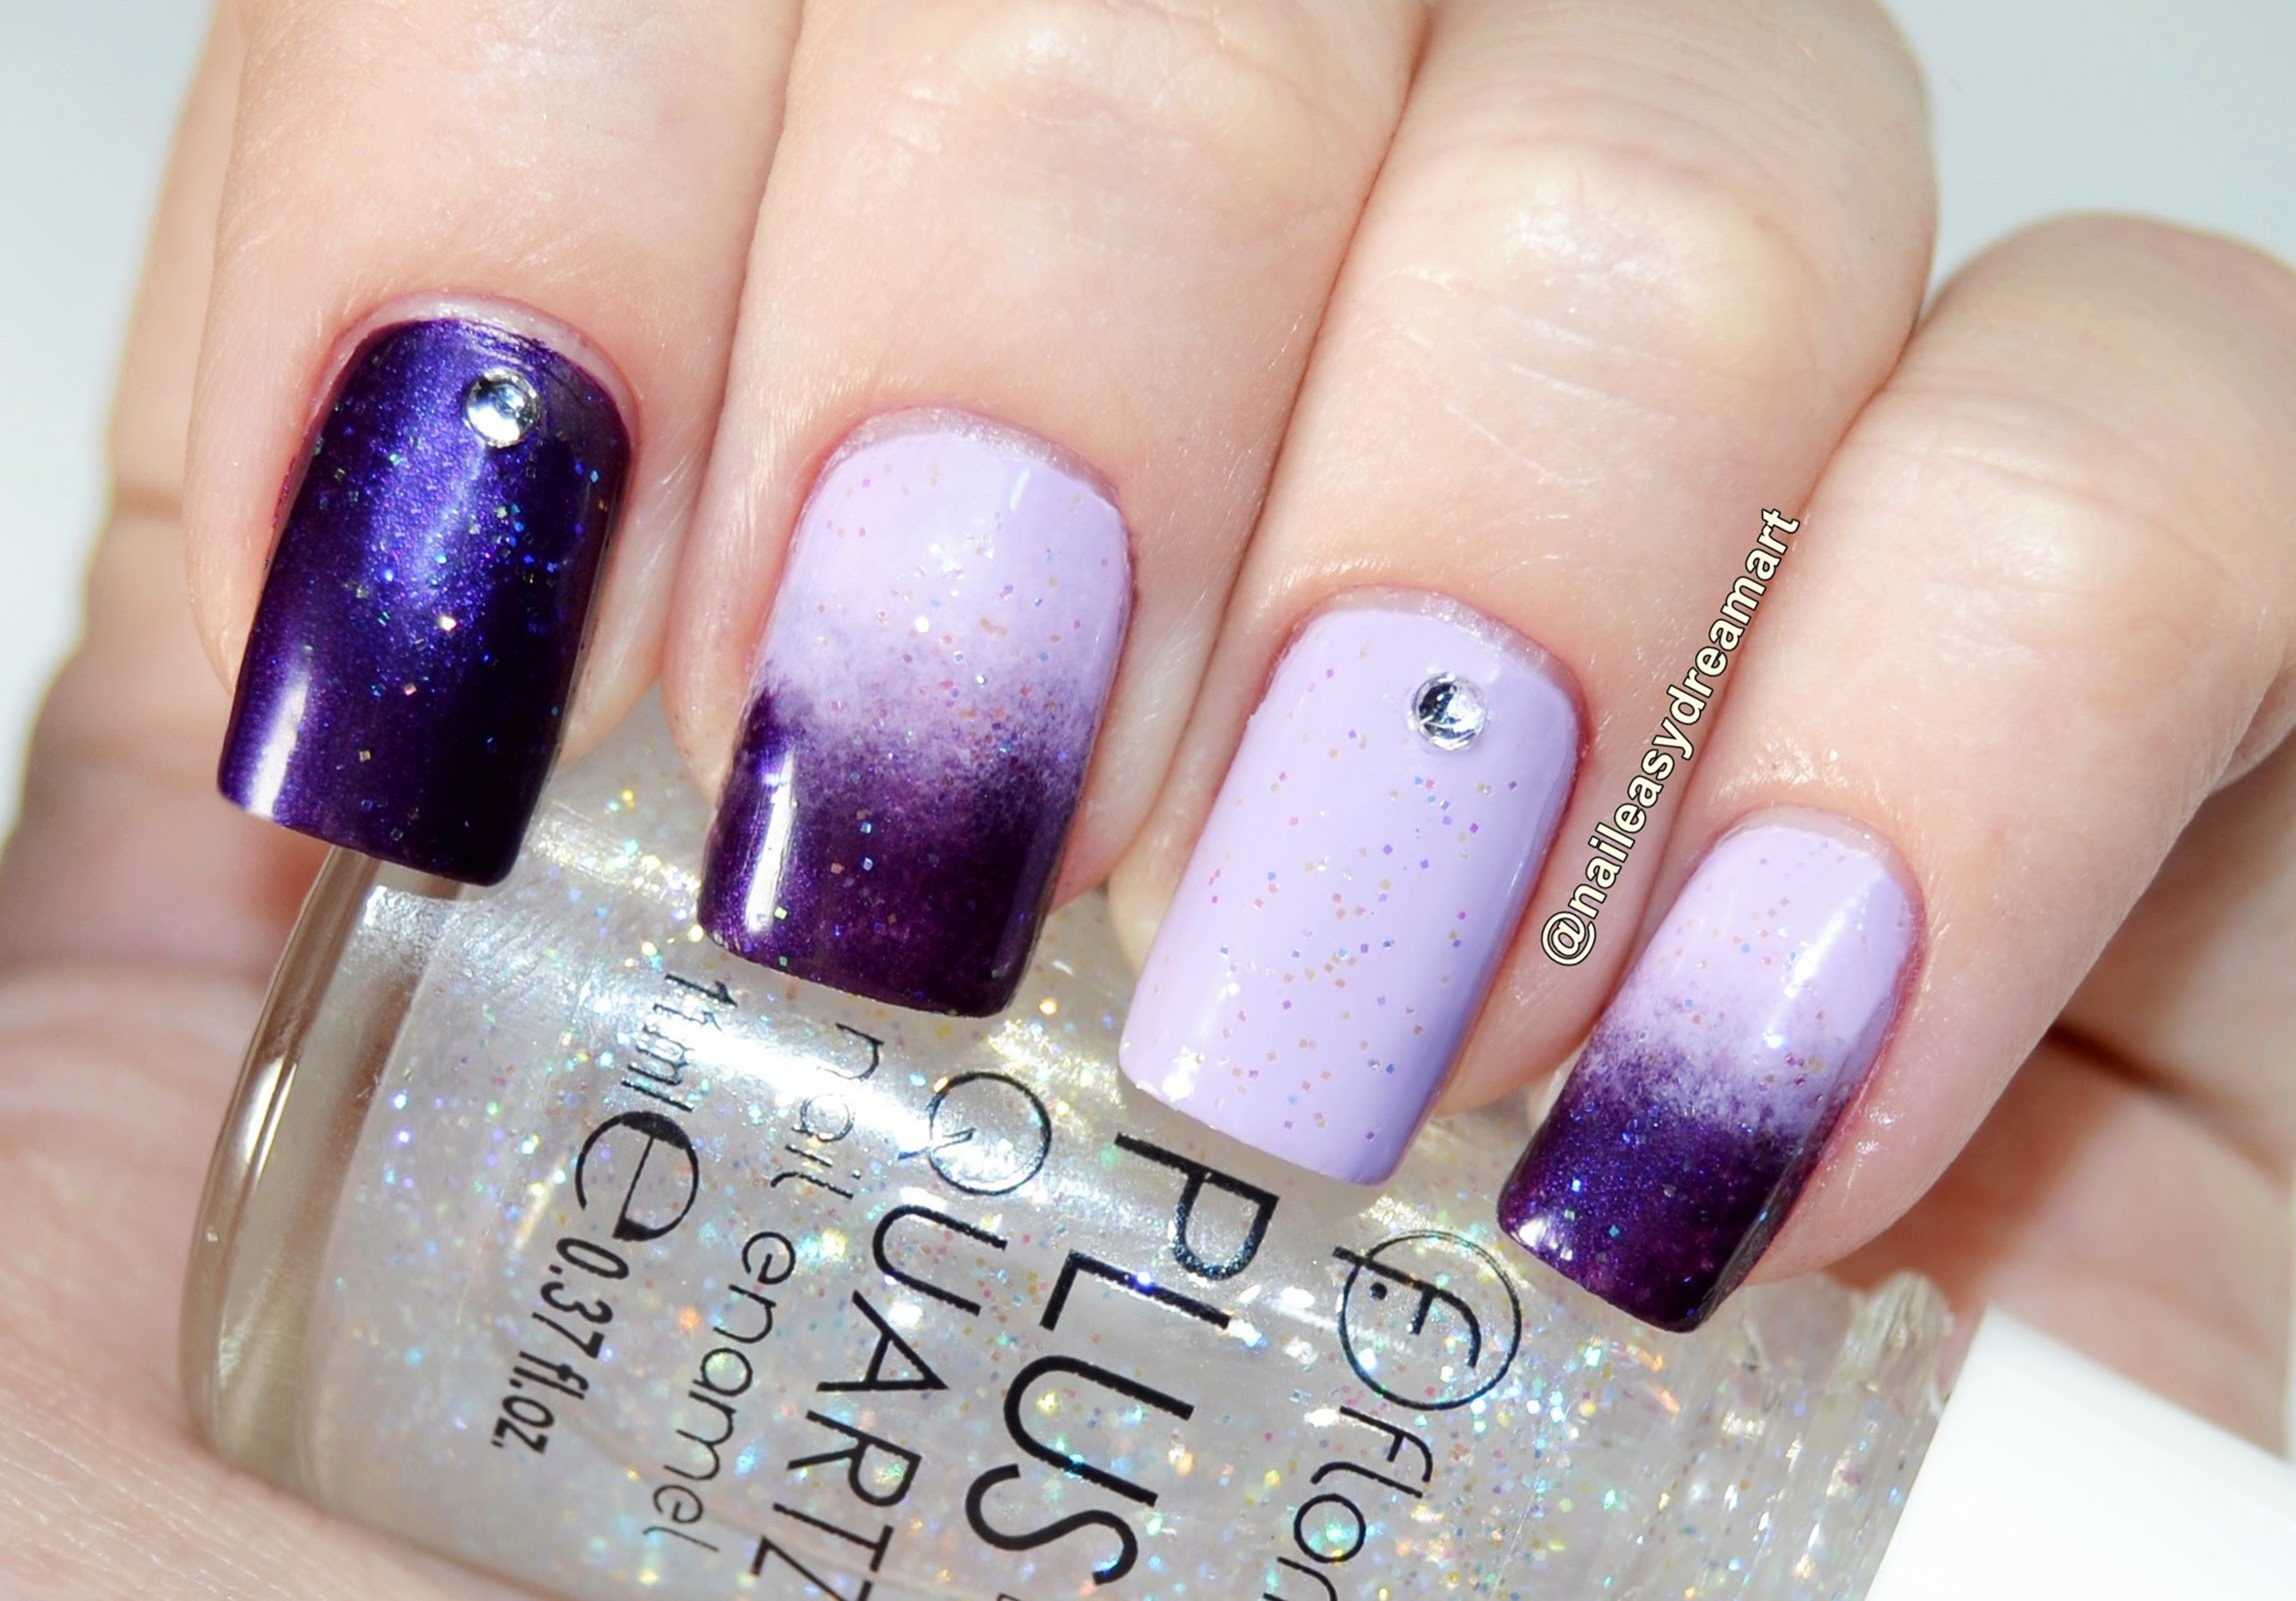
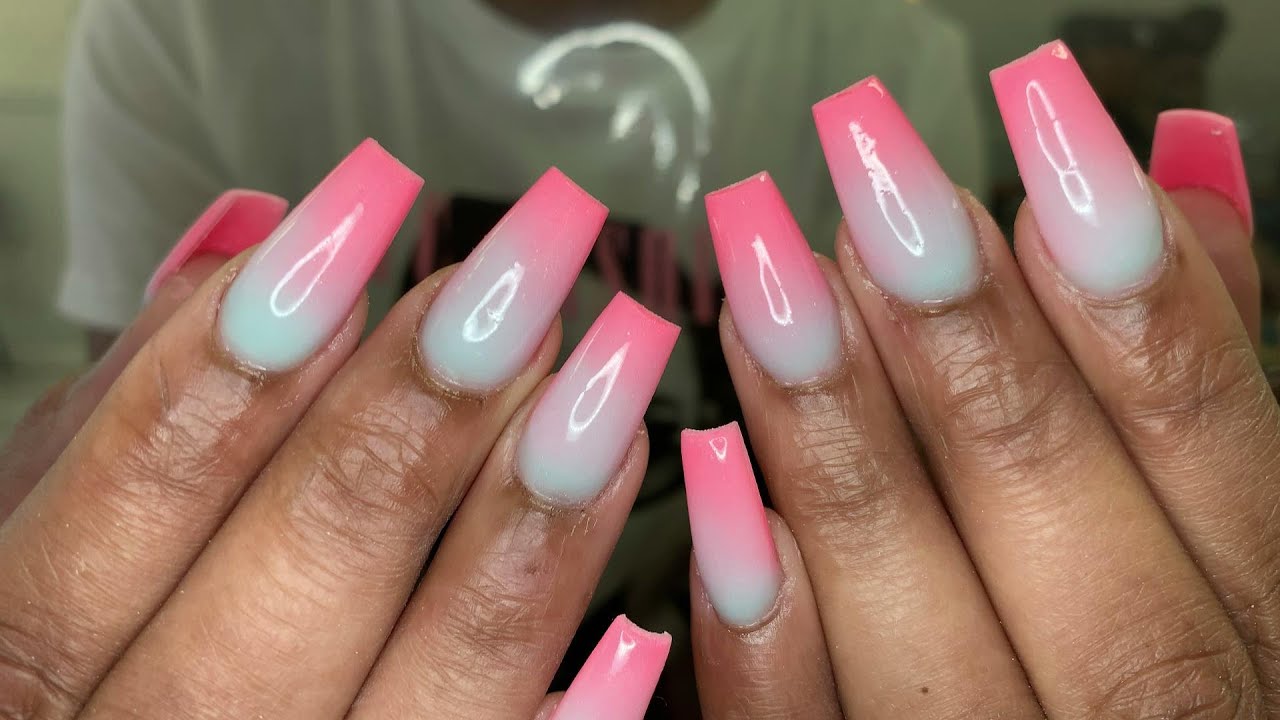
Ombre nails have been a popular trend in the world of nail art, and for good reason. The gradient effect adds a touch of glamour and elegance to any manicure. While traditional ombre nails require using gel or regular polish, it can also be achieved with acrylic paint. In this tutorial, we will show you how to create beautiful ombre nails using acrylic paint. First, gather your materials. You will need a base coat, two or more colors of acrylic paint, a top coat, a makeup sponge, a small paintbrush, and some nail polish remover. Start by prepping your nails with a base coat. This will protect your nails and help the acrylic paint adhere better. Let it dry completely. Next, apply a light base color on your nails. This will serve as the base for your ombre effect. You can use any color you want, but lighter shades work best for this technique. Let it dry completely before moving on to the next step. Now, it's time to create your ombre effect. Pour a small amount of your chosen colors onto a palette or a piece of foil. Use a makeup sponge to pick up a small amount of one color and gently dab it onto the bottom half of your nail. Repeat this step with your other colors, slightly overlapping them to create a gradient effect. Once you are happy with the gradient, use a small paintbrush dipped in nail polish remover to clean up any excess paint around your cuticles and skin. This will give you a clean and polished look. Let the paint dry completely before applying a top coat. This will seal in your design and give your nails a shiny finish. And there you have it, gorgeous ombre nails using acrylic paint!1. How to Create Ombre Nails with Acrylic Paint | Nail Art Tutorial


1. How to Create Ombre Nails with Acrylic Paint

If you're a beginner in the world of nail art, creating an ombre effect with acrylic paint may seem intimidating. But fear not, because this tutorial will show you just how easy it can be. Start by gathering your materials - a base coat, two or more colors of acrylic paint, a top coat, a makeup sponge, a small paintbrush, and some nail polish remover. Prep your nails with a base coat and let it dry completely. Then, apply a light base color of your choice and let it dry as well. Now, instead of using a makeup sponge, we will be using a small paintbrush to create our ombre effect. Dip your brush in water and then in your chosen color of acrylic paint. Start at the bottom of your nail and paint small strokes upwards, slightly overlapping each stroke to create a gradient effect. Repeat this step with your other colors, blending them together as you go. Clean up any excess paint around your cuticles and skin using a small paintbrush dipped in nail polish remover. Once your design is dry, apply a top coat to seal it in and give your nails a glossy finish. And just like that, you have achieved an ombre nail art look using acrylic paint with ease!2. Easy Ombre Nail Art Tutorial Using Acrylic Paint


Nail Art Tutorial

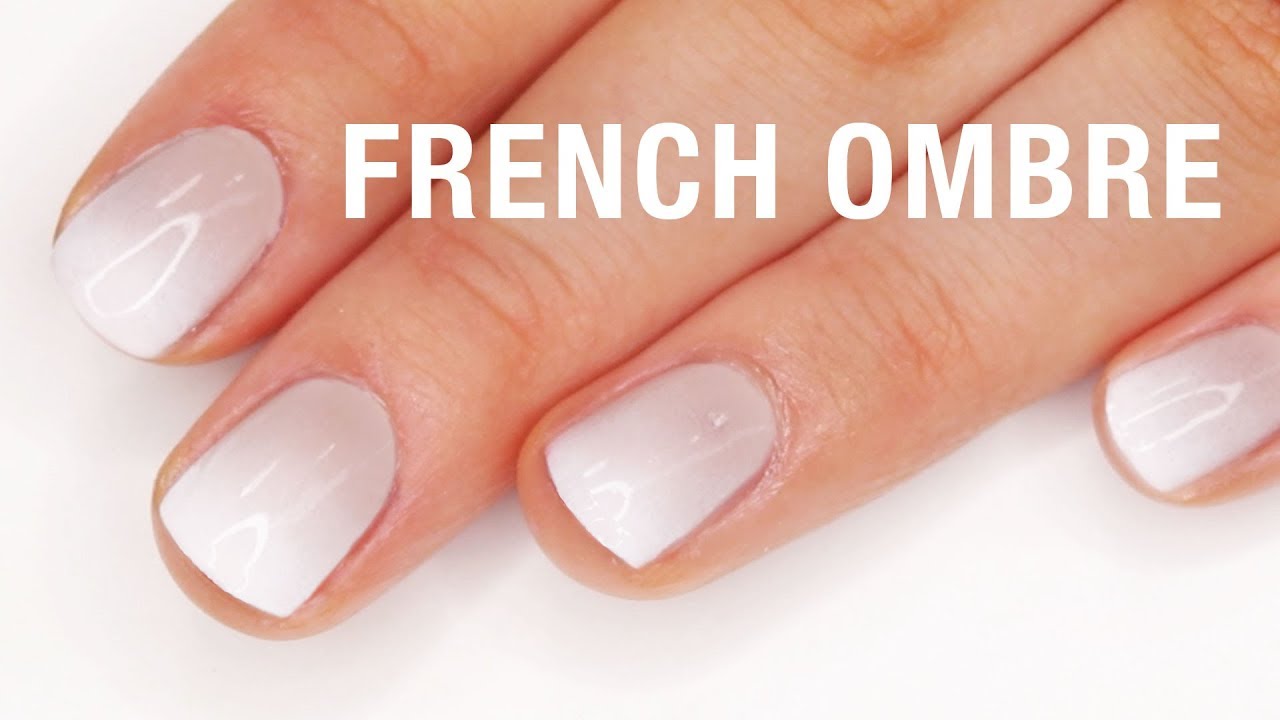


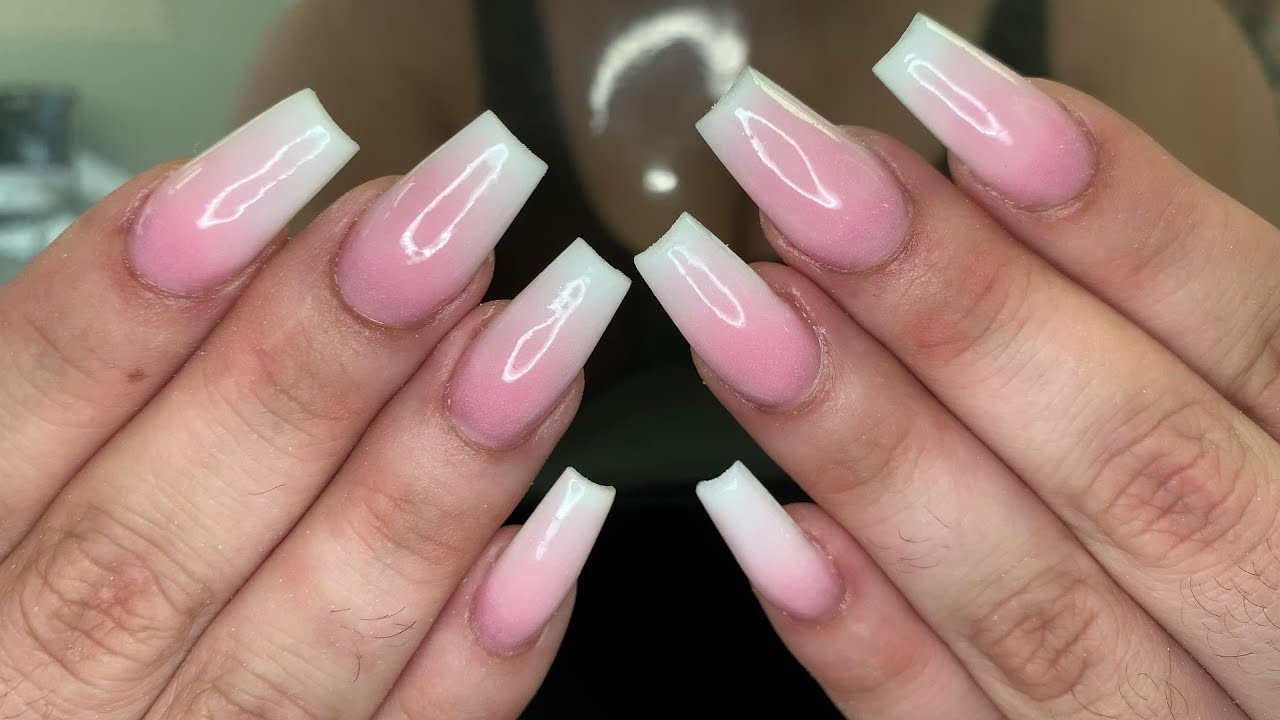
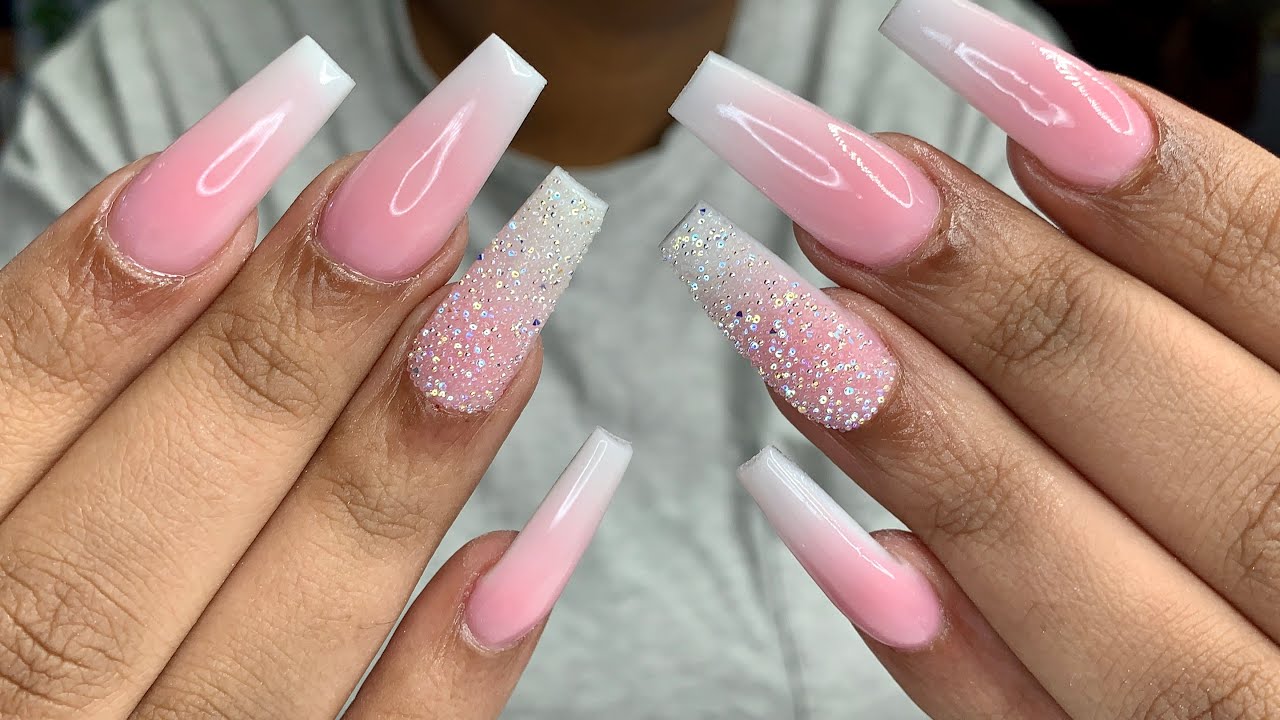
Why spend money at a nail salon when you can achieve stunning ombre nails at home? With this step by step tutorial, you'll be able to create your own DIY ombre nails using acrylic paint. First, gather your materials - a base coat, two or more colors of acrylic paint, a top coat, a makeup sponge, a small paintbrush, and some nail polish remover. Apply a base coat and let it dry completely. Then, choose your base color and apply it on your nails. Let it dry before moving on to the next step. Take your makeup sponge and apply a small amount of your chosen colors on it, slightly overlapping them. Dab the sponge onto your nails, starting from the bottom and working your way up. This will create a gradient effect. You may need to repeat this step a few times to achieve the desired intensity of the colors. Use a small paintbrush dipped in nail polish remover to clean up any excess paint around your cuticles and skin. Once your design is dry, apply a top coat to protect it and give your nails a glossy finish. And there you have it, beautiful DIY ombre nails using acrylic paint!3. DIY Ombre Nails with Acrylic Paint | Step by Step Tutorial


2. Easy Ombre Nail Art Tutorial Using Acrylic Paint


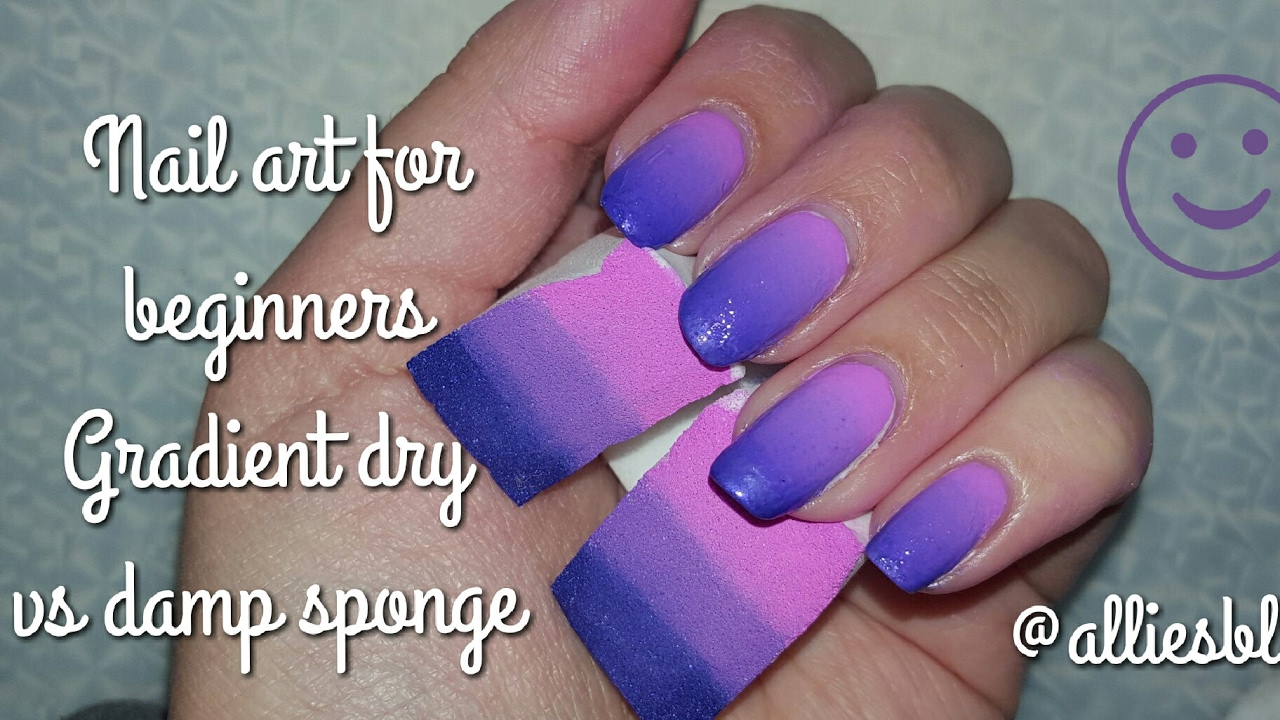
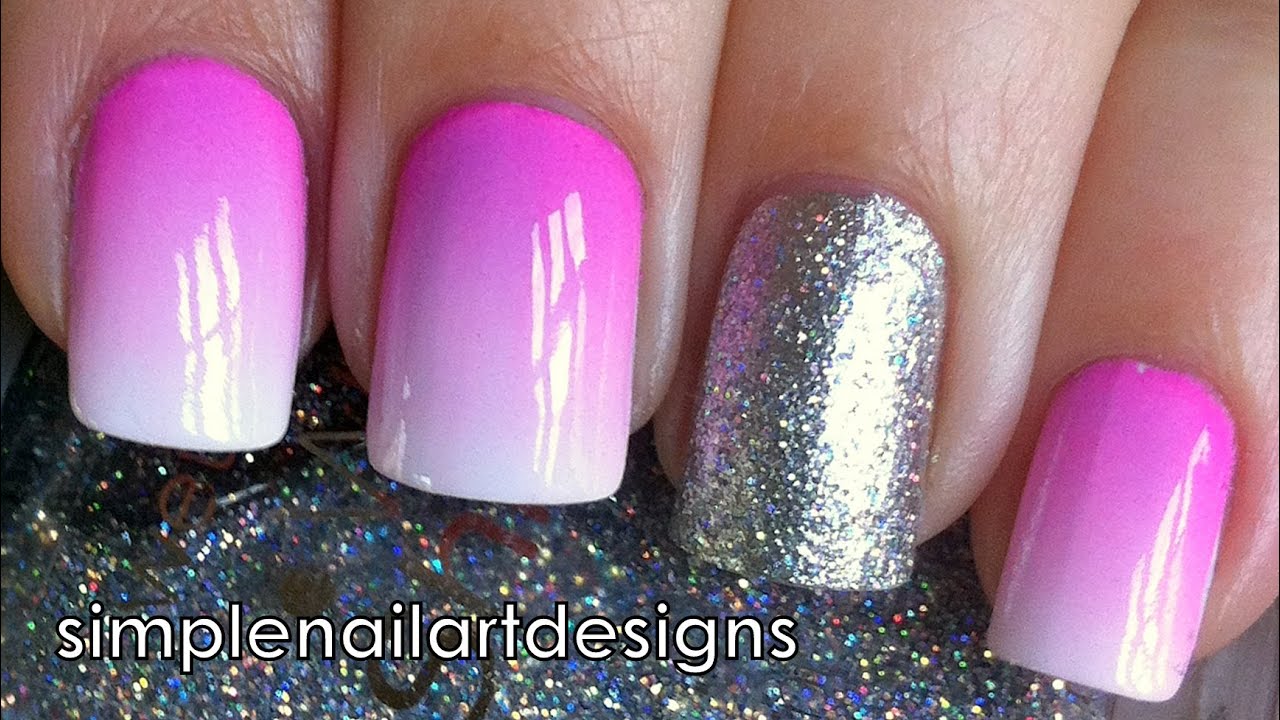
If you're a fan of using a makeup sponge to create ombre nails, then this tutorial is for you. We will show you how to create a stunning ombre nail art using acrylic paint and a sponge. As always, start by prepping your nails with a base coat. This will protect your nails and help the acrylic paint adhere better. Next, apply a light base color and let it dry completely. On a palette or a piece of foil, pour out a small amount of your chosen colors of acrylic paint. Use a makeup sponge to pick up a small amount of one color and gently dab it onto the bottom half of your nail. Repeat this step with your other colors, slightly overlapping them to create a gradient effect. Use a small paintbrush dipped in nail polish remover to clean up any excess paint around your cuticles and skin. Once your design is dry, apply a top coat to seal it in and give your nails a glossy finish. And there you have it, a gorgeous ombre nail art using acrylic paint and a sponge!4. Ombre Nail Art Tutorial with Acrylic Paint and Sponge


3. DIY Ombre Nails with Acrylic Paint

If you're new to the world of nail art, creating ombre nails with acrylic paint may seem daunting. But fear not, because this tutorial will show you just how simple it can be. Gather your materials - a base coat, two or more colors of acrylic paint, a top coat, a makeup sponge, a small paintbrush, and some nail polish remover. Prep your nails with a base coat and let it dry completely. Then, apply a light base color and let it dry as well. Take your chosen colors of acrylic paint and pour them onto a palette or a piece of foil. Using a small paintbrush, create small strokes of each color on your nails, slightly overlapping them to create a gradient effect. Clean up any excess paint using a small paintbrush dipped in nail polish remover. Once your design is dry, apply a top coat to seal it in and give your nails a glossy finish. And there you have it, simple acrylic paint ombre nails perfect for beginners!5. Acrylic Paint Ombre Nails | Simple Tutorial for Beginners


Step by Step Tutorial


If you don't have a makeup sponge or a small paintbrush on hand, don't worry! You can still achieve gorgeous ombre nails using just acrylic paint and a toothpick. Here's how: Start by prepping your nails with a base coat. Next, apply a light base color and let it dry completely. On a palette or a piece of foil, pour out a small amount of your chosen colors of acrylic paint. Use a toothpick to mix them together and create a gradient effect. Then, use the toothpick to apply the paint onto your nails, starting from the bottom and working your way up. Clean up any excess paint using a small paintbrush dipped in nail polish remover. Once your design is dry, apply a top coat to seal it in and give your nails a glossy finish. And there you have it, beautiful ombre nails using just acrylic paint and a toothpick!6. Ombre Nail Art Tutorial Using Acrylic Paint and Toothpick


4. Ombre Nail Art Tutorial with Acrylic Paint and Sponge


If you're someone who likes to know every little detail, then this tutorial is for you. We will show you exactly how to create stunning ombre nails using acrylic paint. First, gather your materials - a base coat, two or more colors of acrylic paint, a top coat, a makeup sponge, a small paintbrush, and some nail polish remover. Start by prepping your nails with a base coat to protect them and help the acrylic paint adhere better. Next, apply a light base color and let it dry completely. On a palette or a piece of foil, pour out a small amount of your chosen colors of acrylic paint. Dab a makeup sponge onto the paint and gently dab it onto your nails, starting from the bottom and working your way up. Repeat this step with your other colors, slightly overlapping them to create a gradient effect. Use a small paintbrush dipped in nail polish remover to clean up any excess paint around your cuticles and skin. Once your design is dry, apply a top coat to seal it in and give your nails a glossy finish. And there you have it, detailed steps on how to do ombre nails with acrylic paint!7. How to Do Ombre Nails with Acrylic Paint | Detailed Tutorial


5. Acrylic Paint Ombre Nails

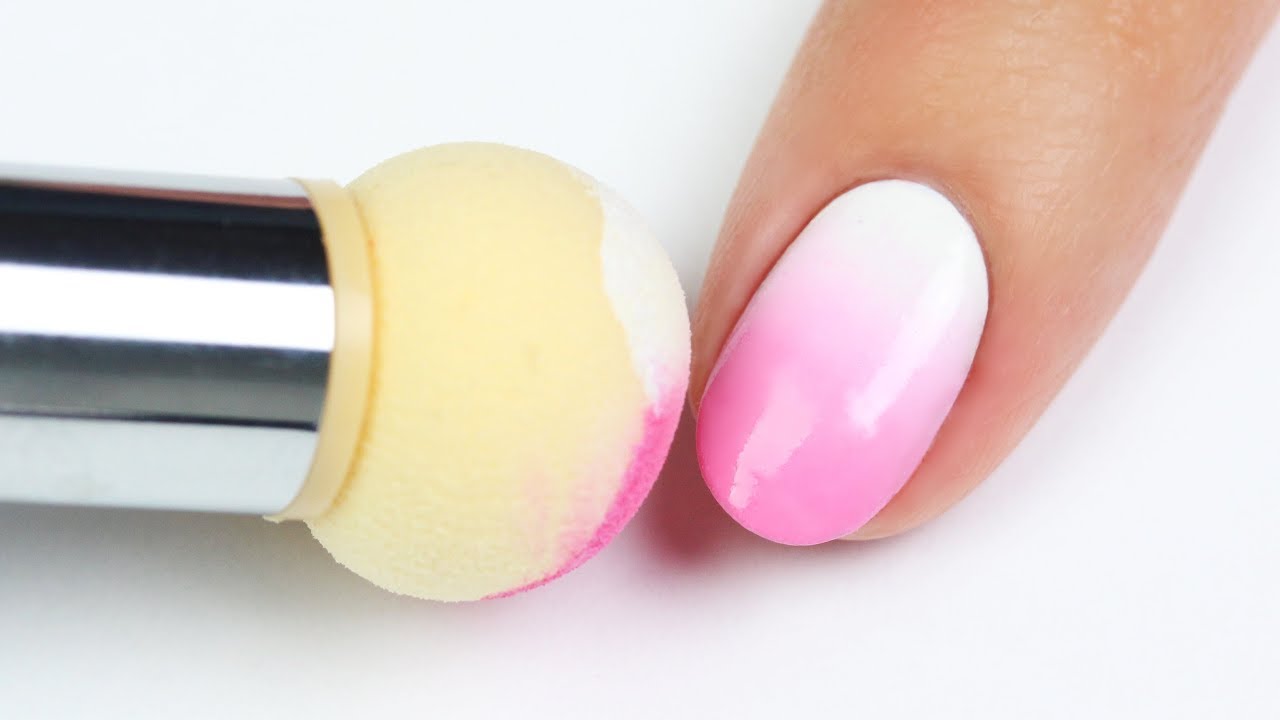
One of the most common methods for creating ombre nails is using a makeup sponge. In this tutorial, we will show you how to achieve the perfect ombre nail art using acrylic paint and a makeup sponge. As always, start by prepping your nails with a base coat. Next, apply a light base color and let it dry completely. On a palette or a piece of foil, pour out a small amount of your chosen colors of acrylic paint. Use a makeup sponge to pick up a small amount of one color and gently dab it onto the bottom half of your nail. Repeat this step with your other colors, slightly overlapping them to create a gradient effect. Use a small paintbrush dipped in nail polish remover to clean up any excess paint around your cuticles and skin. Once your design is dry, apply a top coat to seal it in and give your nails a glossy finish. And there you have it, stunning ombre nails using a makeup sponge and acrylic paint!8. Ombre Nail Art Tutorial with Acrylic Paint and Makeup Sponge


Simple Tutorial for Beginners


If you're a fan of the gradient look, then this tutorial is for you. We will show you how to create beautiful ombre nails using acrylic paint and a gradient technique. Start by prepping your nails with a base coat to protect them. Next, apply a light base color and let it dry completely. On a palette or a piece of foil, pour out a small amount of your chosen colors of acrylic paint. Use a small paintbrush to create small strokes of each color on your nails, slightly overlapping them to create a gradient effect. Clean up any excess paint using a small paintbrush dipped in nail polish remover. Once your design is dry, apply a top coat to seal it in and give your nails a glossy finish. And there you have it, beautiful acrylic paint ombre nails with a gradient effect!9. Acrylic Paint Ombre Nails | Gradient Nail Art Tutorial


6. Ombre Nail Art Tutorial Using Acrylic Paint and Toothpick


If you have a striping brush on hand, you can use it to create stunning ombre nails with acrylic paint. Here's how: Start by applying a base coat to protect your nails. Next, apply a light base color and let it dry completely. On a palette or a piece of foil, pour out a small amount of your chosen colors of acrylic paint. Use a striping brush to create small strokes of each color on your nails, slightly overlapping them to create a gradient effect. Clean up any excess paint using a small paintbrush dipped in nail polish remover. Once your design is dry, apply a top coat to seal it in and give your nails a glossy finish. And there you have it, gorgeous ombre nails using acrylic paint and a striping brush!10. Ombre Nail Art Tutorial Using Acrylic Paint and Striping Brush


7. How to Do Ombre Nails with Acrylic Paint


How to Create Stunning Ombre Nail Art with Acrylic Paint
The Beauty of Ombre Nail Art
 Ombre nail art is a popular trend that involves blending two or more colors on the nails, creating a gradient effect. This technique adds a touch of elegance and sophistication to any manicure. While ombre nails can be achieved using regular nail polish, using
acrylic paint
allows for more precise and vibrant color blending. In this tutorial, we will guide you through the steps to create beautiful ombre nail art using acrylic paint.
Ombre nail art is a popular trend that involves blending two or more colors on the nails, creating a gradient effect. This technique adds a touch of elegance and sophistication to any manicure. While ombre nails can be achieved using regular nail polish, using
acrylic paint
allows for more precise and vibrant color blending. In this tutorial, we will guide you through the steps to create beautiful ombre nail art using acrylic paint.
Gather Your Supplies
 Before getting started, make sure you have all the necessary supplies on hand. You will need a base coat, top coat, a variety of acrylic paint colors, a small paintbrush, and a makeup sponge.
Acrylic paint
comes in a wide range of colors, so feel free to get creative and choose shades that complement each other.
Before getting started, make sure you have all the necessary supplies on hand. You will need a base coat, top coat, a variety of acrylic paint colors, a small paintbrush, and a makeup sponge.
Acrylic paint
comes in a wide range of colors, so feel free to get creative and choose shades that complement each other.
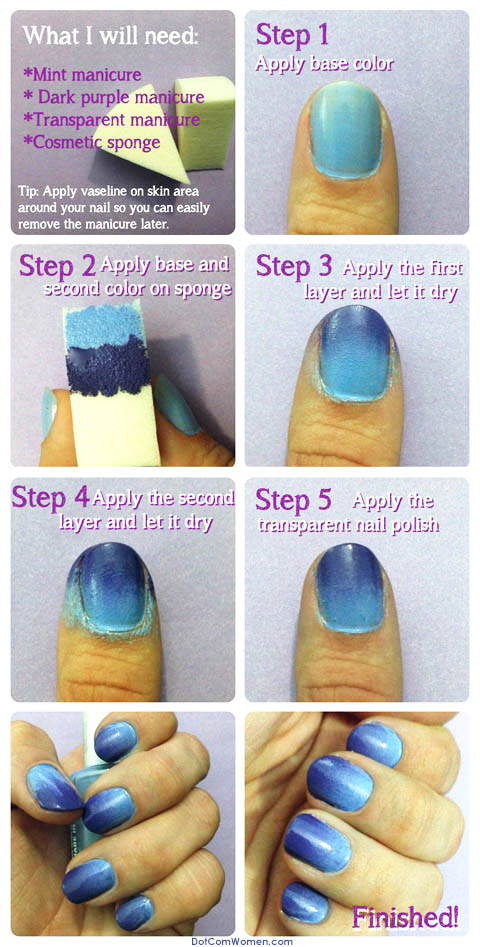
Step 1: Prep Your Nails
 Start by preparing your nails for the ombre design. This involves shaping your nails, pushing back your cuticles, and applying a base coat. The base coat will help the acrylic paint adhere to your nails and prevent any staining.
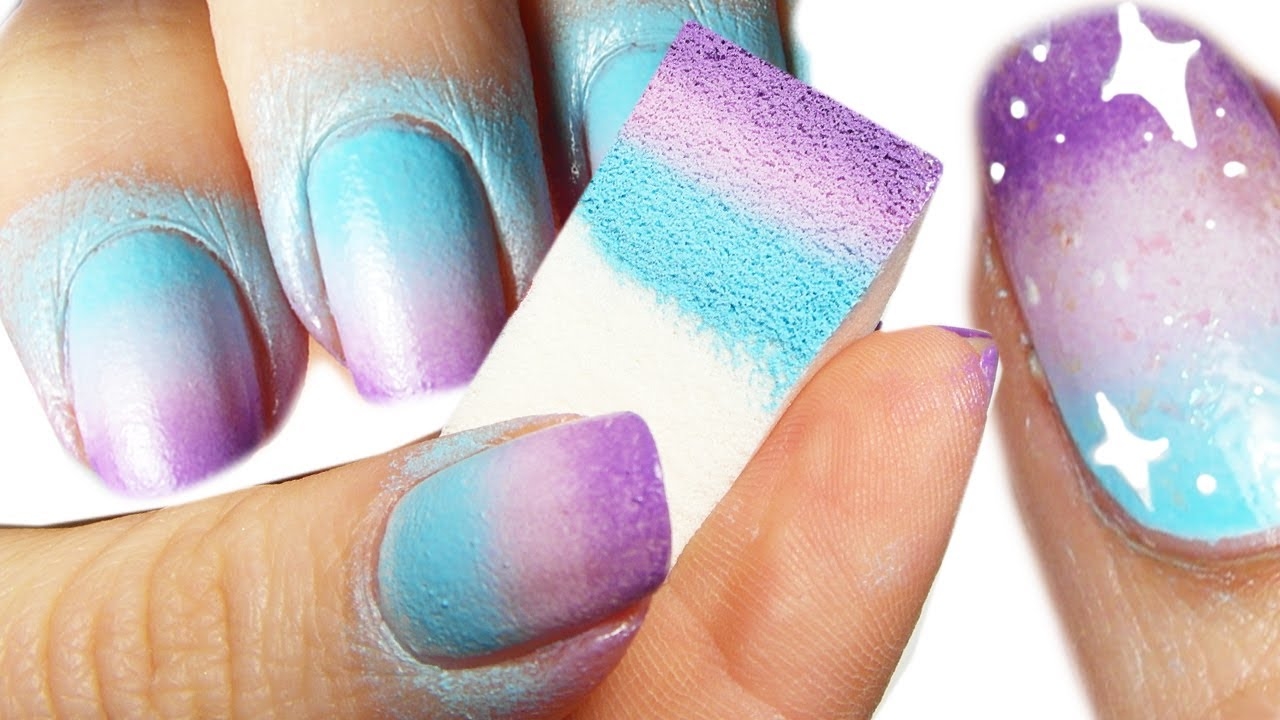
Step 2: Create a Paint Palette
 Using a clean surface, such as a plastic plate or a piece of foil, squirt a small amount of each acrylic paint color you will be using for your ombre design. Make sure to leave enough space between each color for blending.
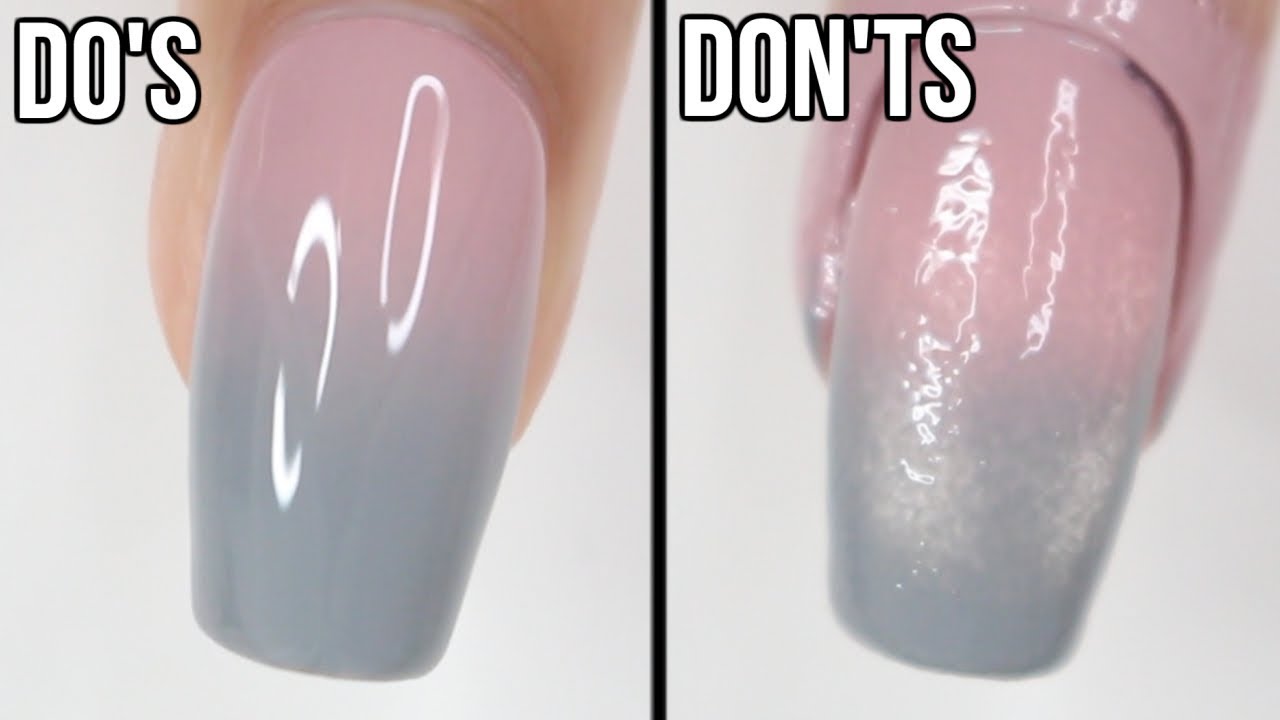
Step 3: Paint Your Nails
 Using your small paintbrush, apply a thin layer of the lightest color to the tips of your nails. This will serve as the base for your ombre design. Next, dip the tip of your makeup sponge into the next color and gently dab it onto the middle of your nail. Repeat this step with each color, working your way down the nail and slightly overlapping each color to create a seamless blend.
Step 4: Blend and Repeat
 Once you have applied all the colors, use a clean side of the sponge to gently blend the colors together. You may need to add more paint to your palette and repeat the process until you achieve your desired ombre effect.
Step 5: Seal the Design
 Once the paint has dried, apply a top coat to seal and protect your ombre design. This will also give your nails a glossy finish.
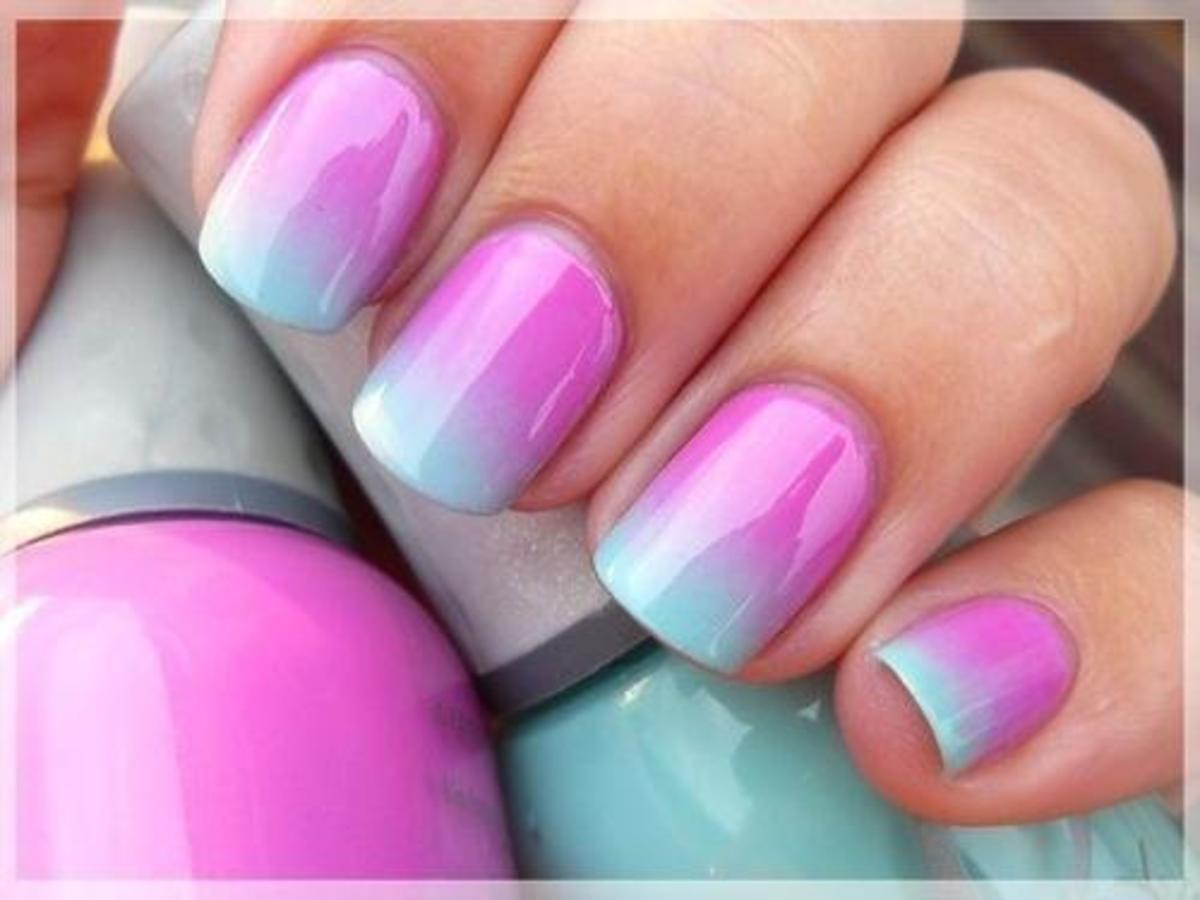
Play Around with Different Colors and Techniques
 Don't be afraid to experiment with different color combinations and techniques. You can try vertical or diagonal ombre designs, or even add glitter for some extra sparkle. With
acrylic paint
, the possibilities are endless.
Now that you know how to create stunning ombre nail art using acrylic paint, you can easily achieve this trendy look at home. Have fun and get creative with your ombre designs!
Don't be afraid to experiment with different color combinations and techniques. You can try vertical or diagonal ombre designs, or even add glitter for some extra sparkle. With
acrylic paint
, the possibilities are endless.
Now that you know how to create stunning ombre nail art using acrylic paint, you can easily achieve this trendy look at home. Have fun and get creative with your ombre designs!


