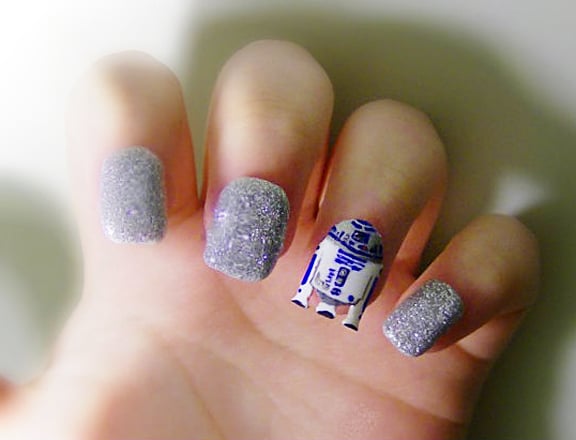
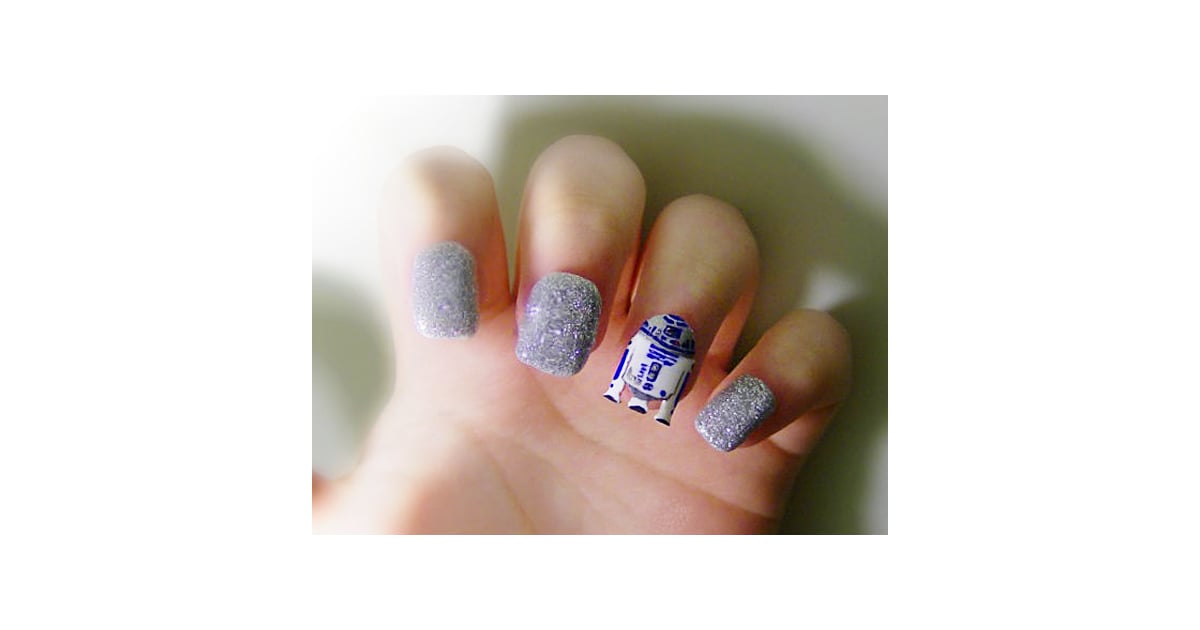
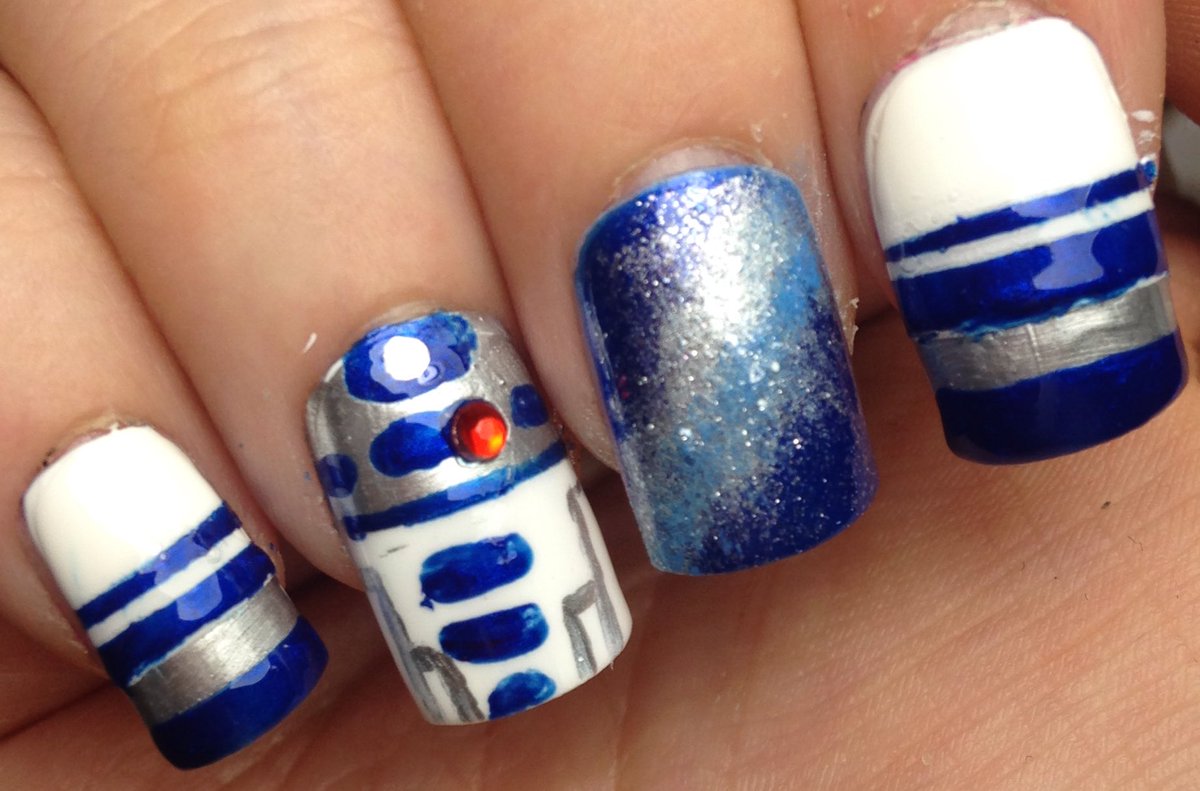
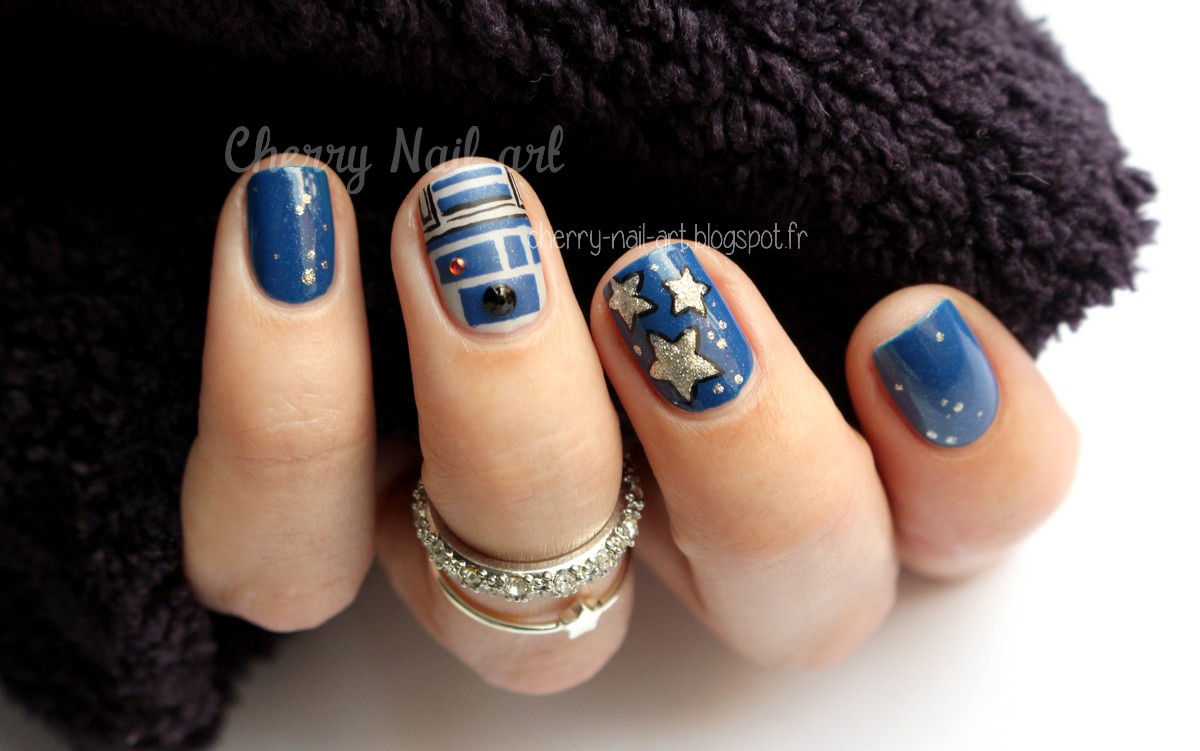
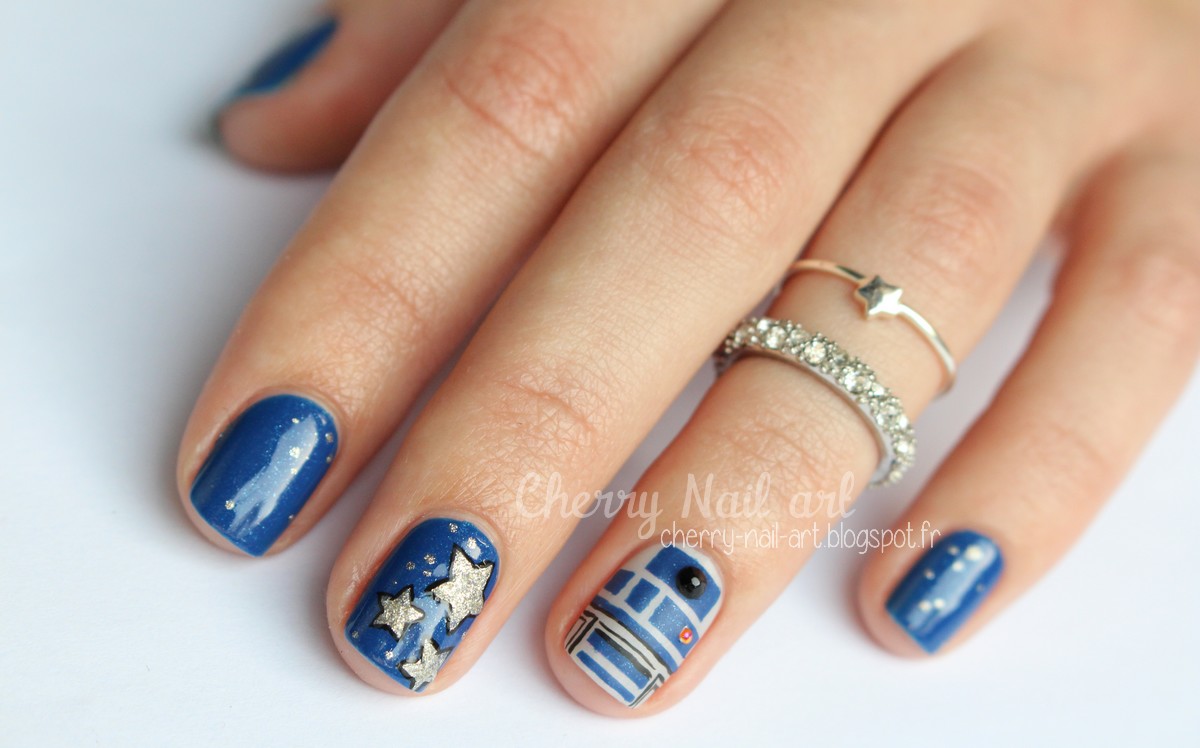
Looking to add a touch of intergalactic charm to your manicure? Look no further than this R2-D2 nail art tutorial by Cutepolish. This design is perfect for fans of the beloved droid from the Star Wars franchise, and it's surprisingly easy to recreate at home. First, start off with a base coat to protect your nails and ensure your polish lasts longer. Then, apply two coats of white nail polish and let it dry completely. It's important to let each layer dry before moving on to the next step. Next, using a small nail art brush or a toothpick, create R2-D2's signature blue stripes on one side of your nail. You can use a light blue or a metallic blue polish for this step. Make sure to leave some space for the robot's other features. Then, on the opposite side of your nail, use a black nail art pen or a thin brush to create R2-D2's rectangular "eye" and "mouth". You can also use a dotting tool to create the circular shapes if you prefer. Fill in these shapes with black polish. To add some dimension and detail to your design, use a silver nail art pen or a thin brush to create R2-D2's buttons and details on the blue stripes. You can also use a white polish and a dotting tool to add small white dots on the blue stripes for a more accurate representation of the droid. Finish off your R2-D2 nails with a generous layer of top coat to seal in your design and add shine. And that's it! You now have a cute and quirky manicure that will surely impress any Star Wars fan.1. R2-D2 Nail Art Tutorial by Cutepolish


1. R2-D2 Nail Art Tutorial by Cutepolish


For a more detailed and intricate R2-D2 nail art, check out this tutorial by HannahRoxNails. This design is perfect for those looking for a challenge and have a bit more time on their hands. Start off with a white base coat and let it dry completely. Then, using a large dotting tool, create R2-D2's circular "head" on the middle of your nail using a light blue polish. Make sure to leave some space at the top for the "eye" and "mouth". Next, using a small nail art brush or a toothpick, create R2-D2's blue stripes on one side of your nail. Make sure to leave some space for the robot's other features. You can also add some light blue and silver details on the white base using a thin brush or a nail art pen. On the opposite side of your nail, use a black nail art pen or a thin brush to create R2-D2's rectangular "eye" and "mouth". Fill in these shapes with black polish. To add even more detail to your design, use a silver nail art pen or a thin brush to create R2-D2's buttons and details on the blue stripes. You can also use a white polish and a dotting tool to add small white dots on the blue stripes for a more accurate representation of the droid. Finally, use a small dotting tool and a black polish to create R2-D2's small black dots on the top and bottom of the white base. Finish off your manicure with a top coat and admire your handiwork.2. Star Wars R2-D2 Nail Art Tutorial by HannahRoxNails

2. Star Wars R2-D2 Nail Art Tutorial by HannahRoxNails


If you're short on time but still want to rock some R2-D2 nails, this tutorial by Nailed It NZ is perfect for you. It's a quick and simple design that still captures the essence of the beloved droid. Start off with a white base coat and let it dry completely. Then, using a large dotting tool, create R2-D2's circular "head" on the middle of your nail using a light blue polish. Make sure to leave some space at the top for the "eye" and "mouth". Next, using a small nail art brush or a toothpick, create R2-D2's blue stripes on one side of your nail. You can also use a light blue or a metallic blue polish for this step. Make sure to leave some space for the robot's other features. On the opposite side of your nail, use a black nail art pen or a thin brush to create R2-D2's rectangular "eye" and "mouth". Fill in these shapes with black polish. For the final touch, use a silver nail art pen or a thin brush to create R2-D2's buttons and details on the blue stripes. You can also use a white polish and a dotting tool to add small white dots on the blue stripes for a more accurate representation of the droid. Seal in your design with a top coat and show off your cute and easy R2-D2 nails.3. Easy R2-D2 Nail Art Tutorial by Nailed It NZ


3. Easy R2-D2 Nail Art Tutorial by Nailed It NZ


If you're a fan of holographic nail polish, this R2-D2 nail art tutorial by Simply Nailogical is perfect for you. It's a fun and unique take on the classic R2-D2 design. Start off with a white base coat and let it dry completely. Then, using a large dotting tool, create R2-D2's circular "head" on the middle of your nail using a holographic blue polish. Make sure to leave some space at the top for the "eye" and "mouth". Next, using a small nail art brush or a toothpick, create R2-D2's blue stripes on one side of your nail. You can also use a light blue or a metallic blue polish for this step. Make sure to leave some space for the robot's other features. On the opposite side of your nail, use a black nail art pen or a thin brush to create R2-D2's rectangular "eye" and "mouth". Fill in these shapes with black polish. For the final touch, use a silver nail art pen or a thin brush to create R2-D2's buttons and details on the blue stripes. You can also use a white polish and a dotting tool to add small white dots on the blue stripes for a more accurate representation of the droid. Finish off your R2-D2 holographic nails with a top coat to protect your design and add shine. You'll surely turn heads with this unique and eye-catching manicure.4. R2-D2 Nail Art Tutorial by Simply Nailogical


4. R2-D2 Nail Art Tutorial by Simply Nailogical


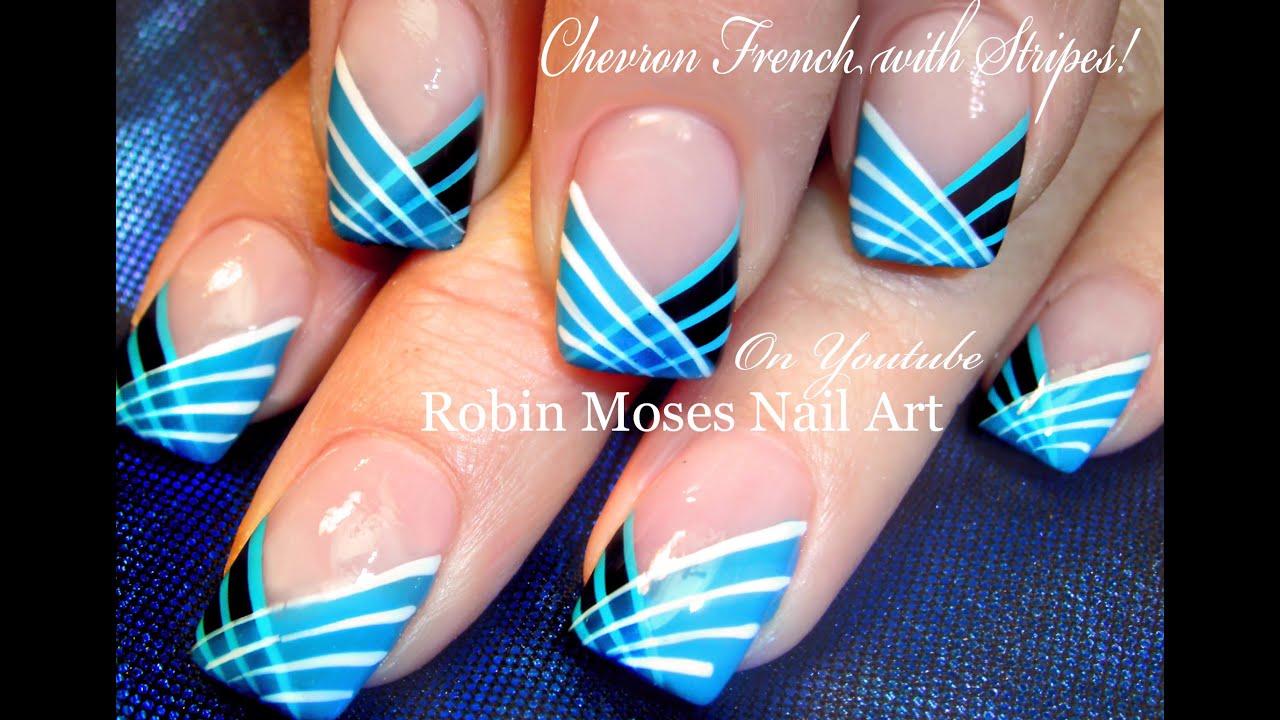
This R2-D2 nail art tutorial by Robin Moses Nail Art is perfect for those looking for a more cartoonish and fun take on the classic design. It's a great option for kids or anyone who loves cute and playful nail art. Start off with a white base coat and let it dry completely. Then, using a large dotting tool, create R2-D2's circular "head" on the middle of your nail using a light blue polish. Make sure to leave some space at the top for the "eye" and "mouth". Next, using a small nail art brush or a toothpick, create R2-D2's blue stripes on one side of your nail. You can also use a light blue or a metallic blue polish for this step. Make sure to leave some space for the robot's other features. On the opposite side of your nail, use a black nail art pen or a thin brush to create R2-D2's rectangular "eye" and "mouth". Fill in these shapes with black polish. For the final touch, use a white nail art pen or a thin brush to create R2-D2's buttons and details on the blue stripes. You can also use a black polish and a dotting tool to add small black dots on the white base for a more cartoon-like effect. Finish off your R2-D2 cartoon nails with a top coat and show off your adorable and playful manicure.5. R2-D2 Nail Art Tutorial by Robin Moses Nail Art


5. R2-D2 Nail Art Tutorial by Robin Moses Nail Art


Nails by Miri's R2-D2 nail art tutorial is perfect for those who want to add some sparkle and glam to their manicure. It's a great design for special occasions or if you just want to add some bling to your day. Start off with a white base coat and let it dry completely. Then, using a large dotting tool, create R2-D2's circular "head" on the middle of your nail using a light blue glitter polish. Make sure to leave some space at the top for the "eye" and "mouth". Next, using a small nail art brush or a toothpick, create R2-D2's blue stripes on one side of your nail. You can also use a light blue or a metallic blue polish for this step. Make sure to leave some space for the robot's other features. On the opposite side of your nail, use a black nail art pen or a thin brush to create R2-D2's rectangular "eye" and "mouth". Fill in these shapes with black polish. For the final touch, use a silver nail art pen or a thin brush to create R2-D2's buttons and details on the blue stripes. You can also use a white polish and a dotting tool to add small white dots on the blue stripes for a more accurate representation of the droid. Seal in your design with a top coat and admire your sparkling and glamorous R2-D2 nails.6. R2-D2 Nail Art Tutorial by Nails by Miri


6. R2-D2 Nail Art Tutorial by Nails by Miri


Nails by Jema's R2-D2 nail art tutorial is perfect for those who want to add some texture to their manicure. It's a great design for those who love experimenting with different nail art techniques. Start off with a white base coat and let it dry completely. Then, using a large dotting tool, create R2-D2's circular "head" on the middle of your nail using a textured blue polish. Make sure to leave some space at the top for the "eye" and "mouth". Next, using a small nail art brush or a toothpick, create R2-D2's blue stripes on one side of your nail. You can also use a light blue or a metallic blue polish for this step. Make sure to leave some space for the robot's other features. On the opposite side of your nail, use a black nail art pen or a thin brush to create R2-D2's rectangular "eye" and "mouth". Fill in these shapes with black polish. For the final touch, use a silver nail art pen or a thin brush to create R2-D2's buttons and details on the blue stripes. You can also use a white polish and a dotting tool to add small white dots on the blue stripes for a more accurate representation of the droid. Finish off your textured R2-D2 nails with a top coat and admire the unique and dimensional effect.7. R2-D2 Nail Art Tutorial by Nails by Jema


7. R2-D2 Nail Art Tutorial by Nails by Jema


Nails by Miri's second R2-D2 nail art tutorial is perfect for those who want a more abstract and modern take on the classic design. It's a great option for those who love minimalist and geometric nail art. Start off with a white base coat and let it dry completely. Then, using a large dotting tool, create R2-D2's circular "head" on the middle of your nail using a light blue polish. Make sure to leave some space at the top for the "eye" and "mouth". Next, using a small nail art brush or a toothpick, create R2-D2's blue stripes on one side of your nail. You can also use a light blue or a metallic blue polish for this step. Make sure to leave some space for the robot's other features. On the opposite side of your nail, use a black nail art pen or a thin brush to create R2-D2's rectangular "eye" and "mouth". Fill in these shapes with black polish. For the final touch, use a white nail art pen or a thin brush to create R2-D2's buttons and details on the blue stripes. You can also use a black polish and a dotting tool to add small black dots on the white base for a more abstract and modern look. Seal in your design with a top coat and show off your unique and artistic R2-D2 nails.8. R2-D2 Nail Art Tutorial by Nails by Miri

8. R2-D2 Nail Art Tutorial by Nails by Miri


Nails by Jema's second R2-D2 nail art tutorial is perfect for those who want to add a pop of color to their manicure. It's a great design for those who love bright and bold nail art. Start off with a white base coat and let it dry completely. Then, using a large dotting tool, create R2-D2's circular "head" on the middle of your nail using a bright blue polish. Make sure to leave some space at the top for the "eye" and "mouth".9. R2-D2 Nail Art Tutorial by Nails by Jema


9. R2-D2 Nail Art Tutorial by Nails by Jema
Unleash Your Inner Droid with R2D2 Nail Art
Revamp Your Nails with this Fun and Creative Tutorial
 When it comes to nail art, there are endless possibilities to express your unique style and personality. From simple designs to intricate patterns, the options are endless. But for all the Star Wars fans out there, there's a nail art trend that will surely make your heart skip a beat - R2D2 nail art. This tutorial will guide you step by step on how to achieve this fun and eye-catching design.
What You'll Need:
- White nail polish
- Black nail polish
- Blue nail polish
- Silver nail polish
- Small paintbrush
- Dotting tool or toothpick
- Top coat
Step 1: Base Coat
Start by applying a base coat to protect your nails and create a smooth base for the design.
Step 2: White Base
Apply two coats of white nail polish to all your nails. This will serve as the base color for the R2D2 design.
Step 3: Creating the R2D2 Design
Using your small paintbrush, create a rectangle on the bottom half of your nail with black nail polish. This will be the body of R2D2. Next, use your dotting tool or toothpick to create small dots on the top half of your nail with blue nail polish. These will be the buttons on R2D2's head.
Step 4: Adding Details
Using your small paintbrush and silver nail polish, add a thin line to the top and bottom of the rectangle, and two small rectangles on each side of the body to represent R2D2's legs. Then, using your dotting tool or toothpick, create a small silver dot in the center of each blue button.
Step 5: Finishing Touches
Once the design is dry, apply a top coat to seal in your manicure and make it last longer.
And there you have it - your very own R2D2 inspired nails! This fun and unique design is perfect for any Star Wars-themed event or just to show off your love for the iconic droid. So grab your nail polishes and get creative with this R2D2 nail art tutorial. May the force be with you!
When it comes to nail art, there are endless possibilities to express your unique style and personality. From simple designs to intricate patterns, the options are endless. But for all the Star Wars fans out there, there's a nail art trend that will surely make your heart skip a beat - R2D2 nail art. This tutorial will guide you step by step on how to achieve this fun and eye-catching design.
What You'll Need:
- White nail polish
- Black nail polish
- Blue nail polish
- Silver nail polish
- Small paintbrush
- Dotting tool or toothpick
- Top coat
Step 1: Base Coat
Start by applying a base coat to protect your nails and create a smooth base for the design.
Step 2: White Base
Apply two coats of white nail polish to all your nails. This will serve as the base color for the R2D2 design.
Step 3: Creating the R2D2 Design
Using your small paintbrush, create a rectangle on the bottom half of your nail with black nail polish. This will be the body of R2D2. Next, use your dotting tool or toothpick to create small dots on the top half of your nail with blue nail polish. These will be the buttons on R2D2's head.
Step 4: Adding Details
Using your small paintbrush and silver nail polish, add a thin line to the top and bottom of the rectangle, and two small rectangles on each side of the body to represent R2D2's legs. Then, using your dotting tool or toothpick, create a small silver dot in the center of each blue button.
Step 5: Finishing Touches
Once the design is dry, apply a top coat to seal in your manicure and make it last longer.
And there you have it - your very own R2D2 inspired nails! This fun and unique design is perfect for any Star Wars-themed event or just to show off your love for the iconic droid. So grab your nail polishes and get creative with this R2D2 nail art tutorial. May the force be with you!


