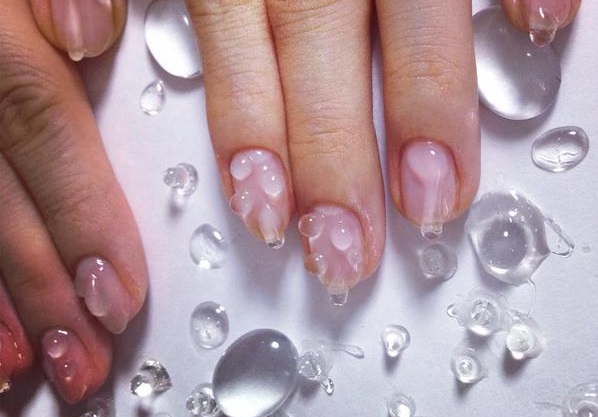
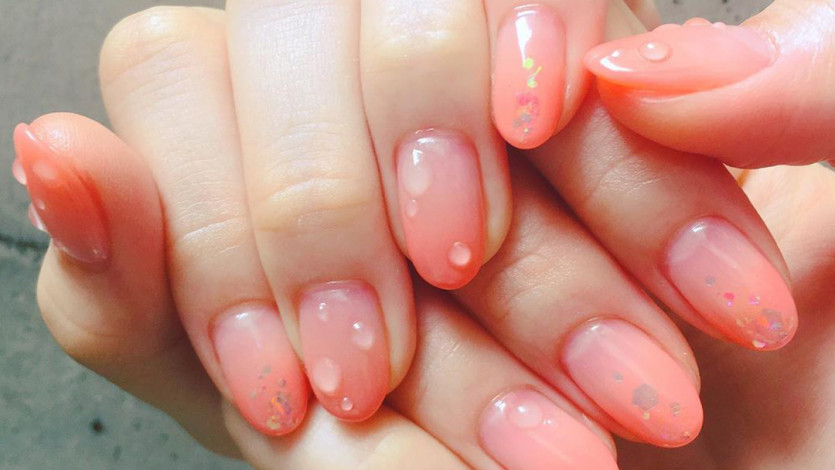
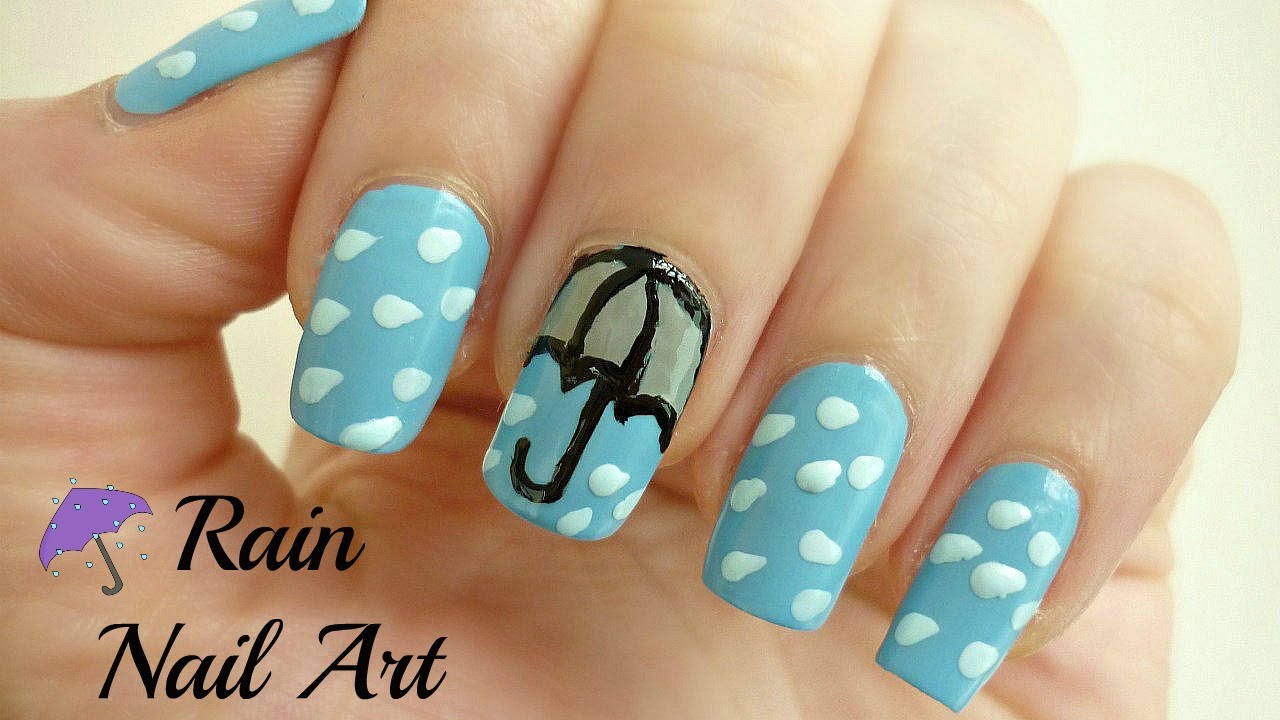
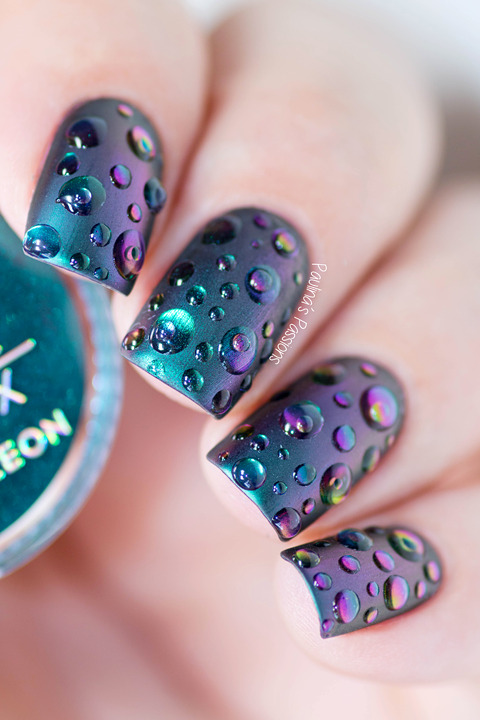
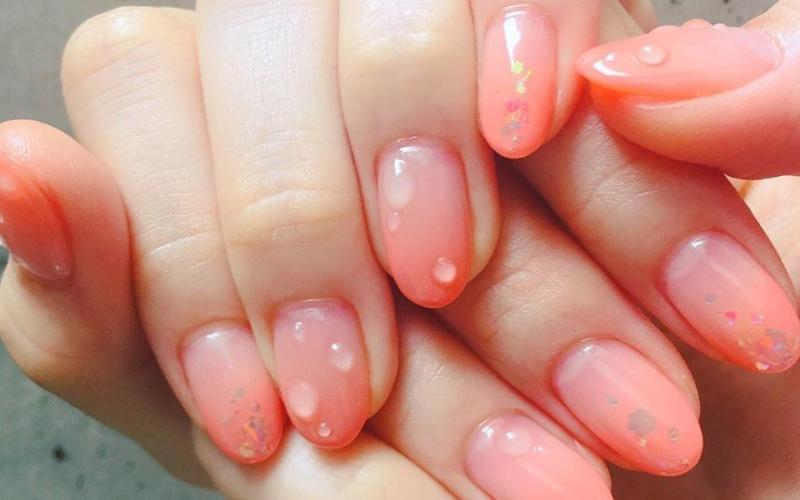
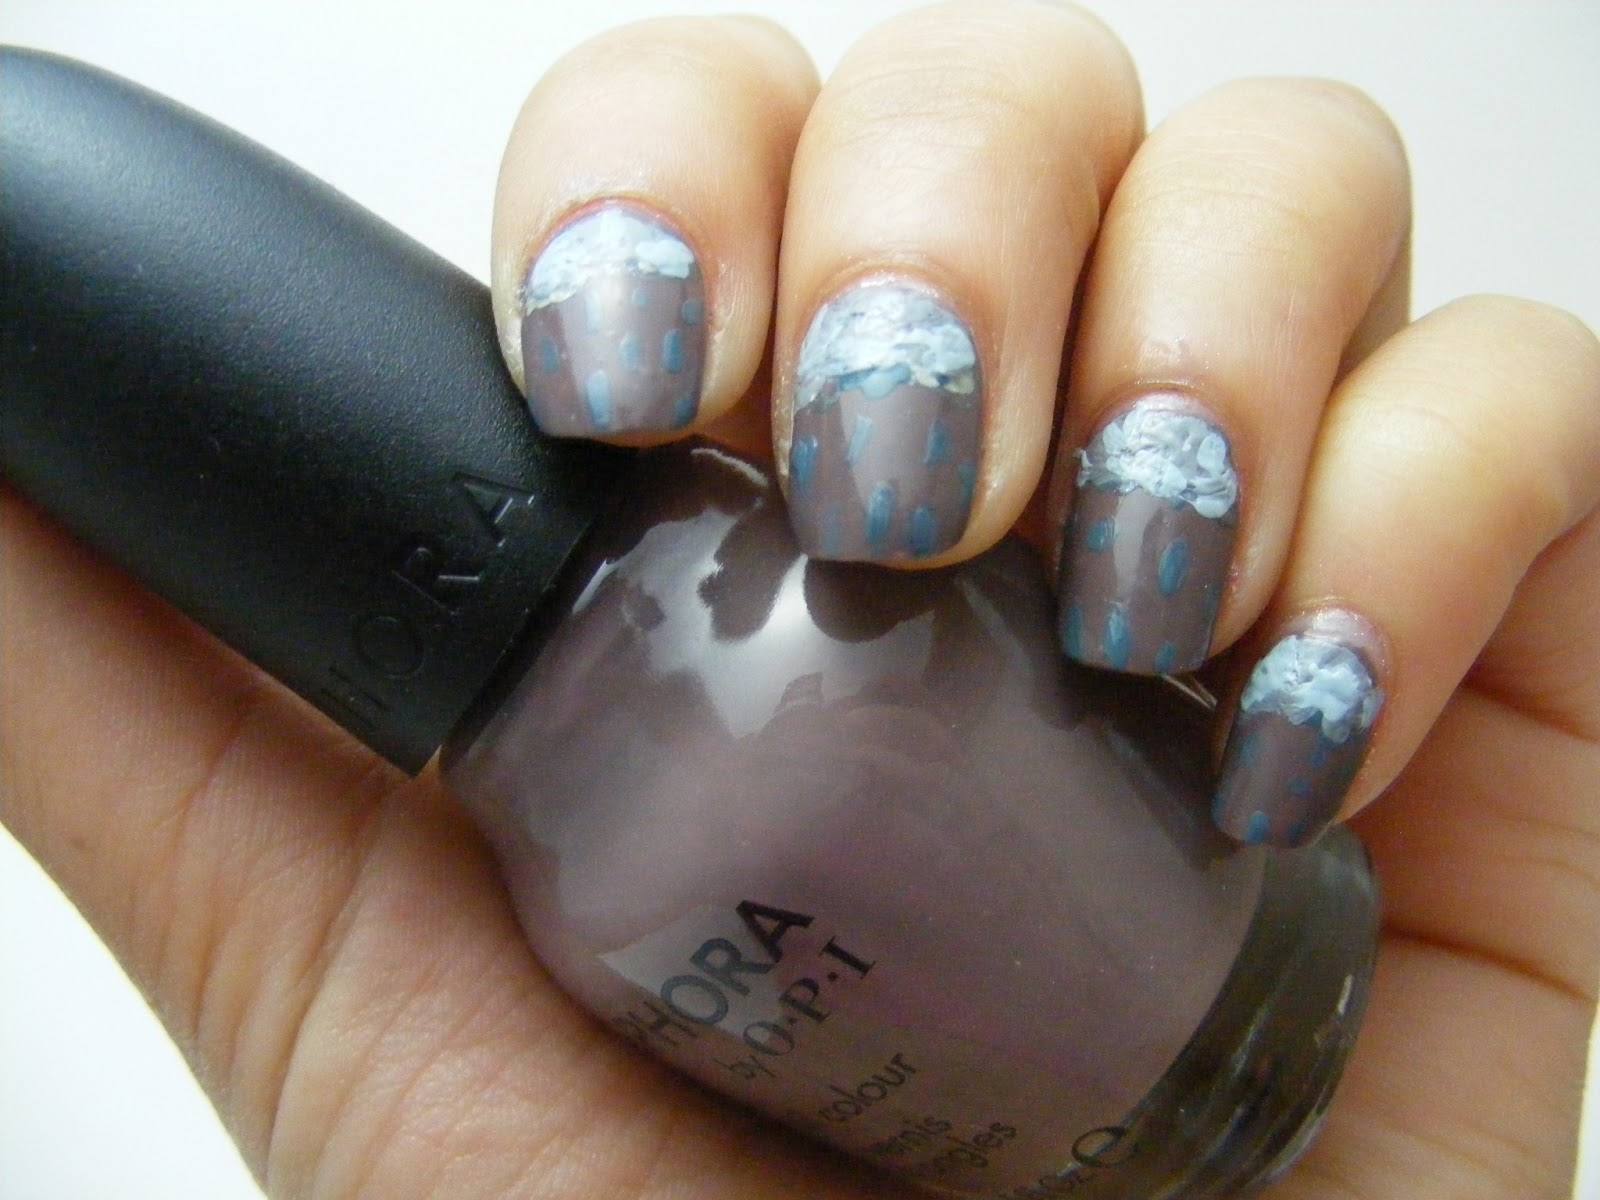
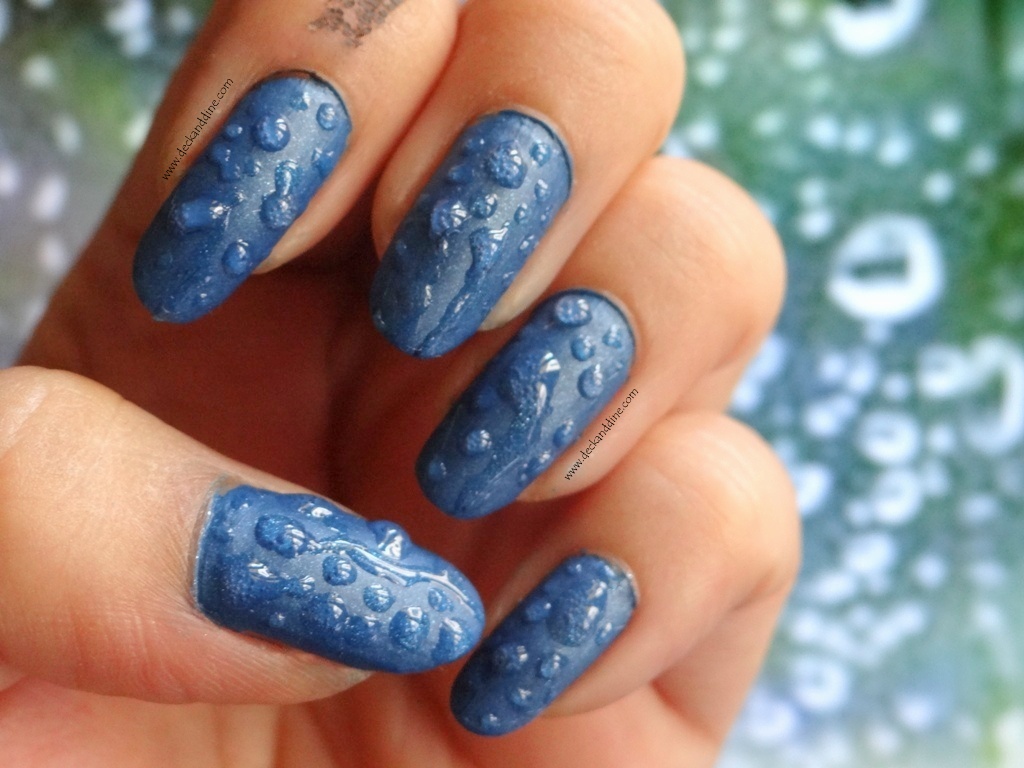
If you're looking for a unique and eye-catching nail art design, water droplet nails are the perfect choice. This tutorial will guide you through the steps to achieve this stunning look. To start, gather your materials: a base coat, a light blue nail polish, a dark blue nail polish, a clear top coat, a dotting tool, and a thin brush. Begin by applying the base coat to your nails and letting it dry completely. This will help protect your nails and make the design last longer. Next, paint your nails with two coats of the light blue polish. Make sure to let each coat dry before applying the next one. This will ensure a smooth and even base for your design. Once the blue polish is dry, take your dotting tool and dip it into the dark blue polish. Use the tool to create small dots on your nails. These dots will represent the raindrops. Using the thin brush, carefully drag some of the dots down to create a teardrop shape. You can vary the size and placement of the droplets to make the design more interesting. Repeat this process on all your nails, and then let the design dry completely. Once dry, seal it with a clear top coat to add shine and protect your design. And there you have it, a beautiful water droplet nail art look that is sure to turn heads.1. Water Droplet Nail Art Tutorial


1. Water Droplet Nail Art Tutorial


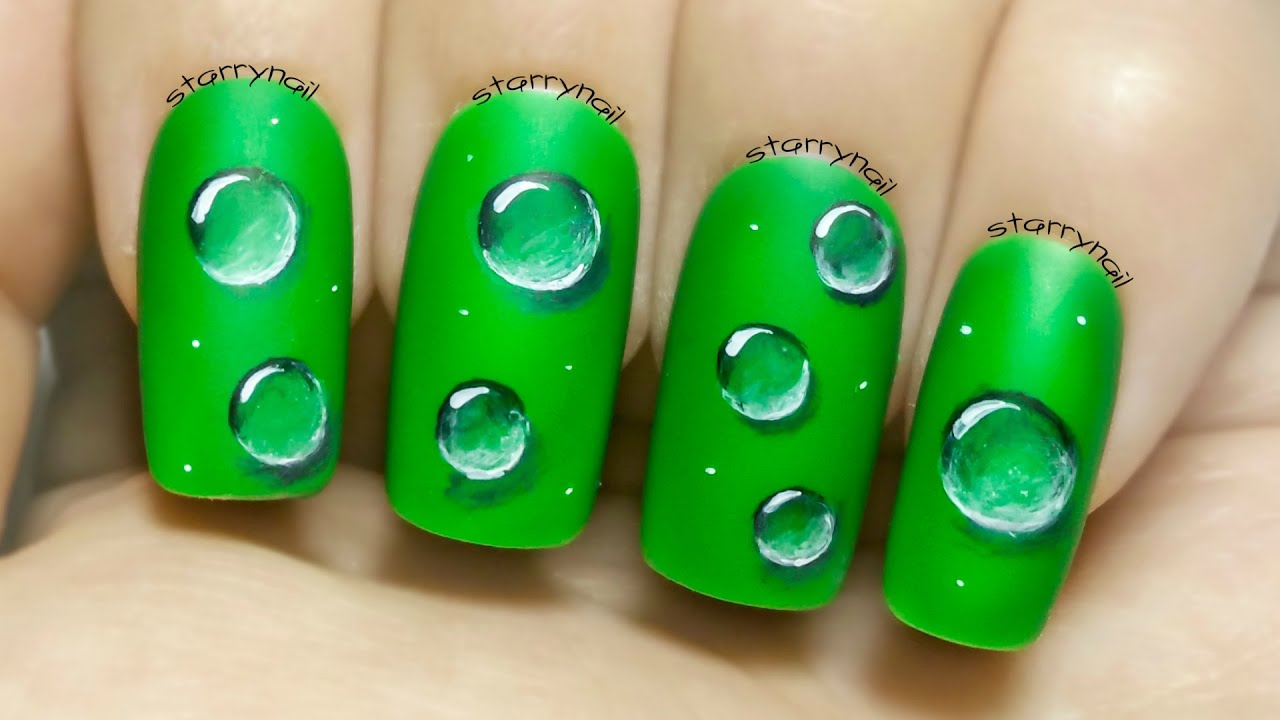


Raindrop nails are a popular choice for nail art enthusiasts, and for good reason. They are versatile, easy to create, and can be customized to fit your personal style. Here are some ideas to inspire your next raindrop nail design: Glitter Raindrops: Add some sparkle to your raindrop nails by incorporating glitter polish into the design. You can either use glittery nail polish or apply loose glitter on top of the droplets for a more dramatic effect. Rainbow Raindrops: For a fun and colorful look, use different shades of polish to create a rainbow of raindrops on your nails. This works especially well with a white or light blue base color. Matte Raindrops: Give your raindrop design a different texture by using matte top coat over the droplets. This will create a cool contrast with the shiny base color. Floral Raindrops: Add a floral twist to your raindrop nails by using a thin brush to create small flower petals around the droplets. This will give your design a delicate and feminine touch. Negative Space Raindrops: For a more subtle look, try leaving some of your nails bare and only painting the raindrops on a few accent nails. This negative space design is perfect for those who prefer a minimalist style. With these ideas, you can create endless variations of raindrop nail art to suit your mood and style.2. Raindrop Nail Design Ideas


2. Raindrop Nail Design Ideas


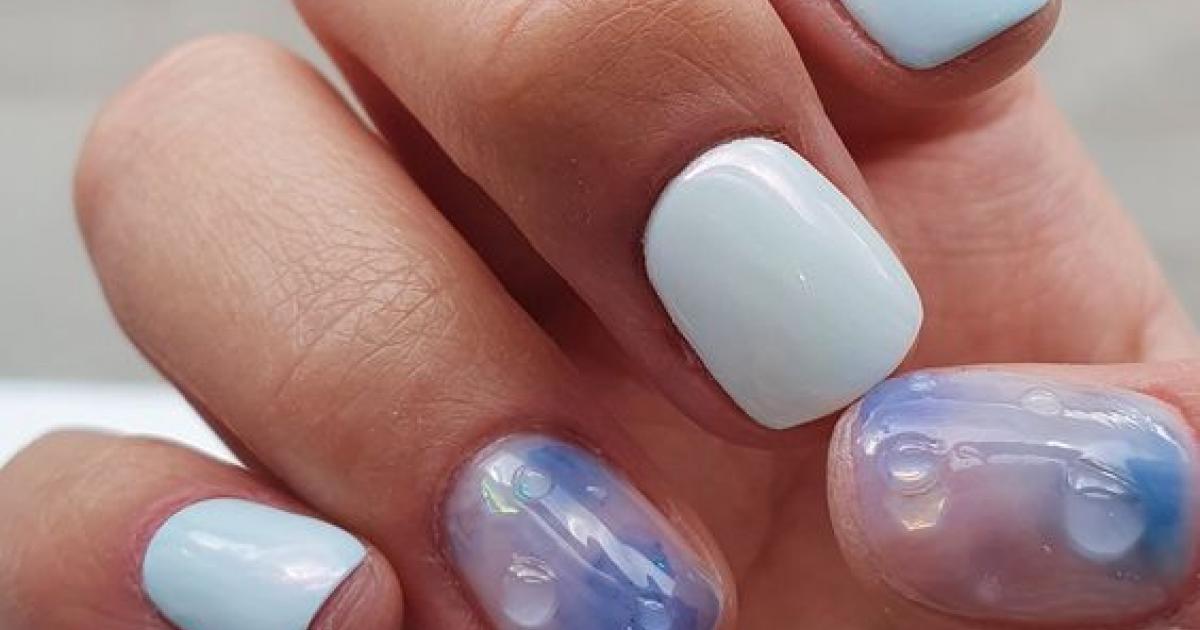
Creating a raindrop nail art look may seem daunting, but with the right tools and techniques, you can achieve this design easily. Here's a step-by-step guide to help you get started: Step 1: Prep Your Nails Start by removing any old nail polish and trimming and shaping your nails. Then, apply a base coat to protect your nails and help the polish adhere better. Step 2: Paint Your Nails Choose a light blue or pastel color as your base and apply two coats, letting each coat dry completely before moving on. Step 3: Create the Raindrops Using a dotting tool or the end of a bobby pin, create small dots on your nails with a darker blue polish. You can vary the size and placement of the dots to make them look more like raindrops. Step 4: Add Details Take a thin brush and carefully drag some of the dots down to create teardrop shapes. You can also add smaller dots around the bigger ones to give the illusion of falling rain. Step 5: Seal the Design Once the design is dry, apply a clear top coat to protect it and add shine. This will also help the design last longer. With these steps, you can easily create a beautiful raindrop nail art look that will impress everyone.3. How to Create a Raindrop Nail Art Look


3. How to Create a Raindrop Nail Art Look


If you're new to nail art, trying out intricate designs may seem intimidating. But don't worry, raindrop nails are perfect for beginners as they are easy to create and require minimal tools. Here are some tips to help you achieve a flawless raindrop nail art look: Use a Dotting Tool: A dotting tool is a must-have for creating raindrop nails as it helps create perfect dots of various sizes. You can also use the end of a bobby pin or a toothpick as a substitute. Start with a Light Base Color: Using a light blue or pastel color as your base will make the raindrops stand out more and give a more realistic look. Practice on a Paper: Before applying the design on your nails, practice creating the raindrops on a piece of paper to get a feel for the technique. Be Patient: Let each layer of polish dry completely before moving on to the next step. This will prevent smudging and ensure a neat and clean design. With these tips, even beginners can create stunning raindrop nail art looks that will make it seem like they've been doing it for years.4. Raindrop Nail Art for Beginners

4. Raindrop Nail Art for Beginners


Gel polish is a popular choice for nail art as it provides a long-lasting and glossy finish. You can also create raindrop nail art using gel polish with these simple steps: Step 1: Prep Your Nails File and shape your nails, and gently push back your cuticles. Then, cleanse your nails with alcohol or nail cleanser to remove any oils or residue. Step 2: Apply a Base Coat Apply a thin layer of base coat and cure it under a UV or LED lamp according to the instructions on the polish bottle. This will help the polish adhere better and prevent chipping. Step 3: Paint Your Nails Choose a light blue gel polish as your base and apply two coats, curing each layer under the lamp. Make sure to cap the free edge of your nails for better longevity. Step 4: Create the Raindrops Using a dotting tool or the end of a bobby pin, create small dots with a darker blue gel polish. Cure the dots under the lamp. Step 5: Seal the Design Apply a layer of top coat and cure it under the lamp. This will protect the design and add shine to your nails. With these steps, you can create a beautiful raindrop nail art look that will last for weeks.5. Raindrop Nail Art with Gel Polish

5. Raindrop Nail Art with Gel Polish


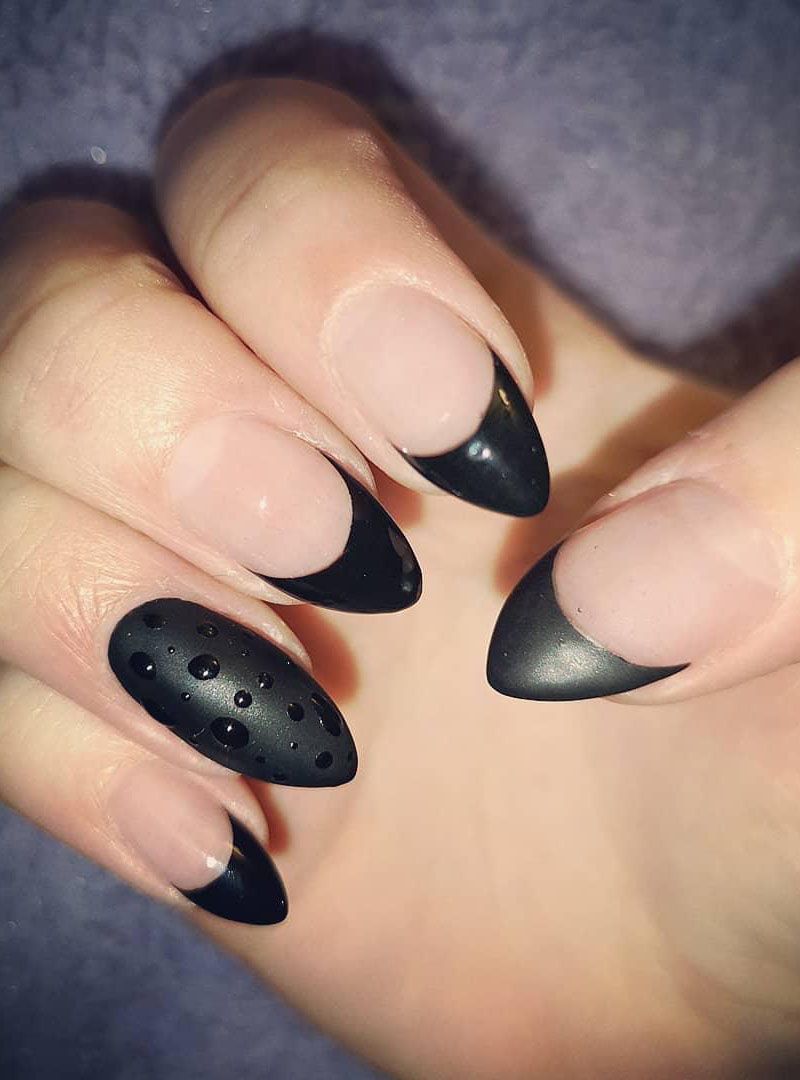
Raindrop nails can be made even more adorable with these cute designs: Kawaii Raindrops: Add a touch of cuteness to your raindrop nails by drawing little faces on the droplets. This is perfect for those who love all things kawaii. Cartoon Raindrops: You can also draw popular cartoon characters or animals on your raindrop nails for a fun and playful look. Heart Raindrops: Instead of creating traditional teardrop shapes, use a thin brush to paint heart-shaped raindrops for a sweet and romantic design. Polka Dot Raindrops: For a more whimsical look, add small polka dots in different colors around the raindrops to give the illusion of splashing rain. With these cute variations, your raindrop nail design will be anything but ordinary.6. Cute Raindrop Nail Designs


6. Cute Raindrop Nail Designs


If you're a fan of stamping plates, you can incorporate them into your raindrop nail art design for a unique and intricate look. Here's how: Step 1: Prep Your Nails Start by prepping your nails with a base coat and a light blue or pastel polish as your base color. Let it dry completely. Step 2: Choose a Stamping Plate Select a stamping plate with a raindrop design and transfer it onto your stamper using a dark blue polish. Step 3: Stamp the Design Place the stamper onto your nail and roll it gently to transfer the design. Repeat this on all your nails. Step 4: Add Details Using a thin brush or a dotting tool, add smaller droplets or other details to the design to make it more interesting. Step 5: Seal the Design Apply a clear top coat to protect the design and add shine. And there you have it, a stunning raindrop nail art look using stamping plates.7. Raindrop Nail Art Using Stamping Plates

7. Raindrop Nail Art Using Stamping Plates

Raindrop nails can also be elegant and sophisticated. Here are some ideas to achieve an elegant raindrop nail art look: Nude Raindrops: Instead of using blue polishes, try using nude or nude-pink shades for a more subtle and elegant look. Gold Raindrops: Apply a gold foil or metallic polish over the raindrops to give them a luxurious and glamorous touch. Lace Raindrops: Create lace-like designs around the raindrops using a thin brush and white polish for an elegant and delicate look. Jeweled Raindrops: Add some sparkle to your raindrop nails by placing small rhinestones or studs around the droplets. This will give your design a touch of elegance and luxury. With these ideas, you can create a raindrop nail art look that is both elegant and unique.8. Elegant Raindrop Nail Art Ideas


8. Elegant Raindrop Nail Art Ideas


For a colorful and fun look, try incorporating a rainbow into your raindrop nails. Here's how: Step 1: Prep Your Nails Apply a base coat and let it dry. Then, paint your nails with a white base color and let it dry completely. Step 2: Create the Rainbow Using a thin brush, paint a curved line with red polish on your nail. Then, add orange, yellow, green, blue, and purple lines, one after the other, to create a rainbow. Step 3: Add the Raindrops Using a dotting tool, create small blue raindrops along the rainbow. You can also add some white dots to create the illusion of clouds. Step 4: Seal the Design Apply a clear top coat to protect the design and add shine. Your rainbow raindrop nails are now complete!9. Rainbow Raindrop Nail Art


9. Rainbow Raindrop Nail Art

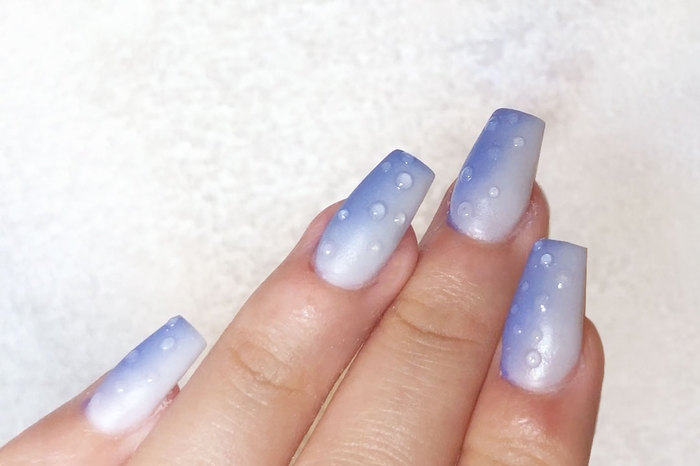
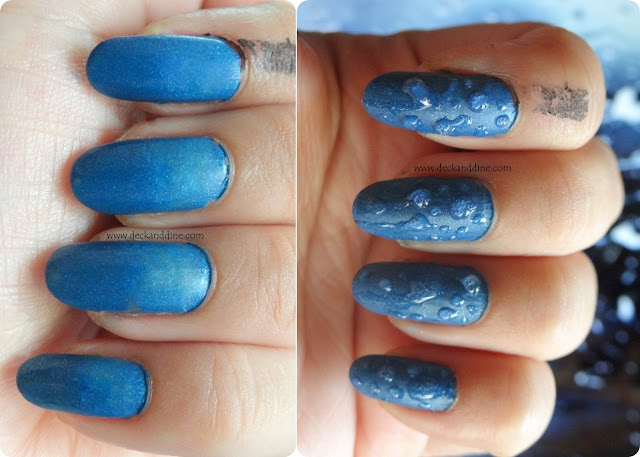
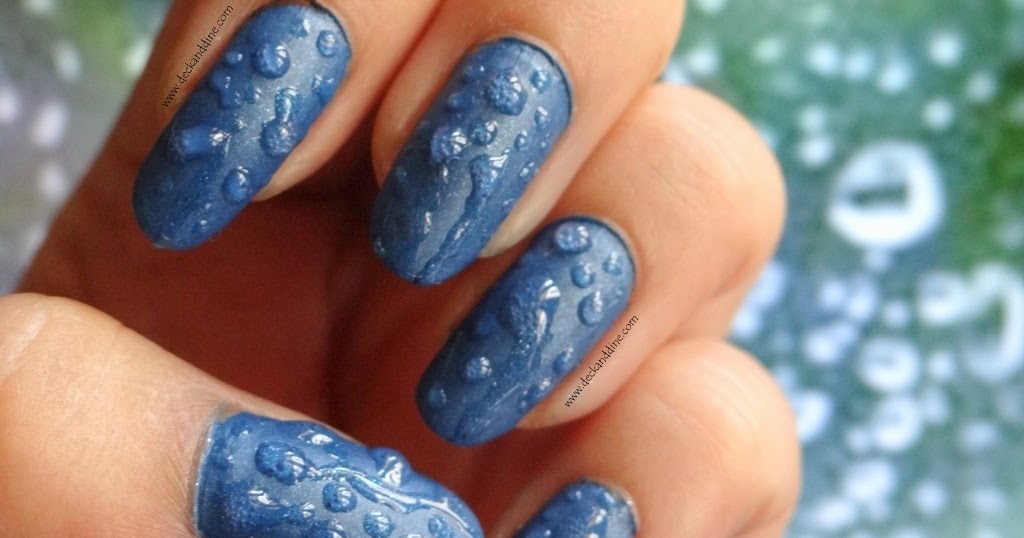
If you want to try something different, why not create a matte raindrop nail art look? Here's a tutorial to help you achieve this trendy design: Step 1: Prep Your Nails Start by filing and shaping your nails and pushing back your cuticles. Then, cleanse your nails with alcohol or nail cleanser. Step 2: Apply a Base Coat Apply a thin layer of base coat and let it dry. Then, paint your nails with a light blue or pastel polish as your base color. Step 3: Create the Raindrops Using a dotting tool or the end of a bobby pin, create small dots with a dark blue polish. Then, using a thin brush, carefully drag some of the dots down to create teardrop shapes. Step 4: Add the Matte Top Coat Once the design is dry, apply a matte top coat over the raindrops. This will give your design a unique and trendy finish. With these simple steps, you can create a stunning matte raindrop nail art look that is sure to make a statement.10. Matte Raindrop Nail Art Tutorial

10. Matte Raindrop Nail Art Tutorial
The Beauty of Rain Drop Nail Art
Embracing Nature in Your Nail Design
 In the world of nail art, there are countless designs and techniques to choose from. From intricate patterns to bold colors, there is no limit to what you can do with your nails. However, one trend that has been gaining popularity in recent years is rain drop nail art. This unique and eye-catching design mimics the look of raindrops falling on your nails, creating a refreshing and natural look. So, why should you consider trying out this trend for yourself? Let's explore the beauty of rain drop nail art and how it can enhance your overall house design.
One of the main reasons why rain drop nail art has become so popular is because of its versatility. This design can be adapted to suit any style, whether you prefer a more minimalistic look or a bold and colorful one. The beauty of rain drop nail art lies in its simplicity. With a few basic tools and a steady hand, you can create a stunning look that will elevate your overall house design.
Another advantage of rain drop nail art is that it adds a touch of nature to your nails. In today's fast-paced world, we often find ourselves disconnected from the beauty of nature. By incorporating rain drops into your nail design, you can bring a sense of tranquility and serenity into your daily life. Plus, with the use of
featured keywords
like "rain" and "nature" in your nail design, you can showcase your love for the outdoors and add a unique touch to your overall house design.
Moreover, rain drop nail art is not limited to a specific color scheme or nail length. Whether you have short or long nails, you can easily create this design and make it your own. You can play around with different colors and patterns,
related main keywords
like "pastel" or "ombre," to create a design that fits your personality and style. This makes rain drop nail art a perfect choice for any occasion, whether it's a casual day out or a special event.
In conclusion, rain drop nail art is more than just a trend, it's a way to embrace
featured keywords
like "nature" and "beauty" in your daily life. With its versatility and simplicity, this design can enhance your overall house design and bring a touch of tranquility and nature into your world. So, why not give it a try and let the rain drops fall on your nails?
In the world of nail art, there are countless designs and techniques to choose from. From intricate patterns to bold colors, there is no limit to what you can do with your nails. However, one trend that has been gaining popularity in recent years is rain drop nail art. This unique and eye-catching design mimics the look of raindrops falling on your nails, creating a refreshing and natural look. So, why should you consider trying out this trend for yourself? Let's explore the beauty of rain drop nail art and how it can enhance your overall house design.
One of the main reasons why rain drop nail art has become so popular is because of its versatility. This design can be adapted to suit any style, whether you prefer a more minimalistic look or a bold and colorful one. The beauty of rain drop nail art lies in its simplicity. With a few basic tools and a steady hand, you can create a stunning look that will elevate your overall house design.
Another advantage of rain drop nail art is that it adds a touch of nature to your nails. In today's fast-paced world, we often find ourselves disconnected from the beauty of nature. By incorporating rain drops into your nail design, you can bring a sense of tranquility and serenity into your daily life. Plus, with the use of
featured keywords
like "rain" and "nature" in your nail design, you can showcase your love for the outdoors and add a unique touch to your overall house design.
Moreover, rain drop nail art is not limited to a specific color scheme or nail length. Whether you have short or long nails, you can easily create this design and make it your own. You can play around with different colors and patterns,
related main keywords
like "pastel" or "ombre," to create a design that fits your personality and style. This makes rain drop nail art a perfect choice for any occasion, whether it's a casual day out or a special event.
In conclusion, rain drop nail art is more than just a trend, it's a way to embrace
featured keywords
like "nature" and "beauty" in your daily life. With its versatility and simplicity, this design can enhance your overall house design and bring a touch of tranquility and nature into your world. So, why not give it a try and let the rain drops fall on your nails?


