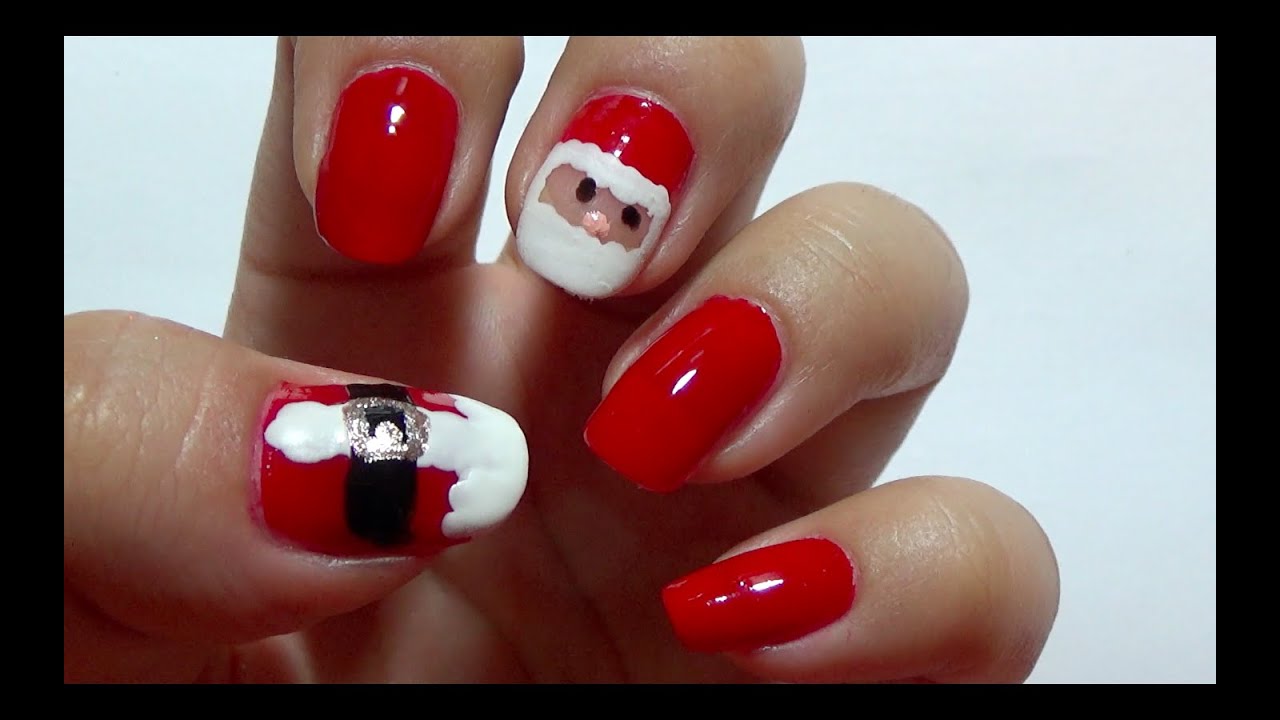
Get into the holiday spirit with this easy Santa nail art tutorial! This design is perfect for those looking for a festive and fun look for their nails. With just a few simple steps, you'll have adorable Santa nails that are sure to make you stand out at any holiday party. To start, you'll need a few basic nail art tools such as a small brush, dotting tool, and red, white, and black nail polish. Begin by painting your nails with a base coat and then apply two coats of a bright red polish. Let it dry completely before moving on to the next step. Next, take your small brush and dip it into white nail polish. Create a small white triangle at the tip of your nail to represent Santa's hat. Use the dotting tool to create a white pom-pom on the top of the hat. Then, take your small brush and create a small white line across the bottom of the triangle for the hat's brim. Now it's time for Santa's face. Use your small brush and white nail polish to create a half-circle at the base of your nail. This will be Santa's beard. Then, use your dotting tool to create two small white dots for his eyes. Take your small brush and create a small red circle for his nose. Lastly, use your small brush and black nail polish to create a small rectangle at the top of the beard for Santa's mustache. Then, use the dotting tool to create a small black dot for his mouth. Finish off the look with a top coat to seal in your design and add some shine. There you have it - easy Santa nail art that anyone can do! This design is perfect for beginners or those with limited time, but still want to add a festive touch to their nails. So go ahead and give it a try, and spread some holiday cheer with your adorable Santa nails!1. "Easy Santa Nail Art Tutorial"


1. "Easy Santa Nail Art Tutorial"


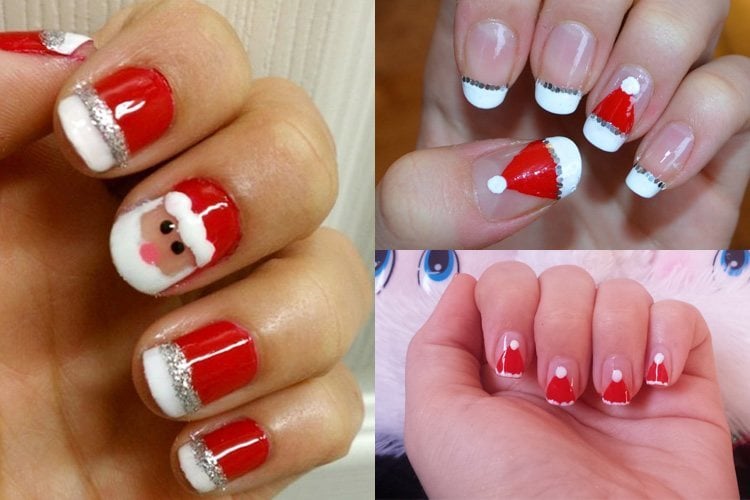
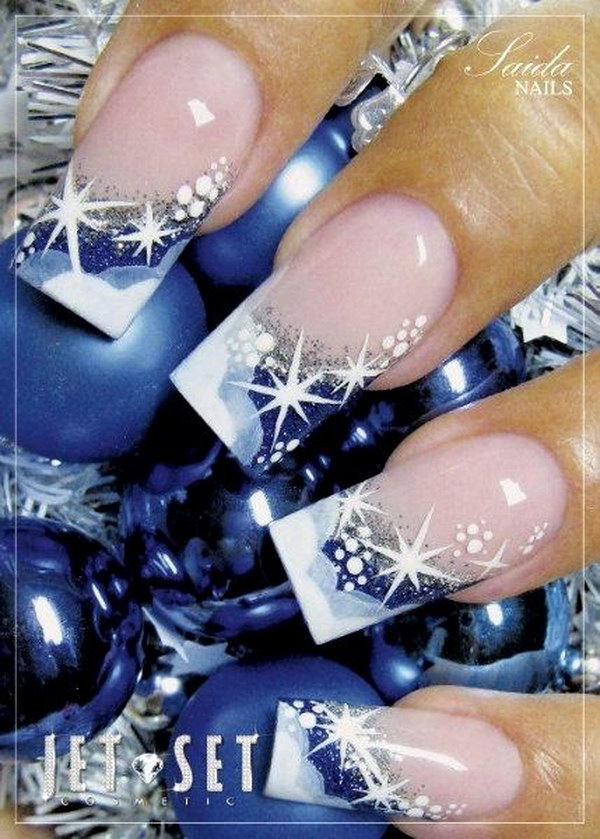
Looking for more ways to incorporate Santa into your Christmas nail art? Look no further! There are endless possibilities when it comes to Santa-inspired designs, from cute and cartoon-like to more realistic and detailed. One idea is to create a fun and whimsical Santa design on just one nail. Use a light blue polish for the base and then create a small Santa using red, white, and black nail polish. You can even add a small Santa hat on top of the nail for an extra festive touch. If you're feeling more adventurous, you can try creating a full nail design with Santa and his reindeer. Paint your nails with a dark blue or black base and then use a small brush and white nail polish to create a snowy landscape. Next, use a dotting tool and red nail polish to create Santa's iconic suit, and use brown polish for his reindeer. Finish off the design with some glitter for a snowy effect. For a more elegant look, try a French manicure with a twist. Use a light pink or nude polish for the base and then create a white tip on each nail. Use your dotting tool and red and black polish to create Santa's hat and beard on the ring finger. This design is perfect for those who want a subtle nod to Santa in their holiday nails. There are so many fun and creative ways to incorporate Santa into your Christmas nail art. Don't be afraid to experiment and have fun with it. After all, it's the most wonderful time of the year!2. "Christmas Nail Art Designs with Santa Claus"


2. "Christmas Nail Art Designs with Santa Claus"


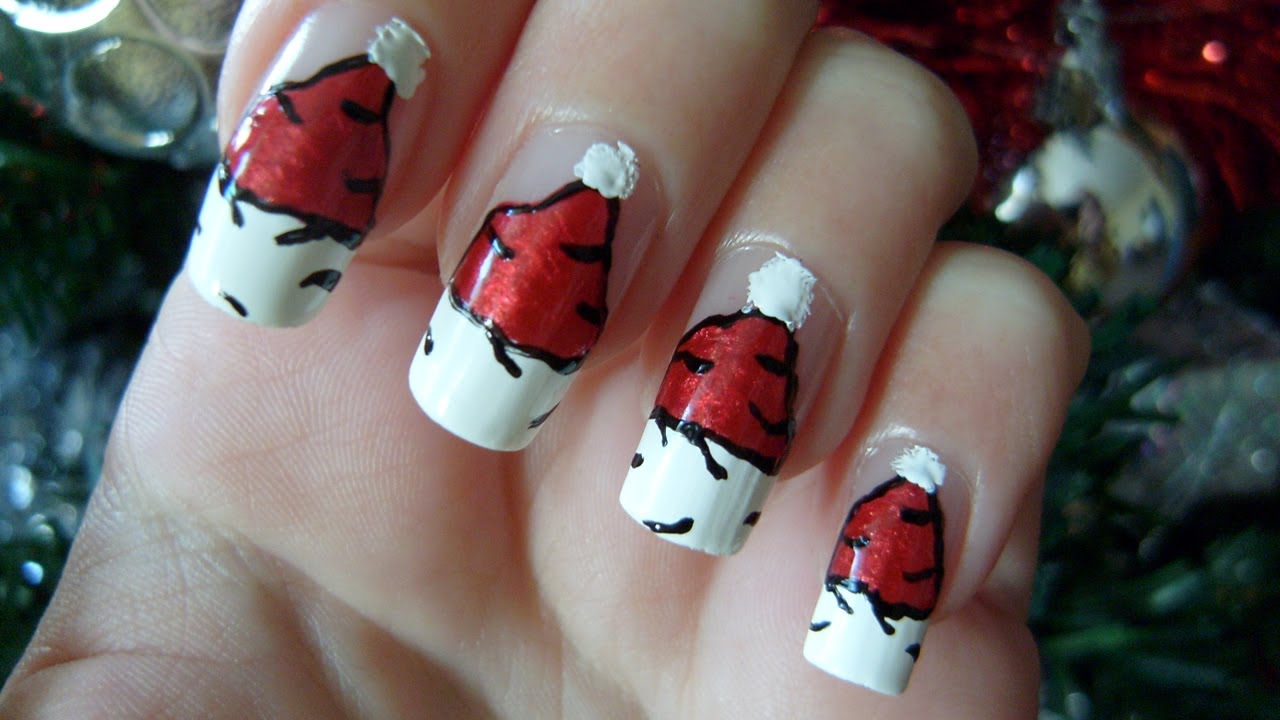
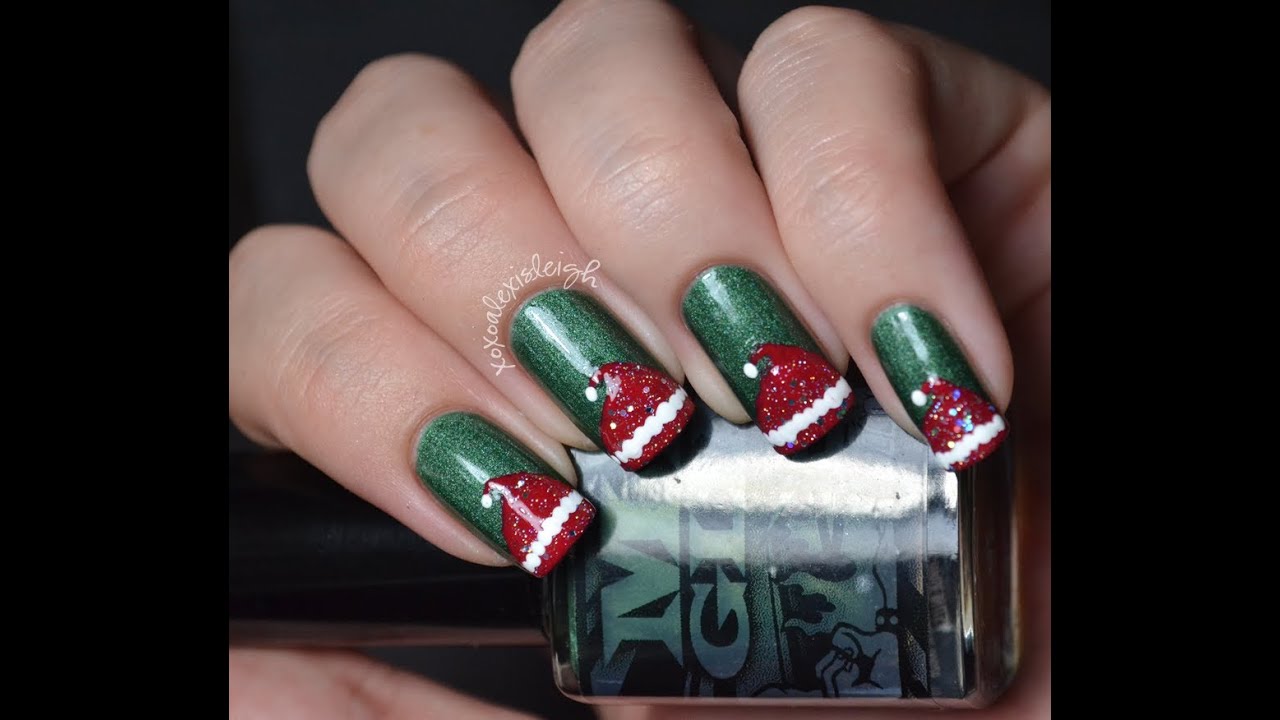
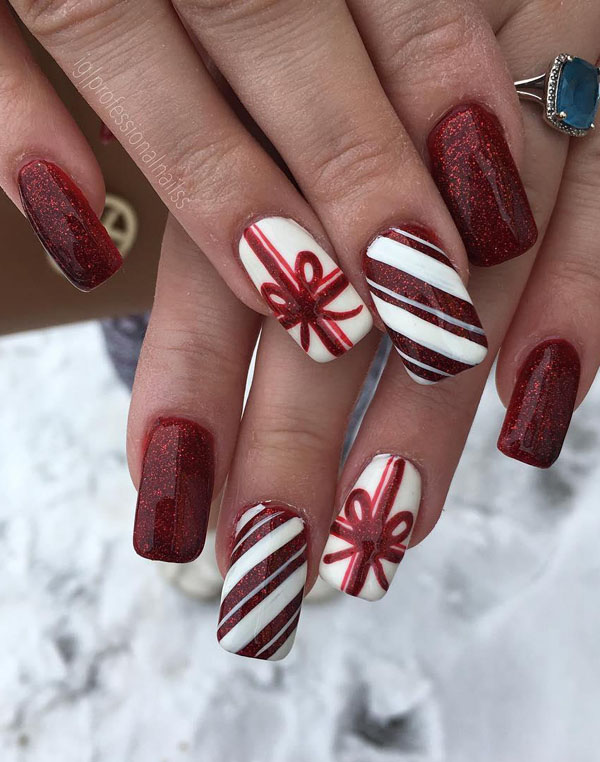
If you're a fan of the classic Santa hat, then this DIY Santa hat nail art tutorial is perfect for you. This design is simple yet eye-catching, and will surely get you in the holiday spirit. For this design, you'll need a red and white nail polish, as well as a small brush and dotting tool. Start by painting your nails with a white base coat. Once dry, use your small brush to create a thin red line across the tip of your nail. This will be the base of your Santa hat. Next, use your dotting tool and red nail polish to create small dots on the red line, representing the fur trim of the hat. Then, use your small brush and red polish to create a triangle on the tip of your nail, connecting to the red line. This will complete your Santa hat. For an extra festive touch, you can use a glittery red polish for the base instead of a plain red. You can also add a small dot of white polish at the top of the hat for a pom-pom effect. Finish off the design with a top coat to seal in your design and add some shine. This DIY Santa hat nail art is perfect for those who want a simple yet fun holiday design. It's also a great option for those with shorter nails, as the design can be easily adjusted to fit any nail length. Give it a try and rock those cute Santa hats on your nails this Christmas!3. "DIY Santa Hat Nail Art Tutorial"


3. "DIY Santa Hat Nail Art Tutorial"


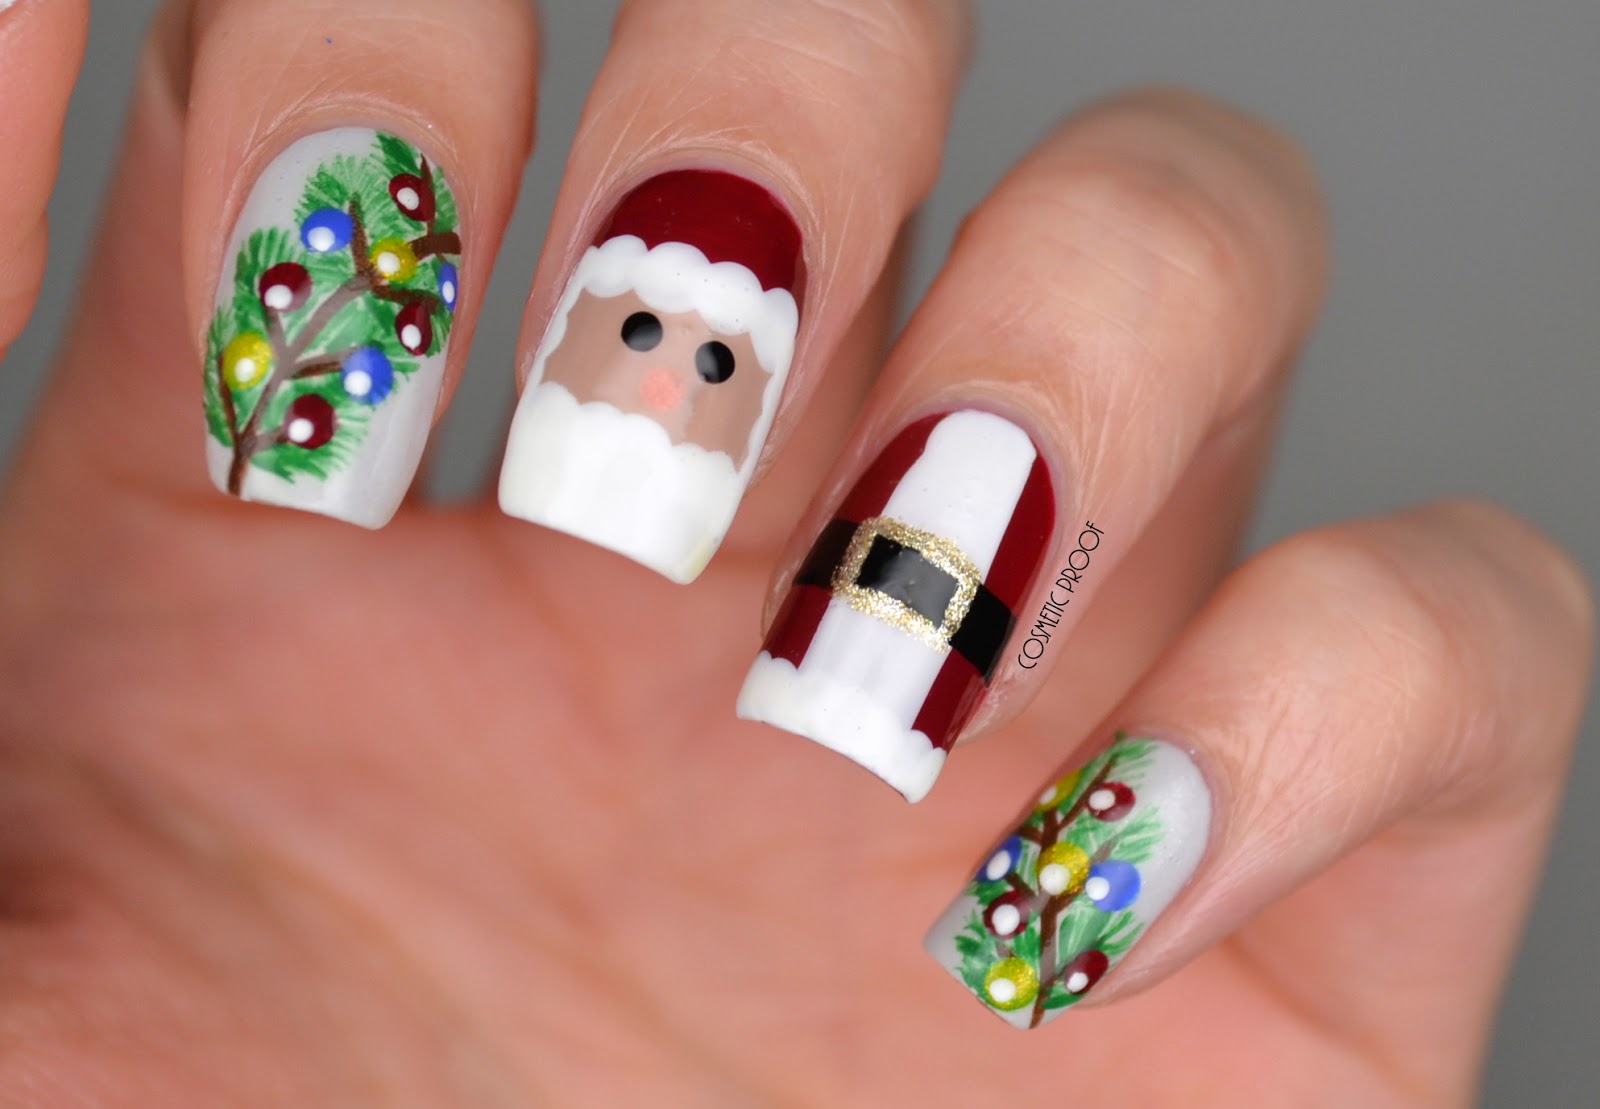
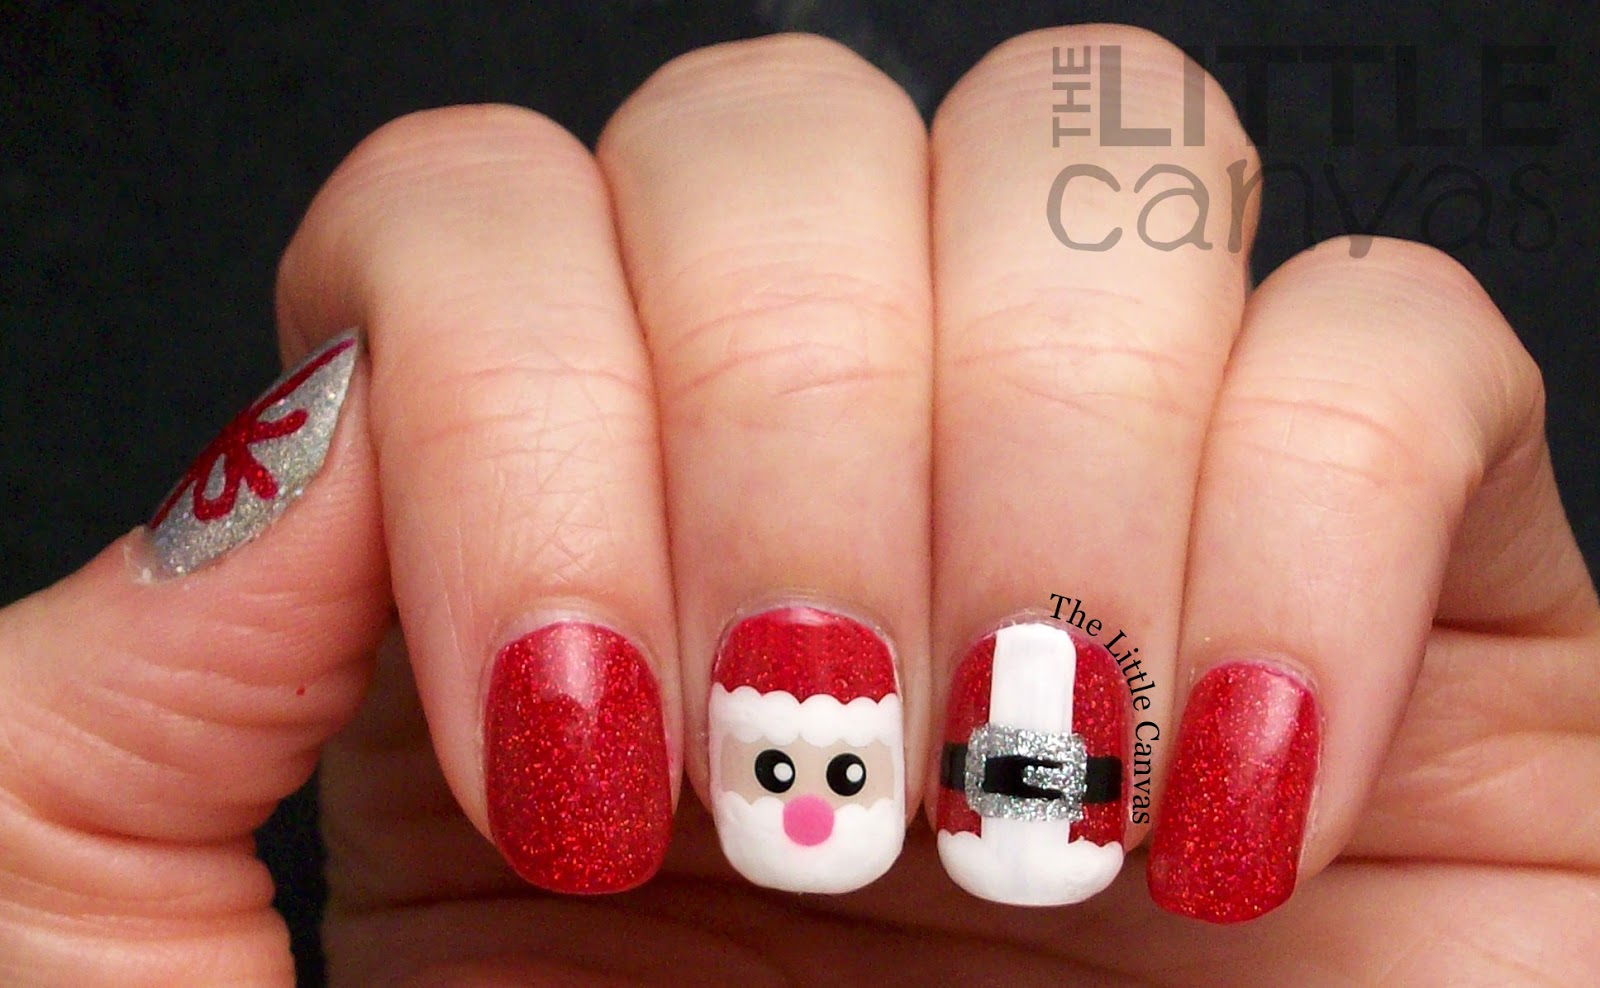
For those who want to take their Santa nail art to the next level, this step by step tutorial is for you. It may take a bit more time and patience, but the end result will be worth it! Start by painting your nails with a bright red polish. Once dry, take a small brush and create a white triangle at the tip of your nail for Santa's hat. Use your dotting tool to create a white pom-pom on top of the hat, and then use your small brush to create a white line across the bottom for the brim. Next, use your small brush and white polish to create a half-circle at the base of your nail for Santa's beard. Use your dotting tool to create two small white dots for his eyes, and then use your small brush and red polish to create a small circle for his nose. Use black polish and a small brush to create a small rectangle for his mustache, and use the dotting tool to create a small black dot for his mouth. Now it's time to add some details. Use your small brush and black polish to create a belt across the middle of your nail, and use a small dotting tool to create a silver buckle. Then, use your small brush and black polish to create Santa's boots at the bottom of your nail. Lastly, use a small brush and white polish to create a snowy landscape at the base of your nail. Finish off the design with a top coat to seal in your design and add some shine. This detailed Santa nail art is sure to impress and bring some festive cheer to your nails!4. "Santa Claus Nail Art Step by Step"

4. "Santa Claus Nail Art Step by Step"


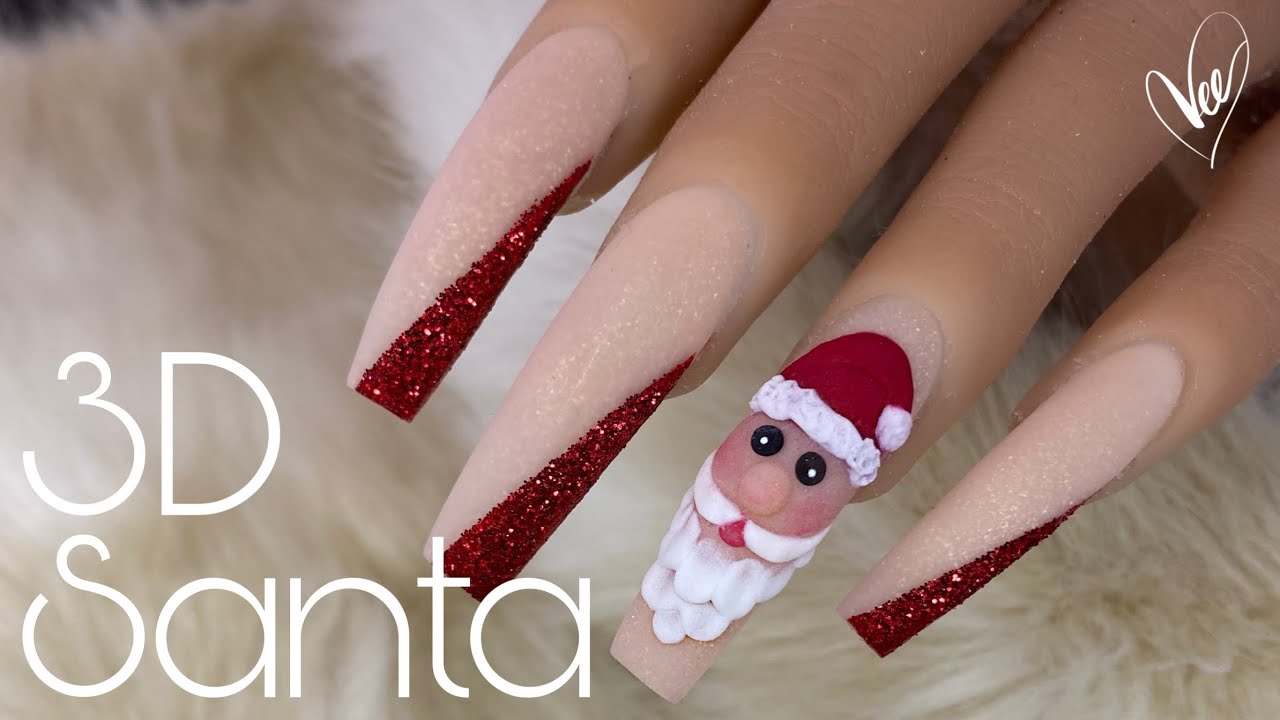
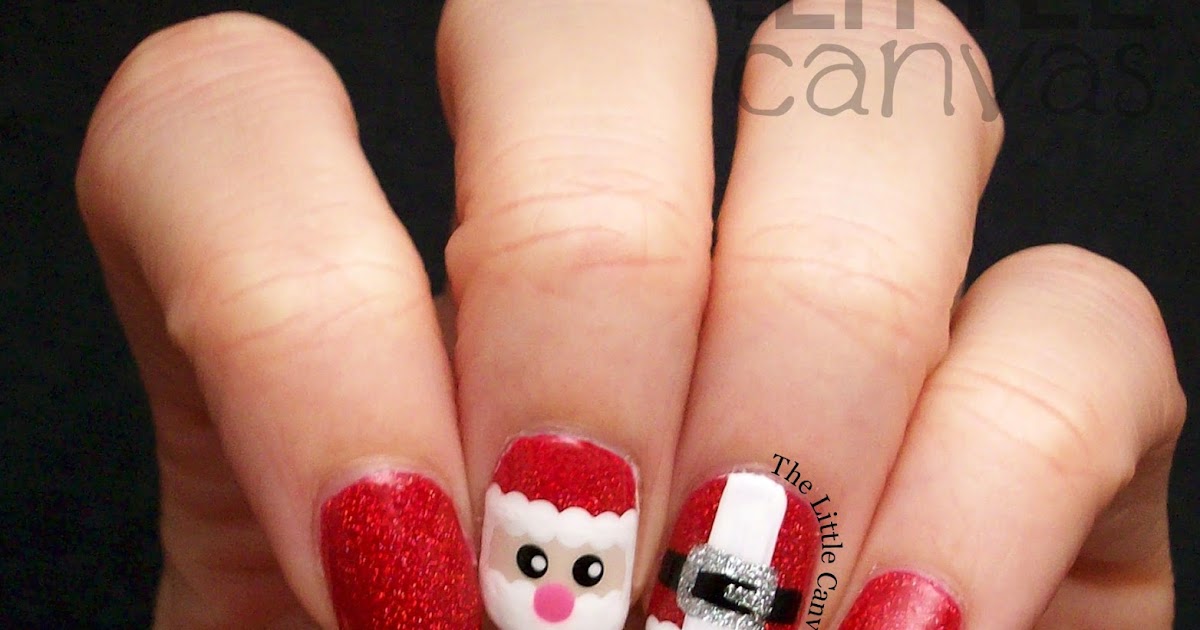
If you're looking for cute and playful Santa nail art ideas, look no further! There are so many adorable designs to choose from that will make your nails stand out this holiday season. One idea is to create a simple Santa design on just one nail. Paint your nails with a nude or light pink base and use a small brush and red polish to create Santa's hat on the tip of your nail. Use your dotting tool and white polish to create a small pom-pom on the top of the hat. Then, use your small brush and white polish to create a small half-circle at the base of your nail for Santa's beard. Use the dotting tool and black polish to create his eyes and a small red dot for his nose. For a more whimsical look, try creating a cartoon-style Santa on just one nail. Use a light blue base and create Santa using red, white, and black polish. Add some glitter for a snowy effect and finish off the design with a top coat. There are endless possibilities when it comes to cute Santa nail art. Get creative and have fun with it - your nails will thank you!5. "Cute Santa Nail Art Ideas for the Holidays"


5. "Cute Santa Nail Art Ideas for the Holidays"


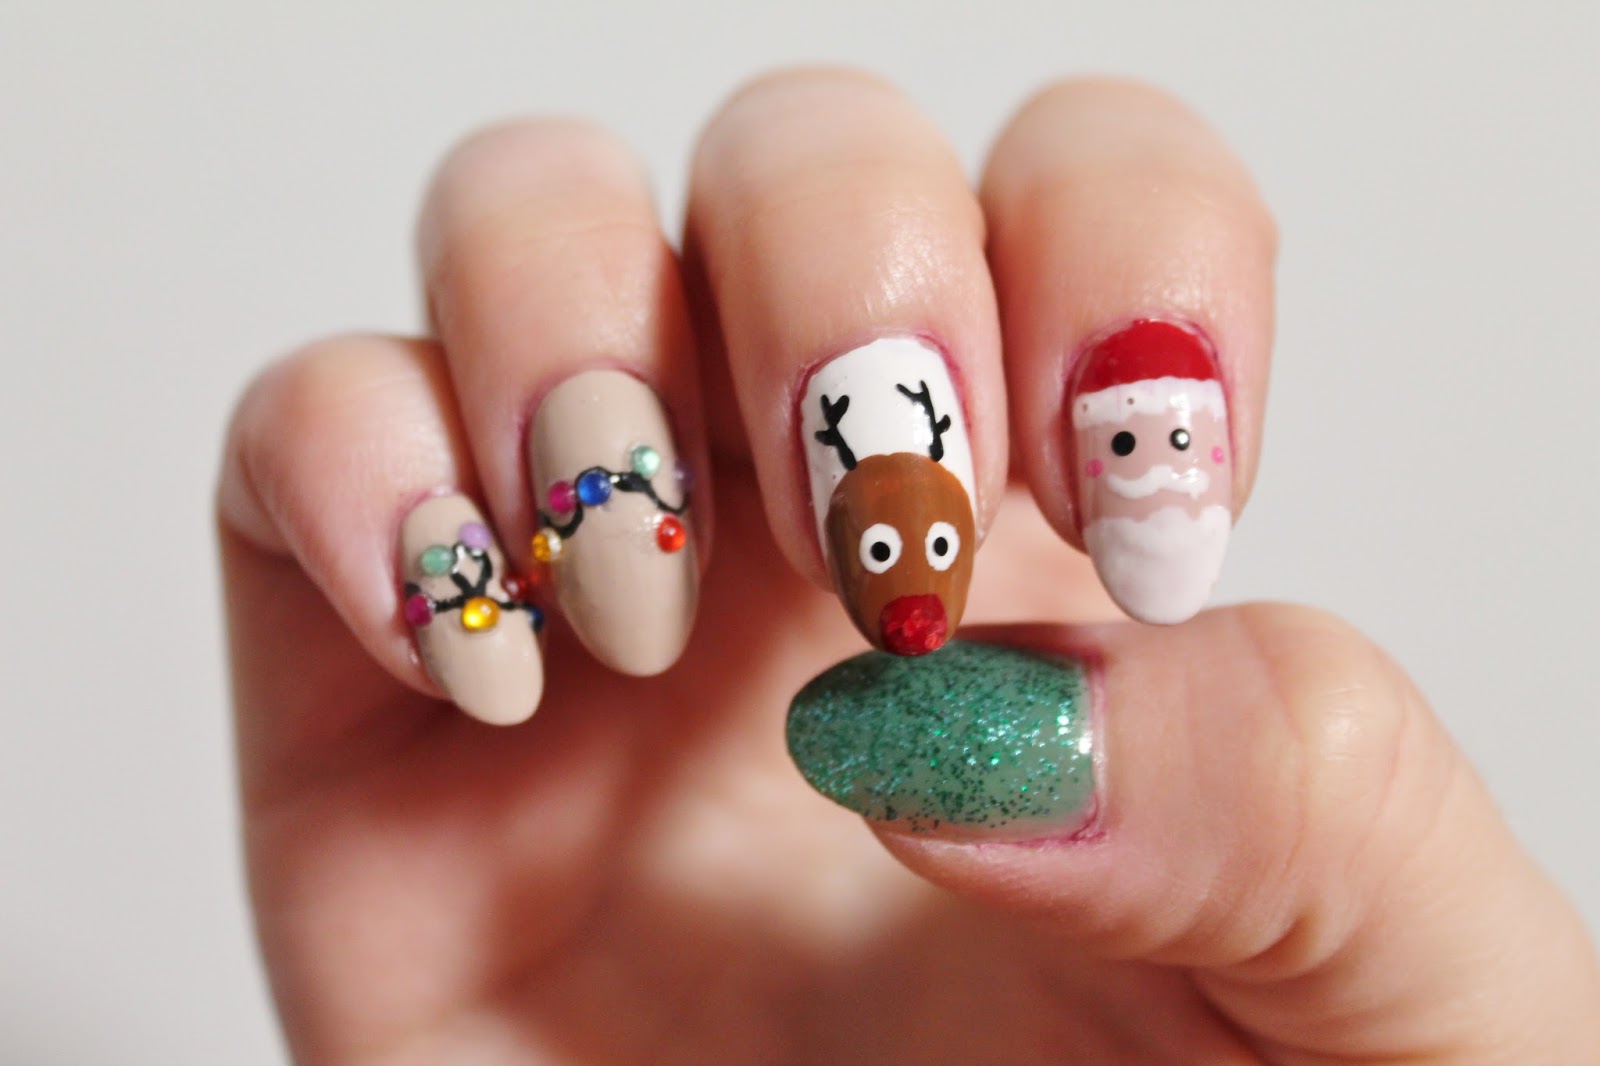
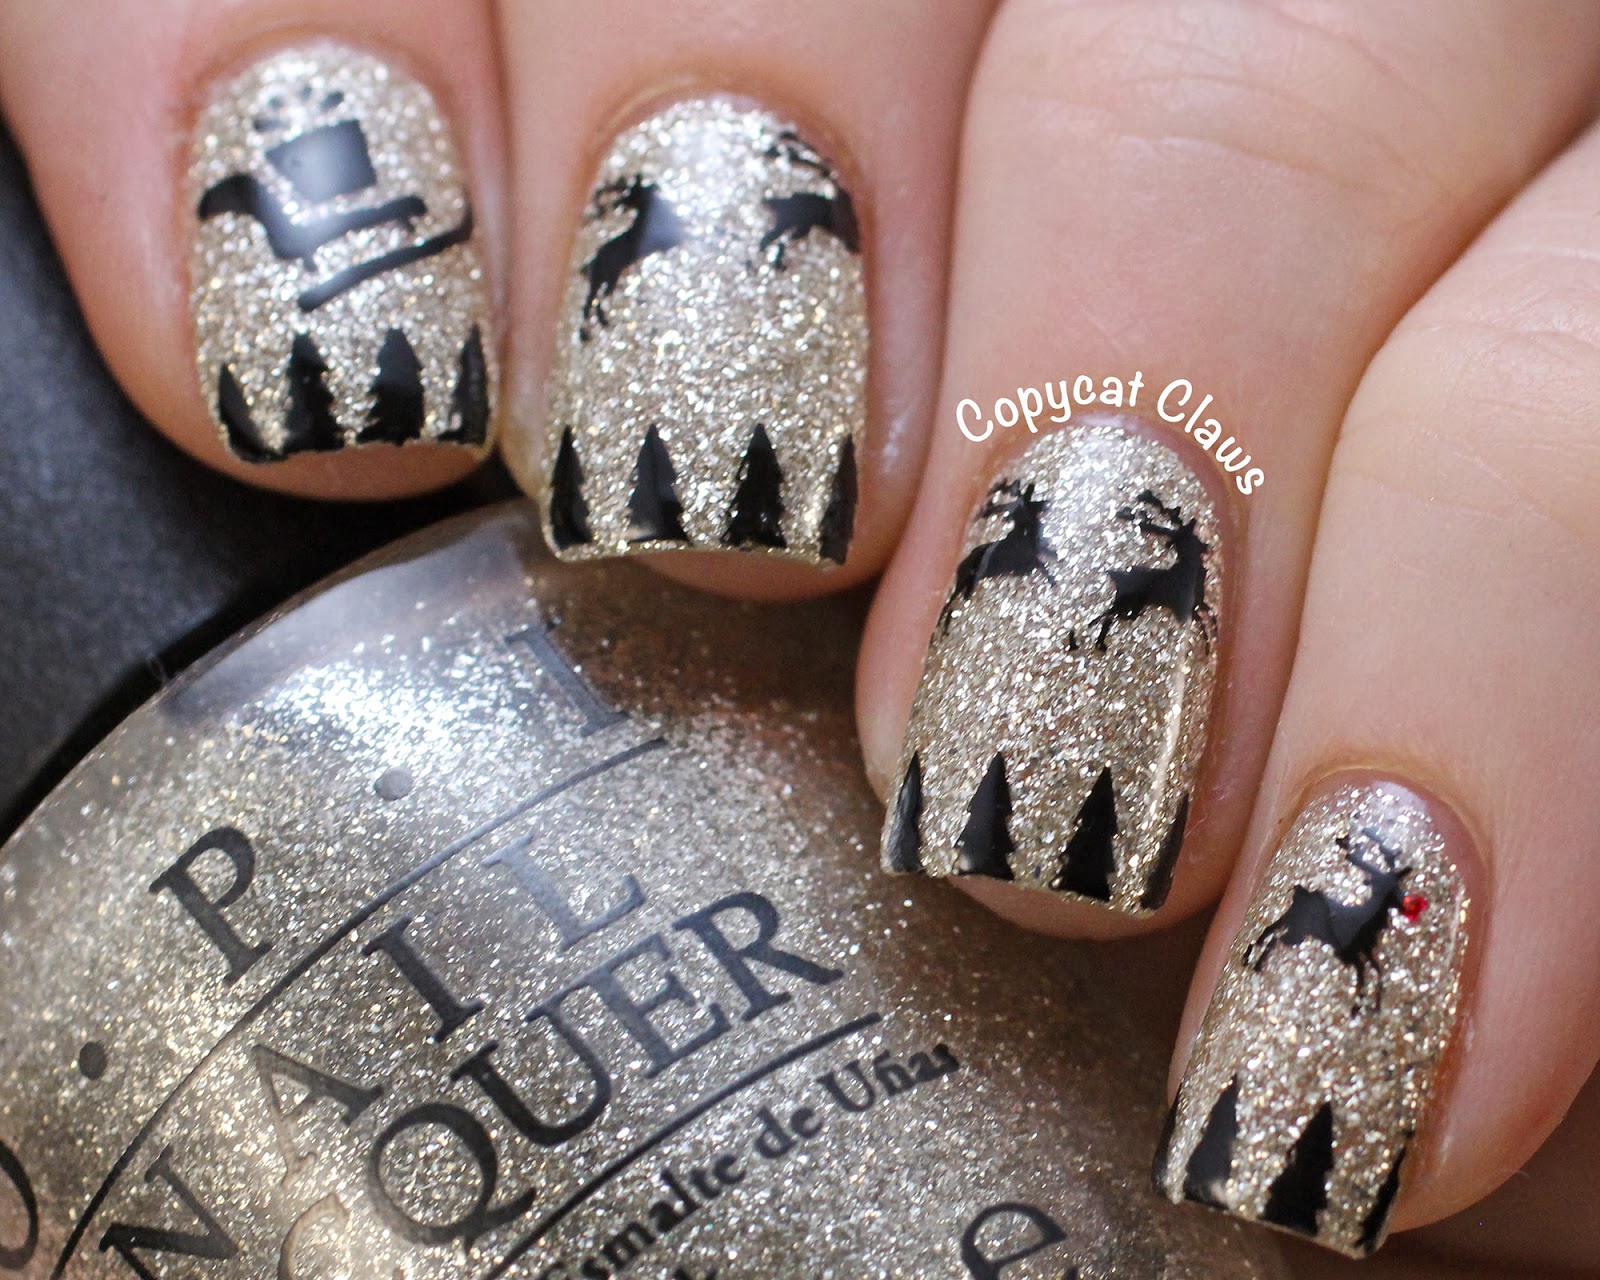
Why settle for just Santa on your nails when you can have his trusty reindeer too? This Santa and reindeer nail art tutorial is perfect for those who want a fun and festive design that showcases both of these holiday icons. Start by painting your nails with a dark blue or black base. Once dry, use a small brush and white polish to create a snowy landscape at the base of your nail. Use your dotting tool and red polish to create Santa's suit, and use white polish for his beard. Next, use a small brush and brown polish to create his reindeer, and use black polish for their eyes and antlers. For an extra touch, you can add some glitter for a snowy effect or use a small brush and silver polish to create a sleigh in the background. Finish off the design with a top coat to seal in your design and add some shine. This adorable Santa and reindeer nail art is perfect for the holiday season and is sure to be a hit at any Christmas party. So why not give it a try and spread some holiday cheer with your nails?6. "Santa and Reindeer Nail Art Tutorial"


6. "Santa and Reindeer Nail Art Tutorial"


Celebrate the most wonderful time of the year with these festive Santa nail art designs. These designs are perfect for those who want to go all out and show their love for Santa on their nails. One idea is to create a full nail design with Santa's face on each nail. Use a light blue or nude base and then use a small brush and red polish to create Santa's hat on the tip of your nail. Use your dotting tool and white polish to create a pom-pom on the top of the hat, and then use your small brush to create a white line across the bottom for the brim. Next, use your dotting tool and black polish to create Santa's eyes and mouth, and use a red dot for his nose. Finish off the design with a top coat. For a more elegant look, try a French manicure with a twist. Use a light pink or nude base and then create a white tip on each nail. Use your small brush and red polish to create Santa's hat and beard on the ring finger. You can even add some glitter for a snowy effect. These festive Santa nail art designs are perfect for those who want to make a statement this holiday season. They are fun, playful, and perfect for any Christmas celebration!7. "Festive Santa Nail Art Designs for Christmas"
7. "Festive Santa Nail Art Designs for Christmas"


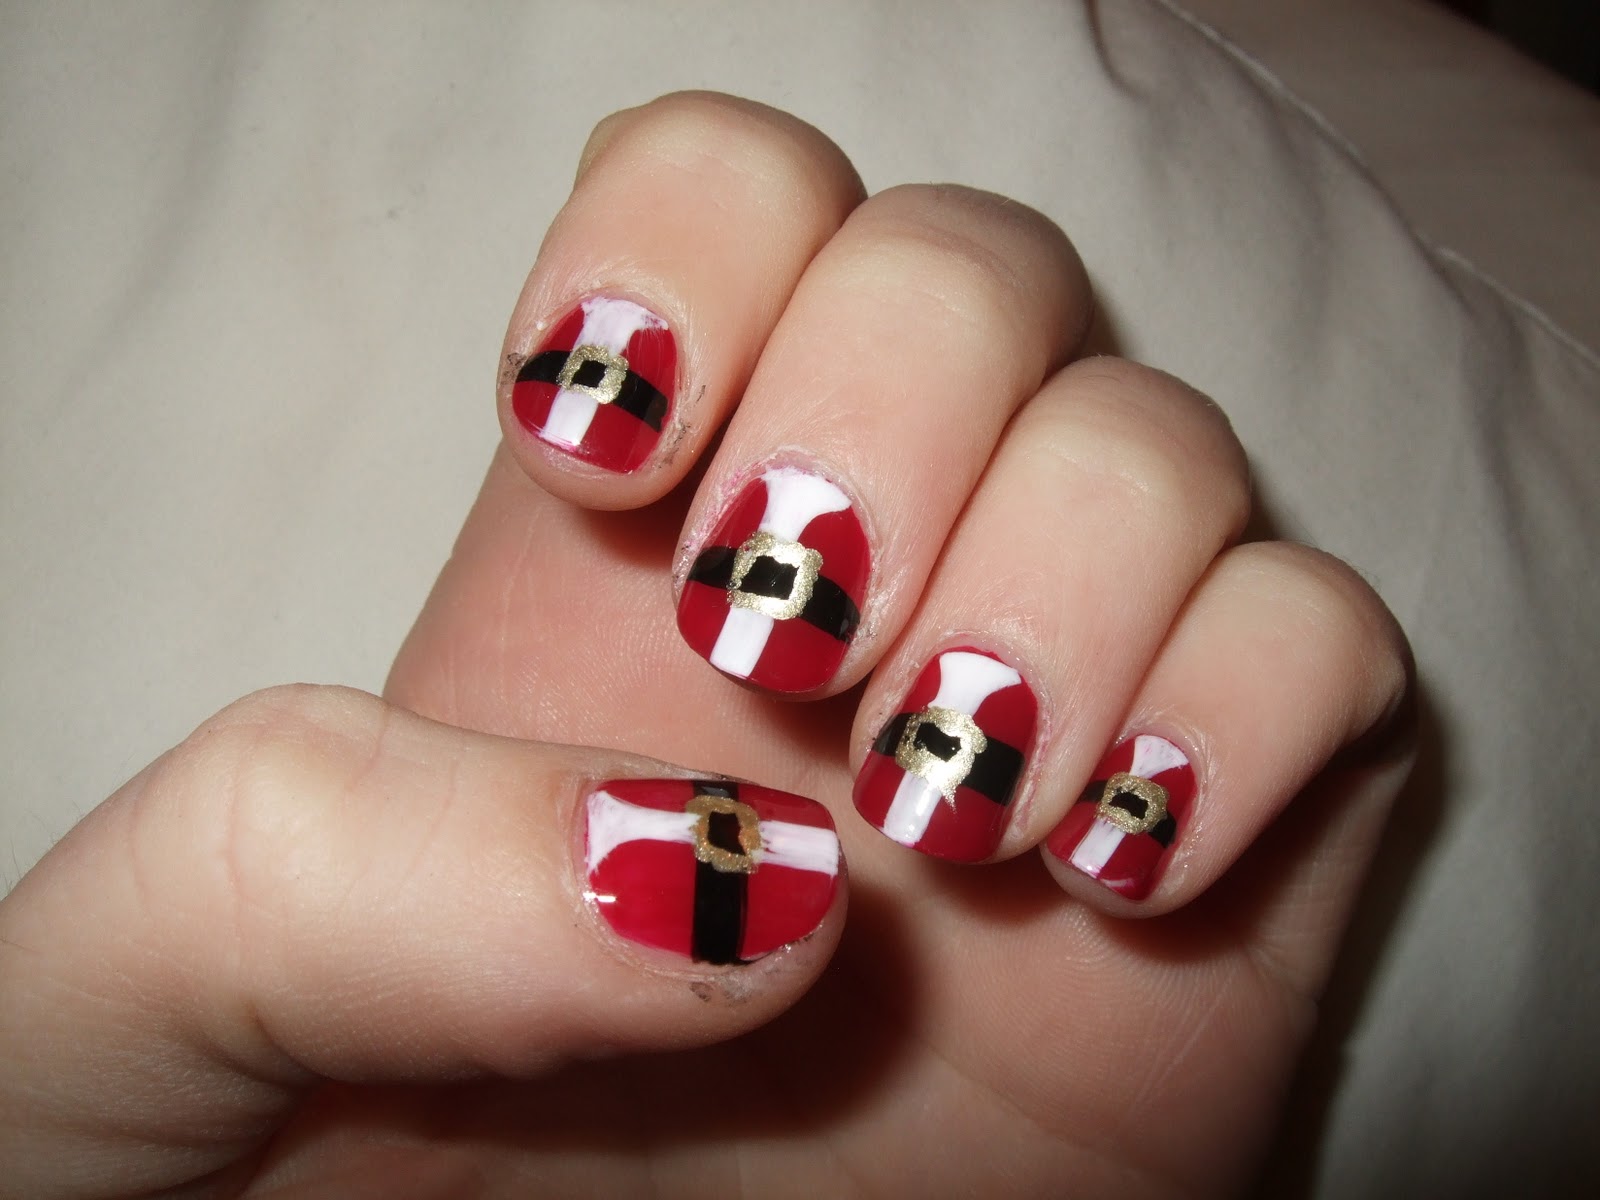
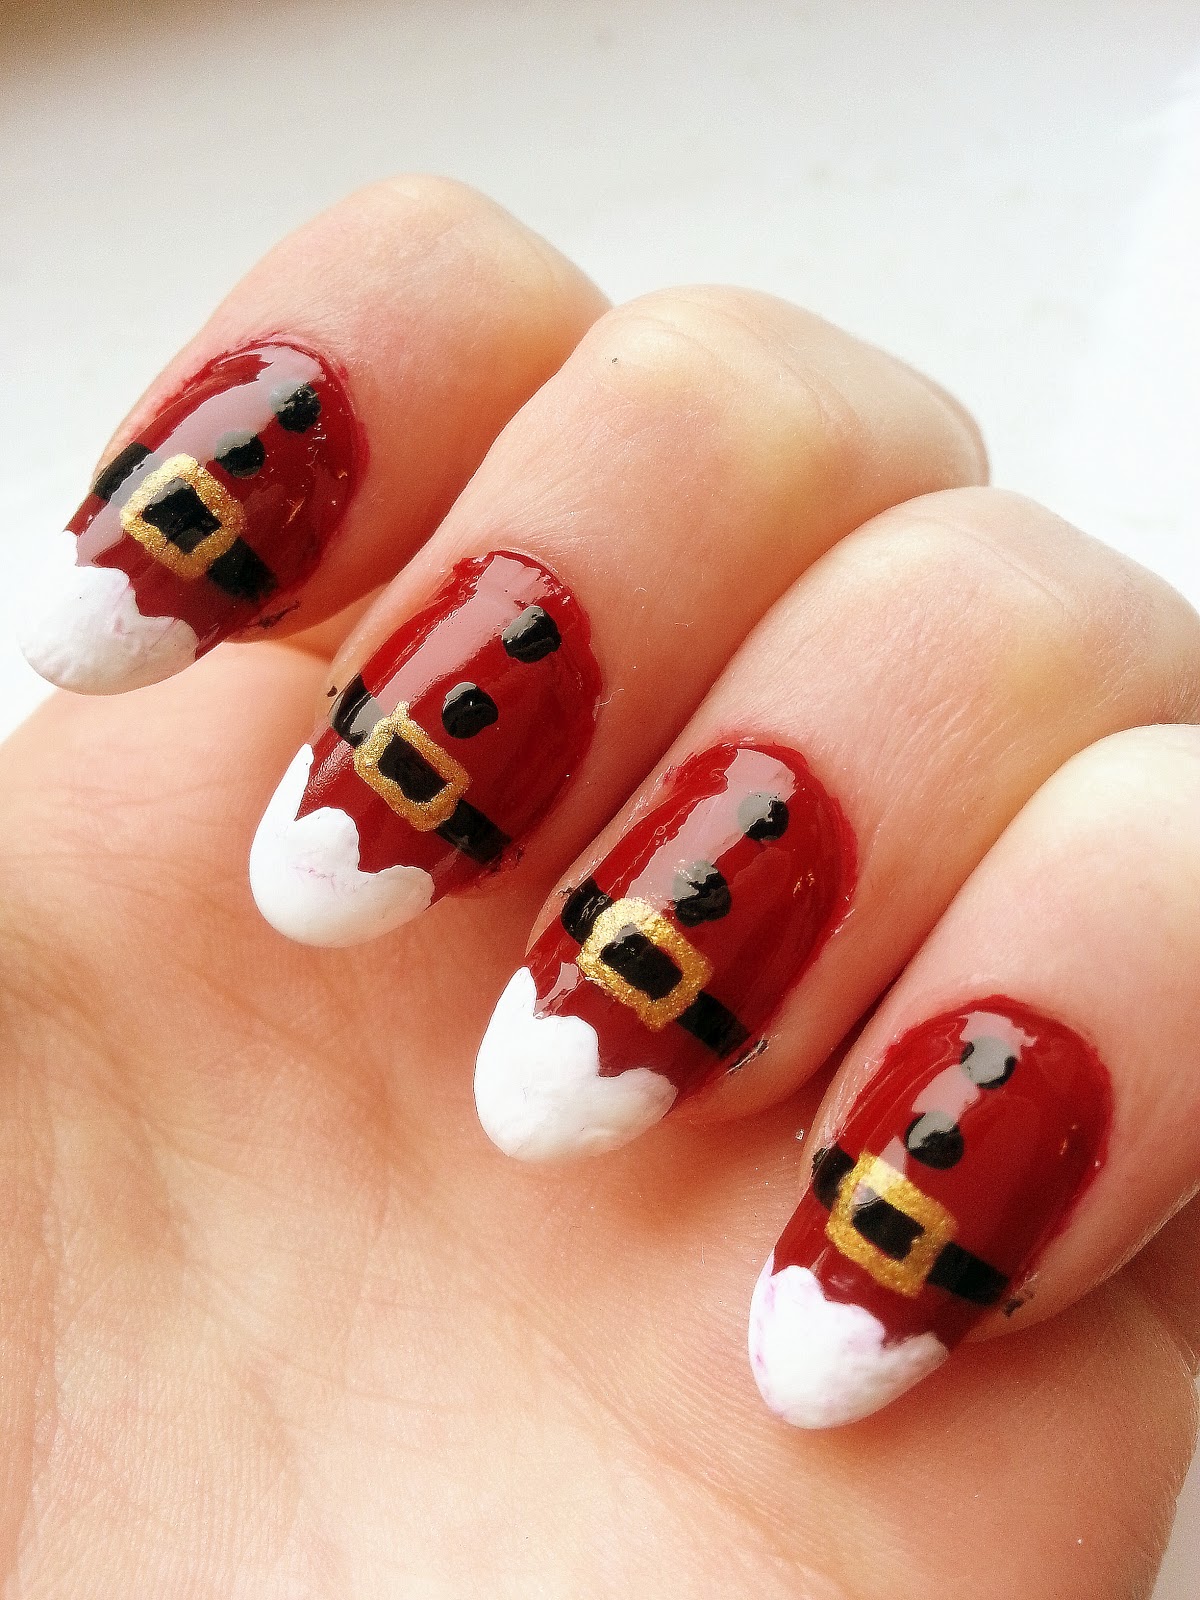
If you're looking for a unique and fun Santa nail art design, this Santa suit nail art tutorial is for you. This design is perfect for those who want to incorporate Santa in a more subtle and creative way. Start by painting your nails with a nude or light pink base. Once dry, use a small brush and black polish to create a thin line across the tip of your nail. This will be the base of Santa's belt. Then, use your dotting tool and silver polish to create a small buckle on the belt. Next, use your small brush and white polish to create a small half-circle at the base of your nail for Santa's beard. Use your dotting tool and black polish to create his eyes and a small red dot for his nose. Then, use your small brush and red polish to create a small circle for his hat. To complete the look, use a small brush and black polish to create Santa's boots at the bottom of your nail. Finish off the design with a top coat to seal in your design and add some shine. This unique Santa suit nail art is perfect for those who want to stand out with a fun and creative design. Give it a try and rock those Santa suits on your nails this Christmas!8. "Santa Suit Nail Art Tutorial"

8. "Santa Suit Nail Art Tutorial"


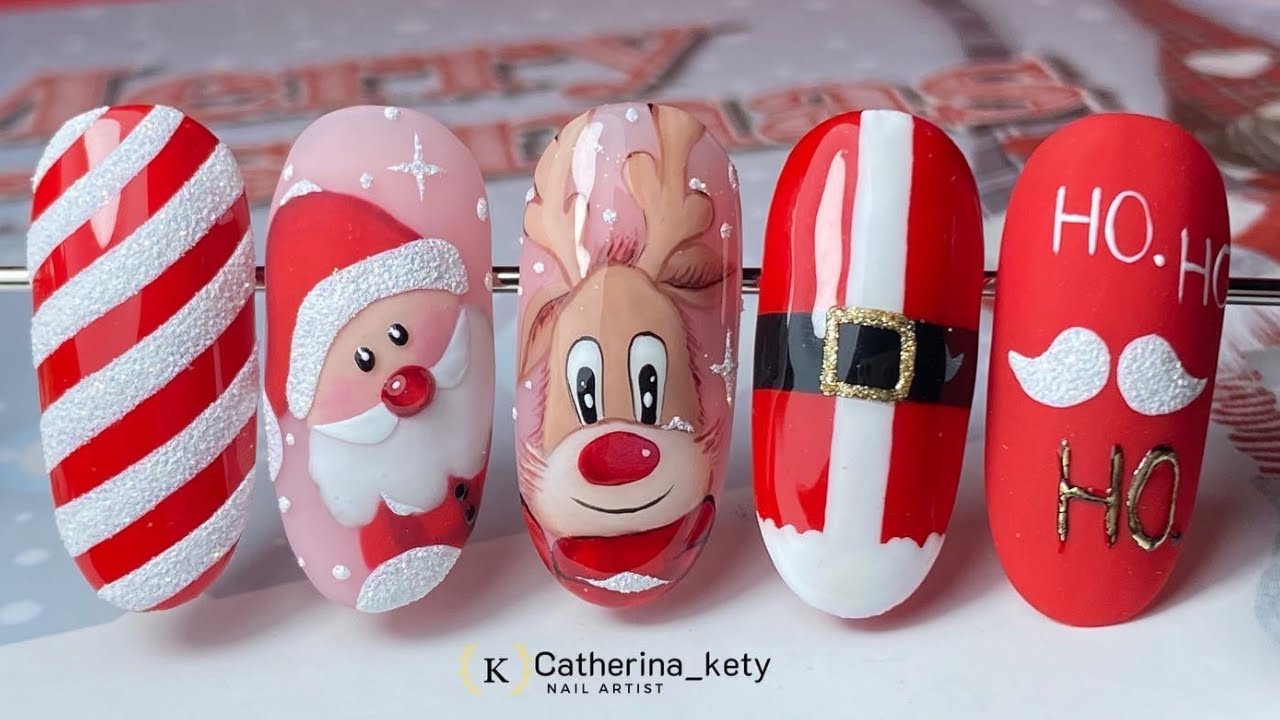
If you can't decide on just one Santa nail art design, why not try a Christmas nail art compilation featuring various Santa designs? This is a great way to showcase different styles and techniques, and you can even customize it to fit your own preferences. Start by choosing a few different Santa designs that you like, such as the classic Santa face, Santa and his reindeer, or Santa's hat. Paint each nail with a different base color, such as red, white, or green. Then, use your chosen designs and create a different Santa on each nail. You can even add some festive touches, such as glitter, snowflakes, or Christmas trees, to tie the designs together. Finish off the look with a top coat to seal in your designs and add some shine. This Christmas nail art compilation featuring Santa is perfect for those who want to showcase their love for Santa in a creative and unique way. So go ahead and mix and match your favorite Santa designs for a festive and fun holiday look!9. "Christmas Nail Art Compilation: Santa Edition"
9. "Christmas Nail Art Compilation: Santa Edition"


Last but certainly not least, we have Santa Claus inspired nail art designs that are perfect for the holiday season. These designs are not only cute and festive, but they also incorporate different aspects of Santa's iconic look. One idea is to create a full nail design with Santa's face on each nail. Use a light blue or nude base and then use a small brush and red polish to create Santa's hat on the tip of your nail. Use your dotting tool and white polish to create a pom-pom on the top of the hat, and then use your small brush to create a white line across the bottom for the brim. Next, use your dotting tool and black polish to create Santa's eyes and mouth, and use a red dot for his nose. Finish off the design with a top coat. For a more elegant look, try a French manicure with a twist. Use a light pink or nude base and then create a white tip on each nail. Use your small brush and red polish to create Santa's hat and beard on the ring finger. You can even add some glitter for a snowy effect. These Santa Claus inspired nail art designs are perfect for those who want to add a festive touch to their nails without going over the top. They are versatile, fun, and will surely make your nails stand out this holiday season.10. "Santa Claus Inspired Nail Art Designs"

10. "Santa Claus Inspired Nail Art Designs"


Add Some Festive Cheer with Santa Nail Art: A Fun and Easy Tutorial

Get into the Holiday Spirit with Santa Nail Art
.JPG) Christmas is just around the corner and what better way to get into the festive spirit than with some fun and easy Santa nail art? This playful and creative nail design is perfect for spreading holiday cheer and adding a touch of whimsy to your look. Whether you’re attending a Christmas party or simply want to add some festive flair to your everyday style, Santa nail art is a great option for all skill levels.
Christmas is just around the corner and what better way to get into the festive spirit than with some fun and easy Santa nail art? This playful and creative nail design is perfect for spreading holiday cheer and adding a touch of whimsy to your look. Whether you’re attending a Christmas party or simply want to add some festive flair to your everyday style, Santa nail art is a great option for all skill levels.
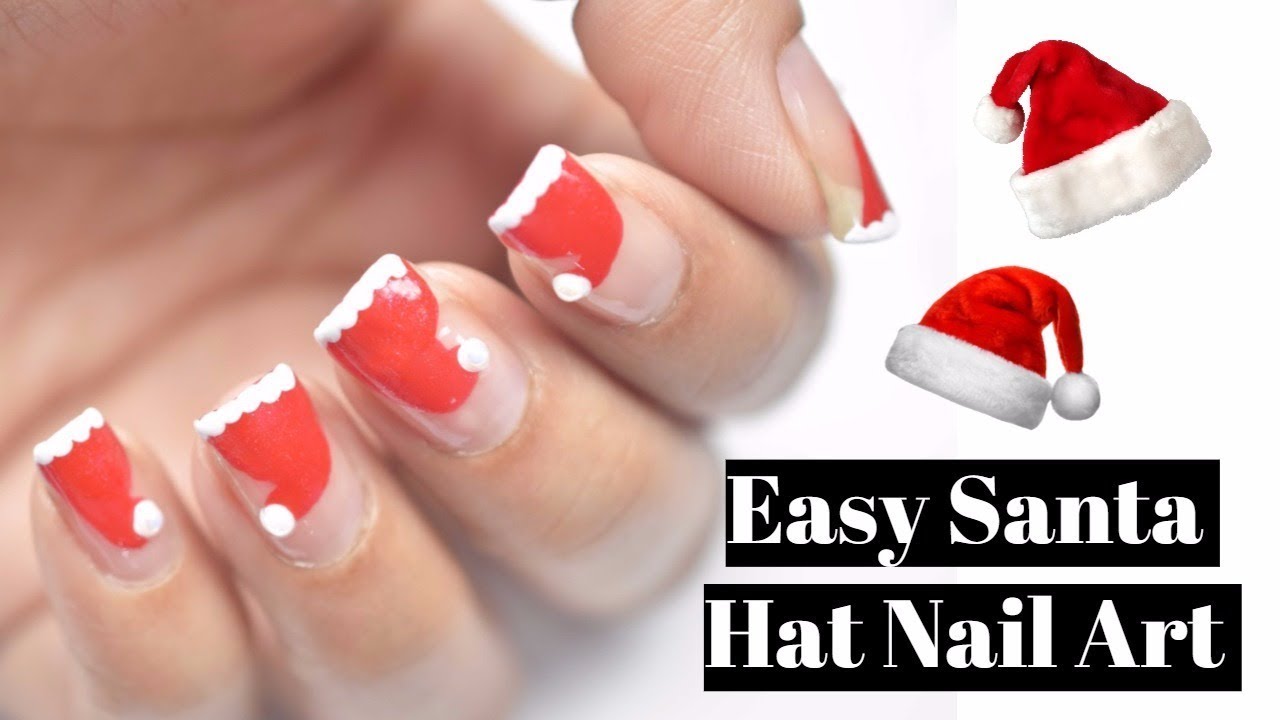
Step-by-Step Tutorial for Santa Nail Art
 To create your very own Santa nail art,
you will need:
red, white, black, and gold nail polish, a fine-tipped brush, a dotting tool, and a top coat. Start by painting all your nails with a base coat of red polish. Once dry, use the fine-tipped brush to carefully paint a white triangle at the tip of each nail. This will be Santa’s iconic hat.
Next, use the dotting tool and white polish to create two small circles for Santa’s eyes. Then, using the fine-tipped brush and black polish, draw a small smile under the eyes.
The key to creating a cute and playful Santa is to keep the facial features small and simple.
To add some festive sparkle, use the dotting tool and gold polish to create a small dot on the tip of the hat. This will be the pom-pom. Once all the details are dry,
seal in your design with a top coat
for a long-lasting and glossy finish.
To create your very own Santa nail art,
you will need:
red, white, black, and gold nail polish, a fine-tipped brush, a dotting tool, and a top coat. Start by painting all your nails with a base coat of red polish. Once dry, use the fine-tipped brush to carefully paint a white triangle at the tip of each nail. This will be Santa’s iconic hat.
Next, use the dotting tool and white polish to create two small circles for Santa’s eyes. Then, using the fine-tipped brush and black polish, draw a small smile under the eyes.
The key to creating a cute and playful Santa is to keep the facial features small and simple.
To add some festive sparkle, use the dotting tool and gold polish to create a small dot on the tip of the hat. This will be the pom-pom. Once all the details are dry,
seal in your design with a top coat
for a long-lasting and glossy finish.
Customize Your Santa Nail Art
 While the classic red and white Santa nail art is always a hit, feel free to get creative and add your own personal touch.
You can try using different colors for the hat or even adding some glitter for a more glamorous look.
You can also experiment with different facial expressions for your Santa, from a big smile to a mischievous grin.
While the classic red and white Santa nail art is always a hit, feel free to get creative and add your own personal touch.
You can try using different colors for the hat or even adding some glitter for a more glamorous look.
You can also experiment with different facial expressions for your Santa, from a big smile to a mischievous grin.
Spread Holiday Cheer with Santa Nail Art
 Not only is Santa nail art a fun and easy way to get into the holiday spirit, but it’s also a great conversation starter and a festive addition to any outfit.
You can even match your Santa nails with your Christmas sweater for the ultimate holiday ensemble.
So go ahead and spread some cheer with this playful and creative nail design. Happy holidays!
Not only is Santa nail art a fun and easy way to get into the holiday spirit, but it’s also a great conversation starter and a festive addition to any outfit.
You can even match your Santa nails with your Christmas sweater for the ultimate holiday ensemble.
So go ahead and spread some cheer with this playful and creative nail design. Happy holidays!


