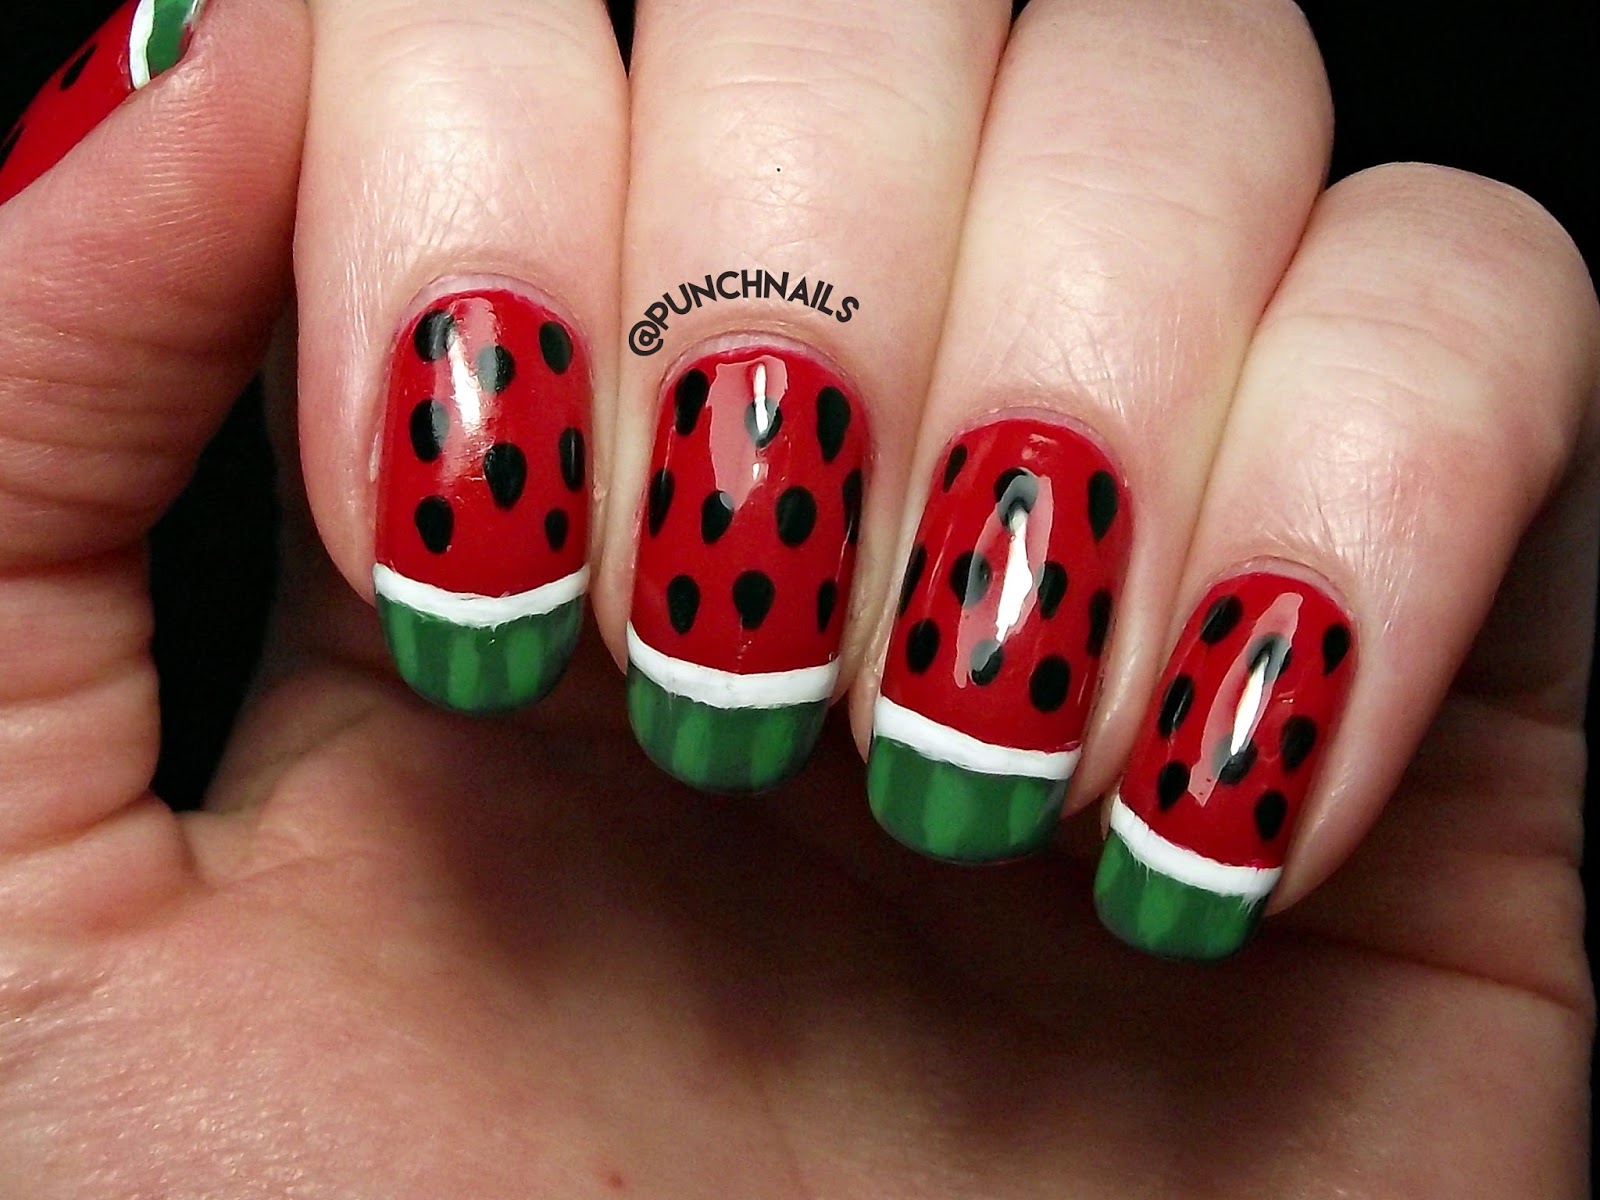
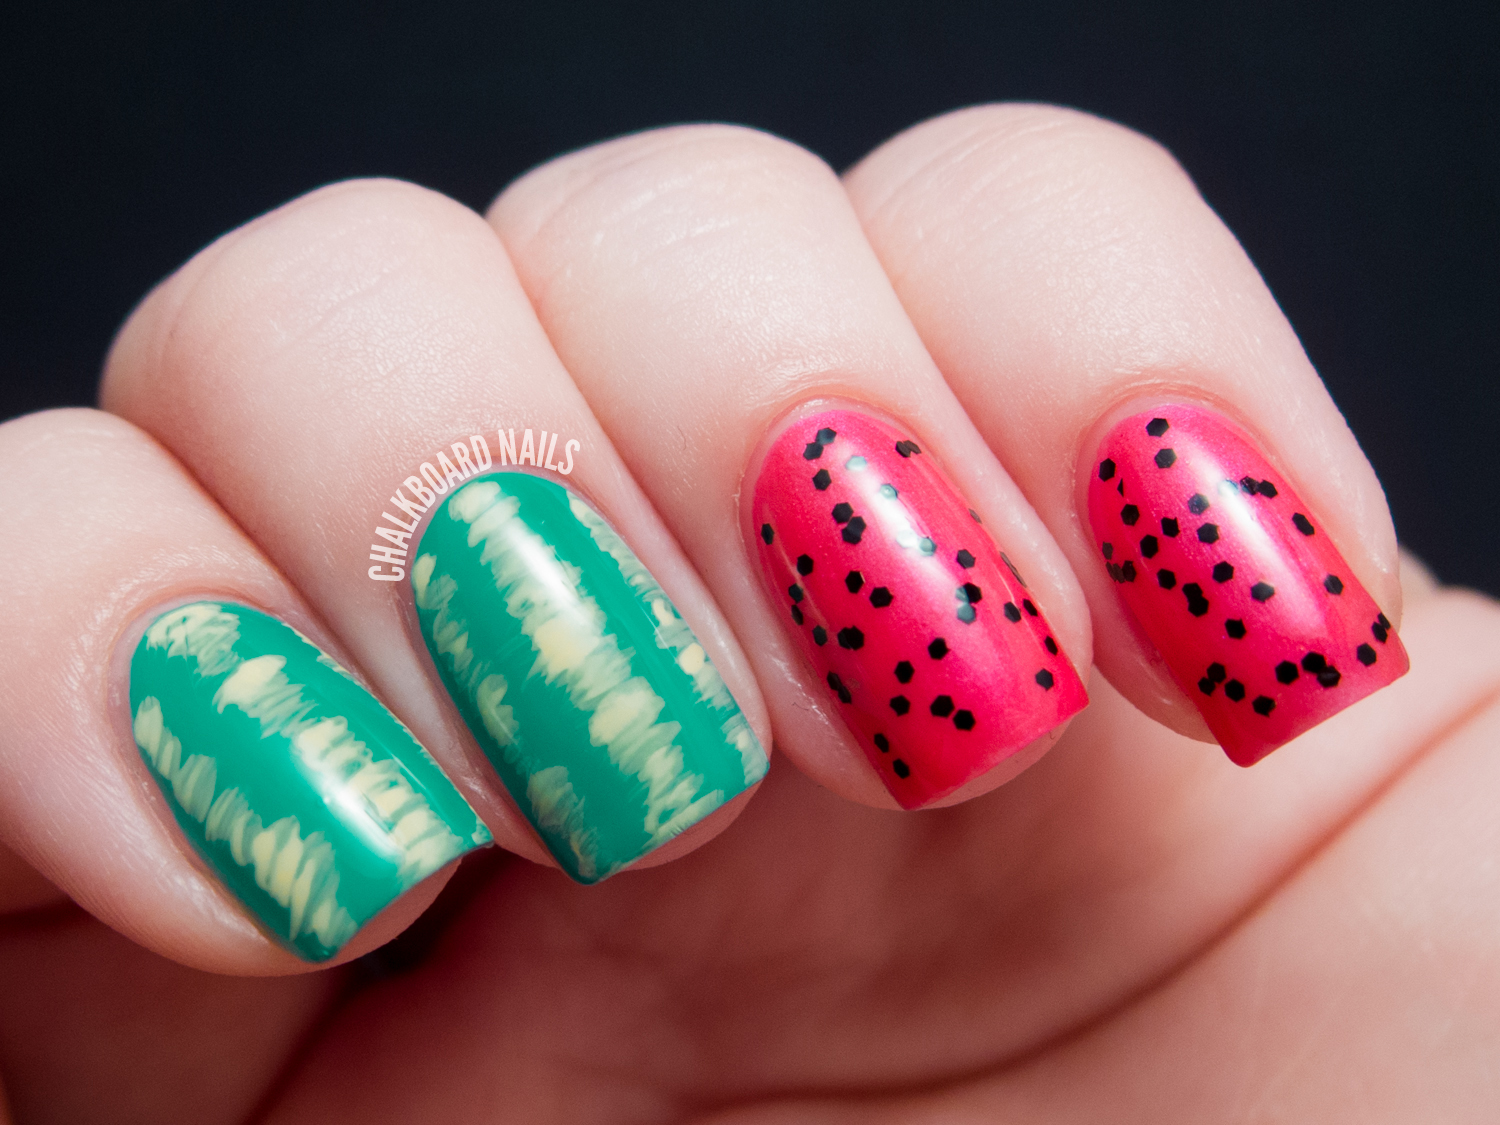
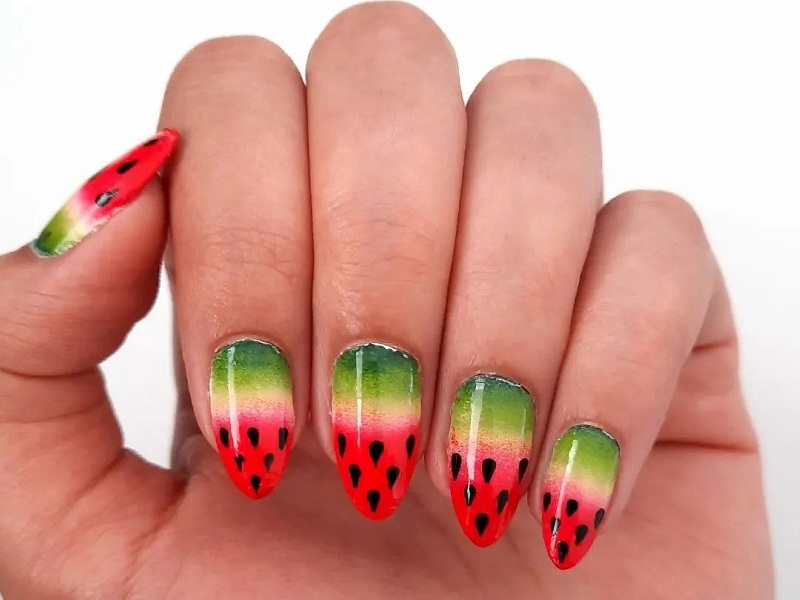
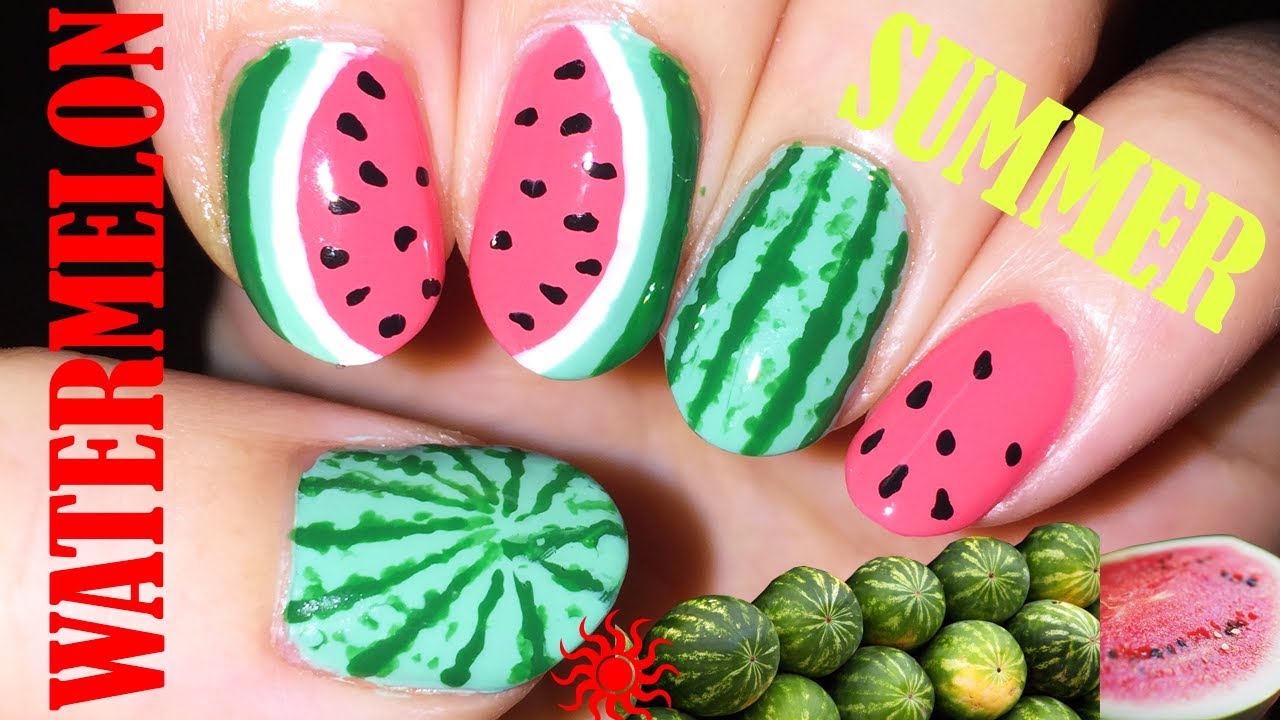
The first tutorial on our list is a classic watermelon nail art design that screams summer. Start by painting your nails with a light green base color, then use a toothpick or a thin nail art brush to create the watermelon pattern on the tips of your nails. Use pink and black nail polish for the watermelon seeds and add a glossy topcoat for a shiny finish.1. Watermelon Nail Art Tutorial for Summer


Watermelon Nail Art Tutorial for Summer


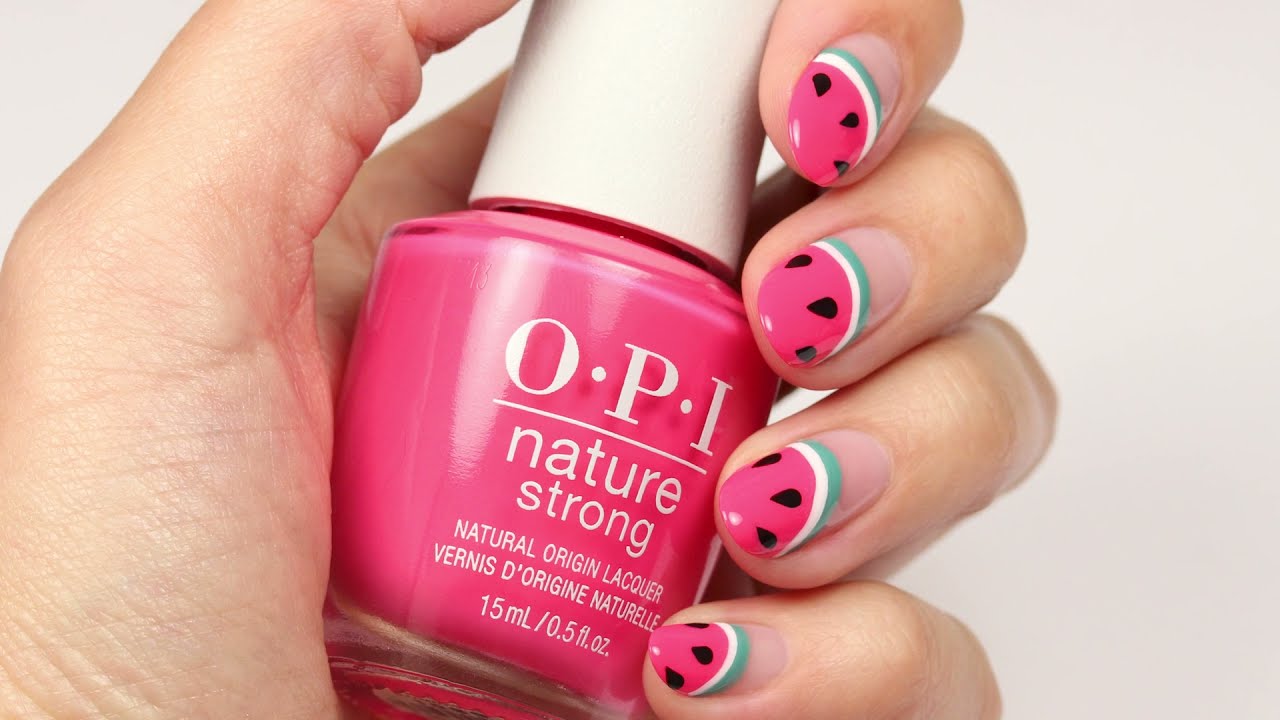
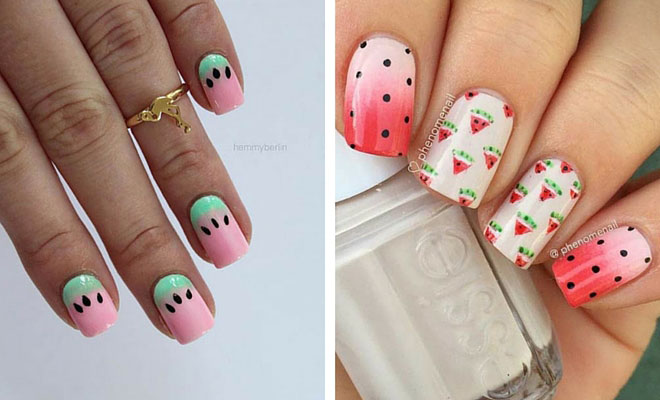
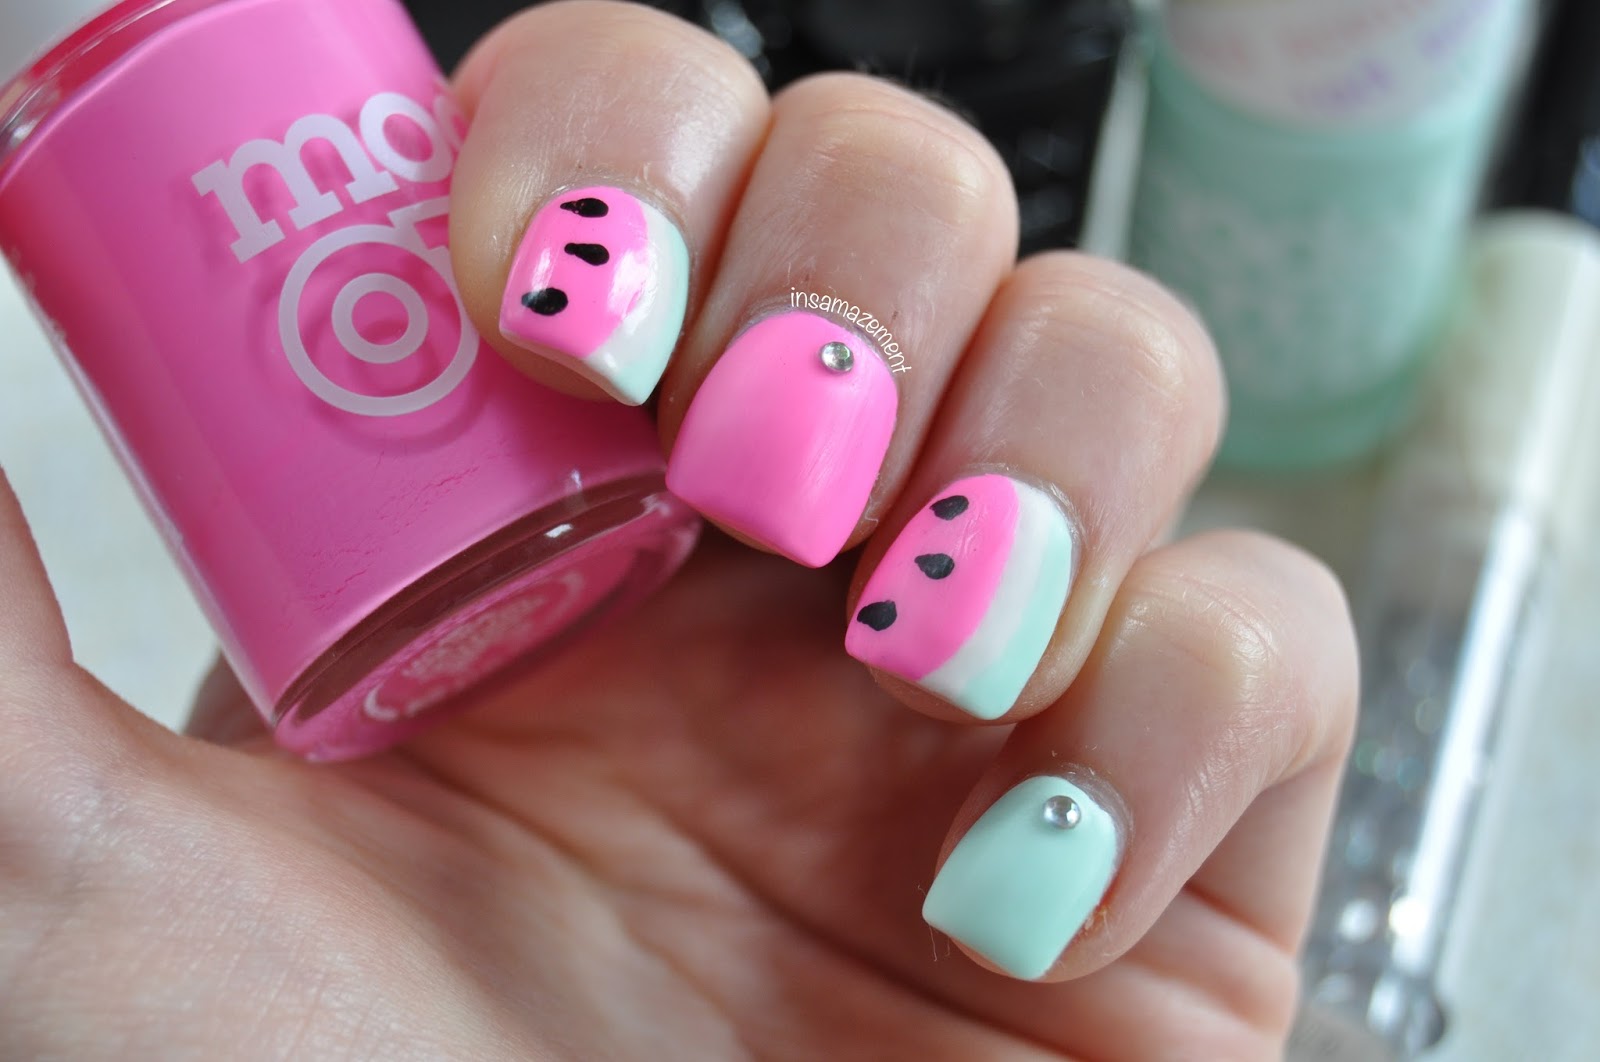
If you're new to nail art or don't have much time to spare, this easy watermelon nail art tutorial is perfect for you. Paint your nails with a white base color and use a green nail polish to create the watermelon rind. Then, use a toothpick or a dotting tool to create the watermelon seeds with black nail polish. Seal it off with a topcoat and you're done!2. Easy Watermelon Nail Art Tutorial


Easy Watermelon Nail Art Tutorial
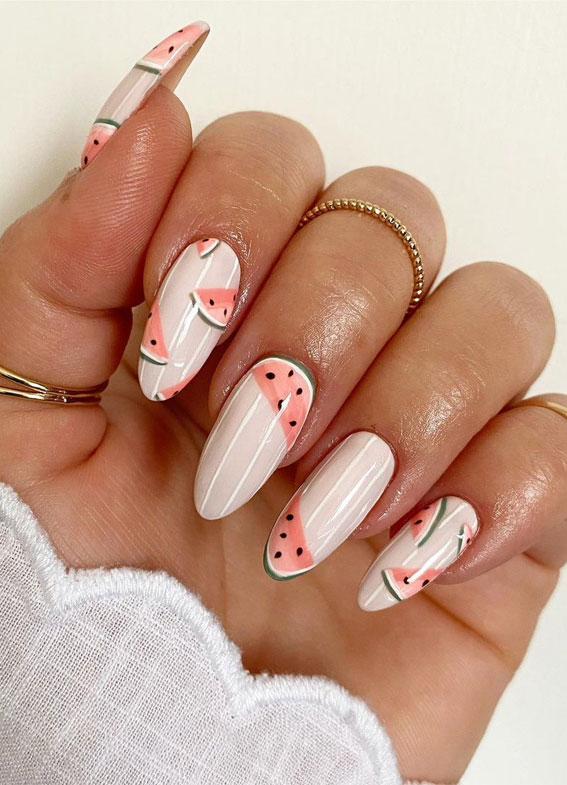
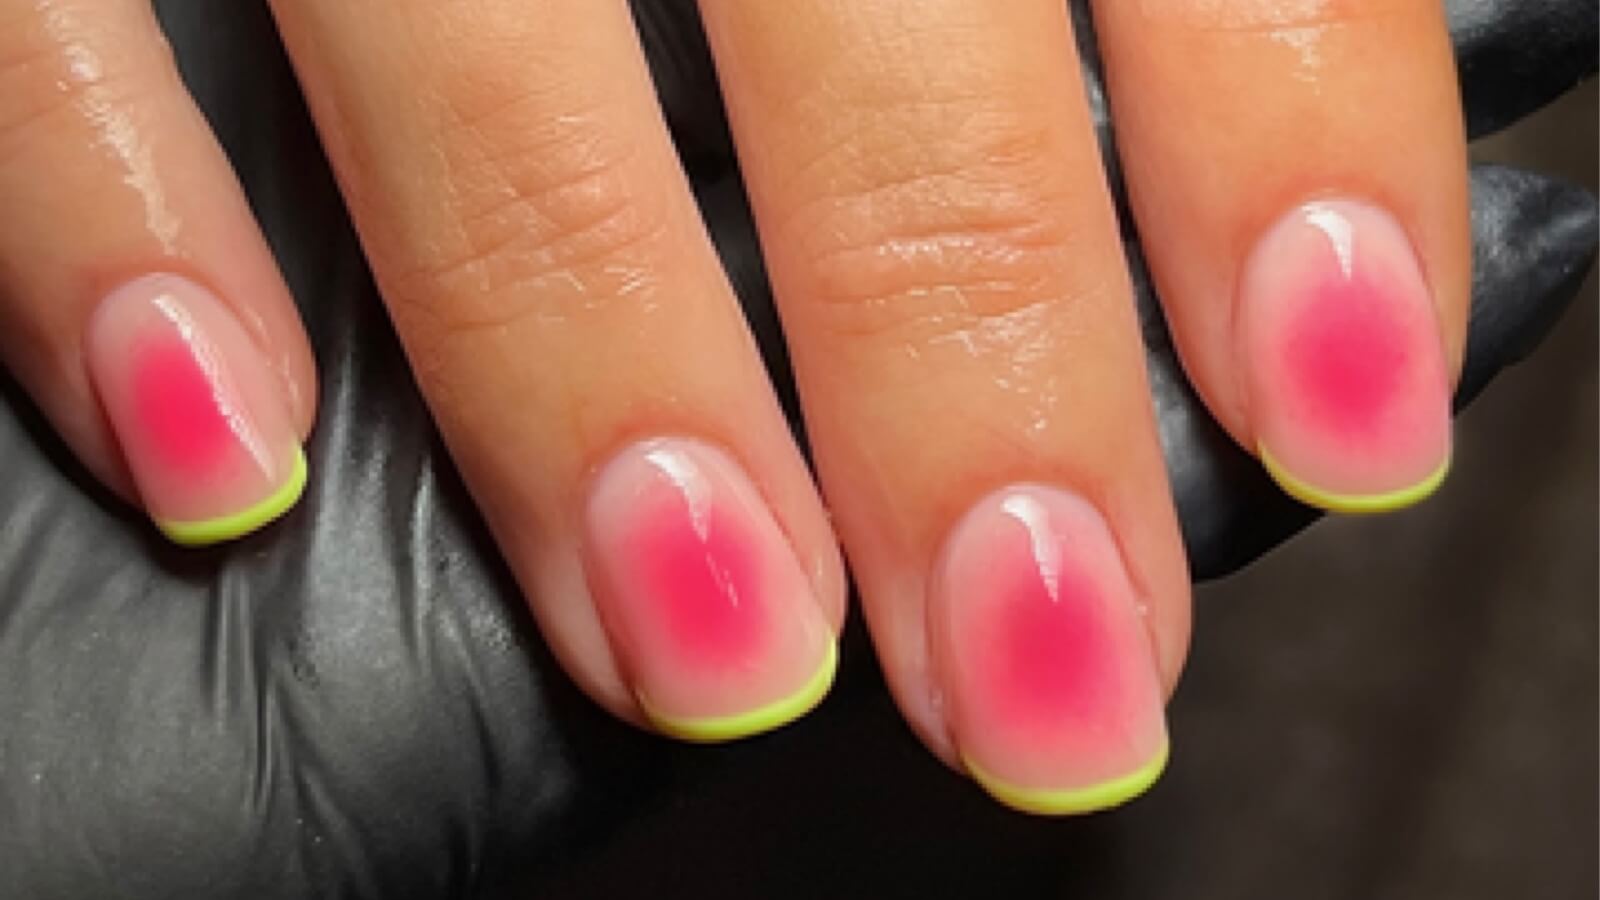
For a simple yet chic watermelon nail art design, paint your nails with a pastel pink base color and use a green nail polish to create the rind. Use a white nail polish to create the watermelon flesh and add some black seeds with a toothpick or a nail art brush. Finish off with a matte topcoat for a trendy look.3. Simple Watermelon Nail Art Design
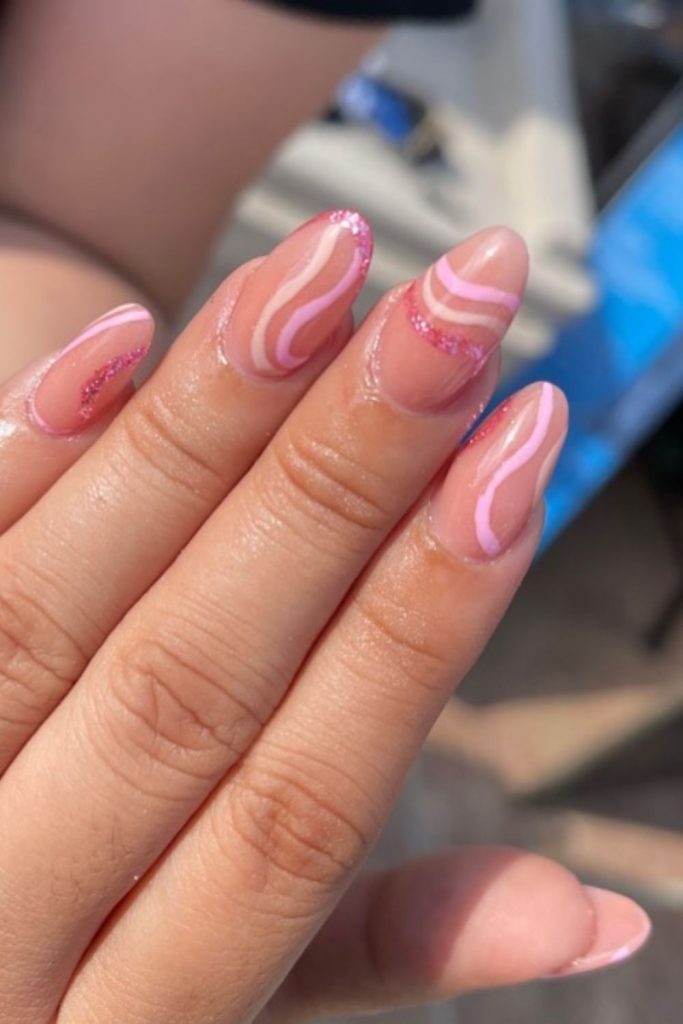


Simple Watermelon Nail Art Design

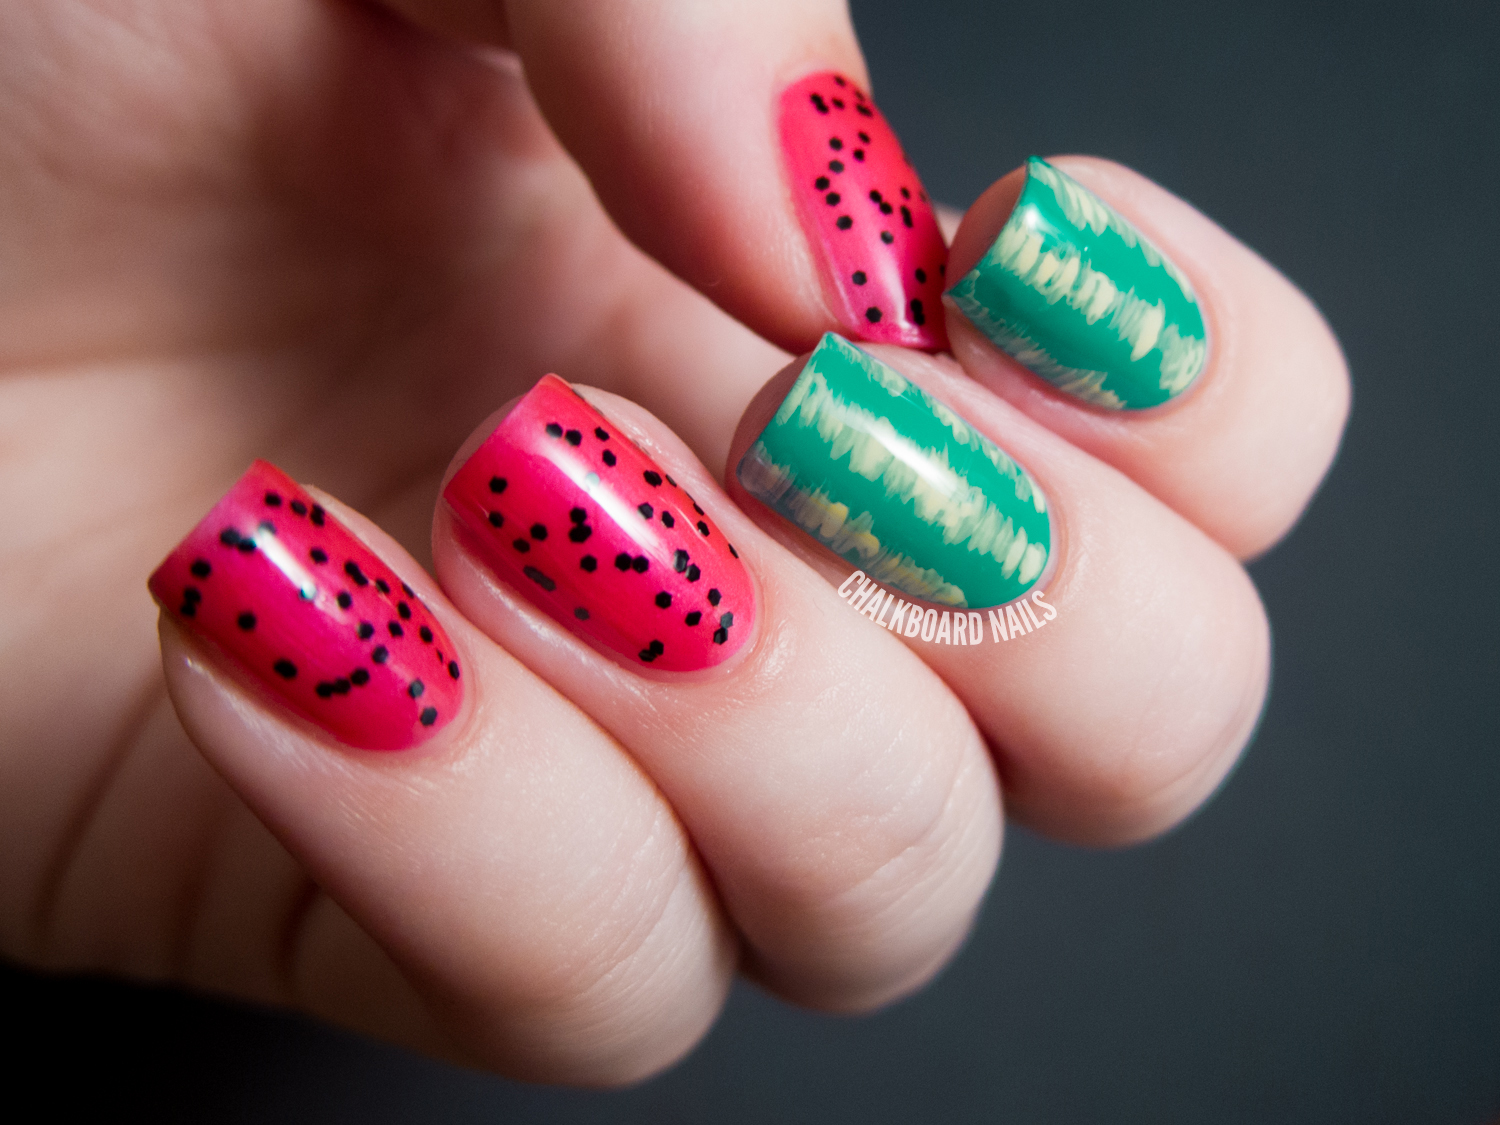
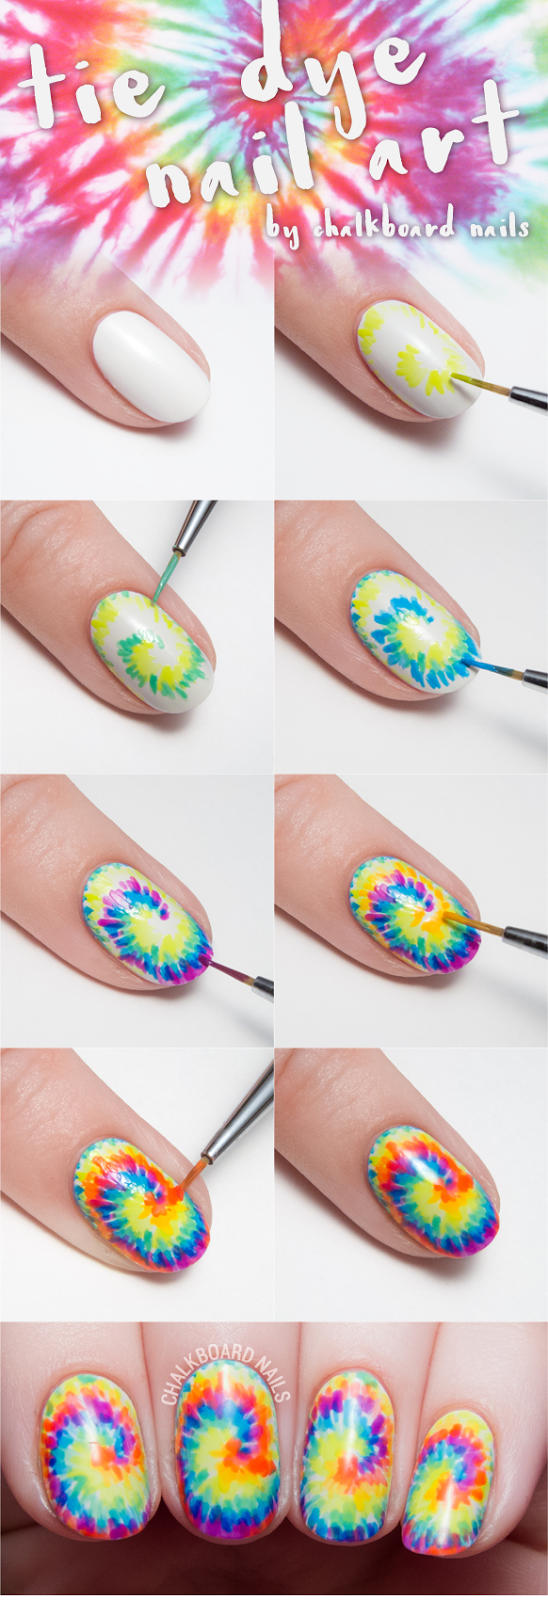
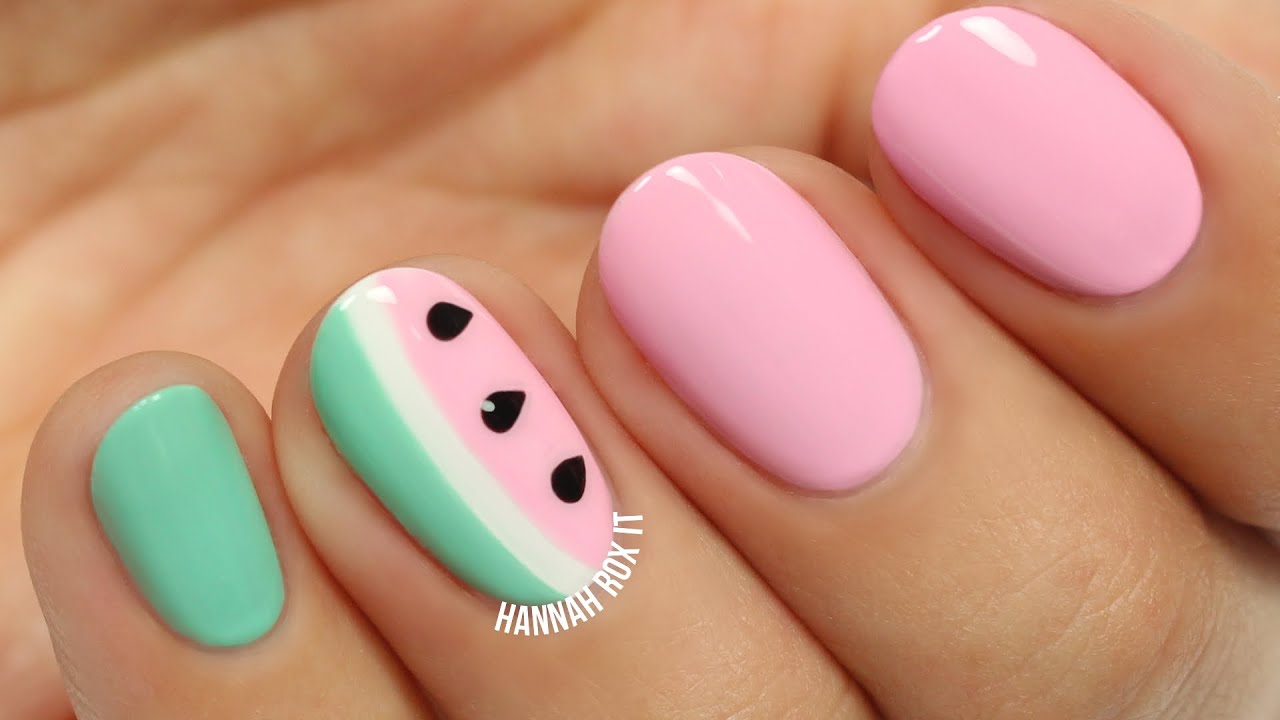
This step by step tutorial will guide you through creating a colorful and vibrant watermelon nail art design. Start with a white base color and use a light green nail polish to create the rind. Then, use pink and dark green nail polish to create the watermelon flesh. Use a toothpick or a nail art brush to create the seeds and seal it off with a topcoat.4. Summer Watermelon Nail Art Step by Step


Summer Watermelon Nail Art Step by Step


If you're feeling crafty, this DIY watermelon nail art tutorial is perfect for you. Cut out small watermelon slices from a nail polish sponge and dab them onto your nails for a unique and textured watermelon design. Use pink, green, and black nail polish for the watermelon colors and finish off with a topcoat.5. DIY Watermelon Nail Art Tutorial


DIY Watermelon Nail Art Tutorial


Short on time? This quick and easy watermelon nail art tutorial is perfect for those who want to achieve a cute and playful look in no time. Paint your nails with a light pink base color and use a green nail polish to create the rind. Then, use a toothpick or a nail art brush to create the seeds with black nail polish. Finish off with a glossy topcoat for a shiny look.6. Quick and Easy Watermelon Nail Art

Quick and Easy Watermelon Nail Art


If you want to add a pop of color to your watermelon nail art, this tutorial is for you. Start with a white or light pink base color and use a bright pink nail polish to create the watermelon flesh. Use a light green nail polish for the rind and add some black seeds with a toothpick or a nail art brush. Finish off with a topcoat for a cute and colorful look.7. Cute Watermelon Nail Art Tutorial


Cute Watermelon Nail Art Tutorial
If you're new to nail art, this tutorial is perfect for you. It's simple and easy to follow, making it a great option for beginners. Start by painting your nails with a light green base color and use a white nail polish to create the watermelon flesh. Use a toothpick or a nail art brush to create the seeds with black nail polish and finish off with a topcoat.8. Watermelon Nail Art for Beginners


Watermelon Nail Art for Beginners

Looking for a fun and playful watermelon nail art design? Look no further! This tutorial will guide you through creating a colorful and vibrant watermelon design. Start with a light green base color and use a light pink nail polish to create the watermelon flesh. Add some black seeds with a toothpick or a nail art brush and finish off with a topcoat.9. Fun Summer Watermelon Nail Art Tutorial
Fun Summer Watermelon Nail Art Tutorial
If you don't have any nail art tools on hand, don't worry! This tutorial will show you how to create a watermelon nail art design using only a toothpick. Start with a white base color and use a green nail polish to create the rind. Then, use a toothpick to create the watermelon flesh and seeds with pink and black nail polish. Finish off with a topcoat for a cute and easy watermelon design. Now that you have 10 different watermelon nail art tutorials to choose from, it's time to get creative and have fun with your nails this summer. Whether you're a beginner or a nail art pro, these tutorials are sure to help you achieve a fun and playful look that's perfect for the sunny season. So, grab your nail polish and get ready to rock those watermelon nails!10. Watermelon Nail Art Tutorial with Toothpick

Watermelon Nail Art Tutorial with Toothpick
The Perfect Summer Nail Art: Watermelon Inspired Design

Why Watermelon Nails?
 Summer is the time for fun, creativity, and bright colors. And what better way to express that than through your nail art? One of the most popular and trendy designs for this summer is watermelon inspired nails. This simple and refreshing design will make your nails stand out and add a touch of playfulness to any outfit. Plus, who doesn't love a juicy slice of watermelon on a hot summer day?
How to Achieve This Look
 To create this cute and simple watermelon nail art, you will need a few materials: a base coat, a top coat, a light green nail polish, a dark green nail polish, a white nail polish, a red nail polish, a small brush or toothpick, and a dotting tool. Start by applying a base coat to protect your nails and allow it to dry completely. Next, apply two coats of light green nail polish as the base color. Once that is dry, use the small brush or toothpick to create thin, curved lines at the tip of your nail using the dark green polish to represent the watermelon's rind.
Adding the Details
 Now it's time to add the details that will make your watermelon nail art pop. Using the dotting tool, create small black dots on the light green area to represent the watermelon seeds. Next, use the white polish to create a thin line just below the dark green curve to represent the white part of the watermelon. Finally, use the red polish to create a curved line just below the white line to represent the juicy red part of the watermelon. Allow your nails to dry completely before applying a top coat to seal in your design and add shine.
Perfect for Any Occasion
 This simple and fun watermelon nail art is perfect for any occasion. Whether you're heading to a pool party, a barbecue, or just want to add some summer vibes to your day, this design is versatile and can be dressed up or down. You can even add glitter or rhinestones for some extra sparkle. Get creative and have fun with it!
In Conclusion
 Watermelon nail art is the perfect way to express your love for summer and add some playful spirit to your nails. With just a few materials and simple steps, you can achieve this trendy and refreshing design. So go ahead and give it a try, and don't forget to show off your nails to your friends. Happy summer and happy nail art!


