Transform your nails into a winter wonderland with this easy-to-follow nail art tutorial. All you need are some basic nail polish colors and a few simple tools to create a snowy scene on your nails. To start, gather white, blue, and silver nail polish, a dotting tool, and a thin nail art brush. Begin by painting your nails with a white base color. This will serve as the snowy backdrop for your design. Next, take your blue nail polish and create a gradient effect on your nails. Use the dotting tool to dab small dots of blue polish on the tips of your nails, then use the thin nail art brush to blend the blue color into the white base. This will create a beautiful winter sky effect. Once your base colors are dry, it's time to create the snowy scene. Use the thin nail art brush and white nail polish to paint snow-capped mountains on your nails. Start at the tip of your nail and create small triangular shapes to mimic the peaks of mountains. You can add as many or as few as you'd like, depending on the size of your nails. Next, use the dotting tool and silver nail polish to create falling snowflakes. Simply dip the dotting tool into the polish and gently press it onto your nails, creating different sized snowflakes. You can also use the dotting tool to add small snowdrifts at the base of your mountains. Finish off your winter wonderland nails with a top coat to seal in your design and add a glossy finish. Your nails will look like a snowy landscape right out of a fairytale!Winter Wonderland Nail Art Tutorial


Winter Wonderland Nail Art Tutorial


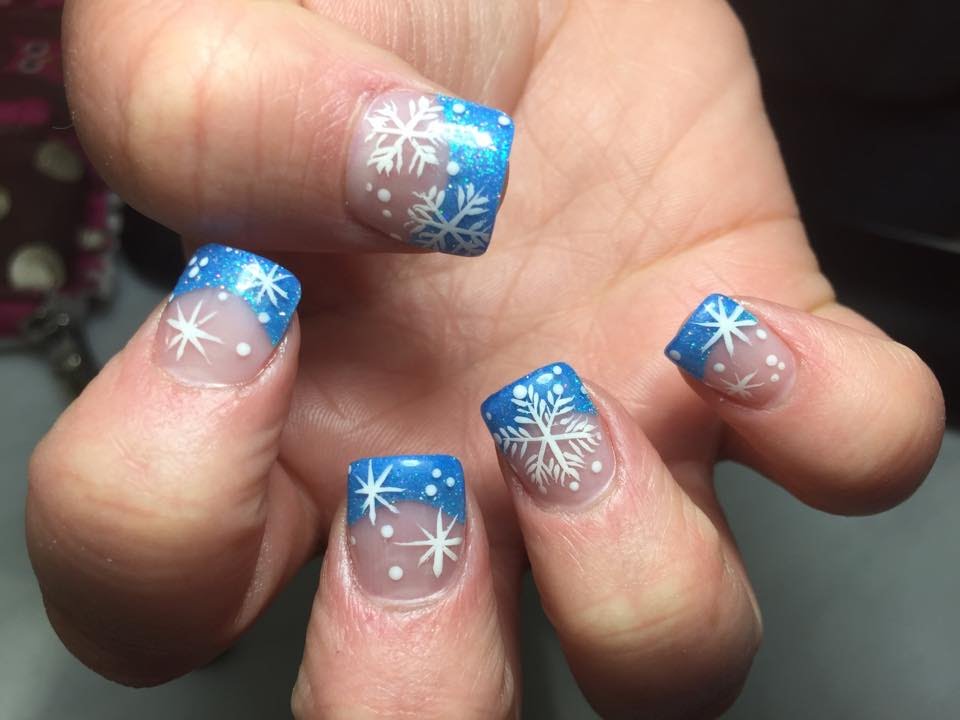
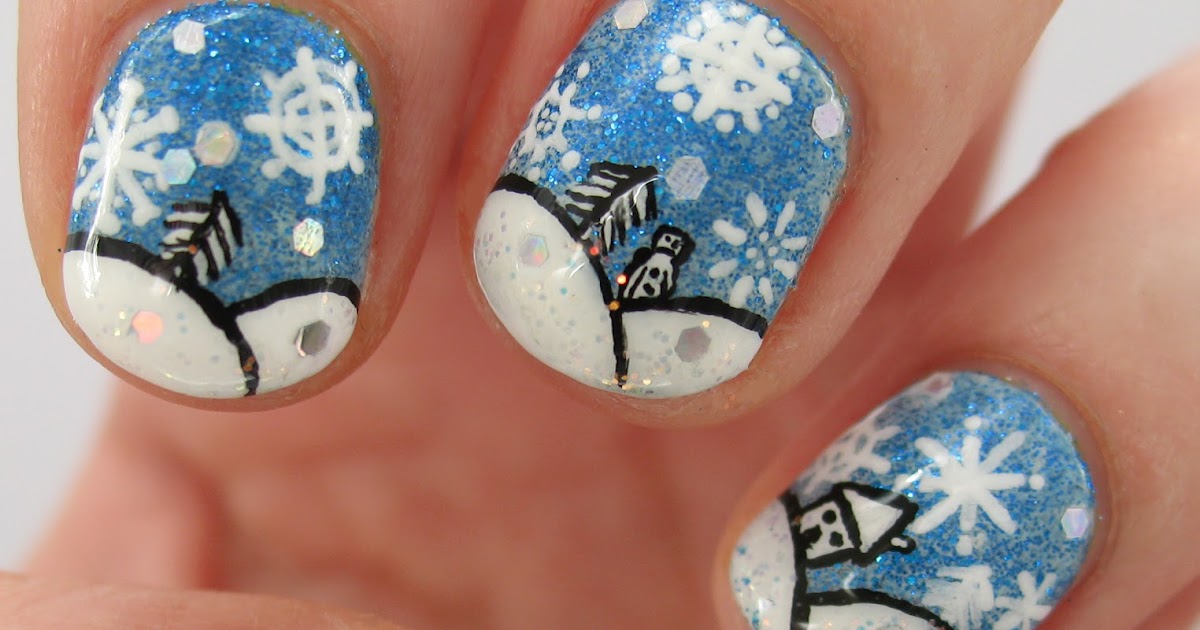
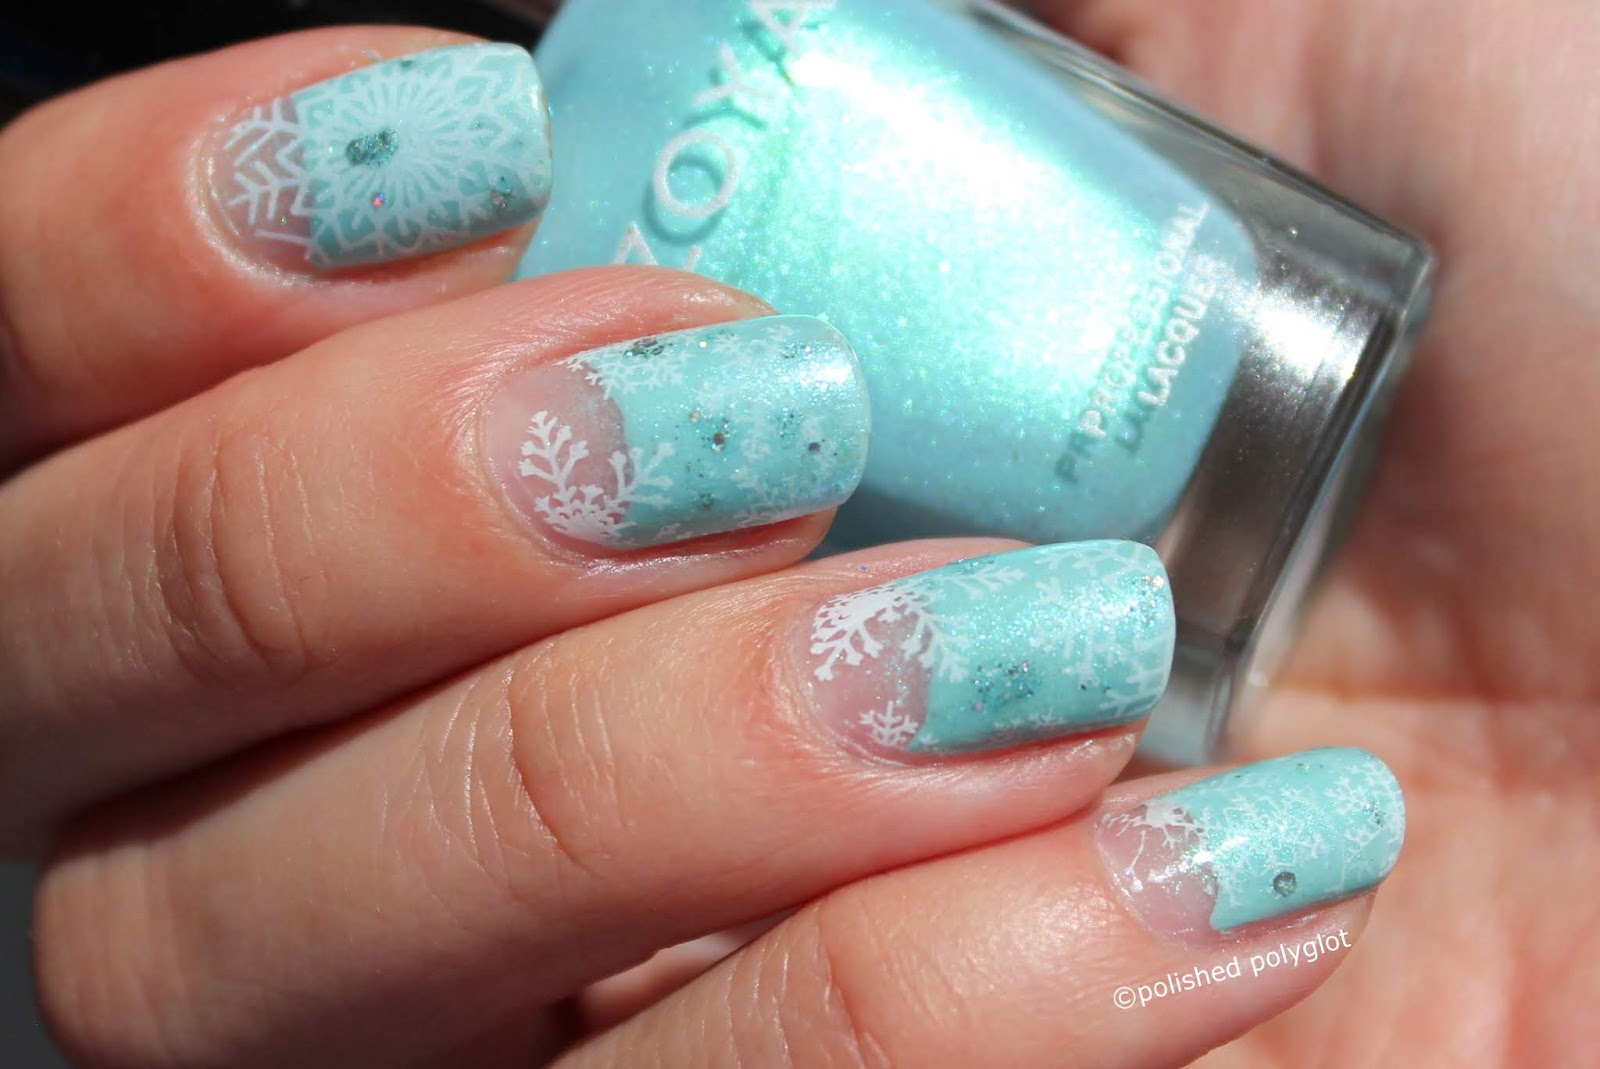
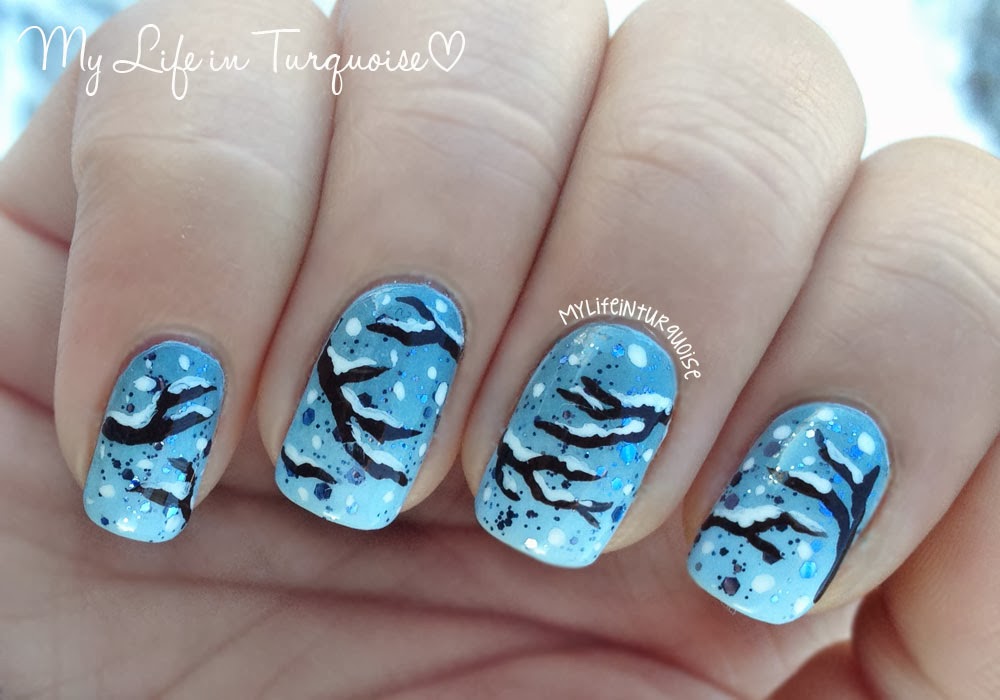
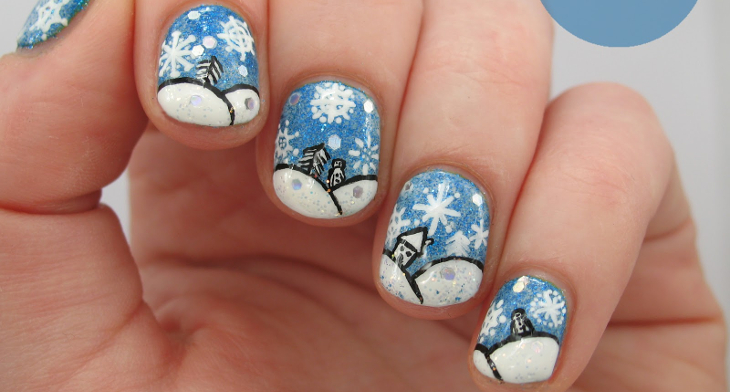
If you're not quite ready to tackle a full winter wonderland design, you can still create a beautiful snowy scene on your nails with just a few simple steps. Start by painting your nails with a pastel blue base color. This will give the illusion of a snowy sky. Next, take a thin nail art brush and white nail polish to create small snow-covered trees on your nails. Simply paint thin, vertical lines for the tree trunks, and then add small horizontal lines for the branches. Finish off the trees with a dab of white polish on the tips for a snowy effect. Next, use the dotting tool and white nail polish to create snowflakes falling from the sky. Vary the sizes and placement of the snowflakes to make it look more natural. To add some depth to your design, use the dotting tool and light blue nail polish to create a hazy, wintery sky. Simply dab the polish onto your nails in a circular motion to create a soft, dreamy effect. Finish off your snowy scene by applying a matte top coat to give your nails a frosted, wintery look.How to Create a Snowy Scene on Your Nails

How to Create a Snowy Scene on Your Nails


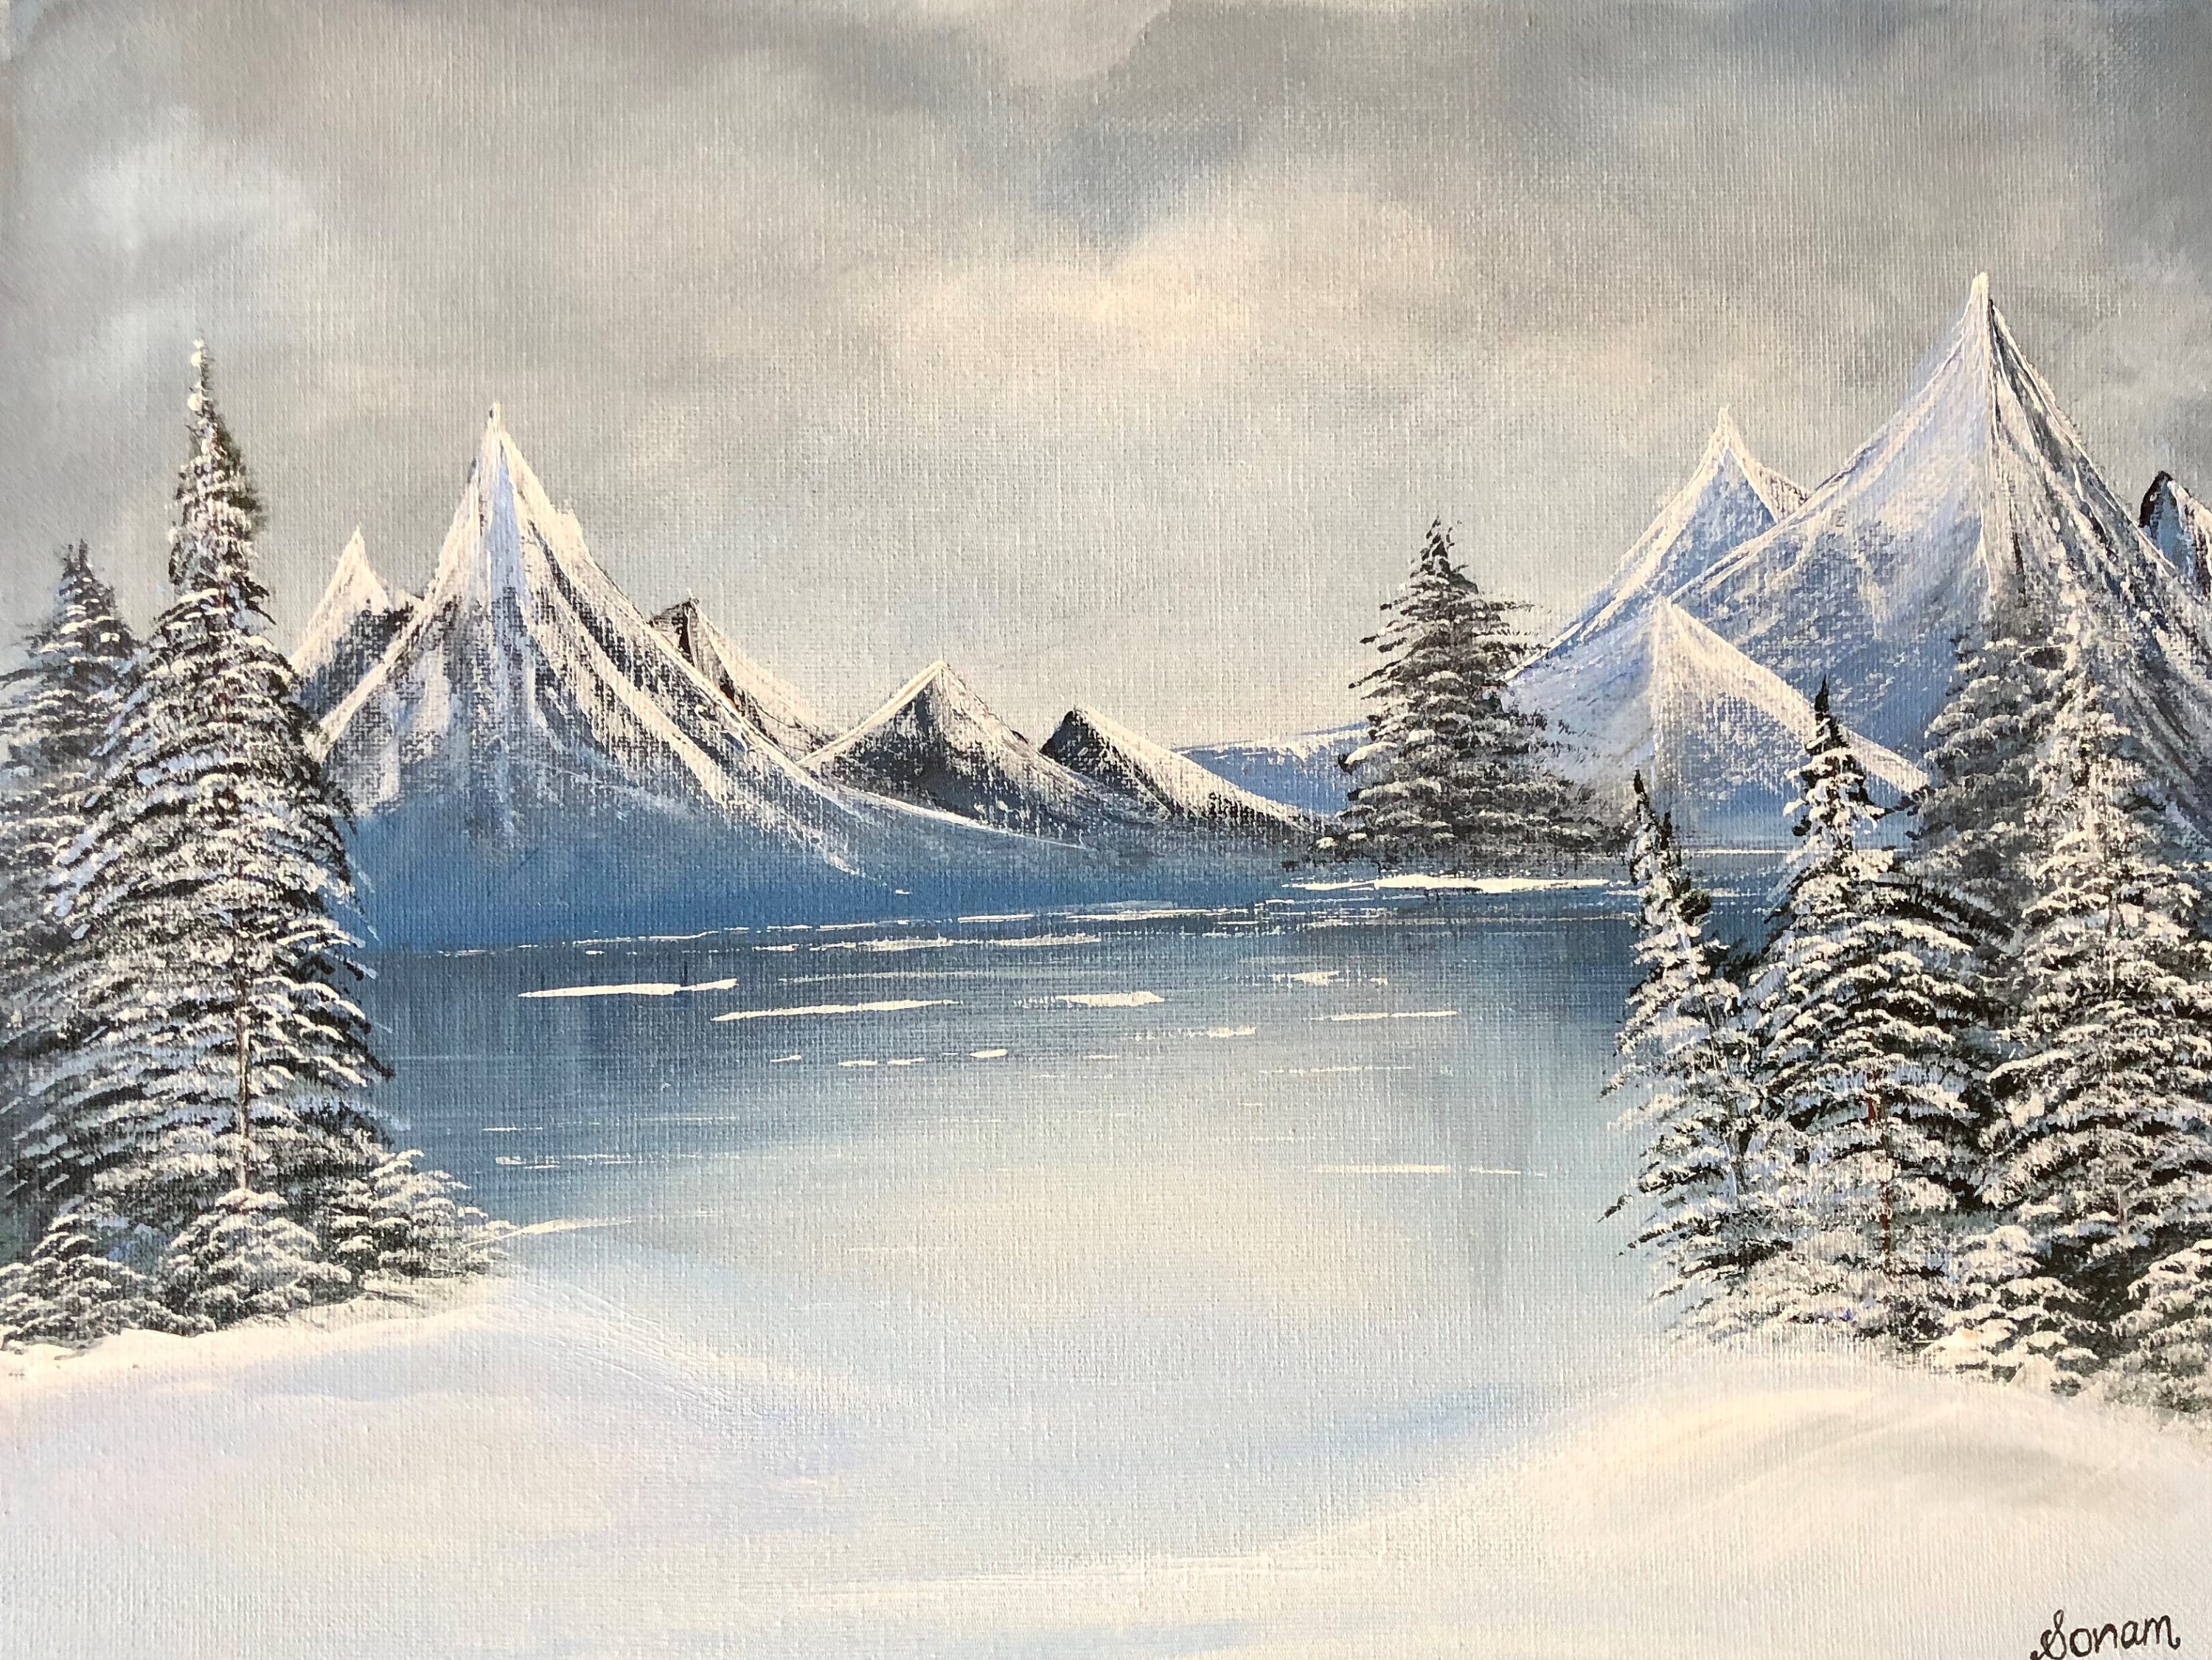
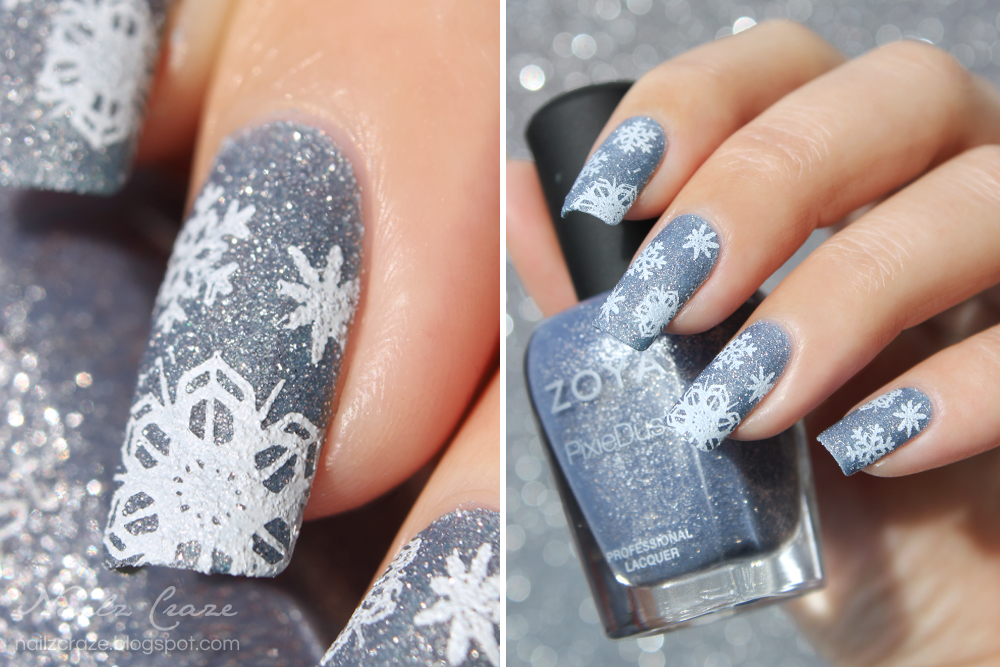
If you're a fan of minimalist nail art, this snowy mountain design is perfect for you. With just a few simple steps, you can create a beautiful winter landscape on your nails. Start by painting your nails with a light grey base color. Next, take a thin nail art brush and white nail polish to create mountains on your nails. Simply paint small, jagged lines to mimic the peaks of mountains. You can make them as big or as small as you'd like, depending on the size of your nails. Next, use the dotting tool and white nail polish to add some snow to your design. Simply dip the dotting tool into the polish and lightly press it onto your nails, creating different sized snowflakes. You can also use the dotting tool to create snowdrifts at the base of your mountains. To finish off your snowy mountain nails, apply a shimmery top coat to give your design a beautiful, icy sheen.Snowy Mountain Nail Art Design


Snowy Mountain Nail Art Design


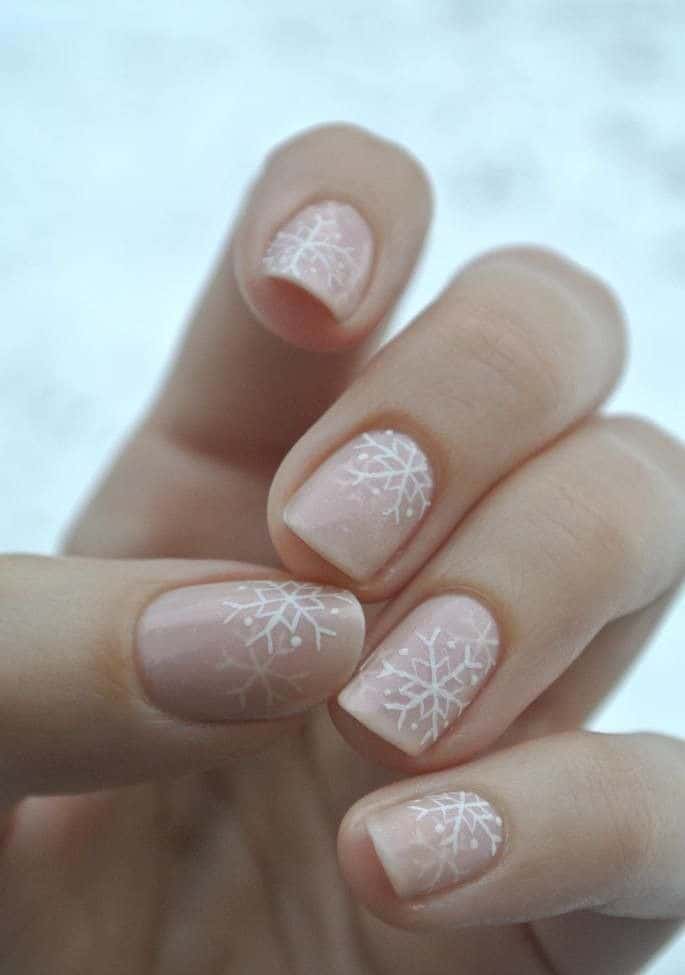
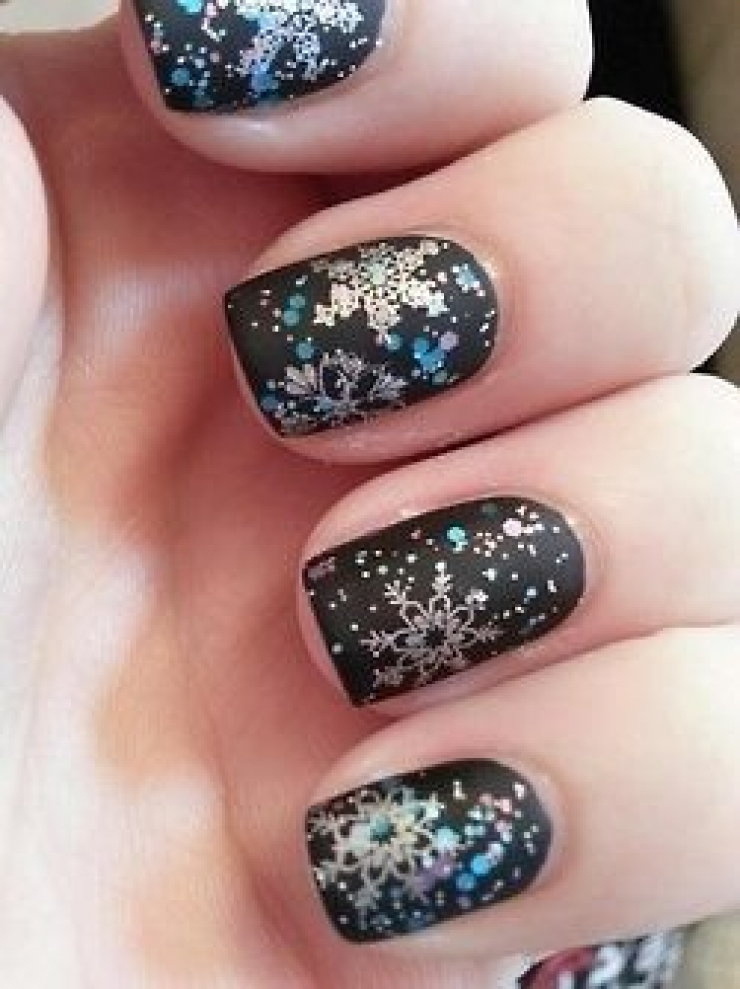
If you're new to nail art, don't worry! This easy snow scene design is perfect for beginners. All you need are some basic nail polish colors and a few simple tools. Start by painting your nails with a soft pink base color. Next, take a thin nail art brush and white nail polish to create snow-covered trees on your nails. Simply paint thin, vertical lines for the tree trunks, and then add small horizontal lines for the branches. Finish off the trees with a dab of white polish on the tips for a snowy effect. Next, use the dotting tool and white nail polish to create snowflakes falling from the sky. Vary the sizes and placement of the snowflakes to make it look more natural. Finish off your design with a matte top coat to give your nails a frosted, wintery look.Easy Snow Scene Nail Art for Beginners


Easy Snow Scene Nail Art for Beginners


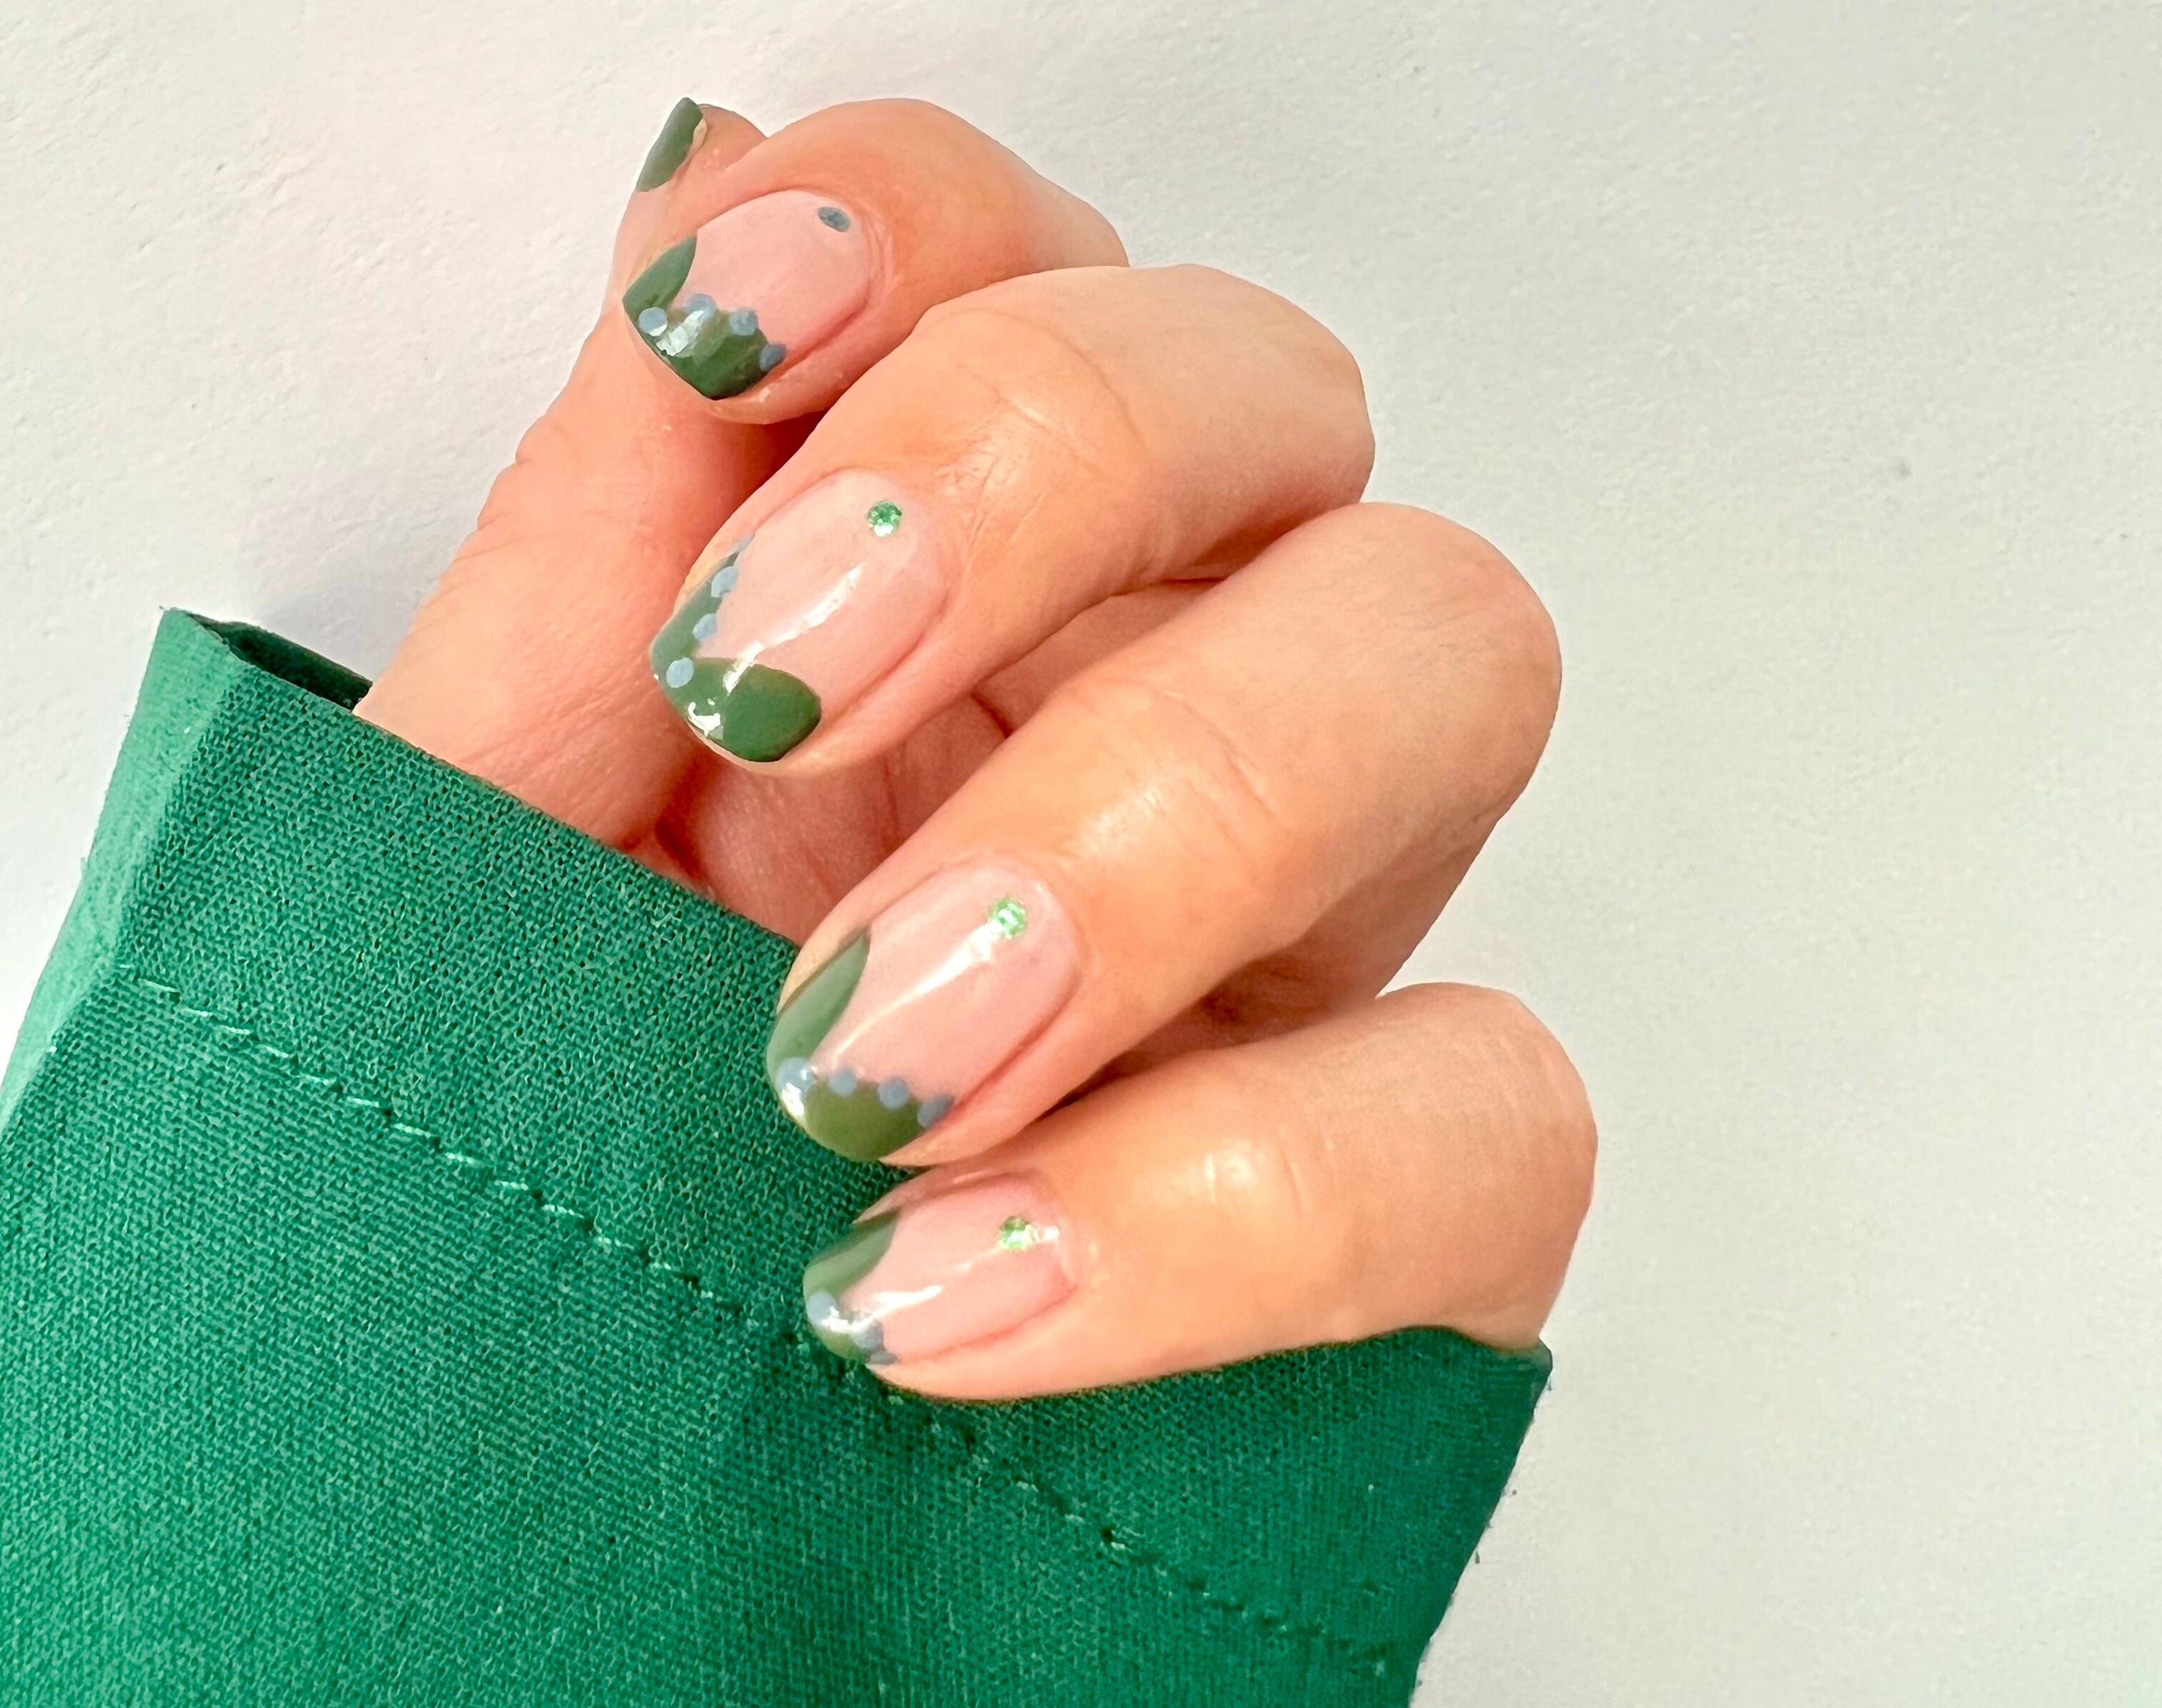
For a more intricate winter nail art design, try creating a snowy forest scene on your nails. This design may take a bit more time and patience, but the end result is worth it. Start by painting your nails with a dark green base color. Next, use a thin nail art brush and white nail polish to create snow-covered trees. Paint thin, vertical lines for the tree trunks, and then add small horizontal lines for the branches. You can create as many trees as you'd like, depending on the size of your nails. Next, use the dotting tool and white nail polish to create snowflakes falling from the sky. Vary the sizes and placement of the snowflakes to make it look more natural. To add some depth to your design, use the dotting tool and dark green nail polish to create pine needles on your trees. Simply dab the polish onto your trees in a circular motion to give them a realistic texture. Finish off your winter forest nails with a matte top coat to give your design a wintery, frosted look.Winter Nail Art Ideas: Snowy Forest Scene

Winter Nail Art Ideas: Snowy Forest Scene


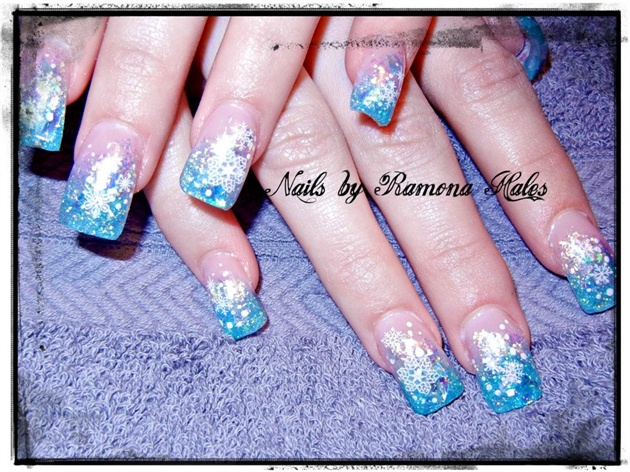
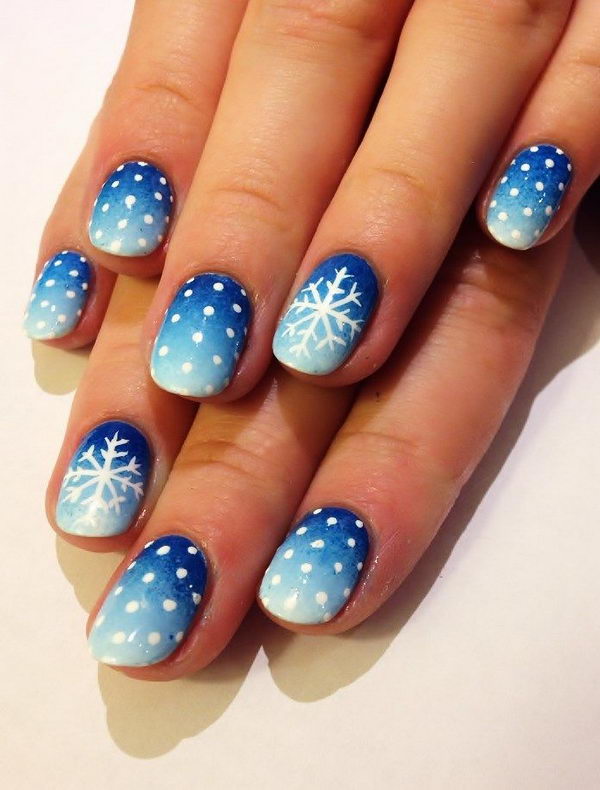
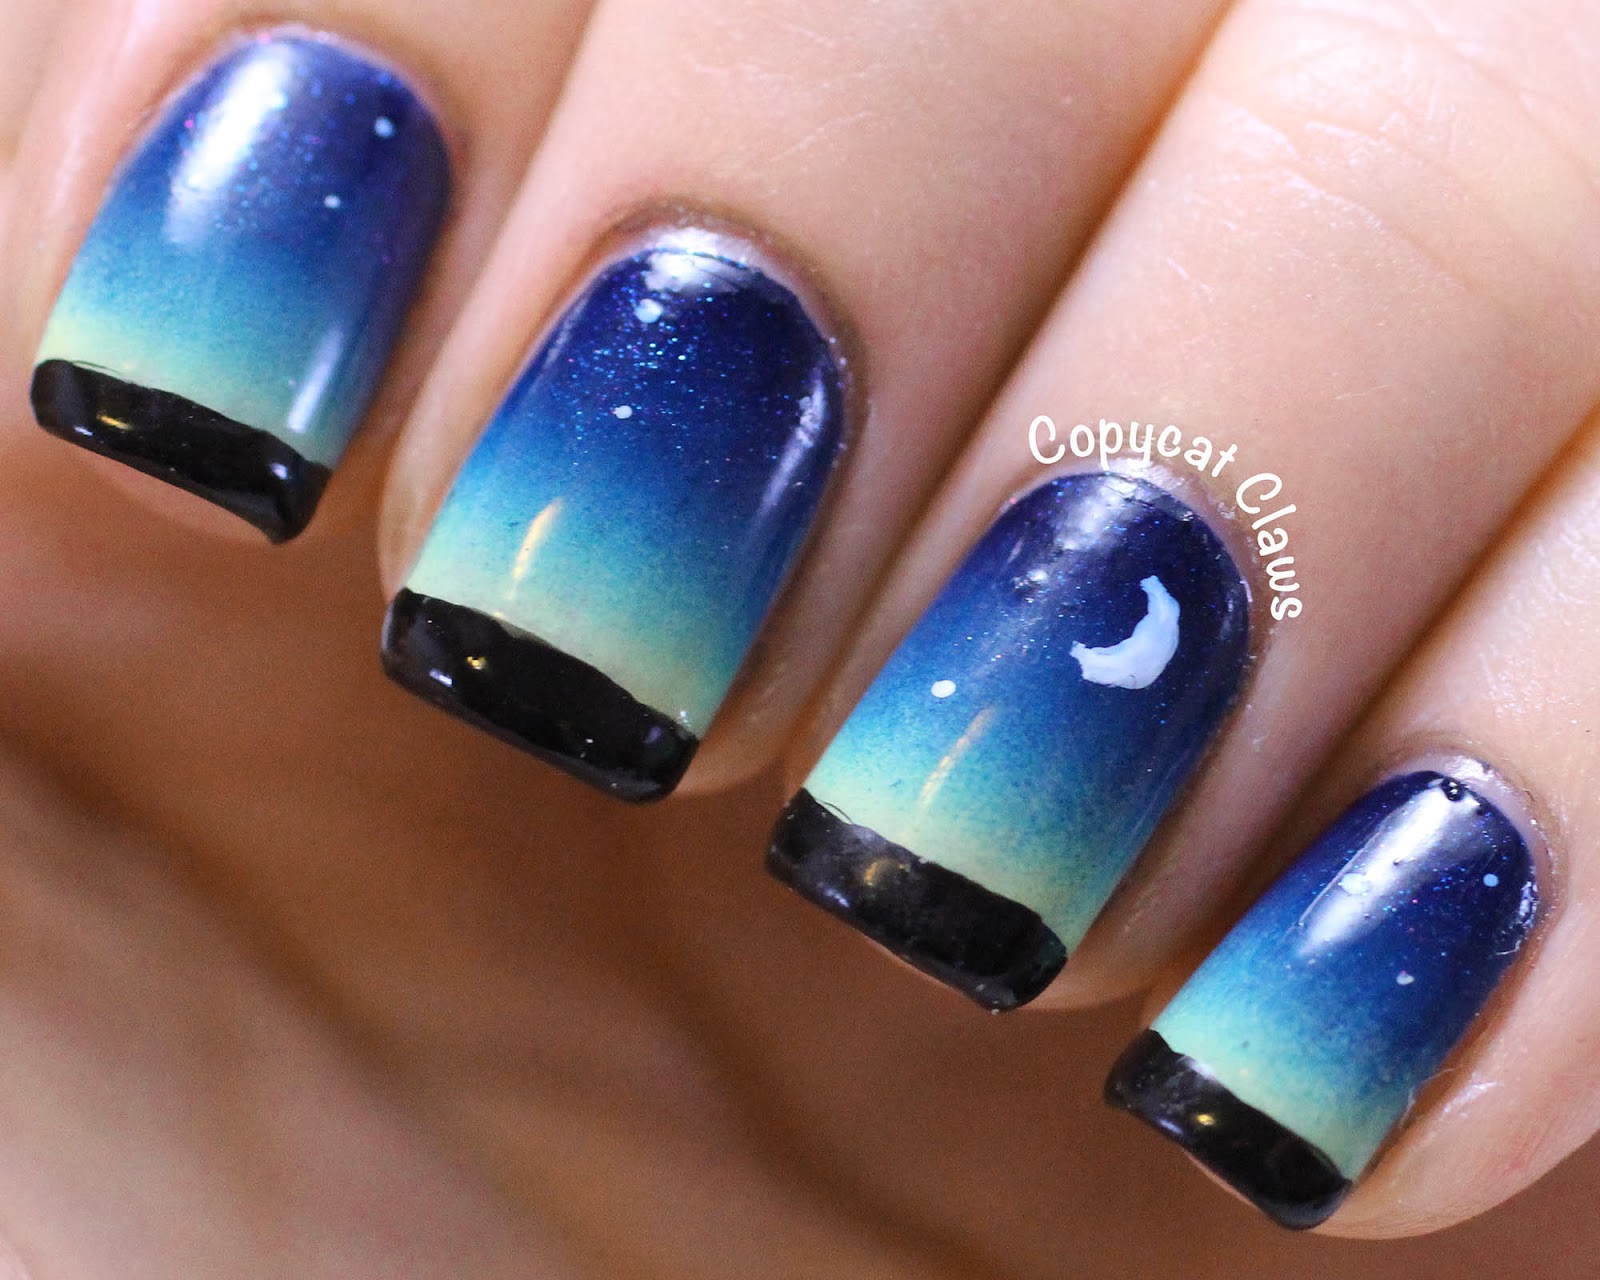
If you love to experiment with different nail art techniques, this DIY snowy nail art tutorial is perfect for you. This design combines ombre and sponge techniques to create a beautiful winter landscape on your nails. Start by painting your nails with a light blue base color. Then, use a makeup sponge to dab on a darker blue polish on the tips of your nails. This will create an ombre effect, mimicking a winter sky. Next, use the dotting tool and white nail polish to create snowflakes falling from the sky. Vary the sizes and placement of the snowflakes to make it look more natural. For a unique twist, use the dotting tool and white nail polish to create birch trees on your nails. Simply paint thin, vertical lines and then use the dotting tool to add small, horizontal lines for the branches. Finish off your design with a matte top coat to give your nails a wintery, frosted look.DIY Snowy Nail Art Tutorial


DIY Snowy Nail Art Tutorial


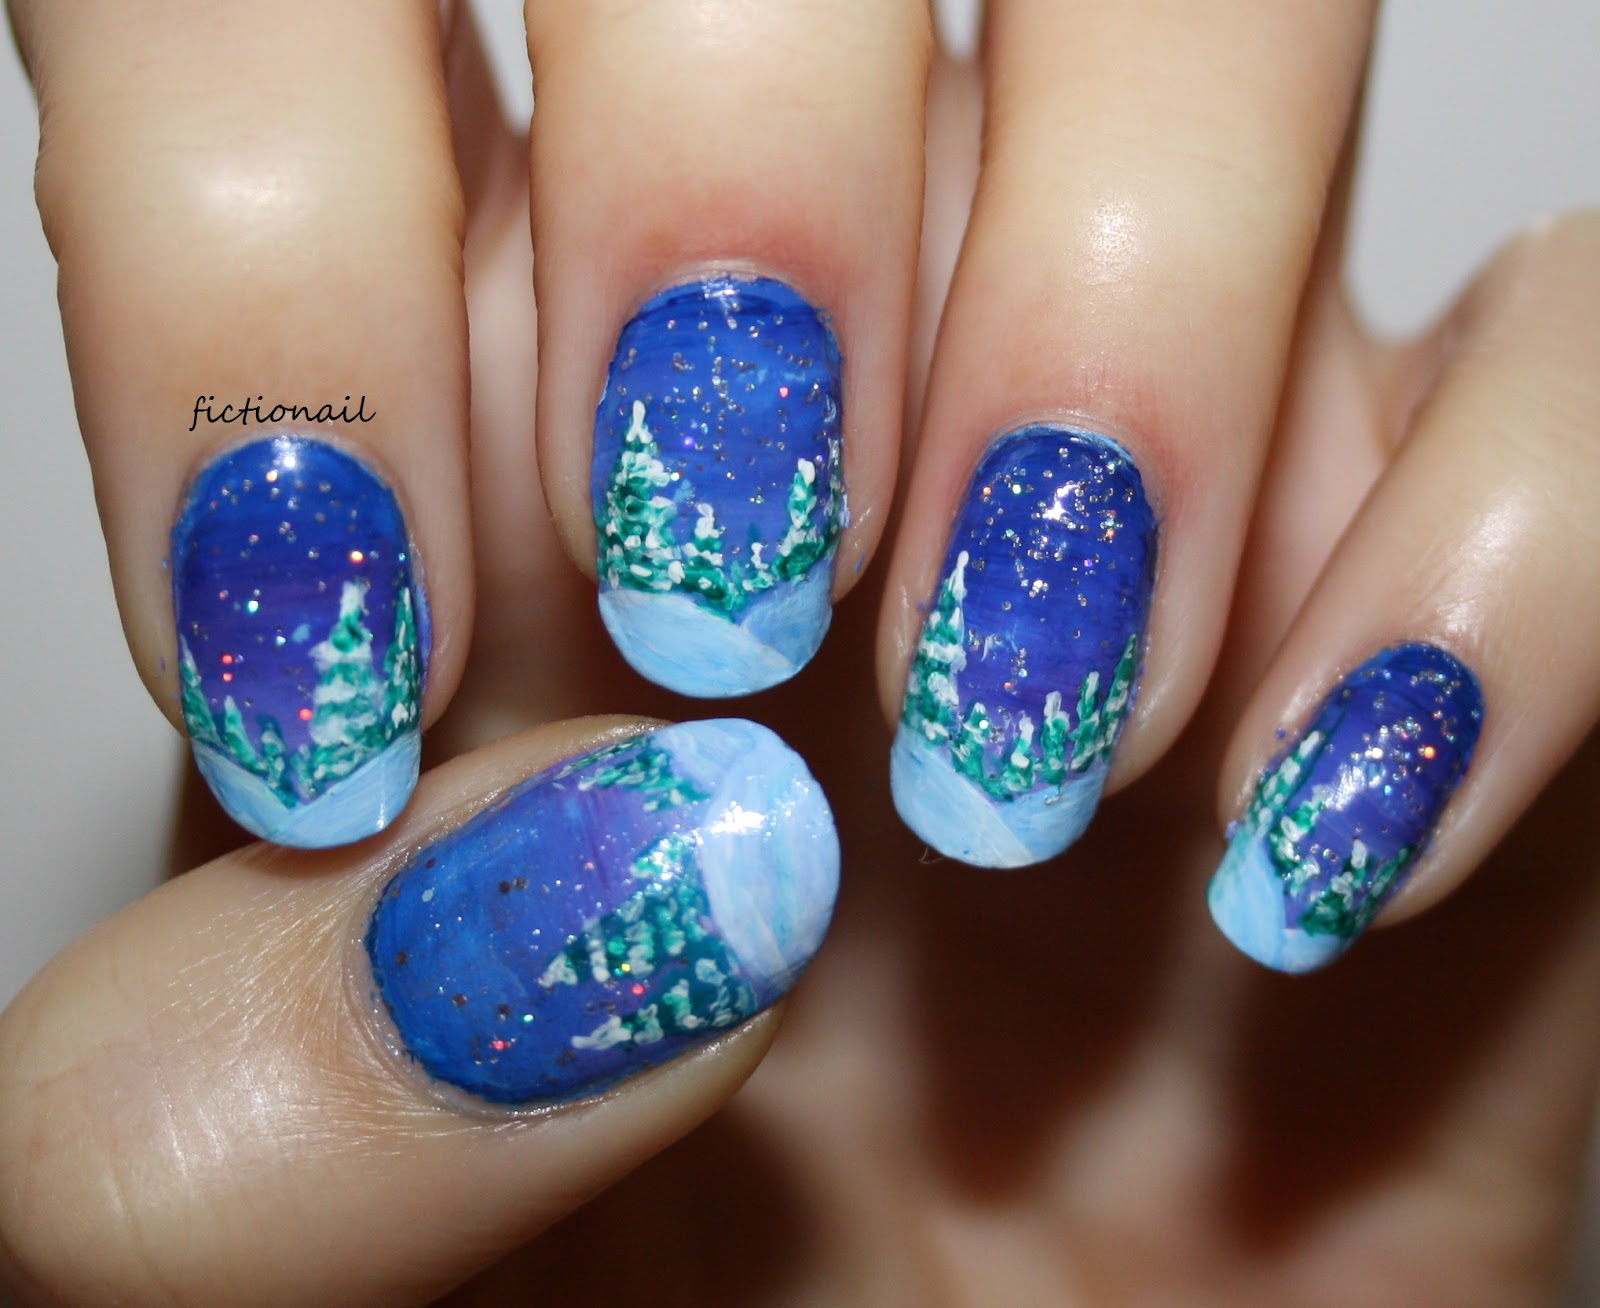
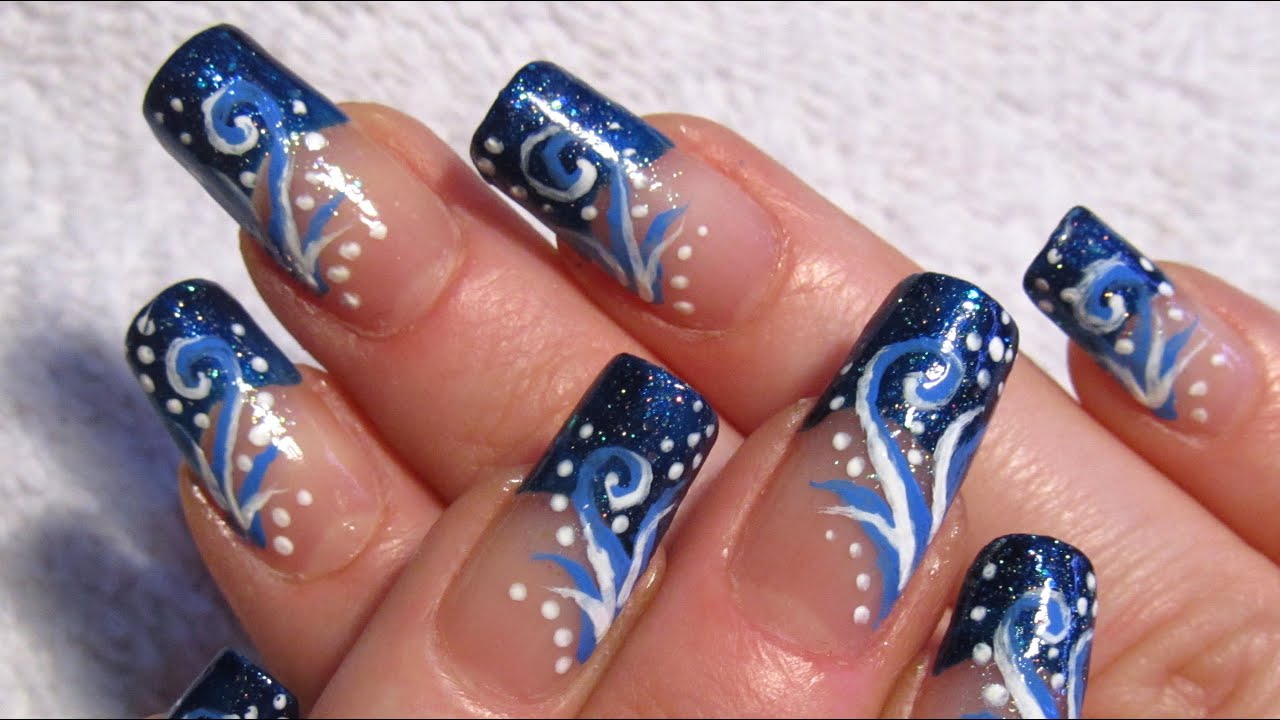
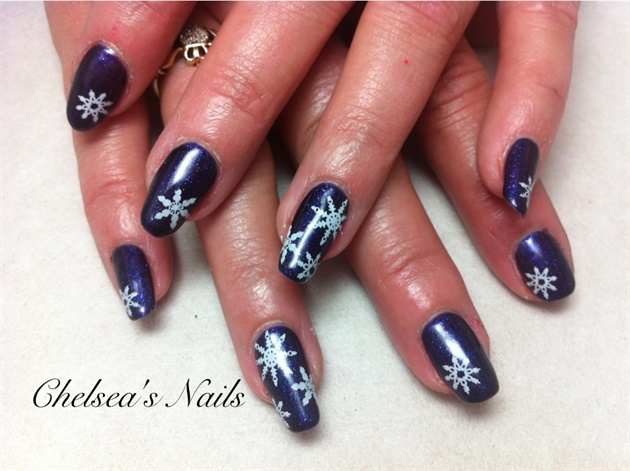
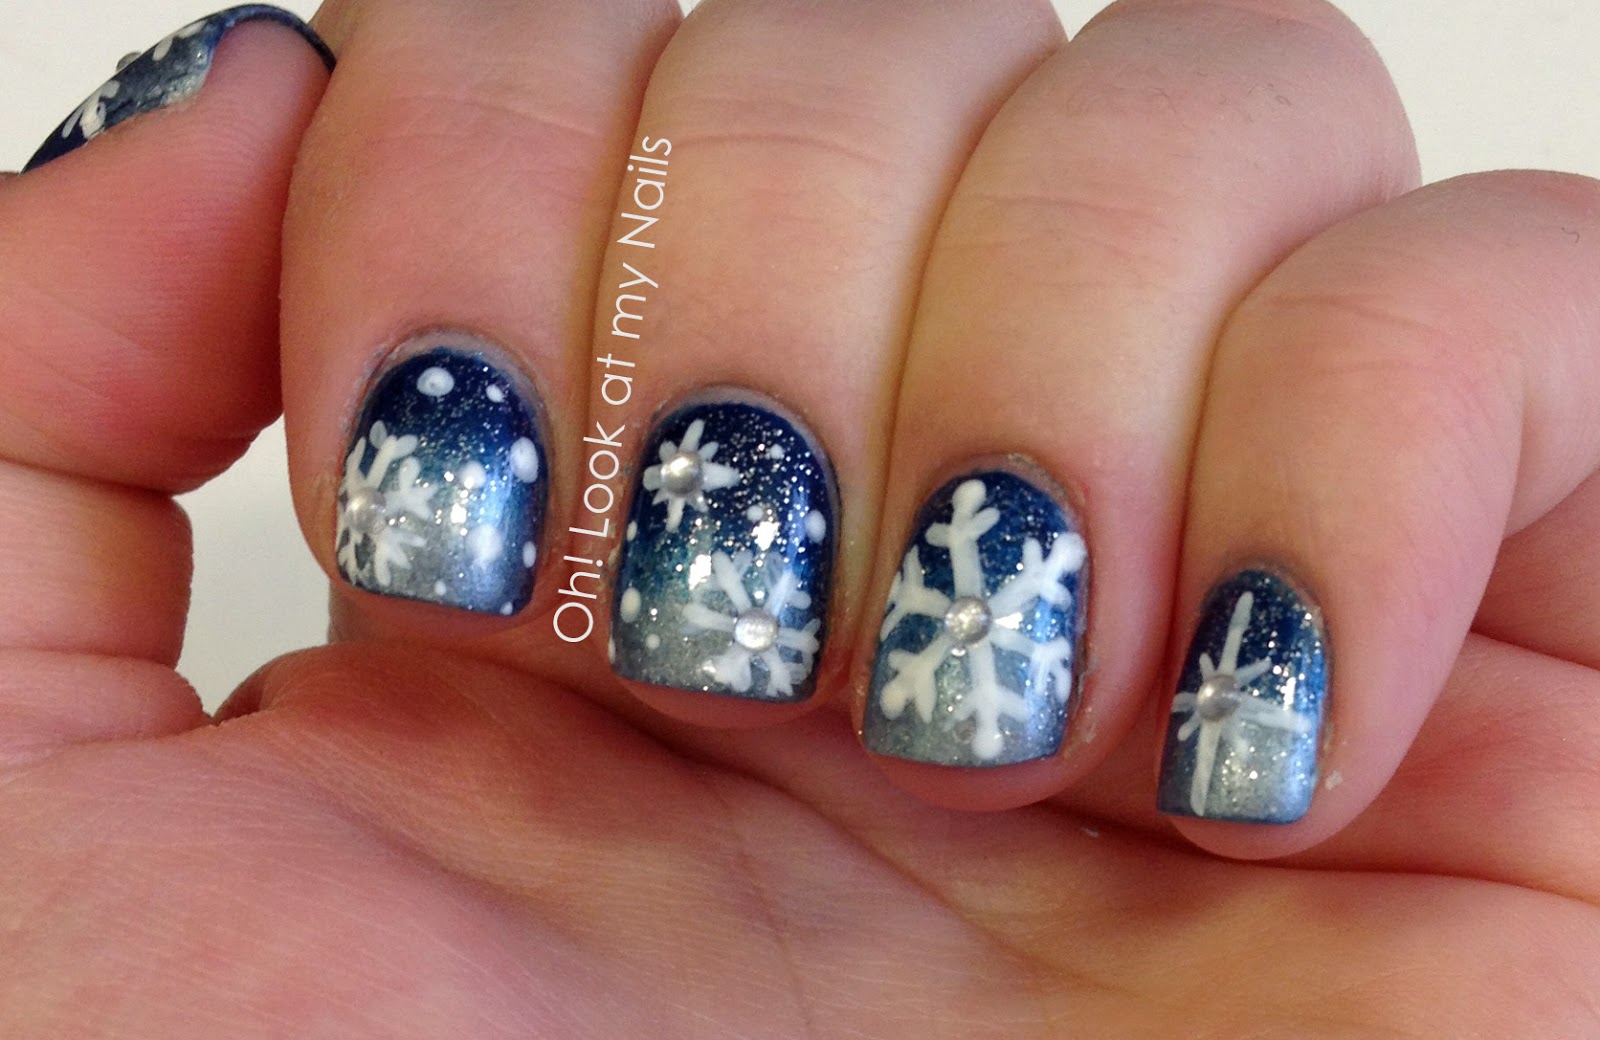
Add a touch of magic to your winter nails with this snowy night sky design. This design incorporates glitter and stars for a stunning and dreamy effect. Start by painting your nails with a deep blue base color. Next, use a thin nail art brush and white nail polish to create snow-covered trees. Paint thin, vertical lines for the tree trunks, and then add small horizontal lines for the branches. You can create as many trees as you'd like, depending on the size of your nails. Next, use the dotting tool and white nail polish to create snowflakes falling from the sky. Vary the sizes and placement of the snowflakes to make it look more natural. To add some sparkle to your design, use a sponge to dab on some silver glitter polish at the tips of your nails. This will create a beautiful snowy effect. Finally, add some stars to your night sky by using the dotting tool and silver nail polish to create small dots on your nails. You can also use a star-shaped nail art sticker for an easier option.Snowy Night Sky Nail Art Design


Snowy Night Sky Nail Art Design


For a cozy and charming winter nail art design, try creating a snowy cabin scene on your nails. This design incorporates glitter and metallic accents for a beautiful and unique look. To start, paint your nails with a metallic silver base color. Next, use a thin nail art brush and white nail polish to create a cabin on your nails. Paint a rectangle shape for the base of the cabin, then add a triangle shape for the roof. You can also add small details like a chimney or windows. Next, use the dotting tool and white nail polish to create snowflakes falling from the sky. Vary the sizes and placement of the snowflakes to make it look more natural. For an added touch of sparkle, use a sponge to dab on some silver glitter polish at the base of your nails. This will give the illusion of a snowy ground. Finish off your design with a matte top coat to give your nails a wintery, frosted look.Winter Nail Art: Snowy Cabin Scene

Winter Nail Art: Snowy Cabin Scene


Add some whimsy to your winter nails with this snowy tree nail art tutorial. This design incorporates different textures and colors for a unique and eye-catching look. To start, paint your nails with a dark green base color. Then, use the dotting tool and white nail polish to create snow-covered trees. Simply paint thin, vertical lines for the tree trunks, and then add small horizontal lines for the branches. You can create as many trees as you'd like, depending on the size of your nails. Next, use a sponge to dab on some white nail polish at the tips of your nails. This will create a snowy effect on the ground. For an added touch of texture, use a thin nail art brush and light blue nail polish to create icy branches on your trees. Simply paint thin, jagged lines on the branches for a frozen look. Finish off your snowy tree nails with a matte top coat to give your design a frosted, wintery look.Snowy Tree Nail Art Tutorial

Snowy Tree Nail Art Tutorial

For a more realistic take on winter nail art, try painting a snowy landscape on your nails. This design incorporates different shades of blue and white for a stunning and dreamy effect. Start by painting your nails with a light blue base color. Then, use a thin nail art brush and white nail polish to create snow-covered trees. Paint thin, vertical lines for the tree trunks, and then add small horizontal lines for the branches. You can create as many trees as you'd like, depending on the size of your nails. Next, use the dotting tool and white nail polish to create snowflakes falling from the sky. Vary the sizes and placement of the snowflakes to make it look more natural.How to Paint a Snowy Landscape on Your Nails

How to Paint a Snowy Landscape on Your Nails


The Perfect Winter Nail Design: Snow Scene Nail Art

Winter is Here
 As the winter season approaches, it's time to embrace the cold weather and all the beautiful things that come with it. From cozy sweaters and hot cocoa to snowy landscapes and winter wonderlands, there's no shortage of inspiration for your next nail design. And what better way to celebrate the season than with a stunning snow scene nail art?
What is Snow Scene Nail Art?
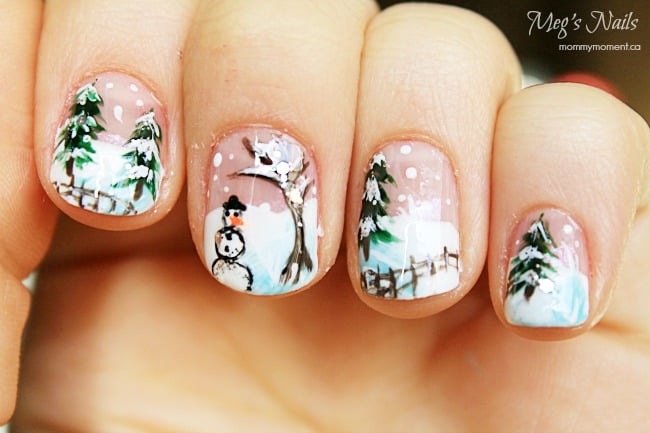
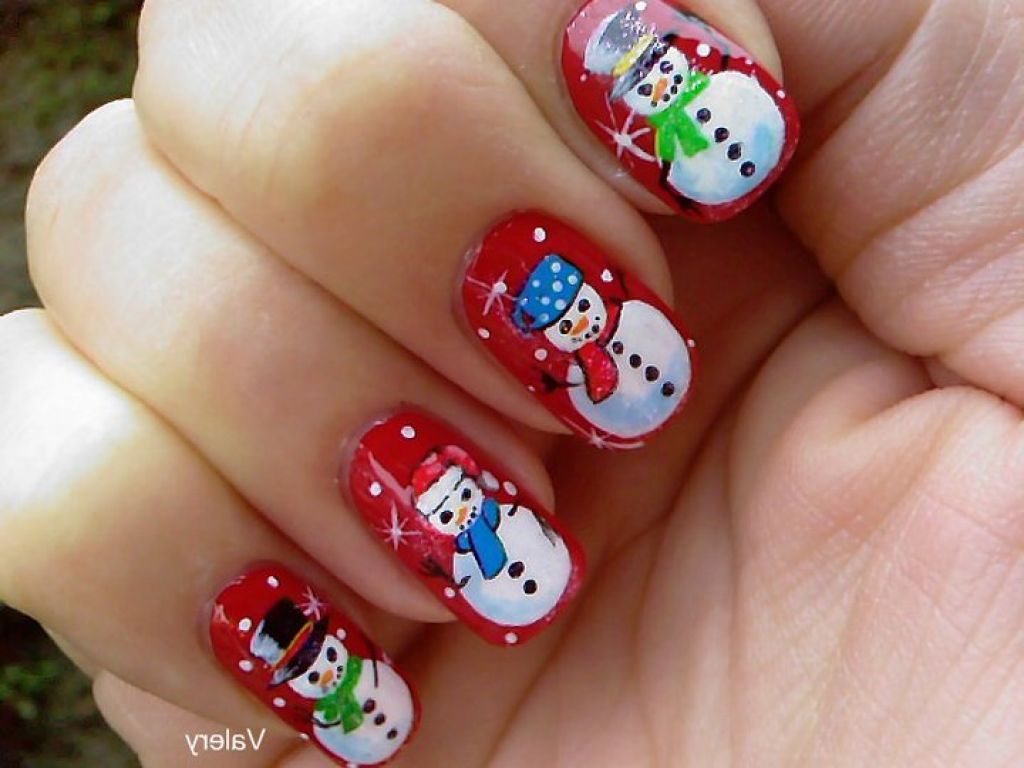
 Snow scene nail art is a popular design that incorporates all things winter into a beautiful and intricate design on your nails. It typically features a snowy landscape with snow-covered trees, snowflakes, and even a cute little snowman or two. This design is perfect for those who love the winter season and want to add a touch of festive charm to their nails.
How to Achieve the Look
 Creating a snow scene nail art may seem daunting, but with a few simple steps and the right tools, you can achieve this look at home. Start by painting your nails with a white or light blue base color to represent the snowy background. Then, using a thin brush, add details such as trees, snowflakes, and any other winter elements you desire. You can also add some glitter or rhinestones to add a touch of sparkle to your design. Finish off with a clear topcoat to seal in your masterpiece.
Make it Your Own
 The beauty of snow scene nail art is that there are endless possibilities to make it your own. You can switch up the colors, add different elements, or even incorporate your favorite winter characters. The key is to let your creativity shine and have fun with the design.
Perfect for Any Occasion
 Snow scene nail art is not just for the holiday season; it's a perfect design for any winter occasion. Whether you're attending a winter wedding, going on a ski trip, or simply want to add some winter magic to your everyday look, this nail design is a versatile and stunning choice.
In Conclusion
 Snow scene nail art is a popular and beautiful way to embrace the winter season and add some festive charm to your nails. With a little bit of creativity and the right tools, you can achieve this look at home. So why not give it a try and let your nails be the perfect canvas for a winter wonderland?


