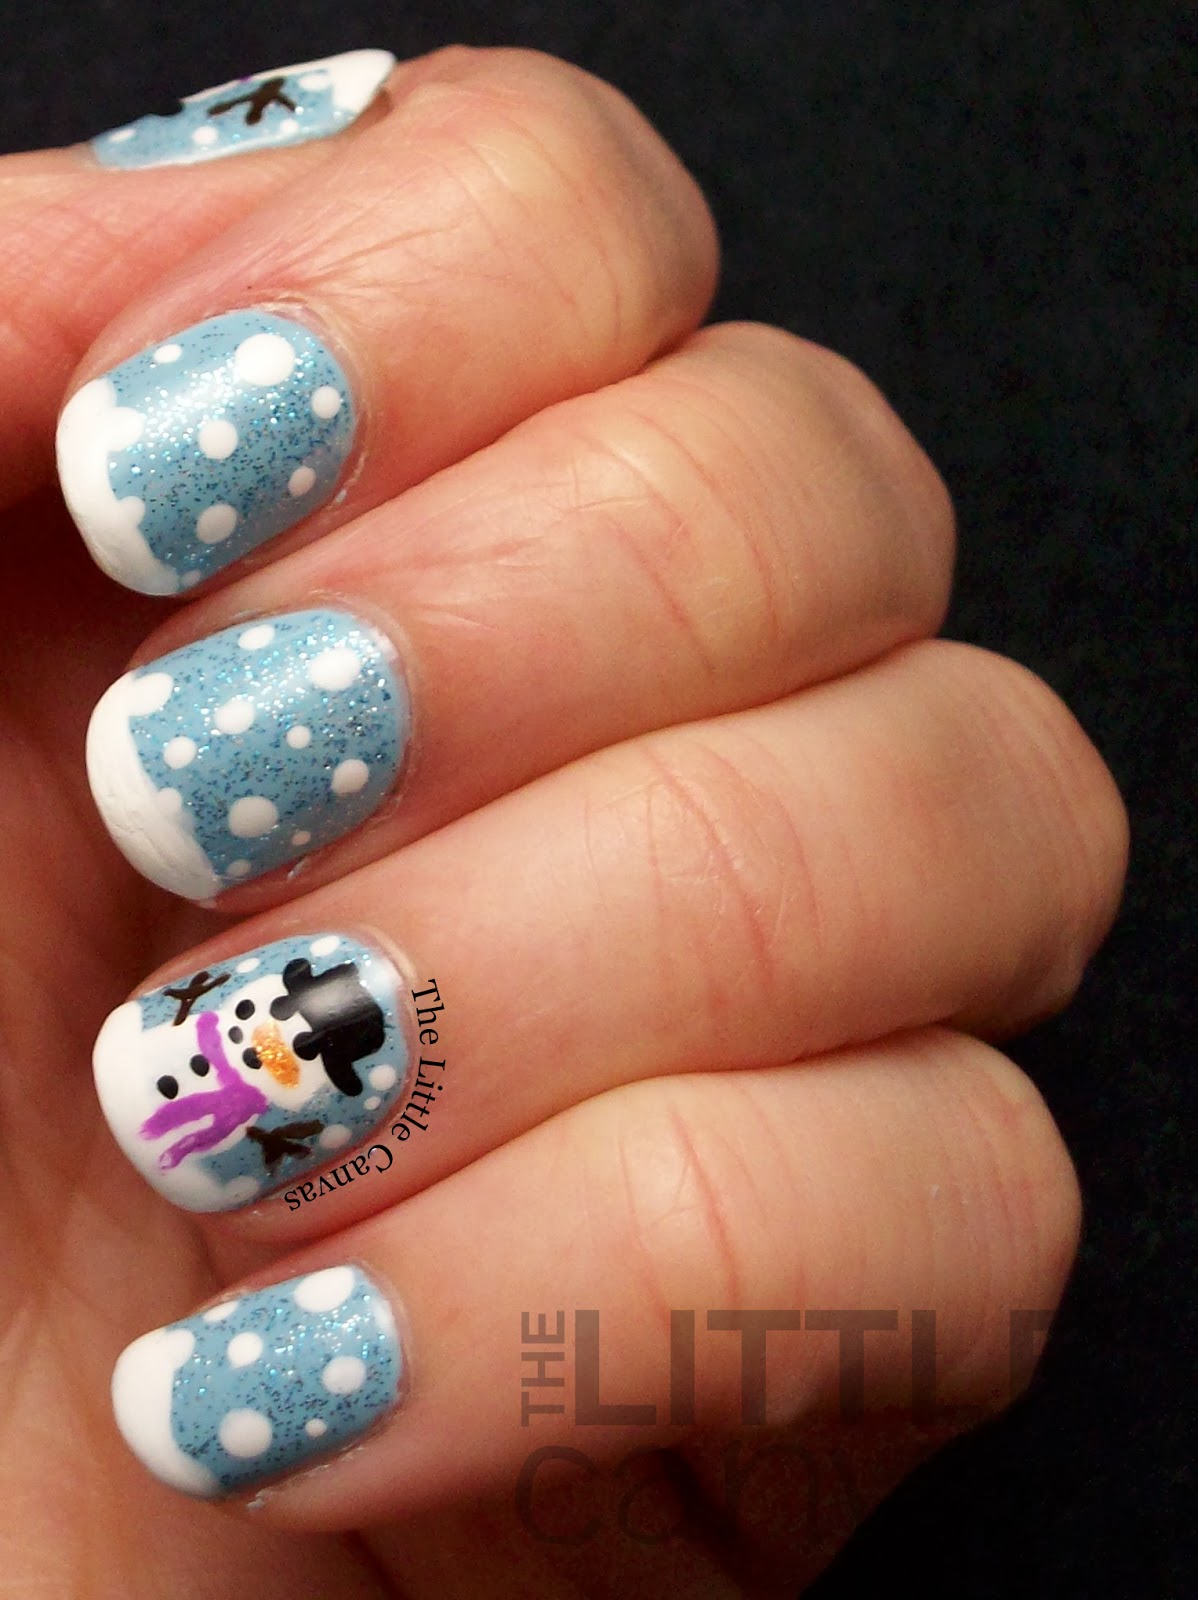
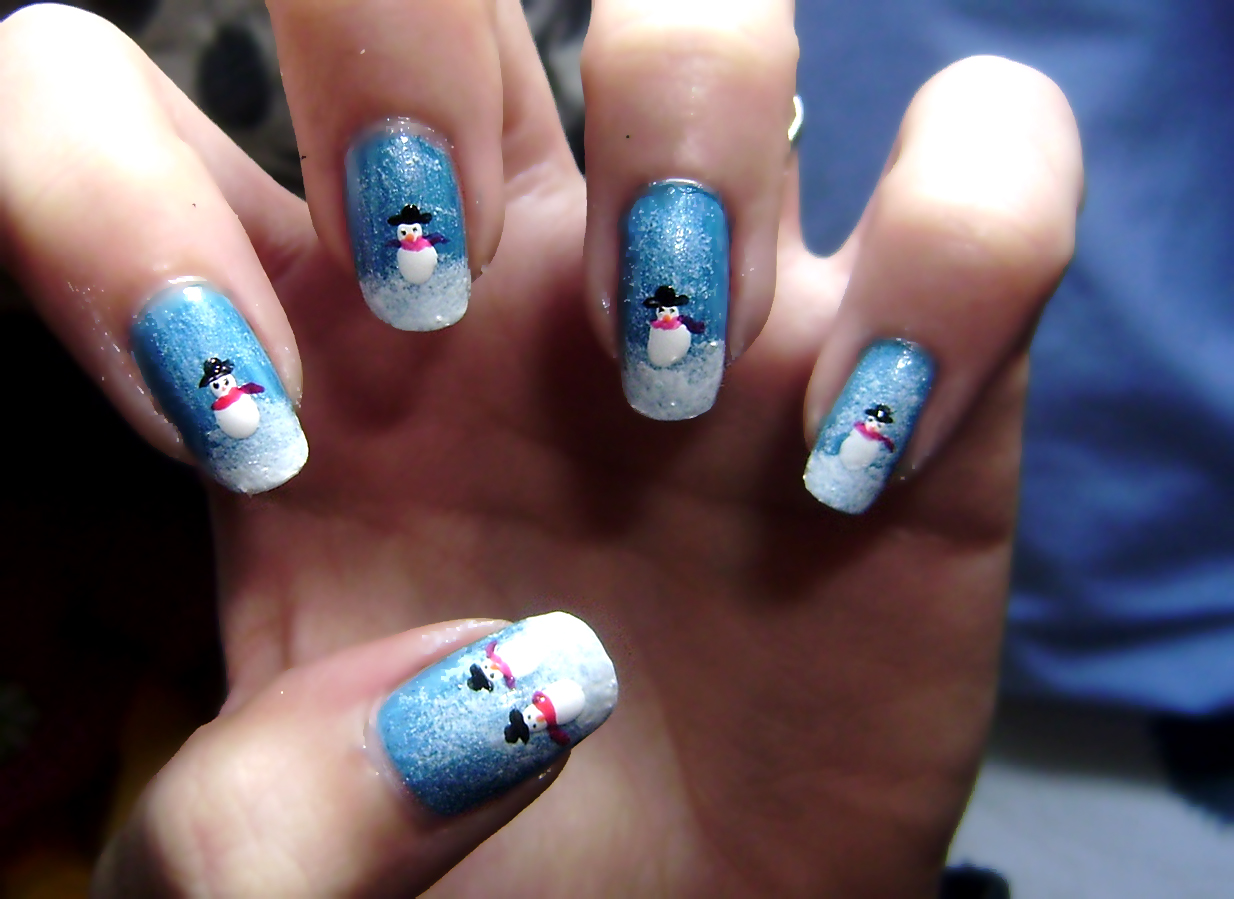
Get ready to rock your winter nails with this easy and adorable snowman nail art tutorial. With just a few simple steps, you can turn your plain nails into a festive and fun design that is perfect for the holiday season. To start, gather your nail polish in shades of white, black, and orange. You will also need a nail art brush or a thin paintbrush, a dotting tool, and a top coat. Step 1: Begin by painting your nails with a white base color. You can use a gel polish for a longer-lasting look. Step 2: Once the base is completely dry, use your nail art brush and black polish to create two small circles for the snowman's eyes. Then, use the dotting tool to create a small dot for the nose with orange polish. Step 3: Using the same dotting tool, create buttons down the center of the nail with black polish. Step 4: Take your nail art brush and create a small black line for the snowman's smile. Step 5: To finish off the design, add a top coat to seal in your snowman nail art and give it a glossy finish.1. Easy Snowman Nail Art Tutorial


1. Easy Snowman Nail Art Tutorial


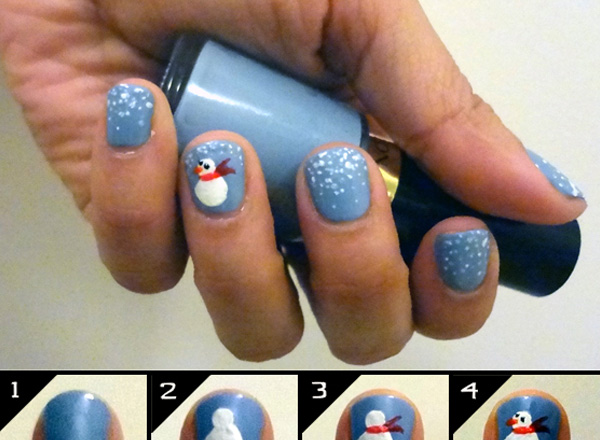
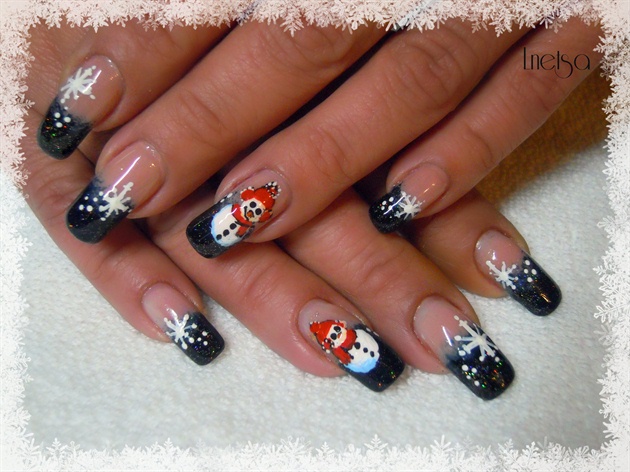
If you want to add some cuteness to your winter nails, this snowman nail design tutorial is the perfect choice. With its adorable details and bright colors, you'll be sure to get compliments on your nails all season long. To begin, you will need a base color in your favorite shade, white and black polish, as well as blue and orange polish for the snowman's scarf and nose. You will also need a detail brush or a toothpick, and a top coat. Step 1: Start by painting your nails with your chosen base color. Let it dry completely. Step 2: Using your detail brush or a toothpick, create two small circles for the snowman's eyes with black polish. Make them slightly larger than the eyes in the previous tutorial for a cuter look. Step 3: Using the same method, create a small dot for the nose with orange polish. Then, use blue polish to create a scarf around the snowman's neck. Step 4: To add some dimension to the scarf, use your detail brush to create thin lines in a darker shade of blue. Step 5: Finish off the design with a top coat to seal in your snowman nail art and give it a glossy finish.2. Cute Snowman Nail Design Tutorial

2. Cute Snowman Nail Design Tutorial


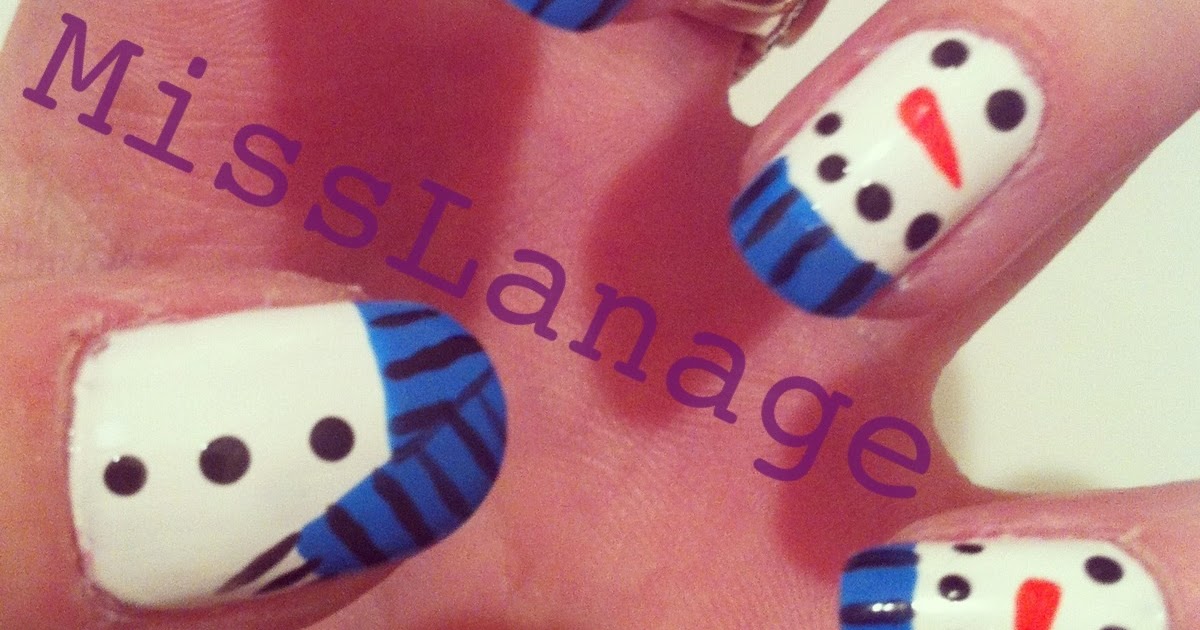
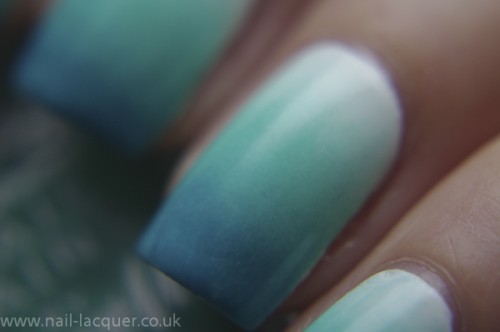
If you're new to nail art or just need a detailed guide, this step-by-step snowman nail art tutorial is perfect for you. With clear instructions and photos, you'll be able to create this cute design in no time. You will need a white base color, black and orange polish, a dotting tool, and a detail brush for this design. Step 1: Begin by painting your nails with a white base color. Let it dry completely. Step 2: Using your dotting tool, create two small circles for the snowman's eyes with black polish. Step 3: Next, use the dotting tool to create buttons down the center of the nail with black polish. Step 4: Use the detail brush to create a small black line for the snowman's smile. Step 5: Lastly, use orange polish to create a small dot for the nose and add some details to the snowman's scarf with the detail brush. Seal in your design with a top coat for a glossy finish.3. Step-by-Step Snowman Nail Art Tutorial


3. Step-by-Step Snowman Nail Art Tutorial


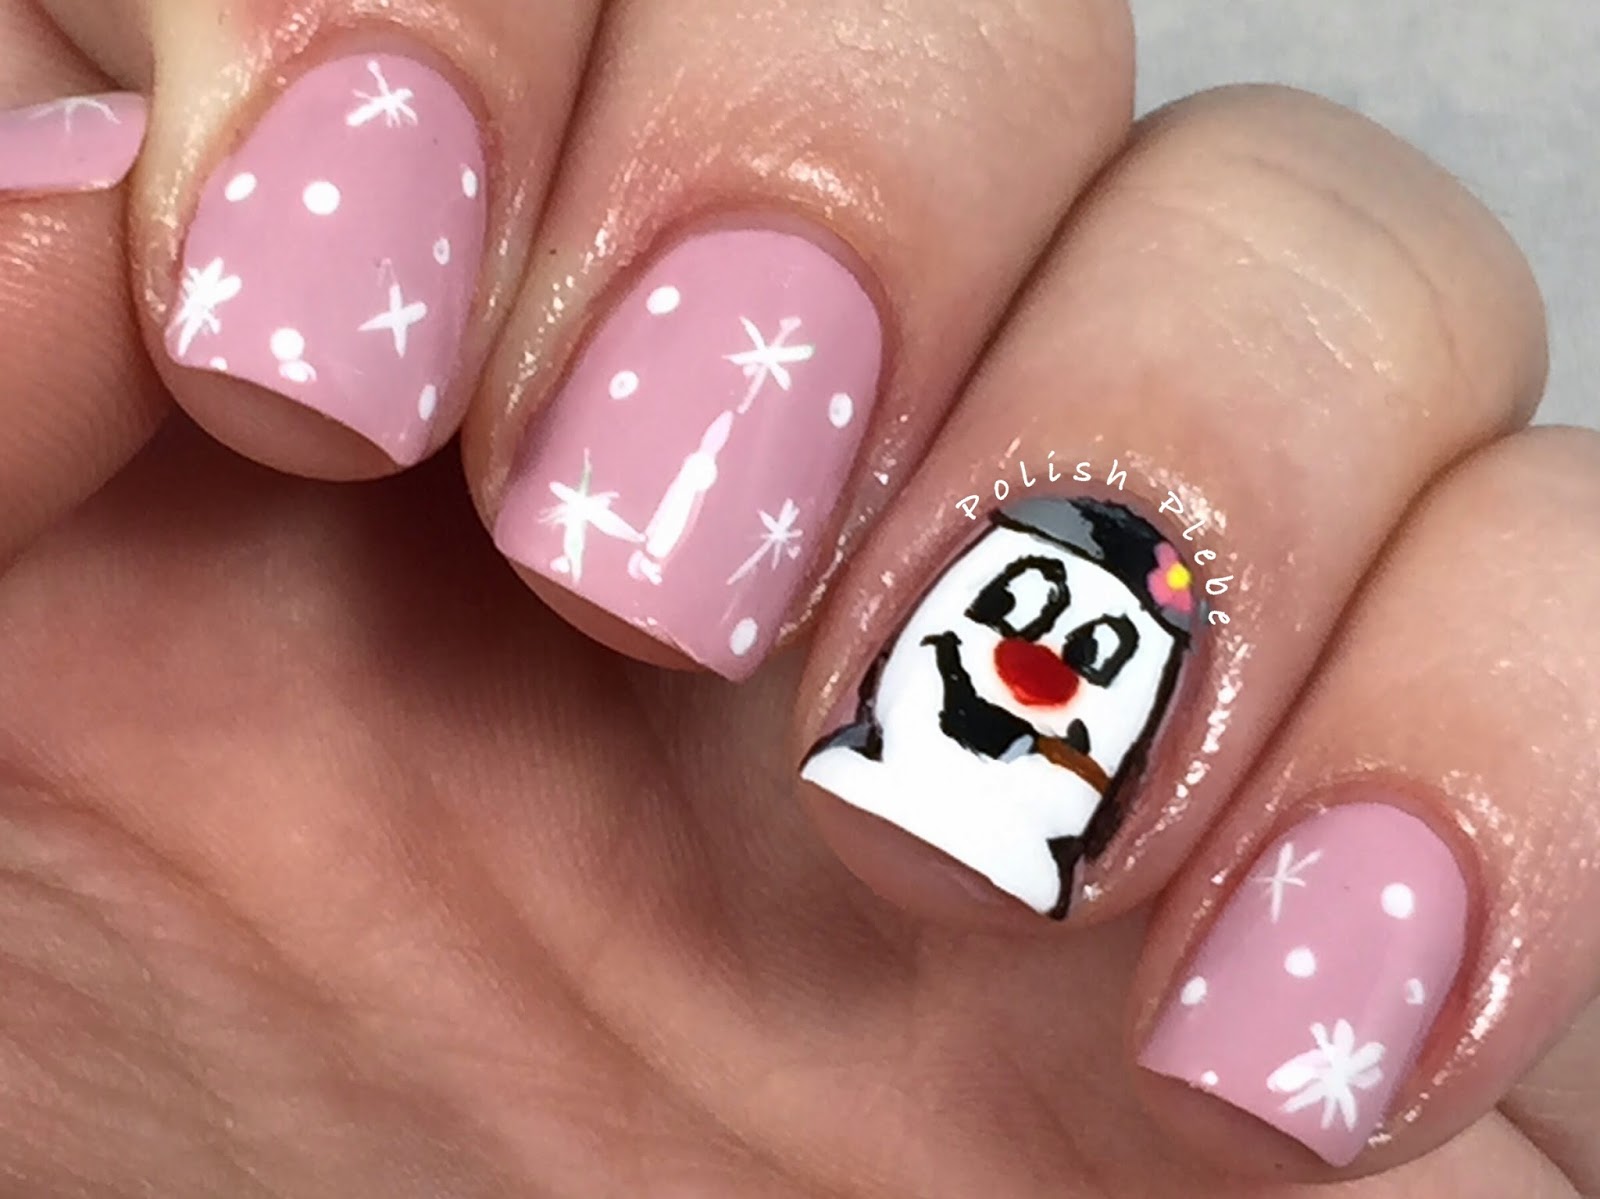
Get into the holiday spirit with this festive snowman nail tutorial. With its bright colors and cute design, this nail art is perfect for any holiday party or gathering. You will need a white base color, black and orange polish, as well as red and green polish for the snowman's hat and scarf. You will also need a detail brush or a toothpick, and a top coat. Step 1: Start by painting your nails with a white base color. Let it dry completely. Step 2: Using your detail brush or a toothpick, create two small circles for the snowman's eyes with black polish. Step 3: Next, use the same method to create a small dot for the nose with orange polish. Step 4: Use red polish to create a Santa hat on top of the snowman's head, and green polish to create a scarf around its neck. Step 5: To add some details to the hat and scarf, use the detail brush to create thin lines in a darker shade of the same color. Seal in your design with a top coat for a glossy finish.4. Festive Snowman Nail Tutorial for the Holidays


4. Festive Snowman Nail Tutorial for the Holidays


If you're new to nail art and looking for an easy design to start with, this snowman nail art tutorial for beginners is perfect for you. With simple steps and minimal tools, you'll be able to create this cute design in no time. You will need a white base color, black and orange polish, a dotting tool, and a top coat for this design. Step 1: Begin by painting your nails with a white base color. Let it dry completely. Step 2: Using your dotting tool, create two small circles for the snowman's eyes with black polish. Step 3: Use the same tool to create buttons down the center of the nail with black polish. Step 4: Lastly, use orange polish to create a small dot for the nose. Seal in your design with a top coat for a glossy finish.5. Snowman Nail Art Tutorial for Beginners

5. Snowman Nail Art Tutorial for Beginners
If you enjoy doing your own nails and love a good DIY project, this snowman nail design tutorial is perfect for you. With its simple steps and materials, you'll be able to create this cute design at home. You will need a white base color, black and orange polish, a detail brush or a toothpick, a dotting tool, and a top coat. Step 1: Paint your nails with a white base color and let it dry completely. Step 2: Use your detail brush or a toothpick to create two small circles for the snowman's eyes with black polish. Step 3: Next, use the dotting tool to create buttons down the center of the nail with black polish. Step 4: Use the detail brush to create a small black line for the snowman's smile. Step 5: Lastly, use orange polish to create a small dot for the nose. Seal in your design with a top coat for a glossy finish.6. DIY Snowman Nail Design Tutorial

6. DIY Snowman Nail Design Tutorial
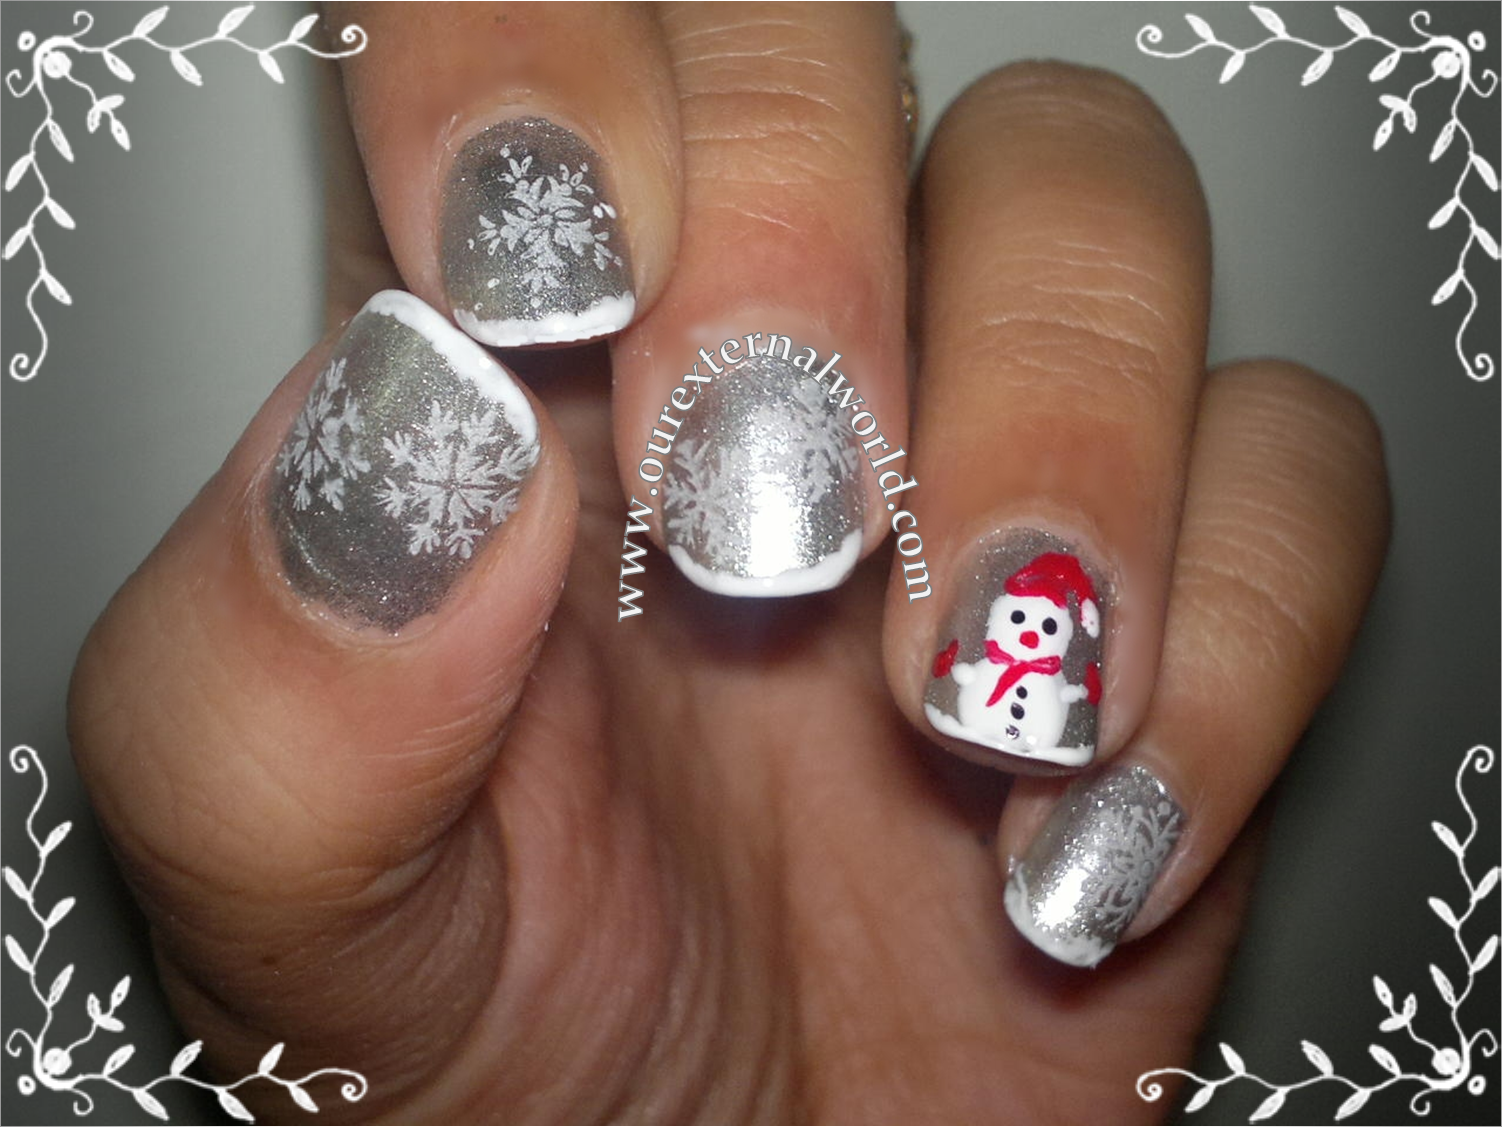
Embrace the winter season with this beautiful winter wonderland snowman nail tutorial. With its frosty colors and intricate details, this design is perfect for anyone who loves a more elegant look. You will need a white base color, black and silver polish, as well as blue and orange polish for the snowman's scarf and nose. You will also need a detail brush or a toothpick, and a top coat. Step 1: Start by painting your nails with a white base color. Let it dry completely. Step 2: Using your detail brush or a toothpick, create two small circles for the snowman's eyes with black polish. Step 3: Use silver polish to create a snowflake design on the rest of the nail. You can use a stamping plate or freehand it with the detail brush. Step 4: Use blue polish to create a scarf around the snowman's neck and add some details with the detail brush. Step 5: Finally, use orange polish to create a small dot for the nose. Seal in your design with a top coat for a glossy finish.7. Winter Wonderland Snowman Nail Tutorial

7. Winter Wonderland Snowman Nail Tutorial
If you love the long-lasting effect of gel polish, this snowman nail art tutorial is perfect for you. With its vibrant colors and cute design, your winter nails will stay fresh for weeks. You will need a white gel base color, black and orange gel polish, a detail brush or a toothpick, and a top coat. Step 1: Begin by applying a white gel base color and curing it under a LED lamp. Step 2: Use your detail brush or a toothpick to create two small circles for the snowman's eyes with black gel polish. Step 3: Next, use the same method to create buttons down the center of the nail with black gel polish. Step 4: Use the detail brush to create a small black line for the snowman's smile. Step 5: Lastly, use orange gel polish to create a small dot for the nose. Cure under the LED lamp and finish off with a top coat for a glossy finish.8. Snowman Nail Art Tutorial with Gel Polish

8. Snowman Nail Art Tutorial with Gel Polish

If you want to involve your kids in some fun winter activities, this adorable snowman nail tutorial is perfect for them. With its simple steps and cute design, your kids will have a blast creating their own snowman nails. You will need a white base color, black and orange polish, a detail brush or a toothpick, and a top coat for this design. Step 1: Begin by painting your kid's nails with a white base color. Let it dry completely. Step 2: Using the detail brush or a toothpick, create two small circles for the snowman's eyes with black polish. Step 3: Next, use the same method to create buttons down the center of the nail with black polish. Step 4: Use the detail brush to create a small black line for the snowman's smile. Step 5: Lastly, use orange polish to create a small dot for the nose. Seal in the design with a top coat for a glossy finish.9. Adorable Snowman Nail Tutorial for Kids

9. Adorable Snowman Nail Tutorial for Kids
Who says snowman nail art is only for casual occasions? This elegant snowman nail art tutorial is perfect for formal events and will add a touch of winter wonderland to your outfit. You will need a white base color, black and silver polish, as well as red and green polish for the snowman's hat and scarf. You will also need a detail brush or a toothpick, and a top coat. Step 1: Start by painting your nails with a white base color. Let it dry completely. Step 2: Using your detail brush or a toothpick, create two small circles for the snowman's eyes with black polish. Step 3: Use silver polish to create a snowflake design on the rest of the nail. You can use a stamping plate or freehand it with the detail brush. Step 4: Use red polish to create a Santa hat on top of the snowman's head and add some details with the detail brush. Step 5: Finally, use green polish to create a scarf around the snowman's neck and add some details. Seal in your design with a top coat for a glossy finish.10. Elegant Snowman Nail Art Tutorial for Formal Events

10. Elegant Snowman Nail Art Tutorial for Formal Events


Create Festive Nails with This Snowman Nail Art Tutorial
Get ready to rock the winter season with these adorable snowman nails!
 If you're looking for a way to spice up your nail game this winter, then look no further than this snowman nail art tutorial. Not only is it fun and festive, but it's also super easy to recreate at home. With just a few simple steps and some
nail polish
in
white
,
black
,
orange
, and
red
, you'll have the cutest snowman nails on the block. Plus, this design is perfect for both beginners and experienced nail artists alike. Let's dive into the tutorial and get started!
If you're looking for a way to spice up your nail game this winter, then look no further than this snowman nail art tutorial. Not only is it fun and festive, but it's also super easy to recreate at home. With just a few simple steps and some
nail polish
in
white
,
black
,
orange
, and
red
, you'll have the cutest snowman nails on the block. Plus, this design is perfect for both beginners and experienced nail artists alike. Let's dive into the tutorial and get started!
Gather Your Supplies
 Before we get started, make sure you have all the necessary supplies. You will need a base coat, white, black, orange, and red nail polish, a fine tip brush, a dotting tool, and a top coat. You can also use a toothpick or a bobby pin instead of a dotting tool if you don't have one on hand.
Prep Your Nails
 Start by applying a base coat to your nails. This will help your
nail polish
last longer and prevent any staining. Once the base coat is dry, apply two coats of white
nail polish
to all your nails. Make sure to let each coat dry completely before moving on to the next step.
Start by applying a base coat to your nails. This will help your
nail polish
last longer and prevent any staining. Once the base coat is dry, apply two coats of white
nail polish
to all your nails. Make sure to let each coat dry completely before moving on to the next step.
Create the Snowman
 Using your fine tip brush and black
nail polish
, draw a curved line near the tip of your nail to create the snowman's head. Then, draw a larger curved line below the first one to create the snowman's body. Next, use your dotting tool or toothpick to create two small black dots for the snowman's eyes. Then, use the same tool to create a carrot-shaped nose with the orange
nail polish
. Lastly, use the dotting tool to add two small red dots for the snowman's cheeks.
Using your fine tip brush and black
nail polish
, draw a curved line near the tip of your nail to create the snowman's head. Then, draw a larger curved line below the first one to create the snowman's body. Next, use your dotting tool or toothpick to create two small black dots for the snowman's eyes. Then, use the same tool to create a carrot-shaped nose with the orange
nail polish
. Lastly, use the dotting tool to add two small red dots for the snowman's cheeks.
The Finishing Touches
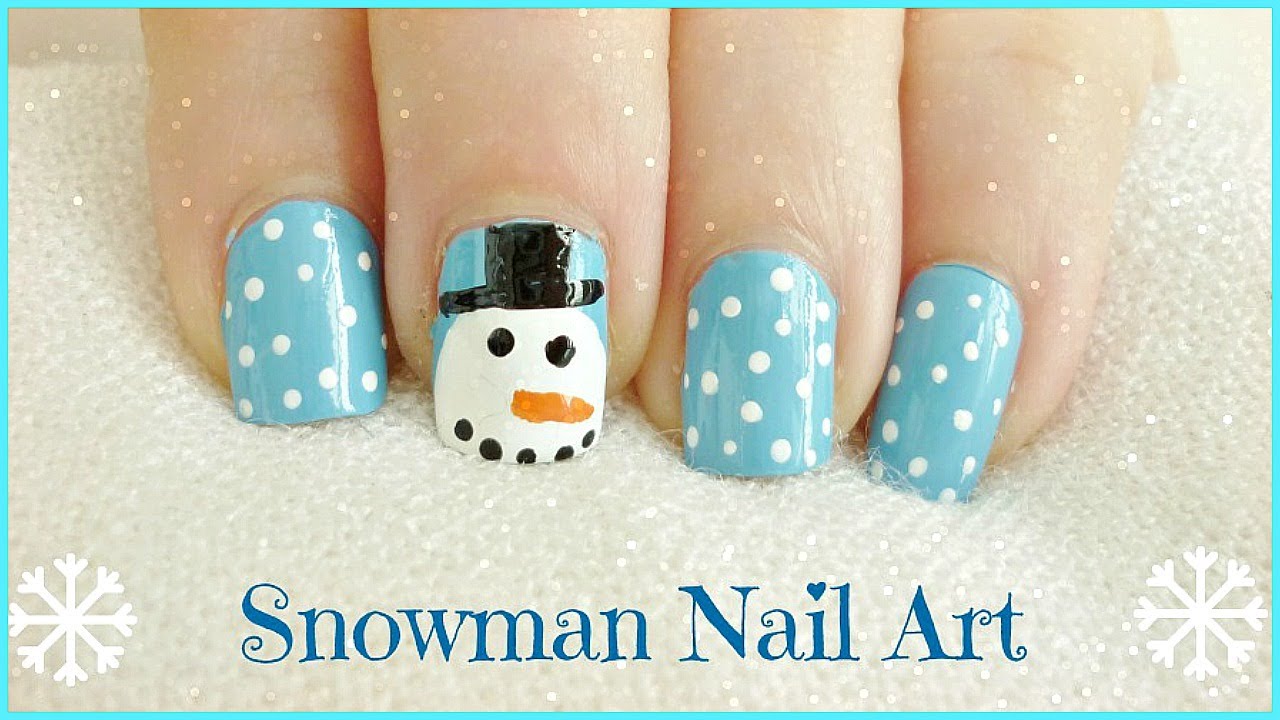 To complete the look, use your fine tip brush and black
nail polish
to create a top hat on the snowman's head. You can also add a scarf by drawing a small curved line near the bottom of the snowman's head and filling it in with the red
nail polish
. Once all the
nail polish
is dry, apply a top coat to seal in your design and add shine.
Now you have the most adorable snowman nails that are perfect for the winter season. You can also get creative and add different details to each snowman for a unique look. So grab your supplies and give this snowman nail art tutorial a try. Your nails will thank you!
To complete the look, use your fine tip brush and black
nail polish
to create a top hat on the snowman's head. You can also add a scarf by drawing a small curved line near the bottom of the snowman's head and filling it in with the red
nail polish
. Once all the
nail polish
is dry, apply a top coat to seal in your design and add shine.
Now you have the most adorable snowman nails that are perfect for the winter season. You can also get creative and add different details to each snowman for a unique look. So grab your supplies and give this snowman nail art tutorial a try. Your nails will thank you!


