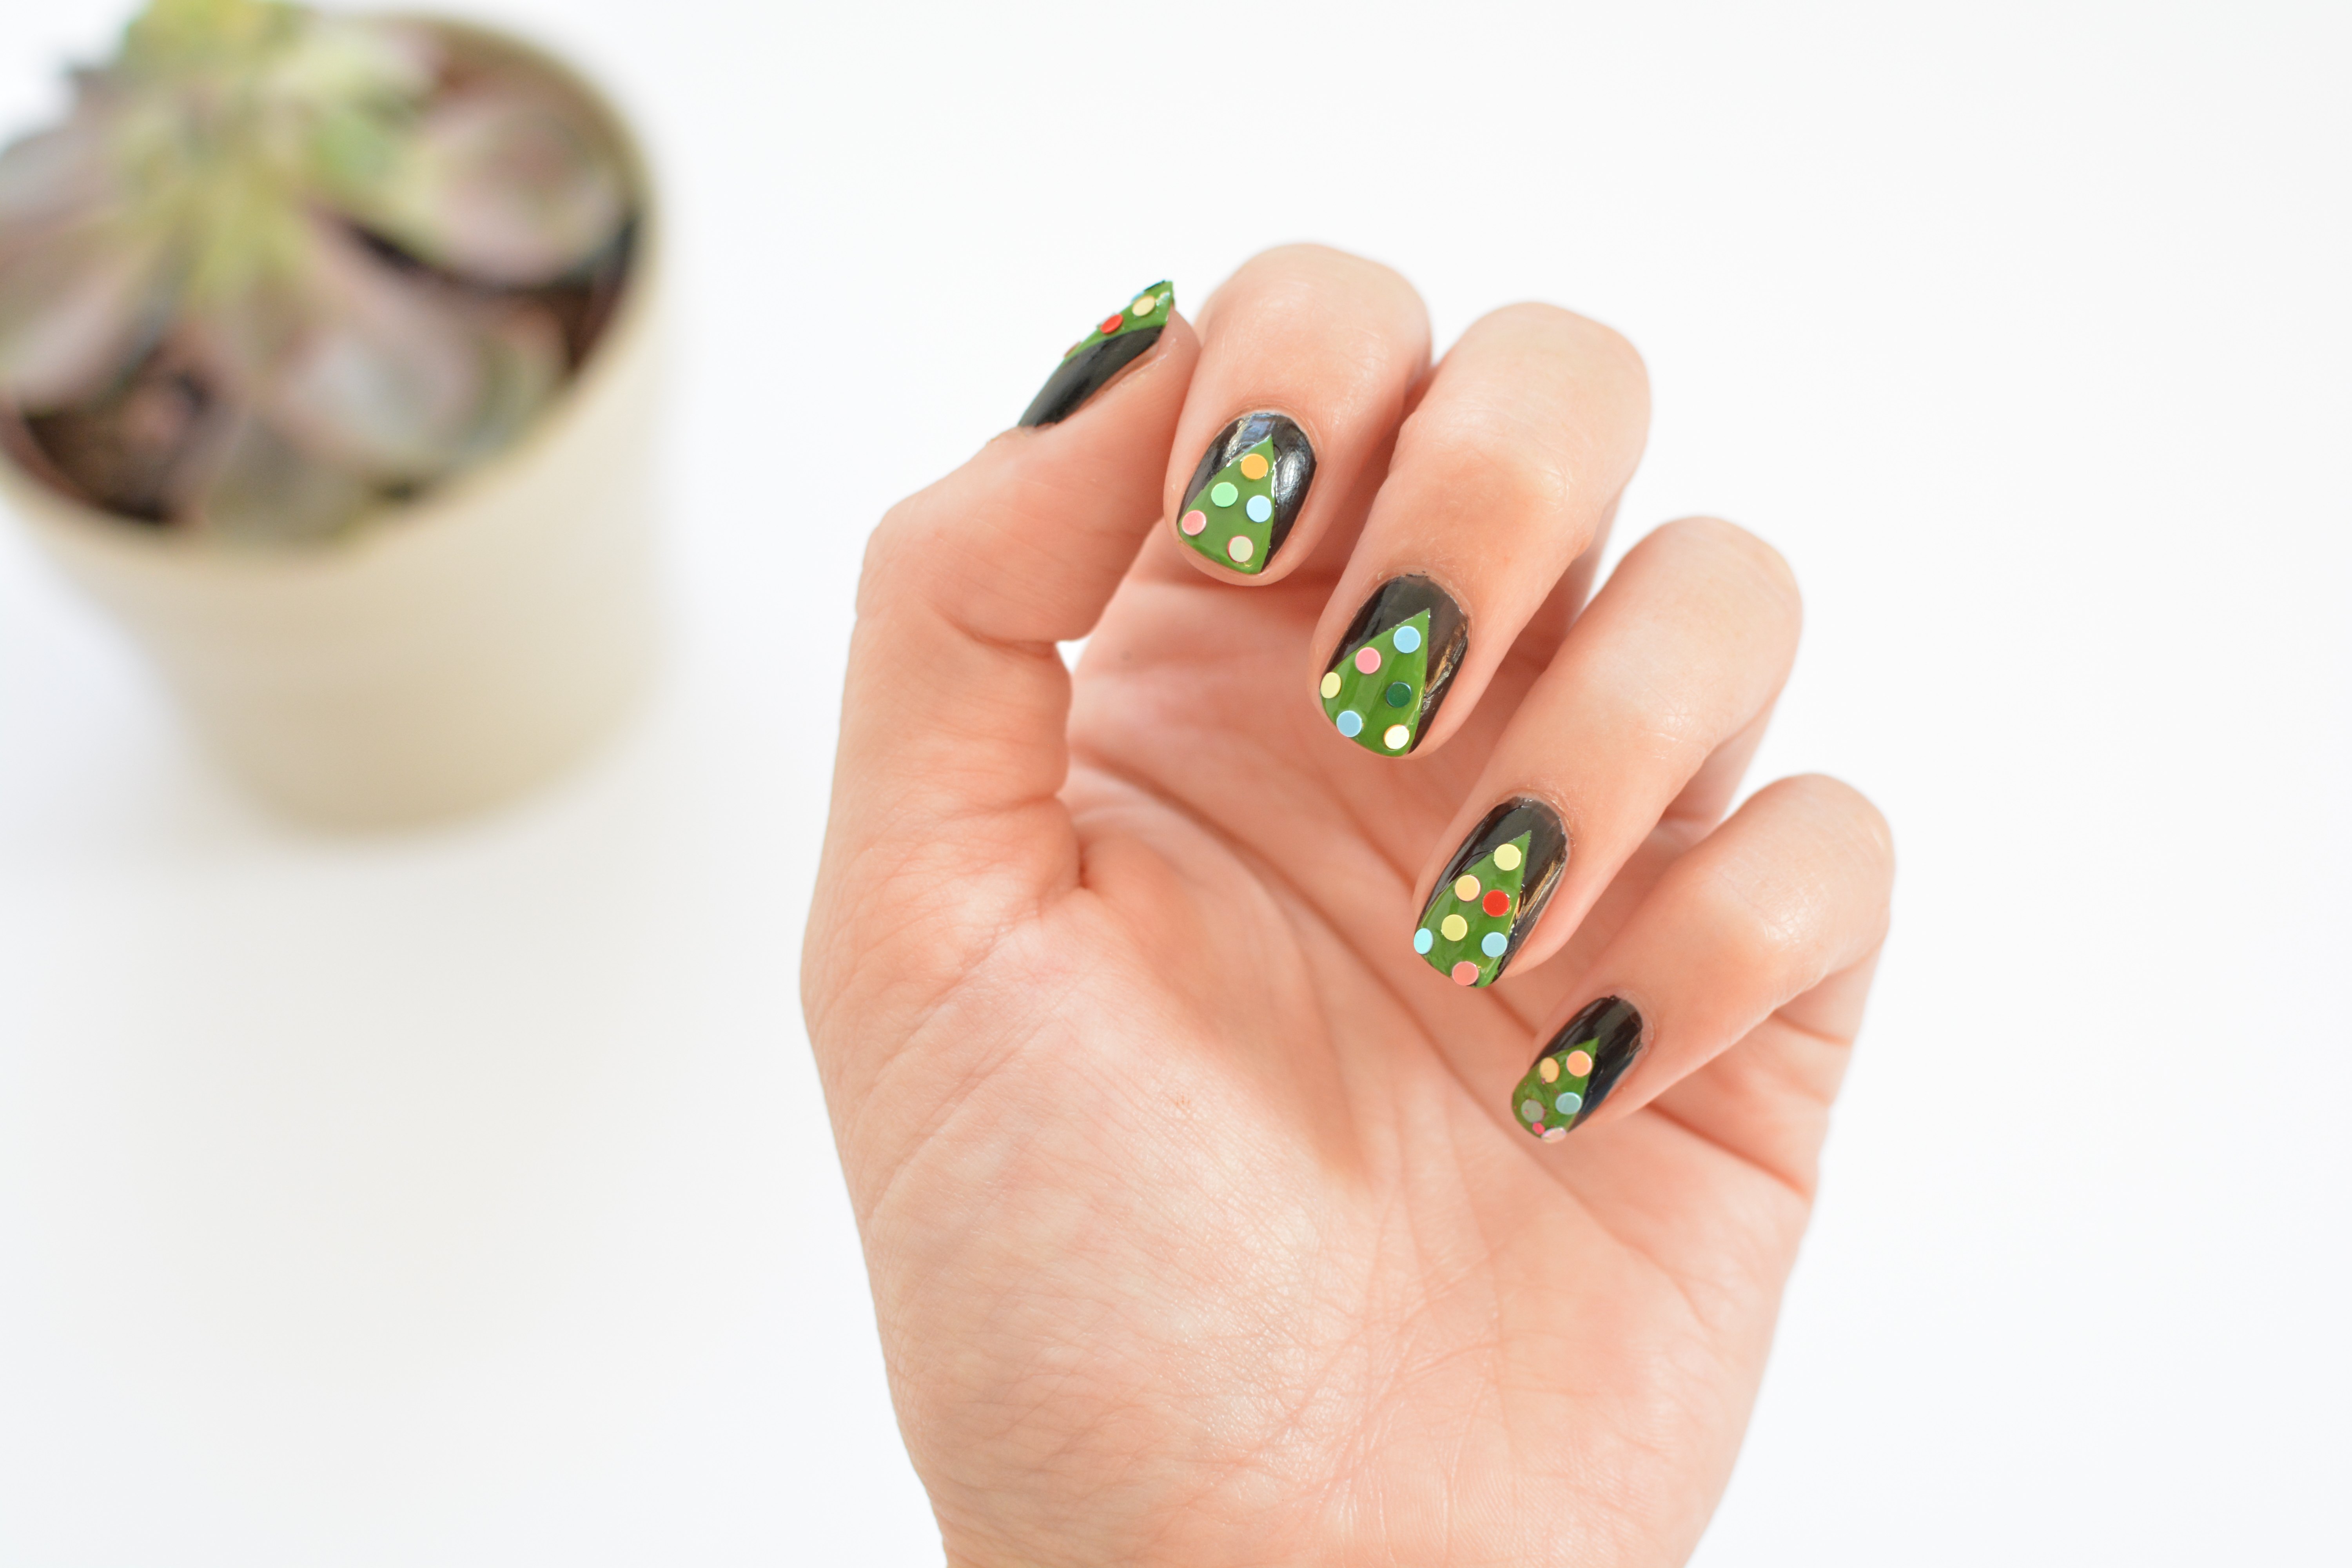
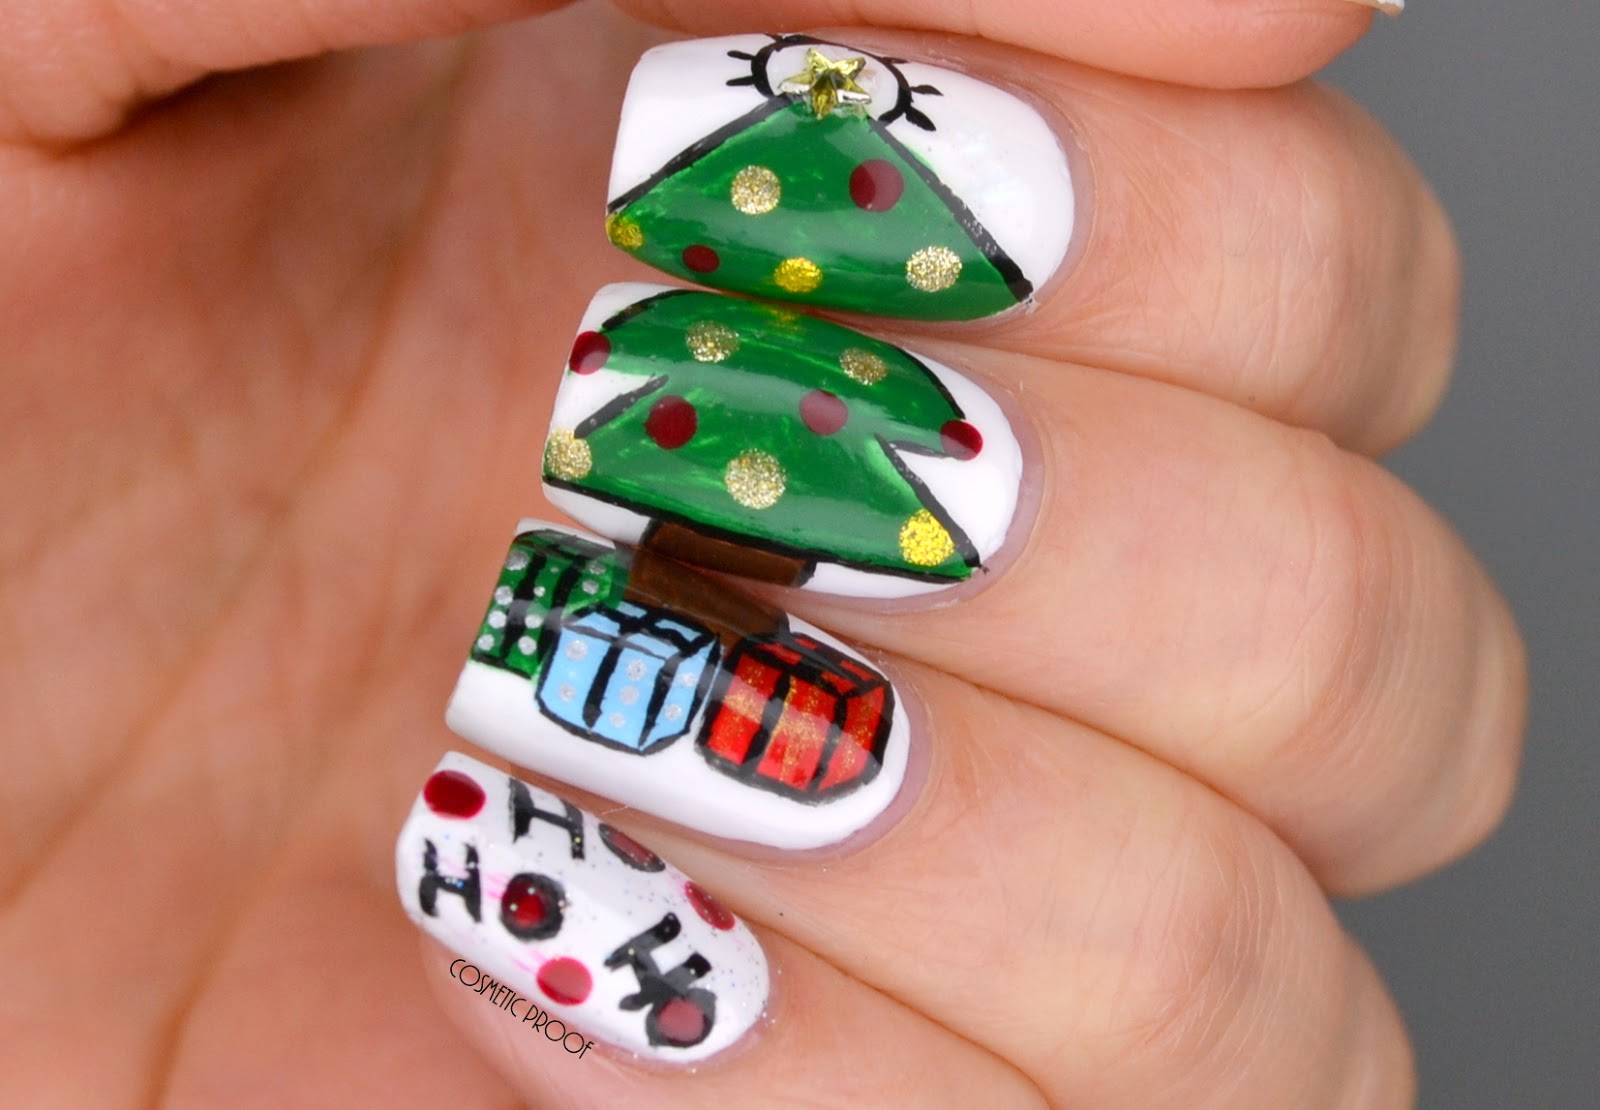
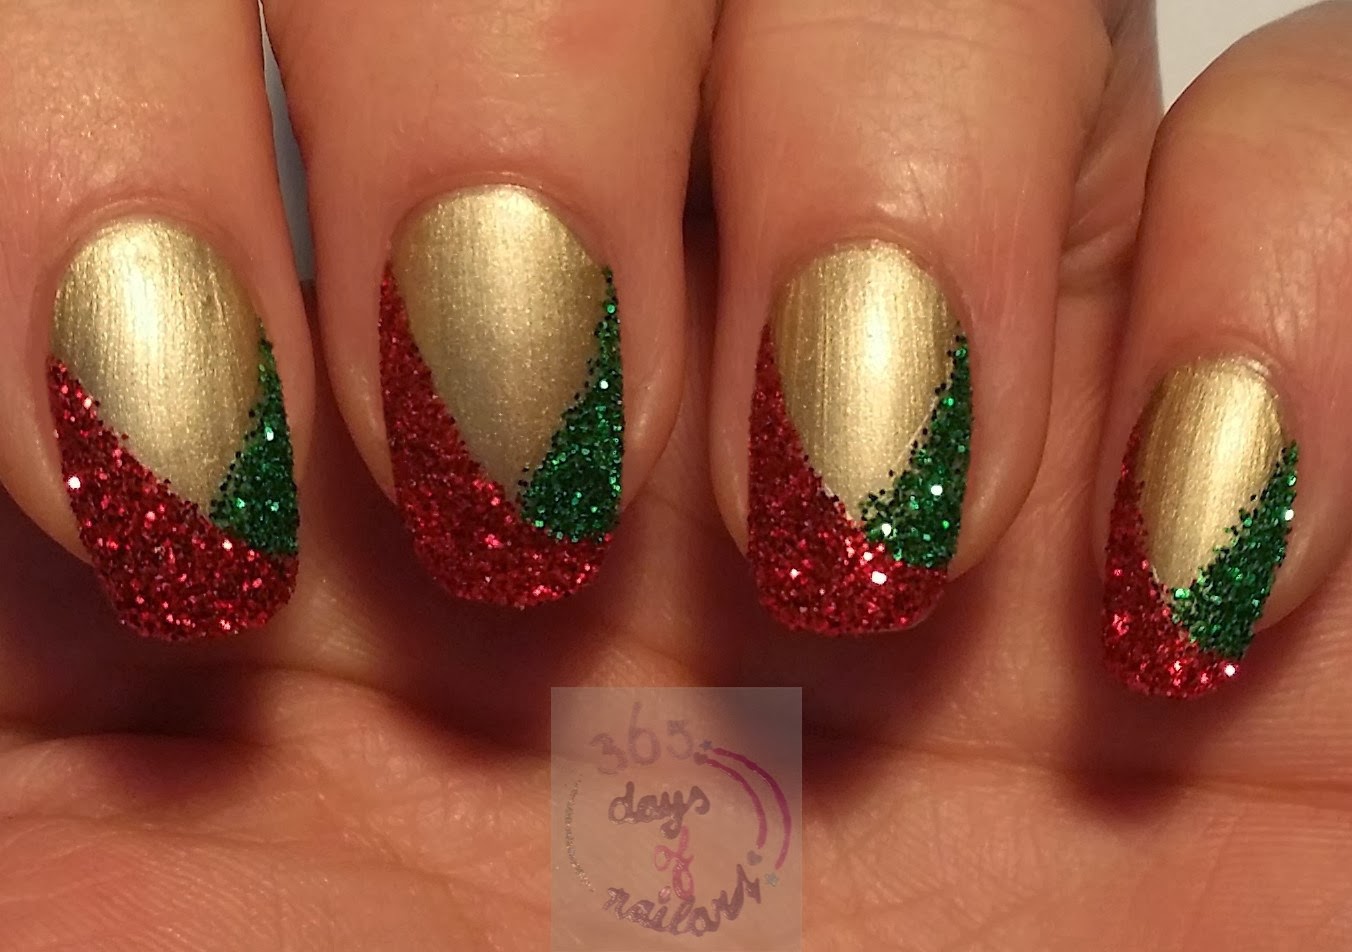
If you want to add some festive flair to your manicure this holiday season, a glittery Christmas tree nail art design is the perfect choice. Using sparkly nail polish or glitter, you can create a fun and eye-catching design that will make your nails stand out. Start by applying a base coat to protect your nails and help the polish adhere better. Then, using a small brush or a toothpick, create a triangle shape with green polish on your nail. You can also use a stencil for a more precise shape. Once the green polish has dried, use a gold glitter polish to add some shimmer and dimension to your tree. You can also add small red or silver dots for ornaments, and a glittery star on top. Finish off with a top coat to seal in your design and give it a glossy finish. Your nails will look like a mini Christmas tree, and you'll be spreading holiday cheer wherever you go!1. Glittery Christmas Tree Nail Art

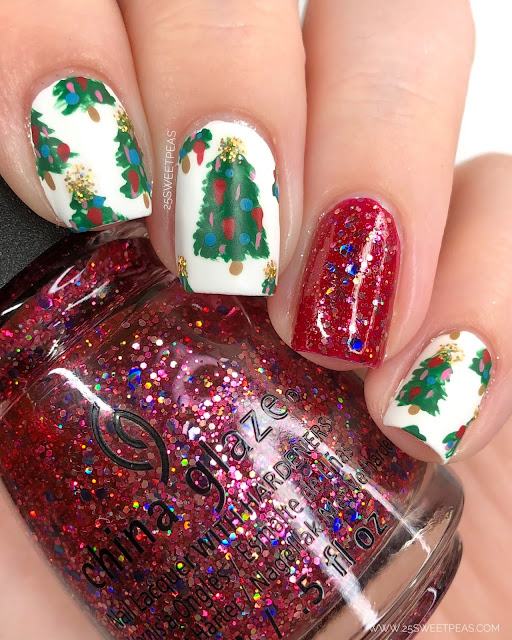
1. Glittery Christmas Tree Nail Art


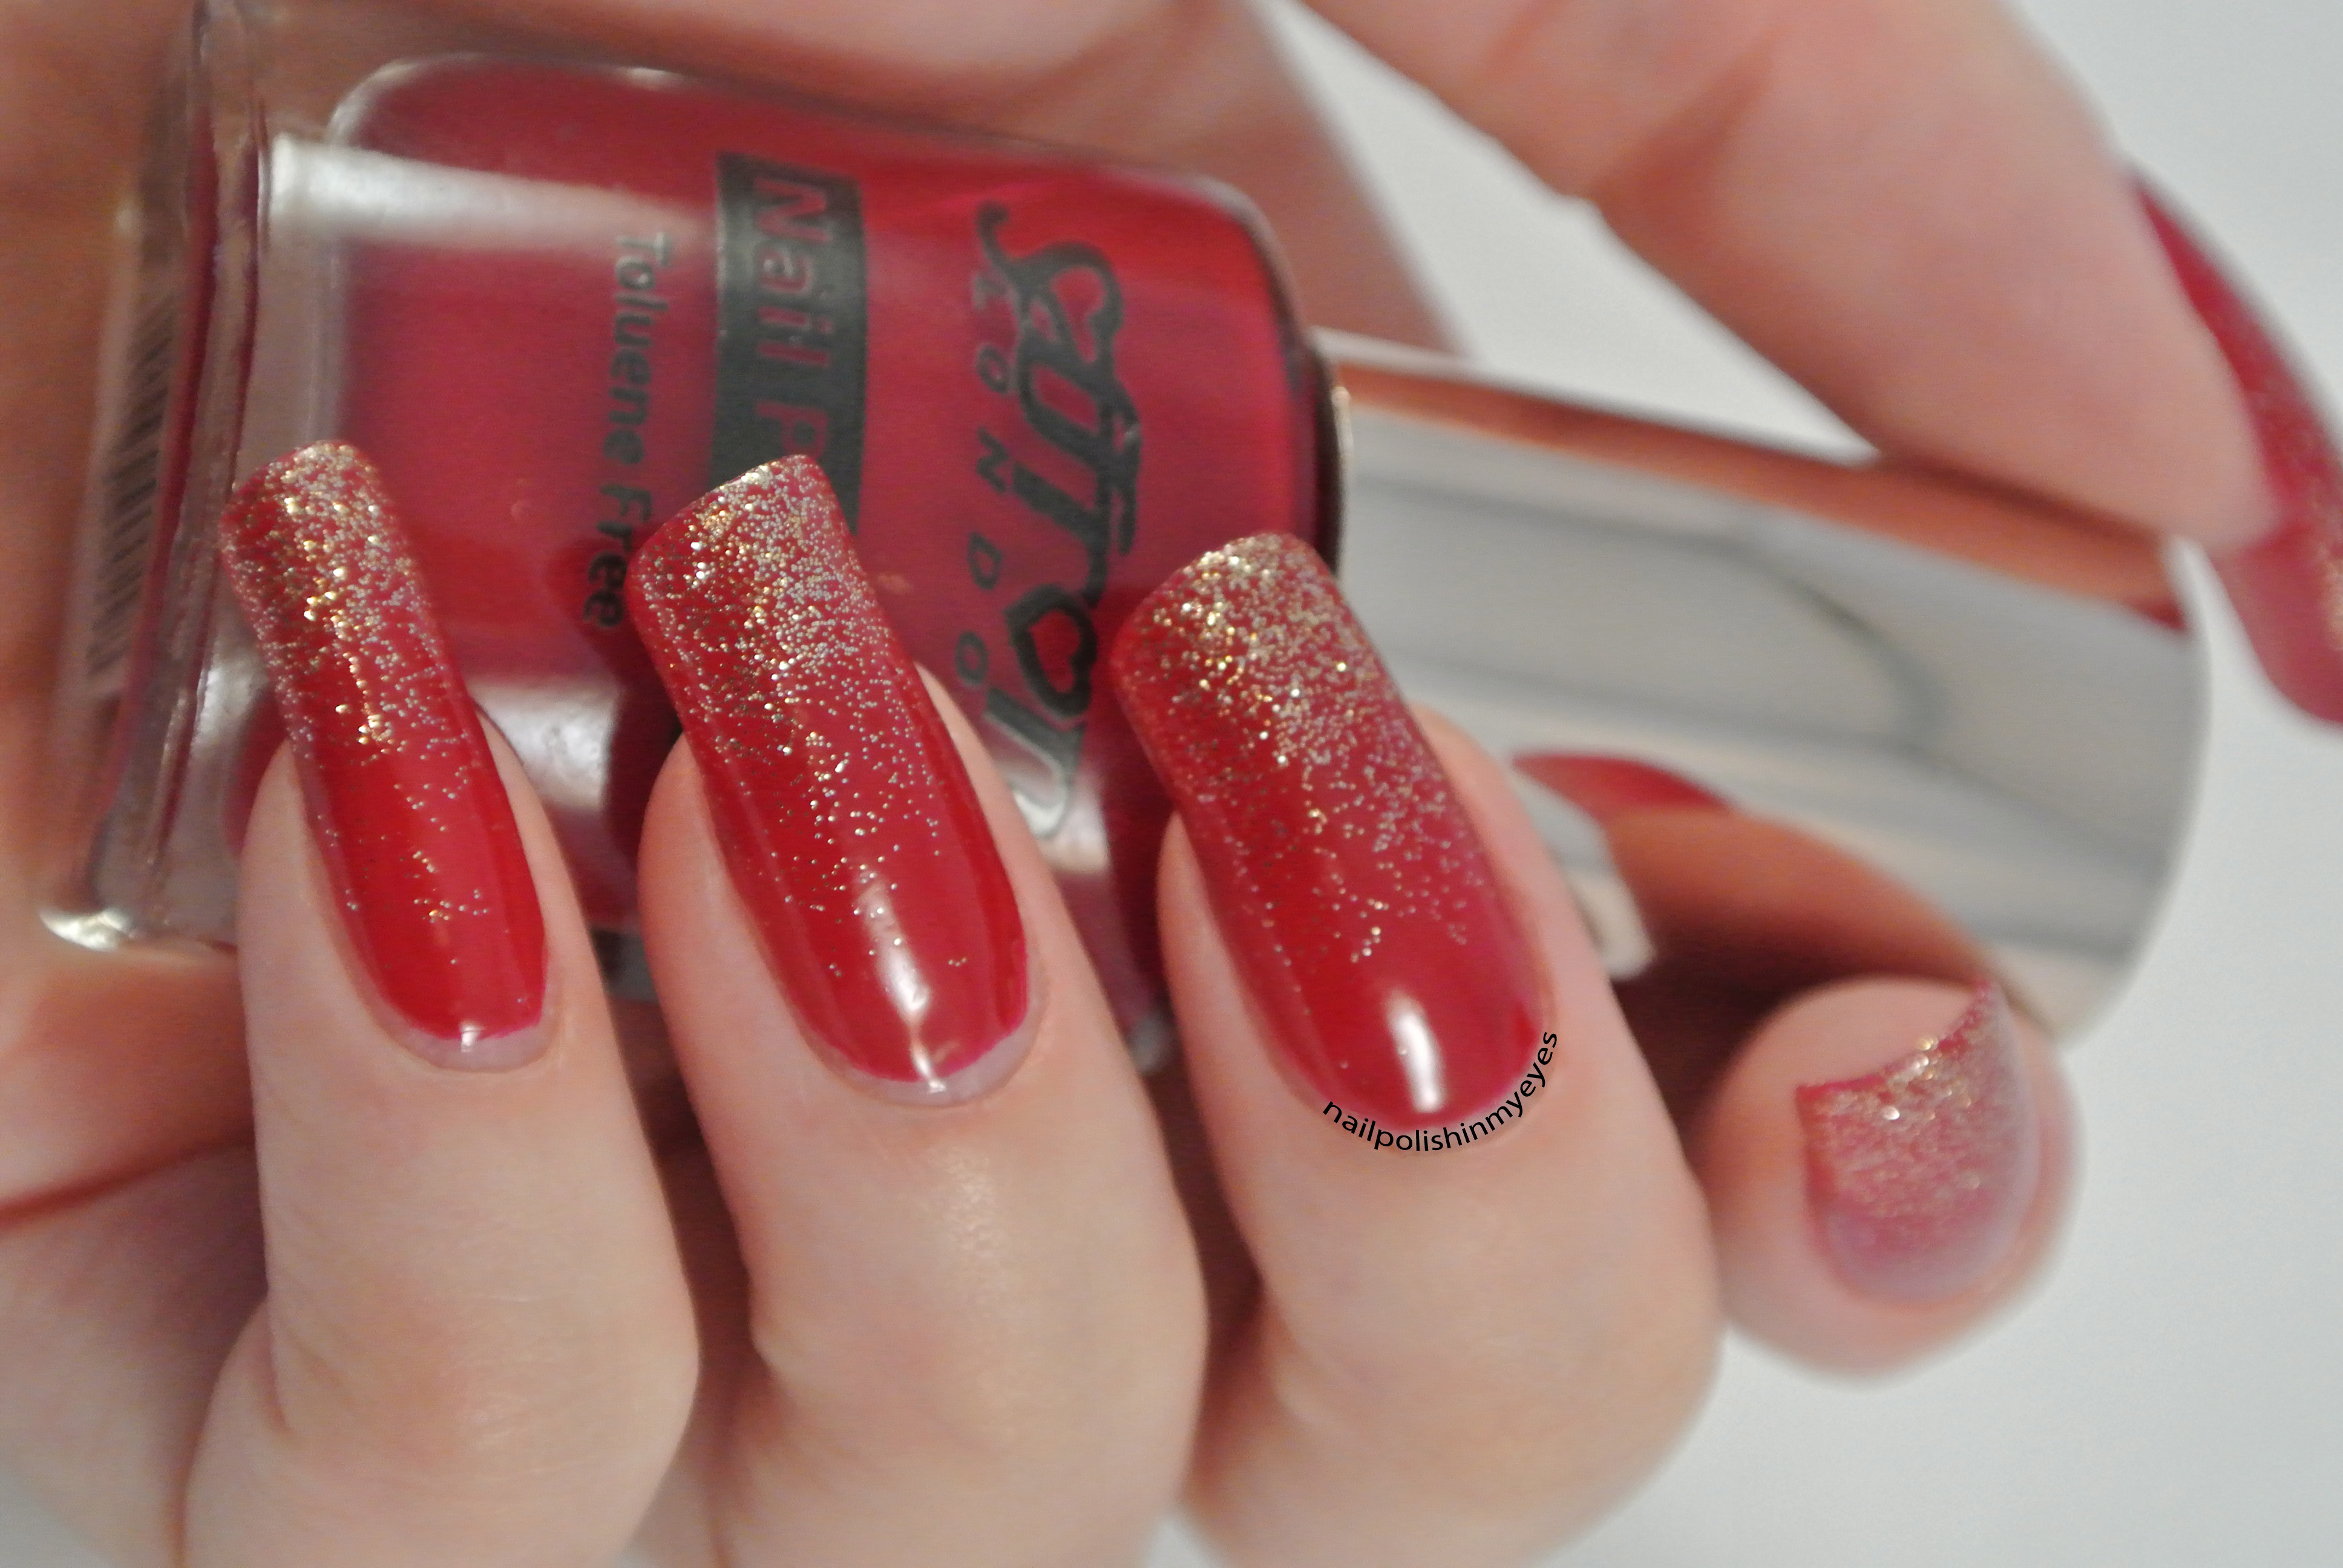
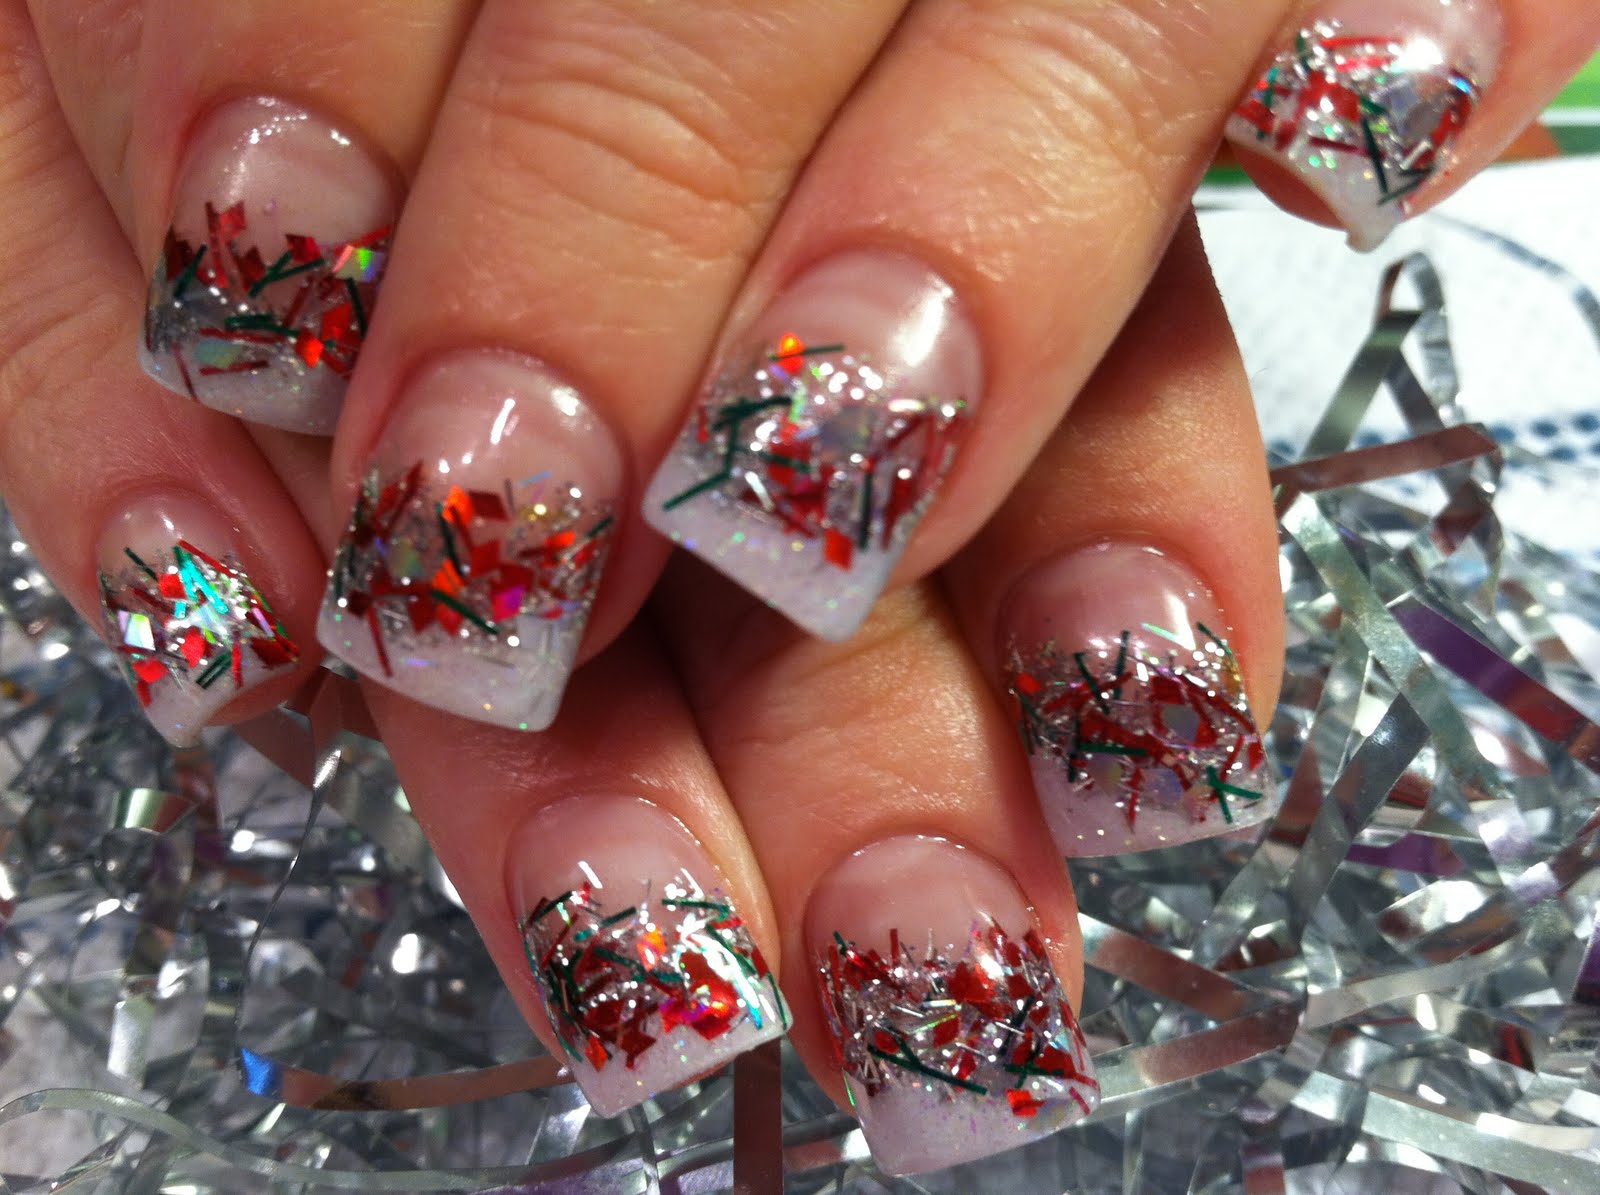
For a more overall sparkly look, a festive sparkle nail design is the way to go. This design is perfect for those who love a bit of dazzle and want to make a statement at their holiday parties. Start with a white or silver base coat and let it dry completely. Then, using a sparkly polish or glitter, create a gradient effect by starting at the tips of your nails and gradually fading the glitter towards the base. You can also use different colored glitters, such as gold, red, or green, to create a more festive look. Finish off with a top coat to seal in the glitter and give your nails a dazzling finish. This design is perfect for any holiday party or gathering, and your nails will be the talk of the night.2. Festive Sparkle Nail Design


2. Festive Sparkle Nail Design


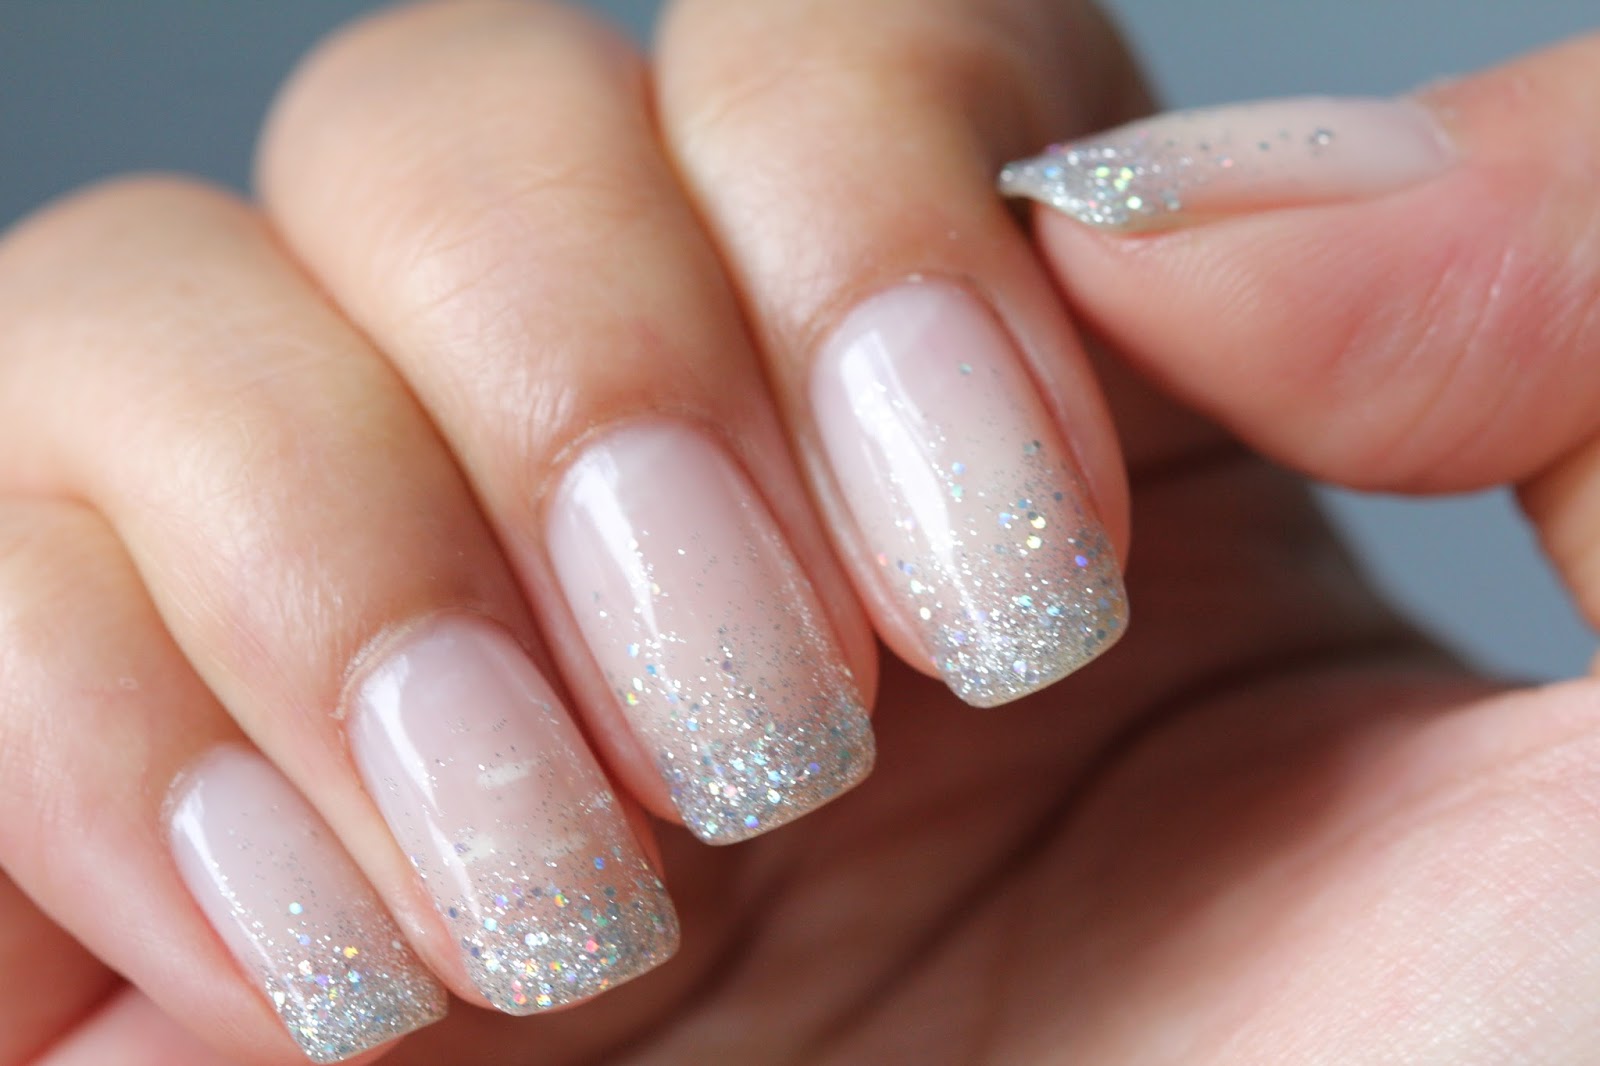
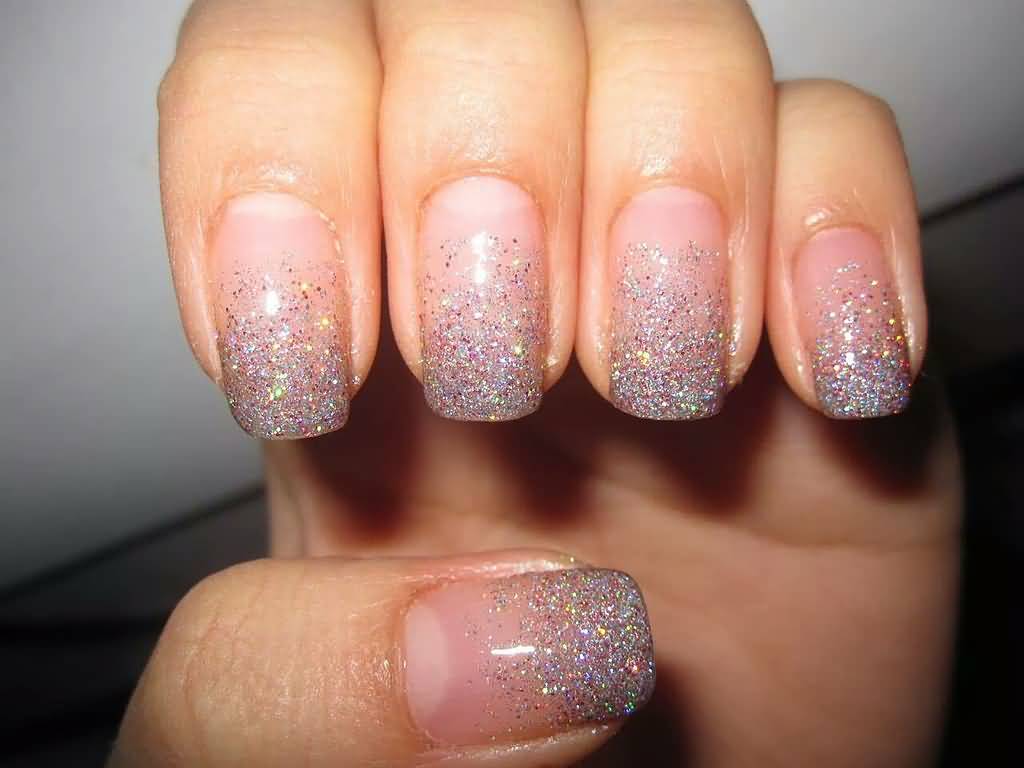
A twist on the traditional glitter gradient, the holiday glitter gradient nails add a touch of sparkle to your nails without being too overwhelming. This design is perfect for those who want to add some holiday flair to their nails, but prefer a more subtle look. Start with a white or light pink base coat and let it dry. Then, using a makeup sponge or a small brush, apply a silver glitter polish at the tips of your nails and gently blend it towards the base. You can also use different colored glitters, such as gold or red, for a more festive look. Finish off with a top coat for a smooth and sparkly finish. This design is perfect for those who want to add a subtle touch of holiday glamour to their nails.3. Holiday Glitter Gradient Nails


3. Holiday Glitter Gradient Nails
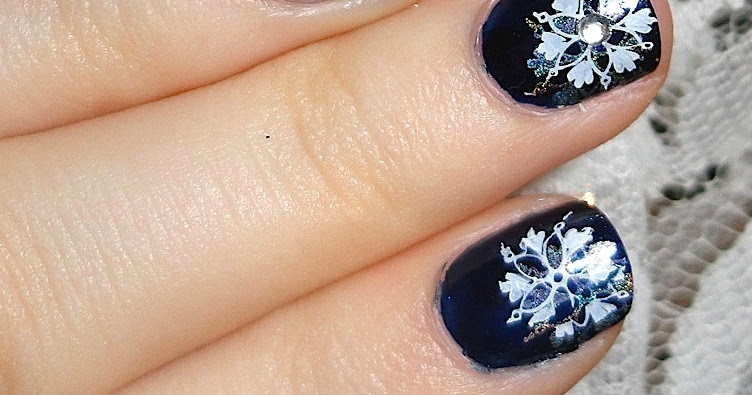
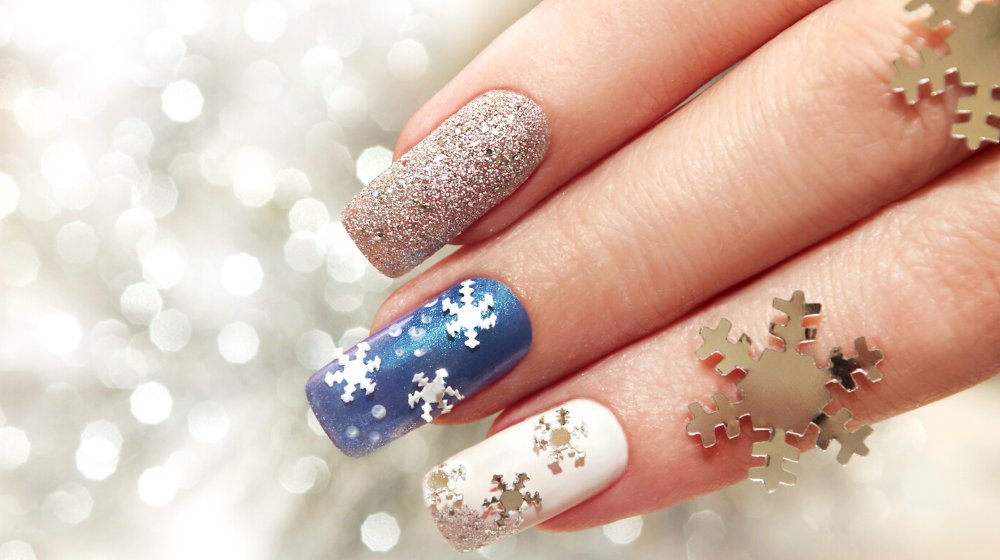
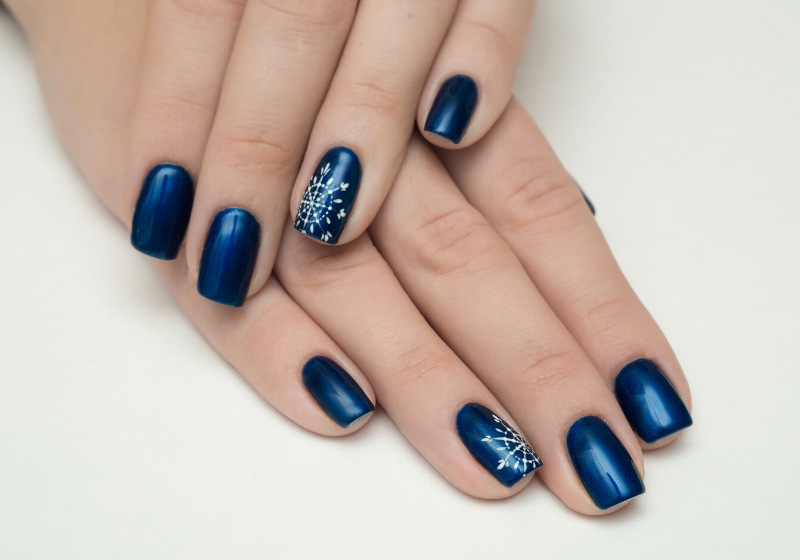
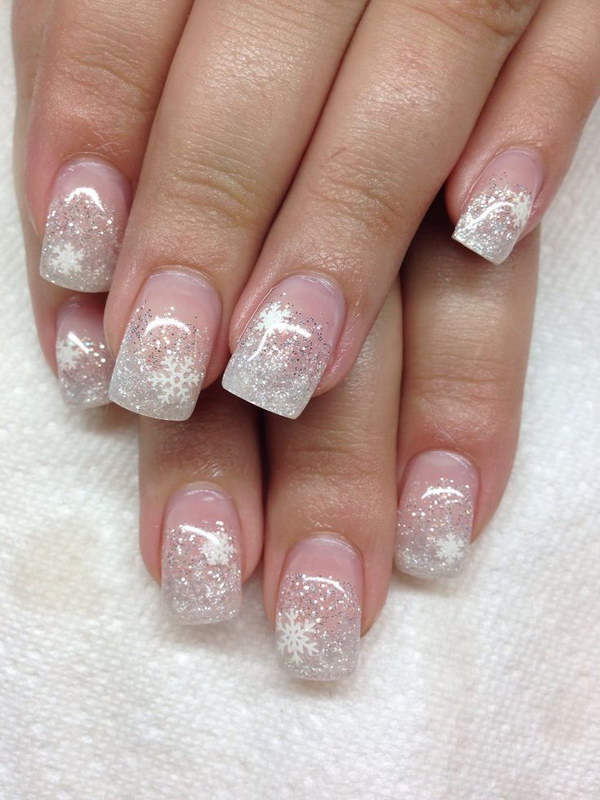
What better way to celebrate the winter season than with a shimmering snowflake nail art design? This design is perfect for those who love sparkly and intricate nail art. Start with a blue or purple base coat to represent the cool winter colors. Then, using a small brush or a toothpick, create snowflake designs with white or silver polish on your nails. Once the snowflakes have dried, use a sparkly polish or glitter to add some shine and dimension to your design. Finish off with a top coat to seal in your design and give your nails a glittery finish. This design will make your nails look like a winter wonderland, and is perfect for the holiday season.4. Shimmering Snowflake Nail Art


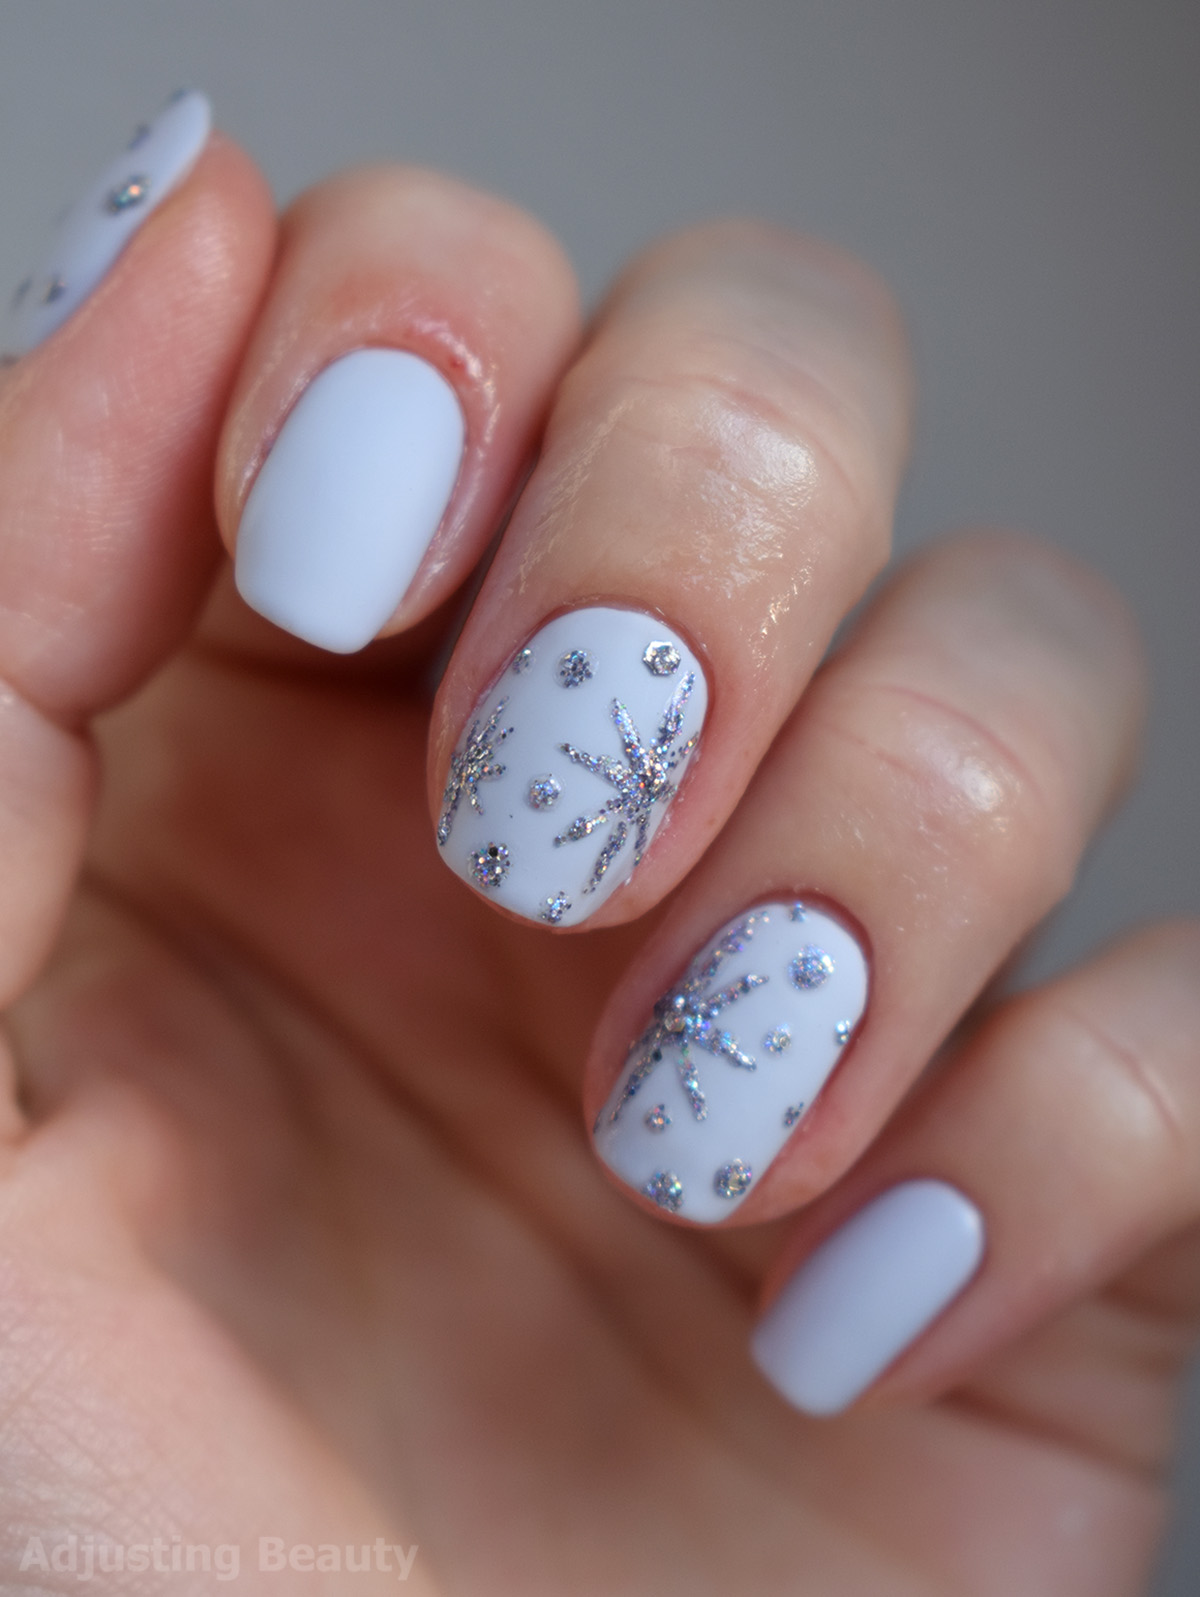
4. Shimmering Snowflake Nail Art


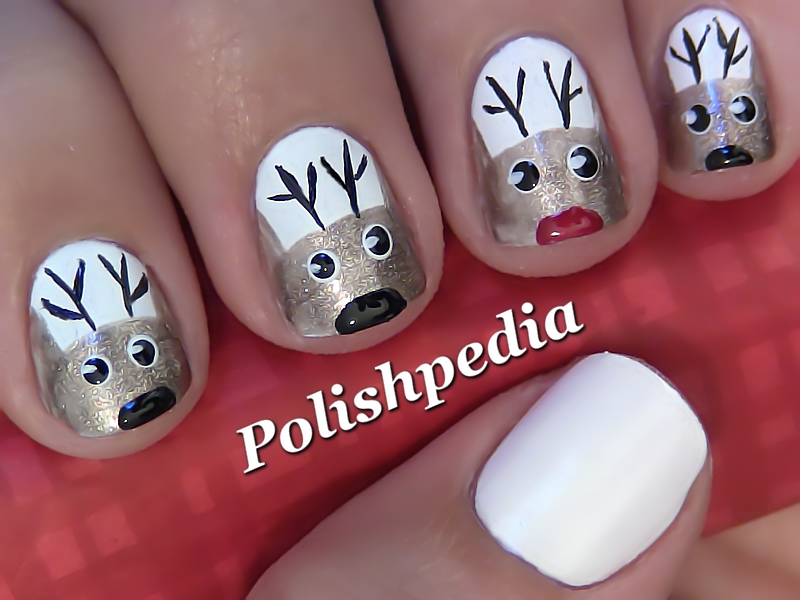
No holiday nail art collection is complete without a cute and sparkly reindeer design. This design is perfect for those who love festive and adorable nail art. Start with a light brown base coat and let it dry. Then, using a small brush or a toothpick, create a reindeer head on your nail with dark brown polish. You can also add small antlers with the same polish. Once the reindeer has dried, use a red polish to create a nose and cheeks for your reindeer. Add some sparkle by using a glittery polish or glitter to create a border around your reindeer. Finish off with a top coat to seal in your design and give it a glossy finish. This cute and sparkly design is perfect for any holiday gathering.5. Sparkly Reindeer Nail Design


5. Sparkly Reindeer Nail Design


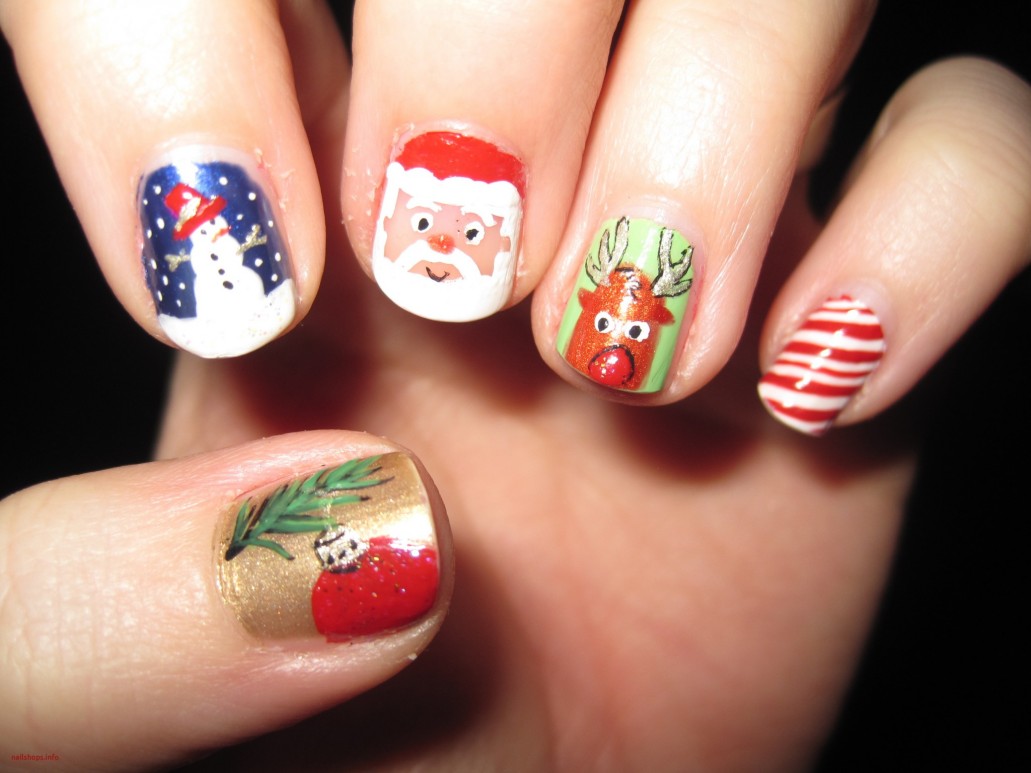

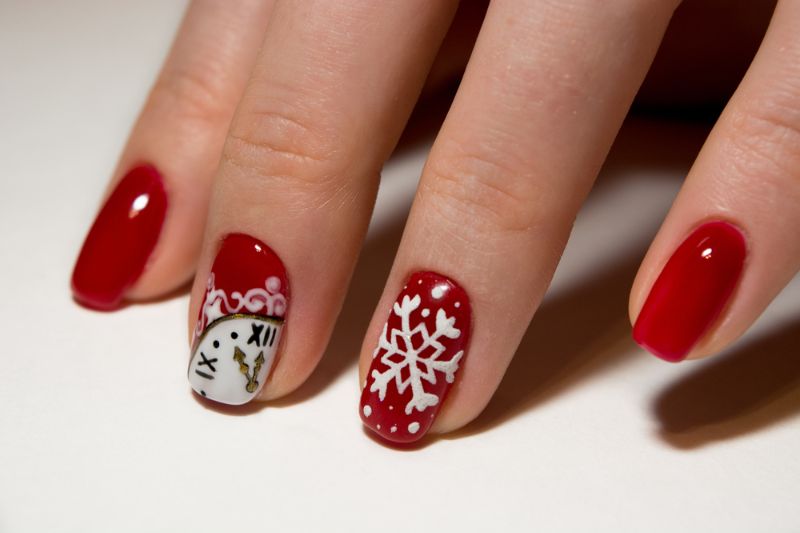
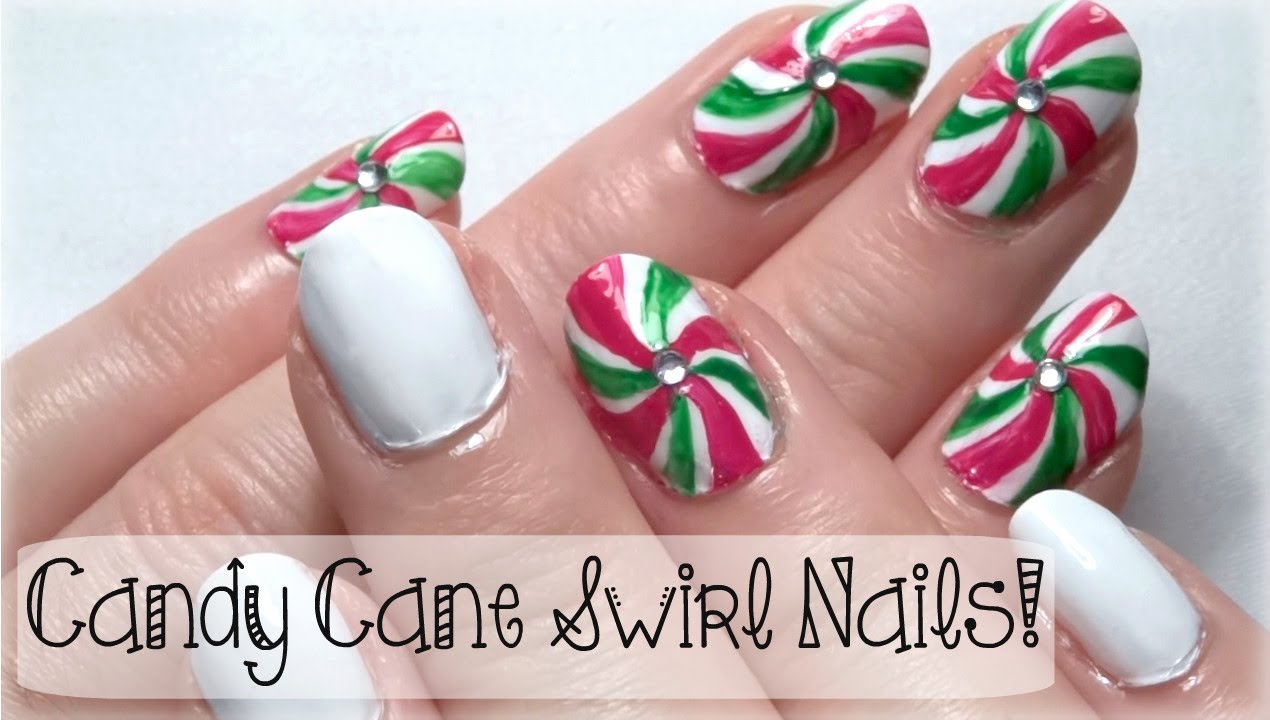
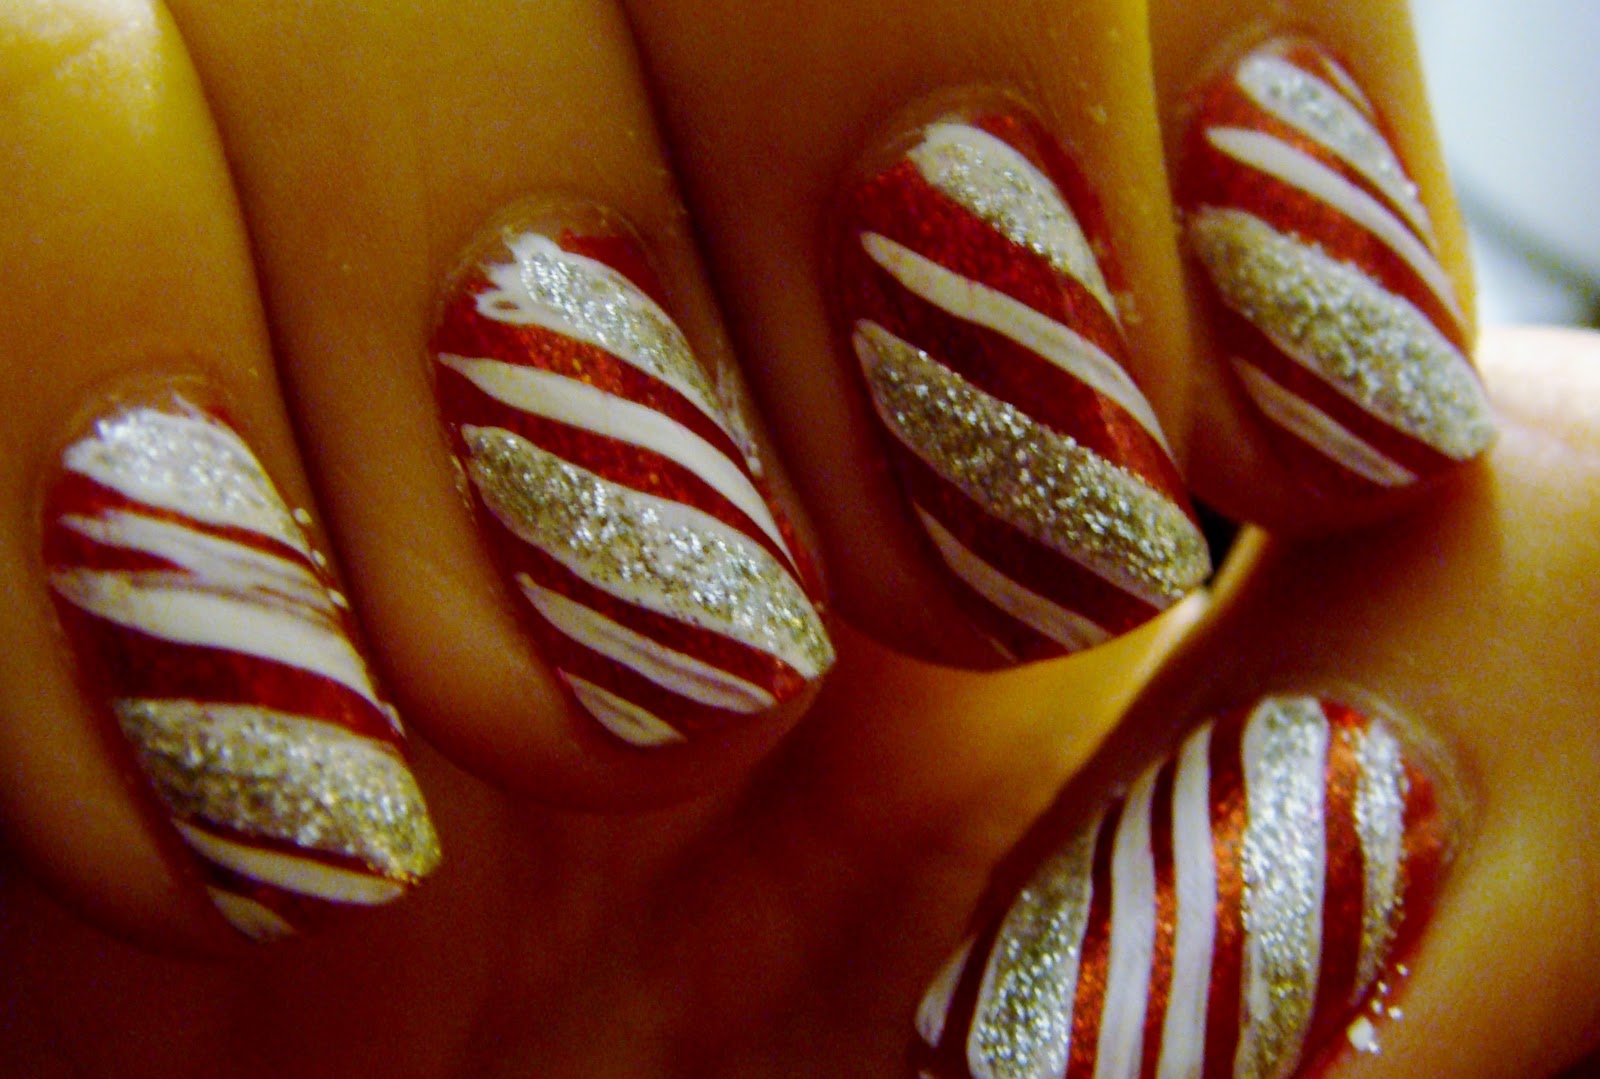
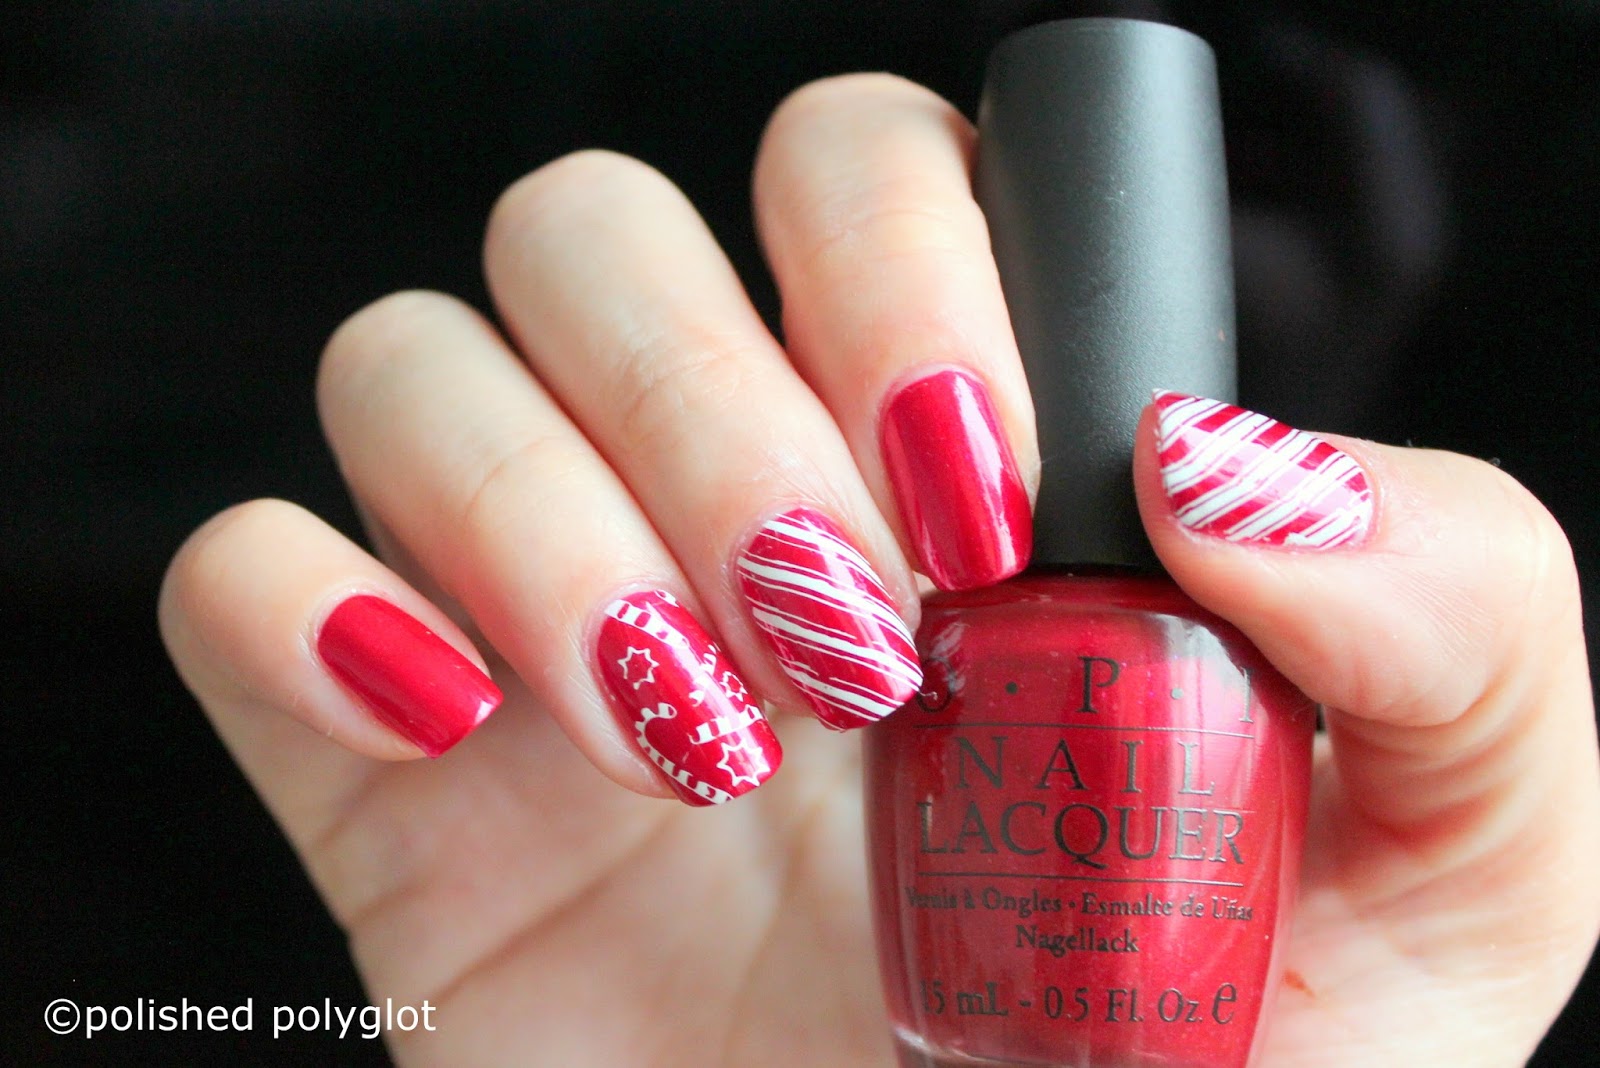
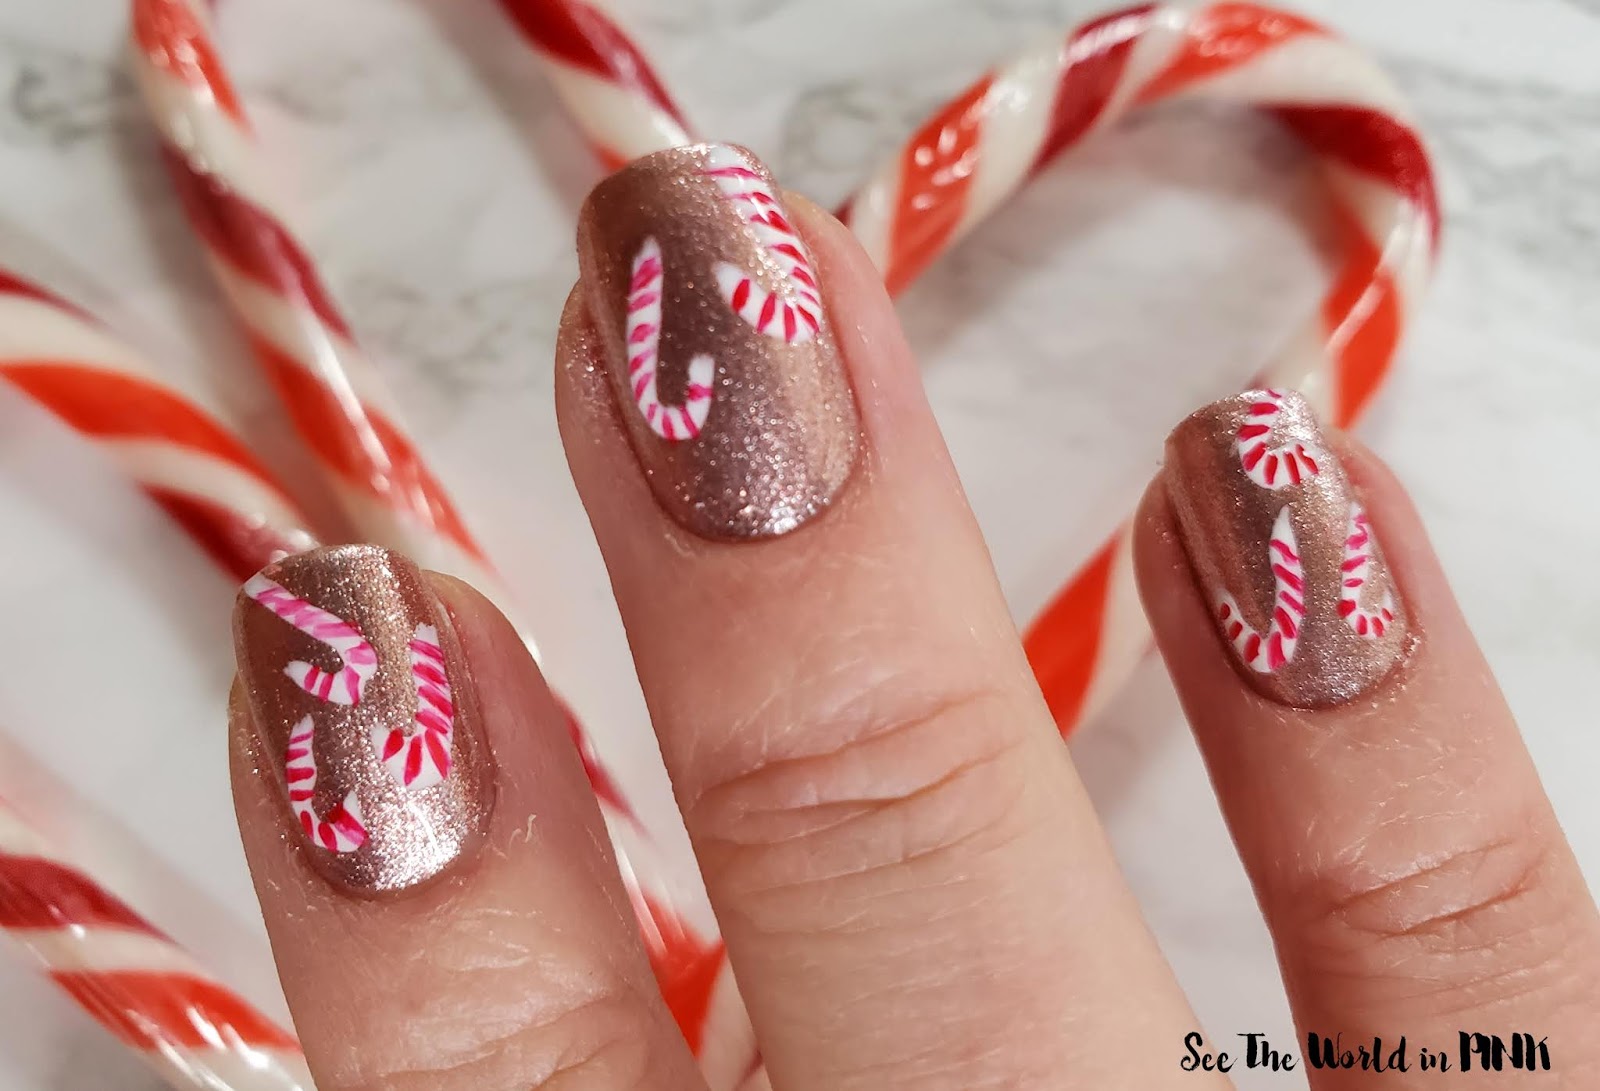
Add some sparkle and sweetness to your holiday manicure with glittery candy cane nails. This design is perfect for those who love fun and whimsical nail art. Start with a white base coat and let it dry. Then, using a small brush or a toothpick, create diagonal stripes with red polish on your nails to represent candy canes. Once the red polish has dried, use a sparkly polish or glitter to add some glamour to your design. Finish off with a top coat to seal in your design and give your nails a festive finish. This design is perfect for those who want to add a touch of sparkle and playfulness to their holiday look.6. Glittery Candy Cane Nails


6. Glittery Candy Cane Nails


For a classic and elegant look, the festive glitter French tips are the perfect choice. This design is perfect for those who love sophistication and want to add a touch of sparkle to their nails. Start with a nude or light pink base coat and let it dry. Then, using a sparkly polish or glitter, create a thin line along the tips of your nails to create the French tip. You can also use different colored glitters, such as gold or silver, for a more festive look. Finish off with a top coat to seal in your design and give your nails a sleek and sparkly finish. This design is perfect for any holiday party or event, and will give your nails a touch of elegance and glamour.7. Festive Glitter French Tips

7. Festive Glitter French Tips


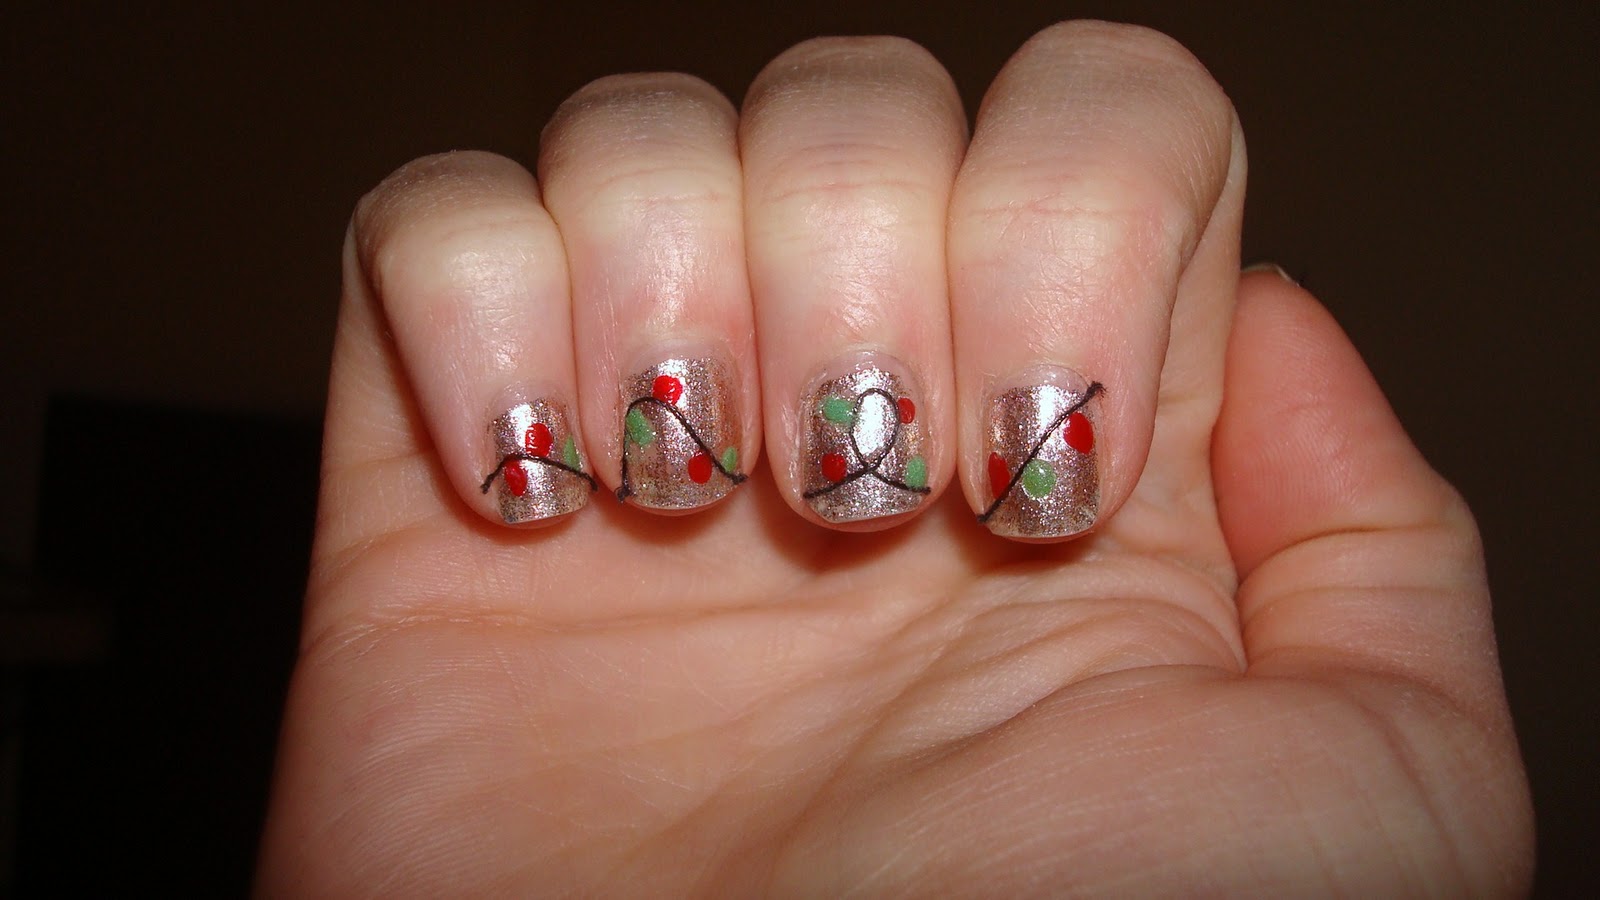
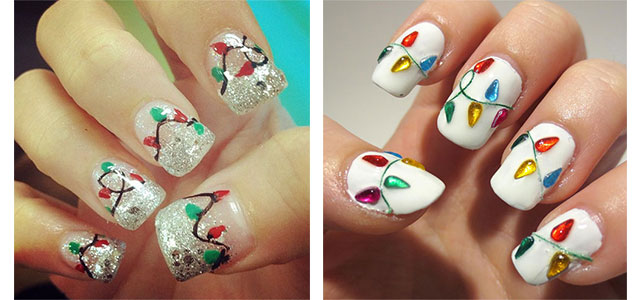
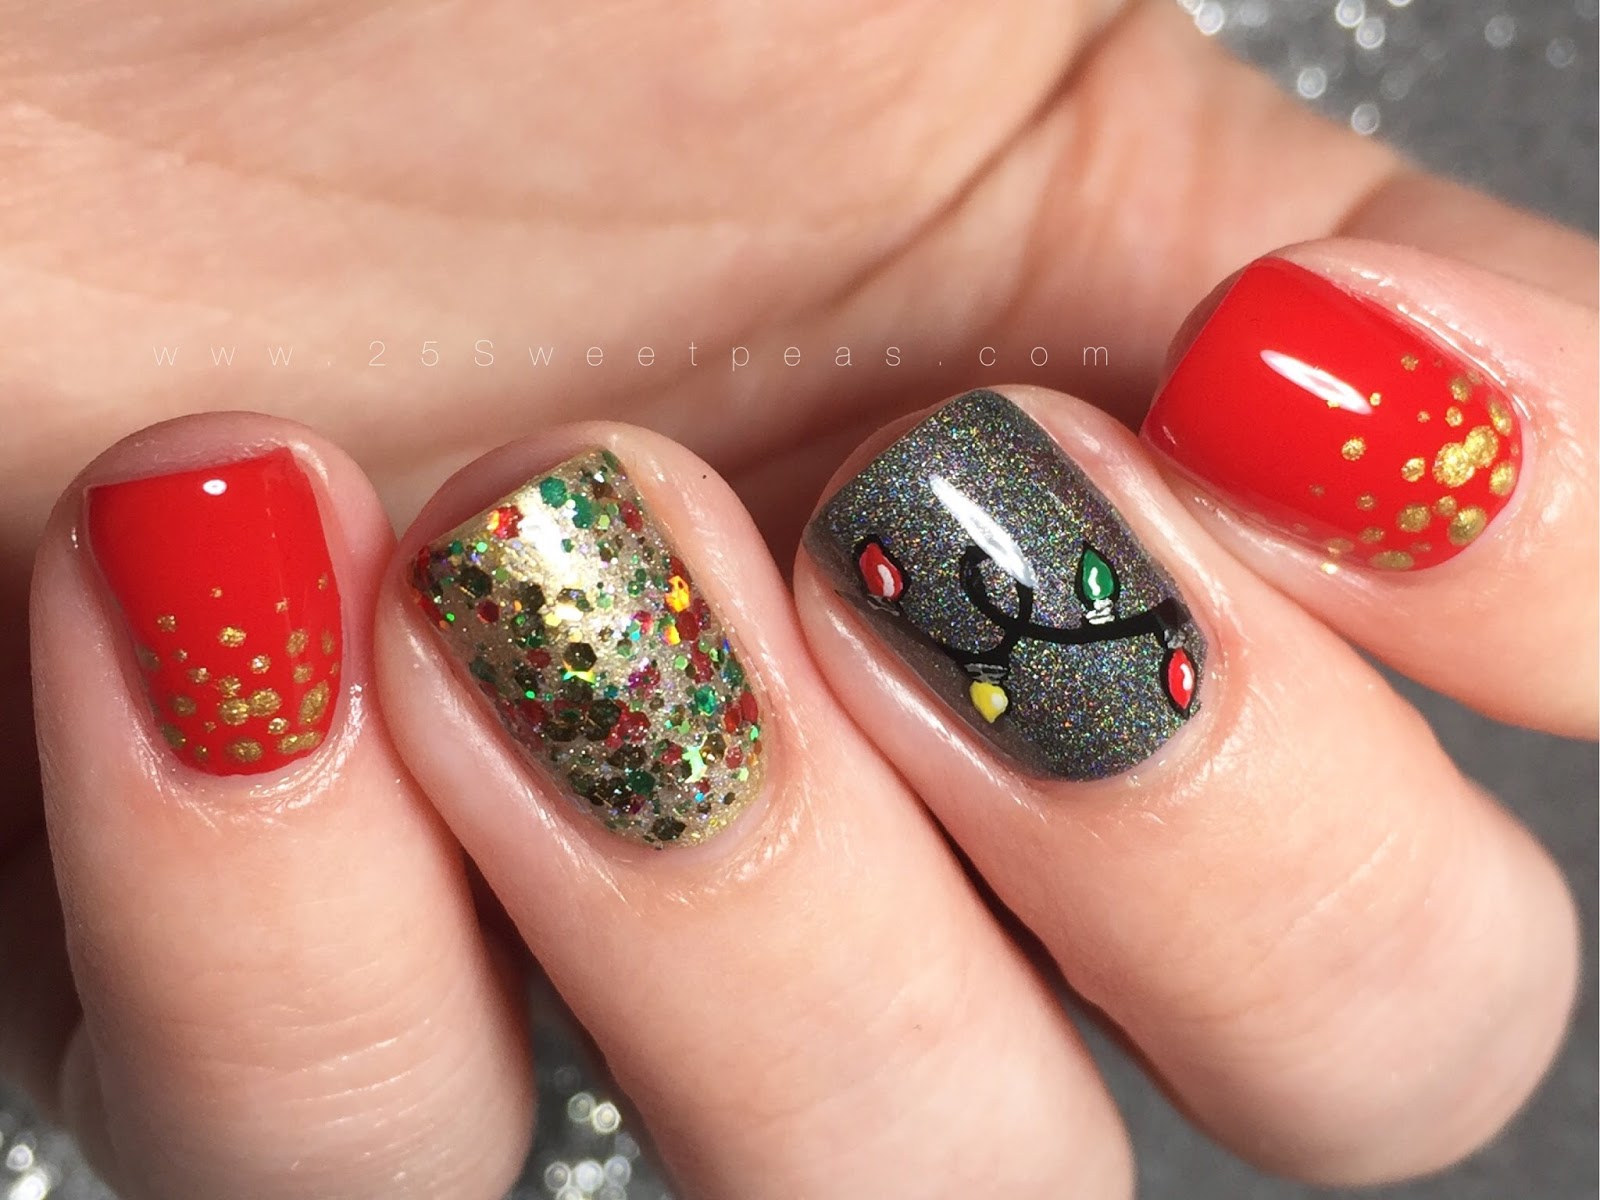
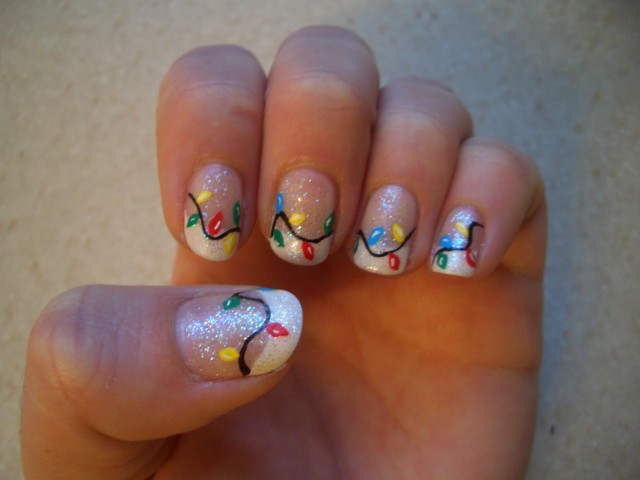
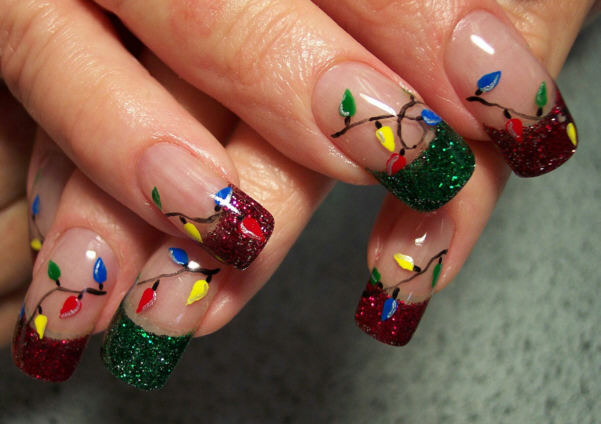
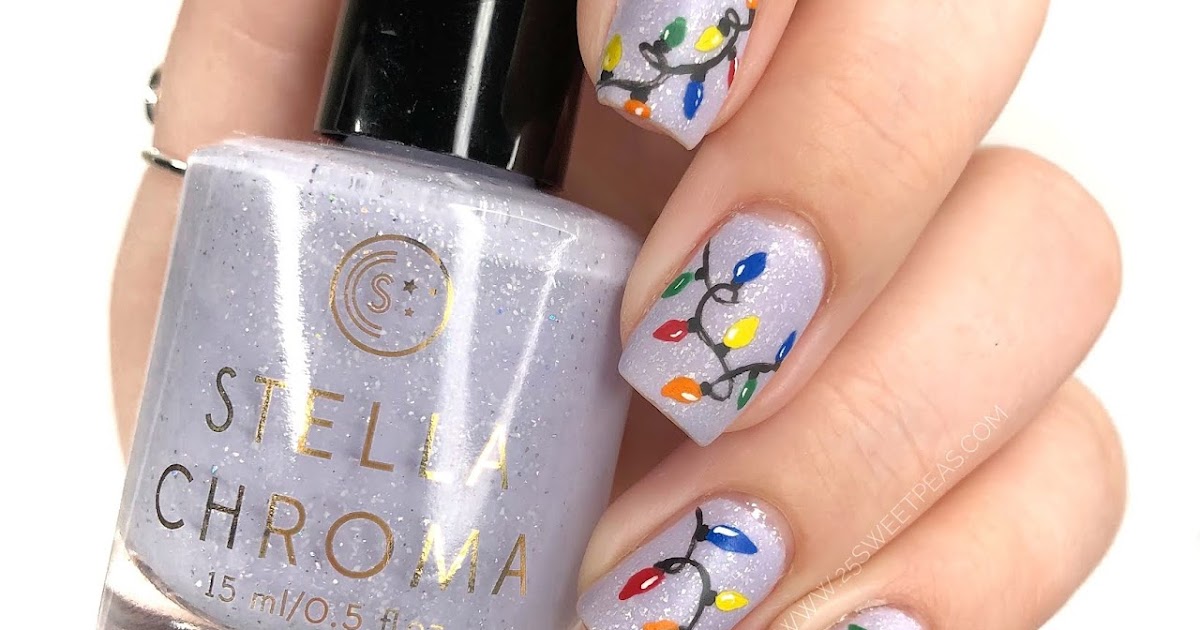
Bring the magic of Christmas lights to your nails with a sparkling Christmas lights nail art design. This design is perfect for those who love colorful and whimsical nail art. Start with a black base coat and let it dry. Then, using a small brush or a toothpick, create curved lines on your nails with red, green, and yellow polish to represent Christmas lights. Once the lights have dried, use a sparkly polish or glitter to add some shine and dimension to your design. Finish off with a top coat to seal in your design and give your nails a festive finish. This design will make your nails look like a mini Christmas light display, and is perfect for the holiday season.8. Sparkling Christmas Lights Nail Art


8. Sparkling Christmas Lights Nail Art

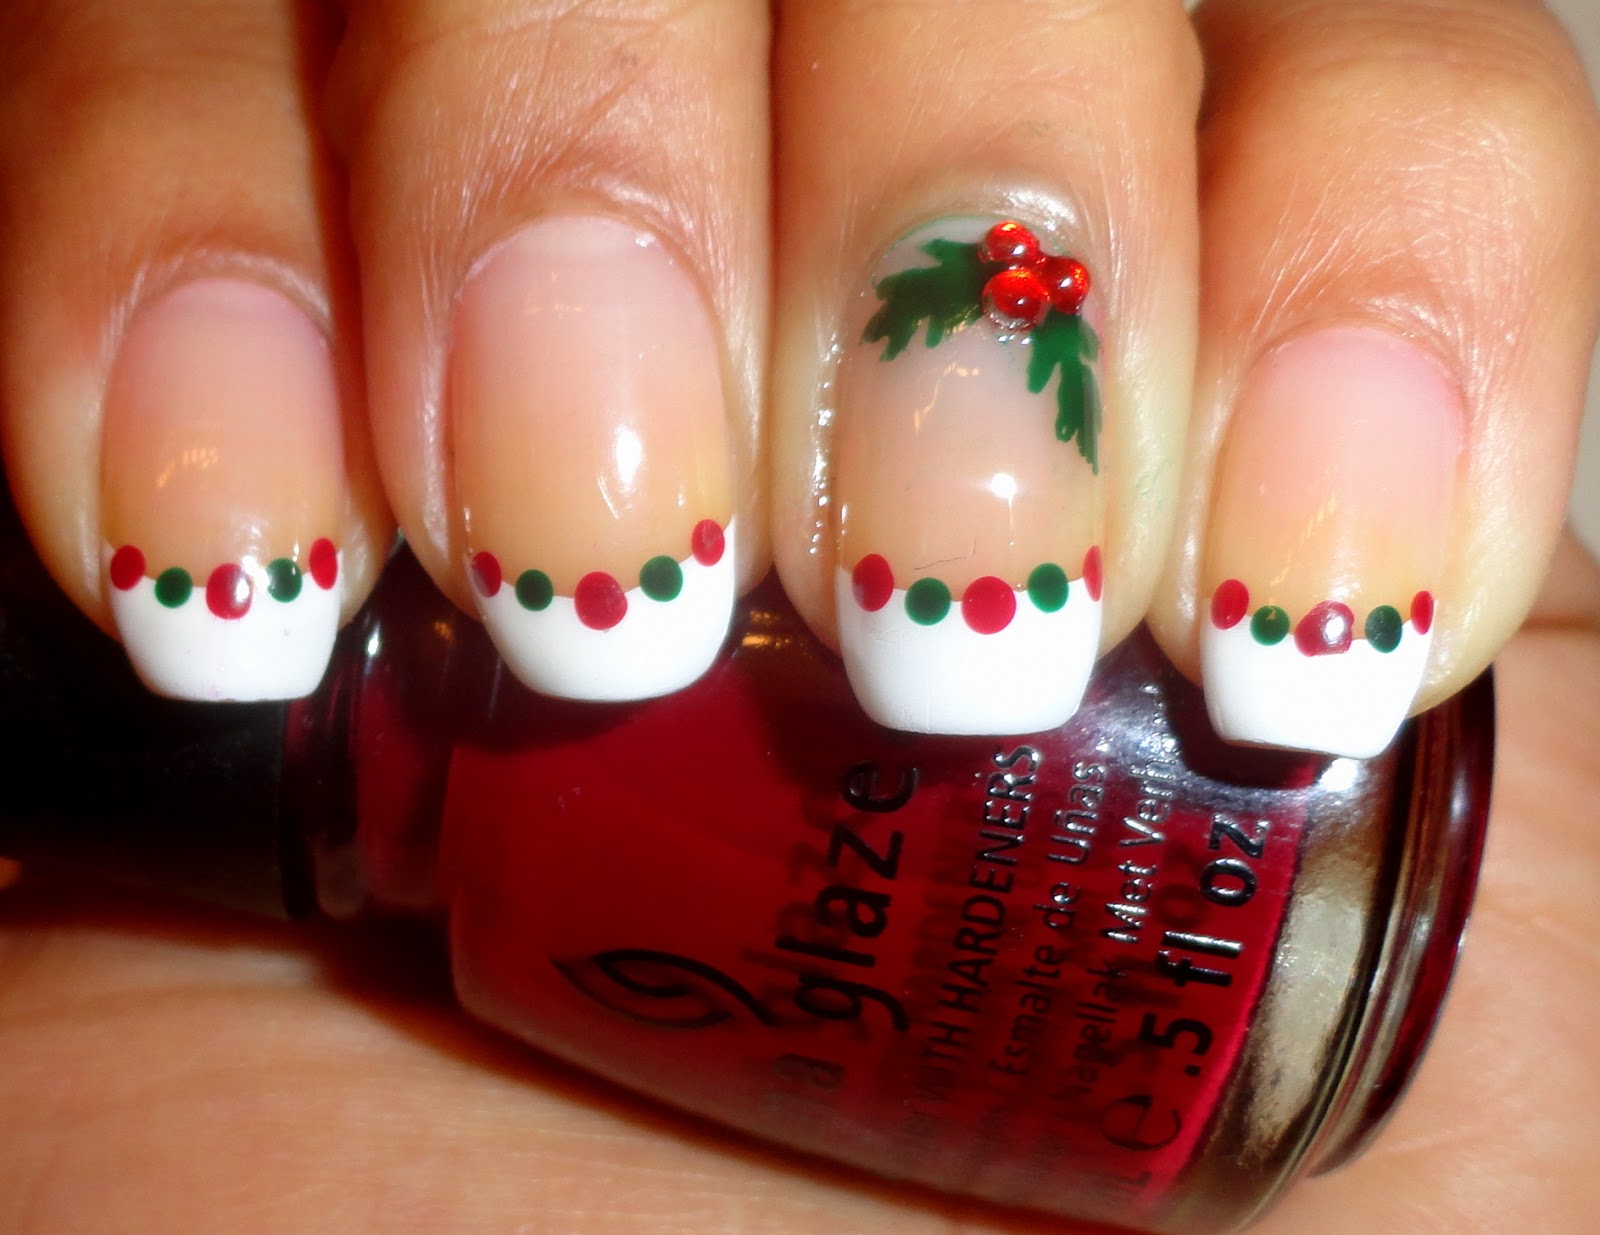
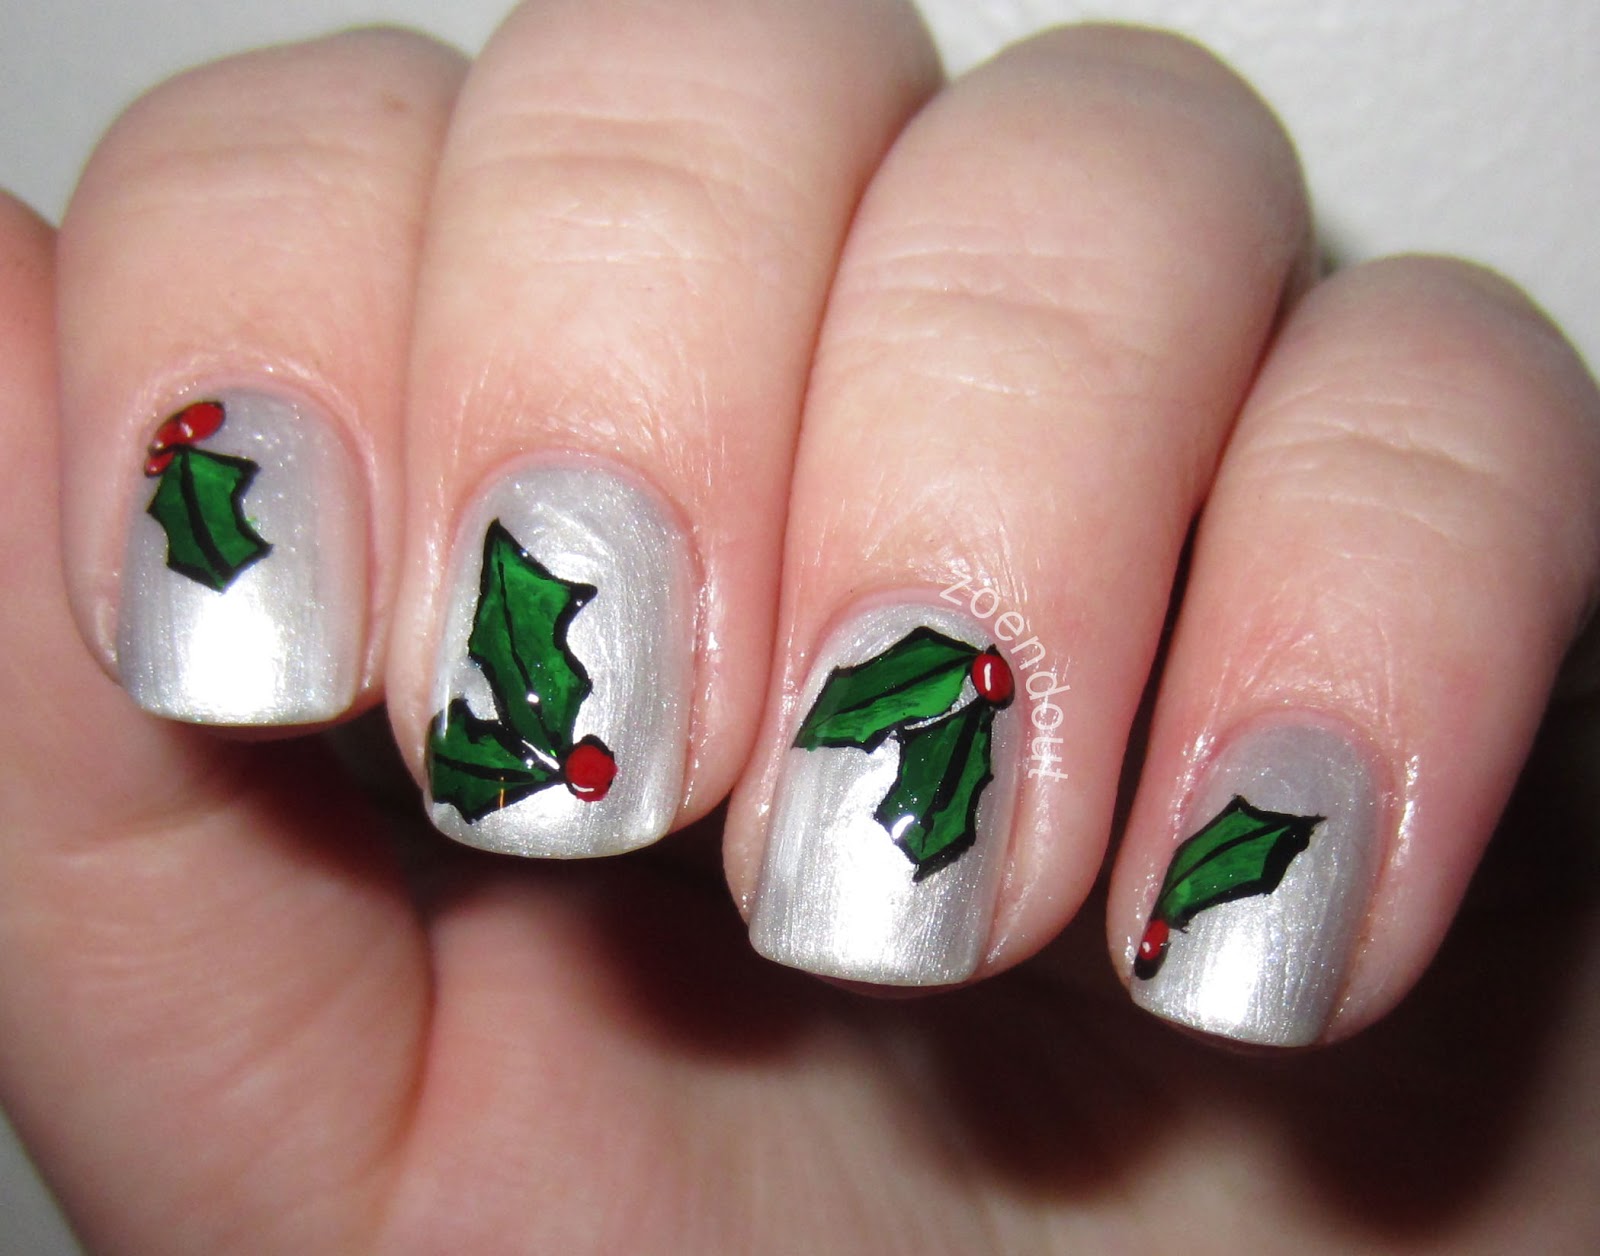
Add some sparkle and nature to your holiday nails with glittery holly and berries. This design is perfect for those who love traditional and festive nail art. Start with a red base coat and let it dry. Then, using a small brush or a toothpick, create holly leaves with green polish on your nails. Add berries with white polish or a sparkly red polish to give your design some shine. Once the design has dried, add some glitter to the leaves and berries for a sparkling effect. Finish off with a top coat to seal in your design and give your nails a festive finish. This design is perfect for those who want to add a touch of nature and glamour to their holiday nails.9. Glittery Holly and Berries Nails


9. Glittery Holly and Berries Nails


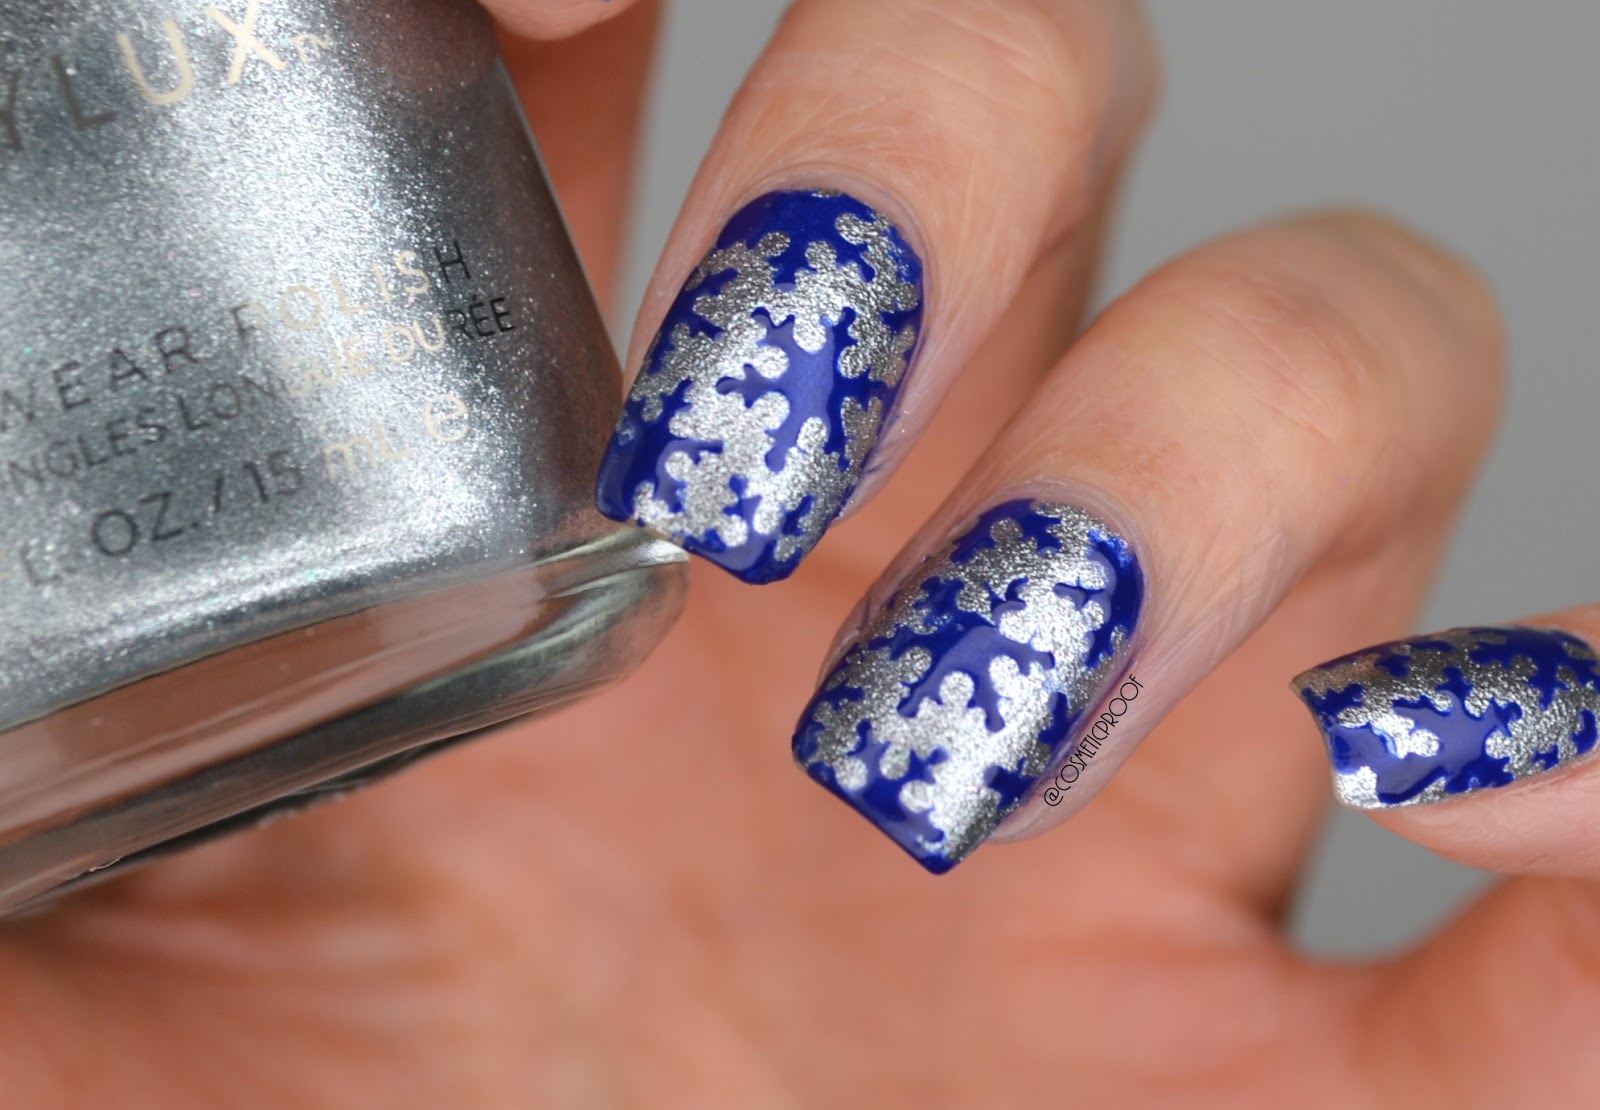
For a unique and wintry look, the snowy glitter ombre nails are the perfect choice. This design is perfect for those who love sparkly and subtle nail art. Start with a light blue base coat and let it dry. Then, using a makeup sponge, apply a sparkly polish or glitter at the tips of your nails and gently blend it towards the base to create an ombre effect. You can also use different shades of blue or white for a more snowy look. Finish off with a top coat to seal in your design and give your nails a glistening finish. This design will make your nails look like a snowy winter wonderland, and is perfect for the holiday season.10. Snowy Glitter Ombre Nails


10. Snowy Glitter Ombre Nails


Why Sparkly Christmas Nail Art is the Perfect Addition to Your Holiday Look

Add Some Sparkle to Your Nails this Christmas
 The holiday season is the perfect excuse to add some sparkle and shine to your everyday look, and what better way to do that than with sparkly Christmas nail art? With so many different designs and techniques to choose from, you can easily elevate your nail game and make a statement at all your holiday parties.
Get Festive with Christmas-Themed Designs
One of the best things about sparkly Christmas nail art is the endless options for festive designs. From candy cane stripes and snowflakes to Christmas tree and reindeer designs, you can easily incorporate the holiday spirit into your nails. These designs are not only fun and eye-catching but also a great conversation starter at any holiday gathering.
The holiday season is the perfect excuse to add some sparkle and shine to your everyday look, and what better way to do that than with sparkly Christmas nail art? With so many different designs and techniques to choose from, you can easily elevate your nail game and make a statement at all your holiday parties.
Get Festive with Christmas-Themed Designs
One of the best things about sparkly Christmas nail art is the endless options for festive designs. From candy cane stripes and snowflakes to Christmas tree and reindeer designs, you can easily incorporate the holiday spirit into your nails. These designs are not only fun and eye-catching but also a great conversation starter at any holiday gathering.
Make a Statement with Glitter and Rhinestones
 Nothing says sparkle like glitter and rhinestones, and they are a must-have for any Christmas nail art design. Whether you opt for a full glitter nail or add some rhinestone accents, these elements will instantly add a touch of glamour to your holiday look. Plus, with all the different colors and sizes available, you can create a unique and personalized design that is sure to stand out.
Complete Your Holiday Outfit
Don't underestimate the power of a good manicure when it comes to completing your holiday outfit. Sparkly Christmas nail art can tie your whole look together and add that extra touch of holiday spirit. Whether you're dressed up for a formal event or keeping it casual with a cozy sweater and jeans, your nails will add the perfect finishing touch.
Nothing says sparkle like glitter and rhinestones, and they are a must-have for any Christmas nail art design. Whether you opt for a full glitter nail or add some rhinestone accents, these elements will instantly add a touch of glamour to your holiday look. Plus, with all the different colors and sizes available, you can create a unique and personalized design that is sure to stand out.
Complete Your Holiday Outfit
Don't underestimate the power of a good manicure when it comes to completing your holiday outfit. Sparkly Christmas nail art can tie your whole look together and add that extra touch of holiday spirit. Whether you're dressed up for a formal event or keeping it casual with a cozy sweater and jeans, your nails will add the perfect finishing touch.
DIY or Leave it to the Professionals
 While some may prefer to go to a nail salon for their Christmas nail art, others may want to try their hand at creating their own festive designs at home. With the right tools and a little bit of patience, you can achieve a stunning look that will make you feel like a holiday queen. However, if you're not confident in your nail art skills, it's always best to leave it to the professionals to ensure a flawless and long-lasting result.
In Conclusion
Sparkly Christmas nail art is a fun and festive way to add some holiday spirit to your look. With the endless design options and the ability to DIY or go to a salon, there's no excuse not to add some sparkle to your nails this holiday season. So go ahead and get creative with your nail art and make a statement at all your Christmas events.
While some may prefer to go to a nail salon for their Christmas nail art, others may want to try their hand at creating their own festive designs at home. With the right tools and a little bit of patience, you can achieve a stunning look that will make you feel like a holiday queen. However, if you're not confident in your nail art skills, it's always best to leave it to the professionals to ensure a flawless and long-lasting result.
In Conclusion
Sparkly Christmas nail art is a fun and festive way to add some holiday spirit to your look. With the endless design options and the ability to DIY or go to a salon, there's no excuse not to add some sparkle to your nails this holiday season. So go ahead and get creative with your nail art and make a statement at all your Christmas events.


