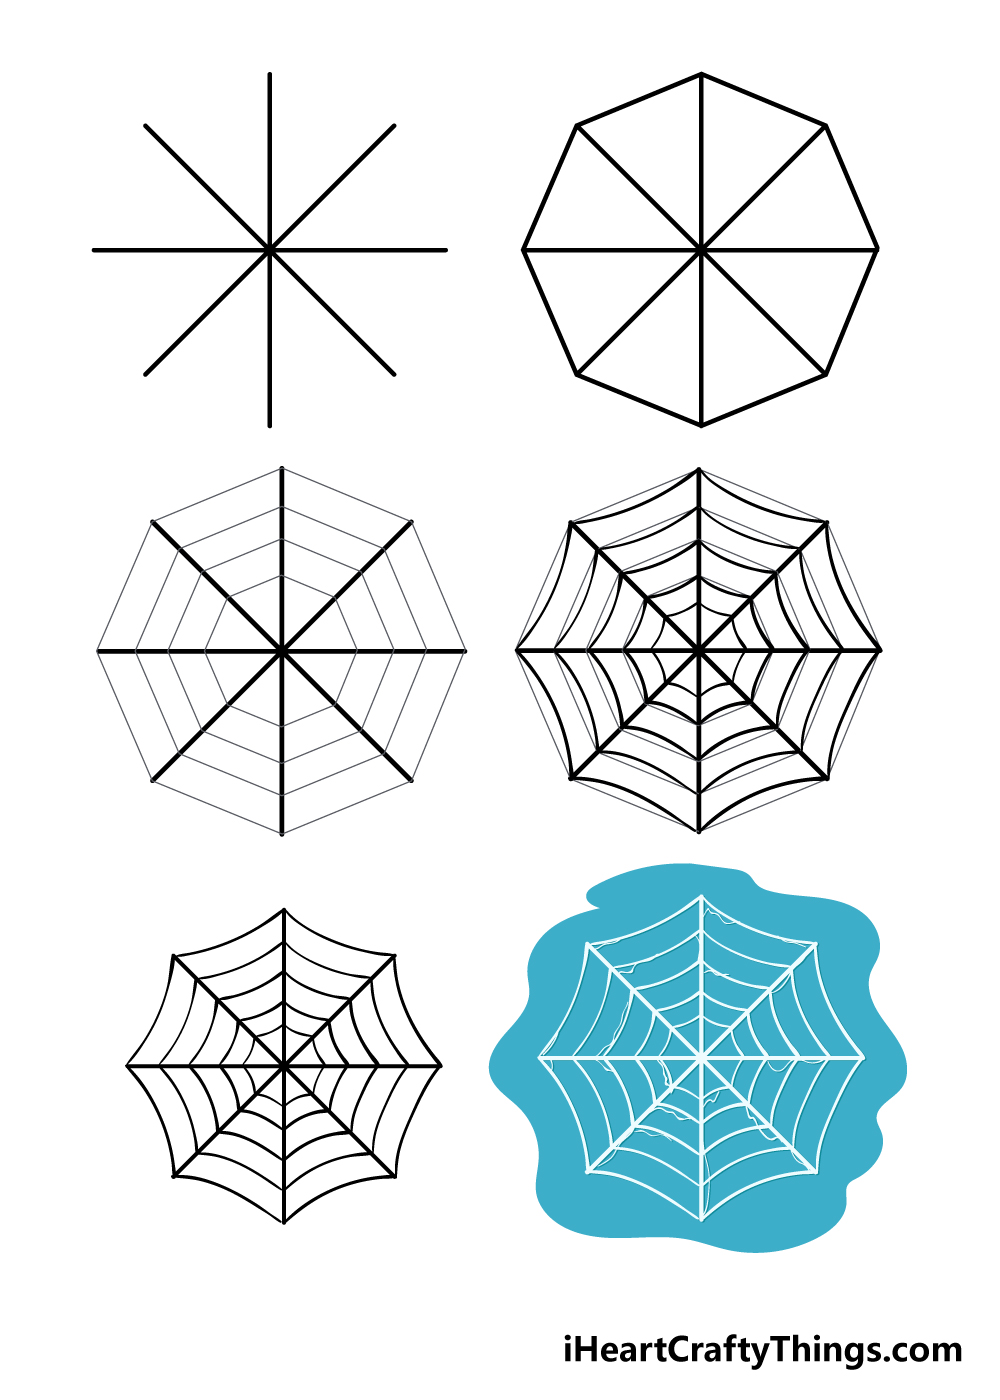
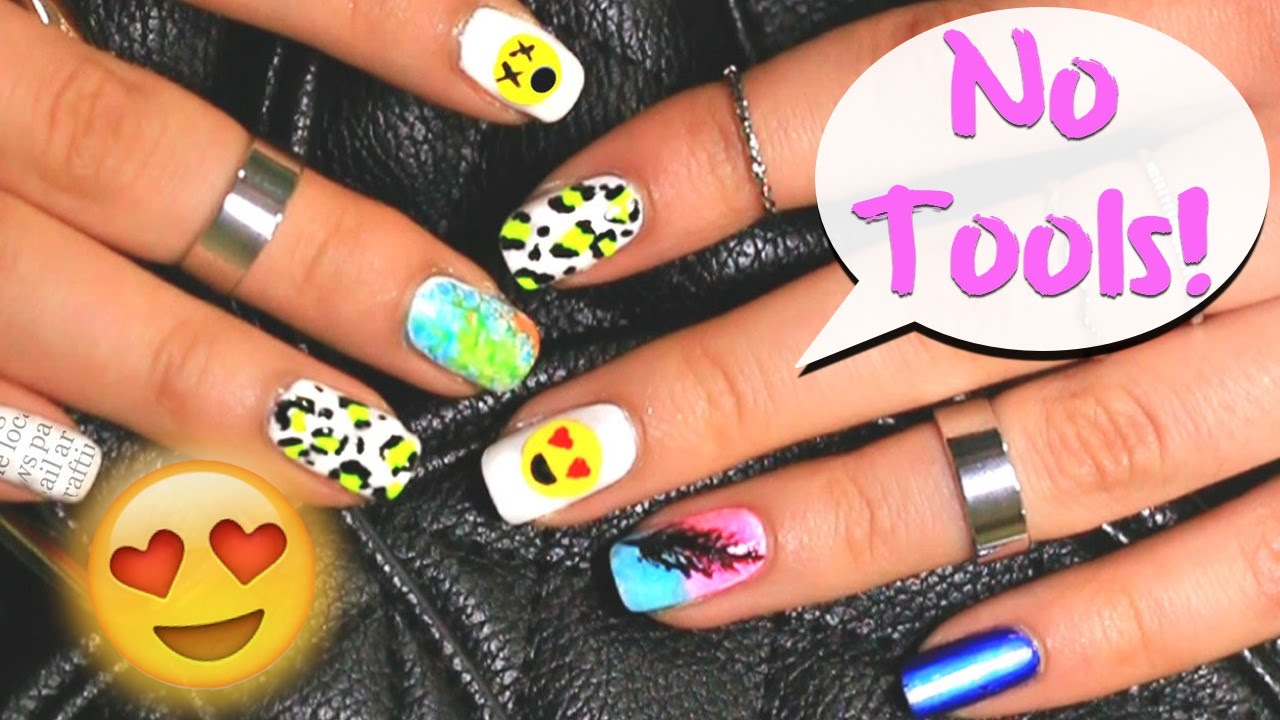
If you're a beginner in the world of nail art, creating intricate designs like a spider web may seem daunting. But fear not, because this easy spider web nail art tutorial is perfect for those just starting out. All you need is a steady hand and a few basic tools to achieve this spooky and stylish look. Featured keywords: easy spider web nail art, nail art for beginners1. Easy Spider Web Nail Art Tutorial | Nail Art For Beginners


1. Easy Spider Web Nail Art Tutorial


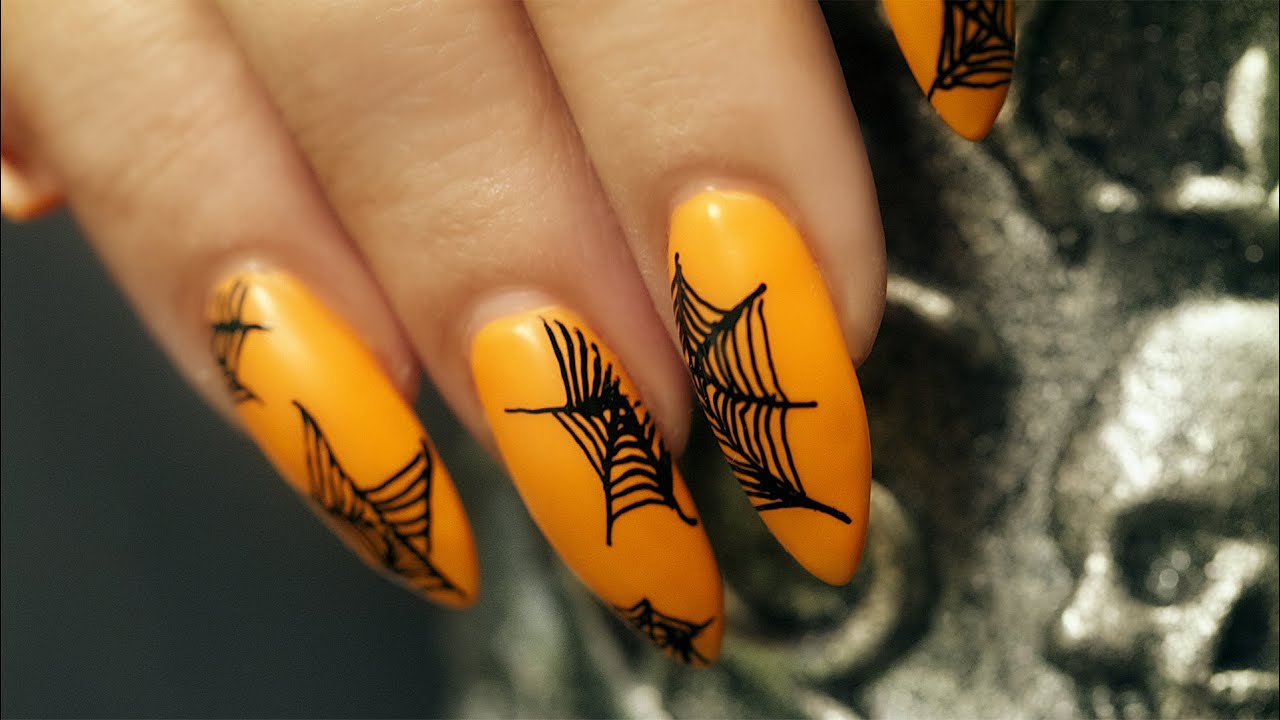
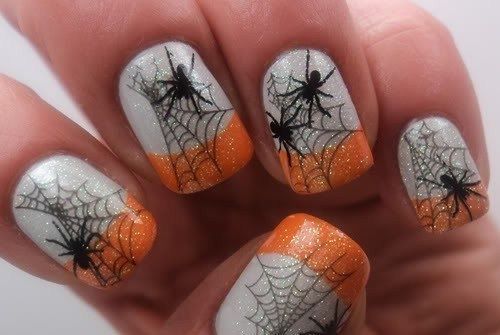
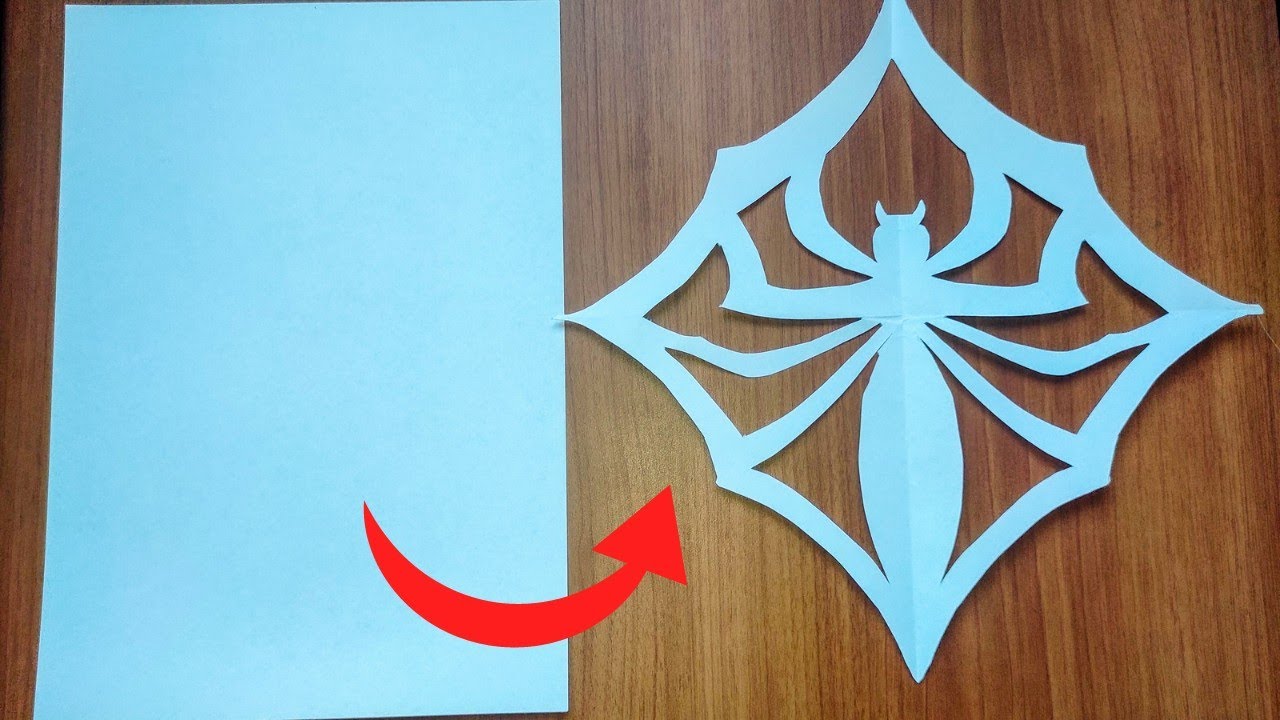
Looking for a fun and festive way to spice up your nails for Halloween? This DIY spider web nail art tutorial is the perfect choice. With just a few simple steps, you'll have spooktacular nails that are sure to impress. Plus, you can customize the colors to match your costume or the overall theme of your Halloween look. Featured keywords: DIY spider web nail art, Halloween nails2. DIY Spider Web Nail Art Tutorial | Halloween Nails

Nail Art For Beginners


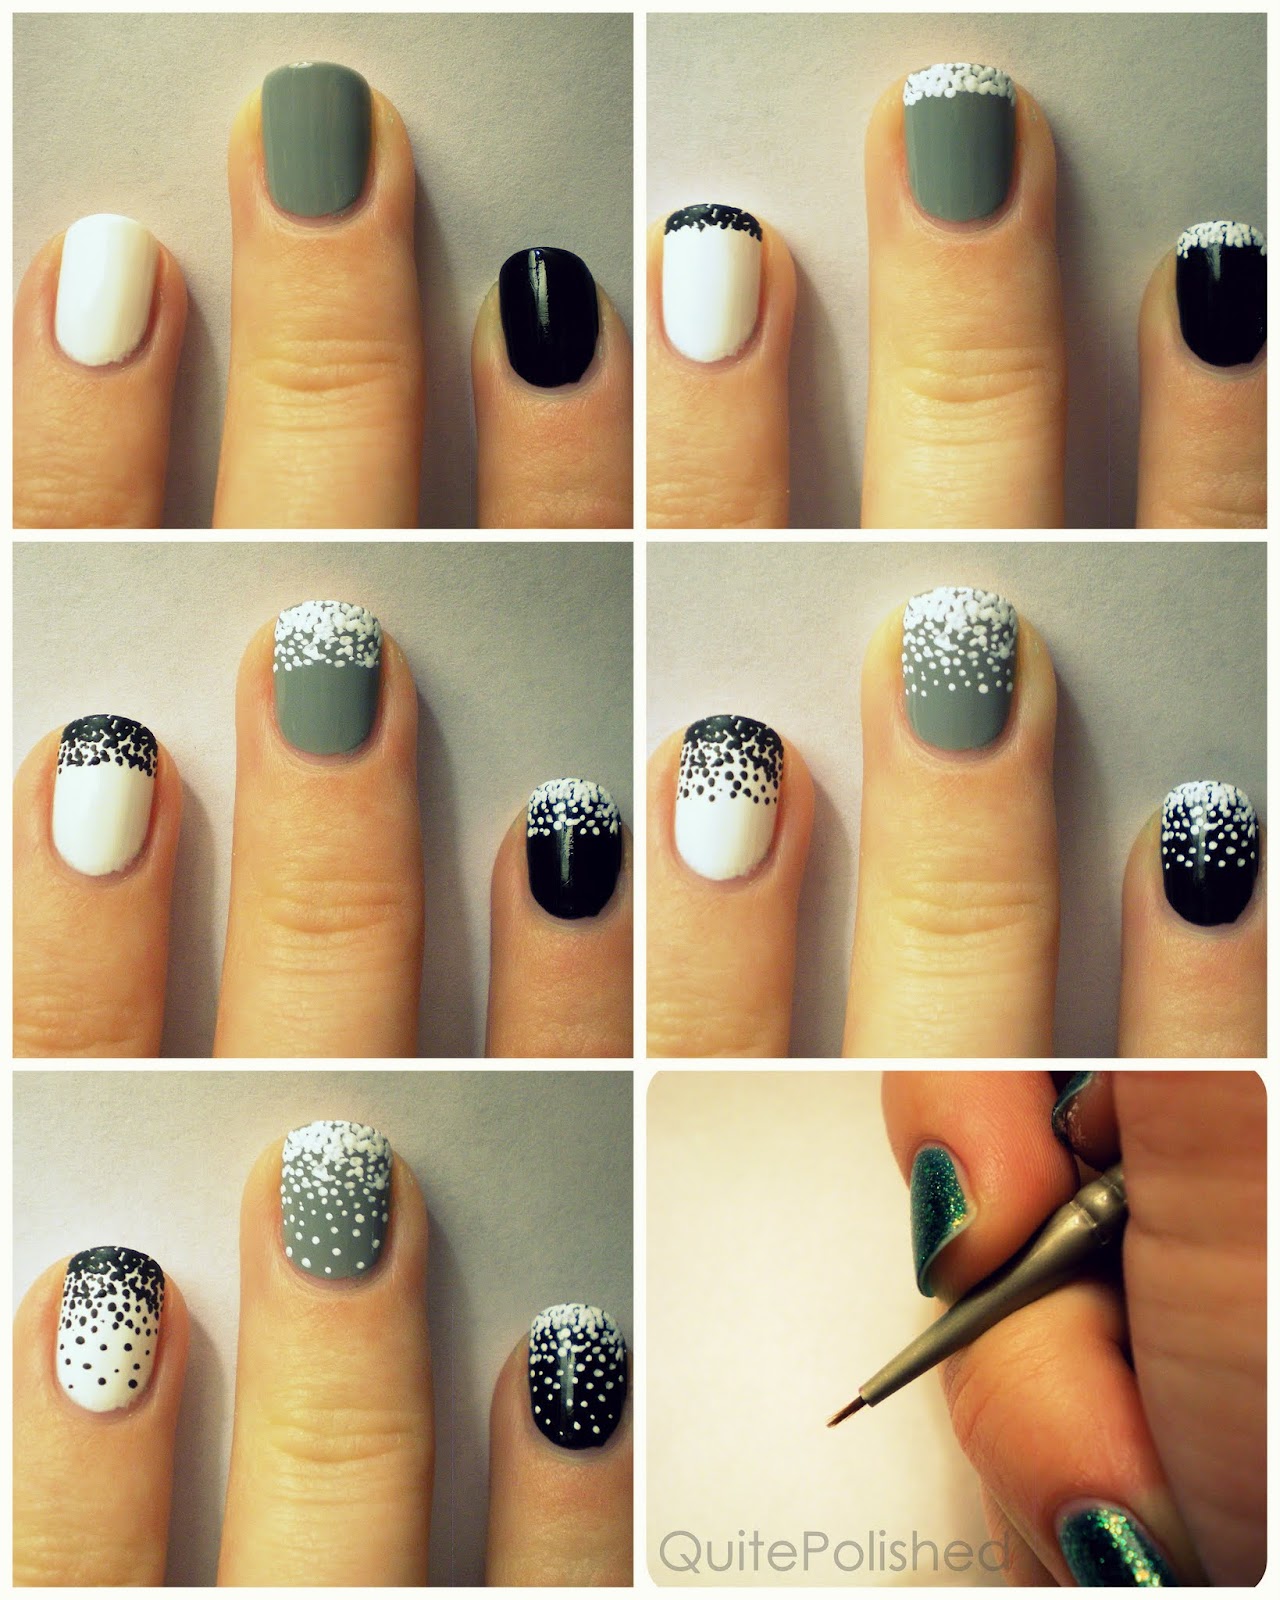
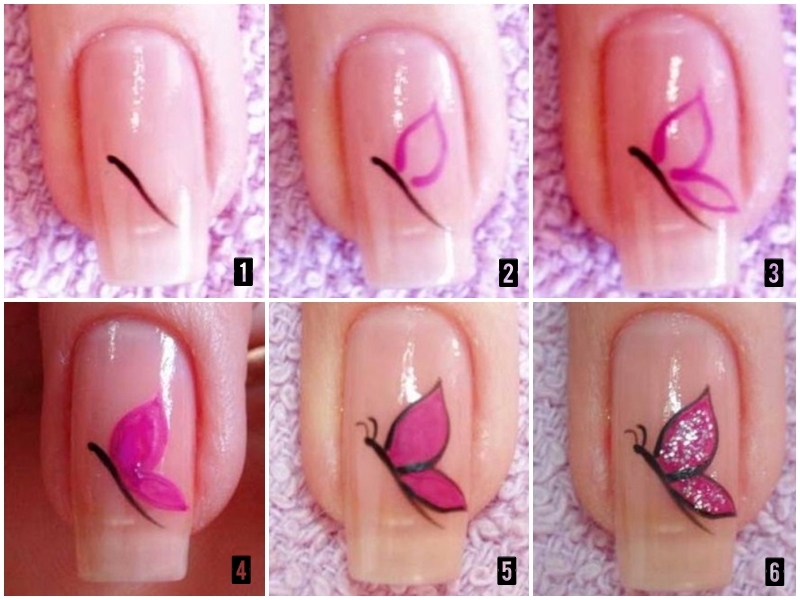
If you're a visual learner, this step by step tutorial on how to create a spider web nail art design is perfect for you. With detailed instructions and accompanying images, you'll be able to recreate this look with ease. Plus, you'll have the added satisfaction of creating a professional-looking design on your own nails. Featured keywords: spider web nail art design, step by step tutorial3. How to Create a Spider Web Nail Art Design | Step by Step Tutorial

2. DIY Spider Web Nail Art Tutorial
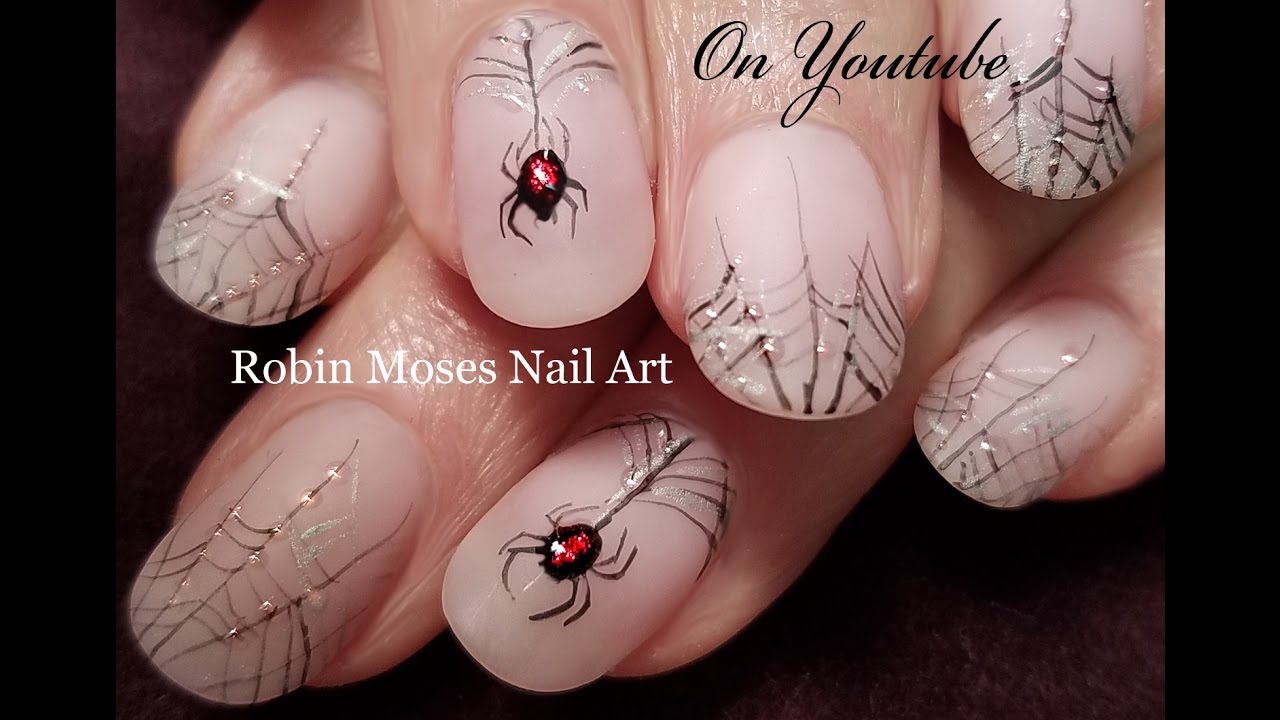
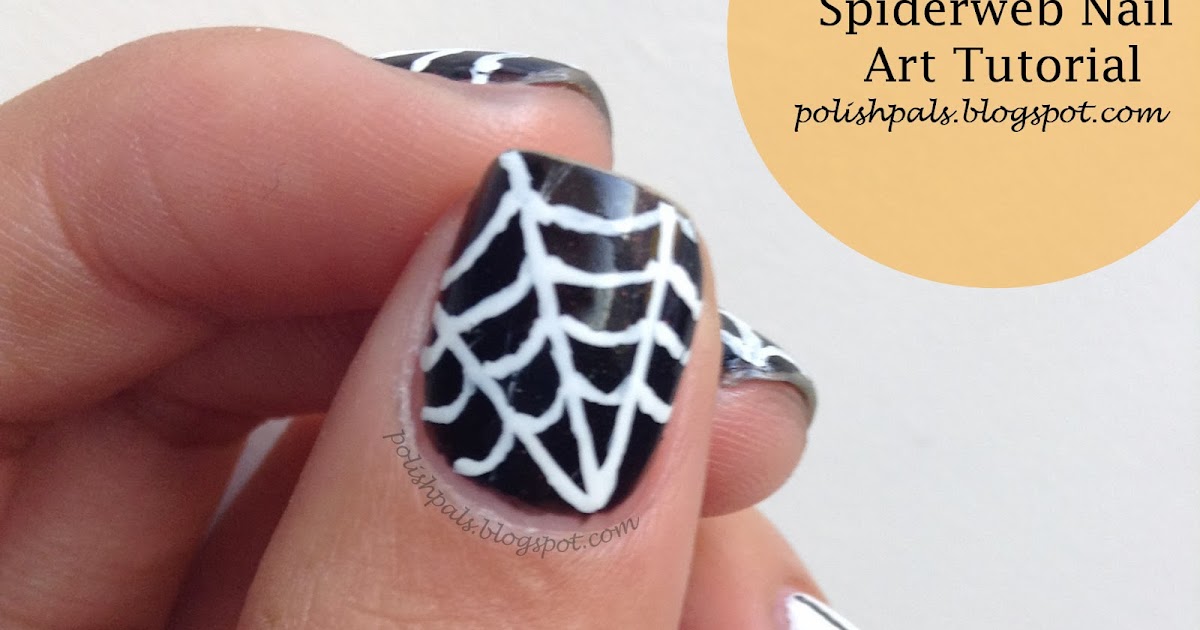
Don't have any fancy nail art tools? No problem! This spider web nail art tutorial uses a simple household item – a toothpick – to create the intricate design. It's perfect for those who want to try out a new technique without investing in expensive tools. And the best part? You likely already have a toothpick lying around in your kitchen. Featured keywords: spider web nail art using a toothpick, no tools needed4. Spider Web Nail Art Tutorial Using a Toothpick | No Tools Needed


Halloween Nails


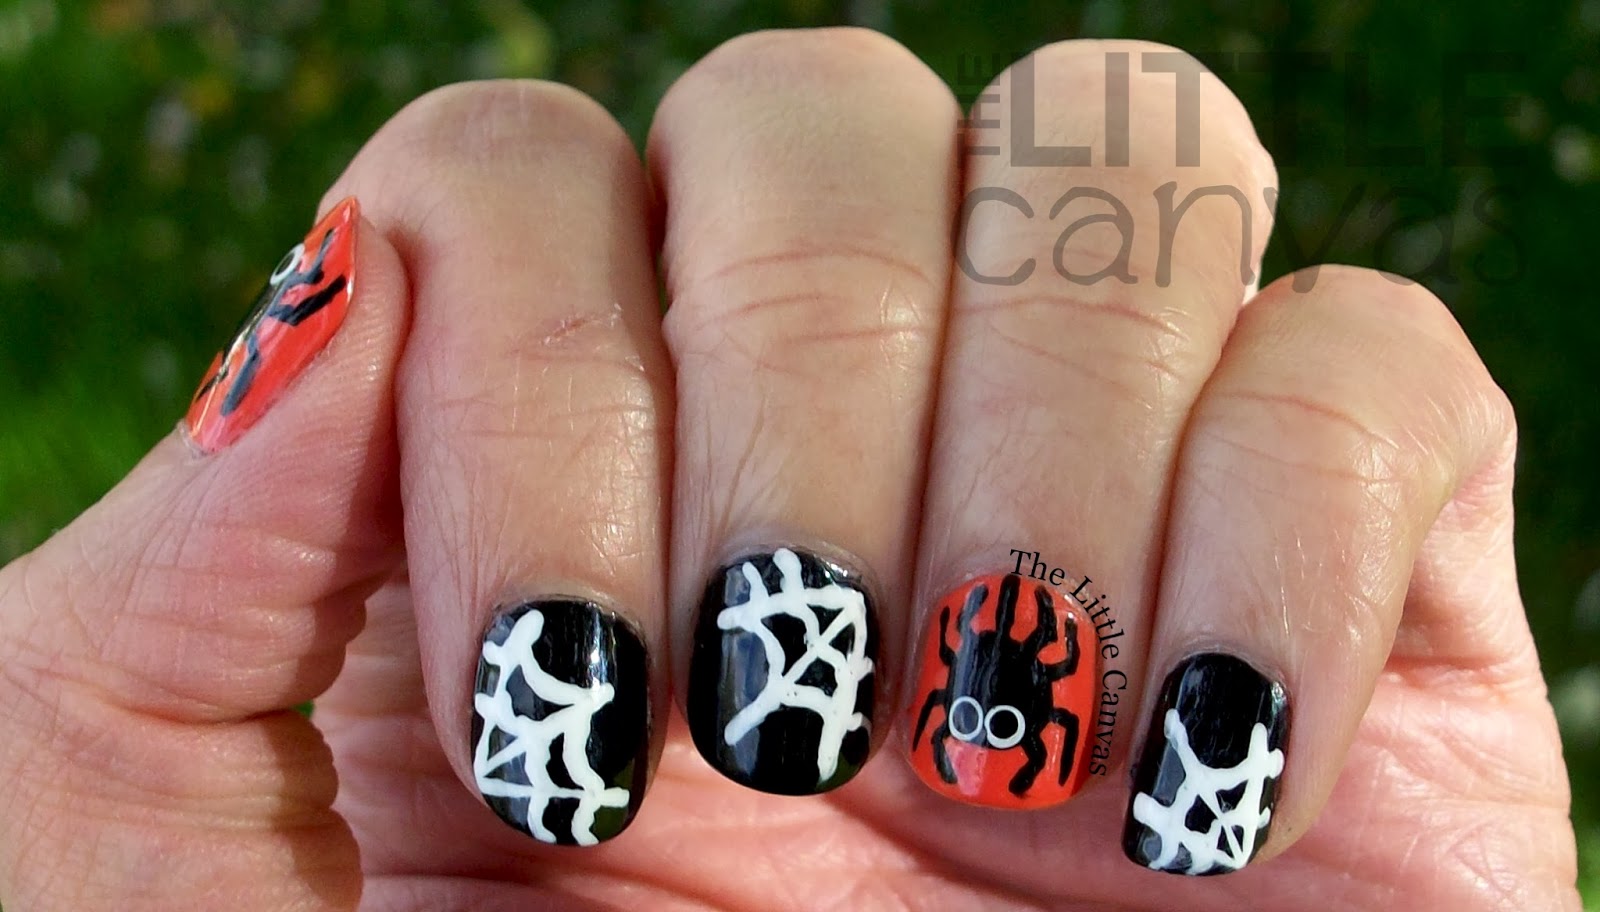
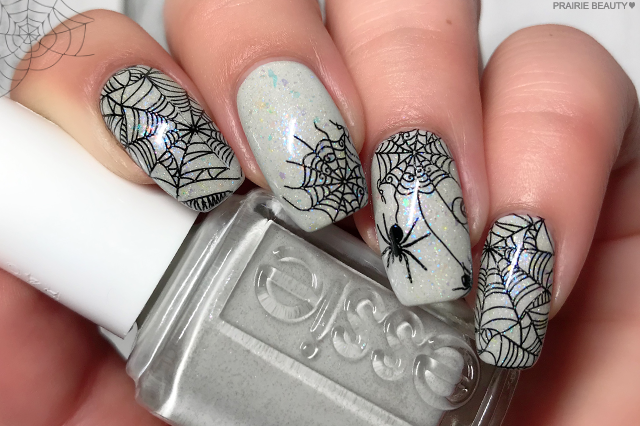
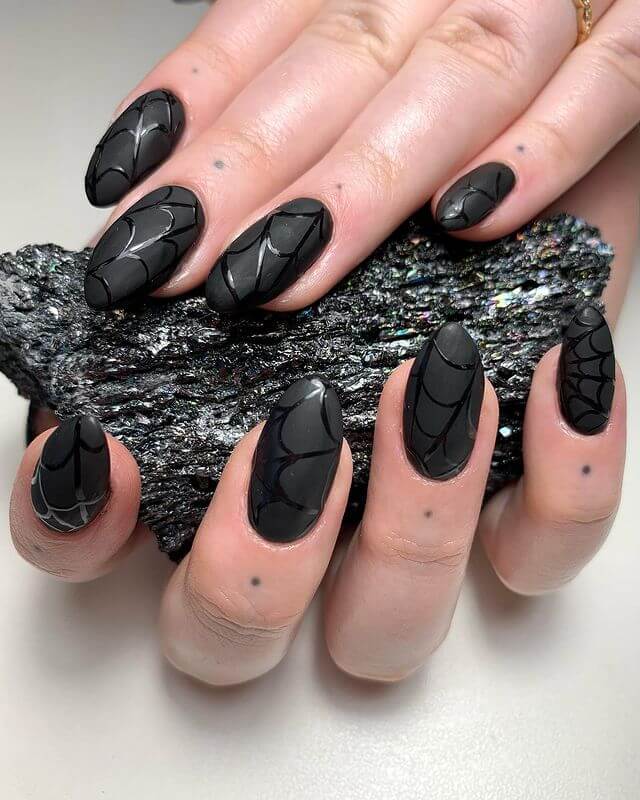
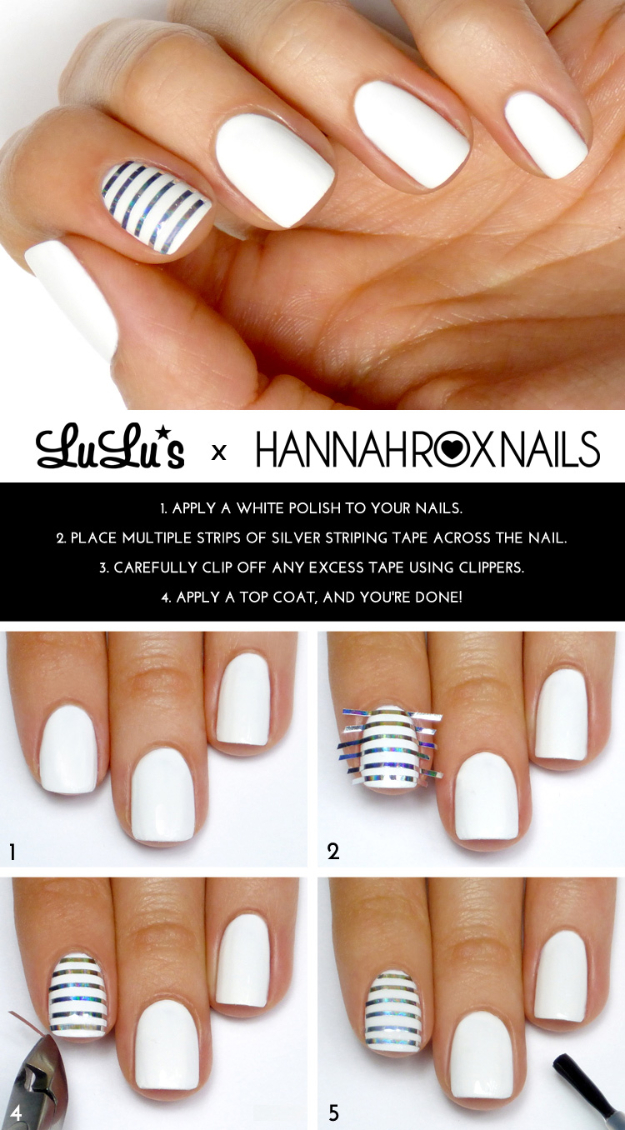
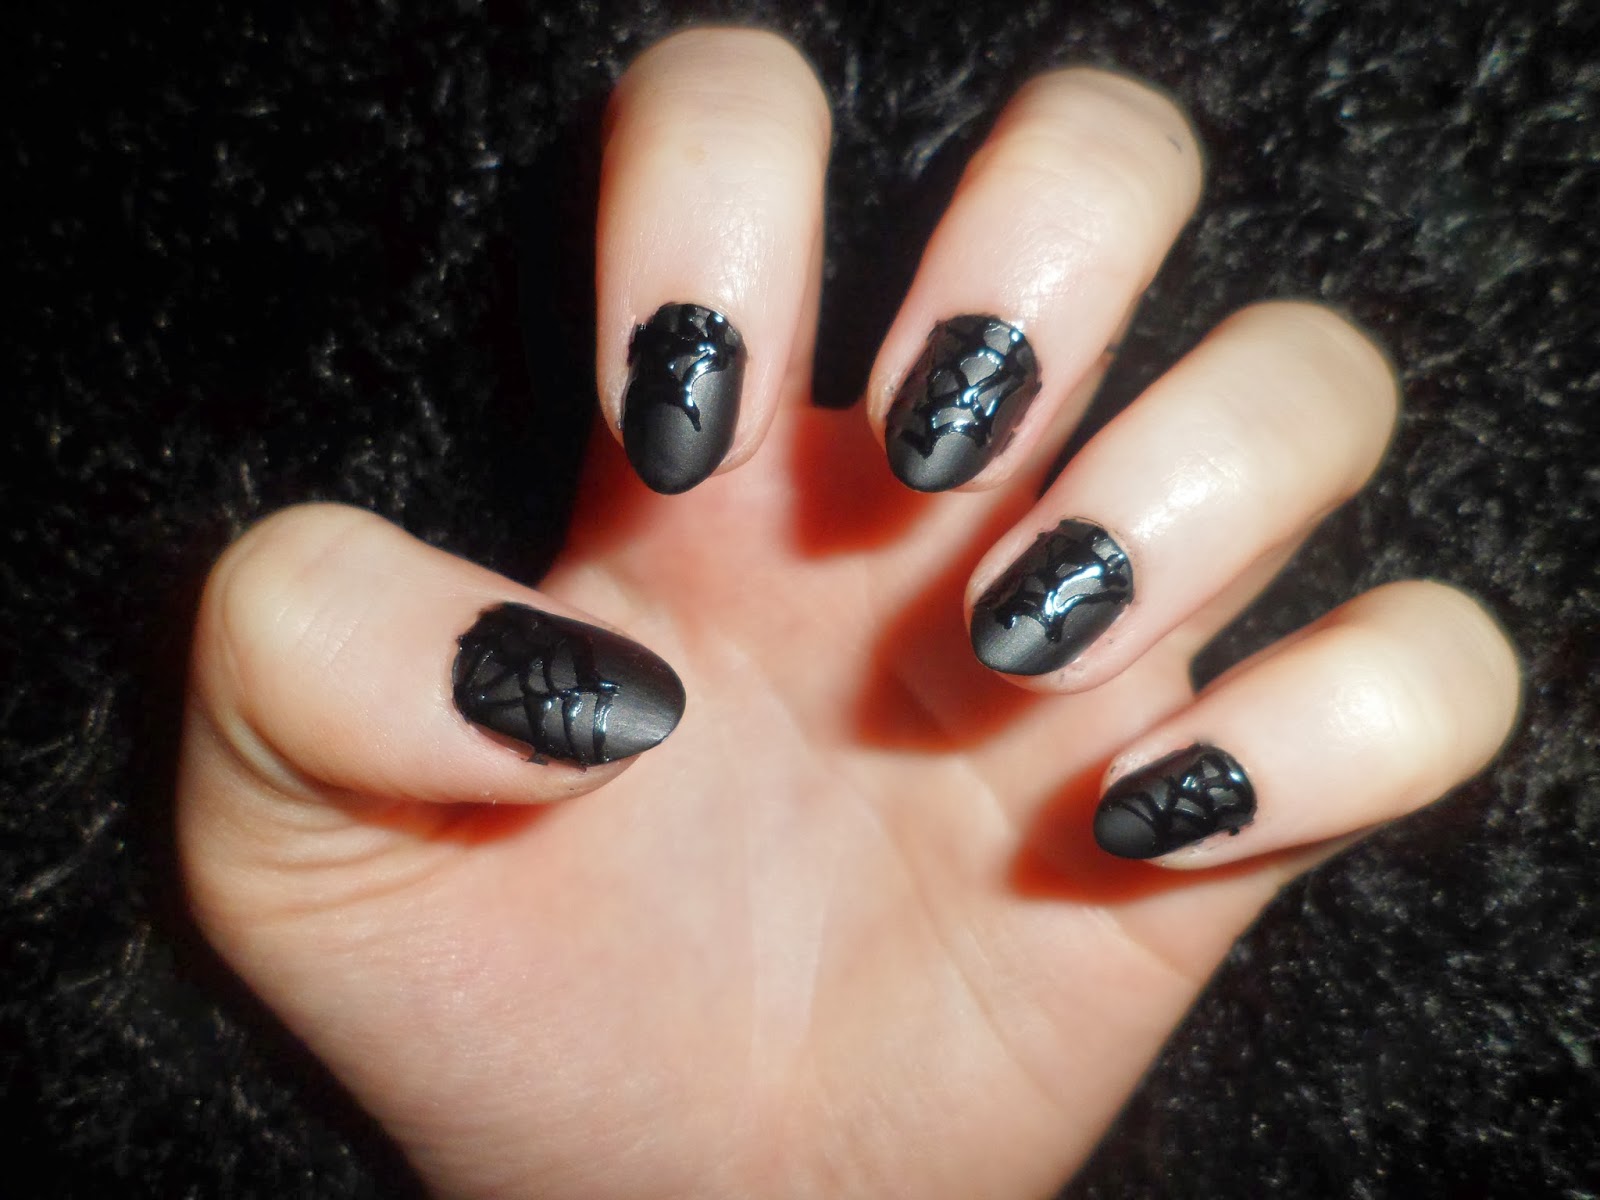
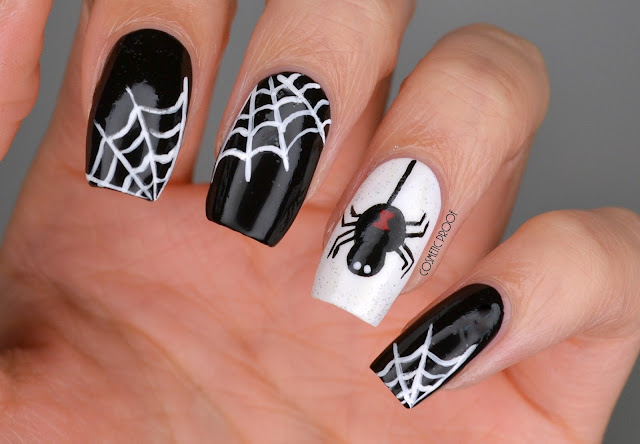
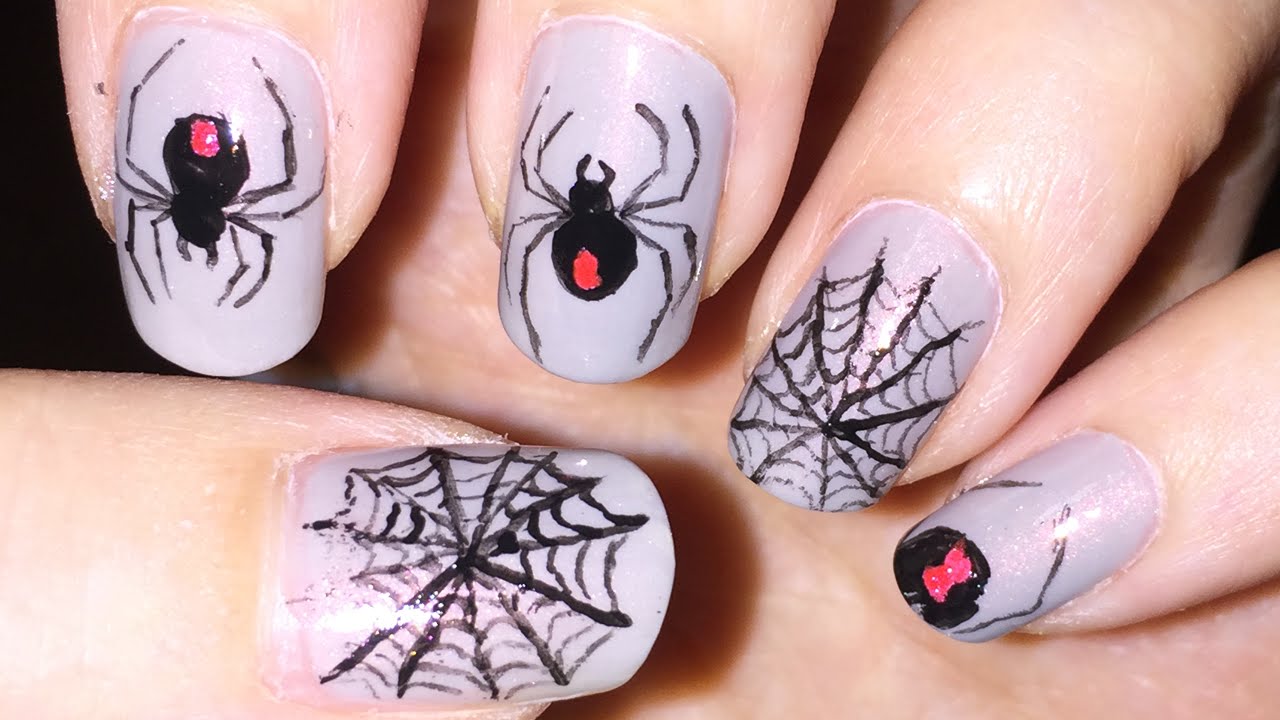
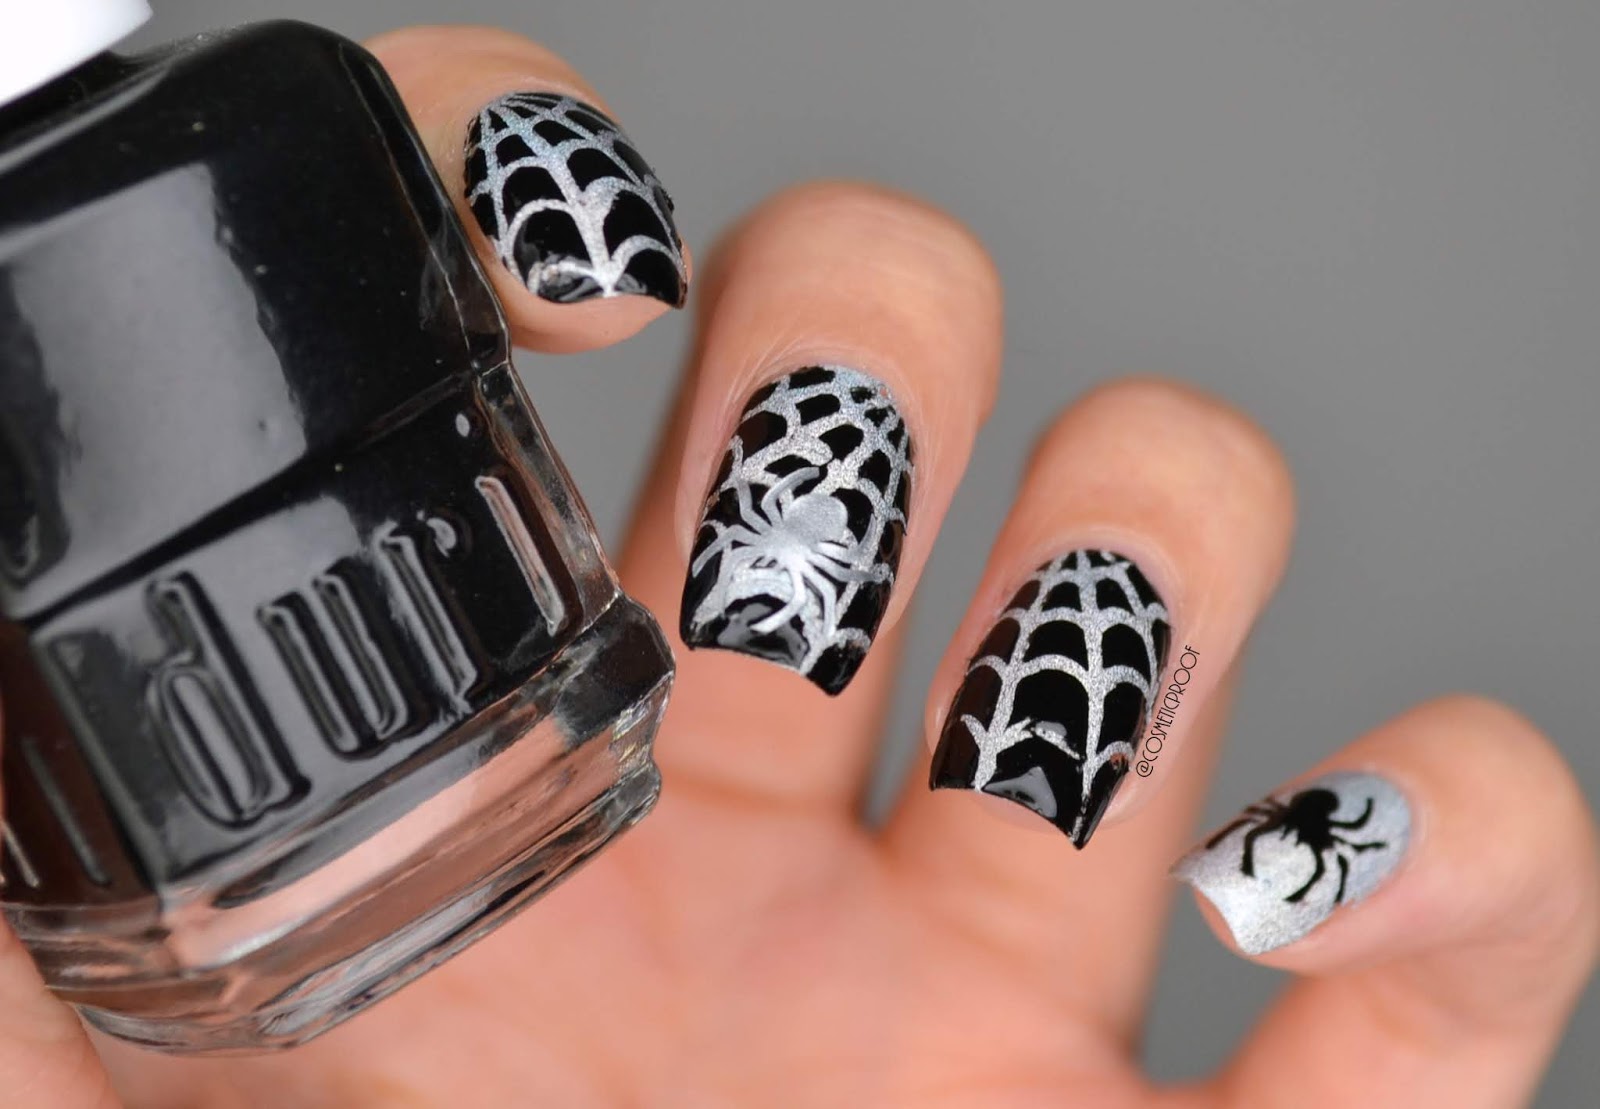
If you prefer a more minimalist approach to nail art, this black and white spider web nail art tutorial is for you. With just two colors, you can create a striking and chic design that is perfect for any occasion. Plus, the monochromatic look adds a touch of elegance to the spooky spider web design. Featured keywords: black and white spider web nail art, minimalist nails5. Black and White Spider Web Nail Art Tutorial | Minimalist Nails

3. How to Create a Spider Web Nail Art Design

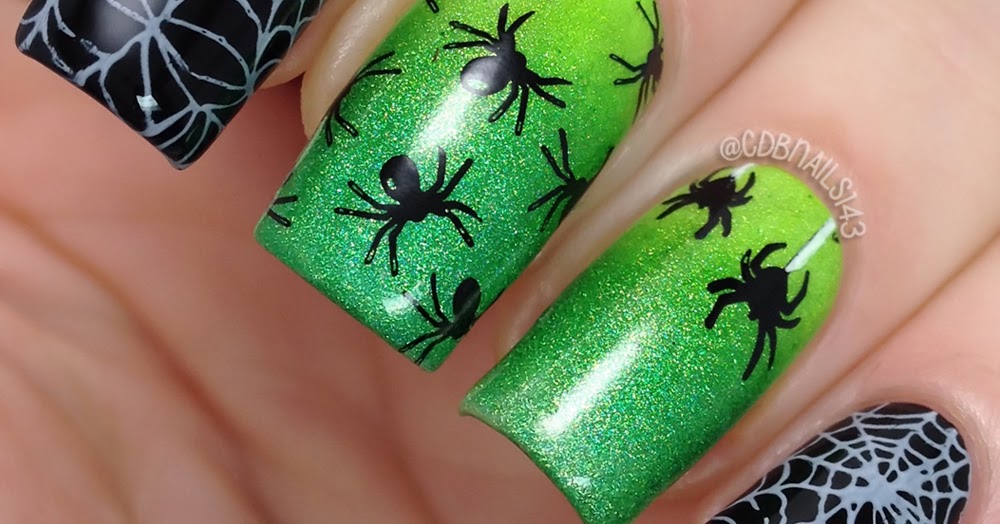
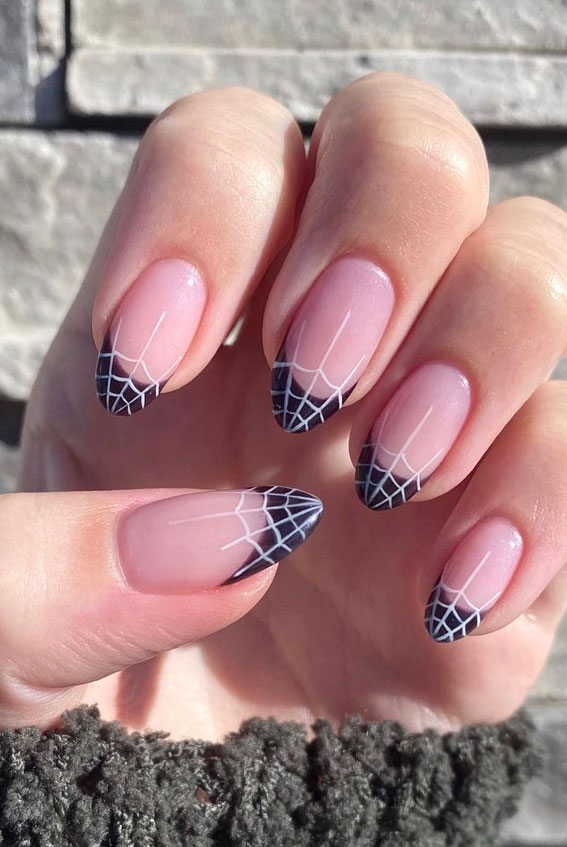
Ombre nails are all the rage, and this gradient spider web nail art tutorial combines two popular trends into one stunning design. By blending different shades of the same color, you can create a unique and eye-catching spider web design on your nails. This look is perfect for those who want to make a statement with their nails. Featured keywords: gradient spider web nail art, ombre nails6. Gradient Spider Web Nail Art Tutorial | Ombre Nails

Step by Step Tutorial


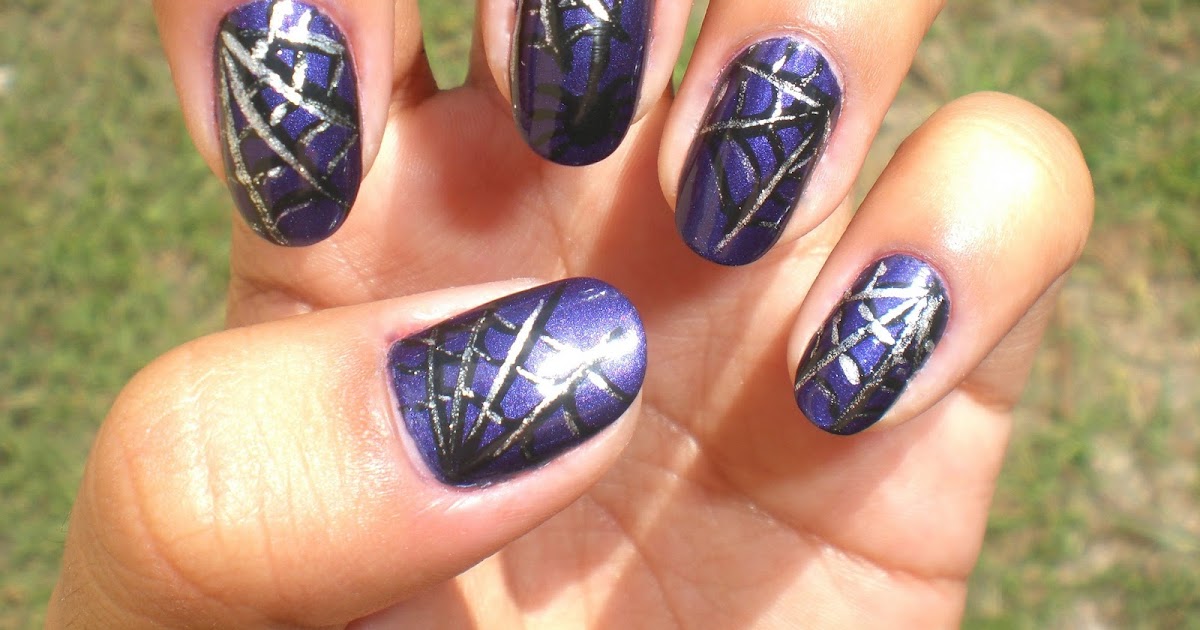
If you're a fan of acrylic nails, this 3D spider web nail art tutorial is a must-try. By using acrylic powder and a small brush, you can add dimension and texture to your spider web design, making it truly stand out. This technique may take a bit more time and practice, but the end result is worth it. Featured keywords: 3D spider web nail art, acrylic nails7. 3D Spider Web Nail Art Tutorial | Acrylic Nails

4. Spider Web Nail Art Tutorial Using a Toothpick


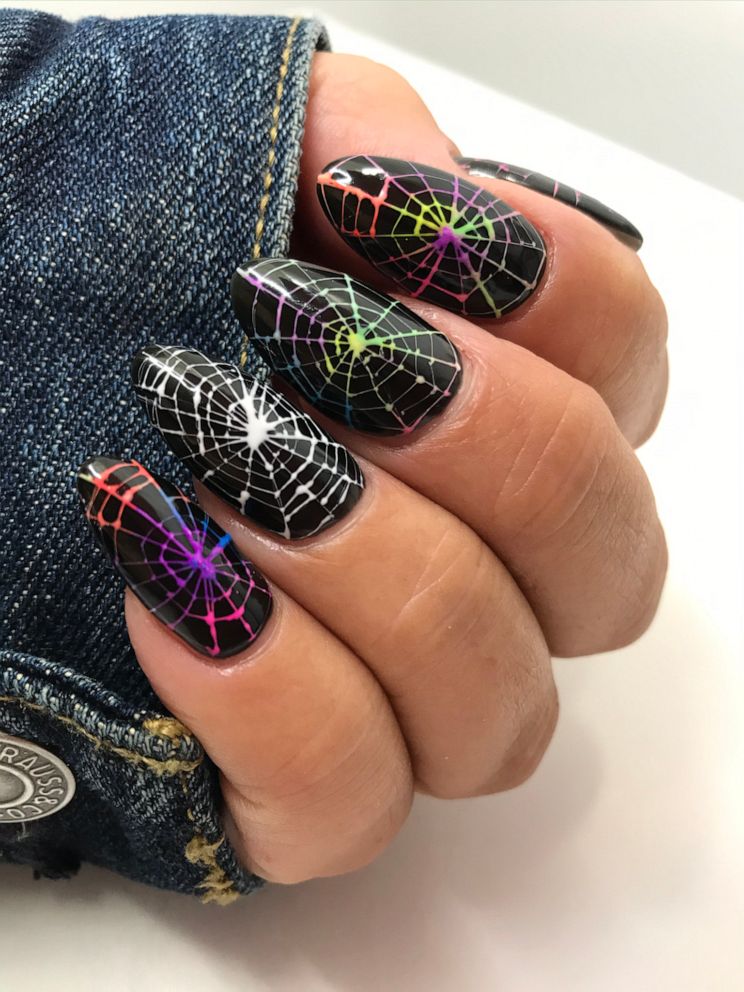
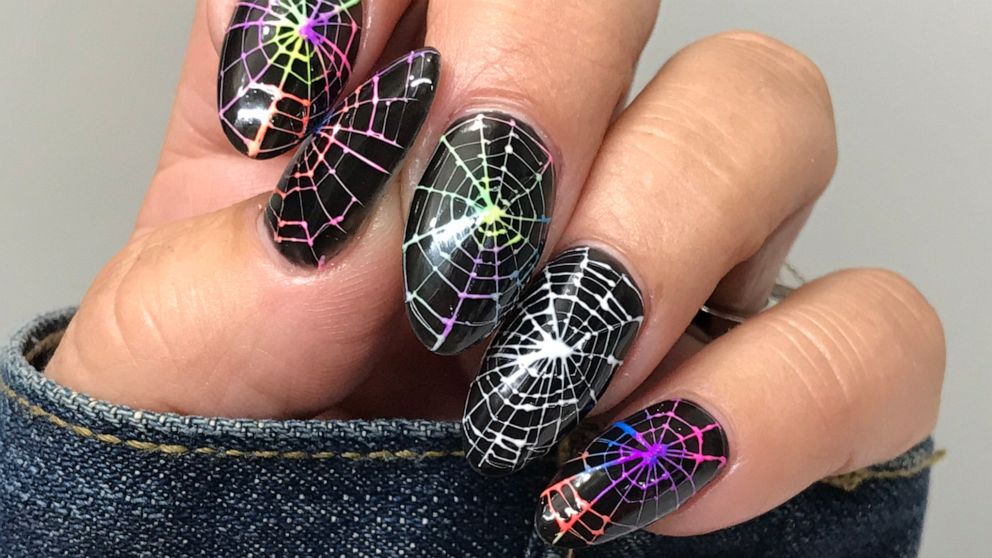
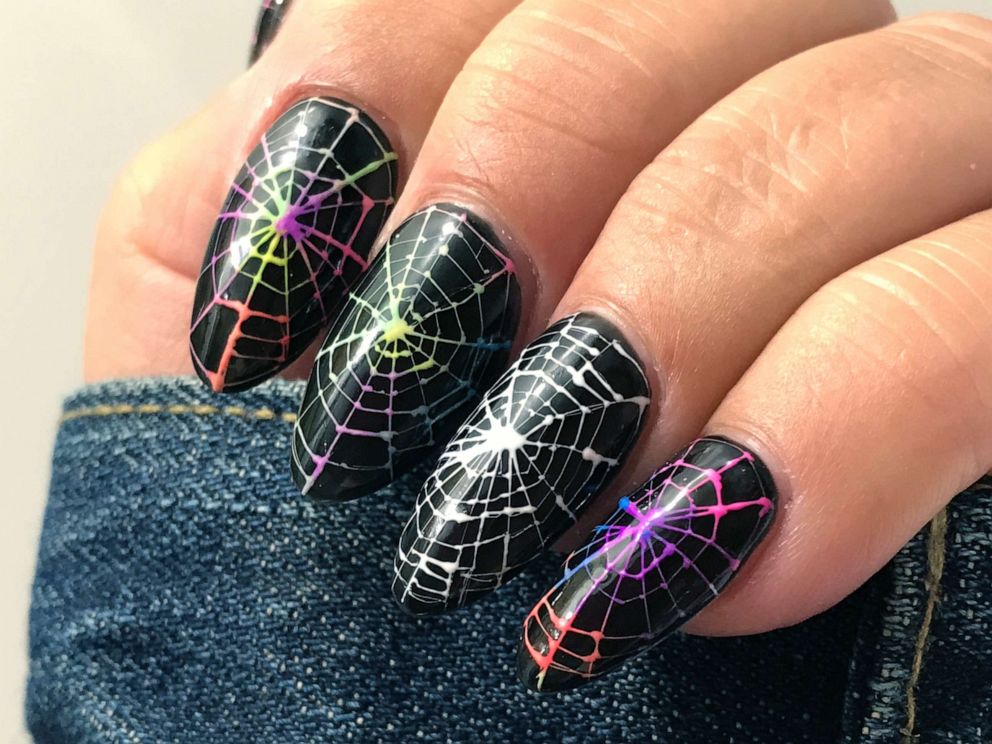
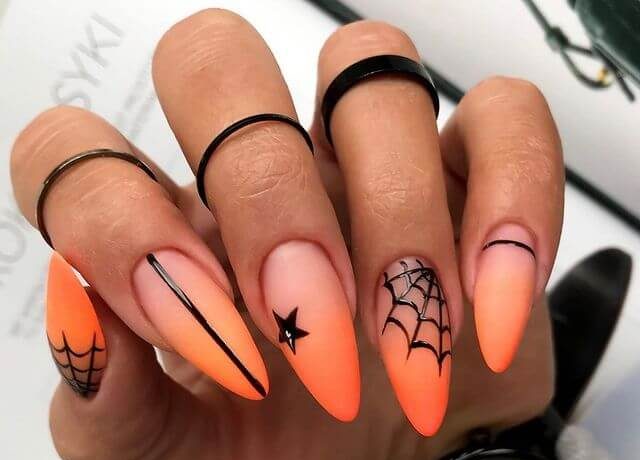
For those who love bold and bright colors, this neon spider web nail art tutorial is the perfect choice. Using vibrant shades, you can create a fun and playful take on the classic spider web design. This look is perfect for parties, festivals, or any time you want to make a statement with your nails. Featured keywords: neon spider web nail art, bright and bold nails8. Neon Spider Web Nail Art Tutorial | Bright and Bold Nails


No Tools Needed


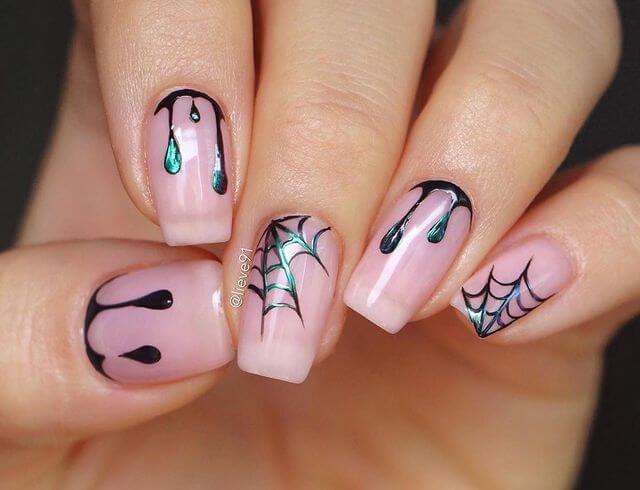
Who doesn't love a bit of sparkle on their nails? This glitter spider web nail art tutorial is the perfect way to add some shimmer and shine to your nail look. You can use any color of glitter you'd like to create a unique and personalized design. And with the upcoming holiday season, this is the perfect look for any festive occasion. Featured keywords: glitter spider web nail art, sparkly nails9. Glitter Spider Web Nail Art Tutorial | Sparkly Nails

5. Black and White Spider Web Nail Art Tutorial

If you prefer a more subtle and understated look, this matte spider web nail art tutorial is the perfect choice. By using a matte top coat, you can transform a glossy design into a sophisticated and chic look. This is a great option for those who want to add a touch of Halloween to their nails without going over the top. Featured keywords: matte spider web nail art, matte nails10. Matte Spider Web Nail Art Tutorial | Matte Nails


Minimalist Nails


Creating a Spooky Look with Spiderweb Nail Art

Unleash Your Creativity
 When it comes to
nail art
, the possibilities are endless. From simple and elegant designs to bold and intricate patterns, there is something for everyone. However, if you want to add a touch of spookiness to your
nail design
, why not try out spiderweb nail art? This
seasonal nail trend
is perfect for Halloween or any
spooky-themed event
. With a few simple steps, you can create a
hauntingly beautiful
look that will surely turn heads.
When it comes to
nail art
, the possibilities are endless. From simple and elegant designs to bold and intricate patterns, there is something for everyone. However, if you want to add a touch of spookiness to your
nail design
, why not try out spiderweb nail art? This
seasonal nail trend
is perfect for Halloween or any
spooky-themed event
. With a few simple steps, you can create a
hauntingly beautiful
look that will surely turn heads.
Gather Your Supplies
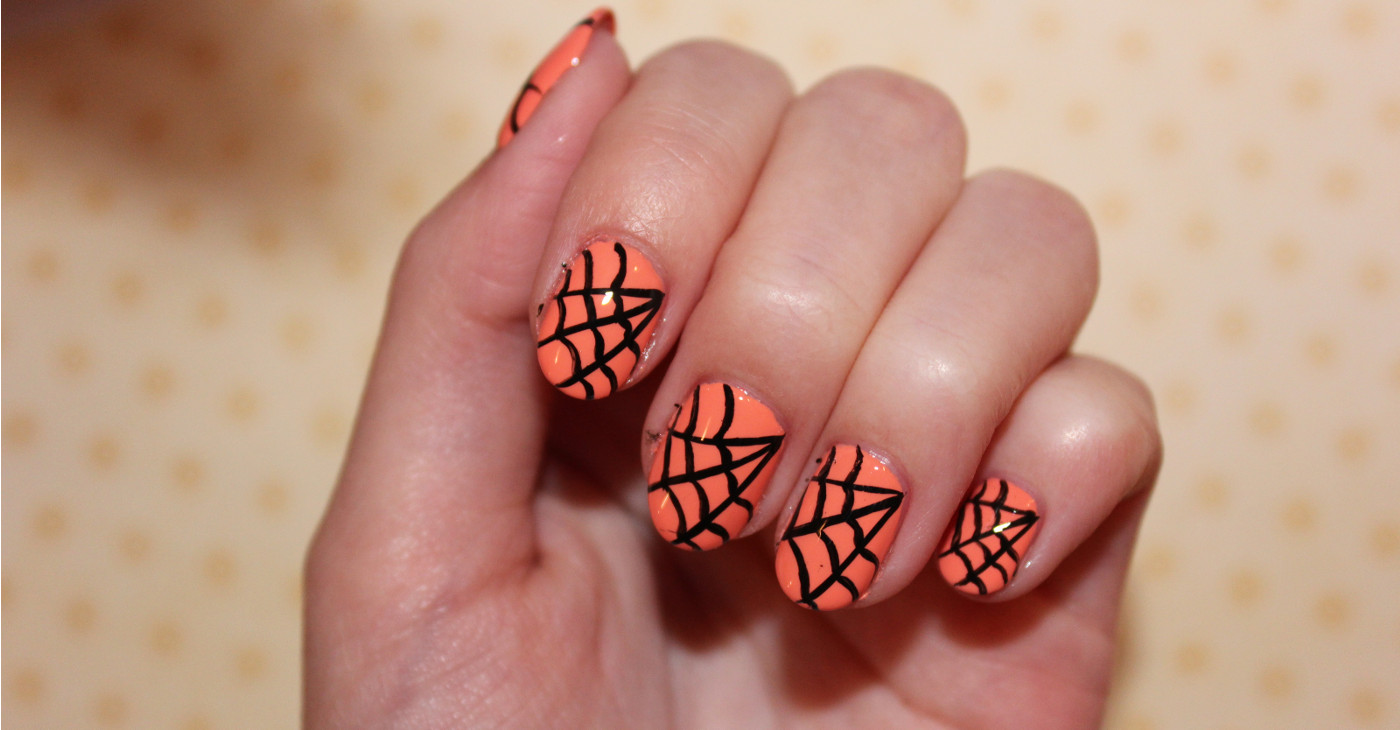
 Before you begin, make sure you have all the necessary supplies. You will need a base coat,
black nail polish
, a thin nail art brush or toothpick, and
white nail polish
. You can also add some
glitter
or
rhinestones
for extra sparkle. Once you have everything ready, it's time to get started.
Before you begin, make sure you have all the necessary supplies. You will need a base coat,
black nail polish
, a thin nail art brush or toothpick, and
white nail polish
. You can also add some
glitter
or
rhinestones
for extra sparkle. Once you have everything ready, it's time to get started.
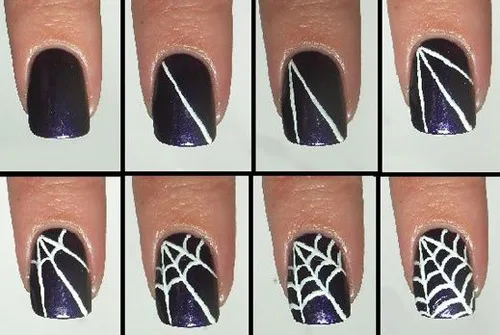
Step-by-Step Tutorial
 1. Start by applying a base coat to protect your nails and ensure your nail polish lasts longer.
2. Once the base coat is dry, apply two coats of
black nail polish
and let it dry completely.
3. Using a thin nail art brush or a toothpick, draw a
small circle
in the center of your nail. This will be the center of your spiderweb.
4. Next, draw three or four curved lines from the circle outward to create the
spokes
of the spiderweb.
5. Connect the spokes by drawing smaller curved lines to create the
web
.
6. You can leave your spiderweb like this or add some
extra details
such as
glitter
or
rhinestones
to make it stand out.
7. Once you are satisfied with your spiderweb, use a
white nail polish
to create the
spider
. You can either use a thin brush or a toothpick to draw the spider's body and legs.
8. Let your nail art dry completely before applying a top coat to seal in your design and add shine.
1. Start by applying a base coat to protect your nails and ensure your nail polish lasts longer.
2. Once the base coat is dry, apply two coats of
black nail polish
and let it dry completely.
3. Using a thin nail art brush or a toothpick, draw a
small circle
in the center of your nail. This will be the center of your spiderweb.
4. Next, draw three or four curved lines from the circle outward to create the
spokes
of the spiderweb.
5. Connect the spokes by drawing smaller curved lines to create the
web
.
6. You can leave your spiderweb like this or add some
extra details
such as
glitter
or
rhinestones
to make it stand out.
7. Once you are satisfied with your spiderweb, use a
white nail polish
to create the
spider
. You can either use a thin brush or a toothpick to draw the spider's body and legs.
8. Let your nail art dry completely before applying a top coat to seal in your design and add shine.
Get Creative
 While this tutorial uses a classic
black and white color scheme
, you can play around with different colors to create a unique look. You can also experiment with different
spiderweb designs
such as a
half spiderweb
or
multiple spiderwebs
on one nail. The key is to let your creativity run wild and have fun with it.
In conclusion, spiderweb nail art is a fun and easy way to add a touch of spookiness to your
nail design
. With a few simple steps and some creativity, you can achieve a
hauntingly beautiful
look that will surely make a statement. So why not give it a try and show off your
spooky side
with this
seasonal nail trend
?
While this tutorial uses a classic
black and white color scheme
, you can play around with different colors to create a unique look. You can also experiment with different
spiderweb designs
such as a
half spiderweb
or
multiple spiderwebs
on one nail. The key is to let your creativity run wild and have fun with it.
In conclusion, spiderweb nail art is a fun and easy way to add a touch of spookiness to your
nail design
. With a few simple steps and some creativity, you can achieve a
hauntingly beautiful
look that will surely make a statement. So why not give it a try and show off your
spooky side
with this
seasonal nail trend
?


