Steampunk nail art is a popular trend that combines Victorian era fashion with a touch of fantasy and science fiction. It's a unique and edgy style that is perfect for those who love to experiment with their nails. If you're new to steampunk nail art, don't worry! In this tutorial, we'll show you how to create a steampunk look on your nails in just a few simple steps. Before we begin, make sure you have nail polish in metallic and industrial colors, as well as some gears, cogs, and other steampunk elements. These can be found at most beauty supply stores or online. Now let's get started!Steampunk Nail Art Tutorial: How to Create a Steampunk Look on Your Nails


Steampunk Nail Art Tutorial: How to Create a Steampunk Look on Your Nails


Step 1: Prep your nails Start by removing any old nail polish and shaping your nails to your desired length and shape. Then, apply a base coat to protect your nails and help the polish adhere better. Step 2: Choose your colors For a classic steampunk look, opt for metallic and industrial colors such as bronze, copper, and gold. You can also add in some black or brown for a more grungy feel. Make sure to have a variety of shades, as this will add depth to your design. Step 3: Create your base Start by painting your nails with your chosen base color. This can be a solid color or a gradient effect using different shades. You can also add in some texture by using a crackle polish or nail foil. Step 4: Add the steampunk elements Now it's time to have some fun! Using tweezers, carefully place gears, cogs, or other steampunk elements onto your nails. You can also use small nail stickers or decals for a quicker and easier application. Step 5: Seal it with a top coat To ensure your design stays in place and lasts longer, finish off with a top coat. This will also give your nails a shiny and smooth finish.Steampunk Nail Art Tutorial: 5 Easy Steps to Achieve a Steampunk Design


Steampunk Nail Art Tutorial: 5 Easy Steps to Achieve a Steampunk Design


Now that you know the basic steps, here are some tips and tricks to help you achieve a flawless steampunk manicure: Tip 1: Use a toothpick or small detailing brush to add intricate designs to your nails. Tip 2: Don't be afraid to mix and match different steampunk elements to create a unique look. Tip 3: Experiment with different base colors, such as deep purple or emerald green, to add a pop of color to your design. Tip 4: If you're not confident in freehand drawing, you can use nail stencils to create precise designs. Tip 5: Have fun and let your creativity flow! Steampunk nail art is all about embracing your individual style.Steampunk Nail Art Tutorial: Tips and Tricks for a Perfect Steampunk Manicure

Steampunk Nail Art Tutorial: Tips and Tricks for a Perfect Steampunk Manicure


For a more detailed step-by-step guide, follow these instructions: Step 1: Prep your nails Remove any old nail polish and shape your nails to your desired length and shape. Apply a base coat to protect your nails and help the polish adhere better. Step 2: Create your base Paint your nails with a base color, such as bronze or copper. Let it dry completely. Step 3: Add texture If desired, add a textured effect using a crackle polish or nail foil. Let it dry completely. Step 4: Paint on details Using a toothpick or small detailing brush, add small details such as gears, cogs, and other steampunk elements. You can also use different shades of metallic polish to add depth. Step 5: Seal it with a top coat Finish off with a top coat to protect your design and add shine.Steampunk Nail Art Tutorial: Step-by-Step Guide to Creating a Steampunk Nail Design


Steampunk Nail Art Tutorial: Step-by-Step Guide to Creating a Steampunk Nail Design
If you're feeling extra creative, you can try these DIY ideas to add a unique and edgy touch to your steampunk nail art: Idea 1: Use small watch parts or screws to create a mechanical effect on your nails. Idea 2: Paint on a clock face or compass design using a small brush. Idea 3: Add a metallic chain or small key as an accent to your design. Idea 4: Use a sponge to create a distressed or grungy effect on your nails. Idea 5: Paint on small phrases or quotes from your favorite steampunk books or movies.DIY Steampunk Nail Art Tutorial: Create a Unique and Edgy Look

DIY Steampunk Nail Art Tutorial: Create a Unique and Edgy Look


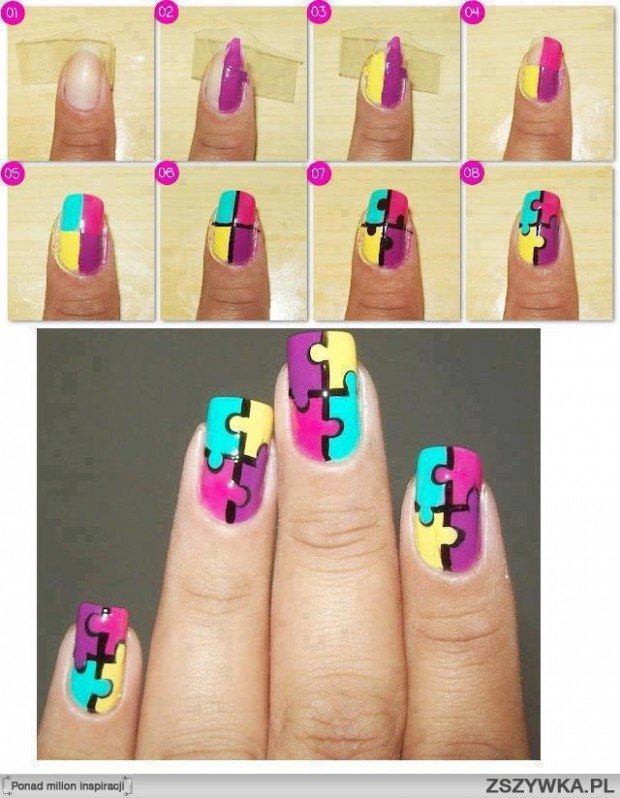
Nail stamping is a popular technique that allows you to transfer intricate designs onto your nails with ease. Here's how you can use nail stamping to create a steampunk design: Step 1: Prep your nails Remove any old nail polish and shape your nails to your desired length and shape. Apply a base coat to protect your nails and help the polish adhere better. Step 2: Choose your colors Apply a base color, such as black or dark brown, to your nails. Let it dry completely. Step 3: Stamp your design Using a steampunk-themed stamping plate and a stamping tool, transfer the design onto your nails. You can use different shades of metallic polish to color in the design. Step 4: Add details Using a small brush or toothpick, add small details such as gears or cogs to your design. Step 5: Seal it with a top coat Finish off with a top coat to protect your design and add shine.Steampunk Nail Art Tutorial: How to Use Nail Stamping to Create a Steampunk Design
Steampunk Nail Art Tutorial: How to Use Nail Stamping to Create a Steampunk Design
If you're short on time or don't feel confident in your nail art skills, nail decals and stickers are a great alternative. Here's how you can use them to create a steampunk look: Step 1: Prep your nails Remove any old nail polish and shape your nails to your desired length and shape. Apply a base coat to protect your nails and help the polish adhere better. Step 2: Choose your decals There are many steampunk-themed nail decals and stickers available online or at beauty supply stores. Choose your favorites and have them ready. Step 3: Apply the decals Follow the instructions on the decal package to apply them onto your nails. You can use tweezers to help with placement. Step 4: Add details If desired, use a small brush or toothpick to add additional details or accents to your design. Step 5: Seal it with a top coat Finish off with a top coat to protect your design and add shine.Steampunk Nail Art Tutorial: Nail Decals and Stickers for a Quick and Easy Steampunk Look


Steampunk Nail Art Tutorial: Nail Decals and Stickers for a Quick and Easy Steampunk Look

The key to achieving a perfect steampunk look is using the right colors. Here are some tips for incorporating metallic and industrial shades into your design: Tip 1: Use bronze or copper as the main color for a classic steampunk look. Tip 2: Add a pop of color with deep red or royal blue. Tip 3: Use black or dark brown for a more grungy and edgy vibe. Tip 4: Mix and match metallic and industrial shades to add depth and dimension to your design. Tip 5: Don't be afraid to experiment with different colors to find your perfect steampunk look.Steampunk Nail Art Tutorial: Using Metallic and Industrial Colors for a Steampunk Vibe

Steampunk Nail Art Tutorial: Using Metallic and Industrial Colors for a Steampunk Vibe

One of the most iconic elements of steampunk fashion are gears and cogs. Here's how you can incorporate them into your nail design: Step 1: Prep your nails Remove any old nail polish and shape your nails to your desired length and shape. Apply a base coat to protect your nails and help the polish adhere better. Step 2: Choose your gears You can find small gears and cogs at most craft stores or online. Choose a variety of sizes and colors to add interest to your design. Step 3: Apply the gears Using tweezers, carefully place the gears onto your nails while the polish is still wet. You can also use a small amount of nail glue to secure them in place. Step 4: Add details If desired, use a small brush or toothpick to add additional details or accents to your design. Step 5: Seal it with a top coat Finish off with a top coat to protect your design and add shine.Steampunk Nail Art Tutorial: Adding Gears, Cogs, and Other Steampunk Elements to Your Nails


Steampunk Nail Art Tutorial: Adding Gears, Cogs, and Other Steampunk Elements to Your Nails


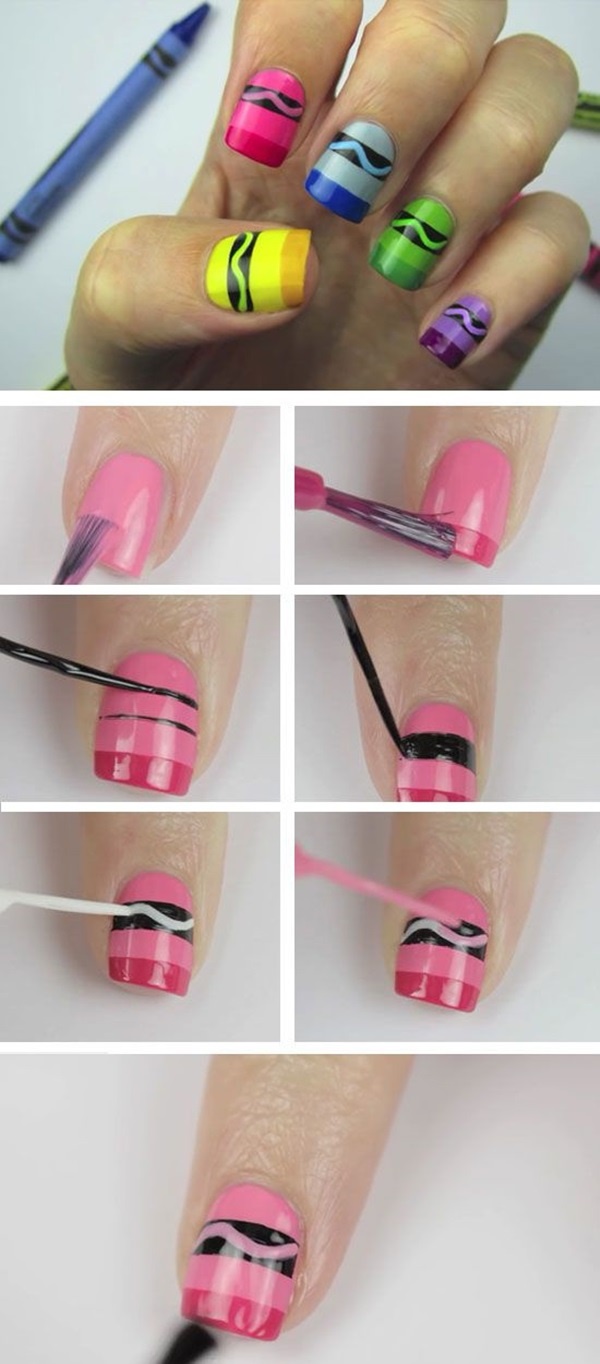
If you're a fan of the classic French manicure, why not give it a steampunk twist? Here's how: Step 1: Prep your nails Remove any old nail polish and shape your nails to your desired length and shape. Apply a base coat to protect your nails and help the polish adhere better. Step 2: Create your base Start by painting your nails with a nude or light pink polish. Let it dry completely. Step 3: Add a metallic tip Using a metallic polish, paint the tips of your nails. You can also use a thin brush to create a gradient effect. Step 4: Add steampunk elements Using a small brush or toothpick, add gears, cogs, or other steampunk elements to the metallic tip of your nails. Step 5: Seal it with a top coat Finish off with a top coat to protect your design and add shine. Now that you have all the tips and tricks, go ahead and try out these steampunk nail art tutorials! With a little creativity and some steampunk elements, you can create a unique and edgy look on your nails. Have fun and let your imagination run wild!Steampunk Nail Art Tutorial: How to Create a Steampunk French Manicure


Steampunk Nail Art Tutorial: How to Create a Steampunk French Manicure
Steampunk Nail Art: A Unique and Creative Way to Express Your Style

What is Steampunk Nail Art?
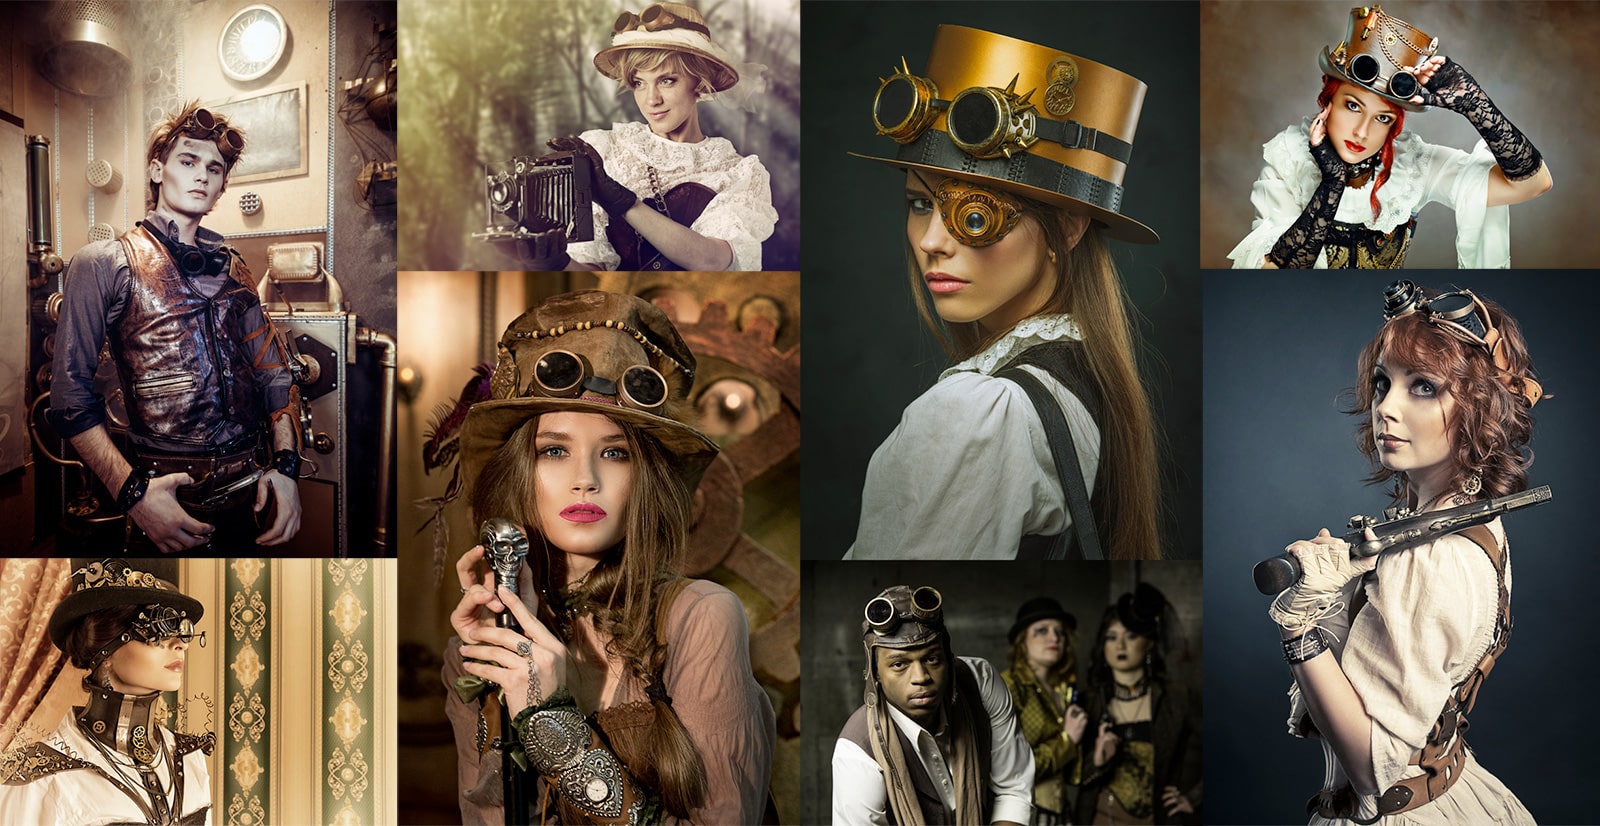
 Steampunk nail art is a unique and innovative way of decorating your nails that combines elements of Victorian fashion, industrial design, and science fiction. It is a subculture that originated in the 1980s and has gained popularity in recent years, especially in the fashion and beauty industry.
How to Achieve the Steampunk Look
 To achieve the steampunk look, there are several key elements you should incorporate into your nail art design. These include metallic colors, gears, cogs, and other mechanical motifs, as well as vintage-looking details such as lace, pearls, and cameos. The combination of these elements creates a retro-futuristic aesthetic that is both edgy and elegant.
Step-by-Step Tutorial
 Now, let's dive into the step-by-step tutorial for creating your own steampunk nail art.
Step 1: Prep Your Nails
Start by shaping your nails and pushing back your cuticles. Then, apply a base coat to protect your nails and create a smooth surface for the nail polish to adhere to.
Step 2: Choose Your Colors
Steampunk nail art is all about metallic and vintage colors. You can choose a base color like bronze, gold, or silver, and then add accents of other colors such as burgundy, navy blue, or emerald green.
Step 3: Add the Gears and Cogs
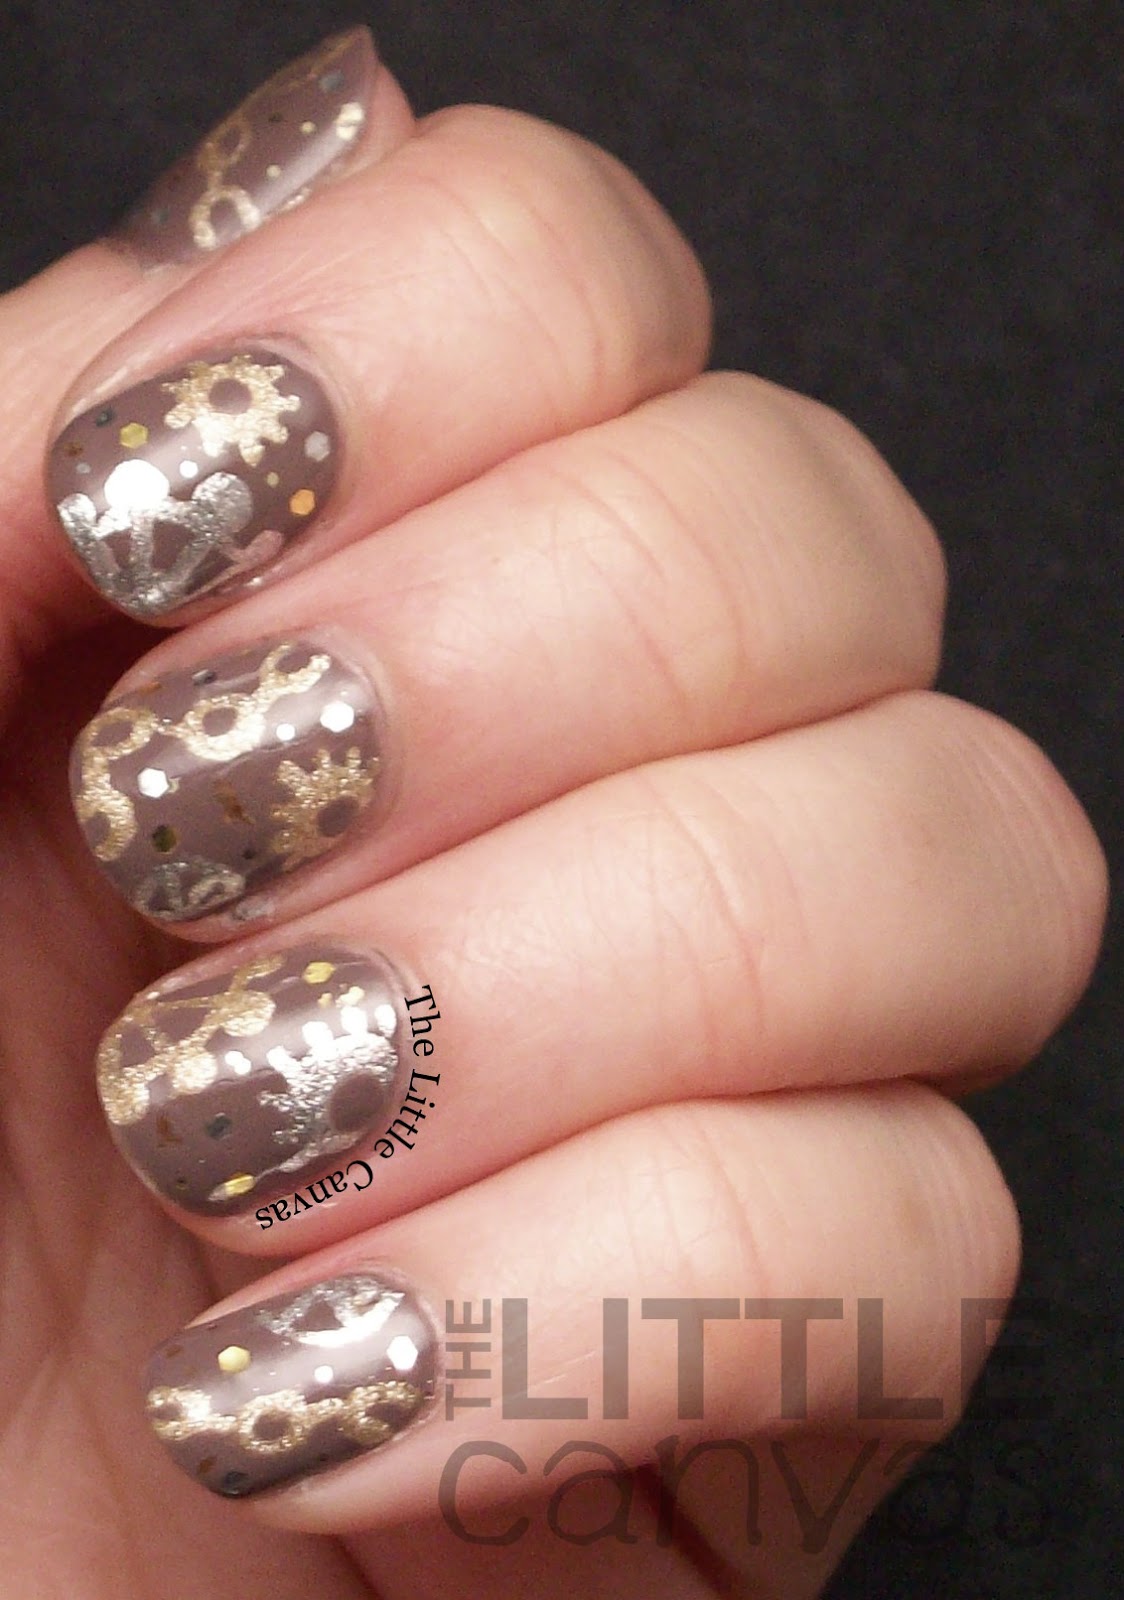
Using a dotting tool or toothpick, create small circles on your nails with black or dark brown nail polish. These will serve as the gears and cogs in your design. You can vary the sizes and placement of these circles to add dimension to your nails.
Step 4: Add Vintage Details
Next, add vintage details to your design, such as lace, pearls, or cameos. You can use nail art stickers or create your own designs with a thin brush and acrylic paint.
Step 5: Seal with Top Coat
Once your design is complete, seal it with a top coat to protect your nail art and give it a glossy finish.
Now, let's dive into the step-by-step tutorial for creating your own steampunk nail art.
Step 1: Prep Your Nails
Start by shaping your nails and pushing back your cuticles. Then, apply a base coat to protect your nails and create a smooth surface for the nail polish to adhere to.
Step 2: Choose Your Colors
Steampunk nail art is all about metallic and vintage colors. You can choose a base color like bronze, gold, or silver, and then add accents of other colors such as burgundy, navy blue, or emerald green.
Step 3: Add the Gears and Cogs
Using a dotting tool or toothpick, create small circles on your nails with black or dark brown nail polish. These will serve as the gears and cogs in your design. You can vary the sizes and placement of these circles to add dimension to your nails.
Step 4: Add Vintage Details
Next, add vintage details to your design, such as lace, pearls, or cameos. You can use nail art stickers or create your own designs with a thin brush and acrylic paint.
Step 5: Seal with Top Coat
Once your design is complete, seal it with a top coat to protect your nail art and give it a glossy finish.
Express Yourself with Steampunk Nail Art
 Steampunk nail art is not only a unique and creative way to express your style, but it also allows you to experiment with different colors, textures, and designs. So let your imagination run wild and create your own steampunk nail art that will surely turn heads and spark conversations.


