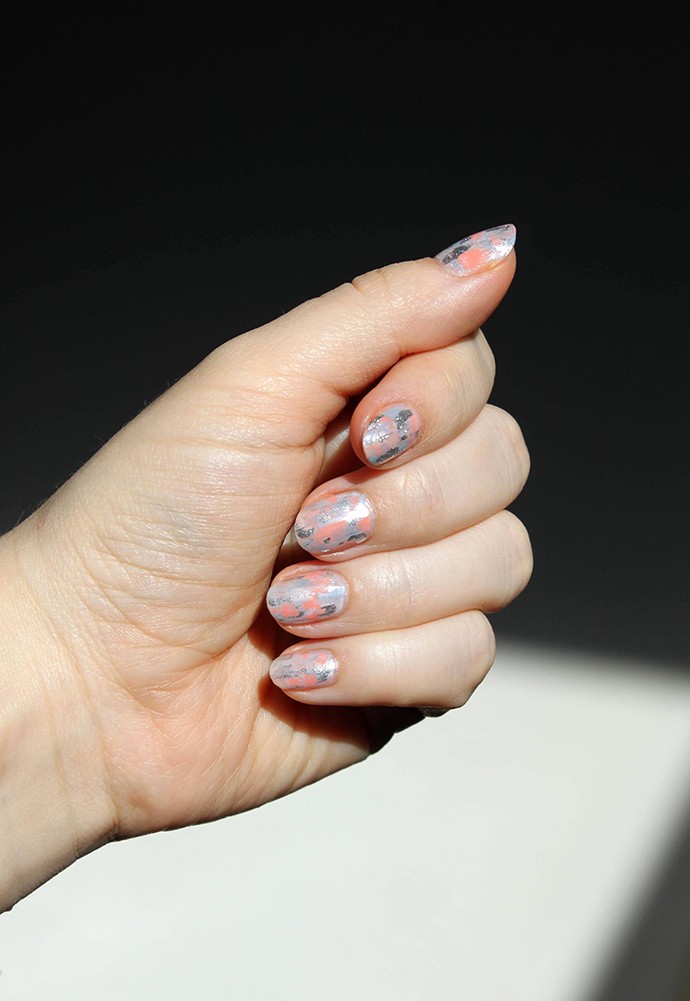
Creating intricate and beautiful nail art doesn't have to be difficult. With the right techniques and some practice, you can achieve stunning results, even as a beginner. One of the most popular and versatile nail art techniques is stroke nail art, which involves creating thin lines and strokes on the nail using a brush or a dotting tool. In this tutorial, we'll show you how to create 5 easy stroke nail art designs that are perfect for beginners.Easy Stroke Nail Art Tutorial for Beginners


Easy Stroke Nail Art Tutorial for Beginners


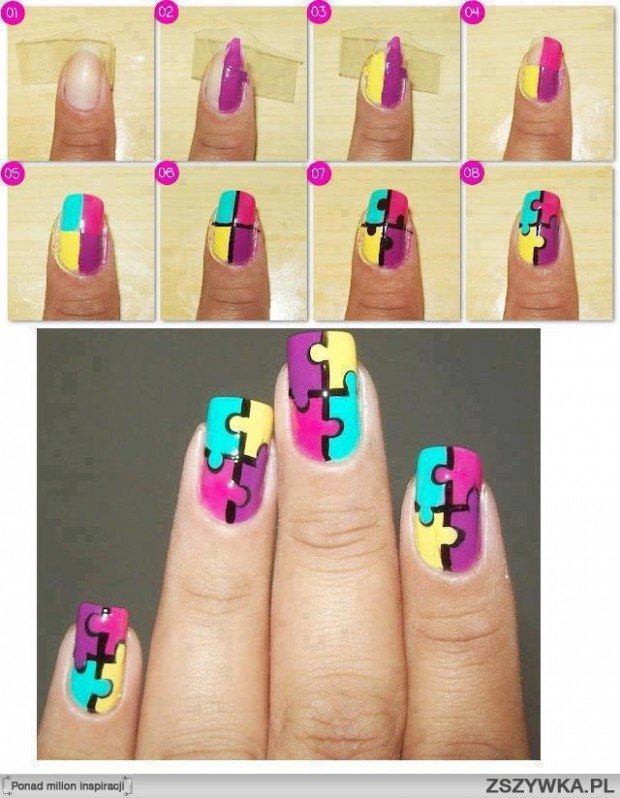
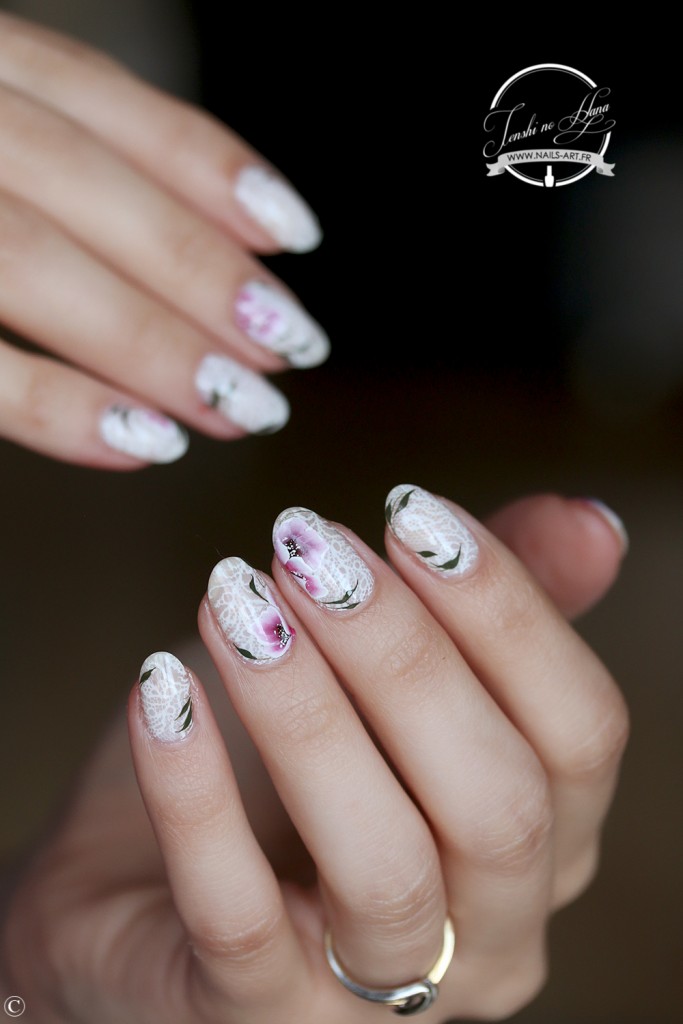
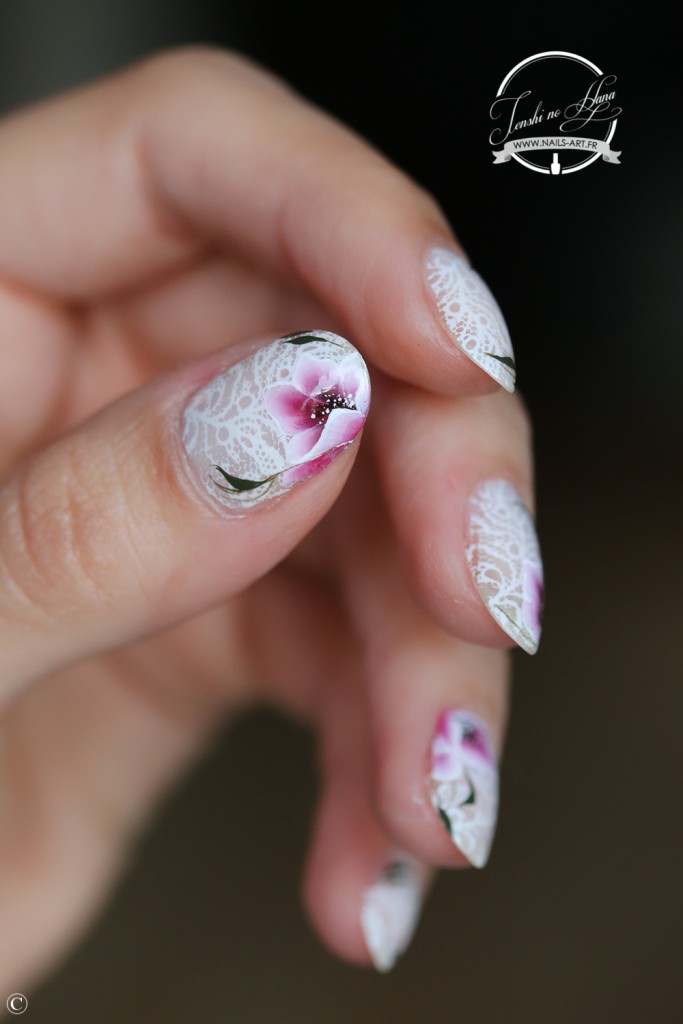
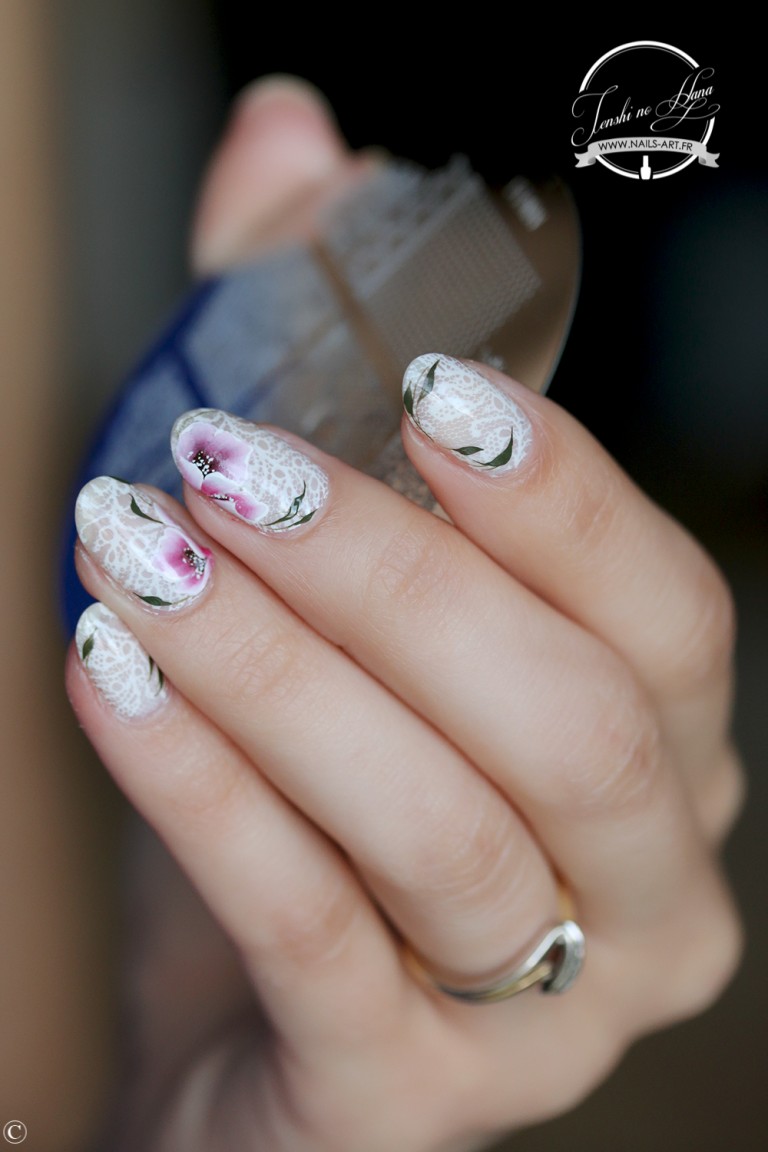
If you're new to nail art, it's best to start with simple designs that don't require a lot of tools or skills. These 5 easy stroke nail art designs are perfect for beginners and can be created using just a few basic nail polish colors and tools. 1. Striped Nails: To create this classic and simple look, start by painting your nails with a light-colored base coat. Once it's dry, use a thin brush or a toothpick to create vertical stripes in a darker color. You can also use multiple colors to make the stripes more interesting. 2. Dotted Nails: For this cute and fun design, paint your nails with a light base color and let it dry completely. Then, use a dotting tool or the end of a bobby pin to create small dots in a different color on your nails. You can create a pattern or randomly place the dots for a playful look. 3. Floral Nails: Floral nail art is perfect for spring and summer. Start by painting your nails with a light base color, then use a thin brush to create small flower petals in different colors. Add some leaves and dots to complete the design. 4. Rainbow Nails: This colorful design is great for adding some brightness to your nails. Paint your nails with a white base coat and let it dry completely. Then, use a thin brush to create thin, colorful stripes on your nails. You can choose any colors you like, but make sure to follow the rainbow order. 5. Geometric Nails: Geometric designs are trendy and easy to create. Paint your nails with a light base color, then use a thin brush or a striping tape to create geometric shapes in a darker color. You can make them as simple or intricate as you want.5 Easy Stroke Nail Art Designs for Beginners


5 Easy Stroke Nail Art Designs for Beginners


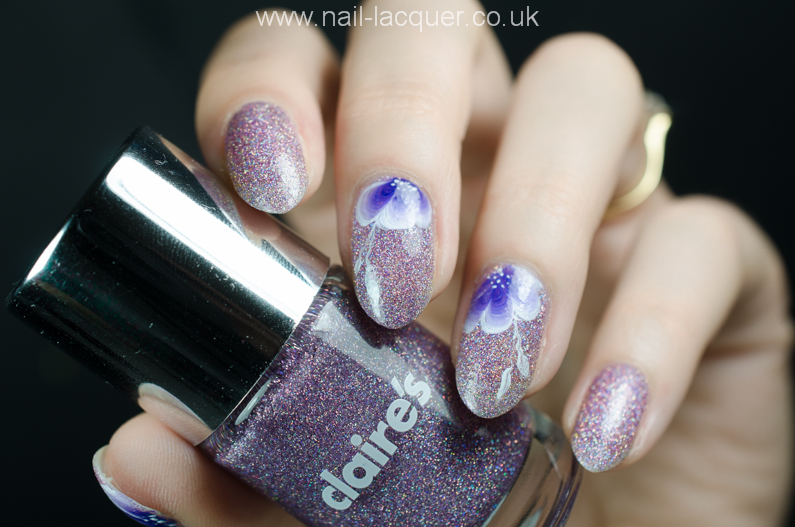
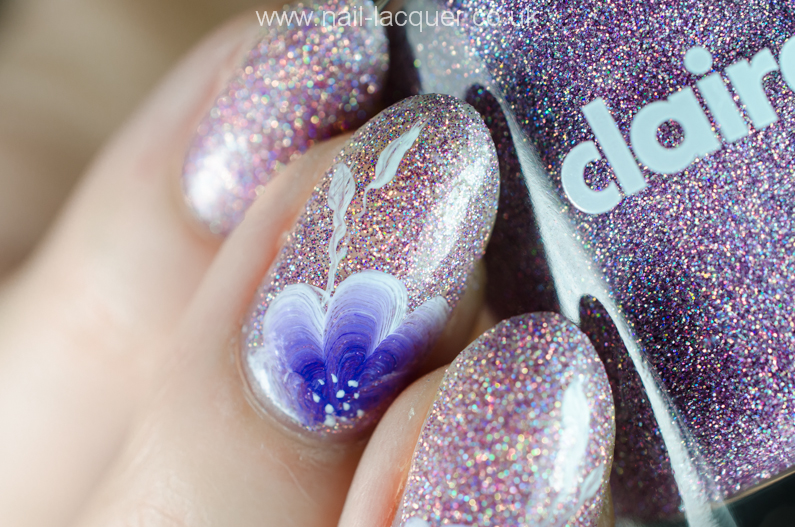
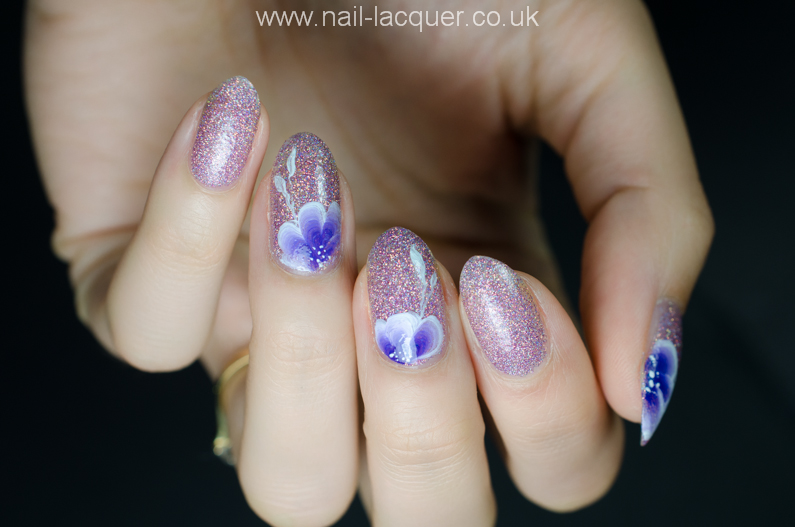
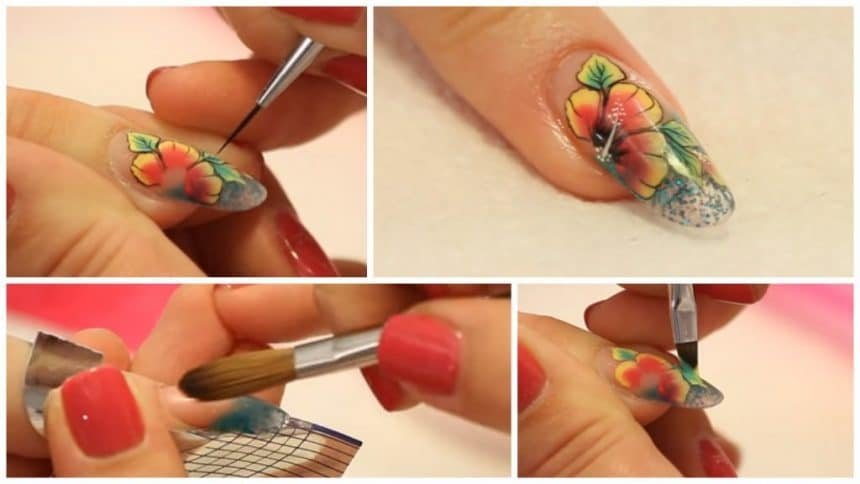
If you're new to stroke nail art, it can be helpful to follow a step-by-step tutorial to get the hang of the technique. Here's a simple tutorial for a classic stroke design that you can easily recreate at home. What you'll need: - Base coat - White nail polish - Black nail polish - Thin nail art brush - Top coat Step 1: Prep your nails Start by prepping your nails. Remove any old polish and shape your nails using a nail file. Apply a base coat to protect your nails from staining and allow it to dry completely. Step 2: Paint your nails white Once the base coat is dry, paint your nails with 2 coats of white nail polish. Allow each coat to dry completely before moving on to the next step. Step 3: Create the strokes Dip your thin nail art brush into black nail polish and carefully create thin strokes on your nails. You can create vertical, horizontal, or diagonal strokes, or a combination of all three. The key is to keep the strokes thin and consistent. Step 4: Add more strokes Continue creating strokes until you're satisfied with the design. You can also add another color to make the design more interesting. Just make sure to let the black strokes dry first before adding the other color. Step 5: Apply top coat Once the design is completely dry, apply a top coat to seal in your design and add shine. This will also help your nail art last longer.Step-by-Step Stroke Nail Art Tutorial


Step-by-Step Stroke Nail Art Tutorial


Stroke nail art is all about precision and patience. To create stunning designs, you'll need a steady hand and some practice. Here are some tips to help you create perfect stroke nail art every time. - Use a thin brush: A thin brush is key to creating thin and precise strokes. Make sure to choose one that is specifically designed for nail art. - Practice on paper first: If you're new to stroke nail art, it can be helpful to practice on paper before trying it on your nails. This will help you get a feel for the brush and the pressure needed to create the strokes. - Use a dotting tool: If you're not confident in your brush skills, you can use a dotting tool instead. Just dip it into nail polish and use it to create small dots, lines, or strokes on your nails. - Be patient: Creating stroke nail art takes time and patience. Don't rush the process, and if you make a mistake, don't worry. You can always clean it up with a cotton swab dipped in nail polish remover.How to Create Stunning Stroke Nail Art

How to Create Stunning Stroke Nail Art


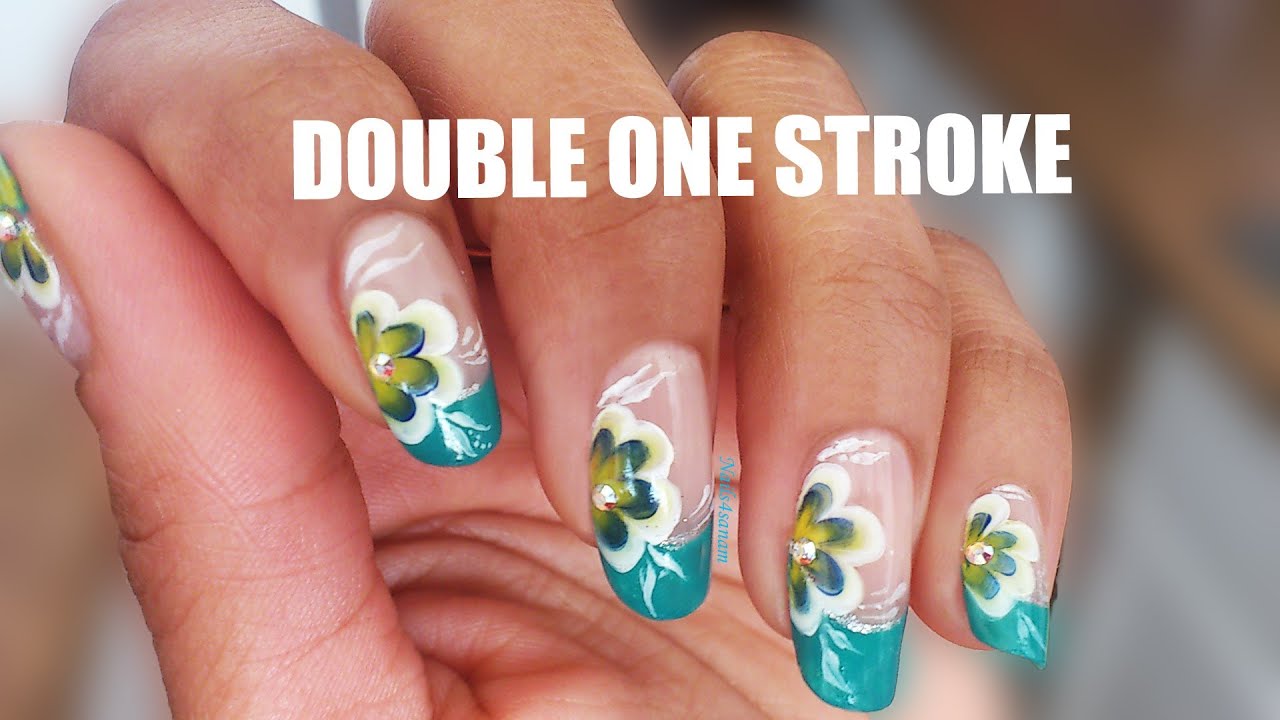
If you're just starting to experiment with nail art, it's best to start with simple designs that don't require a lot of tools or skills. This beginner-friendly stroke nail art tutorial is perfect for those who are new to the technique. What you'll need: - Base coat - Light pink nail polish - White nail polish - Thin nail art brush - Top coat Step 1: Prep your nails Start by prepping your nails. Remove any old polish and shape your nails using a nail file. Apply a base coat to protect your nails from staining and allow it to dry completely. Step 2: Paint your nails pink Once the base coat is dry, paint your nails with 2 coats of light pink nail polish. Allow each coat to dry completely before moving on to the next step. Step 3: Create the strokes Dip your thin nail art brush into white nail polish and carefully create thin strokes on your nails. Start at the base of your nail and drag the brush upwards to create small, curved lines. Repeat this process until you have 5-6 strokes on each nail. Step 4: Add more strokes Continue creating strokes until you're satisfied with the design. You can also add another color to make the design more interesting. Just make sure to let the white strokes dry first before adding the other color. Step 5: Apply top coat Once the design is completely dry, apply a top coat to seal in your design and add shine. This will also help your nail art last longer.Beginner-Friendly Stroke Nail Art Tutorial
Beginner-Friendly Stroke Nail Art Tutorial

There are countless ways to incorporate stroke nail art into your manicures. Here are 10 stroke nail art ideas that you can try at home. 1. Ombre Strokes: Create an ombre effect by blending different colors together with thin strokes. 2. Rainbow Strokes: Use all the colors of the rainbow to create a playful and colorful design. 3. Glitter Strokes: Add some sparkle to your nails by using a glitter nail polish to create your strokes. 4. Negative Space Strokes: Leave some parts of your nails bare to create a negative space design with strokes. 5. French Tip Strokes: Give the classic french tip a twist by creating strokes instead of a solid line. 6. Animal Print Strokes: Use strokes to create an animal print design on your nails. 7. Heart Strokes: Use thin strokes to create hearts on your nails for a cute and romantic look. 8. Geometric Strokes: Experiment with different shapes and angles to create a geometric stroke design. 9. Gradient Strokes: Use different shades of the same color to create a gradient effect with strokes. 10. Color Block Strokes: Create color blocks on your nails using thin strokes in different colors.10 Stroke Nail Art Ideas to Try at Home

10 Stroke Nail Art Ideas to Try at Home

If you're short on time but still want to add some nail art to your manicure, this quick and easy stroke nail art tutorial is perfect for you. What you'll need: - Base coat - Light blue nail polish - Thin nail art brush - Top coat Step 1: Prep your nails Start by prepping your nails. Remove any old polish and shape your nails using a nail file. Apply a base coat to protect your nails from staining and allow it to dry completely. Step 2: Paint your nails blue Once the base coat is dry, paint your nails with 2 coats of light blue nail polish. Allow each coat to dry completely before moving on to the next step. Step 3: Create the strokes Dip your thin nail art brush into white nail polish and carefully create thin strokes on your nails. Start at the base of your nail and drag the brush upwards to create small, curved lines. Repeat this process until you have 5-6 strokes on each nail. Step 4: Apply top coat Once the design is completely dry, apply a top coat to seal in your design and add shine. This will also help your nail art last longer.Quick and Easy Stroke Nail Art Tutorial

Quick and Easy Stroke Nail Art Tutorial
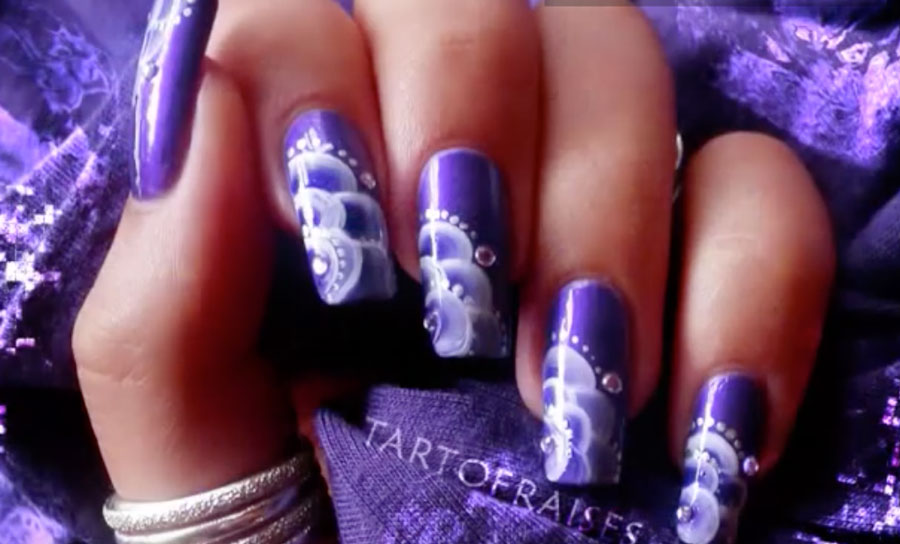
Don't want to spend a fortune at the nail salon? You can create perfect stroke nail art at home with this simple DIY tutorial. What you'll need: - Base coat - Light purple nail polish - Dark purple nail polish - Thin nail art brush - Top coat Step 1: Prep your nails Start by prepping your nails. Remove any old polish and shape your nails using a nail file. Apply a base coat to protect your nails from staining and allow it to dry completely. Step 2: Paint your nails purple Once the base coat is dry, paint your nails with 2 coats of light purple nail polish. Allow each coat to dry completely before moving on to the next step. Step 3: Create the strokes Dip your thin nail art brush into dark purple nail polish and carefully create thin strokes on your nails. Start at the base of your nail and drag the brush upwards to create small, curved lines. Repeat this process until you have 5-6 strokes on each nail. Step 4: Apply top coat Once the design is completely dry, apply a top coat to seal in your design and add shine. This will also help your nail art last longer.DIY Stroke Nail Art Tutorial for Perfect Nails
DIY Stroke Nail Art Tutorial for Perfect Nails
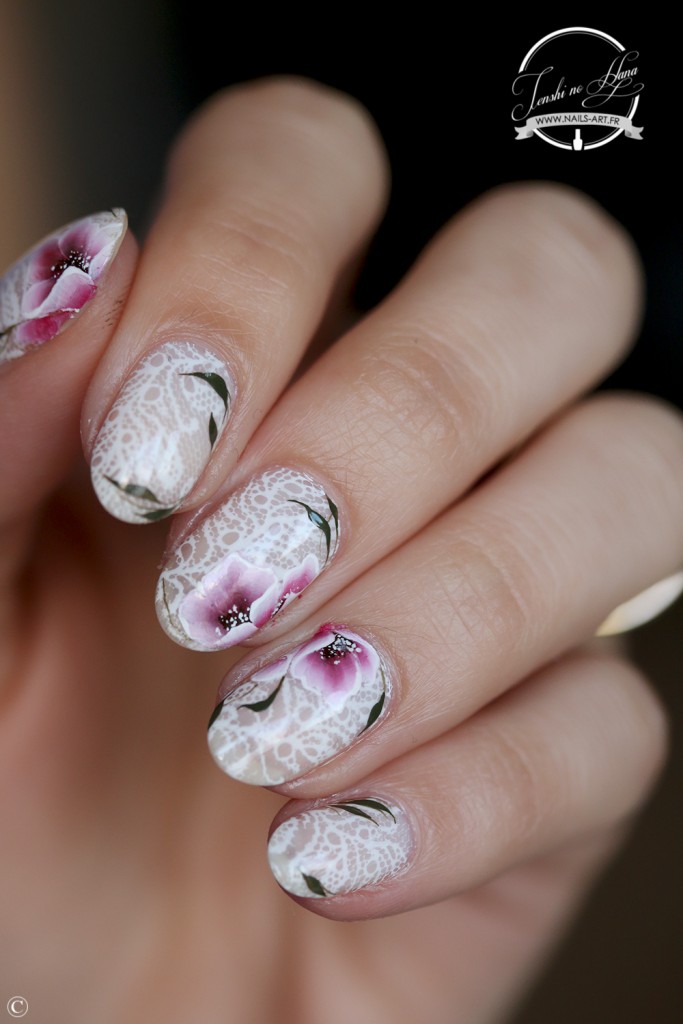
If you prefer a more minimalistic and chic look, this simple stroke nail art tutorial is perfect for you. What you'll need: - Base coat - Light nude nail polish - Thin nail art brush - Top coat Step 1: Prep your nails Start by prepping your nails. Remove any old polish and shape your nails using a nail file. Apply a base coat to protect your nails from staining and allow it to dry completely. Step 2: Paint your nails nude Once the base coat is dry, paint your nails with 2 coats of a light nude nail polish. Allow each coat to dry completely before moving on to the next step. Step 3: Create the strokes Dip your thin nail art brush into black nail polish and carefully create thin strokes on your nails. Start at the base of your nail and drag the brush upwards to create small, curved lines. Repeat this process until you have 5-6 strokes on each nail. Step 4: Apply top coat Once the design is completely dry, apply a top coat to seal in your design and add shine. This will also help your nail art last longer.Simple and Chic Stroke Nail Art Tutorial
Simple and Chic Stroke Nail Art Tutorial
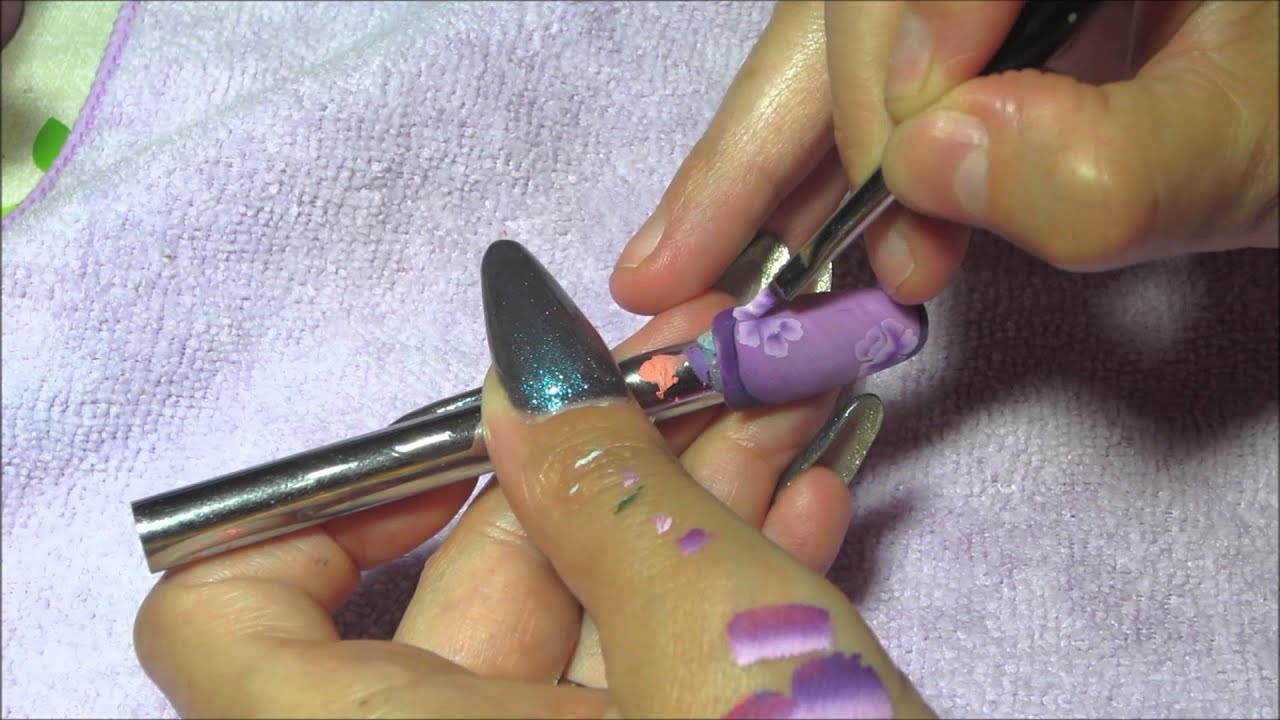
If you're still feeling unsure about creating stroke nail art, here's a step-by-step guide to help you through the process. Step 1: Prep your nails Start by prepping your nails. Remove any old polish and shape your nails using a nail file. Apply a base coat to protect your nails from staining and allow it to dry completely. Step 2: Paint your nails Choose a base color and paint your nails with 2 coats, allowing each coat to dry completely before moving on to the next step. Step 3: Choose your colors Choose the colors you want to use for your strokes. You can use complementary colors, different shades of the same color, or even just one color for a monochromatic look. Step 4: Dip your brush Dip your thin nail art brush into your chosen color and make sure to wipe off any excess polish on the side of the bottle.Step-by-Step Guide to Creating Stroke Nail Art
Step-by-Step Guide to Creating Stroke Nail Art
Using Stroke Nail Art to Elevate Your House Design
Transforming Your Nails into a Work of Art
 When it comes to house design, people often focus on the bigger picture - the furniture, the walls, the lighting. But have you ever considered using your nails as a canvas to add a unique and personalized touch to your home? With stroke nail art, you can do just that.
Stroke nail art involves creating patterns and designs using a single brush stroke. This technique originated in Japan and has gained popularity in recent years, with many nail artists showcasing their intricate and beautiful designs on social media. Not only is it a fun and creative way to express yourself, but it also adds a touch of elegance and sophistication to your overall house design.
How to Get Started with Stroke Nail Art
The first step to achieving stroke nail art is to choose the right tools. You will need a thin, long-bristled brush and a variety of nail polish colors. It's important to have a steady hand and a good grip on the brush to achieve clean and precise strokes.
Next, decide on the design you want to create. You can choose from a variety of stroke patterns such as swirls, lines, and curves. You can also incorporate different shapes and sizes to add dimension to your design. Remember to
bold
your nails as they are a blank canvas waiting for your creativity to shine.
Adding a Personal Touch to Your House Design
Not only can stroke nail art be a fun and creative hobby, but it can also be a way to tie your house design together. You can use the same color combinations and patterns on your nails as you do in your home. For example, if your living room has a blue and white theme, you can incorporate the same colors and patterns in your nail design. This will create a cohesive look and add a unique touch to your overall house design.
Conclusion
Stroke nail art is not just about having pretty nails - it's about using your creativity to elevate your house design. With the right tools, techniques, and color combinations, you can transform your nails into a work of art that reflects your personal style and adds a unique touch to your home. So go ahead, get your brush and nail polish ready, and let your creativity run wild. Your house design will thank you.
When it comes to house design, people often focus on the bigger picture - the furniture, the walls, the lighting. But have you ever considered using your nails as a canvas to add a unique and personalized touch to your home? With stroke nail art, you can do just that.
Stroke nail art involves creating patterns and designs using a single brush stroke. This technique originated in Japan and has gained popularity in recent years, with many nail artists showcasing their intricate and beautiful designs on social media. Not only is it a fun and creative way to express yourself, but it also adds a touch of elegance and sophistication to your overall house design.
How to Get Started with Stroke Nail Art
The first step to achieving stroke nail art is to choose the right tools. You will need a thin, long-bristled brush and a variety of nail polish colors. It's important to have a steady hand and a good grip on the brush to achieve clean and precise strokes.
Next, decide on the design you want to create. You can choose from a variety of stroke patterns such as swirls, lines, and curves. You can also incorporate different shapes and sizes to add dimension to your design. Remember to
bold
your nails as they are a blank canvas waiting for your creativity to shine.
Adding a Personal Touch to Your House Design
Not only can stroke nail art be a fun and creative hobby, but it can also be a way to tie your house design together. You can use the same color combinations and patterns on your nails as you do in your home. For example, if your living room has a blue and white theme, you can incorporate the same colors and patterns in your nail design. This will create a cohesive look and add a unique touch to your overall house design.
Conclusion
Stroke nail art is not just about having pretty nails - it's about using your creativity to elevate your house design. With the right tools, techniques, and color combinations, you can transform your nails into a work of art that reflects your personal style and adds a unique touch to your home. So go ahead, get your brush and nail polish ready, and let your creativity run wild. Your house design will thank you.


