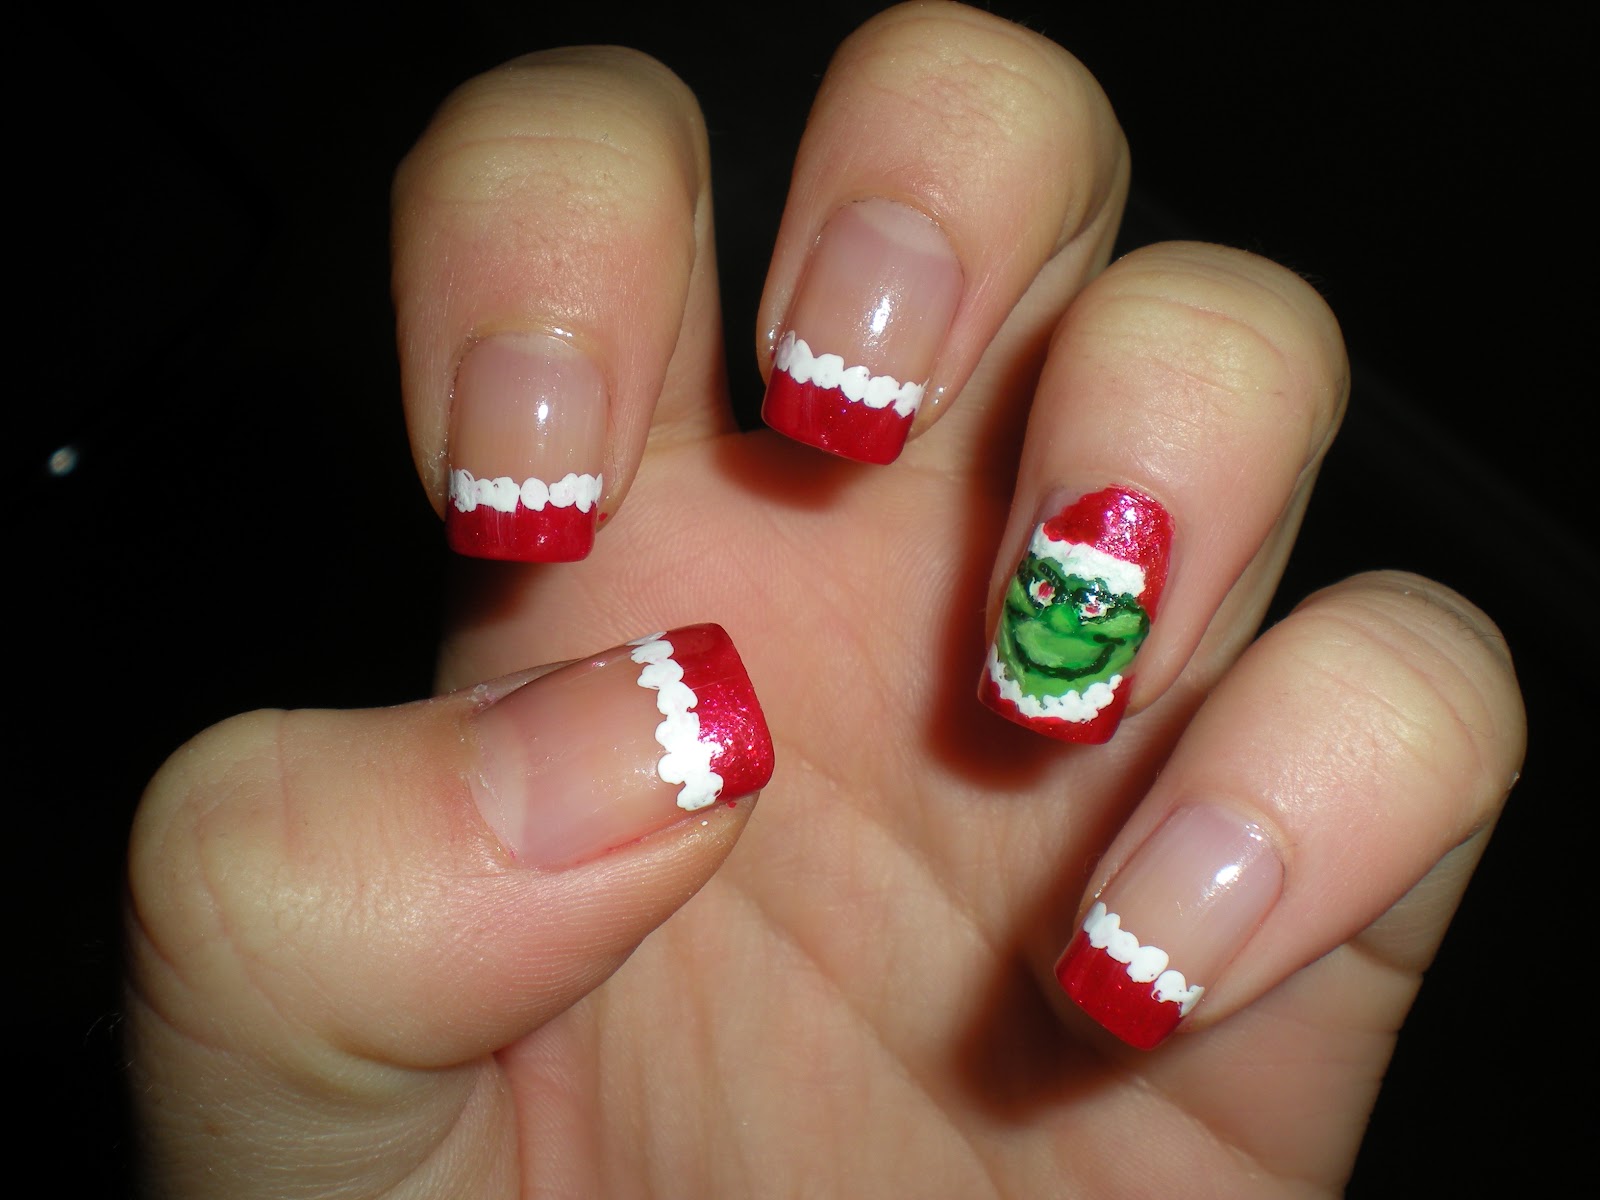
If you're a fan of the classic Christmas tale, "How the Grinch Stole Christmas," then you'll love incorporating the iconic character into your holiday nail art. With his signature green fur and mischievous grin, the Grinch makes for a fun and festive design on your nails. Follow this step-by-step tutorial to learn how to create your own "Grinch" nail art. First, start by painting your nails with a bright red base color. This will serve as the background for your Grinch design. Make sure to let the polish dry completely before moving on to the next step. Next, using a thin brush or a toothpick, create the Grinch's face on your accent nail. Use a dark green polish to draw a circle for his head, and then add two smaller circles for his eyes. Use a black polish to add his eyebrows and a white polish for the whites of his eyes. Now, it's time to add some personality to the Grinch's face. Using a light green polish, draw a large, mischievous smile on his face. You can also add some wrinkles around his eyes and mouth for a more detailed look. To complete the Grinch's face, use a black polish to add his signature tuft of hair on the top of his head. You can also add a Santa hat on top of his head for an extra festive touch. Once you're happy with your Grinch design, use a gold polish to add some glitter on your other nails for a touch of holiday sparkle. Finish off with a clear top coat to seal in your design and add shine. And just like that, you have your very own "Grinch" inspired nail art!1. "The Grinch" Nail Art Tutorial


1. "The Grinch" Nail Art Tutorial


Nail art can seem intimidating, but with the right tools and a little bit of patience, anyone can create a fun and festive design like "The Grinch" on their nails. Here's a breakdown of the steps to follow to create your own "Grinch" nail art. First, gather all the necessary materials: a bright red polish, a dark green polish, a light green polish, a black polish, a white polish, a gold polish, a thin brush or a toothpick, and a clear top coat. Start by painting all of your nails (except for one accent nail) with the bright red polish. Let it dry completely before moving on to the next step. Using the thin brush or toothpick, create the Grinch's face on your accent nail. Start with a circle for his head using the dark green polish. Then, add two smaller circles for his eyes with the black polish and a white polish for the whites of his eyes. Next, use the light green polish to draw a wide, mischievous smile on the Grinch's face. Add some wrinkles around his eyes and mouth with the same color. Using the black polish, draw the Grinch's signature tuft of hair on the top of his head. You can also add a Santa hat on top if you'd like. Once you're satisfied with the Grinch's face, use the gold polish to add some glitter on your other nails for a touch of holiday sparkle. Finish off with a clear top coat to seal in your design and add shine. And there you have it, your very own "Grinch" nail art!2. How to Create "The Grinch" Nail Art


2. How to Create "The Grinch" Nail Art

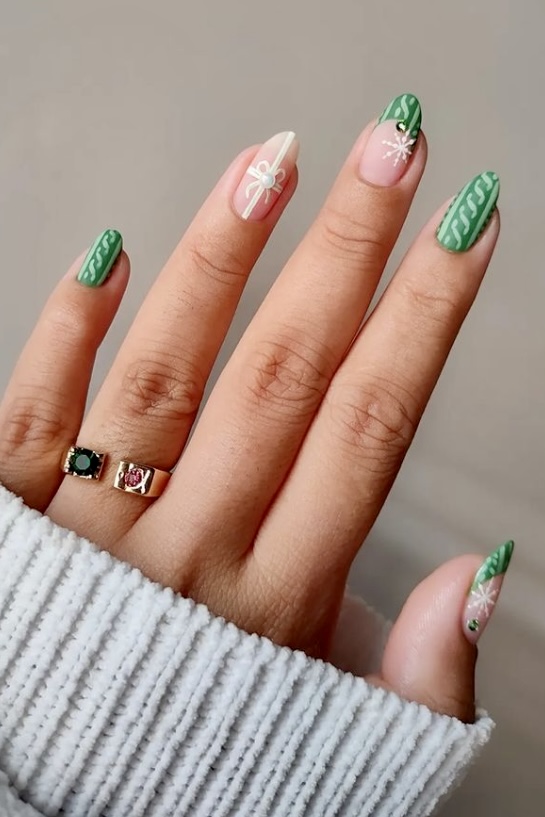
If you love the Grinch but want to switch up your nail art design, there are plenty of ways to incorporate the iconic character into your holiday manicure. Here are a few "Grinch" inspired nail designs to try: 1. Minimalist Grinch: Instead of creating a full Grinch face, try painting a simple green line across the tip of your nails and adding a small red heart for his heart that grew three sizes. 2. Whoville Village: Paint a snowy background on your nails and use a thin brush to create a little Whoville village on one or two nails. You can add the Grinch lurking in the background for an extra touch. 3. Grinch and Max: For a more detailed design, paint the Grinch on one nail and his trusty sidekick Max on another. You can even add some Christmas lights or presents on your other nails for a complete scene. Get creative and have fun with your "Grinch" inspired nail designs!3. "The Grinch" Inspired Nail Designs

3. "The Grinch" Inspired Nail Designs


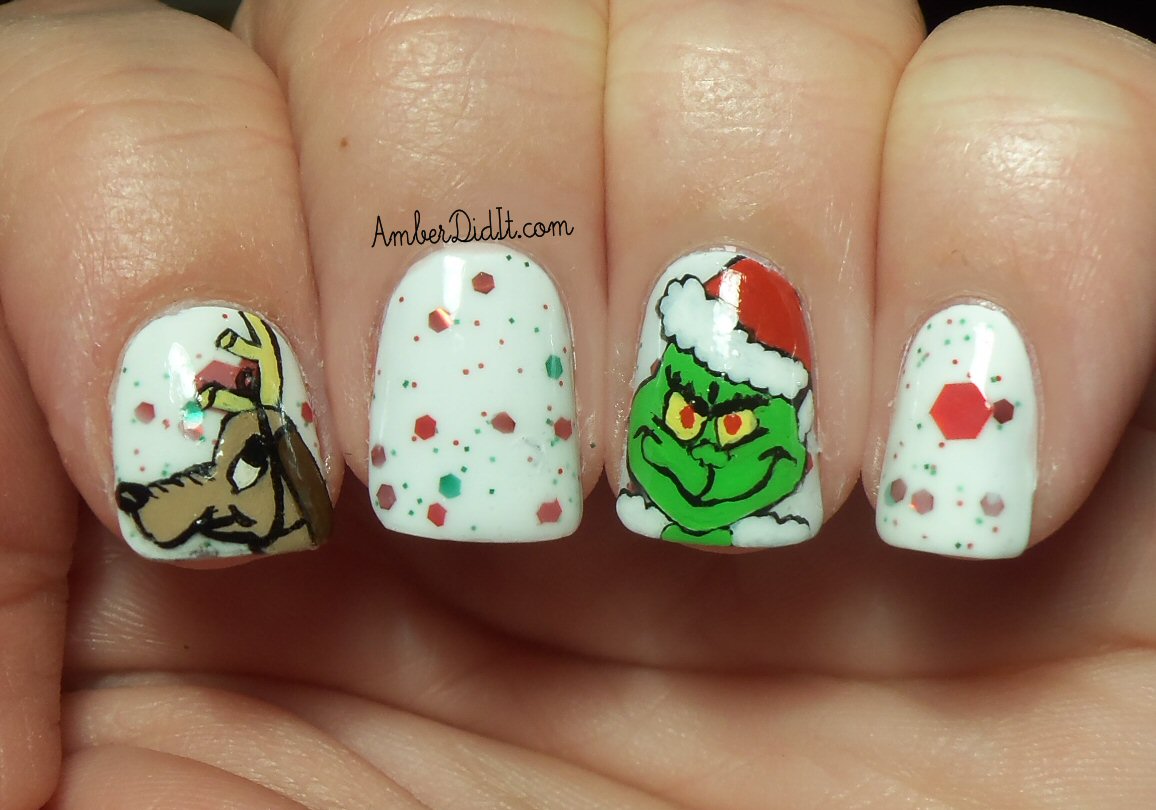
Looking for some holiday nail art inspiration? Look no further than "The Grinch" for some festive and fun ideas. Here are a few ways to incorporate the beloved character into your Christmas nail art: 1. Grinch and Presents: Paint the Grinch on one nail and add some presents on the rest for a cute and colorful design. 2. Grinch and Christmas Tree: Create a Christmas tree design on one or two nails and use the Grinch as the tree topper. 3. Grinch and Reindeer: For a playful design, paint the Grinch on one nail and add a reindeer on another. You can even add a sleigh and some presents on your other nails for a complete scene. There are endless possibilities when it comes to incorporating the Grinch into your Christmas nail art. Let your creativity run wild!4. "The Grinch" Christmas Nail Art Ideas


4. "The Grinch" Christmas Nail Art Ideas


The holiday season is the perfect time to have some fun with your nail art, and "The Grinch" makes for a great inspiration. Here are a few festive nail art designs featuring the beloved character: 1. Grinch and Cindy Lou Who: Paint the Grinch on one nail and Cindy Lou Who on another for a cute and colorful design. 2. Grinch and Christmas Lights: Create a string of Christmas lights on one or two nails and have the Grinch peeking out from behind them. 3. Grinch and Max on a Sleigh: For a detailed design, paint the Grinch and Max on a sleigh on one or two nails and add a snowy background on the rest. These "Grinch" nail art designs are sure to spread some holiday cheer and make a statement on your nails.5. "The Grinch" Nail Art Designs for the Holidays


5. "The Grinch" Nail Art Designs for the Holidays
If you're new to nail art, don't worry! Creating "The Grinch" nail art can be broken down into simple steps to make it easier. Here's a step-by-step guide to creating your own "Grinch" nails: Step 1: Start by painting your nails with a bright red base color. Step 2: Using a thin brush or toothpick, create the Grinch's face on your accent nail with a dark green polish. Step 3: Use a black polish to add his eyebrows and a white polish for the whites of his eyes. Step 4: Use a light green polish to add a mischievous smile and wrinkles around his eyes and mouth. Step 5: Use a black polish to add his tuft of hair on the top of his head. Step 6: Add a Santa hat on top of his head with red and white polish. Step 7: Use a gold polish to add some glitter on your other nails. Step 8: Finish off with a clear top coat to seal in your design and add shine. Follow these steps and you'll have your very own "Grinch" inspired nail art in no time!6. "The Grinch" Nail Art Step-by-Step Guide


6. "The Grinch" Nail Art Step-by-Step Guide


There are endless ways to get inspired by "The Grinch" for your holiday nail art. Here are a few ideas to help get your creative juices flowing: 1. Colors: The classic colors of "The Grinch" are red, green, and white, so try incorporating these into your design. 2. Characters: In addition to the Grinch, there are other beloved characters from the story that you can include in your nail art, such as Cindy Lou Who, Max, and the Whos of Whoville. 3. Scenes: You can recreate iconic scenes from the story, such as the Grinch stealing presents or his heart growing three sizes. Use these ideas as a starting point for your own unique "Grinch" inspired nail art.7. "The Grinch" Nail Art Inspiration
7. "The Grinch" Nail Art Inspiration

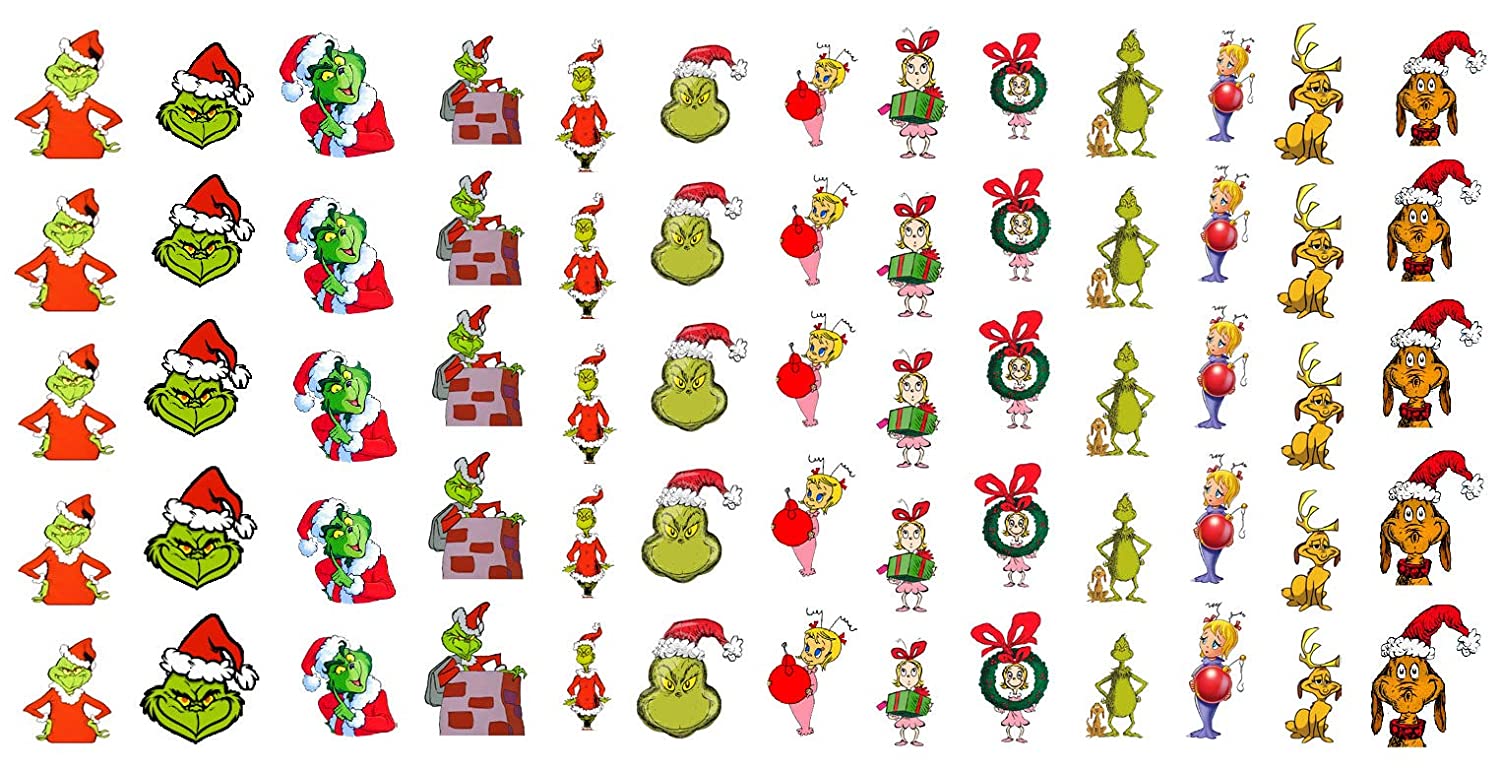
If you're new to nail art, don't be intimidated by the thought of creating a design as detailed as "The Grinch." There are plenty of ways to simplify the design for beginners, such as: 1. Use stickers: You can find Grinch-themed stickers at most craft stores, making it easy to add the character onto your nails without having to paint it yourself. 2. Stick to one color: Instead of incorporating multiple colors into your design, try using just green and black for a simpler look. 3. Use a stamping kit: Nail stamping kits are a great tool for beginners and can help you create detailed designs with ease. Remember, practice makes perfect, so don't be discouraged if your first attempt doesn't turn out exactly how you envisioned. Keep trying and have fun with it!8. "The Grinch" Nail Art for Beginners
8. "The Grinch" Nail Art for Beginners


As we all know, Christmas is the perfect time to add some festive flair to your nails. And what better way to do that than with "The Grinch"? Here are a few "Grinch" nail art ideas to try this holiday season: 1. Grinch and Stockings: Paint the Grinch on one nail and add some festive stockings on the rest of your nails for a cute and colorful design. 2. Grinch and Snowflakes: Create a snowy background on your nails and use a thin brush to add some snowflakes. Then, add the Grinch peeking out from behind the snow for a fun twist. 3. Grinch and Christmas Presents: Paint the Grinch on one nail and add some presents on the rest for a playful and festive design. Get creative and incorporate the Grinch into your Christmas nail art for a unique and fun look.9. "The Grinch" Nail Art Ideas for Christmas


9. "The Grinch" Nail Art Ideas for Christmas


If you're looking to stand out this holiday season, "The Grinch" nail art is the perfect way to do it. Here are a few designs to try for a festive and fun manicure: 1. Grinch and Whoville Village: Create a snowy background on your nails and use a thin brush to paint a Whoville village. Then, add the Grinch lurking in the background for a playful touch. 2. Grinch and Christmas Ornaments: Paint the Grinch on one nail and add some colorful Christmas ornaments on the rest for a fun and festive design. 3. Grinch and Presents on a Sleigh: For a detailed design, paint the Grinch and some presents on a sleigh on one or two nails and add a snowy background on the rest. These "Grinch" nail art designs are sure to make a statement and spread some holiday cheer this season.10. "The Grinch" Nail Art Designs to Try This Holiday Season

10. "The Grinch" Nail Art Designs to Try This Holiday Season

The Grinch Nail Art: Bringing Festive Cheer to Your Nails
Who doesn't love the Grinch? With his iconic green fur, mischievous grin, and heart that grew three sizes, this beloved character has captured the hearts of many during the holiday season. And now, you can bring the festive spirit of the Grinch to your fingertips with the latest trend in nail art – the Grinch nail art.
 The Grinch nail art has taken the beauty world by storm, with countless people showcasing their creativity and love for the Dr. Seuss classic through their manicures. This unique and playful nail design is perfect for the holiday season and will definitely make a statement at any Christmas party.
So, what exactly is Grinch nail art?
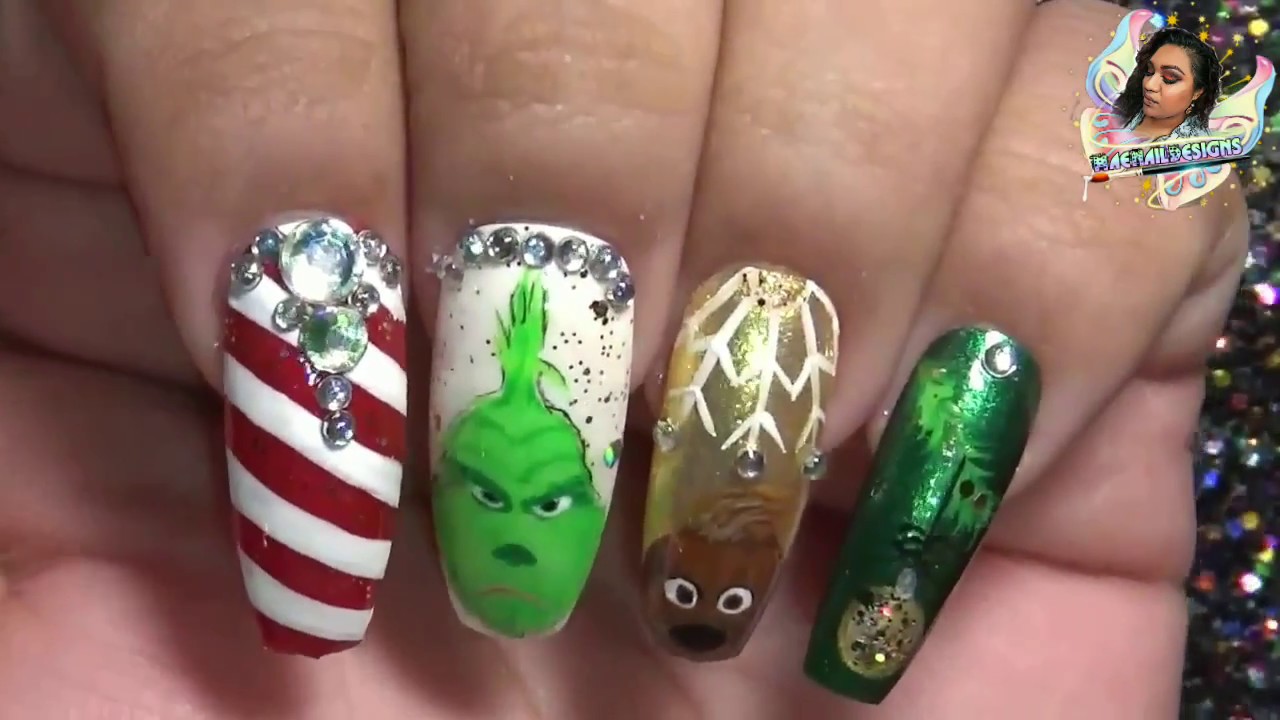
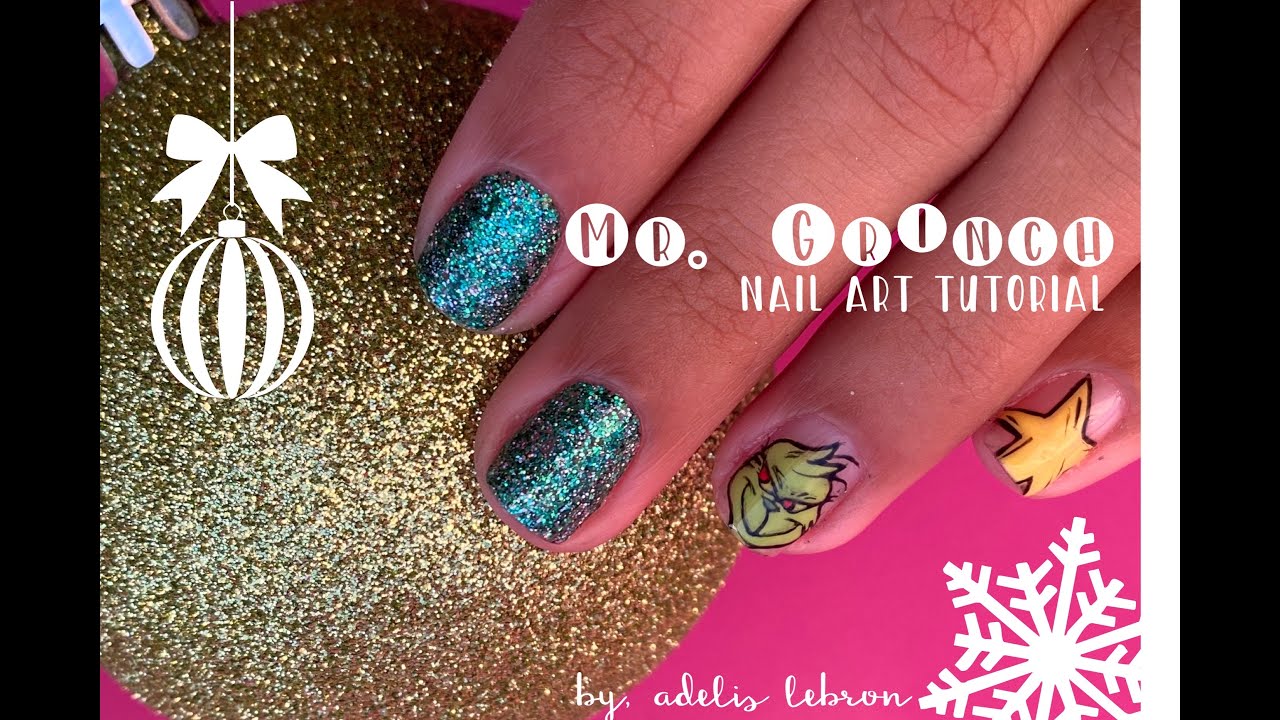
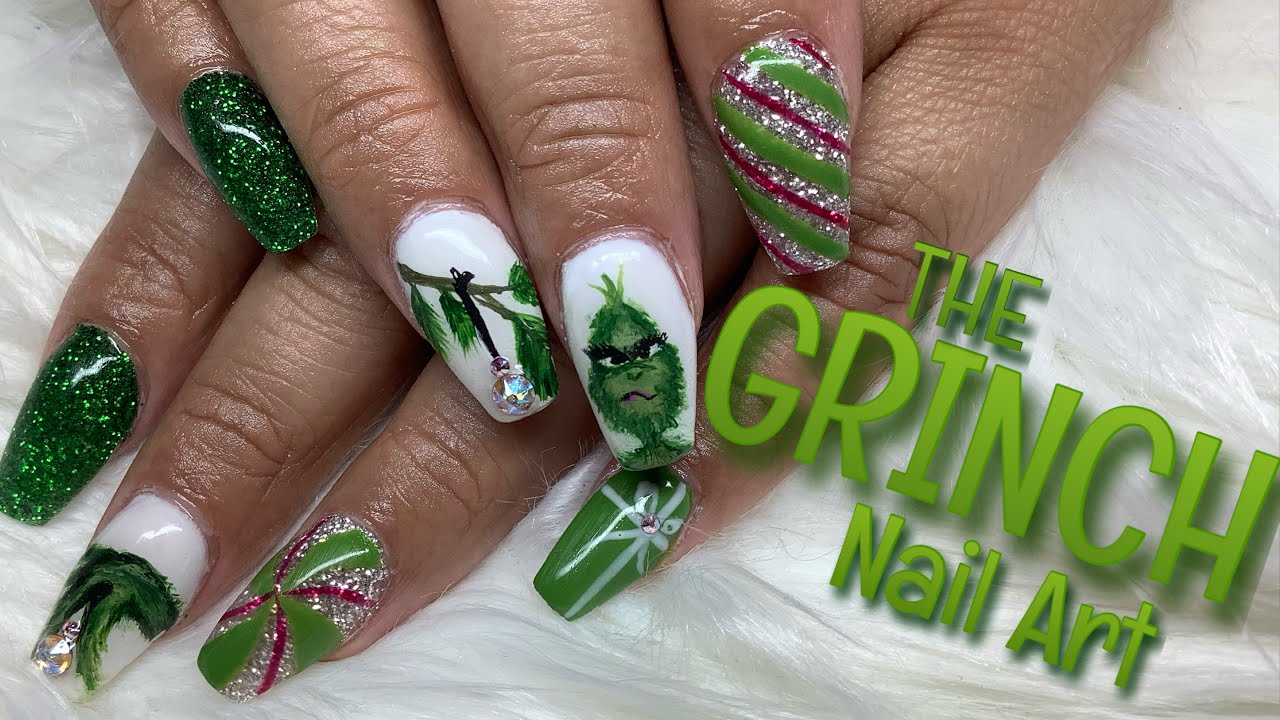
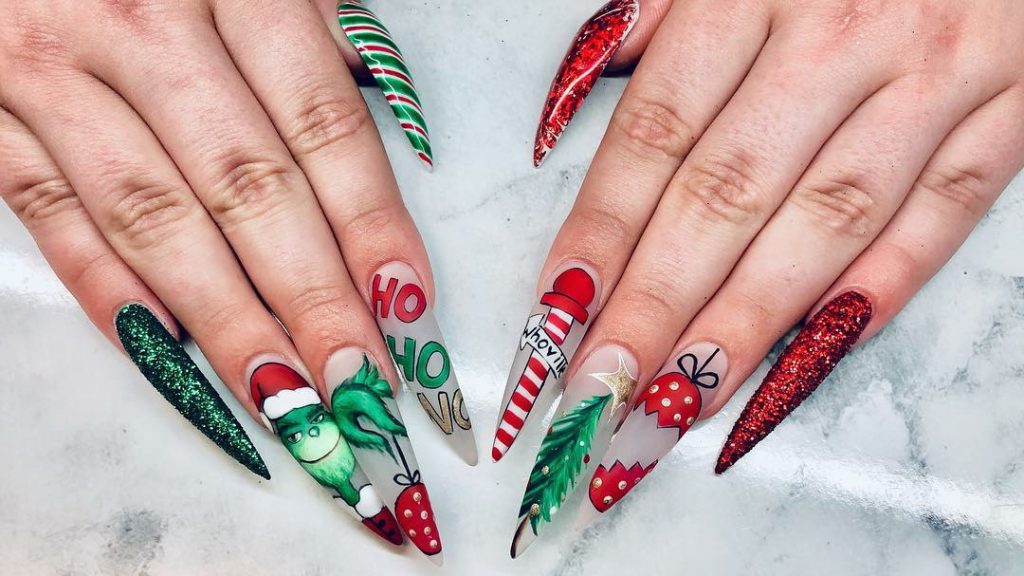
It involves using different shades of green, white, and red to create a whimsical design on your nails that pays homage to the iconic character. From simple and subtle designs featuring the Grinch's face or his signature Santa suit, to more intricate designs with scenes from the movie, there are endless possibilities when it comes to Grinch nail art.
But it's not just about the design,
Grinch nail art also incorporates different textures and elements to bring the design to life.
From fuzzy green fur to glittery red accents, these details add depth and dimension to the nails and make them stand out even more.
The Grinch nail art has taken the beauty world by storm, with countless people showcasing their creativity and love for the Dr. Seuss classic through their manicures. This unique and playful nail design is perfect for the holiday season and will definitely make a statement at any Christmas party.
So, what exactly is Grinch nail art?
It involves using different shades of green, white, and red to create a whimsical design on your nails that pays homage to the iconic character. From simple and subtle designs featuring the Grinch's face or his signature Santa suit, to more intricate designs with scenes from the movie, there are endless possibilities when it comes to Grinch nail art.
But it's not just about the design,
Grinch nail art also incorporates different textures and elements to bring the design to life.
From fuzzy green fur to glittery red accents, these details add depth and dimension to the nails and make them stand out even more.
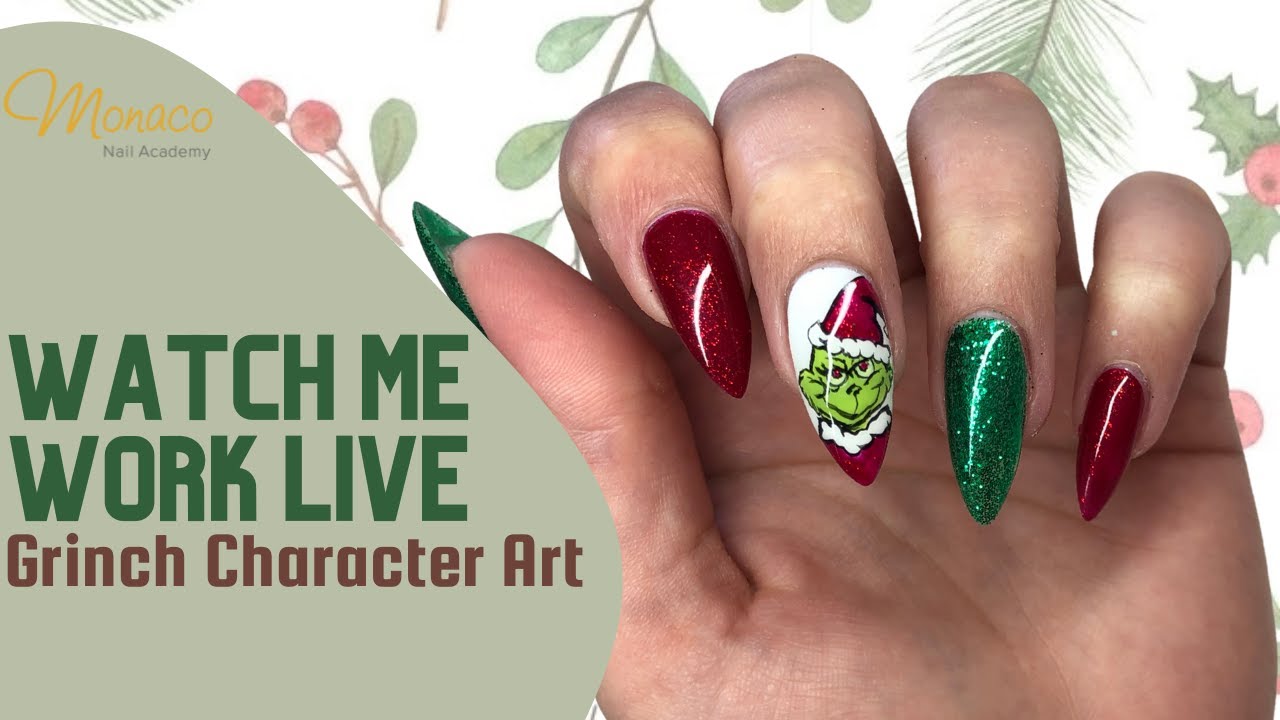
How to achieve the perfect Grinch nail art?
 First, start by prepping your nails as you would for any other manicure – trim, file, and push back your cuticles. Then, choose your desired shades of green, white, and red nail polish. You can also opt for nail wraps or decals if you're not confident in your nail art skills.
Next, it's time to get creative!
Use a thin nail art brush or toothpick to draw the Grinch's face, Santa suit, or any other design you prefer on your nails.
Don't worry about perfection, the quirkier and more imperfect, the better it will look. You can also use stencils or tape to create clean lines and shapes.
Once you've completed the design, add some texture and dimension by using a dotting tool to create fur or adding glitter and rhinestones for some sparkle. Finish off with a top coat to seal in your design and protect your nails. And voila, you have your very own Grinch-inspired nails!
First, start by prepping your nails as you would for any other manicure – trim, file, and push back your cuticles. Then, choose your desired shades of green, white, and red nail polish. You can also opt for nail wraps or decals if you're not confident in your nail art skills.
Next, it's time to get creative!
Use a thin nail art brush or toothpick to draw the Grinch's face, Santa suit, or any other design you prefer on your nails.
Don't worry about perfection, the quirkier and more imperfect, the better it will look. You can also use stencils or tape to create clean lines and shapes.
Once you've completed the design, add some texture and dimension by using a dotting tool to create fur or adding glitter and rhinestones for some sparkle. Finish off with a top coat to seal in your design and protect your nails. And voila, you have your very own Grinch-inspired nails!
Why choose Grinch nail art?
 Aside from being a fun and festive way to celebrate the holiday season, Grinch nail art is a great conversation starter and a unique way to express your love for the classic story. It's also a versatile design that can be adapted to suit any nail length or shape, making it accessible to everyone.
So, this holiday season, why not add a touch of whimsy and nostalgia to your nails with some Grinch nail art?
Whether you're a fan of the movie or just looking for a playful and eye-catching manicure, this trend is sure to bring a smile to your face and spread some holiday cheer. Give it a try and watch your nails transform into a little piece of Whoville magic.
Aside from being a fun and festive way to celebrate the holiday season, Grinch nail art is a great conversation starter and a unique way to express your love for the classic story. It's also a versatile design that can be adapted to suit any nail length or shape, making it accessible to everyone.
So, this holiday season, why not add a touch of whimsy and nostalgia to your nails with some Grinch nail art?
Whether you're a fan of the movie or just looking for a playful and eye-catching manicure, this trend is sure to bring a smile to your face and spread some holiday cheer. Give it a try and watch your nails transform into a little piece of Whoville magic.


