Tiffany blue is a color that is synonymous with luxury and elegance. What better way to incorporate it into your look than through your nails? This tutorial will show you how to achieve a beautiful tiffany blue nail art look that will have you feeling like a million bucks. To start, apply a base coat to protect your nails and create a smooth surface for the polish to adhere to. Then, using a tiffany blue nail polish, paint all of your nails except for your ring finger. For the ring finger, use a white nail polish instead. Once the base color is dry, take a small brush and dip it into a metallic silver nail polish. Create thin lines on each nail, starting at the cuticle and moving towards the tip. This will give the look of silver sparkles on the tiffany blue background. For the ring finger, use the same metallic silver nail polish to create a small bow design. This will give a nod to the iconic Tiffany & Co. bow. Finish off the look with a top coat to seal in the design and add shine. You now have a stunning tiffany blue nail art look that is perfect for any special occasion.1. "Tiffany Blue Nail Art Tutorial"
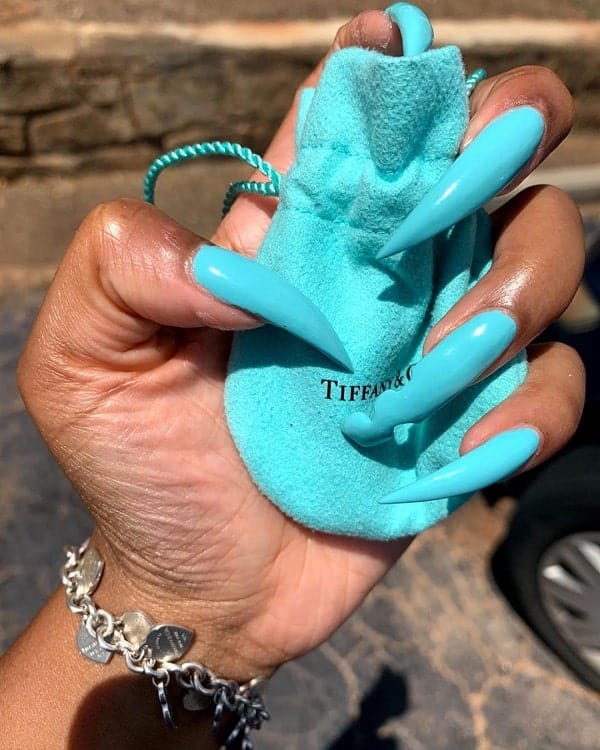


1. "Tiffany Blue Nail Art Tutorial"


Not everyone is a nail art pro, but that doesn't mean you can't still achieve a beautiful tiffany nail art look. This tutorial will show you an easy and foolproof way to create a tiffany blue and white design on your nails. Start by applying a base coat to protect your nails and create a smooth surface. Then, using a tiffany blue nail polish, paint all of your nails except for your middle finger. For the middle finger, use a white nail polish instead. Next, take some striping tape and carefully place it diagonally across your tiffany blue nails. This will create a clean line for the white polish to go over. Paint the white polish on the exposed half of your nails and then carefully remove the striping tape. For the middle finger, use the same striping tape to create a criss-cross pattern. Paint the white polish over the exposed sections and then remove the tape. You now have a simple yet chic tiffany nail art look. Finish off with a top coat to seal in the design and add shine. This look is perfect for those who want to achieve a tiffany nail art look without the hassle of intricate designs.2. "Easy Tiffany Nail Art Tutorial"


2. "Easy Tiffany Nail Art Tutorial"


If you want to take your tiffany nail art to the next level, this step-by-step tutorial is for you. Follow these easy steps to achieve a stunning tiffany blue and white design on your nails. Start by applying a base coat to protect your nails and create a smooth surface. Then, using a tiffany blue nail polish, paint all of your nails except for your ring finger. For the ring finger, use a white nail polish instead. Next, take a small brush and dip it into a metallic silver nail polish. Create thin lines on each nail, starting at the cuticle and moving towards the tip. This will give the look of silver sparkles on the tiffany blue background. For the ring finger, use the same metallic silver nail polish to create a small bow design. This will give a nod to the iconic Tiffany & Co. bow. Using a dotting tool or a toothpick, create white dots on the tiffany blue nails. This will add some dimension to the design and give the look of pearls. Finish off the look with a top coat to seal in the design and add shine. You now have a stunning tiffany nail art look that is perfect for any special occasion or just to add some glamour to your everyday nails.3. "Step-by-Step Tiffany Nail Art Tutorial"


3. "Step-by-Step Tiffany Nail Art Tutorial"


For all the Tiffany & Co. lovers out there, this nail art tutorial is for you. This design is directly inspired by the iconic brand's logo and will have your nails looking like a million dollars. To start, apply a base coat to protect your nails and create a smooth surface. Then, using a tiffany blue nail polish, paint all of your nails except for your ring finger. For the ring finger, use a white nail polish instead. Next, take a small brush and dip it into a metallic silver nail polish. Create thin lines on each nail, starting at the cuticle and moving towards the tip. This will give the look of silver sparkles on the tiffany blue background. For the ring finger, use the same metallic silver nail polish to create a small bow design. This will give a nod to the iconic Tiffany & Co. bow. Using a dotting tool or a toothpick, create white dots on the tiffany blue nails. This will add some dimension to the design and give the look of pearls. Finish off with a top coat to seal in the design and add shine. This tiffany & co. inspired nail art tutorial is perfect for any special occasion or for those who want to show off their love for the iconic brand on their nails.4. "Tiffany & Co. Inspired Nail Art Tutorial"


4. "Tiffany & Co. Inspired Nail Art Tutorial"
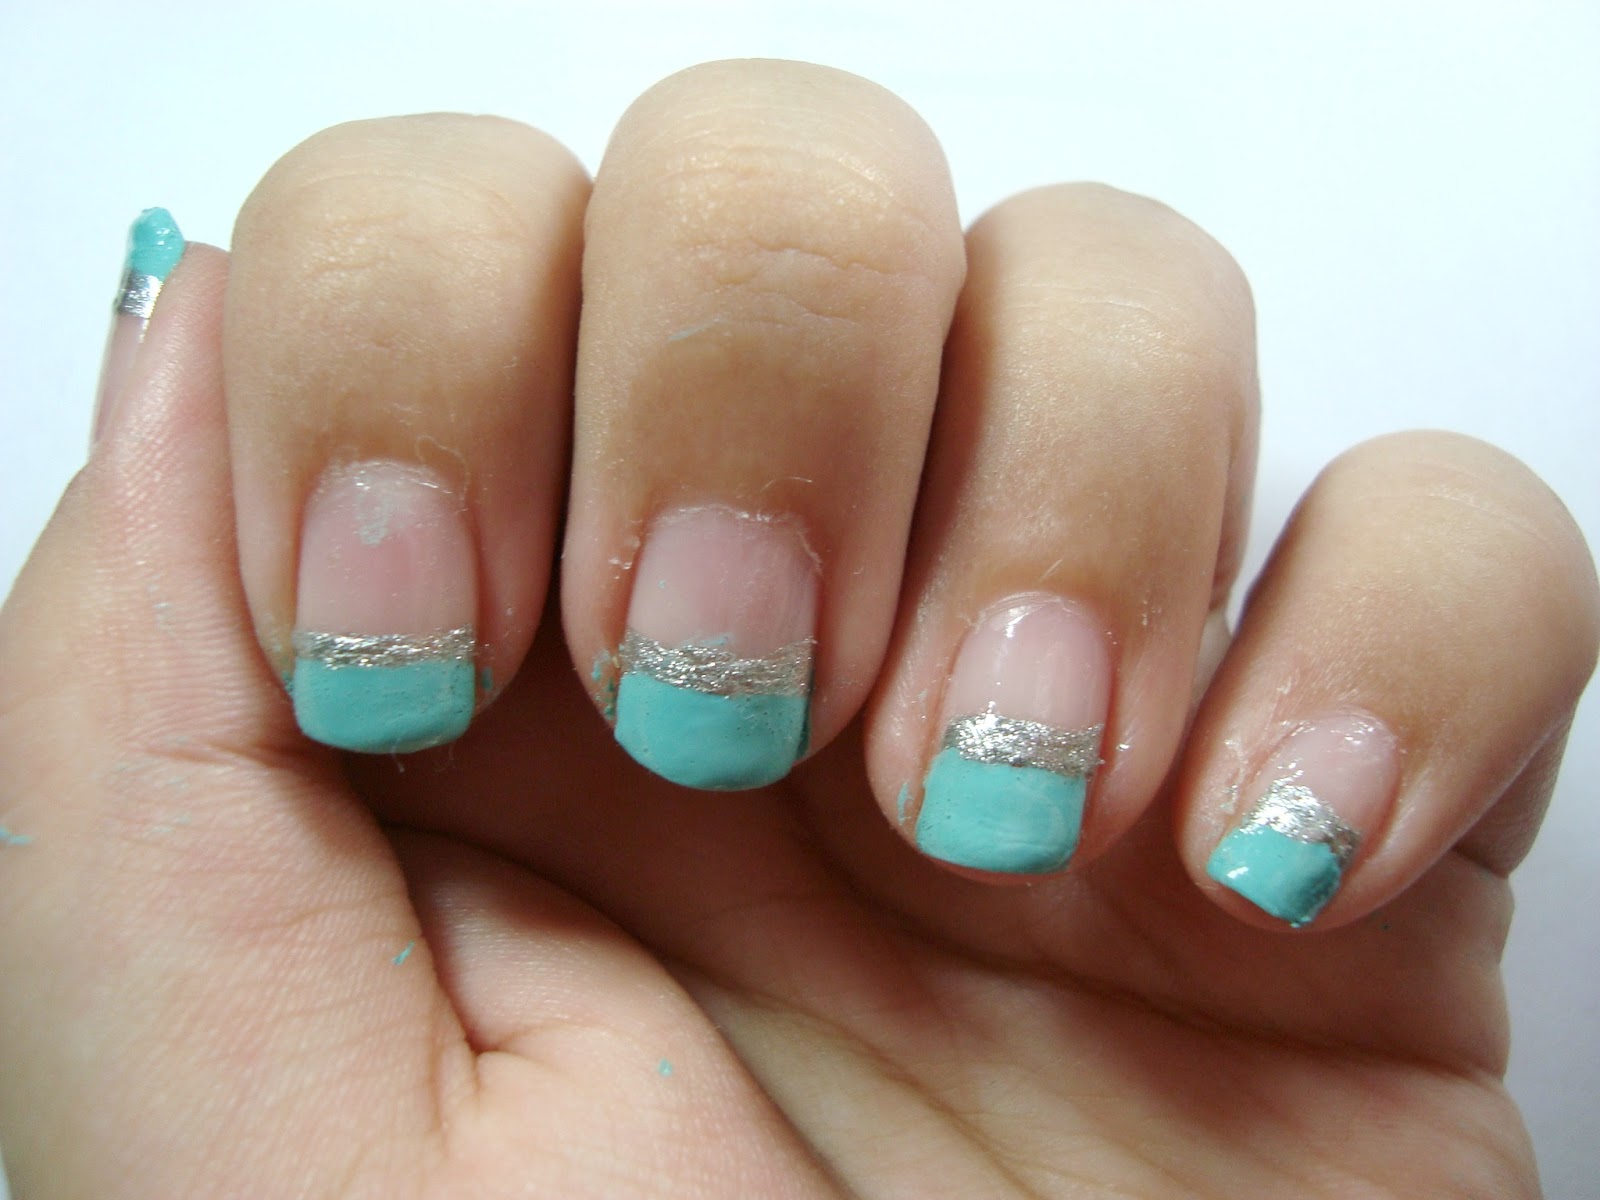
The classic French tip gets a tiffany twist in this nail art tutorial. This elegant and timeless design is perfect for any occasion and will have your nails looking chic and sophisticated. Start by applying a base coat to protect your nails and create a smooth surface. Then, using a tiffany blue nail polish, paint all of your nails except for your ring finger. For the ring finger, use a white nail polish instead. Next, take some striping tape and carefully place it on the tips of your nails, leaving a small section of the tiffany blue polish exposed. Then, paint the white polish over the exposed tips and carefully remove the tape. For the ring finger, use the same striping tape to create a small bow design. This will give a nod to the iconic Tiffany & Co. bow. Finish off the look with a top coat to seal in the design and add shine. This tiffany French tip nail art is perfect for those who want a subtle yet eye-catching design on their nails.5. "Tiffany French Tip Nail Art Tutorial"

5. "Tiffany French Tip Nail Art Tutorial"


Why settle for a plain tiffany blue nail art when you can add some holographic magic to it? This tutorial will show you how to create a stunning tiffany blue and holographic design on your nails. Start by applying a base coat to protect your nails and create a smooth surface. Then, using a tiffany blue nail polish, paint all of your nails except for your ring finger. For the ring finger, use a white nail polish instead. Next, take a small brush and dip it into a holographic nail polish. Create thin lines on each nail, starting at the cuticle and moving towards the tip. This will give the look of holographic sparkles on the tiffany blue background. For the ring finger, use the same holographic nail polish to create a small bow design. This will give a nod to the iconic Tiffany & Co. bow. Finish off the look with a top coat to seal in the design and add shine. This tiffany holographic nail art is perfect for those who want a unique and eye-catching look on their nails.6. "Tiffany Holographic Nail Art Tutorial"

6. "Tiffany Holographic Nail Art Tutorial"


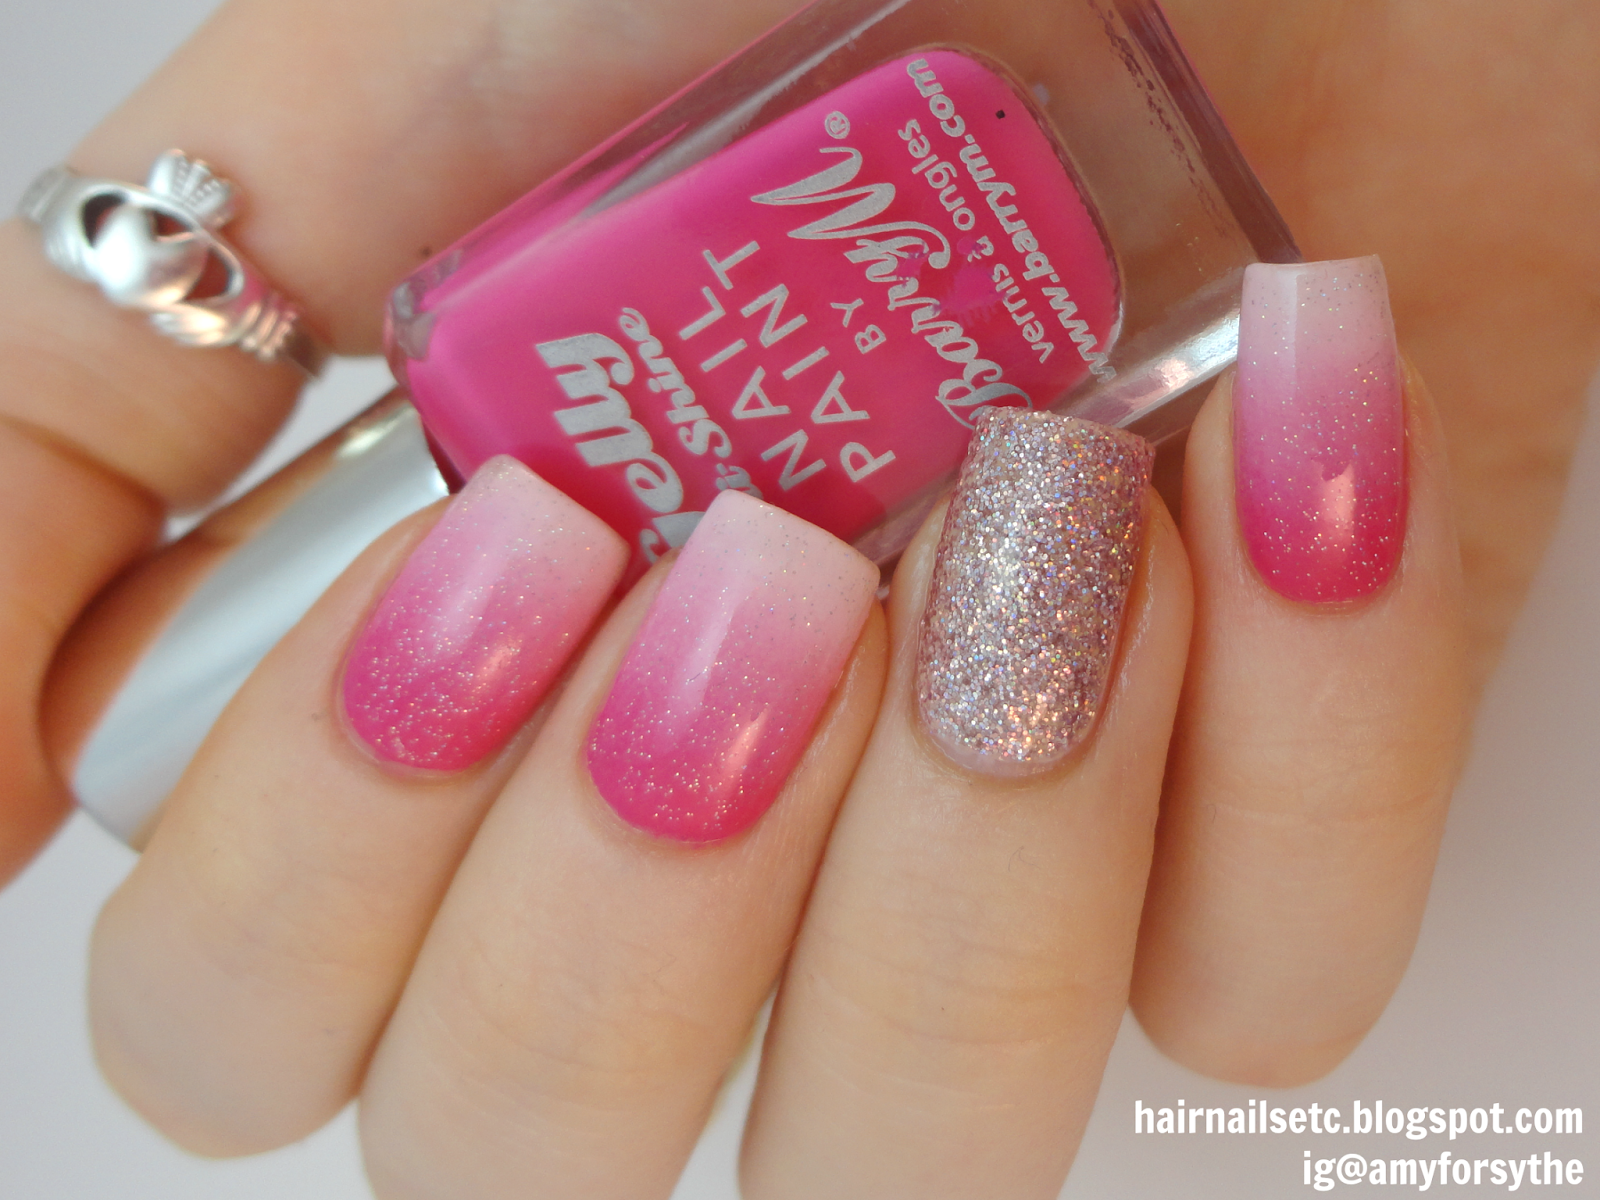
Ombre is a popular nail art technique that involves blending two or more colors together. This tutorial will show you how to create a beautiful tiffany blue ombre design on your nails. Start by applying a base coat to protect your nails and create a smooth surface. Then, using a tiffany blue nail polish, paint all of your nails except for your ring finger. For the ring finger, use a white nail polish instead. Next, take a makeup sponge and paint a thin layer of tiffany blue nail polish on one side and white nail polish on the other side. Dab the sponge onto your nails, starting at the cuticle and moving towards the tip. This will create a gradient effect. For the ring finger, use the same sponge to create a gradient effect with the tiffany blue and white polishes. Then, using a small brush, create a small bow design using a metallic silver nail polish. Finish off the look with a top coat to seal in the design and add shine. This tiffany ombre nail art is perfect for those who want a trendy and subtle design on their nails.7. "Tiffany Ombre Nail Art Tutorial"


7. "Tiffany Ombre Nail Art Tutorial"


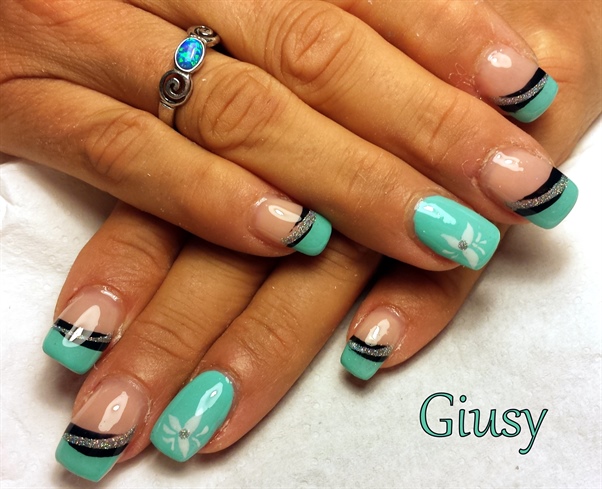
No tiffany nail art collection is complete without a bow design. This simple yet elegant tutorial will show you how to create a tiffany blue and silver bow design on your nails. Start by applying a base coat to protect your nails and create a smooth surface. Then, using a tiffany blue nail polish, paint all of your nails except for your ring finger. For the ring finger, use a white nail polish instead. Next, take a metallic silver nail polish and create a small bow design on the ring finger. You can use a small brush or a dotting tool to achieve the perfect bow shape. For the other nails, use the same silver nail polish to create thin lines on each nail, starting at the cuticle and moving towards the tip. This will give the look of silver sparkles on the tiffany blue background. Finish off with a top coat to seal in the design and add shine. This tiffany bow nail art is perfect for those who want a simple yet classy design on their nails.8. "Tiffany Bow Nail Art Tutorial"


8. "Tiffany Bow Nail Art Tutorial"
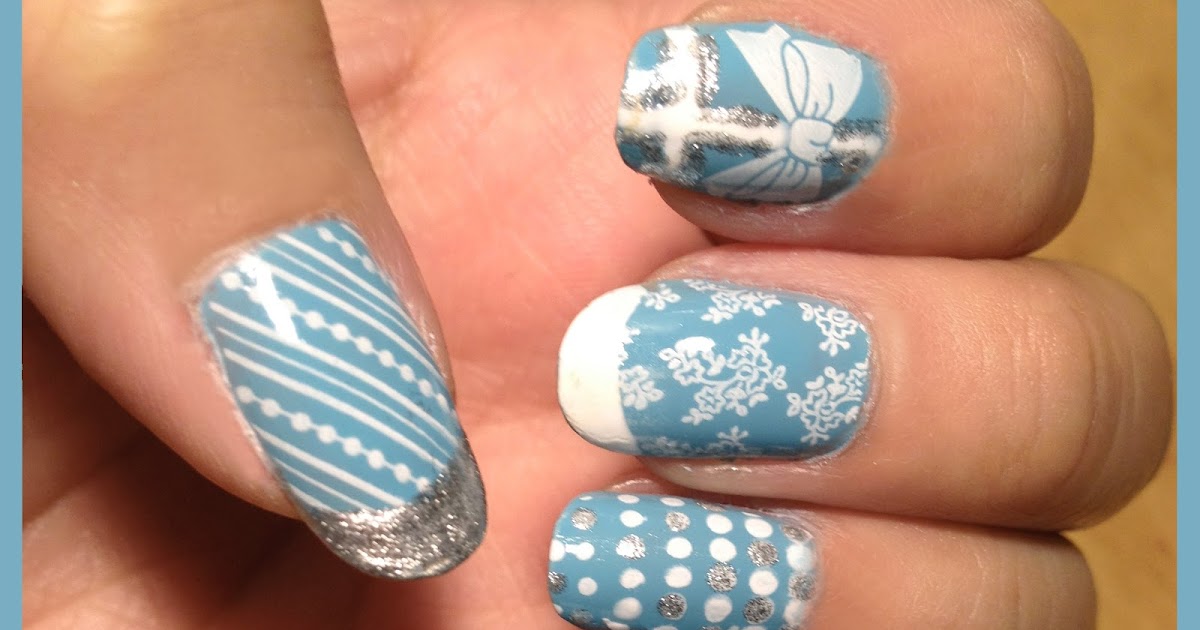
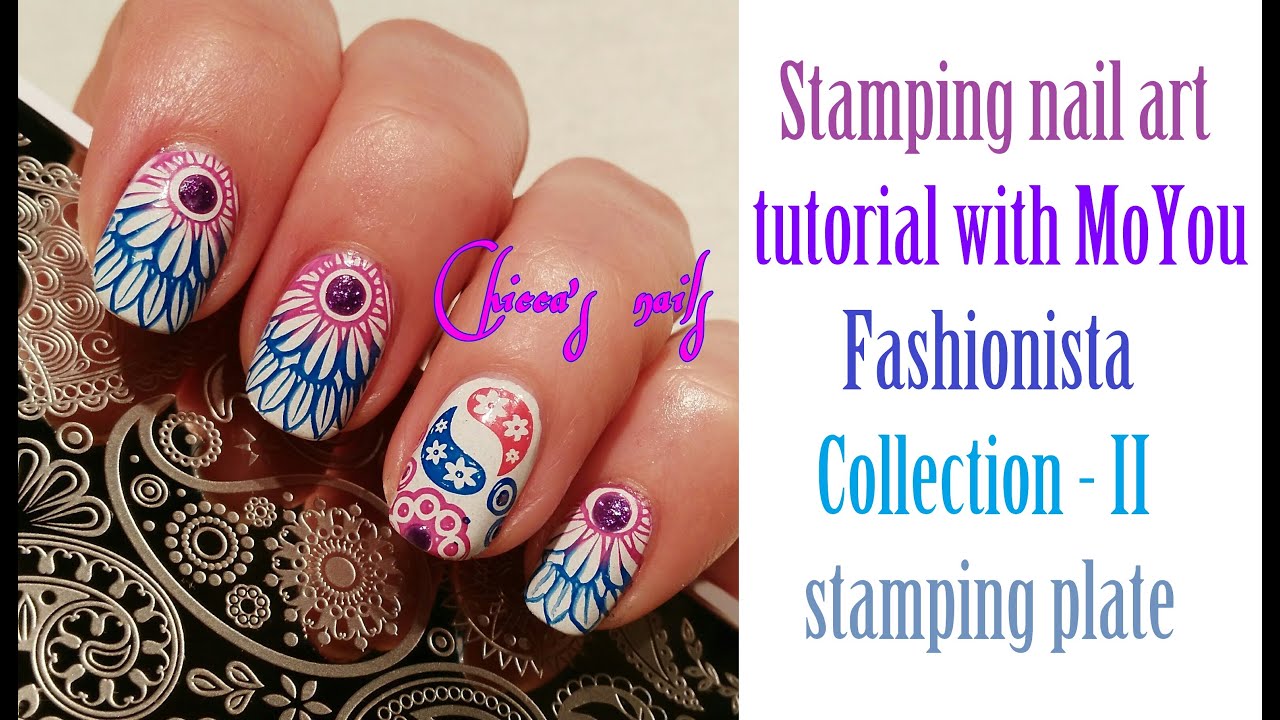
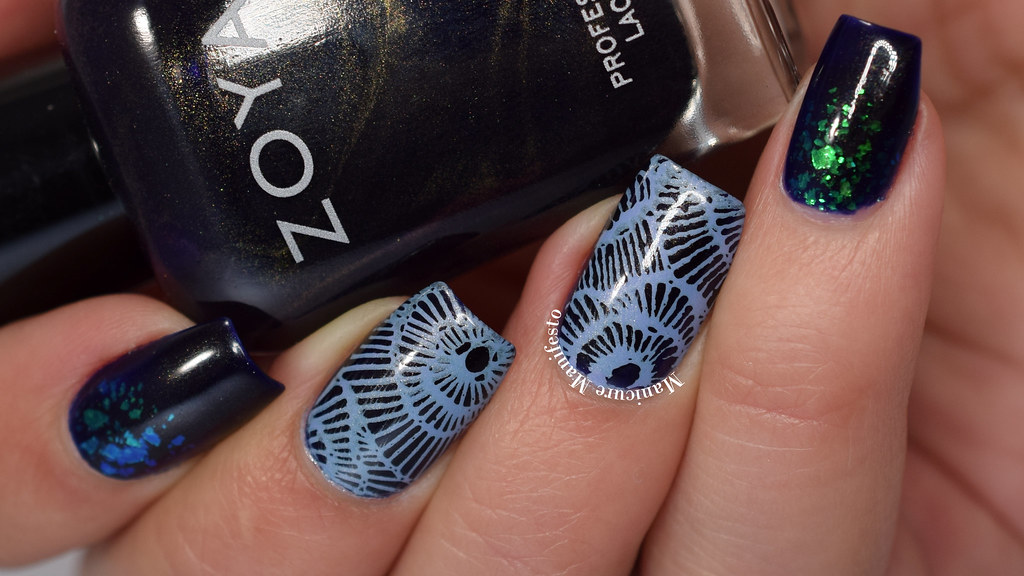
Stamping is a popular nail art technique that involves using a special tool to transfer a design onto your nails. This tutorial will show you how to create a beautiful tiffany blue and silver stamped design on your nails. Start by applying a base coat to protect your nails and create a smooth surface. Then, using a tiffany blue nail polish, paint all of your nails except for your ring finger. For the ring finger, use a white nail polish instead. Next, using a stamping plate with a tiffany blue design, transfer the design onto your nails using a stamping tool and a metallic silver nail polish. This will give the look of intricate tiffany blue designs on a silver background. For the ring finger, use the same stamping plate to transfer a small bow design onto the nail. This will give a nod to the iconic Tiffany & Co. bow. Finish off the look with a top coat to seal in the design and add shine. This tiffany stamping nail art is perfect for those who want a unique and intricate design on their nails.9. "Tiffany Stamping Nail Art Tutorial"


9. "Tiffany Stamping Nail Art Tutorial"
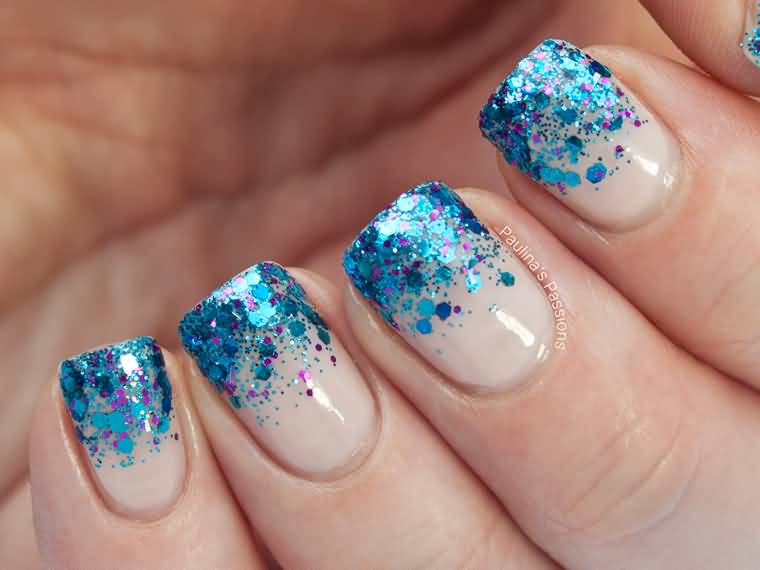
Glitter and tiffany blue? Yes, please! This tutorial will show you how to create a stunning glitter gradient design on your nails using tiffany blue and silver. Start by applying a base coat to protect your nails and create a smooth surface. Then, using a tiffany blue nail polish, paint all of your nails except for your ring finger. For the ring finger, use a white nail polish instead. Next, take a makeup sponge and paint a thin layer of tiffany blue nail polish on one side and a silver glitter nail polish on the other side. Dab the sponge onto your nails, starting at the cuticle and moving towards the tip. This will create a glitter gradient design. For the ring finger, use the same sponge to create a glitter gradient with the tiffany blue and silver polishes. Then, using a small brush, create a small bow design using a metallic silver nail polish. Finish off the look with a top coat to seal in the design and add shine. This tiffany glitter gradient nail art is perfect for those who want a glamorous and eye-catching design on their nails.10. "Tiffany Glitter Gradient Nail Art Tutorial"


10. "Tiffany Glitter Gradient Nail Art Tutorial"

The Art of Tiffany Nail Design

Elevate Your Nail Game with this Step-by-Step Tutorial
 If you're looking to add a touch of elegance and luxury to your nail game, look no further than the iconic Tiffany & Co. brand. Their famous blue hue and intricate designs have been a source of inspiration for many, including in the world of nail art. In this tutorial, we will guide you through the steps to achieve a stunning Tiffany-inspired nail design.
Step 1: Gather Your Materials
To start, you'll need a few essential tools and products:
- A base coat
- Tiffany blue nail polish (or any blue shade that closely resembles the iconic color)
- White nail polish
- Clear top coat
- Nail art brush or toothpick
- Scotch tape
- Nail polish remover
- Cotton swabs
Step 2: Prep Your Nails
Before you begin, make sure your nails are clean and free of any old polish. Use a cotton swab dipped in nail polish remover to clean up the edges and cuticles. This will ensure a smooth and even base for your design.
Step 3: Apply a Base Coat
To protect your natural nails and ensure your design stays put, start by applying a base coat. This will also help your nail polish go on more smoothly and last longer.
Step 4: Paint Your Nails Blue
Using your Tiffany blue nail polish, paint all of your nails except for your ring finger. This will be used for the accent nail.
Step 5: Create a Stripe
Using scotch tape, create a diagonal stripe on your accent nail. Make sure to press down firmly to avoid any polish from seeping through.
Step 6: Add White Polish
Once the tape is securely in place, paint the exposed part of your accent nail with white polish. Carefully remove the tape while the polish is still wet to reveal a clean and crisp line.
Step 7: Create the Tiffany Logo
Using a nail art brush or toothpick, create the iconic Tiffany logo on your accent nail using white polish. Start with a small horizontal line and add a vertical line through the middle. Then, add a small arc on top of the vertical line and fill it in to create the signature "T" shape.
Step 8: Seal the Design
Once your design is complete and the polish is dry, seal it in with a clear top coat. This will add shine and protect your design from chipping.
And there you have it – a stunning Tiffany nail design that will surely turn heads. With a little bit of patience and the right tools, you can elevate your nail game and add a touch of luxury to your everyday look. So go ahead and try out this tutorial, and don't forget to share your creations on social media using
#TiffanyNailArt
.
If you're looking to add a touch of elegance and luxury to your nail game, look no further than the iconic Tiffany & Co. brand. Their famous blue hue and intricate designs have been a source of inspiration for many, including in the world of nail art. In this tutorial, we will guide you through the steps to achieve a stunning Tiffany-inspired nail design.
Step 1: Gather Your Materials
To start, you'll need a few essential tools and products:
- A base coat
- Tiffany blue nail polish (or any blue shade that closely resembles the iconic color)
- White nail polish
- Clear top coat
- Nail art brush or toothpick
- Scotch tape
- Nail polish remover
- Cotton swabs
Step 2: Prep Your Nails
Before you begin, make sure your nails are clean and free of any old polish. Use a cotton swab dipped in nail polish remover to clean up the edges and cuticles. This will ensure a smooth and even base for your design.
Step 3: Apply a Base Coat
To protect your natural nails and ensure your design stays put, start by applying a base coat. This will also help your nail polish go on more smoothly and last longer.
Step 4: Paint Your Nails Blue
Using your Tiffany blue nail polish, paint all of your nails except for your ring finger. This will be used for the accent nail.
Step 5: Create a Stripe
Using scotch tape, create a diagonal stripe on your accent nail. Make sure to press down firmly to avoid any polish from seeping through.
Step 6: Add White Polish
Once the tape is securely in place, paint the exposed part of your accent nail with white polish. Carefully remove the tape while the polish is still wet to reveal a clean and crisp line.
Step 7: Create the Tiffany Logo
Using a nail art brush or toothpick, create the iconic Tiffany logo on your accent nail using white polish. Start with a small horizontal line and add a vertical line through the middle. Then, add a small arc on top of the vertical line and fill it in to create the signature "T" shape.
Step 8: Seal the Design
Once your design is complete and the polish is dry, seal it in with a clear top coat. This will add shine and protect your design from chipping.
And there you have it – a stunning Tiffany nail design that will surely turn heads. With a little bit of patience and the right tools, you can elevate your nail game and add a touch of luxury to your everyday look. So go ahead and try out this tutorial, and don't forget to share your creations on social media using
#TiffanyNailArt
.


