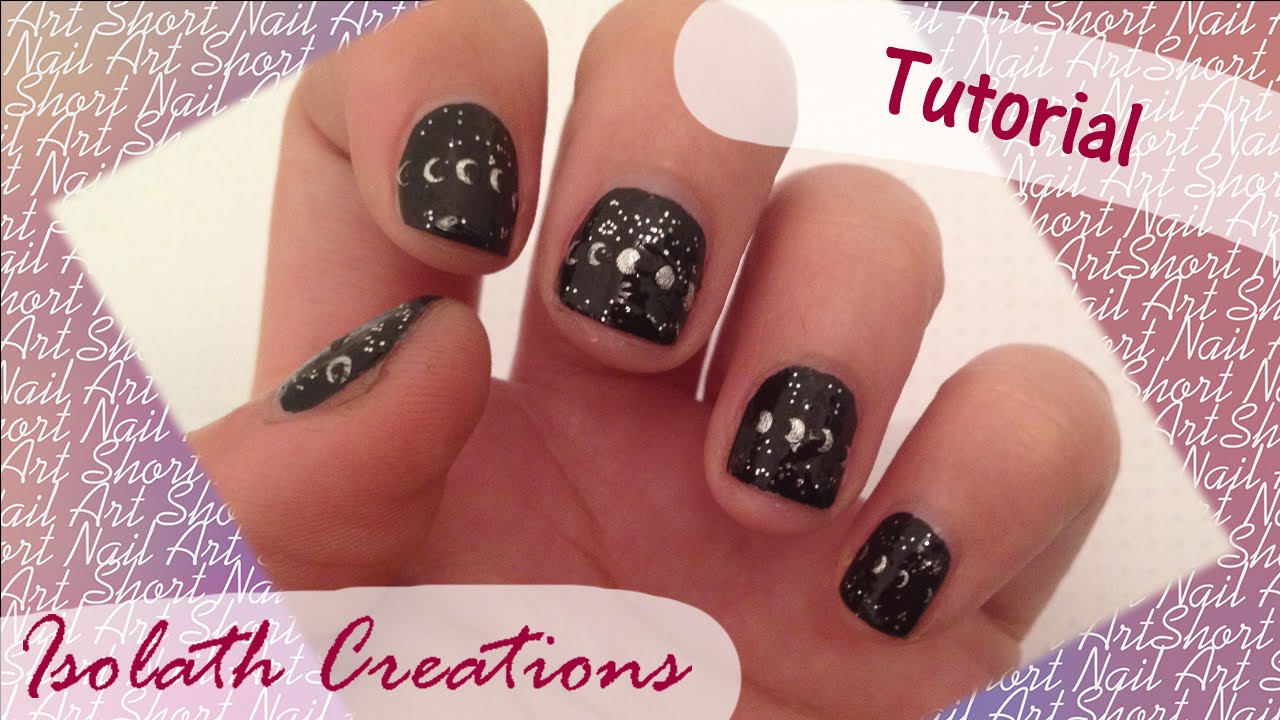
Are you looking to create a stunning and unique nail design that will make you stand out from the crowd? Look no further than total eclipse nail art. This design is perfect for any occasion, whether it's a special event or just a fun day out with friends. In this tutorial, we will guide you through the steps to create your own total eclipse nail art. To start, you will need a few key supplies. Make sure you have a base coat, top coat, black nail polish, white nail polish, and a makeup sponge. You can also add some glitter or rhinestones for an extra touch of sparkle. Begin by applying a base coat to your nails to protect them and help the polish last longer. Then, paint all of your nails with a black nail polish and let them dry completely. Next, take your white nail polish and paint a small crescent shape on the tip of each nail. This will be the base for the eclipse. You can use a small brush or a toothpick to create more precise lines. Now comes the fun part – creating the eclipse effect. Take your makeup sponge and dab it lightly in the black nail polish. Then, gently dab the sponge onto the white crescent shape, blending it out towards the tip of the nail. Repeat this step until you achieve the desired effect. Once your nails are completely dry, you can add some extra details like glitter or rhinestones. Finish off with a top coat to seal in your design and give it a glossy finish. With this easy tutorial, you can create a stunning total eclipse nail art design that will surely turn heads wherever you go.1. Total Eclipse Nail Art Tutorial


1. Total Eclipse Nail Art Tutorial
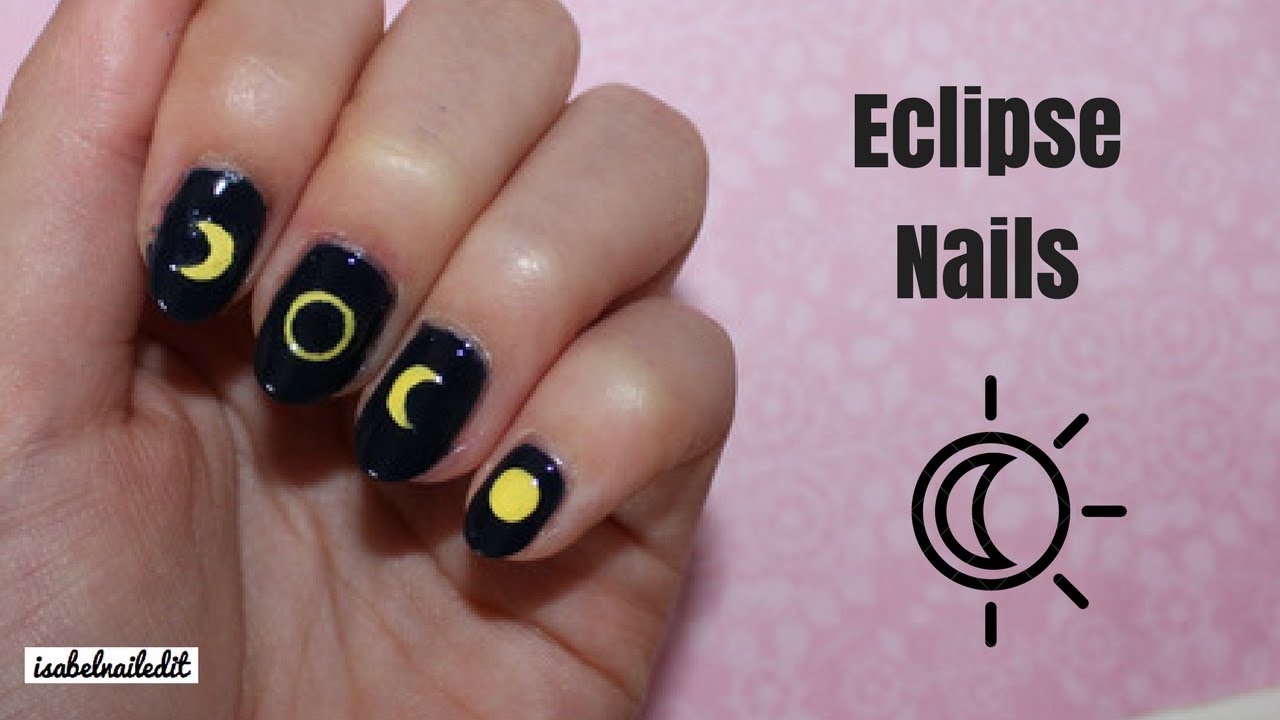


If you're a fan of celestial events and want to show off your love for the stars and the moon, a total eclipse nail design is the perfect choice. With just a few simple steps, you can create a beautiful and unique design that will make your nails stand out. To start, gather your supplies. You will need a base coat, black and white nail polish, a makeup sponge, and a small brush or toothpick. You can also add some metallic silver or gold polish for an extra touch of shine. Begin by applying a base coat to your nails to protect them and help the polish last longer. Then, paint all of your nails with a black nail polish and let them dry completely. Next, take your white nail polish and paint a small crescent shape on the tip of each nail. This will be the base for the eclipse. You can use a small brush or a toothpick to create more precise lines. Now for the fun part – creating the eclipse effect. Take your makeup sponge and dab it lightly in the black nail polish. Then, gently dab the sponge onto the white crescent shape, blending it out towards the tip of the nail. Repeat this step until you achieve the desired effect. For an extra touch of glam, you can use metallic silver or gold polish to create stars or constellations on your nails. You can also add some rhinestones for a more dramatic look. Finish off with a top coat to seal in your design and give it a glossy finish. And there you have it – a stunning total eclipse nail design that is out of this world.2. How to Create a Total Eclipse Nail Design


2. How to Create a Total Eclipse Nail Design


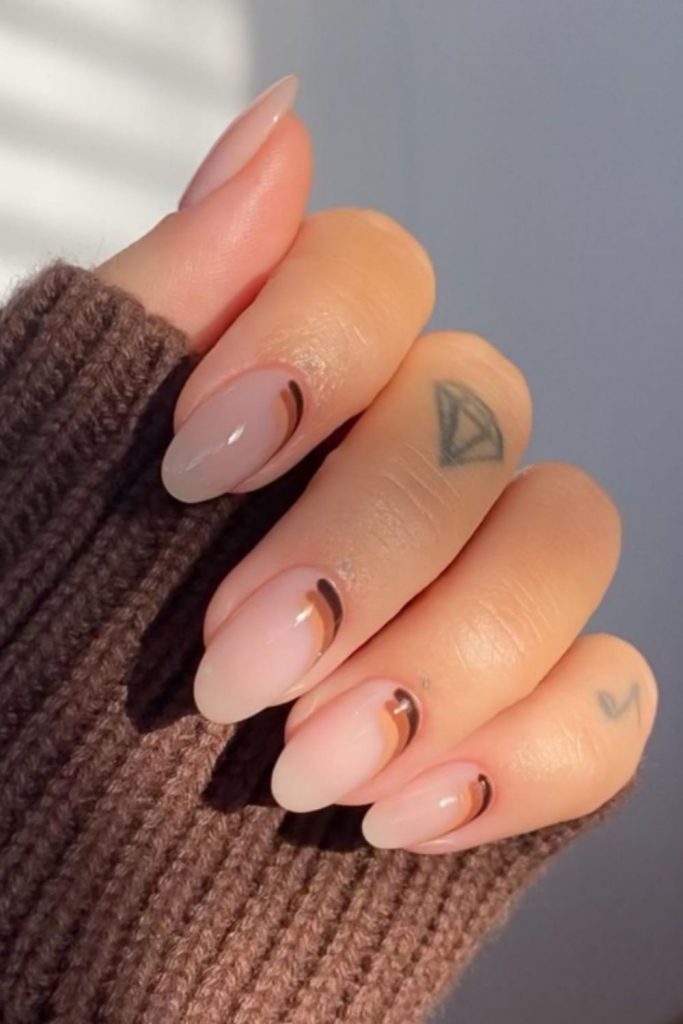
If you're looking for some inspiration for your next manicure, consider a total eclipse nail art design. This unique and eye-catching design is perfect for any occasion and can be customized to fit your personal style. Here are some ideas to get you started. 1. Ombre Eclipse: Instead of a solid black base, create an ombre effect with a dark blue or purple polish. This will give your nails a more mystical and ethereal look. 2. Glitter Eclipse: Add some sparkle to your design by using a glittery top coat over the black polish. This will give your nails a touch of glamour and make them stand out even more. 3. Negative Space Eclipse: For a modern twist on the classic design, leave some negative space on your nails and only paint the eclipse on a portion of the nail. This will create a more minimalist and chic look. 4. Eclipse Accent: If you don't want to paint all of your nails with the eclipse design, you can simply make it an accent nail on one finger. This will still make a statement without being too overwhelming. 5. Eclipse French Tip: Give your classic French manicure a celestial upgrade by adding a white crescent shape on the tip of each nail. This is a subtle yet elegant way to incorporate the eclipse design into your nails. Remember, you can always add your own personal touches and embellishments to make the total eclipse nail art design truly your own. Let your creativity shine!3. Total Eclipse Nail Art Ideas


3. Total Eclipse Nail Art Ideas


Are you new to nail art and feeling intimidated by intricate designs? Don't worry, total eclipse nail art is a great option for beginners. With just a few simple steps, you can create a stunning design that looks like it was done by a professional. Here are some tips for beginners. 1. Start with a clean and smooth base. Make sure your nails are free of any old polish and file them to your desired shape. 2. Use a base coat to protect your nails and help the polish last longer. This will also make it easier to fix any mistakes. 3. Use a small brush or toothpick to create precise lines for the white crescent shape. If you don't have these tools, you can also use a bobby pin or the end of a makeup brush. 4. Don't worry about making the eclipse shape perfect. The beauty of this design is in its imperfections. 5. Practice makes perfect. Don't be discouraged if your first attempt doesn't turn out exactly how you want it. Keep practicing and you'll get better with each try. With these tips in mind, even beginners can create a beautiful total eclipse nail art design that they can be proud of.4. Total Eclipse Nail Art Designs for Beginners

4. Total Eclipse Nail Art Designs for Beginners


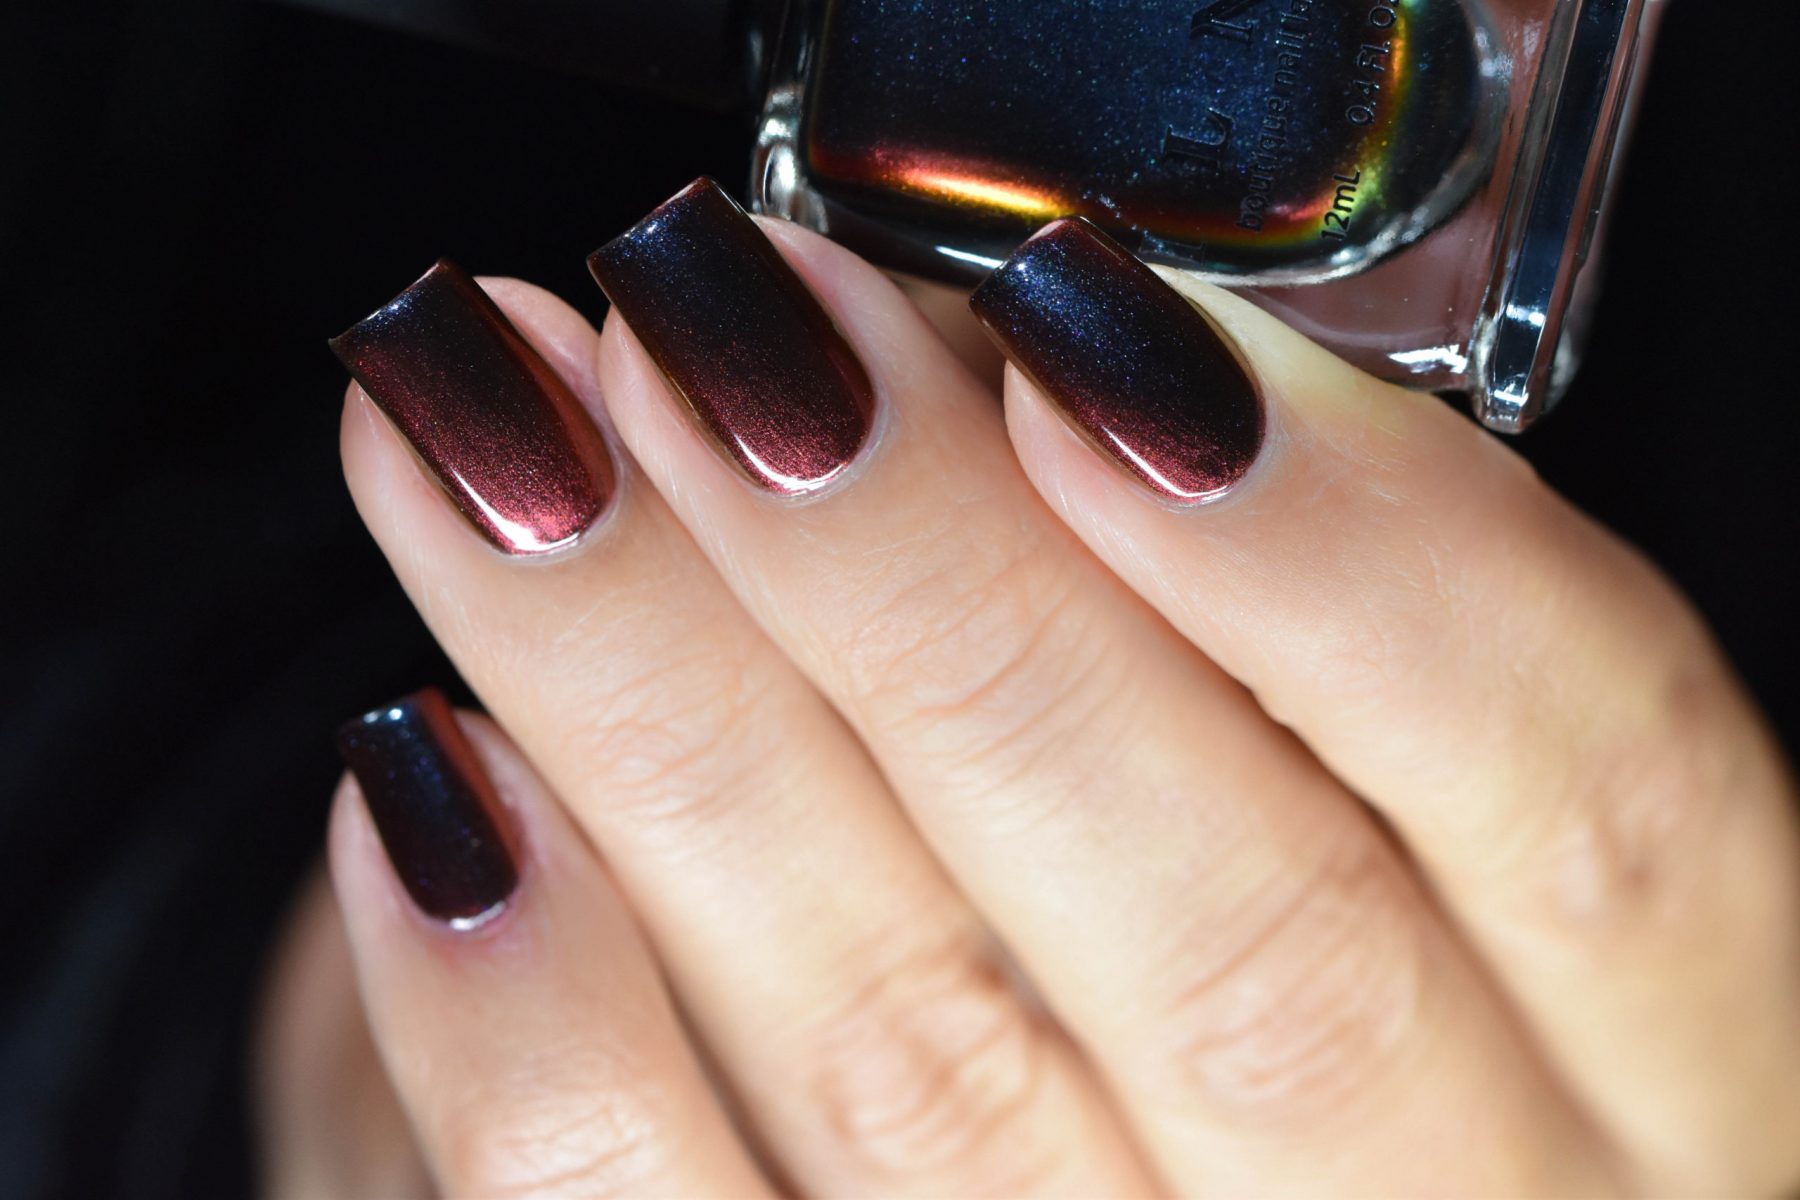
If you're still unsure about trying out total eclipse nail art, take a look at some of these stunning designs for inspiration. From bold and dramatic to subtle and elegant, there are endless possibilities for this unique nail design. 1. Bold and Glittery: This design features a bold black base with a glittery eclipse shape in the center of each nail. The addition of rhinestones adds an extra touch of sparkle. 2. Blue Eclipse: Instead of the traditional black and white, this design uses a dark blue polish for the eclipse shape, giving it a more mystical look. 3. Geometric Eclipse: For a modern twist, this design incorporates geometric shapes and negative space to create a unique and eye-catching eclipse design. 4. Galaxy Eclipse: This design combines two popular nail trends – total eclipse and galaxy nails. The result is a stunning and ethereal look that is sure to turn heads. 5. Minimalist Eclipse: This design keeps it simple with just a white crescent shape on a black base, creating a minimalist and chic look. Don't be afraid to experiment and make the total eclipse nail art design your own. Let your creativity run wild and create a design that speaks to your personal style.5. Total Eclipse Nail Art Inspiration
5. Total Eclipse Nail Art Inspiration


To help you achieve the perfect total eclipse nail art design, we have put together a step-by-step guide for you to follow. With these easy-to-follow instructions, you will have beautiful and unique nails in no time. Step 1: Gather your supplies. You will need a base coat, black and white nail polish, a makeup sponge, and a small brush or toothpick. Step 2: Apply a base coat to protect your nails and help the polish last longer. Step 3: Paint all of your nails with a black nail polish and let them dry completely. Step 4: Using a small brush or toothpick, create a white crescent shape on the tip of each nail. Step 5: Take your makeup sponge and dab it lightly in the black nail polish. Then, gently dab the sponge onto the white crescent shape, blending it out towards the tip of the nail. Repeat this step until you achieve the desired effect. Step 6: Optional – add glitter, rhinestones, or other embellishments to your design for an extra touch of glam. Step 7: Finish off with a top coat to seal in your design and give it a glossy finish. With these simple steps, you can create a stunning total eclipse nail art design that will surely make a statement.6. Total Eclipse Nail Art Step-by-Step Guide
6. Total Eclipse Nail Art Step-by-Step Guide
Before you can create your own total eclipse nail art, you will need to make sure you have all the necessary supplies. Here is a list of the essential items you will need to create this unique nail design. 1. Base Coat: This will protect your nails and help the polish last longer. 2. Black Nail Polish: This will be the base color for your design. 3. White Nail Polish: This will be used to create the eclipse shape. 4. Makeup Sponge: This will be used to create the eclipse effect on your nails. 5. Small Brush or Toothpick: This will be used to create precise lines for the eclipse shape. Optional Supplies: 1. Glitter Polish: Add some sparkle to your design with a glittery top coat. 2. Rhinestones: These can be added for extra embellishment and shine. 3. Metallic Polish: Use silver or gold polish to create stars or constellations on your nails. With these supplies, you're ready to create your own total eclipse nail art.7. Total Eclipse Nail Art Supplies

7. Total Eclipse Nail Art Supplies
Creating total eclipse nail art may seem daunting at first, but with these tips and tricks, you'll be a pro in no time. 1. Use a base coat to protect your nails and help the polish last longer. This will also make it easier to fix any mistakes. 2. Use a small brush or toothpick to create precise lines for the eclipse shape. If you don't have these tools, you can also use a bobby pin or the end of a makeup brush. 3. Don't worry about making the eclipse shape perfect. The beauty of this design is in its imperfections. 4. If you want a more subtle look, you can use a light gray or silver polish instead of black for the eclipse shape. 5. You can create different effects by using different makeup sponges. A denser sponge will create a more concentrated effect, while a lighter sponge will create a softer effect. With these tips and tricks, you can create a beautiful and unique total eclipse nail art design with ease.8. Total Eclipse Nail Art Tips and Tricks
8. Total Eclipse Nail Art Tips and Tricks
Don't have long nails but still want to rock the total eclipse nail art trend? No problem! This design can be easily adapted for short nails. Here's how: 1. Use a lighter color for the eclipse shape. Instead of black, use a dark blue, purple, or gray polish for a more subtle look. 2. Keep the eclipse shape small. Instead of covering the entire tip of the nail, create a smaller crescent shape to fit your short nails. 3. Add embellishments to the base of the nail. If you have a shorter nail bed, adding rhinestones or glitter to the base of the nail can elongate the appearance of your nails. With these tips, you can create a total eclipse nail art design that is perfect for short nails.9. Total Eclipse Nail Art for Short Nails

9. Total Eclipse Nail Art for Short Nails


If you have long nails, you have even more space to get creative with your total eclipse nail art design. Here are some ideas for long nails: 1. Add extra details. With more space to work with, you can add more details to your design, such as stars, constellations, or a gradient effect. 2. Create a negative space design. Instead of painting the entire nail, leave some negative space and only paint the eclipse on a portion of the nail. 3. Mix and match colors. Use different colors for the base and eclipse shape to create a unique and eye-catching look. 4. Add texture. You can use different types of polish, such as matte or chrome, to create a textured effect on your nails. With these ideas, you can create a total eclipse nail art design that is perfect for your long nails.10. Total Eclipse Nail Art for Long Nails


10. Total Eclipse Nail Art for Long Nails
The Beauty of Total Eclipse Nail Art

Transforming Your Nails into a Celestial Masterpiece
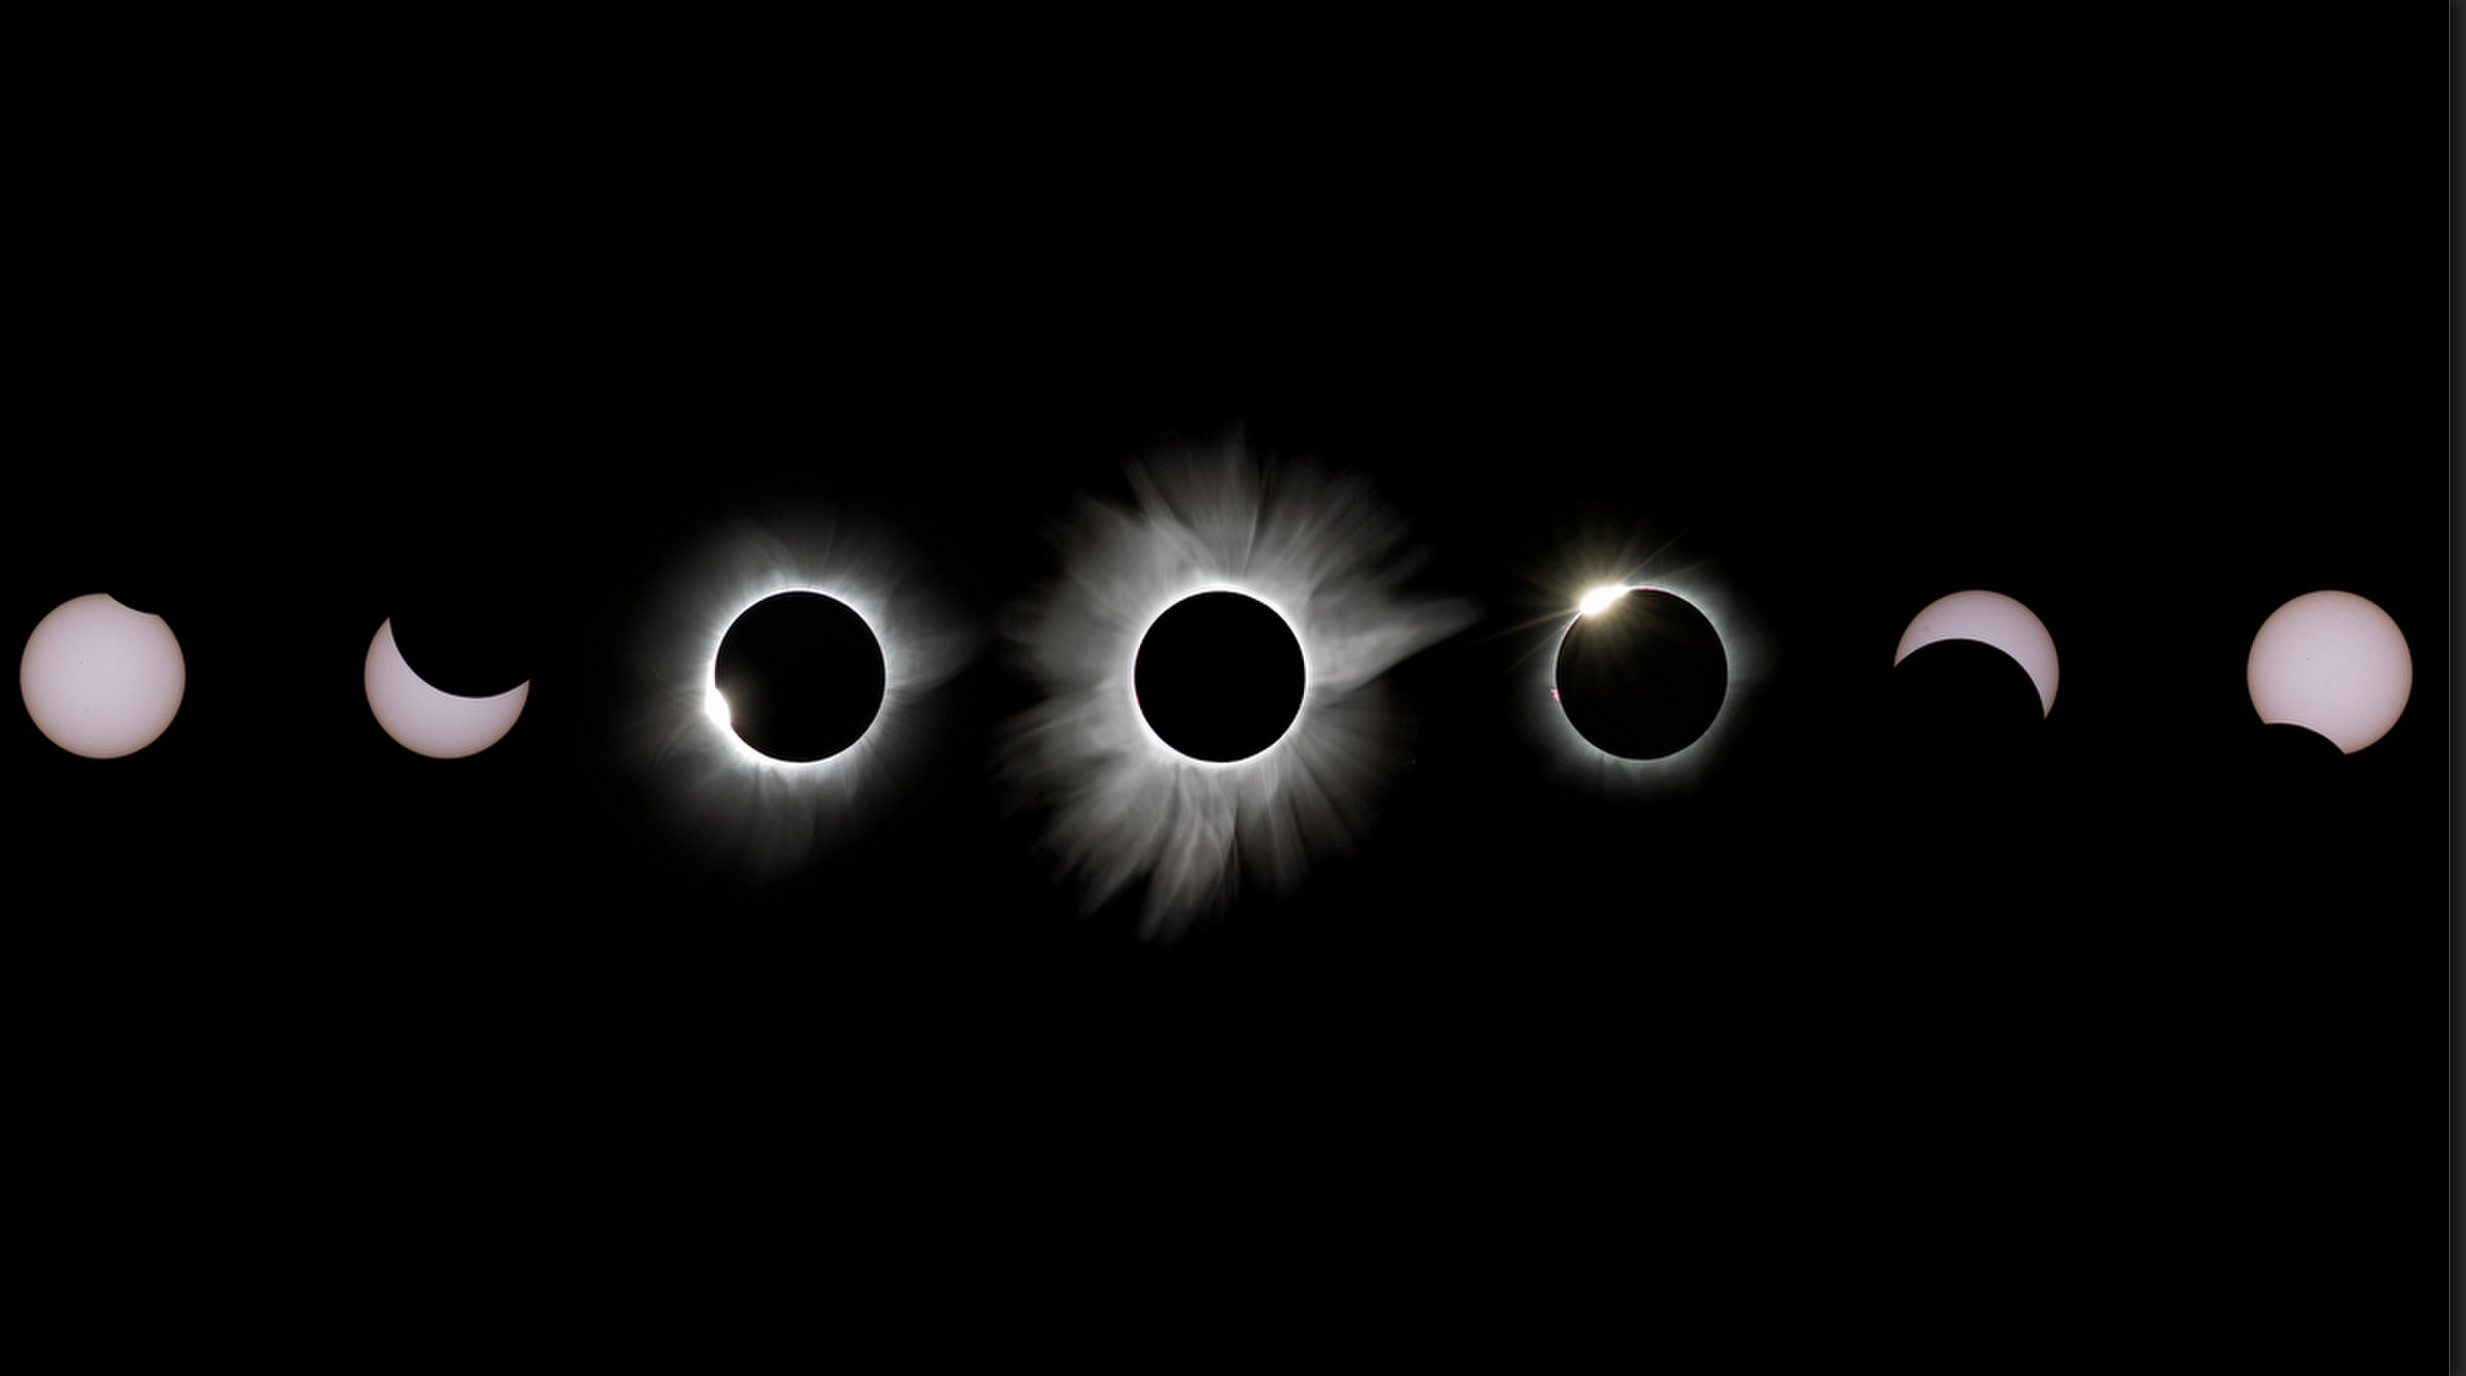
 Total eclipse nail art is a trend that has taken the beauty world by storm. With its stunning and unique design, this nail art is perfect for anyone looking to make a statement. Inspired by the celestial phenomenon of a total solar eclipse, this nail art is a beautiful representation of the alignment of the sun, moon, and earth.
What is Total Eclipse Nail Art?
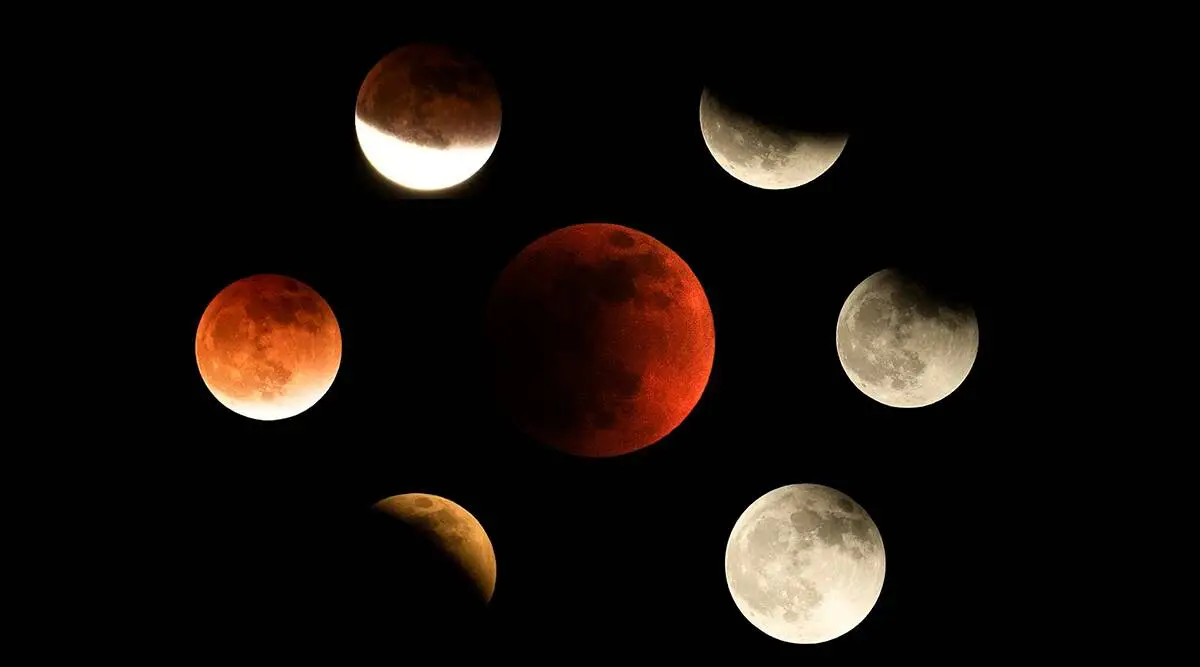
Total eclipse nail art is a nail design that mimics the breathtaking view of a total solar eclipse. It typically involves creating a gradient effect on the nails, with dark shades representing the moon and lighter shades representing the sun. The final look is completed with a black circle in the center, representing the shadow of the moon during a total eclipse.
How to Achieve the Perfect Total Eclipse Nail Art
To achieve this stunning nail art, you will need a few essential tools: a base coat, different shades of nail polish, a makeup sponge, black nail polish, and a top coat. Start by applying a base coat to your nails to protect them and ensure your nail polish lasts longer.
Next, using the lighter shades of nail polish, apply them in a gradient effect to your nails using a makeup sponge. This will create the illusion of the sun's rays shining through the darkness of the eclipse. Once the base colors are dry, use a small brush or toothpick to create a black circle in the center of each nail.
Tips for a Flawless Total Eclipse Nail Art
To truly make your total eclipse nail art stand out, here are some tips to keep in mind:
- Use a white polish as a base before creating the gradient effect to make the colors pop.
- Use a matte top coat to add a unique texture and depth to your design.
- Experiment with different color combinations, such as using metallic shades for a more futuristic look.
- Add some sparkle with glitter polish or rhinestones to represent stars in the night sky.
Final Thoughts
Total eclipse nail art is a bold and stunning way to express your love for celestial events. With its mesmerizing design and endless possibilities, this trend is here to stay. So, why not try out this unique nail art and let your hands do the talking during the next solar eclipse?
Total eclipse nail art is a trend that has taken the beauty world by storm. With its stunning and unique design, this nail art is perfect for anyone looking to make a statement. Inspired by the celestial phenomenon of a total solar eclipse, this nail art is a beautiful representation of the alignment of the sun, moon, and earth.
What is Total Eclipse Nail Art?
Total eclipse nail art is a nail design that mimics the breathtaking view of a total solar eclipse. It typically involves creating a gradient effect on the nails, with dark shades representing the moon and lighter shades representing the sun. The final look is completed with a black circle in the center, representing the shadow of the moon during a total eclipse.
How to Achieve the Perfect Total Eclipse Nail Art
To achieve this stunning nail art, you will need a few essential tools: a base coat, different shades of nail polish, a makeup sponge, black nail polish, and a top coat. Start by applying a base coat to your nails to protect them and ensure your nail polish lasts longer.
Next, using the lighter shades of nail polish, apply them in a gradient effect to your nails using a makeup sponge. This will create the illusion of the sun's rays shining through the darkness of the eclipse. Once the base colors are dry, use a small brush or toothpick to create a black circle in the center of each nail.
Tips for a Flawless Total Eclipse Nail Art
To truly make your total eclipse nail art stand out, here are some tips to keep in mind:
- Use a white polish as a base before creating the gradient effect to make the colors pop.
- Use a matte top coat to add a unique texture and depth to your design.
- Experiment with different color combinations, such as using metallic shades for a more futuristic look.
- Add some sparkle with glitter polish or rhinestones to represent stars in the night sky.
Final Thoughts
Total eclipse nail art is a bold and stunning way to express your love for celestial events. With its mesmerizing design and endless possibilities, this trend is here to stay. So, why not try out this unique nail art and let your hands do the talking during the next solar eclipse?
Get ready to turn heads and wow your friends with your total eclipse nail art. With a little bit of creativity and some essential tools, you can transform your nails into a celestial masterpiece that is out of this world!


