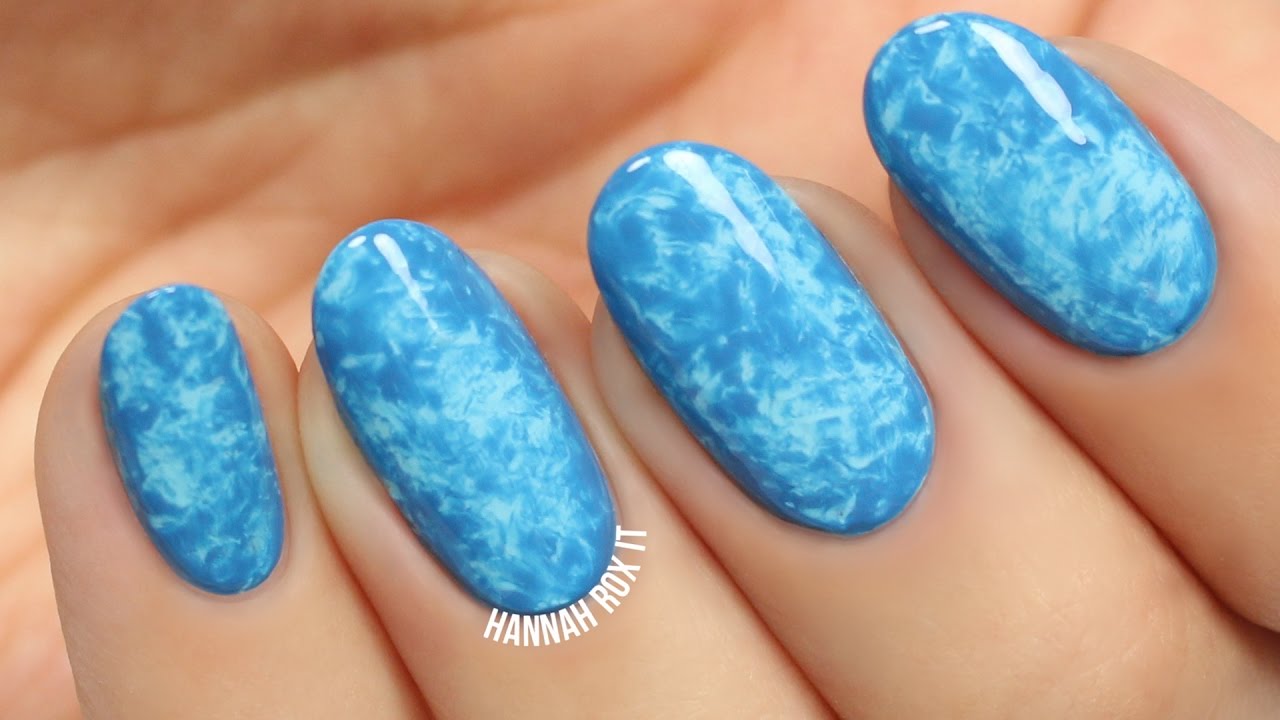
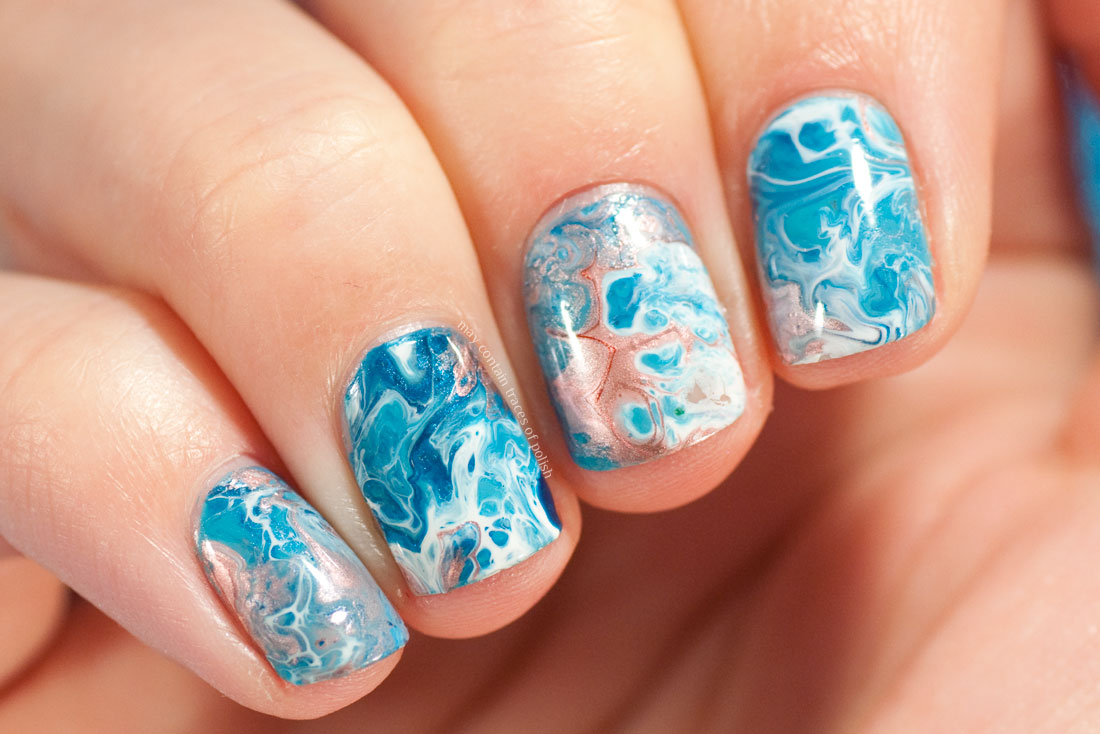
Get ready to make a splash with this stunning water marble nail art tutorial! This technique creates a mesmerizing effect on your nails that is both unique and eye-catching. Plus, with just a few simple steps, you can achieve this DIY water marble nail design at home. To start, you will need a base coat, two or more featured colors of your choice, a cup of room temperature water, and a toothpick or needle for creating the marble effect. Begin by applying your base coat and letting it dry completely. Next, drop a few featured drops of your first color onto the surface of the water. Then, add drops of your second color in the center of the first color. Use the toothpick or needle to create a marble effect by gently dragging the colors together. Once you have achieved your desired marble effect, dip your nail into the water and hold it there for a few seconds. Use a cotton swab dipped in nail polish remover to clean up any excess polish around your finger before removing it from the water. Finally, apply a top coat to seal in your design and voila! You now have gorgeous water marble nails that are sure to make a statement.1. Water Marble Nail Art Tutorial | DIY Water Marble Nails | Water Effect Nail Art

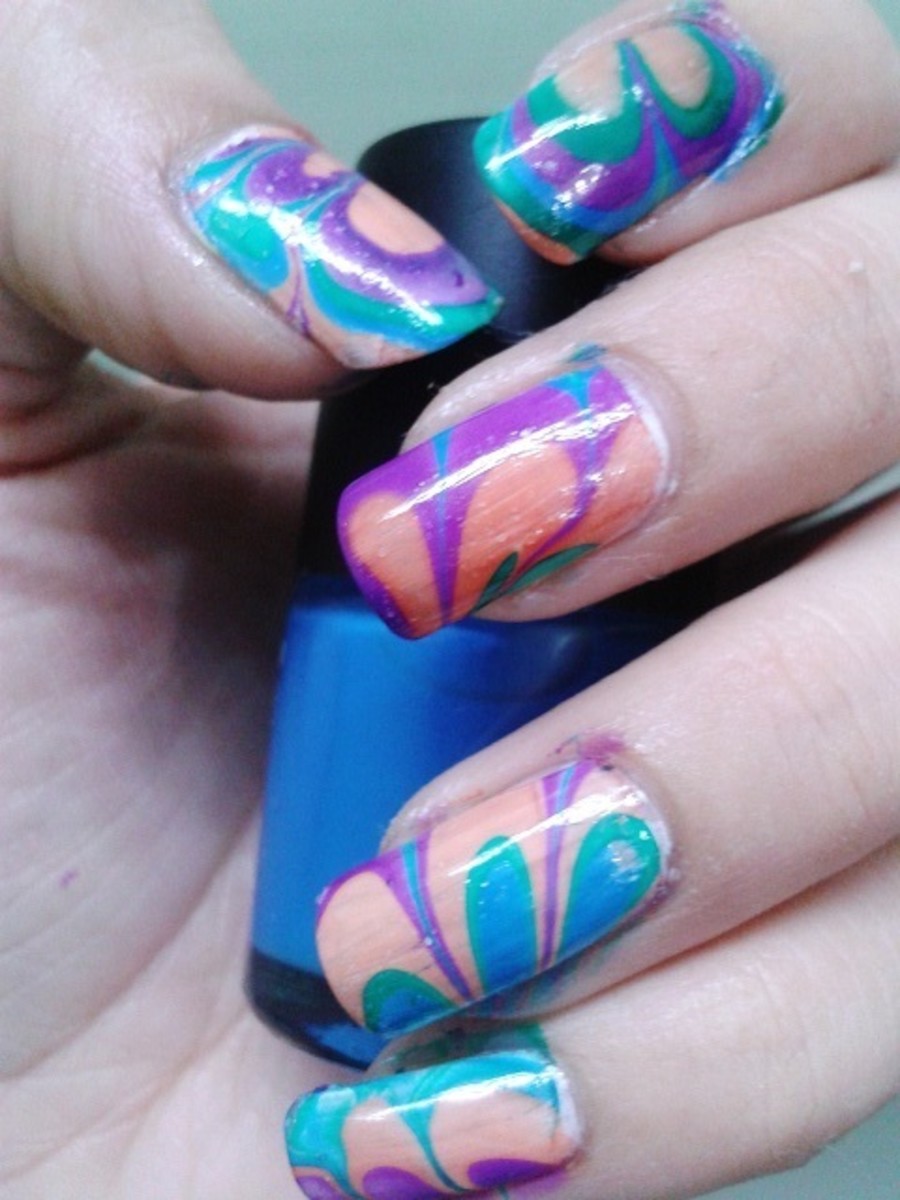

1. Water Marble Nail Art Tutorial


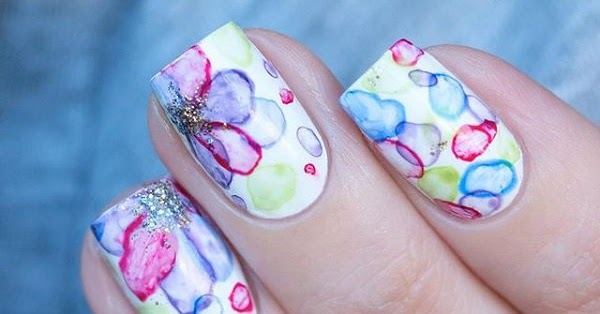
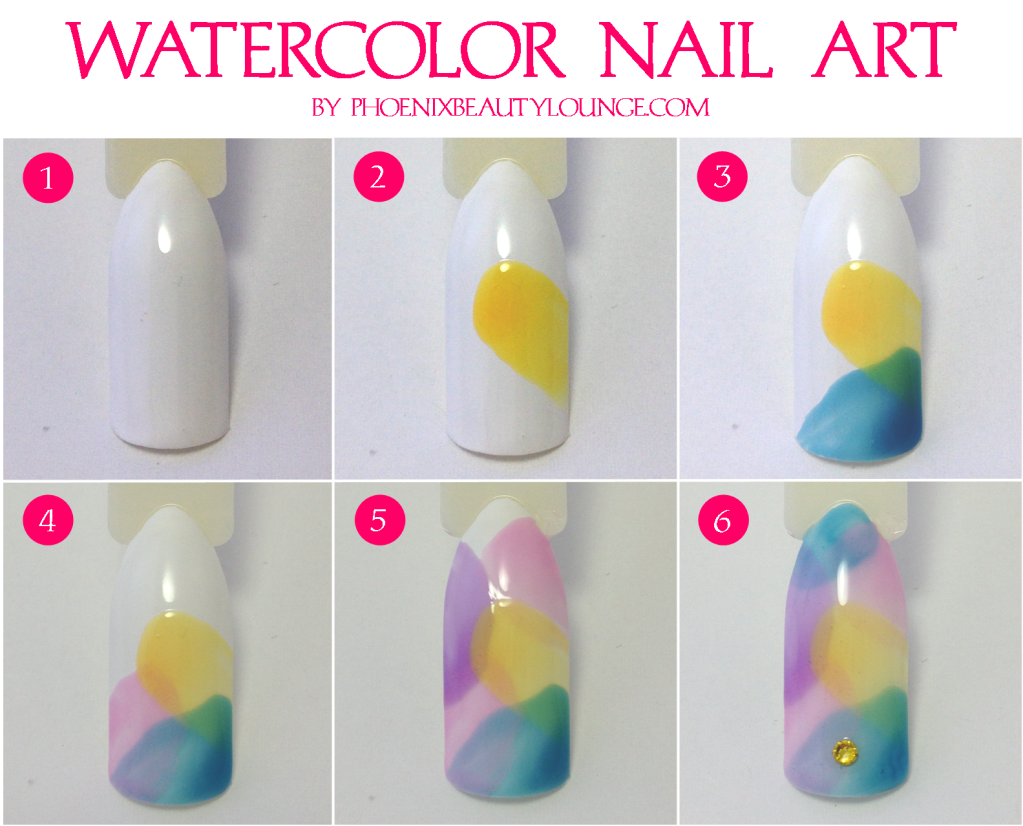
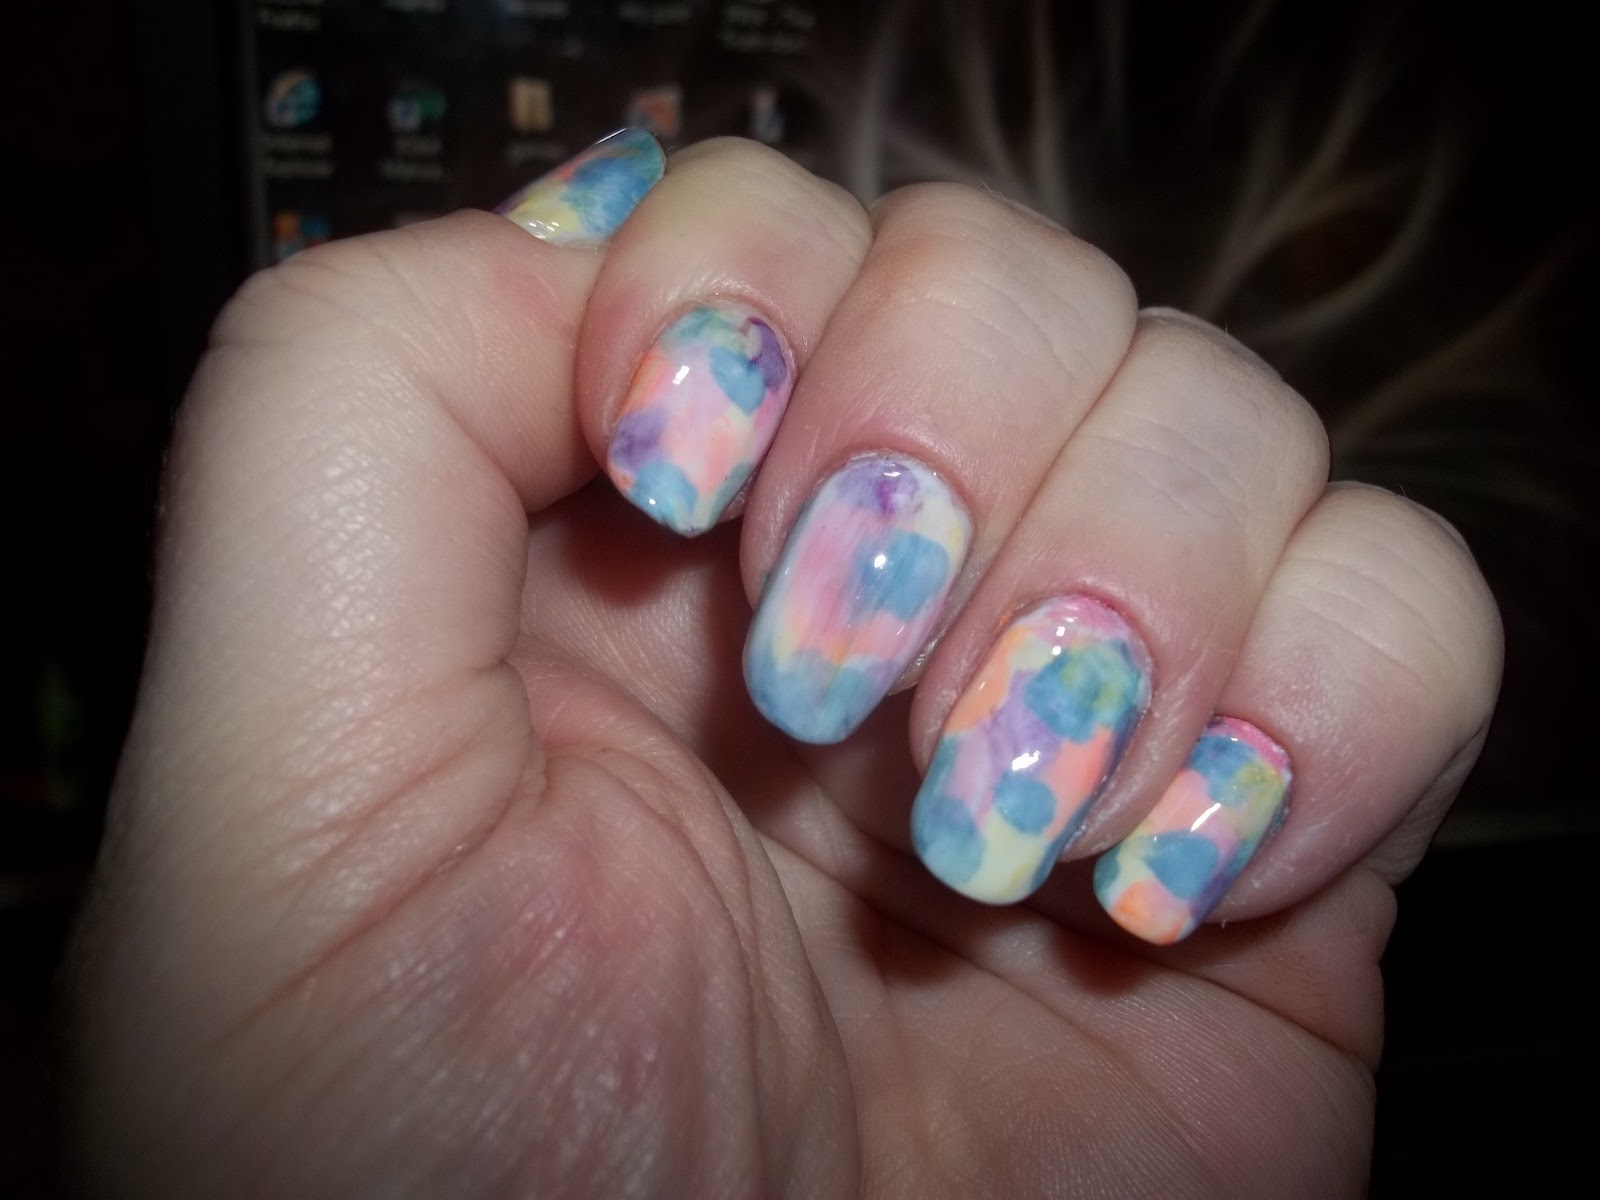
If you love the dreamy and whimsical look of watercolor paintings, why not incorporate it into your nail art? With this simple tutorial, you can achieve a beautiful watercolor nail art effect that will have everyone asking how you did it. To begin, gather your supplies: a base coat, white nail polish, a few featured shades of your choice, a small paintbrush, and a cup of water. Start by applying your base coat and letting it dry. Next, use the white nail polish to create a blank canvas on your nails. This will help the watercolor effect stand out more. Once the white polish is dry, dip your paintbrush into one of your featured shades and then into the cup of water. Using the water, paint strokes onto your nails, blending the color with the white base. Repeat this step with your other featured shades, layering the colors to create a watercolor effect. You can also use the paintbrush to create texture by lightly dabbing it on your nails. Once you have achieved your desired look, let your nails dry and then seal in your design with a top coat. You now have a stunning watercolor nail art look that is perfect for any occasion.2. How to Create a Watercolor Nail Art Effect | Watercolor Nail Art Tutorial


DIY Water Marble Nails


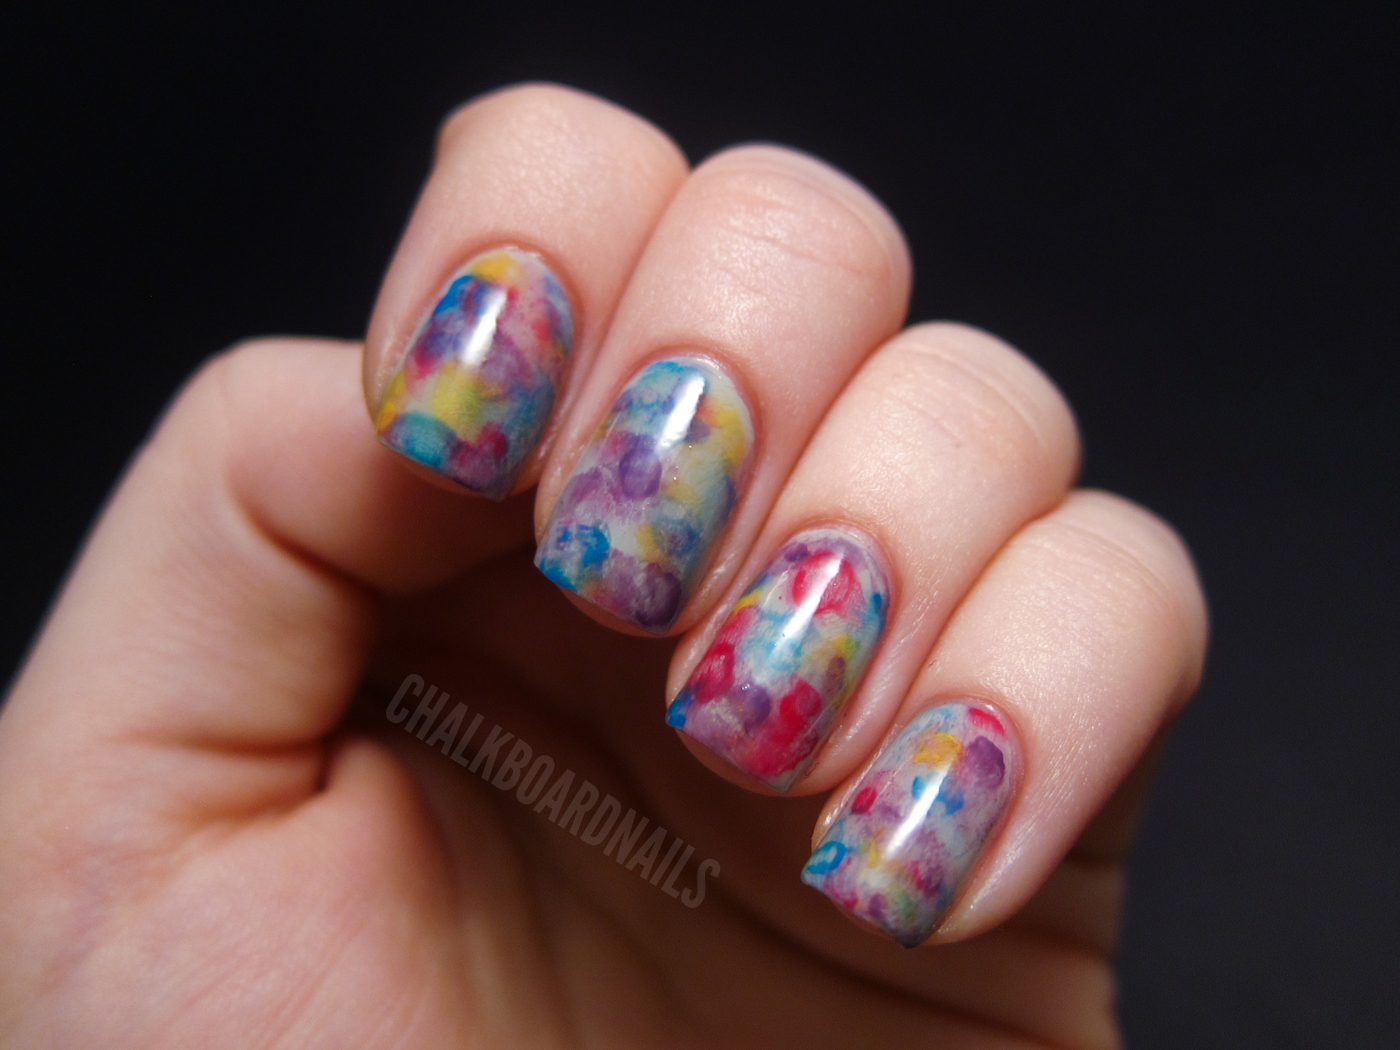
Don't be intimidated by watercolor nail art – it's easier than you think! This tutorial is perfect for beginners who want to try out this popular trend, but don't have a lot of experience with nail art. For this tutorial, you will need a base coat, white nail polish, three or more featured colors of your choice, a small paintbrush, and a cup of water. Begin by applying your base coat and letting it dry. Next, use the white polish to create a blank canvas on your nails. This will help the watercolor effect stand out more. Once the white polish is dry, dip your paintbrush into one of your featured shades and then into the cup of water. Using the water, paint strokes onto your nails, blending the color with the white base. Repeat this step with your other featured shades, layering the colors to create a watercolor effect. You can also use the paintbrush to create texture by lightly dabbing it on your nails. Once your design is complete, let your nails dry and then seal it with a top coat. This easy watercolor nail art tutorial is perfect for anyone looking to add a pop of color to their nails.3. Easy Watercolor Nail Art Tutorial | Watercolor Nail Art for Beginners


Water Effect Nail Art


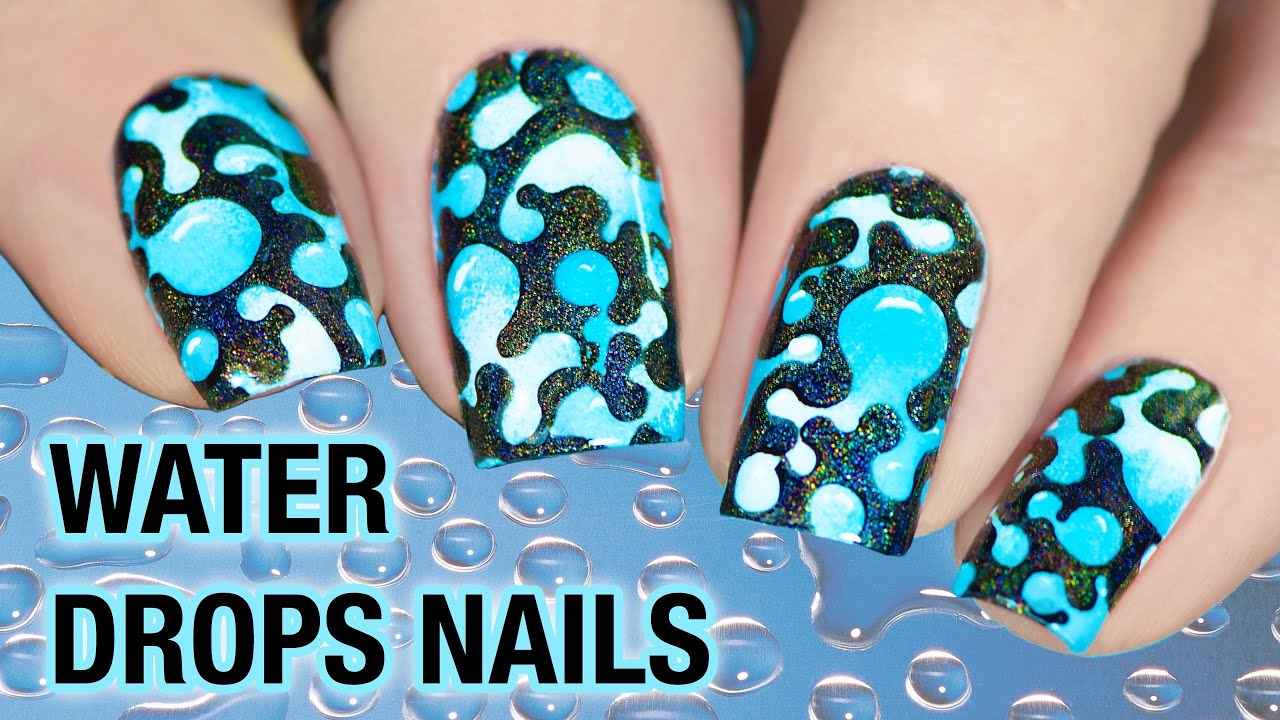

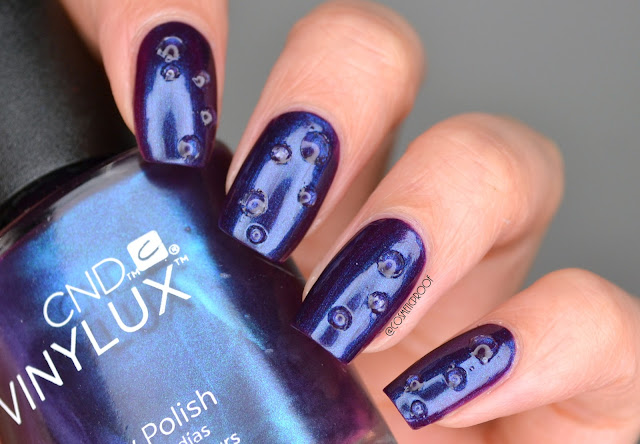
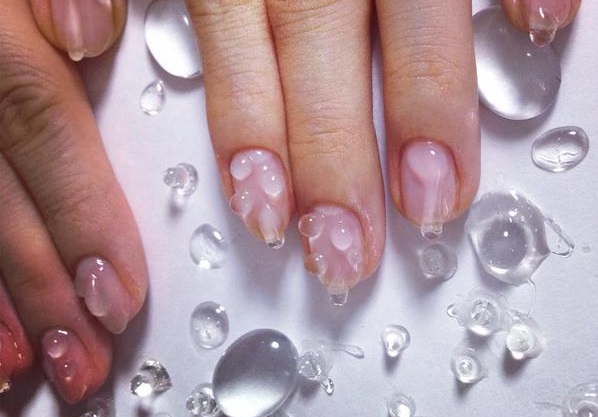
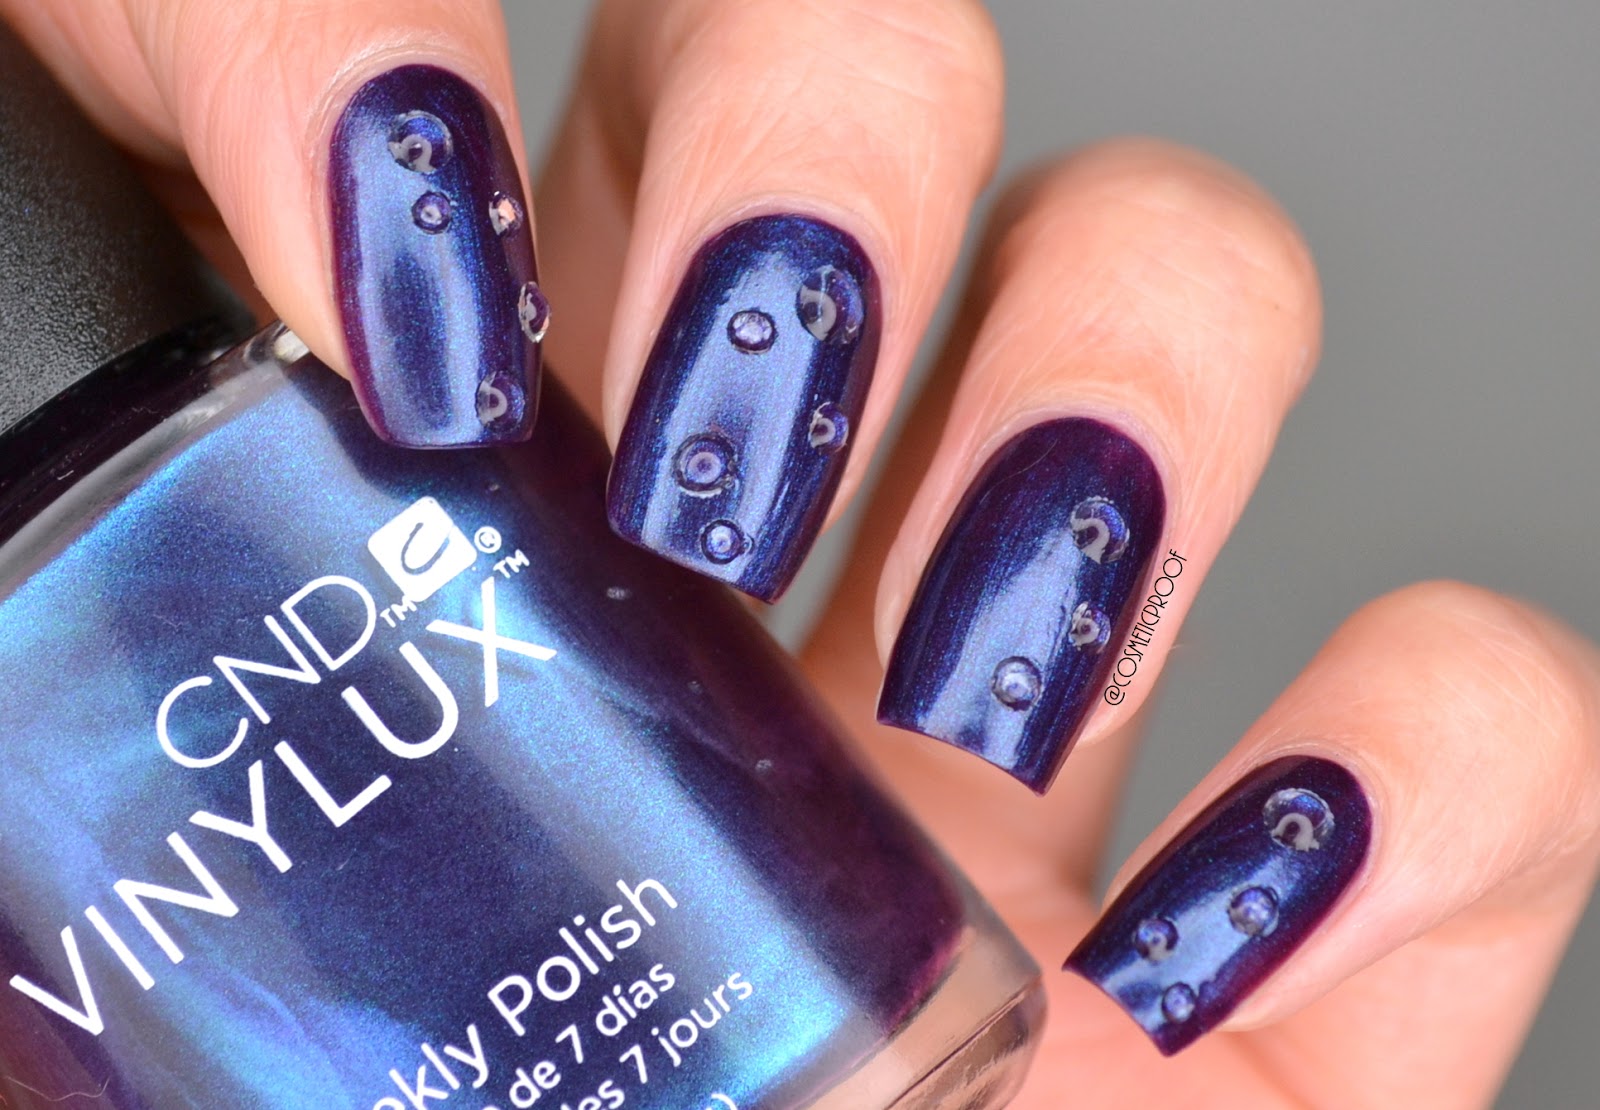
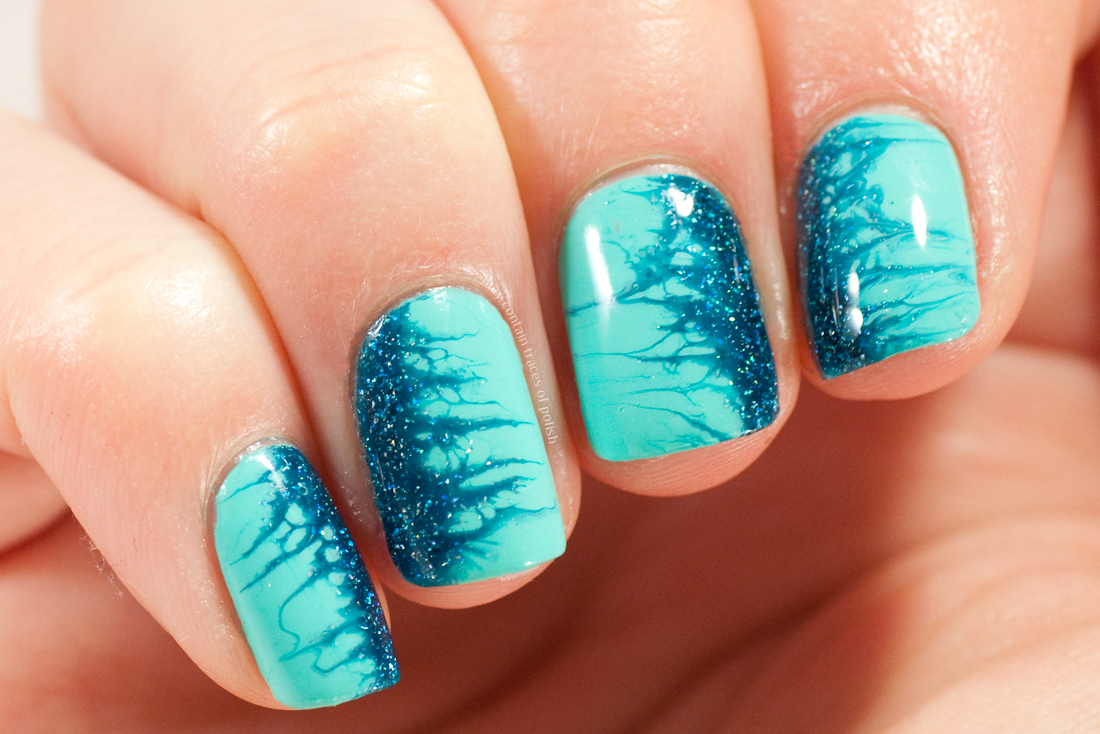
If you want to take your water effect nail art to the next level, try out this water droplet nail art tutorial. This design adds a unique and realistic touch to your nails, making them look like they are covered in tiny water droplets. To start, you will need a base coat, a featured color of your choice, a small paintbrush, a cup of water, and a clear top coat. Begin by applying your base coat and letting it dry. Next, dip your paintbrush into the featured color and then into the cup of water. Using the paintbrush, create small dots on your nails, making sure to leave spaces for the water droplets to shine through. Once your design is complete, let your nails dry and then seal it with a clear top coat. This water droplet nail art tutorial will give your nails a realistic and dimensional look that is sure to turn heads.4. Water Droplet Nail Art Tutorial | Water Droplet Nail Design | Water Effect Nails


2. How to Create a Watercolor Nail Art Effect


Bring the beauty of the ocean to your nails with this ocean water nail art tutorial. Perfect for the summer season, this design will make you feel like you're on a tropical beach every time you look at your nails. To begin, gather your supplies: a base coat, white nail polish, blue and green featured colors, a small paintbrush, and a cup of water. Start by applying your base coat and letting it dry. Next, use the white polish to create a blank canvas on your nails. This will help the watercolor effect stand out more. Once the white polish is dry, dip your paintbrush into the blue and green colors and then into the cup of water. Using the water, paint strokes onto your nails, blending the colors with the white base to create a watercolor ocean effect. You can also use the paintbrush to add details like waves or bubbles. Once your design is complete, let your nails dry and then seal it with a top coat. This ocean water nail art tutorial will transport you to a tropical paradise every time you look at your nails.5. Ocean Water Nail Art Tutorial | Beach Nail Art | Summer Nail Designs


Watercolor Nail Art Tutorial


Channel your inner mermaid with this mermaid scale nail art tutorial. This design is perfect for those who love iridescent and shimmery colors, and want to add a touch of magic to their nails. To start, you will need a base coat, a featured color of your choice, a small paintbrush, a cup of water, and a clear top coat. Begin by applying your base coat and letting it dry. Next, dip your paintbrush into the featured color and then into the cup of water. Using the paintbrush, paint diagonal lines across your nails, creating a scale-like pattern. Once your design is complete, let your nails dry and then seal it with a clear top coat. This mermaid scale nail art tutorial will give your nails a magical and mystical look that is perfect for any occasion.6. Mermaid Scale Nail Art Tutorial | Mermaid Nails | Water Effect Nail Design


3. Easy Watercolor Nail Art Tutorial


Take your watercolor nail art to a whole new level with this galaxy nail art tutorial. This stunning design will make your nails look like a cosmic masterpiece and is perfect for those who love bold and vibrant colors. To begin, gather your supplies: a base coat, black nail polish, a few featured colors of your choice, a small paintbrush, and a cup of water. Start by applying your base coat and letting it dry. Next, use the black polish to create a dark base for your galaxy nails. Once the black polish is dry, dip your paintbrush into your featured colors and then into the cup of water. Using the water, paint strokes onto your nails, blending the colors with the black base to create a galaxy effect. You can also use the paintbrush to add stars and nebulas by lightly dabbing it on your nails. Once your design is complete, let your nails dry and then seal it with a top coat. This watercolor galaxy nail art tutorial will have your nails looking out of this world.7. Watercolor Galaxy Nail Art Tutorial | Galaxy Nails | Water Effect Nail Design
Watercolor Nail Art for Beginners


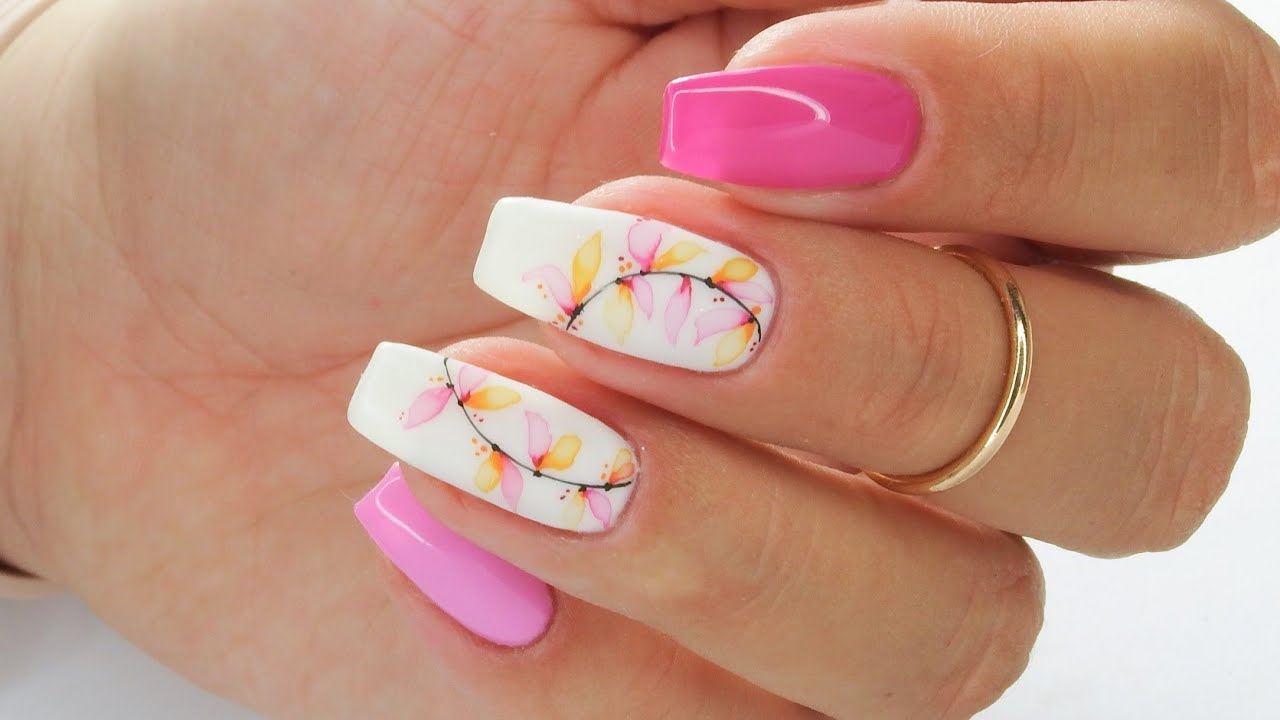
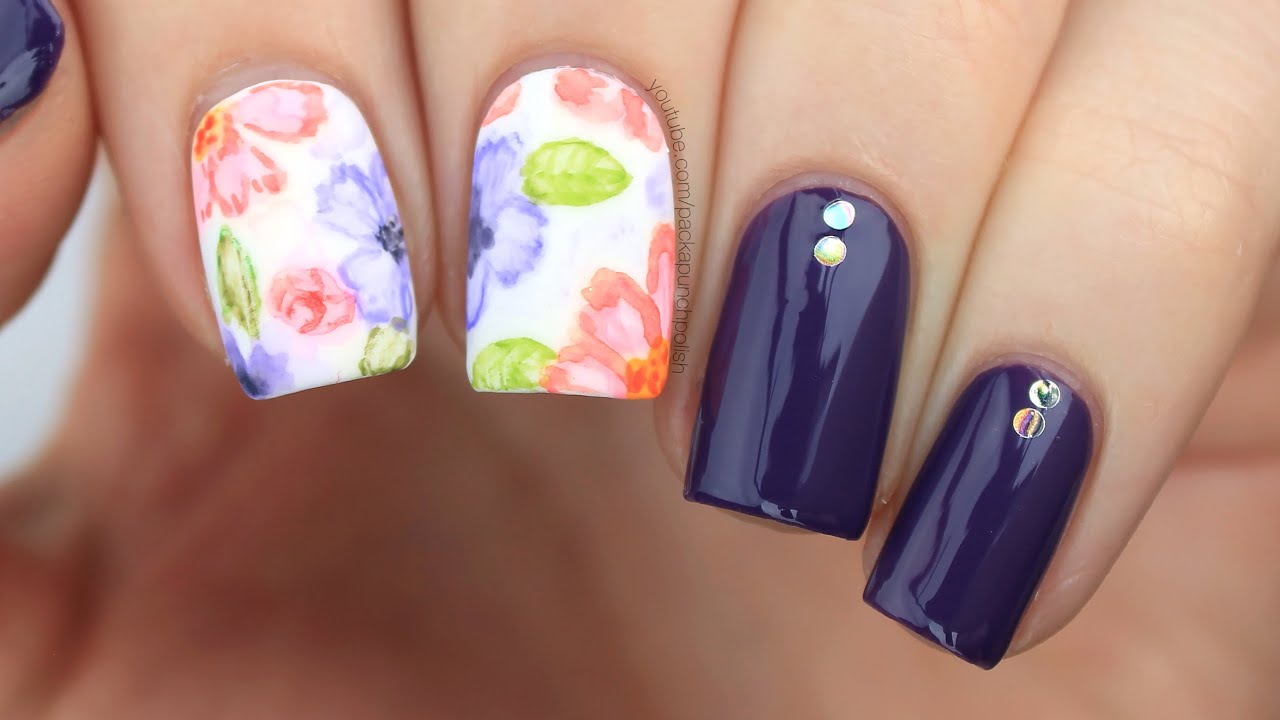
Incorporate the beauty of flowers into your watercolor nail art with this floral nail art tutorial. This design is perfect for those who love soft and feminine looks, and want to add a touch of nature to their nails. For this tutorial, you will need a base coat, white nail polish, a few featured colors of your choice, a small paintbrush, and a cup of water. Begin by applying your base coat and letting it dry. Next, use the white polish to create a blank canvas on your nails. This will help the watercolor effect stand out more. Once the white polish is dry, dip your paintbrush into your featured colors and then into the cup of water. Using the water, paint strokes onto your nails, blending the colors with the white base to create a watercolor floral effect. You can also use the paintbrush to add details like leaves or stems. Once your design is complete, let your nails dry and then seal it with a top coat. This watercolor floral nail art tutorial will give your nails a soft and romantic look that is perfect for any occasion.8. Watercolor Floral Nail Art Tutorial | Floral Nails | Water Effect Nail Design


4. Water Droplet Nail Art Tutorial


If you love the gradient effect of ombre nails, why not add a watercolor twist to it? This watercolor ombre nail art tutorial is perfect for those who want to add a soft and dreamy touch to their ombre nails. For this tutorial, you will need a base coat, white nail polish, a few featured colors of your choice, a small paintbrush, and a cup of water. Begin by applying your base coat and letting it dry. Next, use the white polish to create a blank canvas on your nails. This will help the watercolor effect stand out more. Once the white polish is dry, dip your paintbrush into your featured colors and then into the cup of water. Using the water, paint strokes onto your nails, blending the colors with the white base to create a watercolor ombre effect. You can also use the paintbrush to add texture by lightly dabbing it on your nails. Once your design is complete, let your nails dry and then seal it with a top coat. This watercolor ombre nail art tutorial will give your nails a soft and gradient look that is perfect for any occasion.9. Watercolor Ombre Nail Art Tutorial | Ombre Nails | Water Effect Nail Design


Water Droplet Nail Design


Who doesn't love a good rainbow? This watercolor rainbow nail art tutorial is perfect for those who want to add a fun and playful touch to their nails. Plus, with the watercolor effect, it adds a unique twist to a classic design. For this tutorial, you will need a base coat, white nail polish, a few featured colors of your choice, a small paintbrush, and a cup of water. Begin by applying your base coat and letting it dry. Next, use the white polish to create a blank canvas on your nails. This will help the watercolor effect stand out more. Once the white polish is dry, dip your paintbrush into your featured colors and then into the cup of water. Using the water, paint strokes onto your nails, blending the colors with the white base to create a watercolor rainbow effect. You can also use the paintbrush to add details like clouds or sun.10. Watercolor Rainbow Nail Art Tutorial | Rainbow Nails | Water Effect Nail Design

Water Effect Nails


The Creative World of Water Effect Nail Art

Unleashing Your Inner Artist
 Are you tired of the same old boring nail designs? Want to try something new and unique? Look no further than water effect nail art. This innovative technique allows you to create beautiful, one-of-a-kind designs that will make your nails stand out from the crowd. Let's dive into the world of water effect nail art and discover why it's becoming a popular trend in the beauty industry.
The Basics of Water Effect Nail Art
 Water effect nail art involves creating a marbled effect on your nails by using different colors of nail polish. The process is simple and requires only a few materials, making it accessible to everyone. All you need is a bowl of water, nail polish, and a toothpick or small brush for creating designs. You can use any colors you like, but bold and bright shades work best for this technique.
Creating Your Masterpiece
 To achieve the water effect, start by filling a bowl with water at room temperature. Then, drop a few drops of your chosen nail polish colors onto the surface of the water. Use a toothpick or small brush to swirl the colors around, creating a marbled effect. Once you're satisfied with the design, dip your nail into the water, making sure to cover the entire nail. Repeat this process for each nail, and voila! You have a unique and eye-catching water effect on your nails.
Unlimited Possibilities
 The best part about water effect nail art is that the possibilities are endless. You can experiment with different color combinations, designs, and techniques to create your own unique look. You can also add glitter, rhinestones, or other embellishments to take your water effect nails to the next level. Let your creativity run wild and see what amazing designs you can come up with.
Perfect for Any Occasion
 Water effect nail art is not only fun and easy to do, but it's also perfect for any occasion. Whether you're going to a party, a wedding, or just want to add a pop of color to your everyday look, water effect nails are a great choice. You can also customize the design to match a specific theme or outfit, making it a versatile option for any event.
Conclusion
 Water effect nail art is a game-changer in the world of nail design. With its endless possibilities, ease of execution, and versatility, it's no wonder why it's gaining popularity in the beauty industry. So next time you want to elevate your nail game, give water effect nail art a try and unleash your inner artist.


