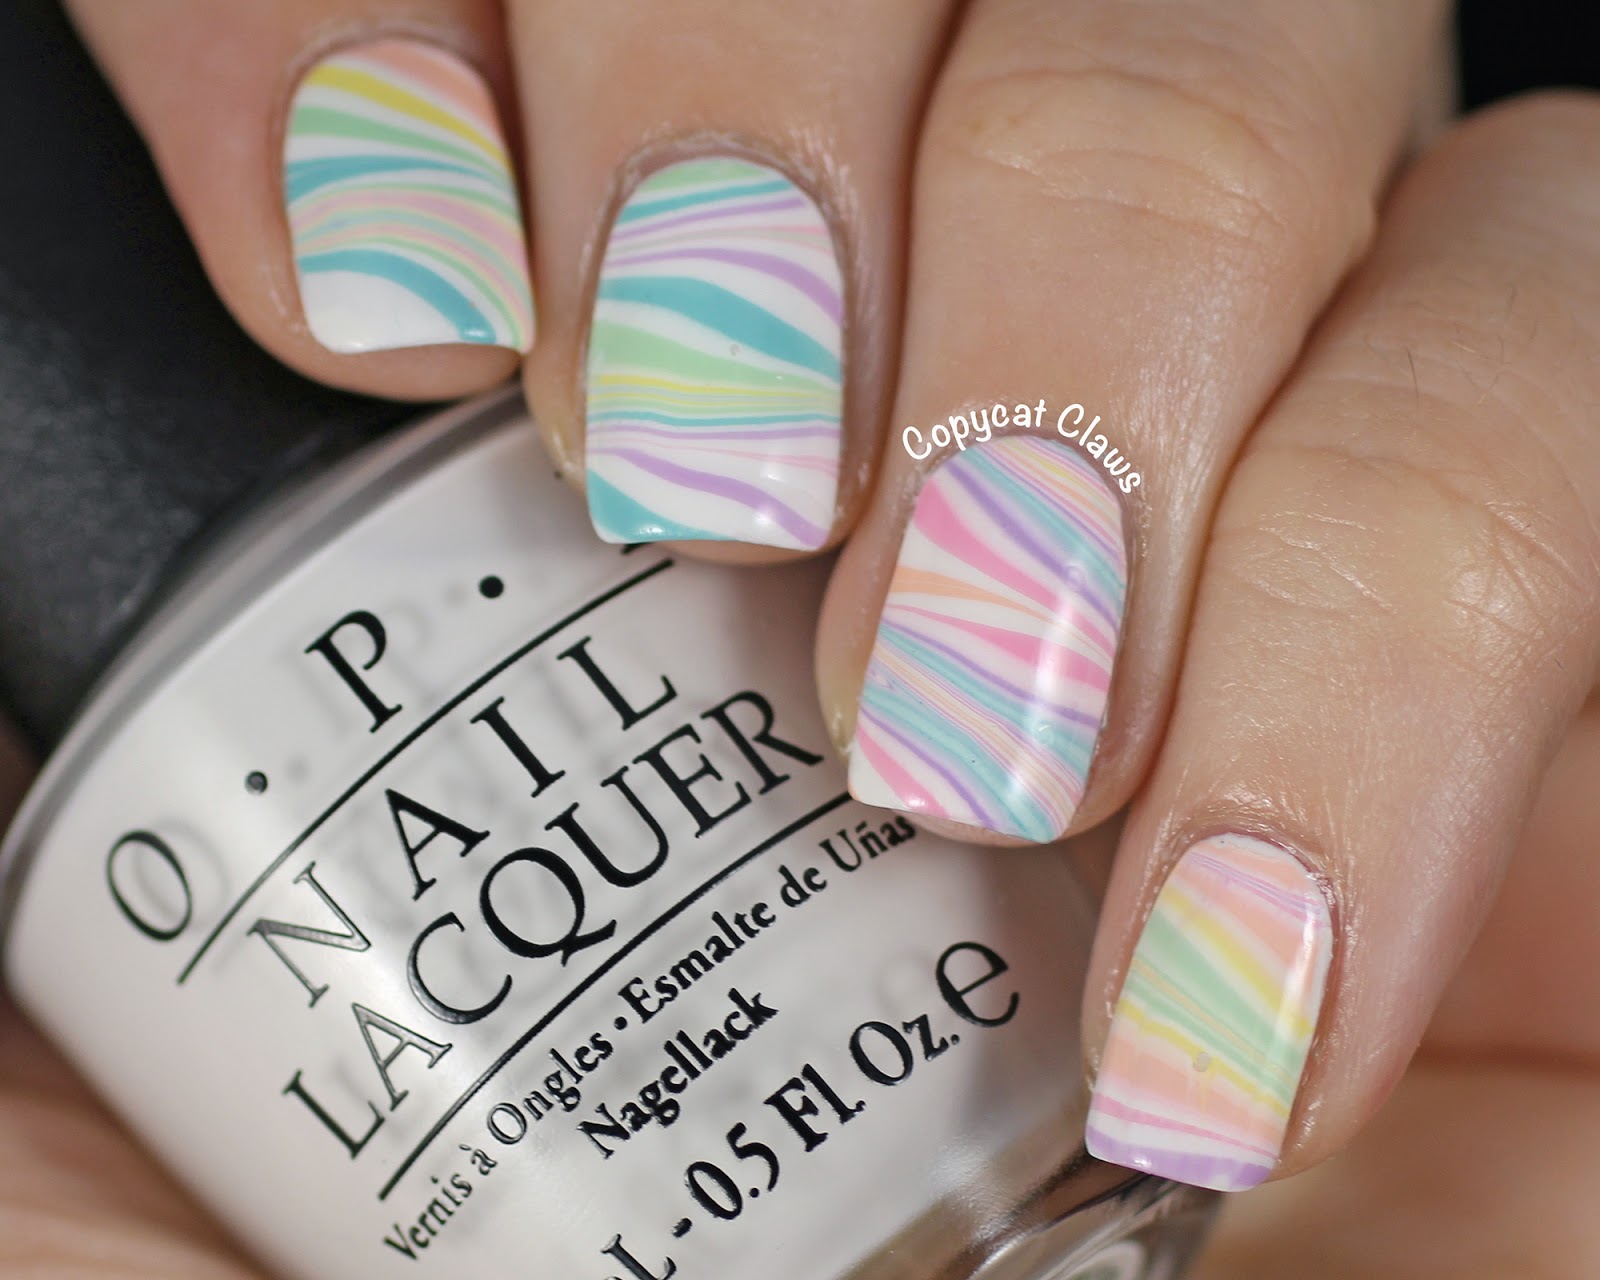
Are you tired of the same old solid color nails? Want to add some fun and creativity to your manicure routine? Look no further than water marble nail art! This trendy and mesmerizing technique is perfect for creating unique and eye-catching designs on your nails. In this tutorial, we will guide you through the steps of creating your very own water marble nail art using dailymotion, a popular online video platform.Water Marble Nail Art Tutorial


Water Marble Nail Art Tutorial


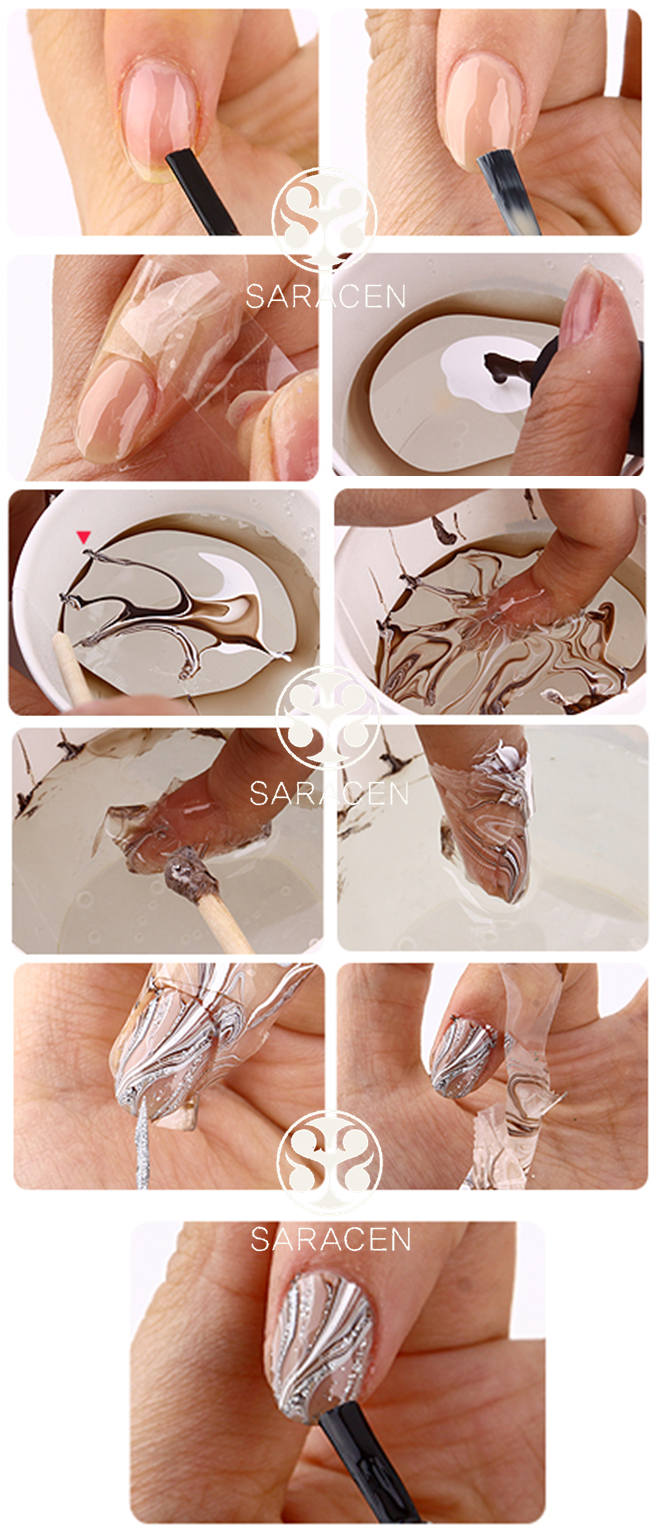
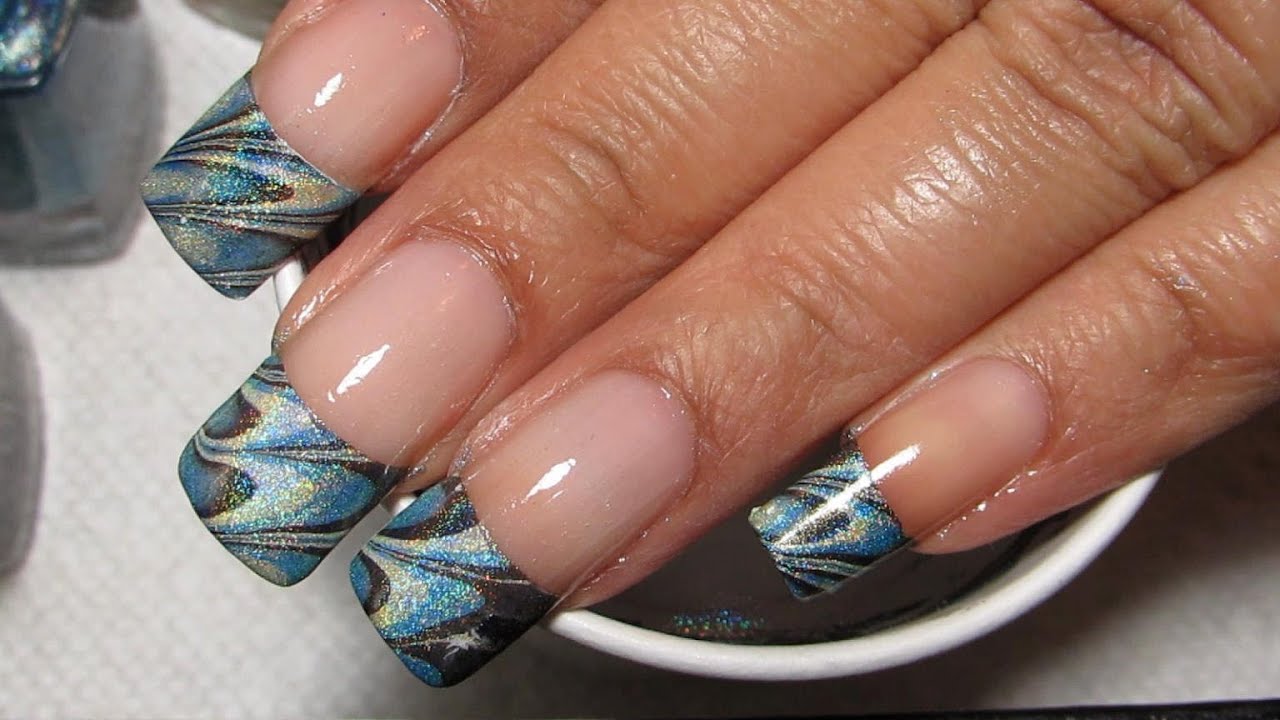
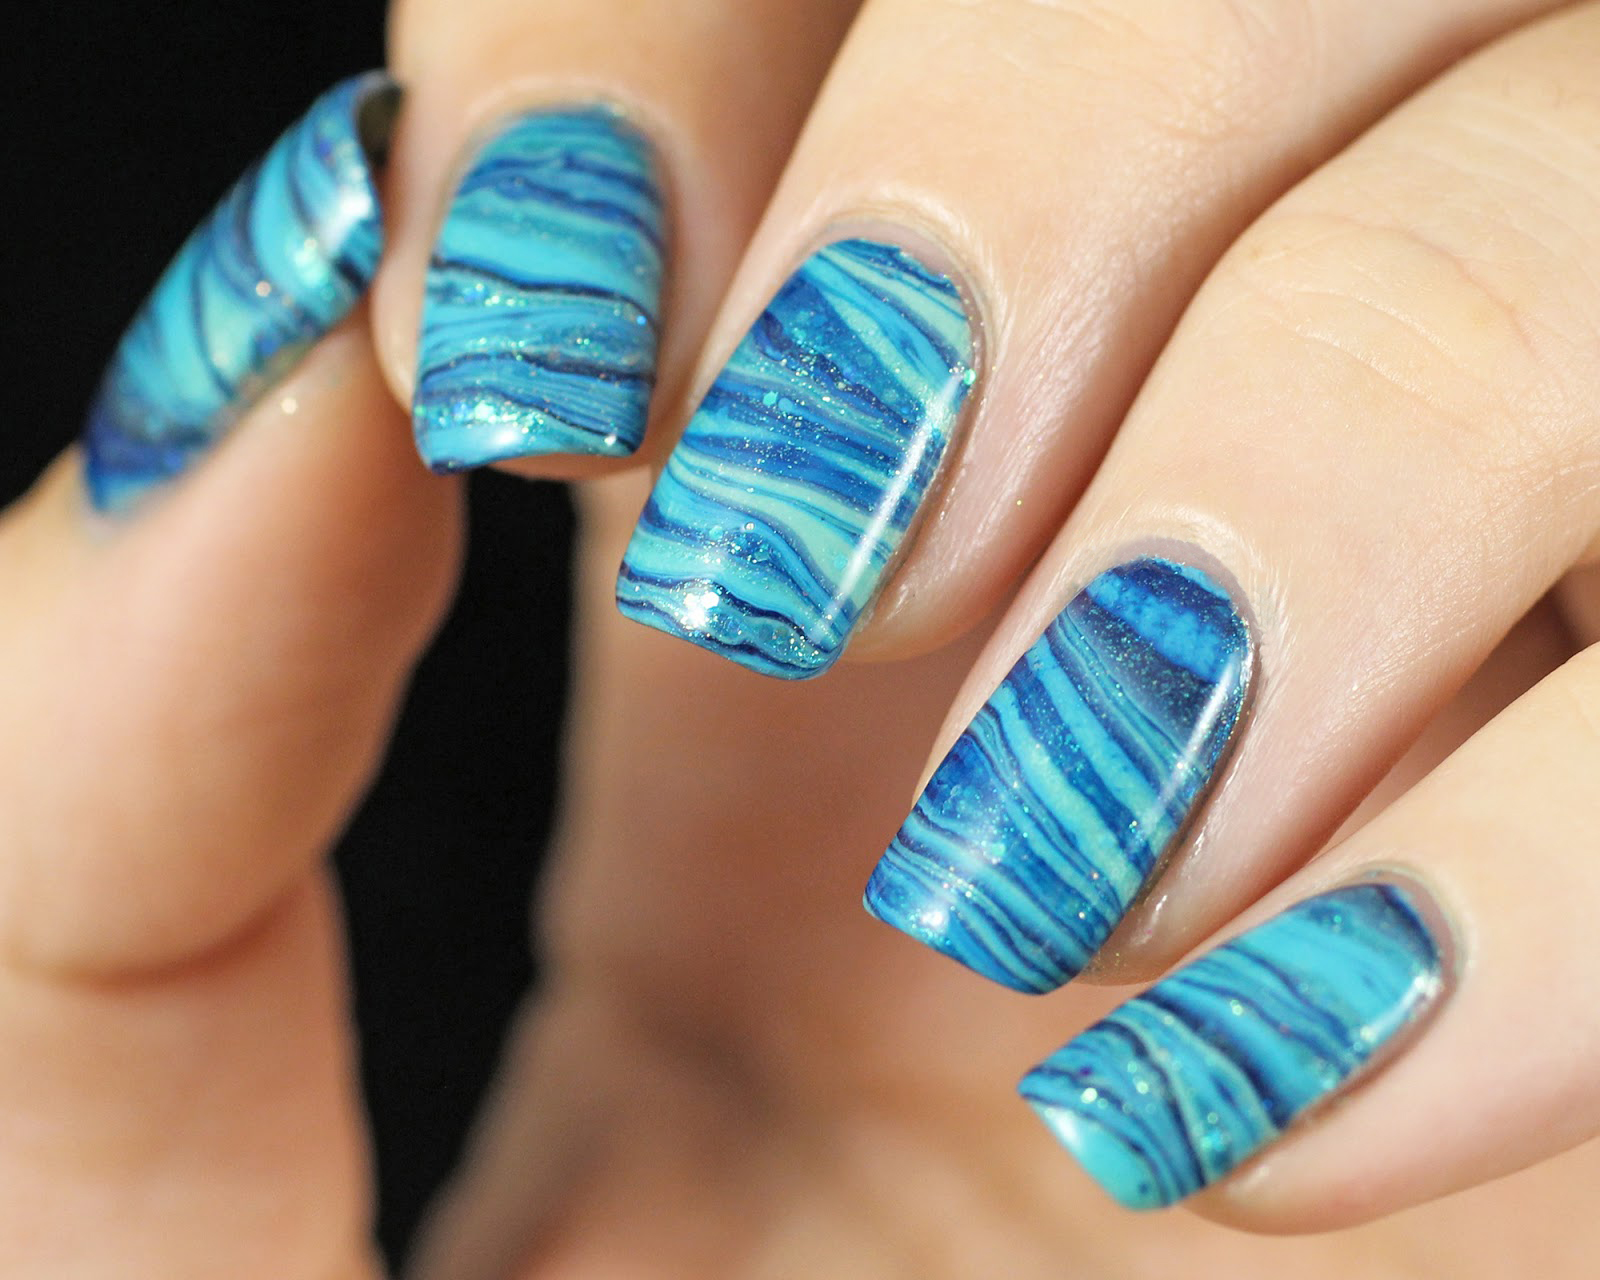
Water marble nail art may seem complicated, but with the right tools and techniques, it can be easily achieved. The process involves creating a pattern on the surface of water and then transferring it onto your nails. Here's a step-by-step guide on how to do water marble nails: Step 1: Start by prepping your nails. Remove any existing nail polish and shape your nails to your desired length and shape. Apply a base coat to protect your natural nails from staining. Step 2: Fill a small cup or bowl with room temperature water. It's important to use room temperature water as cold water can cause the nail polish to clump. Step 3: Choose the colors you want to use for your water marble design. It's best to use nail polishes with a thin consistency for easier spreading on the water surface. Step 4: Drop one drop of your first color onto the surface of the water. Drop the next color in the center of the first color and continue with the remaining colors, alternating the placement to create a bullseye pattern. Step 5: Take a toothpick or a marbling tool and gently swirl the colors together to create a unique design. Step 6: Carefully dip your finger into the water, submerging the nail completely into the design. Use a toothpick to collect any excess nail polish on the surface of the water. Step 7: Remove your finger from the water and clean up any excess nail polish around your finger using a cotton swab dipped in nail polish remover. Step 8: Once your design has dried completely, apply a topcoat to seal in the design and add shine.How to Do Water Marble Nails


How to Do Water Marble Nails


If you're new to water marble nail art, it can be helpful to watch a video tutorial to get a better understanding of the process. Dailymotion offers a variety of water marble nail art tutorials that you can easily follow along with. These tutorials often include helpful tips and tricks to make the process even easier. Some popular water marble nail art tutorials on dailymotion include "Easy Water Marble Nail Art for Beginners," "Step by Step Water Marble Nail Art Tutorial," and "Water Marble Nail Art Designs Using Dailymotion Techniques."Dailymotion Water Marble Nail Art

Dailymotion Water Marble Nail Art

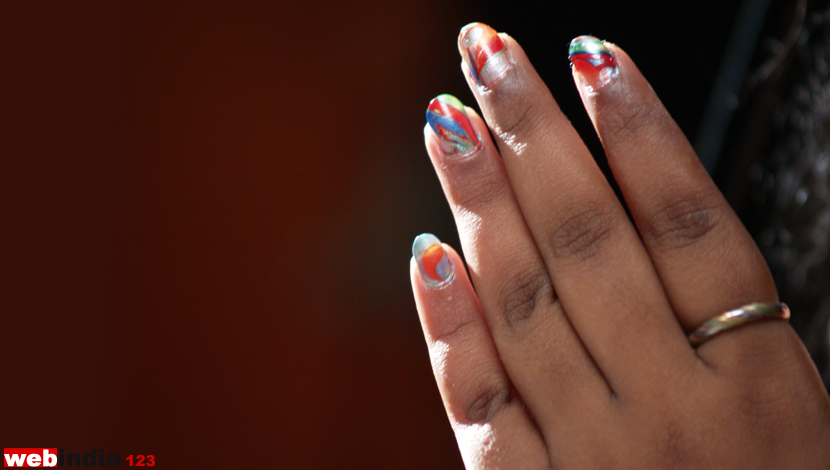
If you're new to water marble nail art, it's best to start with simple designs and colors. As you gain more experience, you can experiment with more complex designs and patterns. Here are a few tips for beginners: Tip 1: Use a white or light-colored base coat to make your water marble design pop. Tip 2: To prevent the nail polish from drying too quickly on the water surface, use room temperature water and work quickly. Tip 3: Clean up any excess nail polish on your skin using a cotton swab dipped in nail polish remover. Tip 4: Don't be afraid to experiment with different color combinations and designs. The possibilities are endless with water marble nail art!Water Marble Nail Art for Beginners

Water Marble Nail Art for Beginners
Water marble nail art can seem intimidating, but with practice, it can become an easy and fun technique. Here are a few tips to make the process even easier: Tip 1: Use a marbling tool instead of a toothpick for more precise designs. Tip 2: Create a larger bullseye pattern by using more drops of nail polish on the water surface. Tip 3: Use tape or liquid latex around your nails to protect your skin from getting stained by the nail polish.Easy Water Marble Nail Art


Easy Water Marble Nail Art


Mastering water marble nail art takes practice, but with these step-by-step instructions, you'll be creating stunning designs in no time: Step 1: Prep your nails by removing any existing nail polish and applying a base coat. Step 2: Fill a cup or bowl with room temperature water. Step 3: Drop one drop of your first color onto the water surface. Continue dropping the remaining colors in a bullseye pattern. Step 4: Use a marbling tool to gently swirl the colors together. Step 5: Dip your finger into the water, submerging the nail completely into the design. Step 6: Remove your finger from the water and clean up any excess nail polish around your finger. Step 7: Apply a topcoat to seal in the design and add shine.Step by Step Water Marble Nail Art


Step by Step Water Marble Nail Art

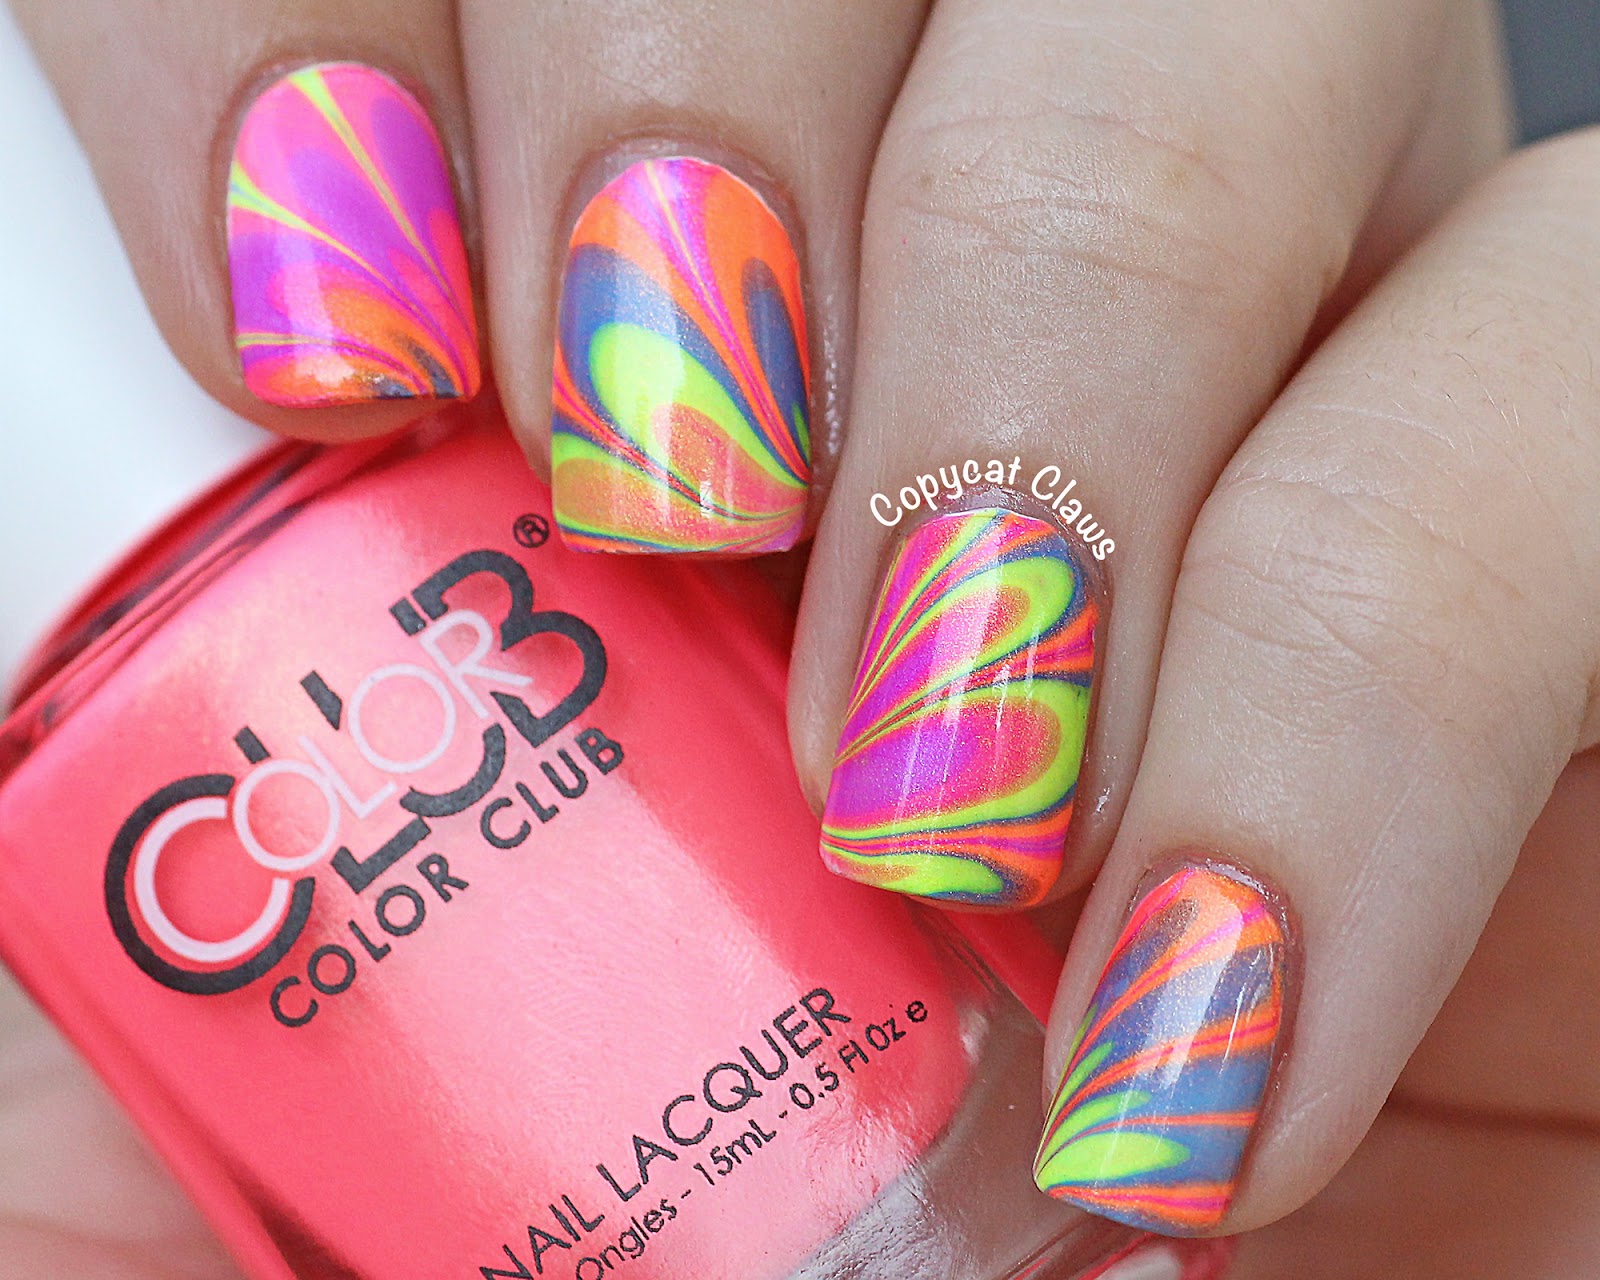
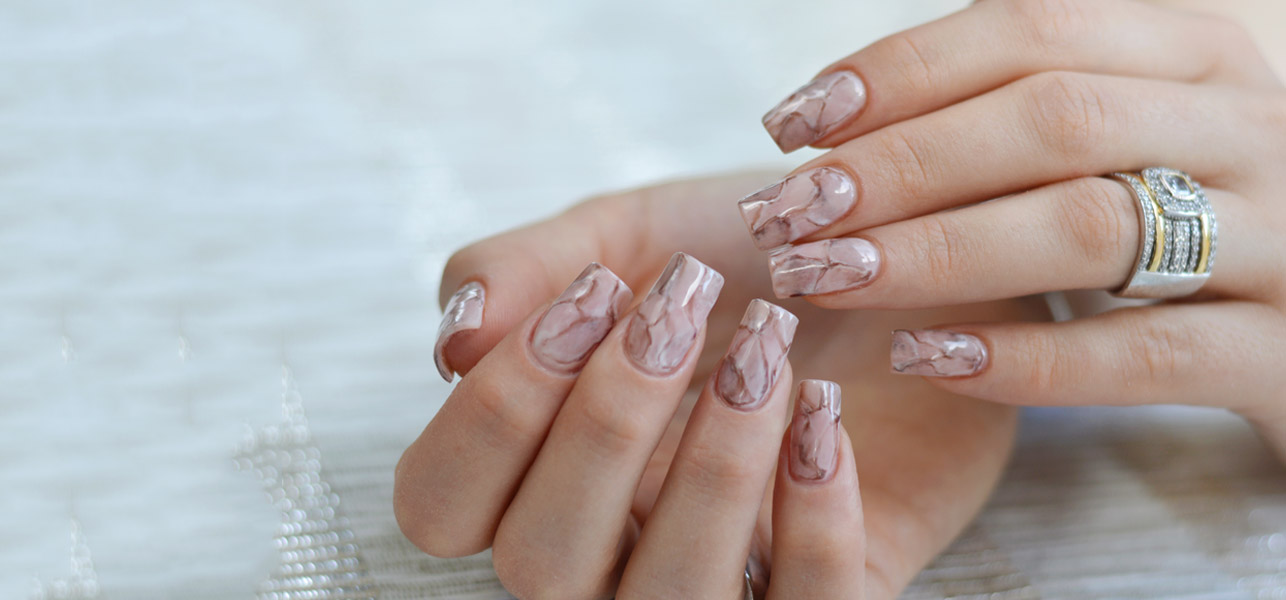
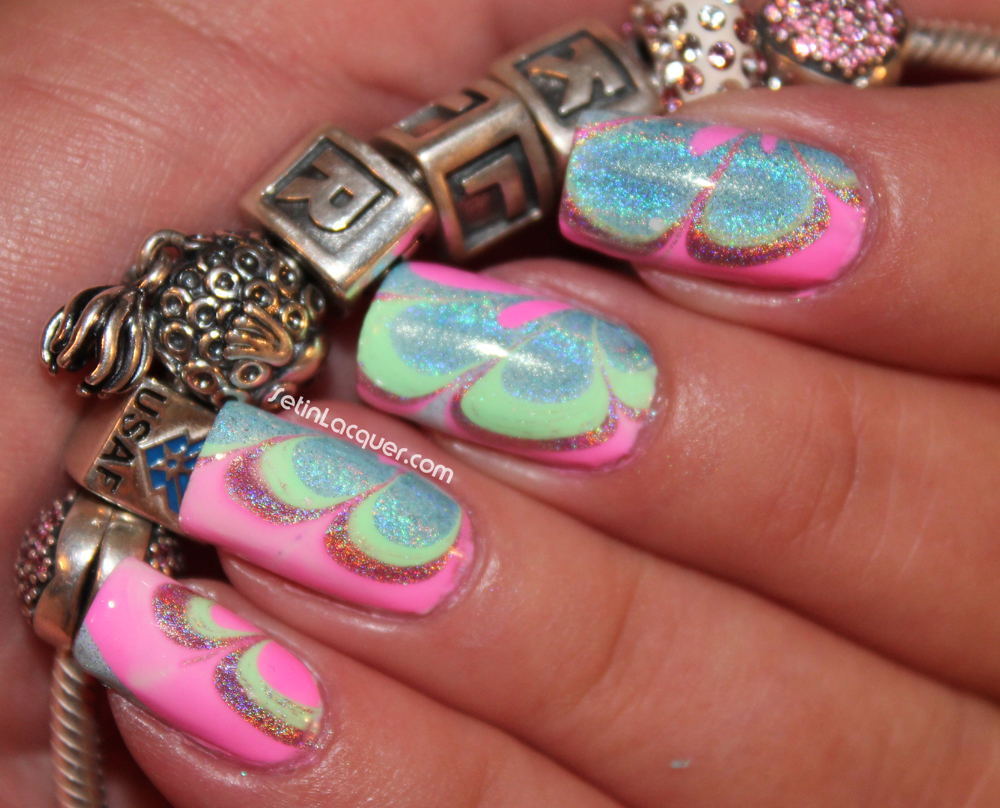
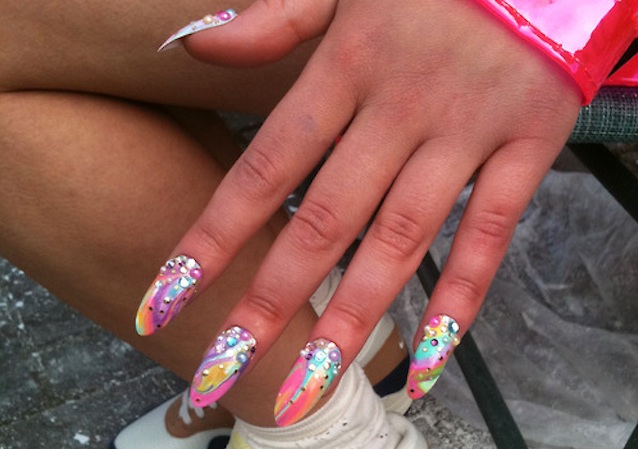
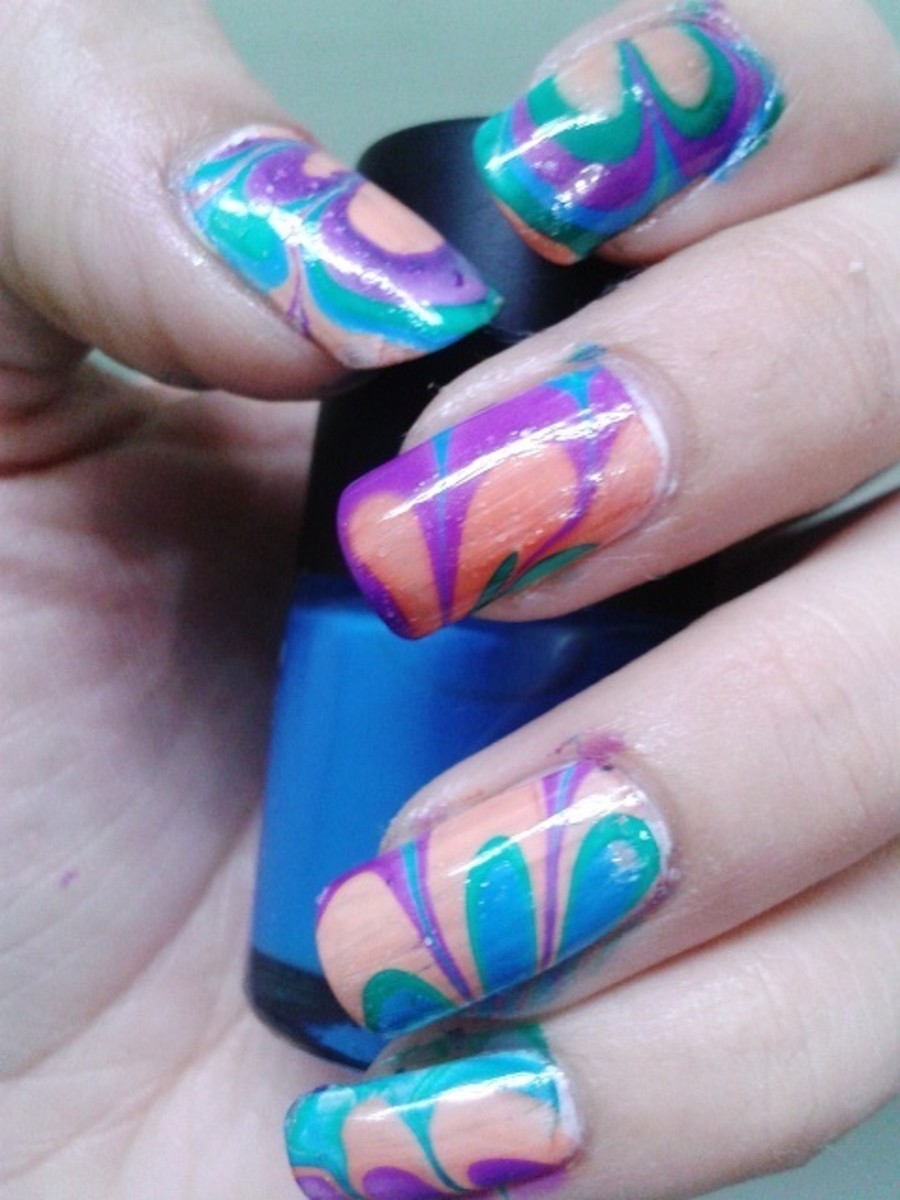
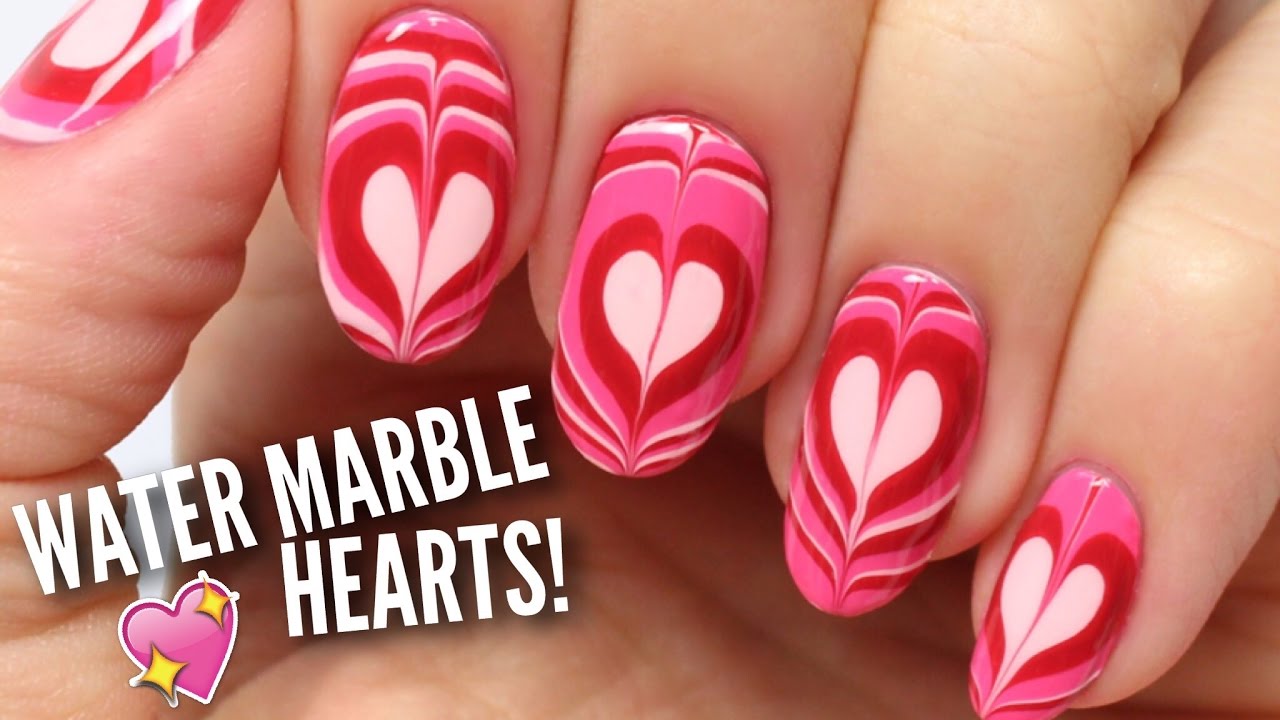
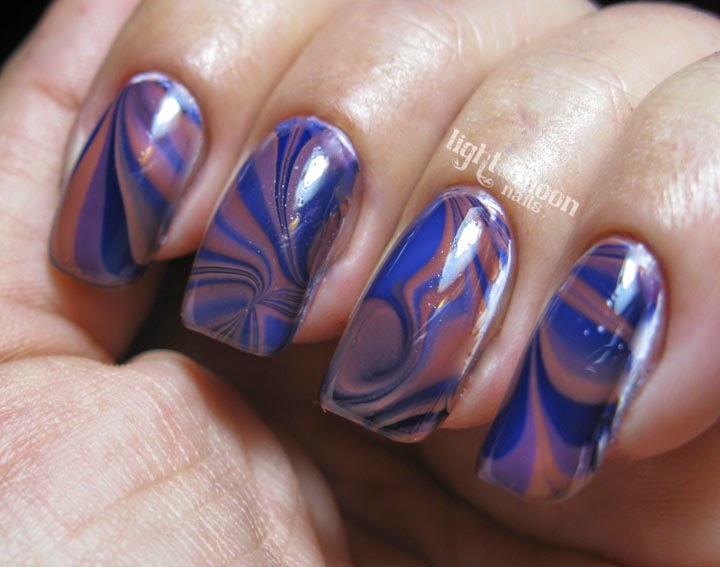
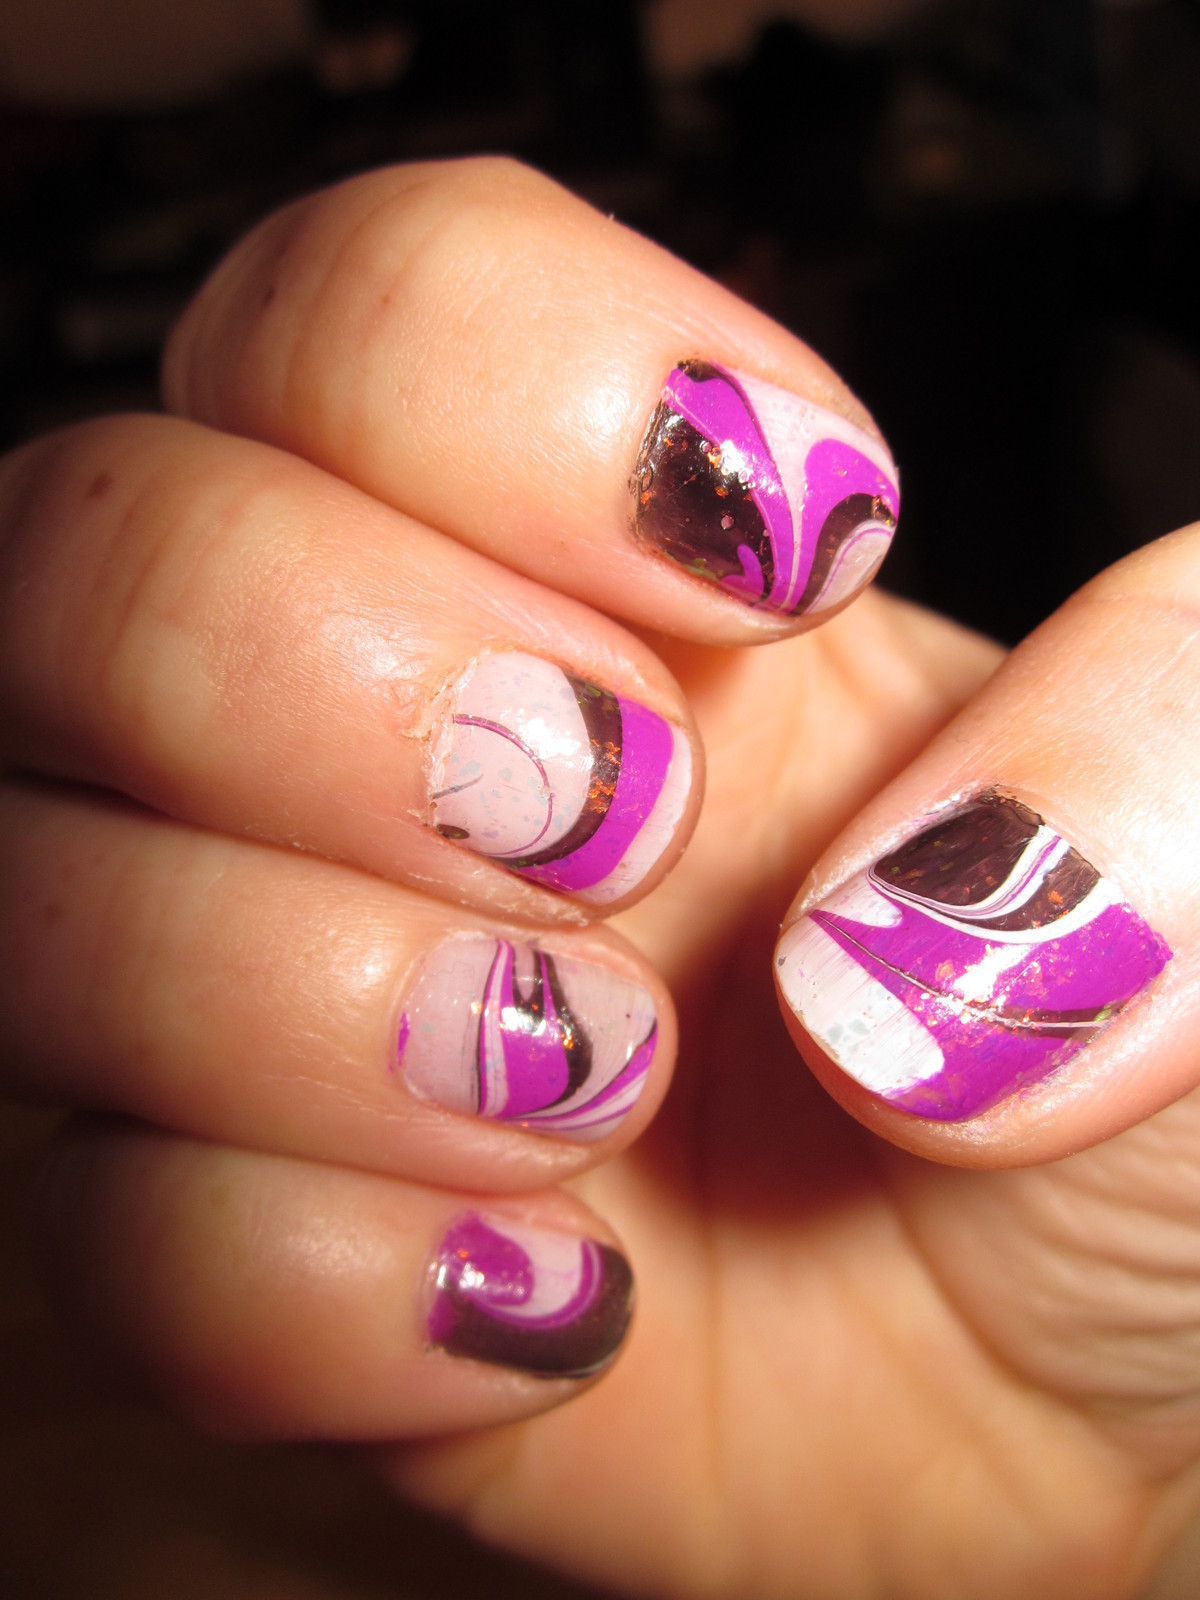
The beauty of water marble nail art is that there are endless design possibilities. You can create abstract designs, floral patterns, or even geometric shapes with this technique. Here are a few popular water marble nail art designs: Flower Petal Design: Create a bullseye pattern on the water surface and use a toothpick to drag the colors towards the center, creating a petal-like design. Geometric Design: Use tape or liquid latex around your nails to create clean lines and geometric shapes in your water marble design. Marble Swirl Design: Use a marbling tool to create a swirling pattern on the water surface before dipping your nails.Water Marble Nail Art Designs


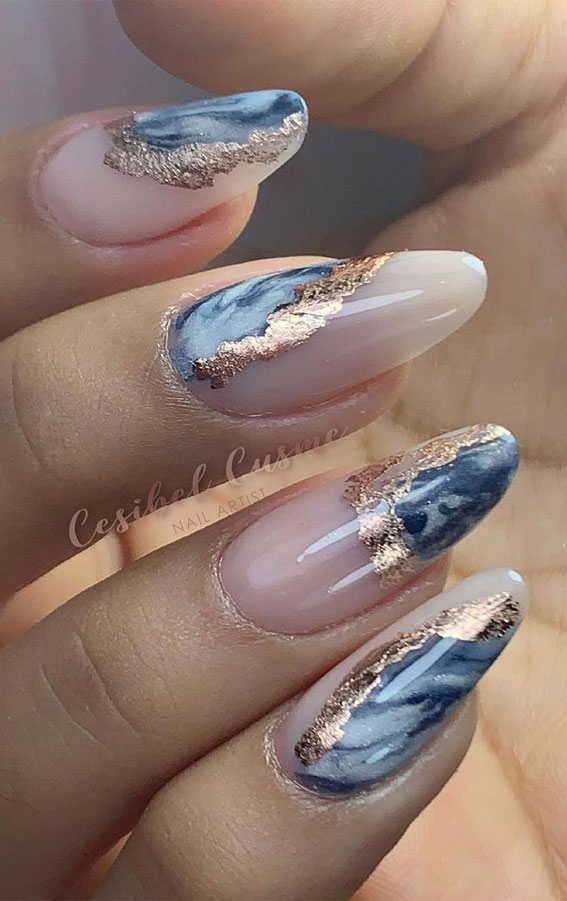
Water Marble Nail Art Designs


Here are a few additional tips and tricks to help you achieve the perfect water marble nail art: Tip 1: Use good quality nail polishes with a thin consistency for easier spreading on the water surface. Tip 2: Clean your marbling tool or toothpick after each dip to prevent the colors from getting muddy. Tip 3: Use a paper towel to collect any excess nail polish on the water surface before dipping your nails.Water Marble Nail Art Tips and Tricks
Water Marble Nail Art Tips and Tricks
Dailymotion is a great platform to find a variety of nail art tutorials, including water marble nail art. Here are a few other popular nail art tutorials on dailymotion that you can check out: Gradient Nail Art: Create a gradient effect on your nails using a makeup sponge and multiple nail polish colors. Stamping Nail Art: Use a stamping kit to easily transfer intricate designs onto your nails. Glitter Ombre Nails: Add some sparkle to your manicure by creating a glitter ombre effect using a makeup sponge.Dailymotion Nail Art Tutorials


Dailymotion Nail Art Tutorials
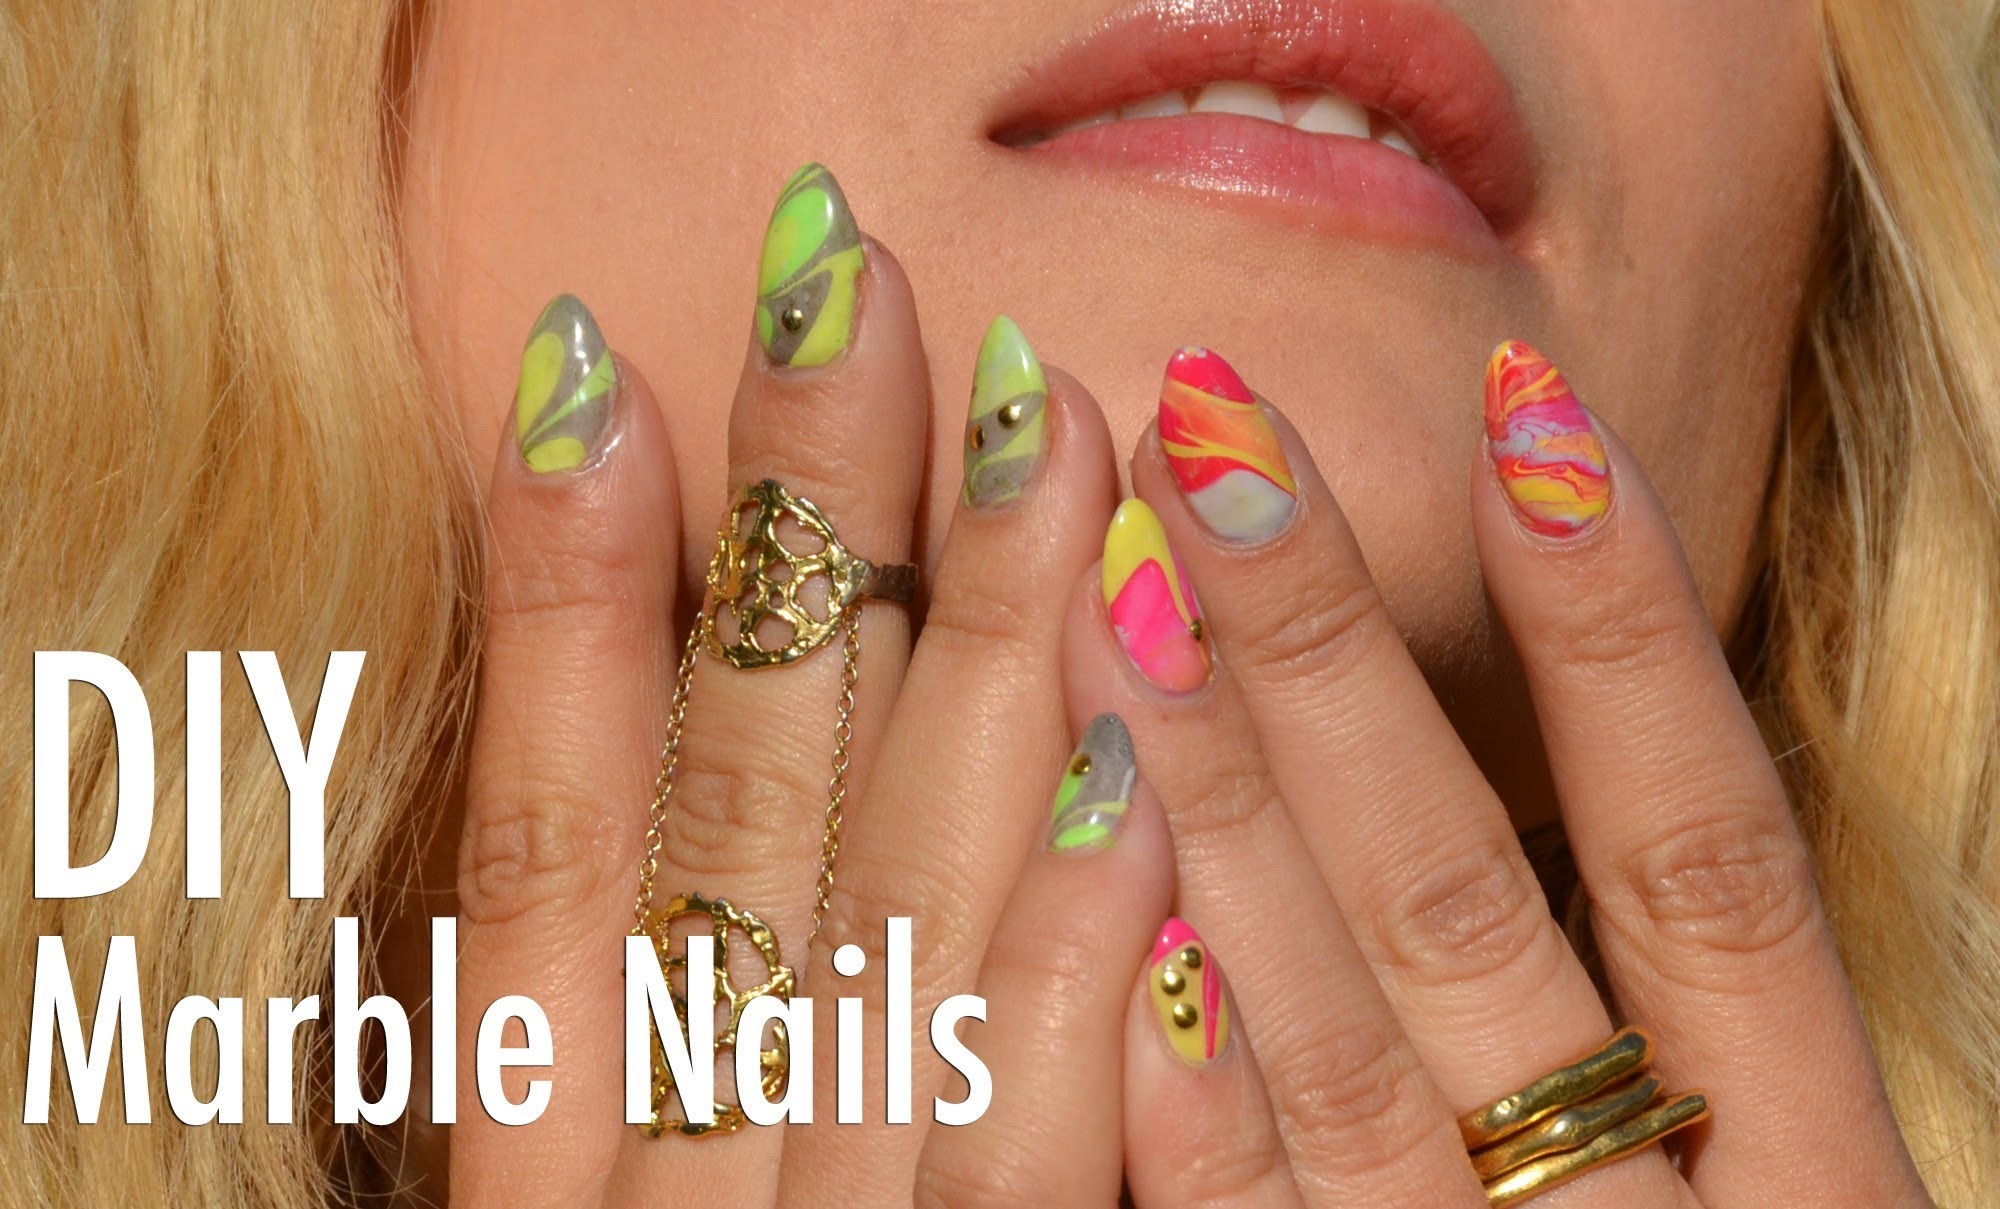


While the traditional water marble nail art technique involves swirling the colors together, there are other techniques you can try to achieve different designs: Water Droplet Technique: Instead of creating a bullseye pattern, drop the nail polish onto the water surface and let it spread naturally to create a water droplet effect. Drag Marble Technique: Use a toothpick or marbling tool to drag the colors vertically or horizontally to create a unique design. Now that you have our top 10 water marble nail art tips, it's time to grab your nail polishes and try it out for yourself! With a little bit of practice and patience, you'll be creating beautiful and unique designs in no time. Don't forget to share your creations on dailymotion for others to see and get inspired! Happy marbling!Water Marble Nail Art Techniques

Water Marble Nail Art Techniques
How to Create Stunning Water Marble Nail Art: Tips and Tricks
The Art of Water Marble Nail Design
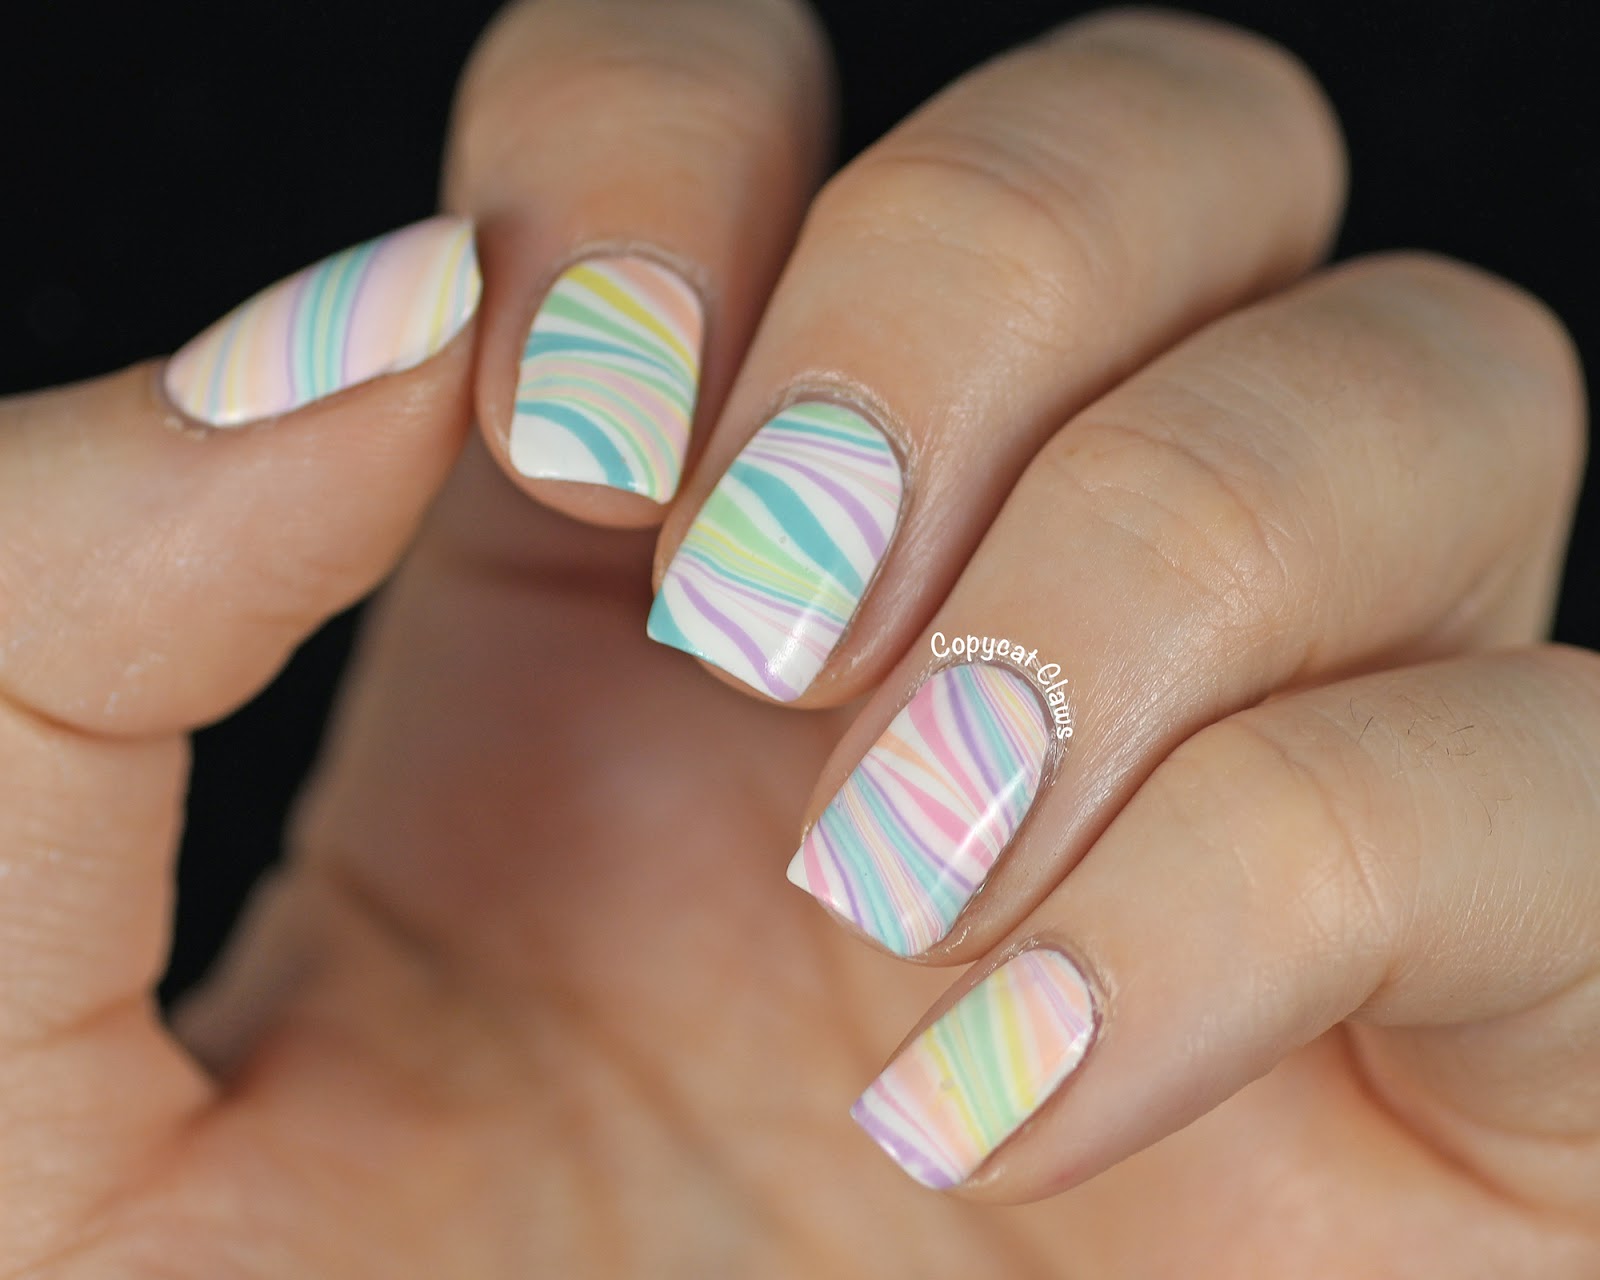
 Water marble nail art has become increasingly popular over the years, and for good reason. It is a fun and creative way to add a unique touch to your nails. This technique involves dropping
nail polish
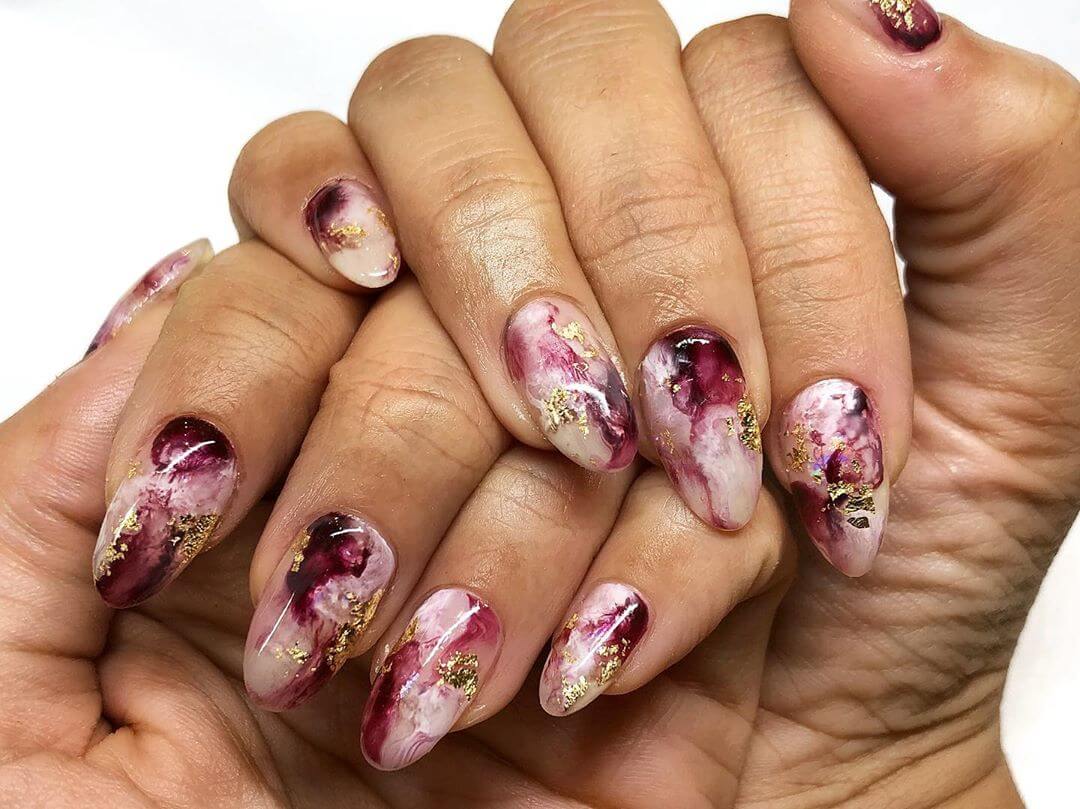
onto the surface of water and creating intricate patterns before dipping your nails into the design. The result? A
marbled
effect that is truly beautiful. However, it can be a bit tricky to master at first. That's why we've compiled some tips and tricks to help you create stunning water marble nail art.
Water marble nail art has become increasingly popular over the years, and for good reason. It is a fun and creative way to add a unique touch to your nails. This technique involves dropping
nail polish
onto the surface of water and creating intricate patterns before dipping your nails into the design. The result? A
marbled
effect that is truly beautiful. However, it can be a bit tricky to master at first. That's why we've compiled some tips and tricks to help you create stunning water marble nail art.
Preparation is Key
 Before diving into creating your water marble design, it's important to
prep your nails
properly. Start by filing and shaping your nails to your desired length and shape. Next, apply a base coat to your nails to protect them from the
nail polish
and help your design last longer. It's also important to have all your tools and materials ready and easily accessible before starting. This includes
cotton swabs
,
toothpicks
, and
nail polish remover
for any cleanup.
Before diving into creating your water marble design, it's important to
prep your nails
properly. Start by filing and shaping your nails to your desired length and shape. Next, apply a base coat to your nails to protect them from the
nail polish
and help your design last longer. It's also important to have all your tools and materials ready and easily accessible before starting. This includes
cotton swabs
,
toothpicks
, and
nail polish remover
for any cleanup.
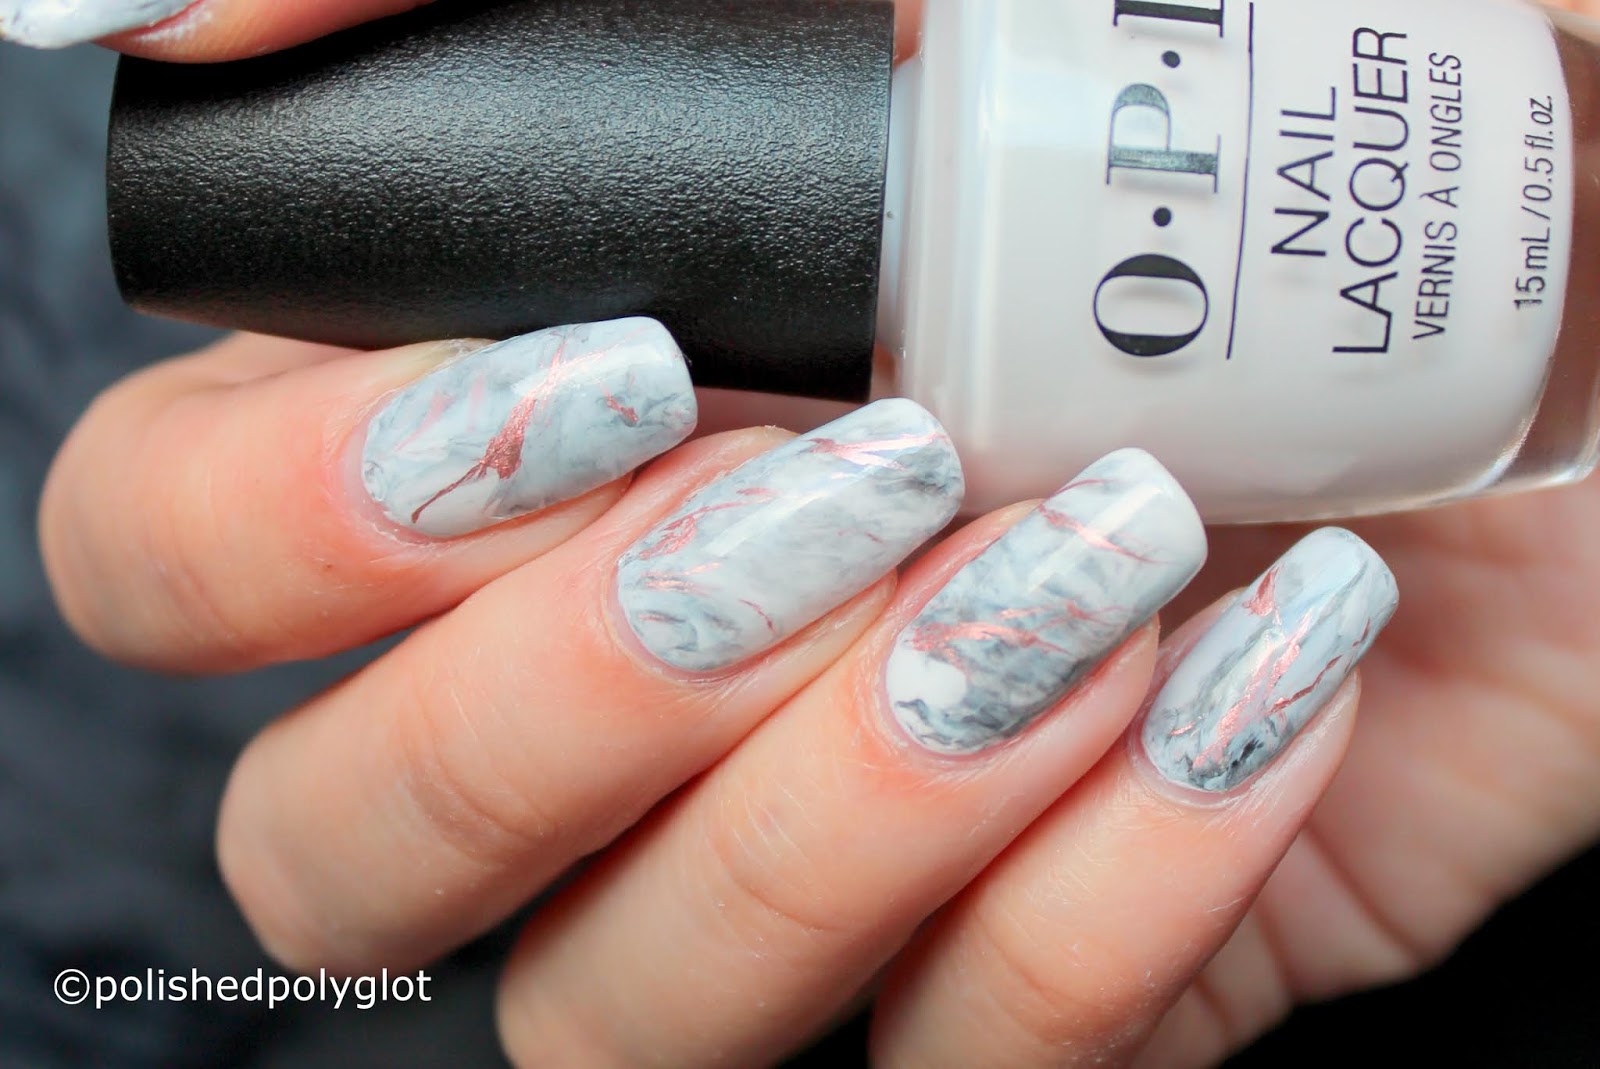
Choose the Right Nail Polish
 Not all
nail polishes
are created equal when it comes to water marbling. It's important to choose polishes that are
quick-drying
and have a
thin consistency
. This will make it easier for the polish to spread and create the desired design. Avoid using glitter or metallic polishes, as they tend to sink to the bottom of the water and create a messy design.
Not all
nail polishes
are created equal when it comes to water marbling. It's important to choose polishes that are
quick-drying
and have a
thin consistency
. This will make it easier for the polish to spread and create the desired design. Avoid using glitter or metallic polishes, as they tend to sink to the bottom of the water and create a messy design.
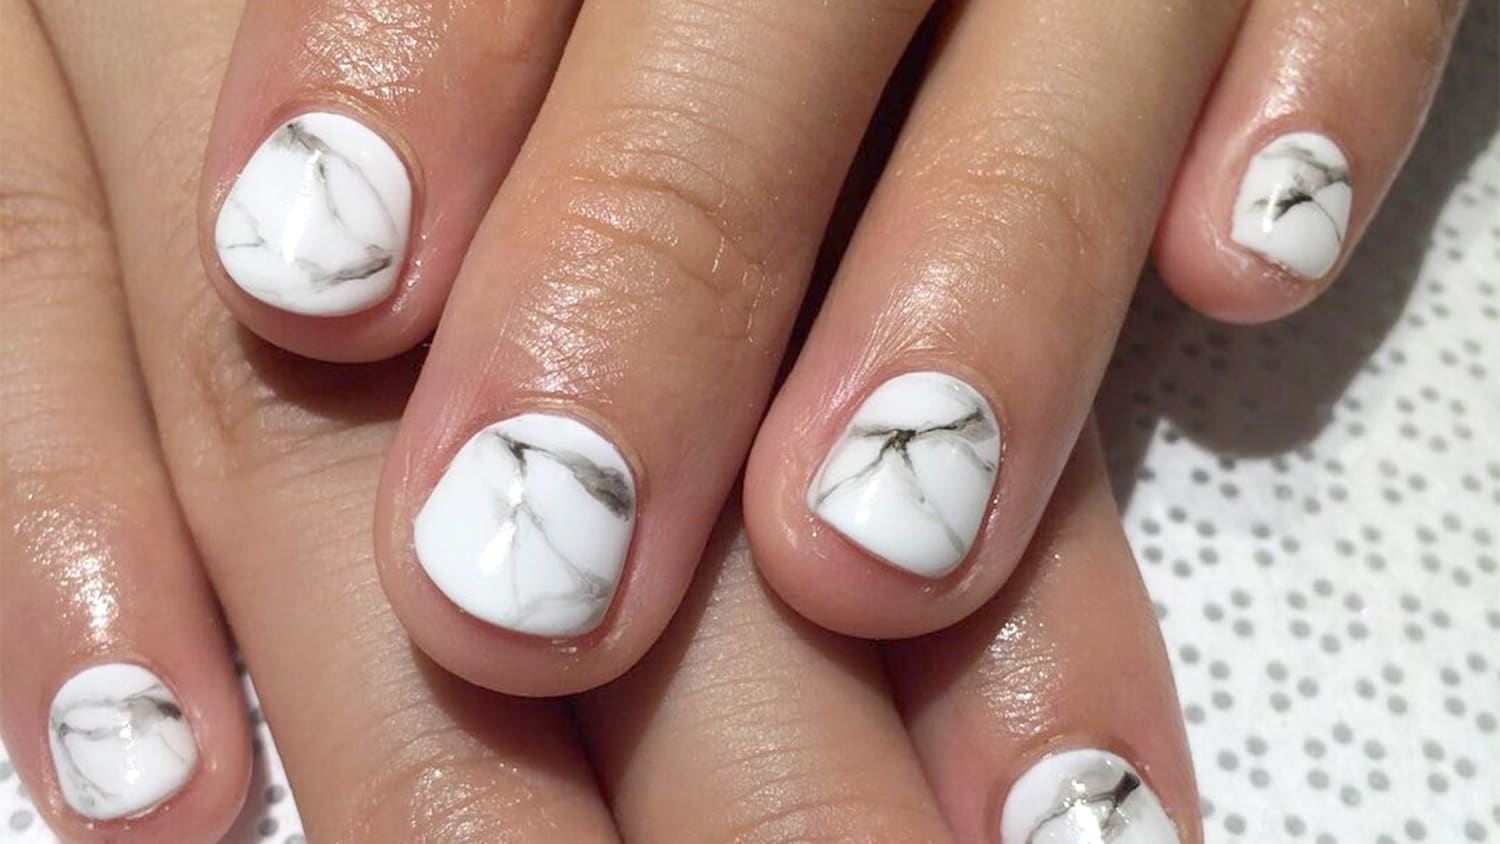
Use Room Temperature Water
.jpg) The temperature of the water plays a crucial role in creating a successful water marble design. It's best to use
room temperature water
as it allows the polish to spread and create the desired patterns. If the water is too cold, the polish may clump and not spread properly. If the water is too warm, the polish may dry too quickly, making it difficult to create the desired design.
The temperature of the water plays a crucial role in creating a successful water marble design. It's best to use
room temperature water
as it allows the polish to spread and create the desired patterns. If the water is too cold, the polish may clump and not spread properly. If the water is too warm, the polish may dry too quickly, making it difficult to create the desired design.
Practice Makes Perfect
 Water marbling can take some practice to get right, so don't be discouraged if your first attempt doesn't turn out as expected. It's important to
take your time
and have patience when creating your design. If you make a mistake, don't be afraid to start over. You can also use
tape
around your nails to help with any cleanup and create a crisp edge.
In conclusion, water marble nail art is a fun and unique way to add some creativity to your nails. With these tips and tricks, you'll be able to create stunning designs in no time. Remember to have fun and experiment with different color combinations to create your own unique water marble design. So go ahead, give it a try and rock those marbled nails!
Water marbling can take some practice to get right, so don't be discouraged if your first attempt doesn't turn out as expected. It's important to
take your time
and have patience when creating your design. If you make a mistake, don't be afraid to start over. You can also use
tape
around your nails to help with any cleanup and create a crisp edge.
In conclusion, water marble nail art is a fun and unique way to add some creativity to your nails. With these tips and tricks, you'll be able to create stunning designs in no time. Remember to have fun and experiment with different color combinations to create your own unique water marble design. So go ahead, give it a try and rock those marbled nails!


