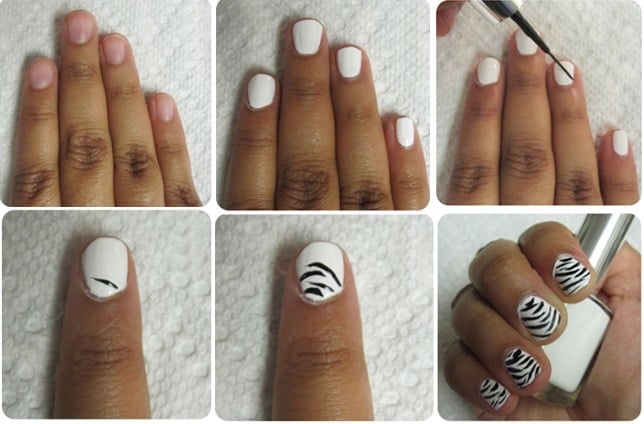
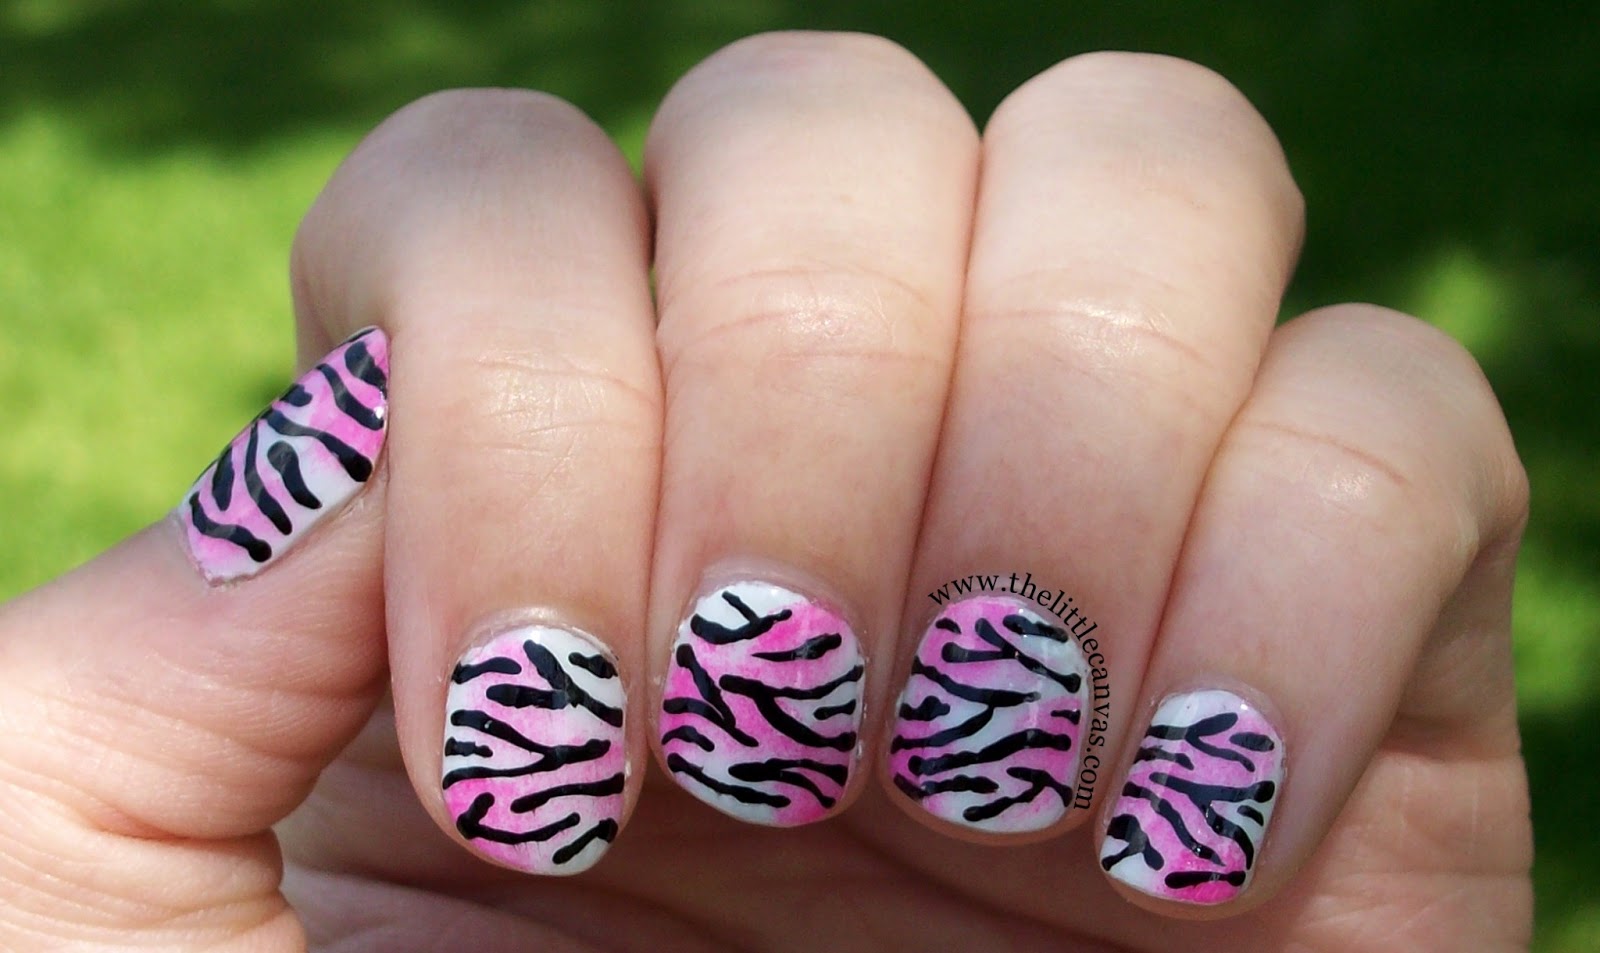
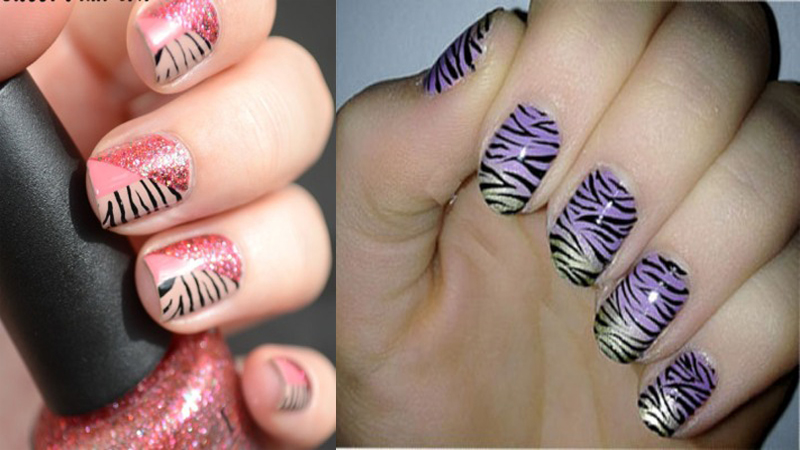
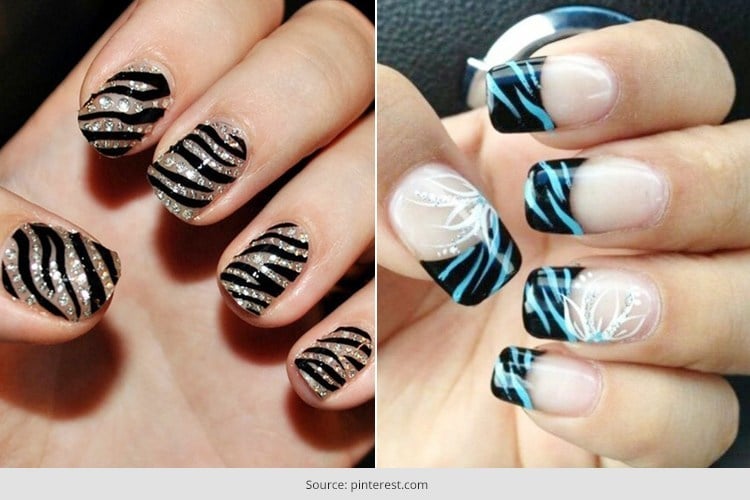
Are you looking for a fun and bold nail design? Look no further than zebra print nail art! This tutorial will guide you step by step on how to achieve the perfect zebra print manicure. First, start by applying a base coat to protect your nails and help the design last longer. Once the base coat is dry, paint your nails with a white or light-colored polish. Next, using a black nail polish, create random stripes on each nail. Don't worry about making them perfect, as zebra stripes are meant to be uneven and imperfect. For a more realistic look, you can also use a dark brown nail polish to add some variation to the stripes. Once the black stripes are dry, use a thin nail art brush or a toothpick to create small lines between the black stripes using a silver nail polish. This will give the design a 3D effect and make it stand out. Finally, finish off with a top coat to seal in your design and add shine. And there you have it, a gorgeous zebra print manicure that will surely turn heads!1. Zebra Print Nail Art Tutorial
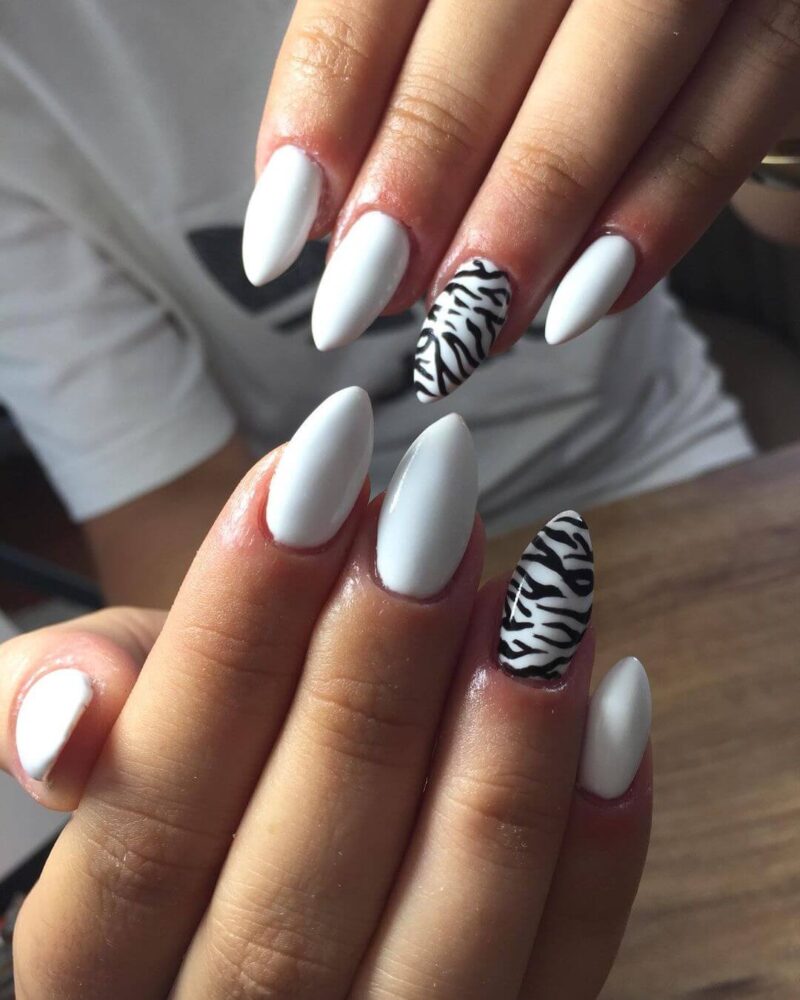


1. Zebra Print Nail Art Tutorial
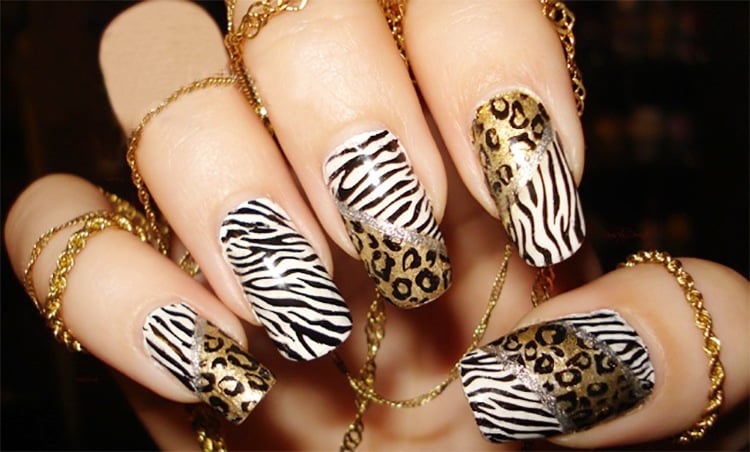

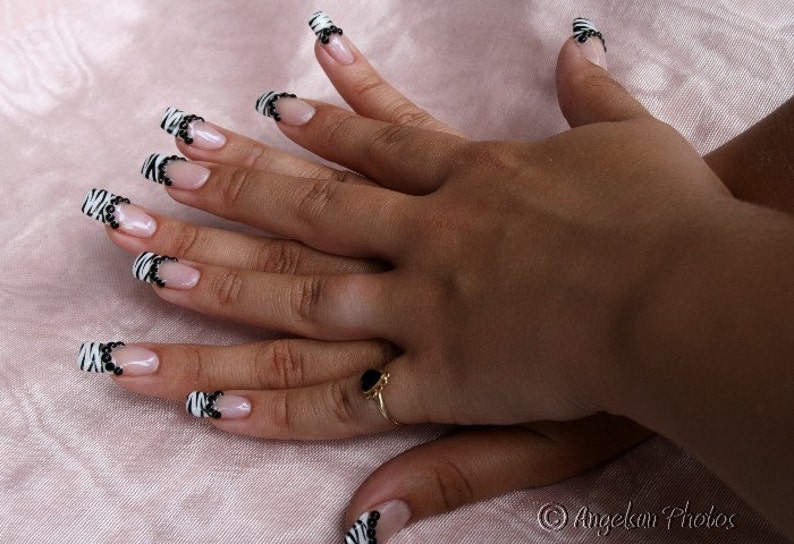
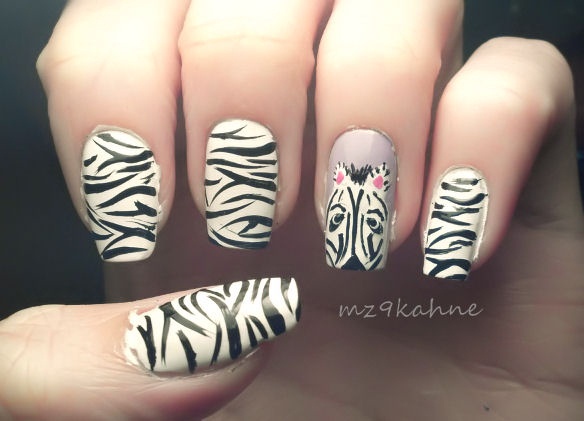
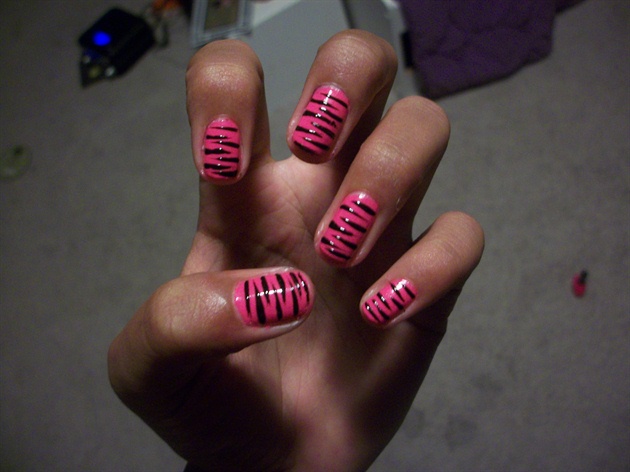
Not everyone is a nail art expert, but that doesn't mean you can't rock a zebra print design on your nails. Here are some easy and beginner-friendly zebra nail art designs that anyone can do. One simple way to achieve a zebra print design is to use a nail stamping plate. Simply paint your nails with a light-colored base coat, then use a black nail polish to stamp the zebra print onto your nails. Finish off with a top coat and you're done! Another easy technique is to use a zebra print nail wrap. These pre-made stickers can be easily applied to your nails, giving you a perfect zebra print design without any effort. If you want to add a pop of color to your zebra print design, you can use colored nail polishes instead of the traditional black and white. This will give your nails a fun and unique twist.2. Easy Zebra Nail Art Designs


2. Easy Zebra Nail Art Designs
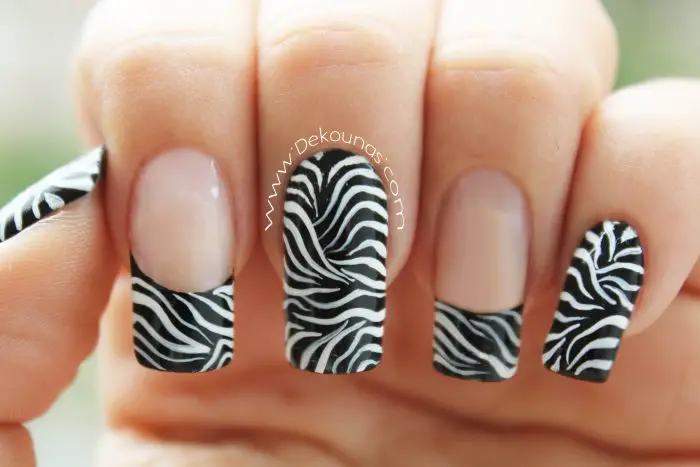


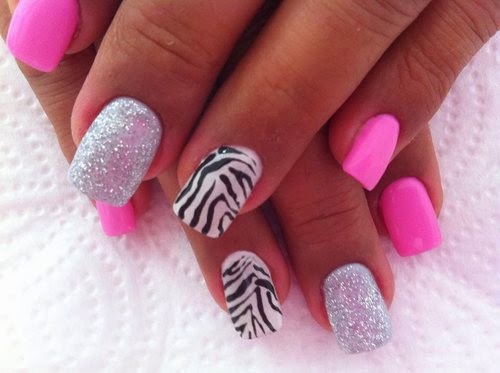
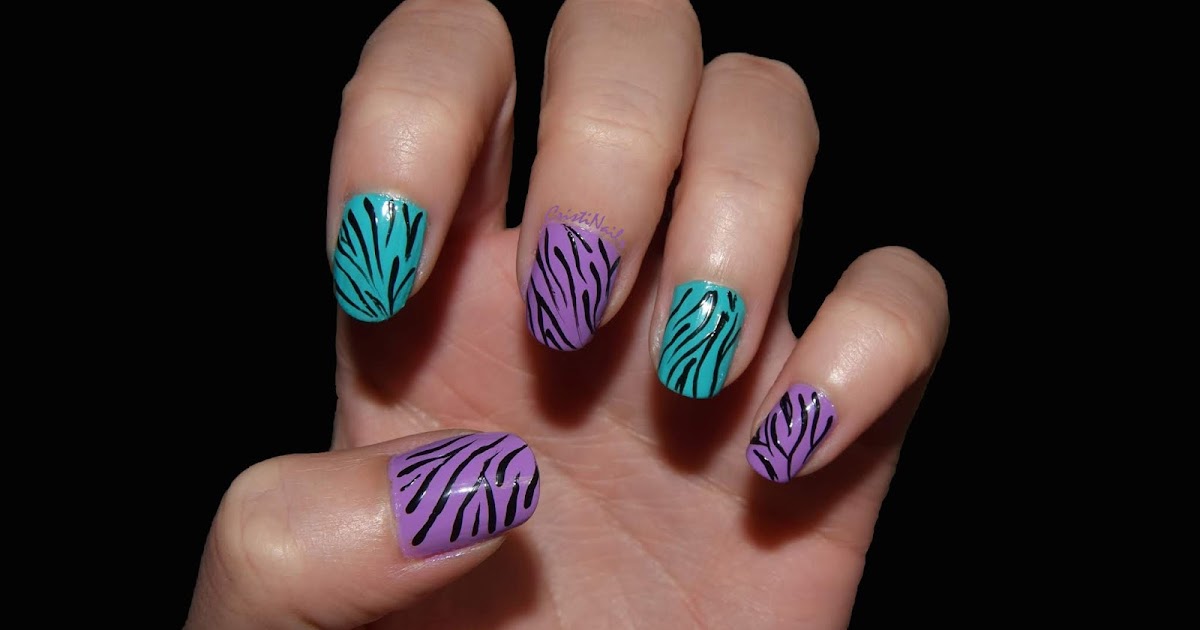
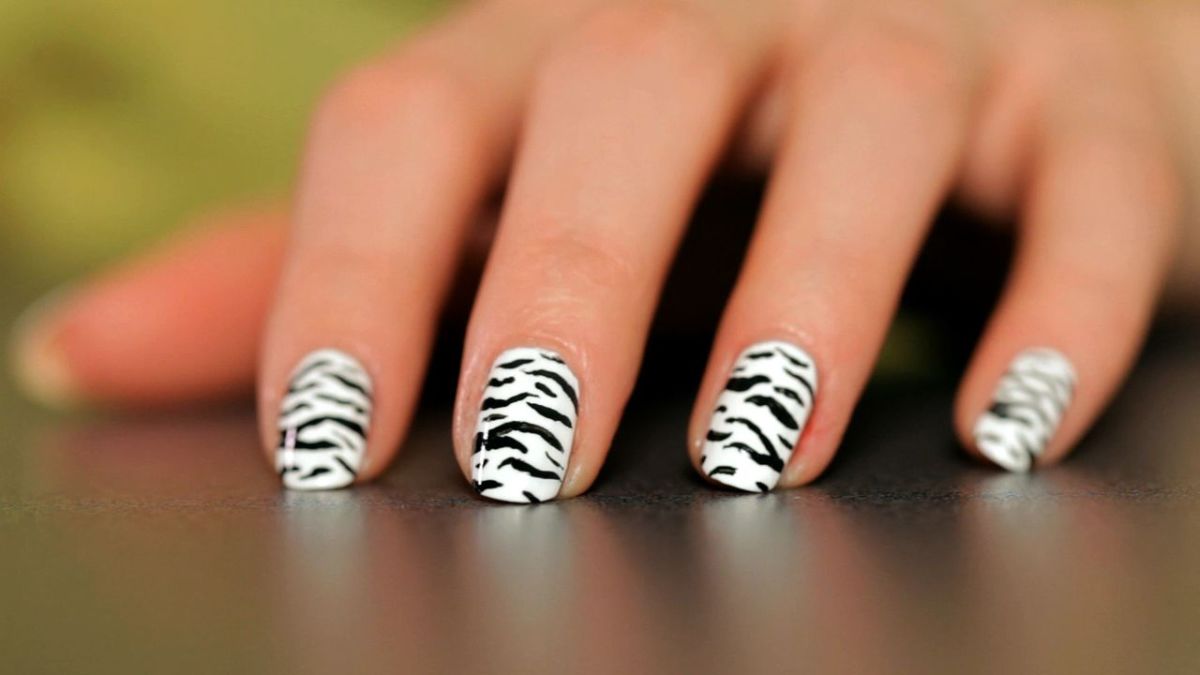
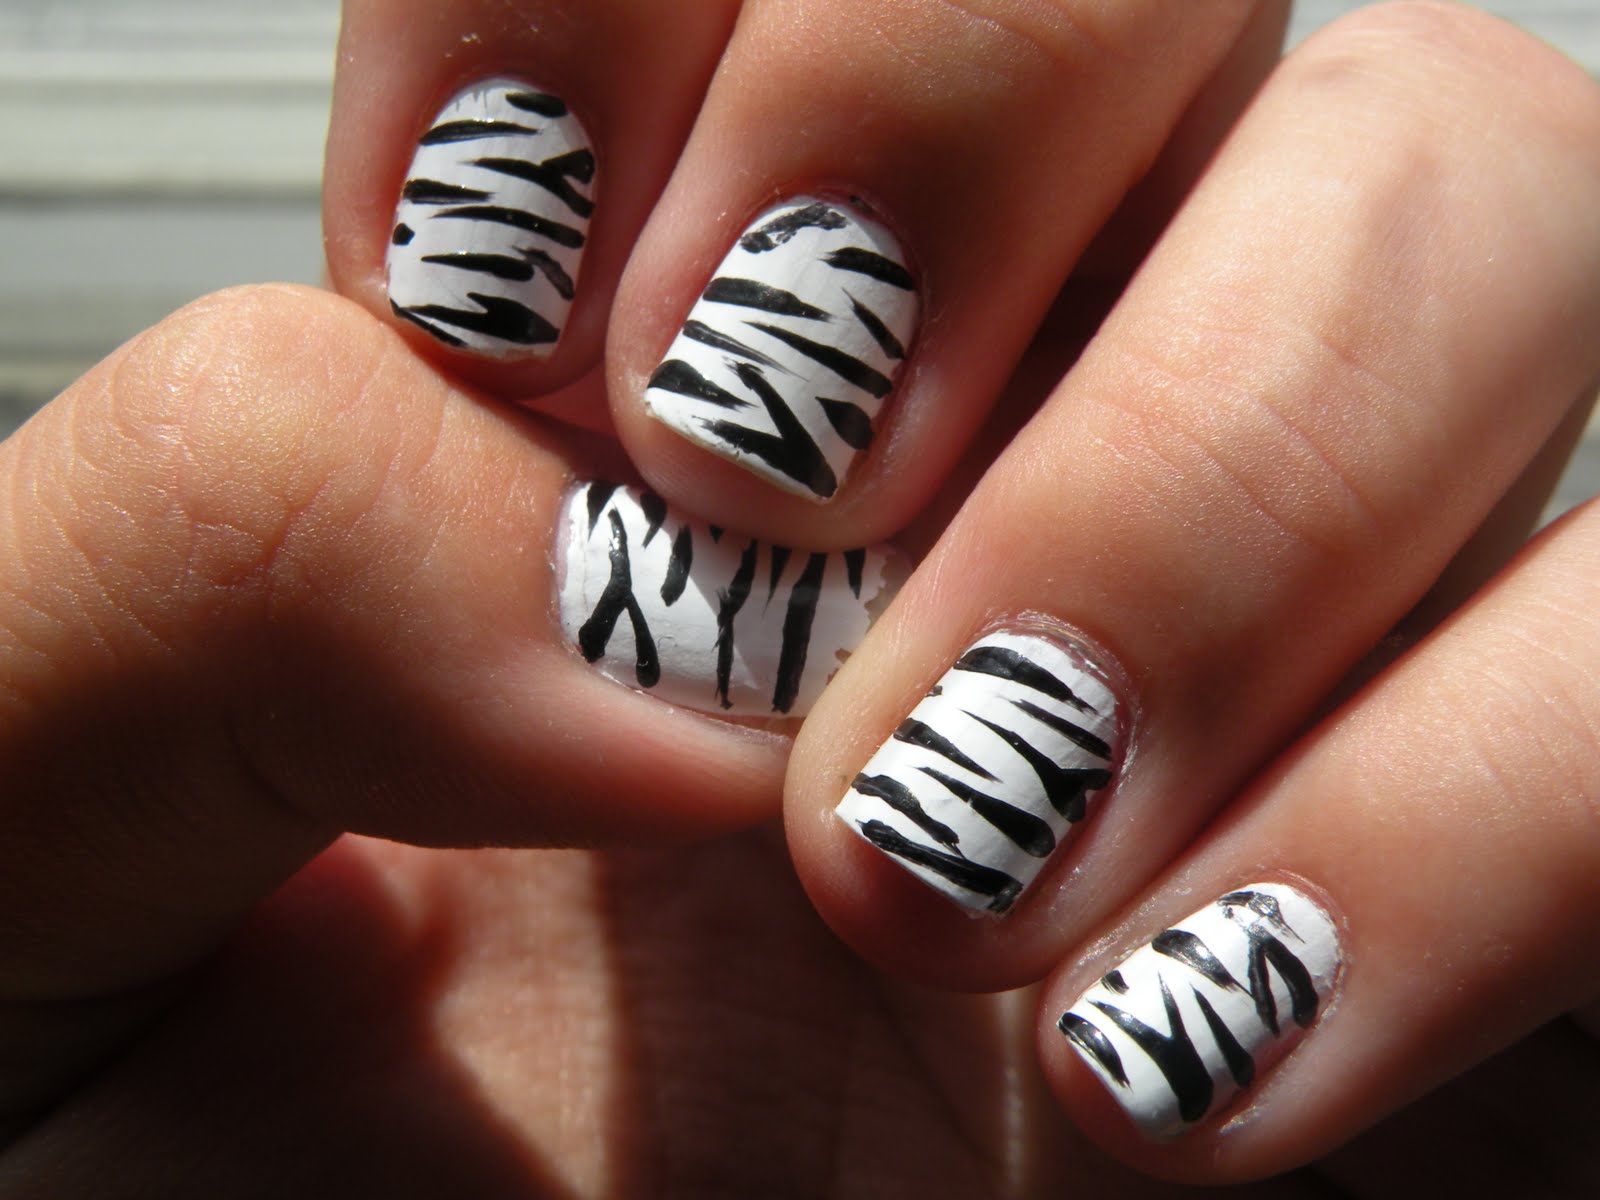
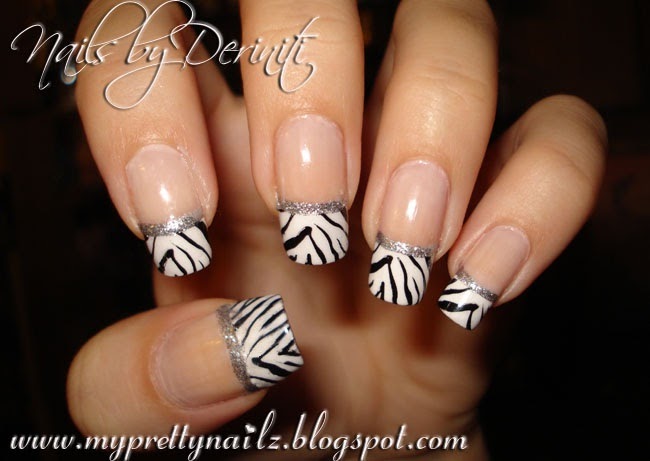
If you want to take your zebra nail art to the next level, try creating zebra stripes on your nails. This design looks great on all nail lengths, whether you have long or short nails. To create this design, start by painting your nails with a white base coat. Then, using a black nail polish, create thin stripes across your nails. You can use a nail art brush or a toothpick to help you create thin and precise lines. For a more dramatic look, you can also use a glittery black nail polish to add some sparkle to your zebra stripes. If you want to add some color to your design, you can also use different colored nail polishes to create the stripes. This will give your zebra nail art a fun and playful twist.3. Zebra Stripe Nail Art


3. Zebra Stripe Nail Art


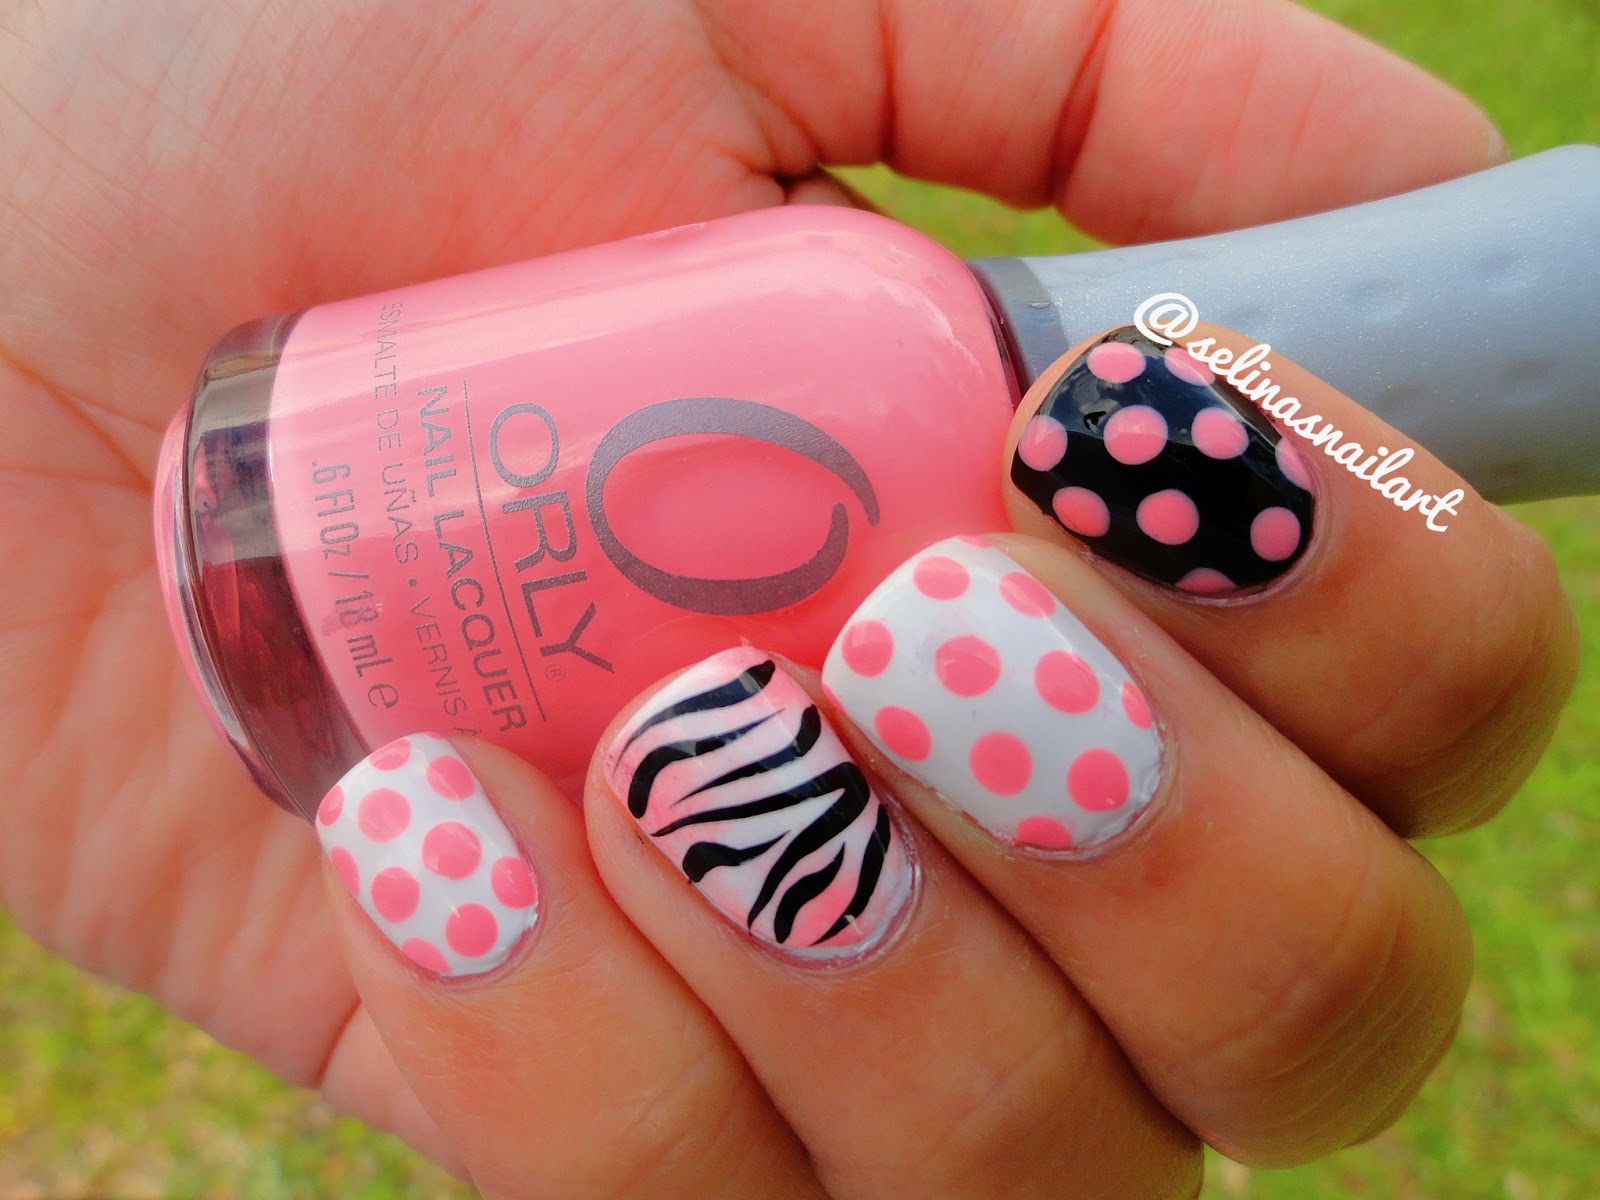
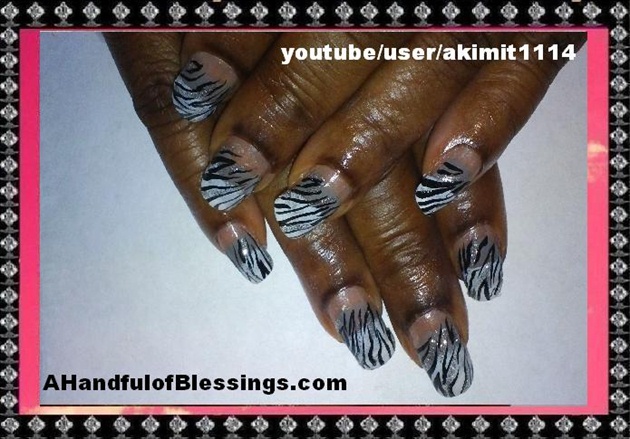
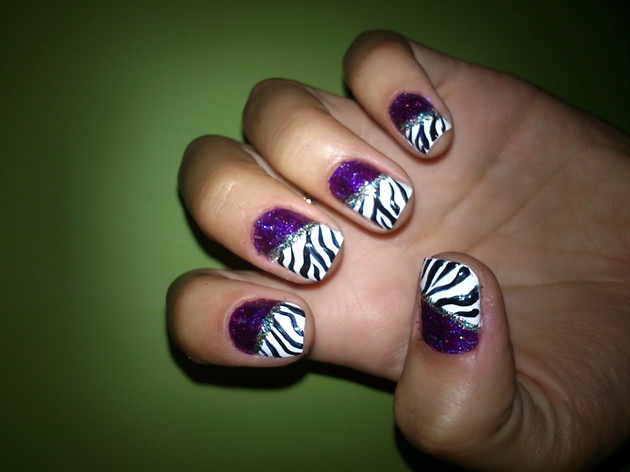
Don't let your short nails stop you from rocking a zebra print design. Here are some zebra nail art ideas specifically for shorter nails. One simple design is to create a diagonal zebra stripe on each nail. Start by painting your nails with a light-colored base coat. Then, using a black nail polish, create a diagonal line across each nail. You can also use a toothpick to help you create thin and precise lines. Another idea is to create a half-moon zebra design. Start by painting your nails with a light-colored base coat, then use a black nail polish to create a half-moon shape at the base of your nails. Fill in the rest of your nails with black stripes to complete the zebra print look. Lastly, you can also create a simple zebra print tip by painting your nails with a light-colored base coat and then using a black nail polish to create vertical stripes on the tips of your nails.4. Zebra Nail Art for Short Nails


4. Zebra Nail Art for Short Nails


If you want to achieve a more precise and clean zebra print design, try using tape as a guide. This technique is great for those who struggle with creating straight lines. Start by painting your nails with a light-colored base coat. Once dry, use scotch tape to create stripes on your nails. Paint over the tape with a black nail polish and then carefully remove the tape to reveal your zebra print design. Finish off with a top coat to seal in your design. You can also use different types of tape, such as striping tape or washi tape, to create different thicknesses of stripes for a unique look.5. Zebra Print Nail Art with Tape


5. Zebra Print Nail Art with Tape
If you're new to nail art, it can be helpful to have a step by step guide to follow. Here is a simple zebra nail art tutorial that anyone can do. Step 1: Start by applying a base coat to protect your nails and help your design last longer. Step 2: Once the base coat is dry, paint your nails with a white or light-colored polish. Step 3: Using a black nail polish, create random stripes on each nail. Don't worry about making them perfect, as zebra stripes are meant to be uneven and imperfect. Step 4: Once the black stripes are dry, use a thin nail art brush or a toothpick to create small lines between the black stripes using a silver nail polish. Step 5: Finish off with a top coat to seal in your design and add shine. With these simple steps, you can achieve a gorgeous zebra print manicure in no time!6. Zebra Nail Art Step by Step


6. Zebra Nail Art Step by Step


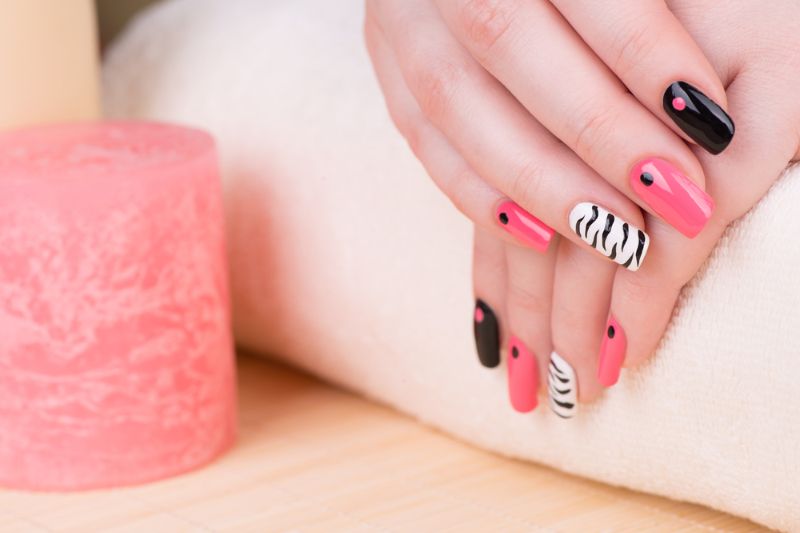
If you're new to nail art, it can be intimidating to try out more complex designs. But don't worry, there are plenty of zebra nail art ideas that are perfect for beginners. One simple design is to create a zebra print accent nail. Paint all your nails with a light-colored base coat, then use a black nail polish to create a zebra print design on one nail. This is an easy way to incorporate the trendy print without having to do it on all your nails. You can also try using nail stickers to create a zebra print design. Simply stick the stickers onto your nails and finish off with a top coat to seal them in. Another easy design is to create a gradient effect with zebra stripes. Start with a white base coat, then use a gray nail polish to create stripes on the tips of your nails. Finish off with a top coat to blend the colors and create a subtle zebra print look.7. Zebra Nail Art for Beginners

7. Zebra Nail Art for Beginners


If you don't have a nail art brush on hand, you can still create a stunning zebra print design using a simple toothpick. Start by painting your nails with a light-colored base coat. Once dry, use a toothpick to create thin, uneven lines with a black nail polish on each nail. This will give your zebra print design a more natural and realistic look. You can also use the toothpick to create small dots between the stripes using a silver nail polish for added detail.8. Zebra Nail Art with Toothpick


8. Zebra Nail Art with Toothpick


For a quick and easy way to achieve a zebra print design, try using a nail stamping plate. These pre-made designs can be easily transferred onto your nails for a flawless zebra print look. Start by painting your nails with a light-colored base coat. Once dry, use a stamping plate with a zebra print design and a black nail polish to stamp the design onto your nails. Finish off with a top coat and you're done! You can also use different colors and designs on each nail for a fun and unique zebra print manicure.9. Zebra Nail Art with Stamping

9. Zebra Nail Art with Stamping

Take your zebra nail art to the next level by adding some bling with rhinestones. This design is perfect for a special occasion or a night out. Start by painting your nails with a light-colored base coat. Once dry, use a black nail polish to create zebra stripes on each nail. Then, using a dotting tool or a toothpick, add small dots of nail glue where you want to place the rhinestones. Next, carefully place rhinestones onto the dots of glue, creating a row of rhinestones on each nail. Finish off with a top coat to seal in the rhinestones and your zebra print design. With these top 10 zebra tips nail art, you can create stunning and unique designs for your nails. Don't be afraid to experiment and have fun with different colors and techniques to make the zebra print your own. So go ahead, unleash your wild side and try out these zebra nail art ideas today!10. Zebra Nail Art with Rhinestones
10. Zebra Nail Art with Rhinestones
How to Incorporate Zebra Print into Your Nail Art
Unleash Your Wild Side
 When it comes to nail art, there are endless possibilities for designs and themes. One fun and bold trend that has been gaining popularity is zebra print. This animal-inspired pattern adds a touch of wildness to any nail look and can be easily done at home. Whether you want to add a subtle zebra accent or go all out with a full zebra print manicure, here are some tips to help you nail this trend.
Choose the Right Colors
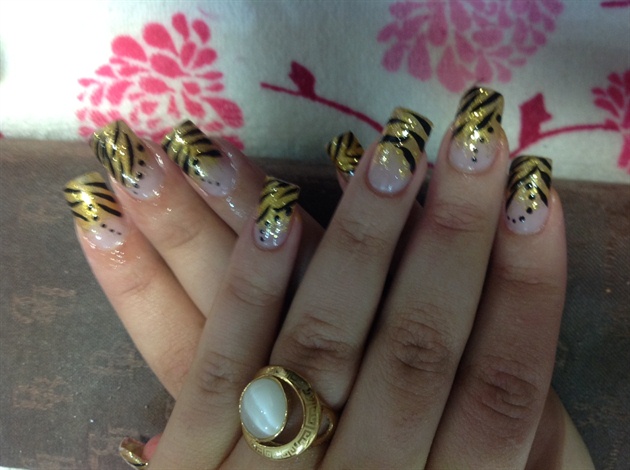
 The key to achieving a realistic zebra print is to choose the right colors. While black and white are the classic zebra colors, you can also experiment with different shades such as navy blue and metallic silver. For a more playful look, try using bright colors like hot pink or neon green.
Bold and contrasting colors
will make your zebra print stand out.
The key to achieving a realistic zebra print is to choose the right colors. While black and white are the classic zebra colors, you can also experiment with different shades such as navy blue and metallic silver. For a more playful look, try using bright colors like hot pink or neon green.
Bold and contrasting colors
will make your zebra print stand out.
Get Creative with Your Tools
 To create the zebra stripes, you can use a variety of tools such as a small brush, a toothpick, or even a bobby pin.
Experiment with different tools
to see which one gives you the best results. You can also use a stamping plate with a zebra print design if you want a more precise and uniform look.
To create the zebra stripes, you can use a variety of tools such as a small brush, a toothpick, or even a bobby pin.
Experiment with different tools
to see which one gives you the best results. You can also use a stamping plate with a zebra print design if you want a more precise and uniform look.
Play with Placement
 While the traditional zebra print is a horizontal pattern, you can play around with the placement to create a unique look. Try doing a diagonal pattern or adding zebra stripes on just one or two accent nails.
Don't be afraid to get creative and have fun with the placement
to make your zebra print nail art stand out.
While the traditional zebra print is a horizontal pattern, you can play around with the placement to create a unique look. Try doing a diagonal pattern or adding zebra stripes on just one or two accent nails.
Don't be afraid to get creative and have fun with the placement
to make your zebra print nail art stand out.
Don't Forget the Top Coat
 After you have painted on your zebra print, make sure to seal it with a top coat. This will not only add shine but also help your design last longer.
Opt for a quick-drying top coat
to avoid smudging your design.
After you have painted on your zebra print, make sure to seal it with a top coat. This will not only add shine but also help your design last longer.
Opt for a quick-drying top coat
to avoid smudging your design.
Practice Makes Perfect
 As with any nail art, practice makes perfect. Don't be discouraged if your first attempt at zebra print doesn't turn out exactly how you envisioned it. Keep practicing and trying out different techniques until you find what works best for you. Remember,
practice makes perfect
and you'll soon be a pro at creating zebra print nail art.
Now that you have some tips on how to incorporate zebra print into your nail art, it's time to unleash your wild side and give it a try.
Get creative and have fun
with this bold and trendy design. Who knows, you might just find that zebra print is your new favorite nail art!
As with any nail art, practice makes perfect. Don't be discouraged if your first attempt at zebra print doesn't turn out exactly how you envisioned it. Keep practicing and trying out different techniques until you find what works best for you. Remember,
practice makes perfect
and you'll soon be a pro at creating zebra print nail art.
Now that you have some tips on how to incorporate zebra print into your nail art, it's time to unleash your wild side and give it a try.
Get creative and have fun
with this bold and trendy design. Who knows, you might just find that zebra print is your new favorite nail art!


